This project has been a long time coming. We’ve been working on this built in desk with shelves for Ellie’s bedroom for the past 3 weeks. Sometimes we set unrealistic expectations of how much we can get done in a week. 🤪
In a perfect world, with everything going smoothly we hoped to get this built in desk done in a week. Ambitious I know, but that’s what I am, ambitious! But the reality of it is, that it’s summer, there are swimming lessons, play dates and sleepovers with cousins and the list goes on.
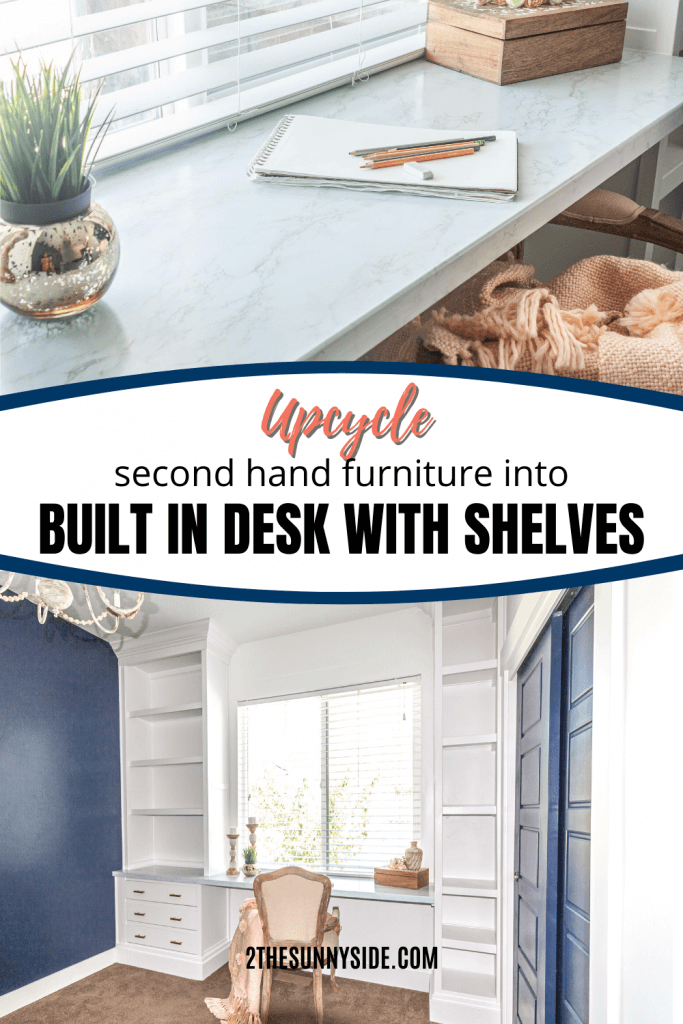
Ellie is our budding artist! She is constantly drawing, crafting or creating something. She is our little protégé. With all of these art and craft projects, she needed a big work surface and lots and lots of storage. Definitely a built in desk with shelves is just what Ellie’s room needed.
We are no strangers to built ins, we (with the help of Steve) have built 4 bookcase built-ins, a built-in entertainment center and the mudroom. All of these built-ins were built from scratch. However, this time we thought we’d show how to build a built in desk with shelves using existing second hand furniture.
If you love to re-imagine old furniture pieces like us, then you’ll love our Modern Desk Makeover!
And if you like a modern industrial look, take a look at this desk we built.
- Upcycle Furniture into a Built In Desk with Shelves
- Tools needed:
- Prep the area for Built In Desk with Shelves
- Modifying & Installing Dresser Section
- Modify & Attach Right-side Bookcase
- Installing the Desk top for the built ins
- Install Left Bookcase
- Detail Molding for the Built In Desk
- Putty – Caulk – Prime – Paint
To see more highlights from this bedroom makeover click on any link below.
- How To Paint a Room with Pro Results
- Built In Desk | Upcycling At Its Best
- Upcycle Idea | Transforming Twin Bed to Daybed
- How To Refinish Furniture | With a Raw Wood Look
- DIY Canopy for a Bed | Fit for a Princess
- Shelf Decorating Ideas | A Step by Step Guide
- Roman Shade | How to Make Them Yourself
- How To Reupholster a Chair | with French Country & Boho Flair
- French Country Chandelier with Boho Flair
- DIY Mirror Frame | Quick and Easy Idea
- Antique Hardware For Dresser
- Bedroom Ideas for Tweens |Girl Room
- Area Rug For Bedroom | Top Ideas For Tween Girl
- How To Make a Bolster Pillow
- How To Make an Envelope Pillow
Sunny Side Design is a participant in the Amazon Services LLC Associates Program, an affiliate advertising program designed to provide a means for sites to earn advertising fees by advertising and linking to Amazon.com. As an Amazon Associate, this blog earns from qualifying purchases with no additional cost to you. Click here to read our full disclosure policy.
Upcycle Furniture into a Built In Desk with Shelves
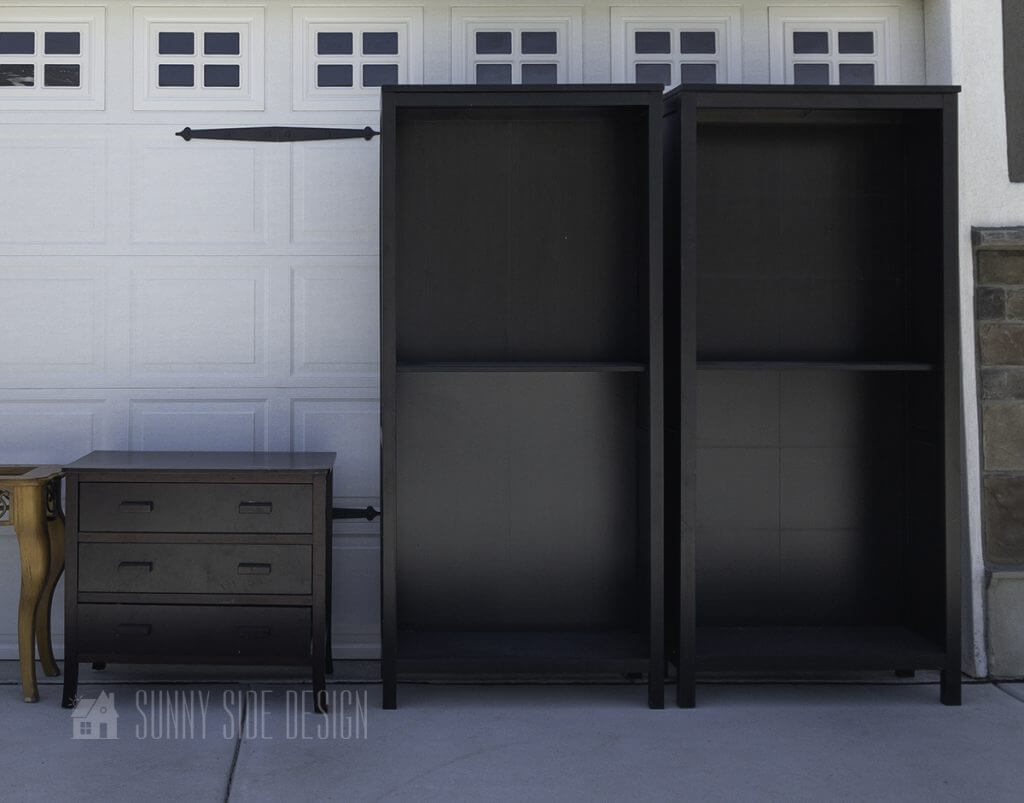
Steph began a search on Facebook marketplace for bookcases and a small dresser. It took a few weeks to find the sizes she needed to work in Ellie’s room. But this turned out to be an inexpensive project. Steph spend $175 total! Isn’t that amazing!
The small dresser was $20 and the two bookcases were $50 for the pair. They are solid wood and were easy to work with. In fact the bookcases were from Ikea which made it simple to make modifications. Scroll down and see how we put this all together.
If you are a more visual learner, you can see the video tutorial below.
Tools needed:

Prep the area for Built In Desk with Shelves

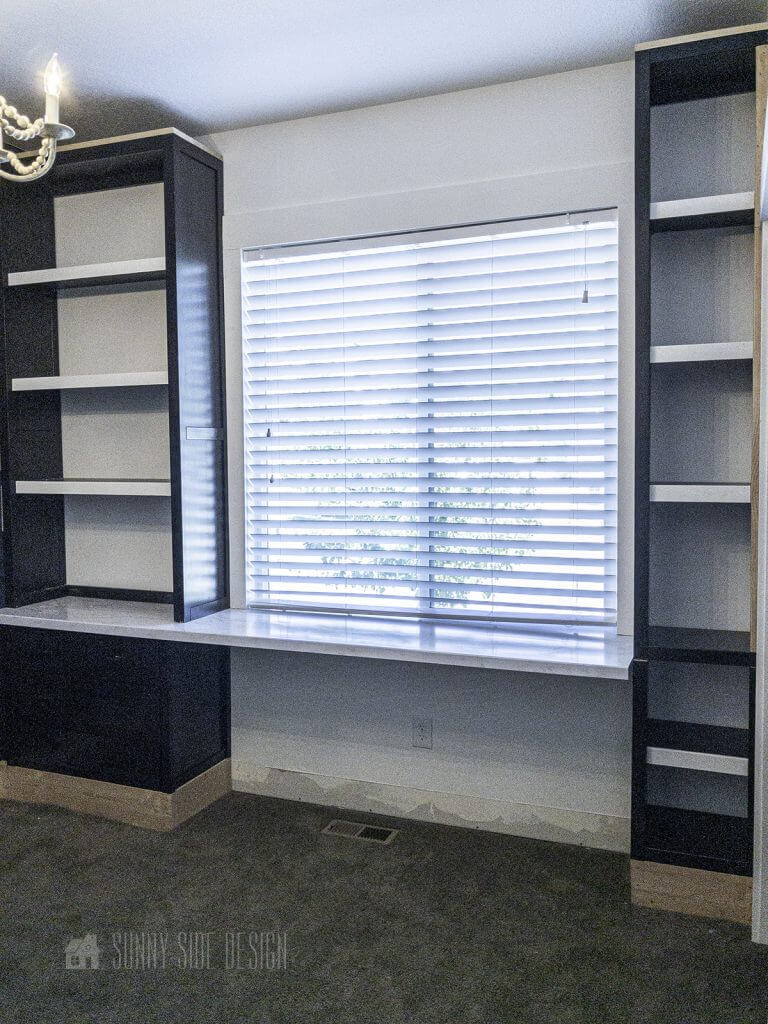
This is the wall where we will install the built in desk and shelves. Steph searched for furniture pieces that would fit the area on the left side. We were able to find bookcases that were the exact width of the wall on the left side of the window.
The bookcase on the right side of the window would need to be modified.

To remove the baseboard, we scored the caulk with a utility knife, then pried the baseboard away from the wall.
We removed the baseboard carefully so we could reuse it around the built ins.
The small dresser was brought in so we could get an exact measurement where we would need to remove the baseboard on the side wall as well.
We also removed the windowsill. We placed a board under the edge and tapped with a hammer to loosen it. The desk top will be at the same height as the windowsill.
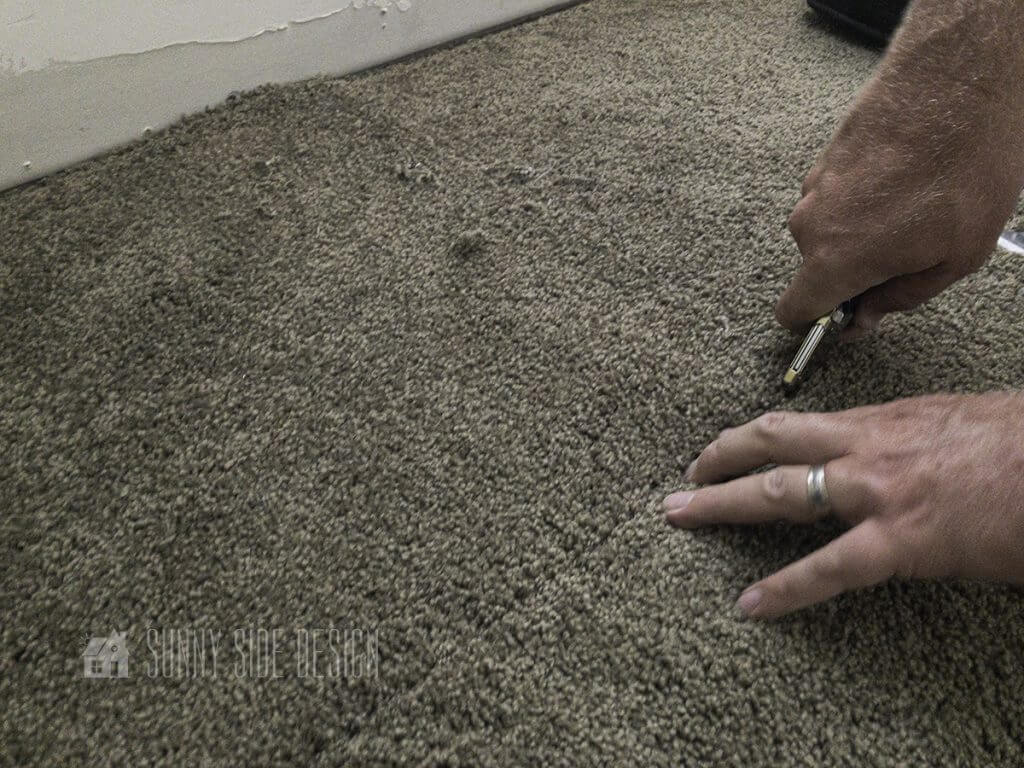
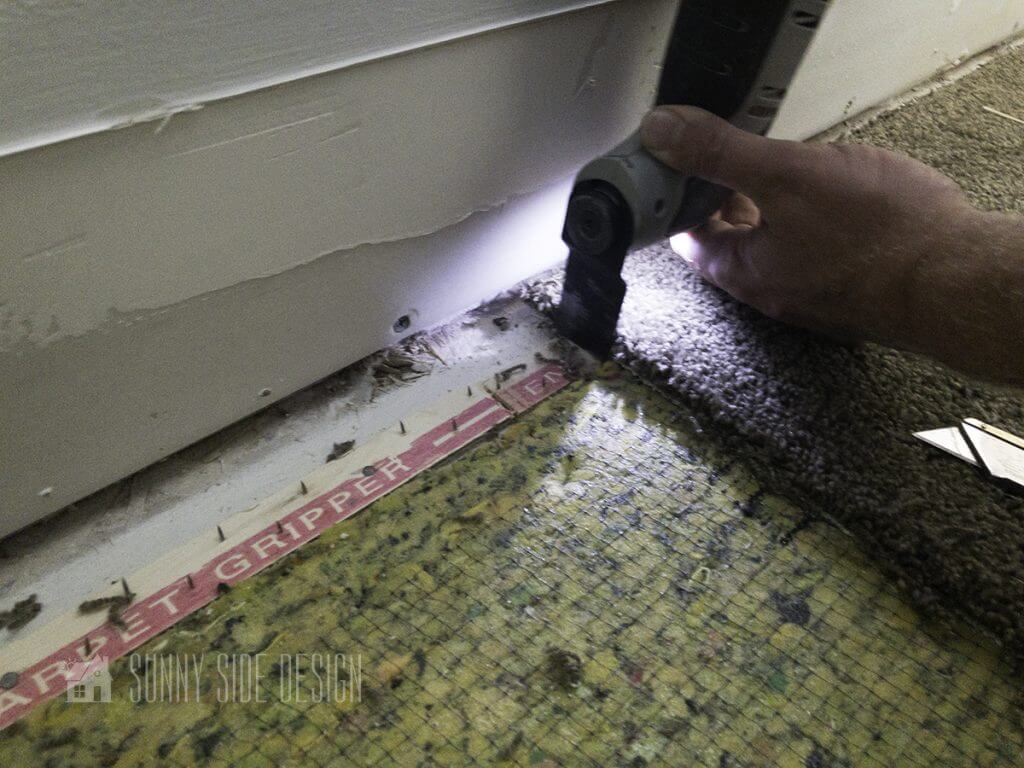
The carpeting will also need to be removed where the built ins will sit. We marked and cut the carpet with a utility knife and also removed the carpet pad as well as the tack strip.
Are you enjoying this project? Please Pin It, save it for later and share it with a friend.
Sharing is caring!
Modifying & Installing Dresser Section
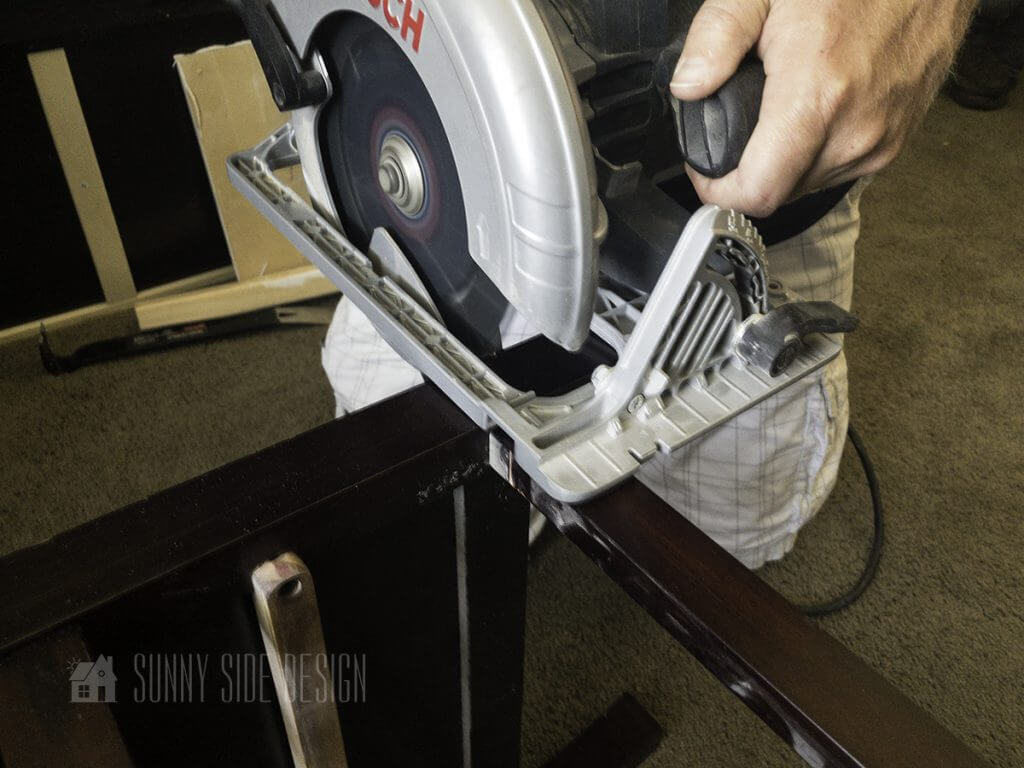
Two modifications needed to be made to install the dresser. First we cut off the legs with a circular saw. Then we removed the top as well.

We created a base for the dresser to sit on from 2×8 lumber. The board was ripped down to 6 1/2″ high. This was the height that we needed the dresser to be for the desk top.
The boards were screwed together forming a box. This box was then secured to the wall and the floor.
The dresser then was placed on the box and attached with screws.
We also attached the dresser at the top edge with screws into studs.
Modify & Attach Right-side Bookcase
This side is where we bring in the brains. Steve always finds the best way to make things work.
First, we basically cut the bookcase in half. The top section of the right shelves will be the full length.
Second, we needed the remaining half of the bookcase to be cut down to the height that the countertop will be.
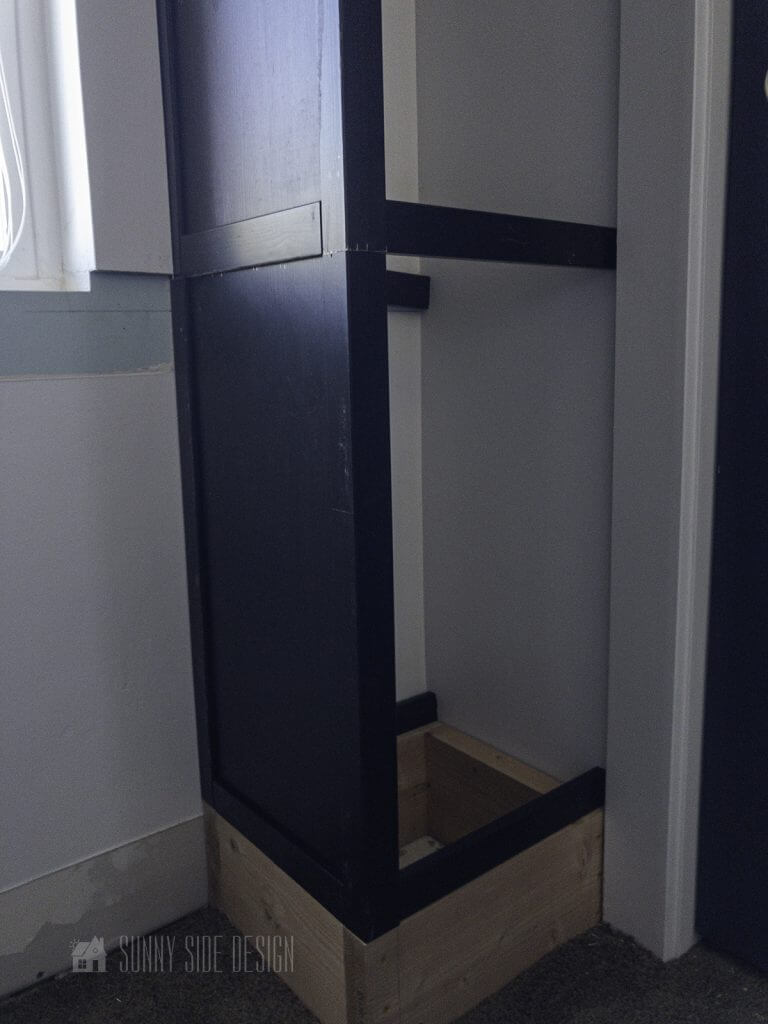
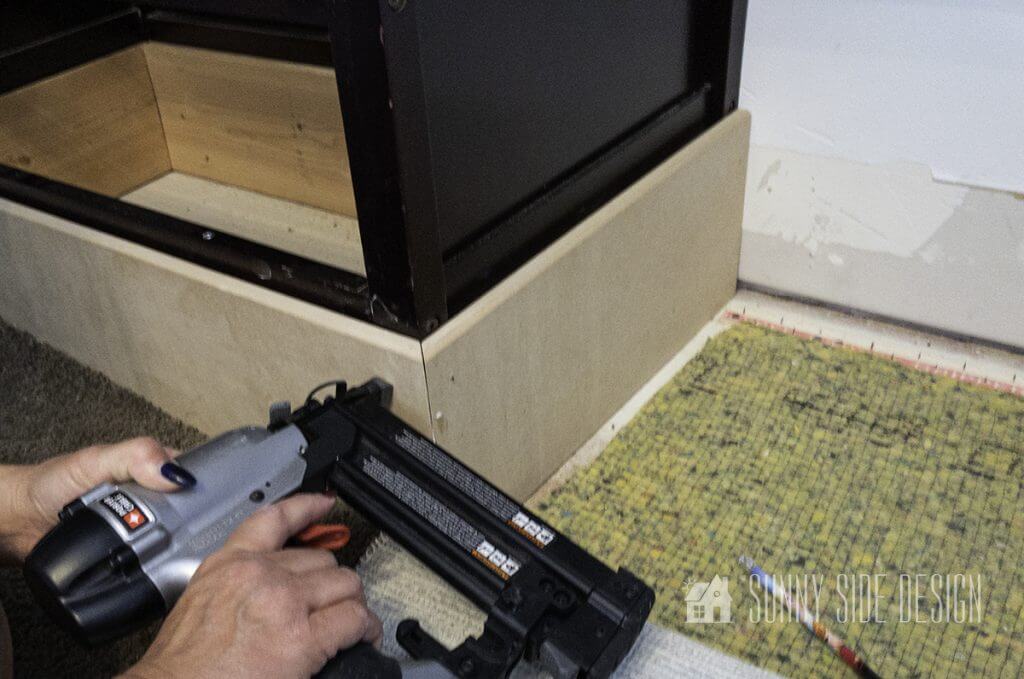
Then we build a base just like the left side for the bookcase to sit on. The base was then secured to the wall and floor with screws.

Next we secured the lower section of the bookcase to the base. We used the brad nailer for this.

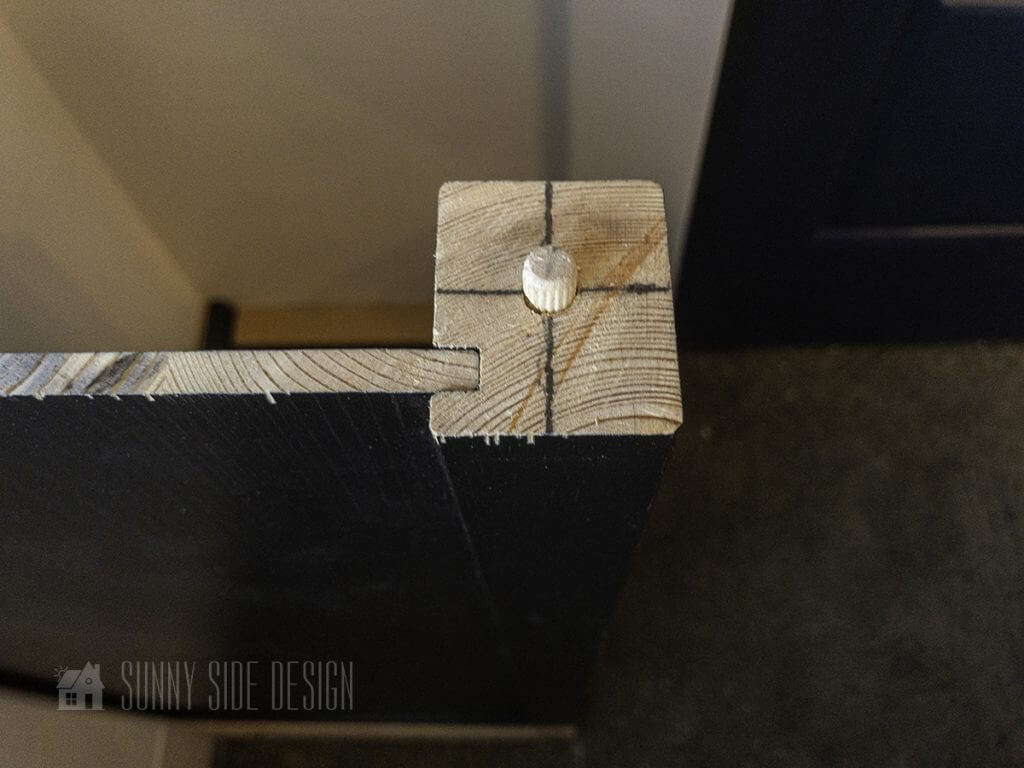
This is where Steph and I get stumped. How to secure the two sections together. I love the solution Steve came up with!
We marked the center of the side post of the bookcase on the top of the lower section and the bottom of the upper section.
Then we drilled holes in each section. We then inserted a dowel with wood glue, securing the two sections together.

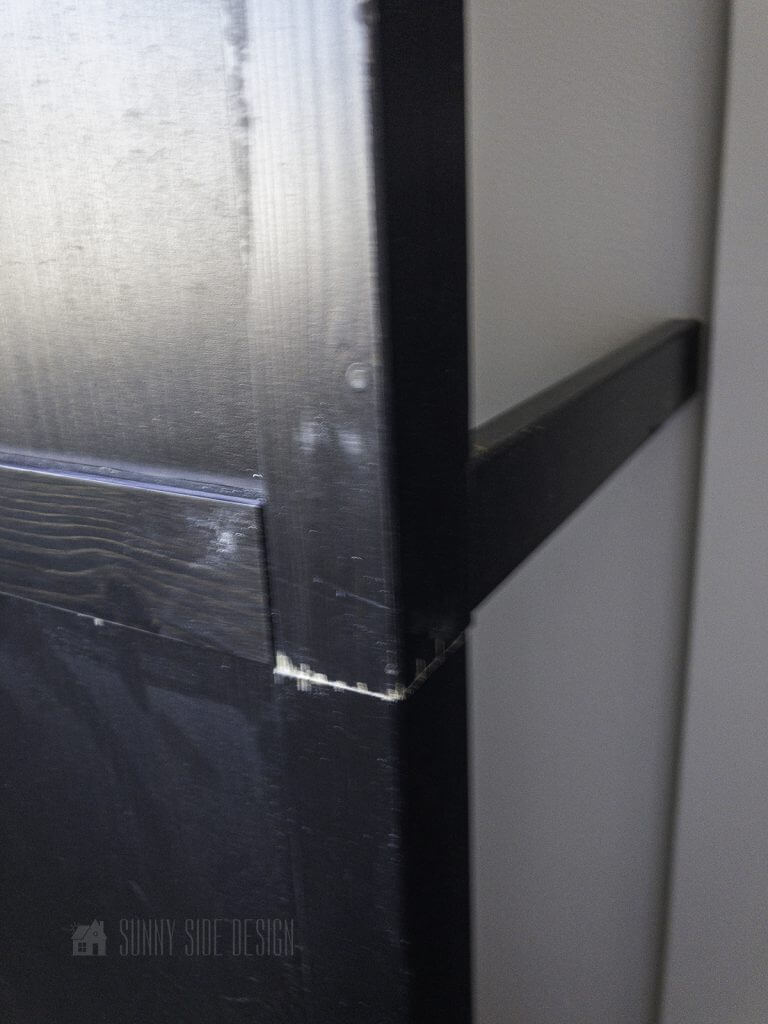
You can see the seam here, but with a little wood putty and paint it looked like one continuous piece.
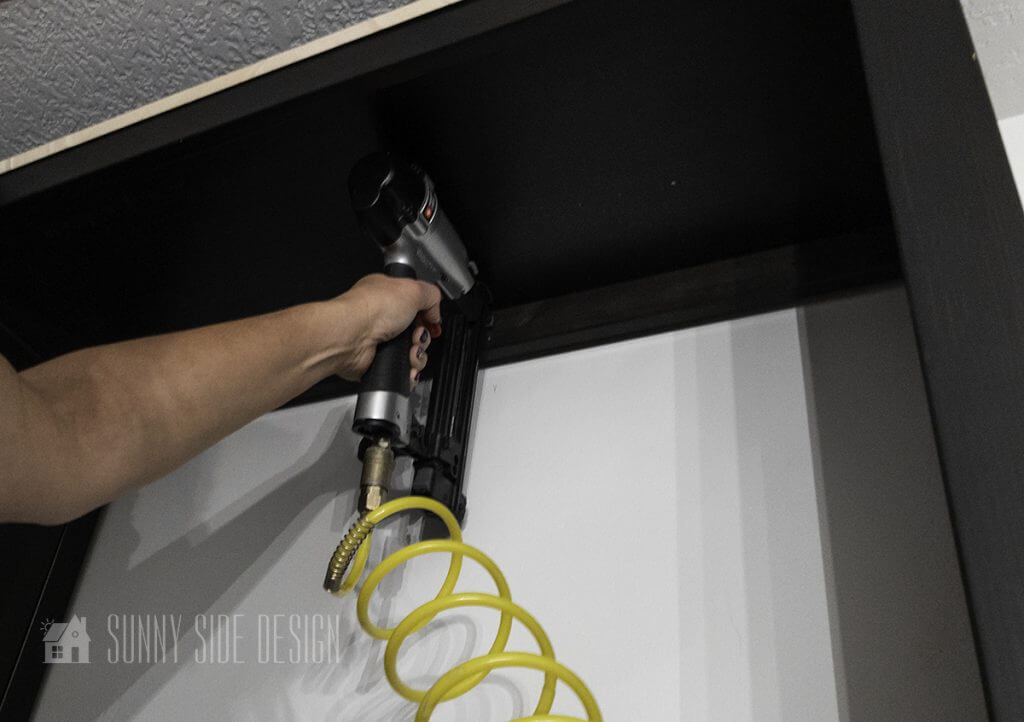
The cross sections of the bookcase were then secured into studs with the brad nailer.
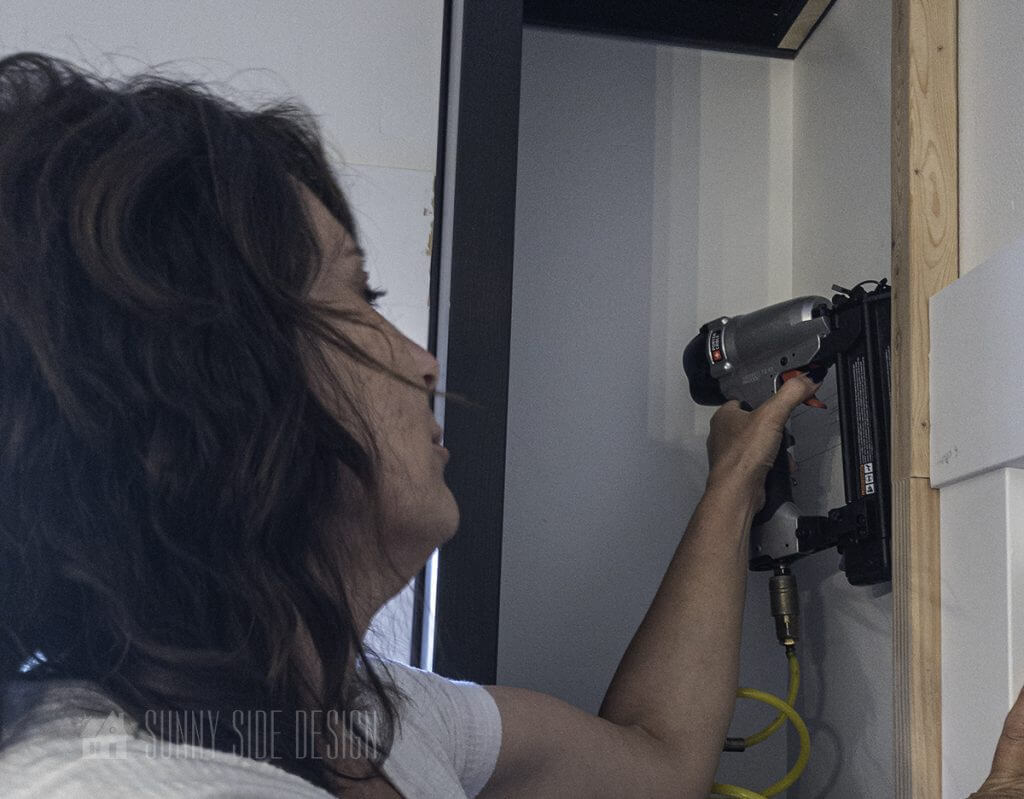
Now because we cut the bookcase in half we did not have a side post on the right side of the bookcase. So we created one from a 2×2 piece of wood. It was cut to length and attached to the wall with the brad nailer.

The next thing we needed to add was cleats to hold the shelves on the right side. Again, these were attached with the brad nailer.
If you’re new here, welcome! We’re so glad you’re here.
Let us introduce ourselves, we’re Michelle and Steph, a mom and daughter team who love to DIY and decorate our homes.
Not only are we passionate about making our homes warm, comfortable and unique, but it’s our mission to help you create that same feeling in your own home.
You’ll find ideas for repurposing, creating, decorating and making your home truly yours, while always mindful of a tight budget.
Undoubtedly we love finding ways to make your home look high-end on a small budget.
Plus you’ll also find a recipe or two as we share our family favorites with you.
We’d love it if you’d join our community of doers so you won’t miss any inspiration for your home.
We love new friends.

[mailerlite_form form_id=2]
Installing the Desk top for the built ins

We made a cleat from a 2×4 board, and secured it at the height of the window. This is the same height as the top of the dresser as well.


You can see here the desk top on top of the cleat and it also sits on top of the dresser.
We then secured the desk top to the dresser with a few brads. Shooting them through the top rail of the dresser into the desk top.
Another cleat was installed on the right side bookcase to secure that end of the desk top.
You can see a full tutorial on how we created this desk top here.
Install Left Bookcase

For both bookcases we trimmed the top so it was flush with the front of the bookcase.
This was easy to do because they were from Ikea. We simply unscrewed them and trimmed them on the table saw, then reattached.
The left bookcase was placed on the desk top and secured to the wall. We marked where the studs were and secured with the brad nailer.

The lower portion of the bookcase was attached to the desk top by shooting brads through the bottom of the desk top into the sides of the bookcase.
Let’s stay connected! Follow us on social media!
Detail Molding for the Built In Desk

To make the shelves appear chunkier, we cut flat molding to length and attached it with the brad nailer.
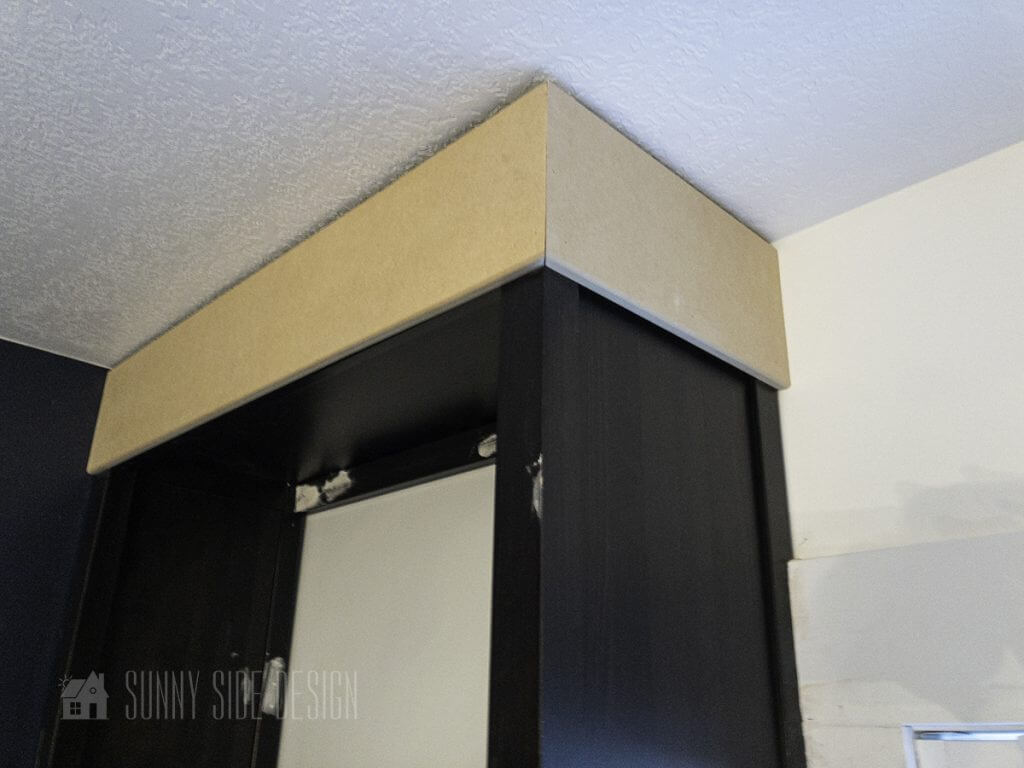
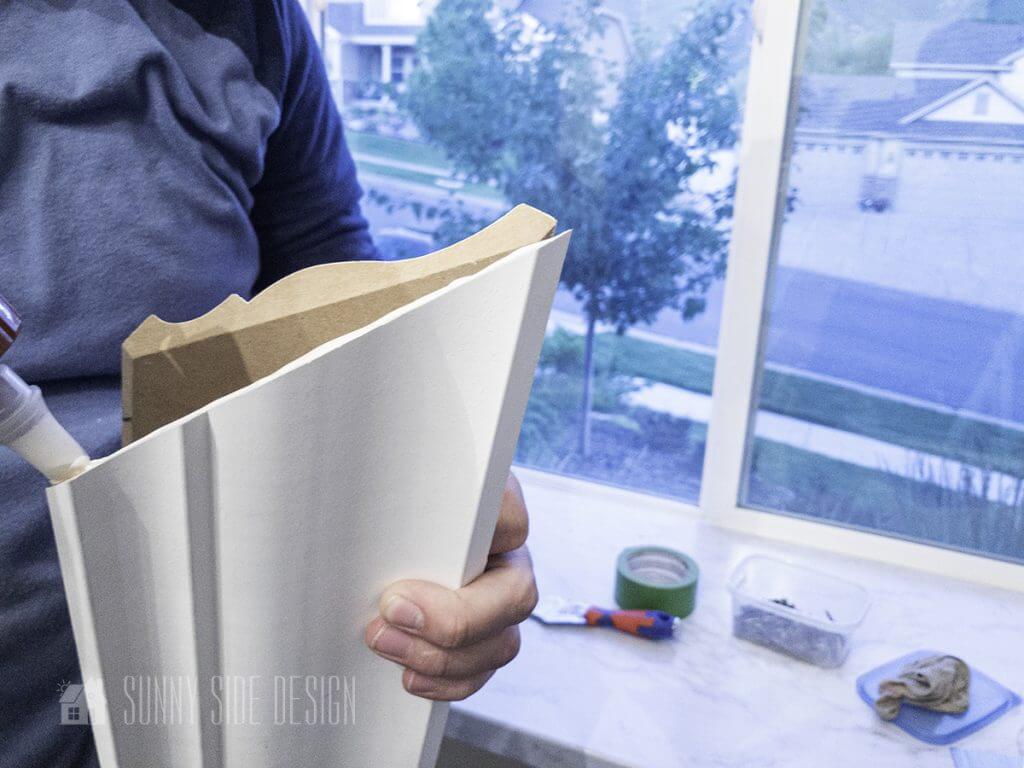
Next we covered the base and the lower edge of the dresser and the right bookcase base with a MDF board that we had routered. It was cut with a 45º angle and attached with the brad nailer.
The same molding treatment was added to the top of each bookcase as well.

We are coming to the home stretch!
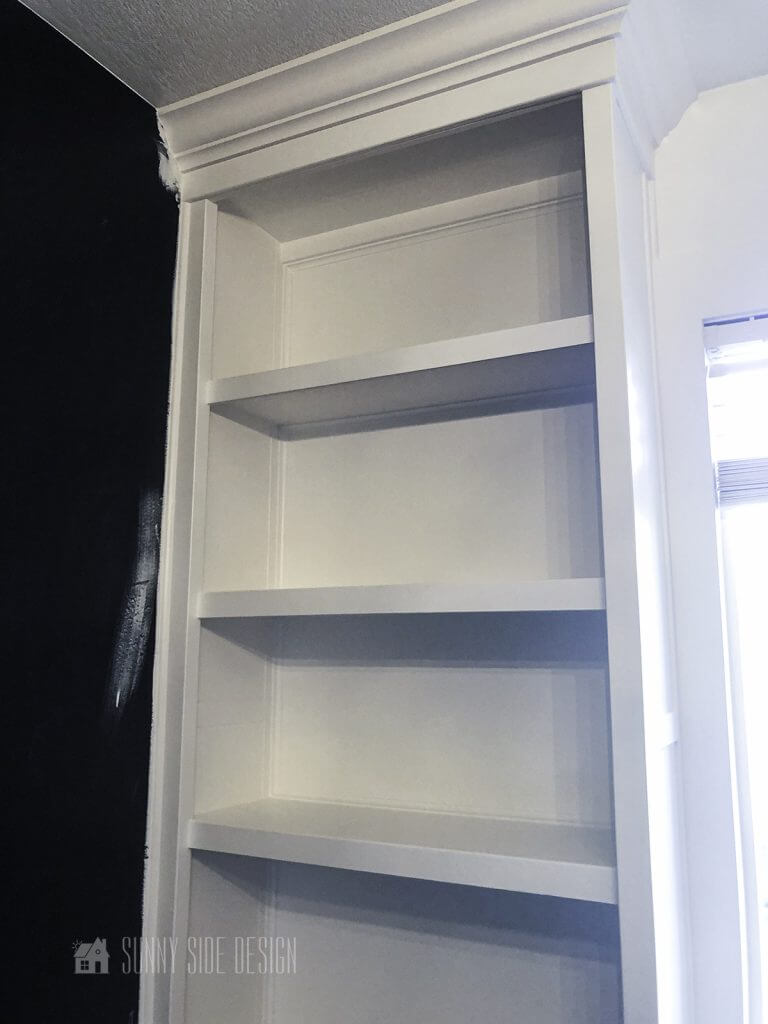
It’s time for the crown molding! This is a step I let Steve do. Maybe one day I’ll give it a shot. But, he does such a good job.
The cut for crown molding is a double mitre cut. Steve always makes a dry fit and makes sure it all lines up perfectly before attaching.
Then he applies wood glue on the angle and nails the joint together.
He then takes the joined piece and attaches it into place with the brad nailer.

We had some gaps where the bookcase met the wall. So we attached a small 1/2″ quarter round molding down the sides of the bookcase and dresser.
The last bit of molding to attach is the baseboard. We reused the pieces we took off and had a leftover piece from another project to complete this.
Putty – Caulk – Prime – Paint
This tutorial was all about creating a built in desk with shelves using second hand furniture. So we’re not showing you how to caulk, putty, prime and paint. For a tutorial on that you can see these 2 posts.
How to Paint Furniture with Professional Results
How to Paint a Room and Get Pro Results

We are so pleased with the way this turned out. It has that touch of glam that Ellie wanted in here room.


She now has a huge desk area for all of her creative projects. This will also be a great homework station.
For more homework station ideas click here.
There will soon be a tutorial with all the details of how we created this desk top as well.
While we used existing furniture pieces to create this built in desk, we also have a post “How to Make a Simple Cabinet Box” if you’d like to build your own.
Also we have made our own built in shelves too along with a built in reading nook.

We can’t wait for the paint to cure so we can get in here and style these shelves.

Have you ever considered adding a built in to your home? If you do not need to customize a bookcase to fit, then this is a simple way of adding built ins to your home.
If you have questions or comments about this project we’d love to hear from you.
We hope you found some inspiration for your home today.
Please share your tips and ideas with us.
We love hearing from you!
If you’re new here, WELCOME! We love having new readers and friends!
You can learn more about us here.
Let’s stay connected! Join our DIY community of doers and you won’t miss the weekly updates and more inspiration for you always on a budget.
Sharing is caring!
Thanks for stopping by Sunny Side Design. Empowering you to create a home you love!
DISCLAIMER
This blog’s content is for entertainment purposes only and is not professional advice. By reading this blog and attempting to recreate a project, you assume all responsibility for any injuries or damages incurred. Read my full disclaimer here.
PHOTO USE AND CONTENT SHARING
All of the photographs you see here are the property of Sunny Side Design unless otherwise credited.
We love for others to share our work, so please feel free to use one photo with a link back to our website.
Pinning and sharing is always encouraged!
Please do not reproduce other Sunny Side Design content without permission.
Retailers We Love
- Anthropologie
- Birch Lane
- Crate & Barrel
- Joss and Main
- Lampsplus
- Mark & Graham
- One Kings Lane
- Pottery Barn
- Rejuvenation
- Serena & Lily
- Wayfair
- West Elm
- Williams Sonoma
- World Market
Be sure to follow us on Pinterest for even more home decor and DIY ideas.
To see what we are working on before it’s on our blog, follow us on Instagram.
You will also find our video tutorials on our YouTube channel.
- Creating a Cozy Outdoor Living Room with Thrifted Finds

- The Best ‘Berry in Love’ Bridal Shower Ideas
- Paint an Old World Texture Finish on a Vase
- Easy Strawberry Chicken Salad with Lime Maple Balsamic Vinaigrette


Wow! Talk about function and form. This turned out beautifully.
Ah, thank you Cyndi! It was a great solution for a small bedroom and a little girl who loves to craft. Thanks for stopping by and have a wonderful week.