Do you love that rustic farmhouse style?
This coffee table totally speaks farmhouse to me.
We were asked to refinish this table for a client who was looking for that fresh farmhouse style.
But let me tell you when I first saw this table, all I saw was a beat up table that I wasn’t sure was worth saving.
However, keep scrolling and watch the dramatic transformation of this Chalk Paint Coffee Table Makeover.
If you love to re-imagine old furniture pieces like us, then you’ll love our Modern Desk Makeover too!
Or take a look at our Modern Floating Nightstand.
One or our favorite transformations with chalk paint is grandpa’s old dresser.
Sunny Side Design is a participant in the Amazon Services LLC Associates Program, an affiliate advertising program designed to provide a means for sites to earn advertising fees by advertising and linking to Amazon.com. As an Amazon Associate, this blog earns from qualifying purchases with no additional cost to you. Click here to read our full disclosure policy.
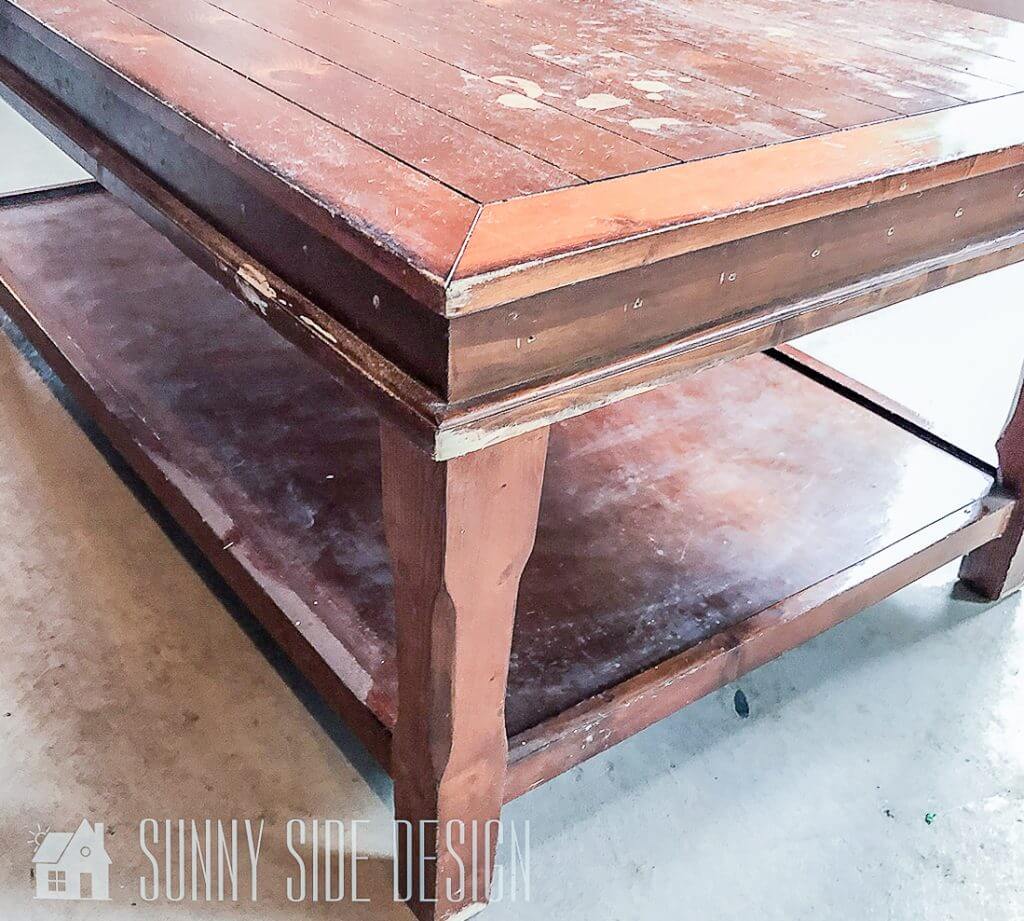
Coffee Table – BEFORE
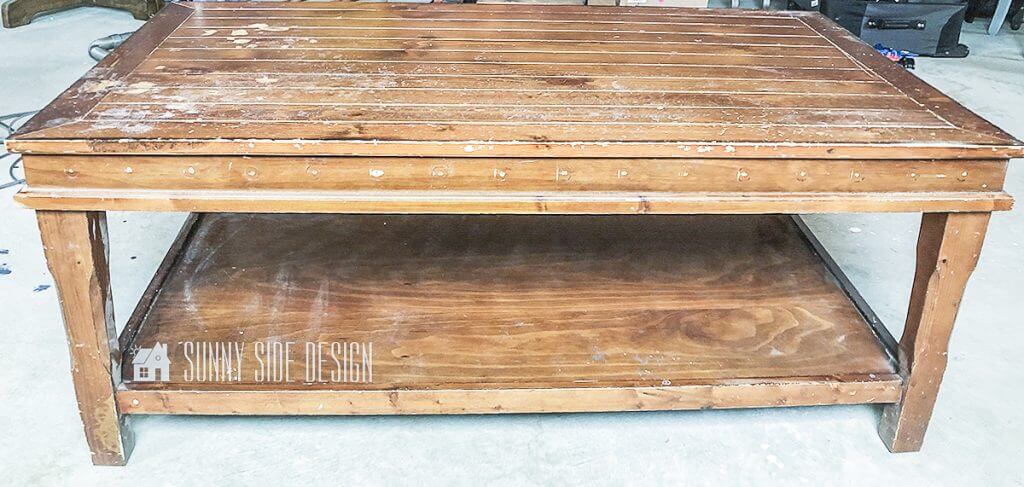
Without a doubt, this table was in rough shape! It had had a nailhead border that was removed. The finish was chipped, as well as water damaged.
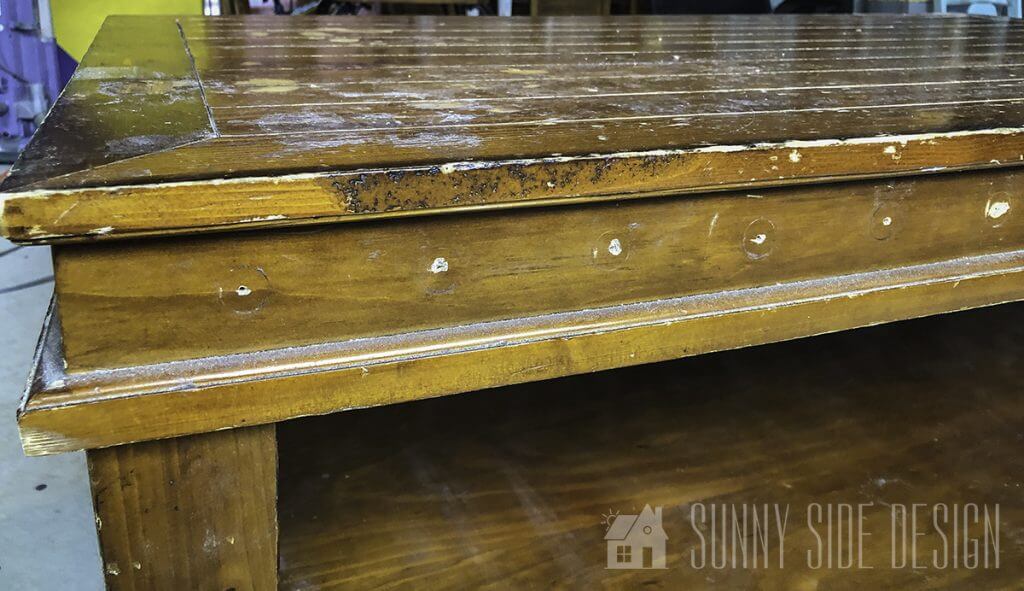
The table top was so rough, it looked as though someone had taken a fork and pierced the surface. It was trashed! But with a little lovin’ it became a treasure!
Step 1 – Fill in nail holes
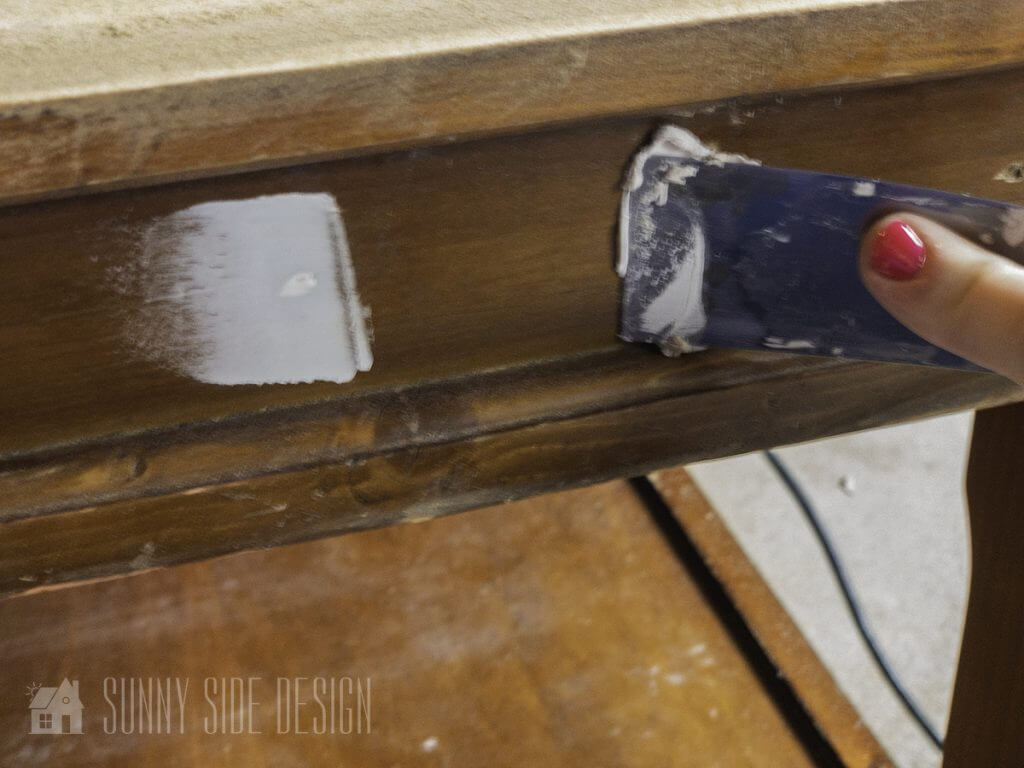

First of all, we needed to tackle all of the nail head holes. Using Drydex Spackling Paste and a small putty knife, we filled in all of the holes.
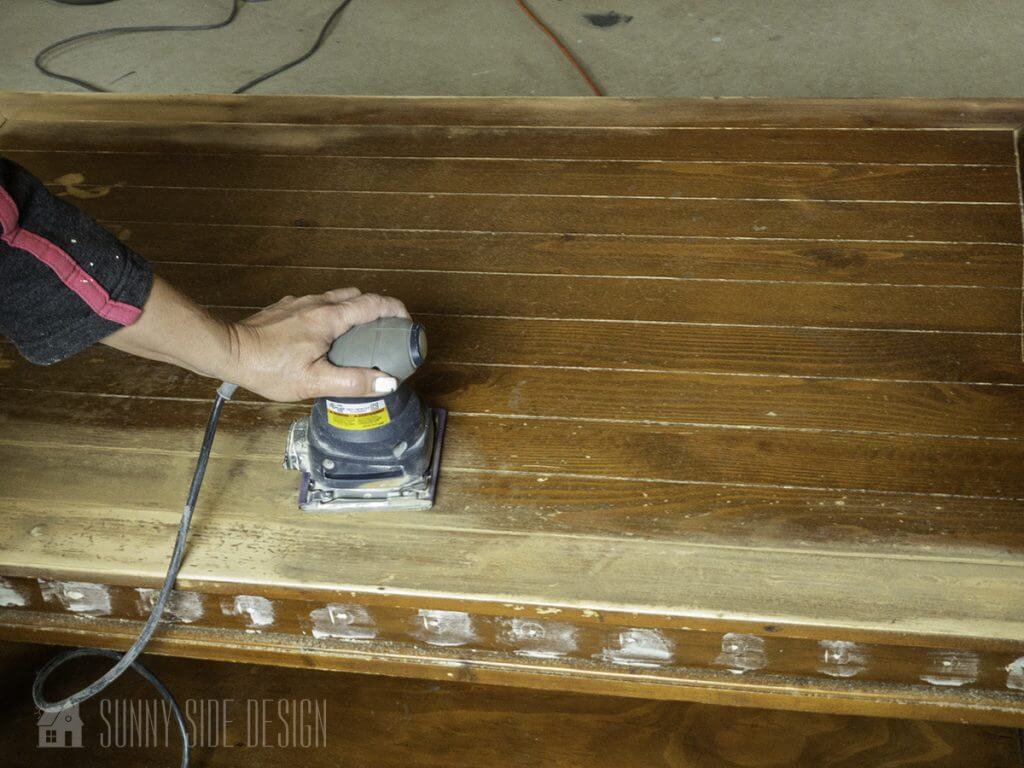
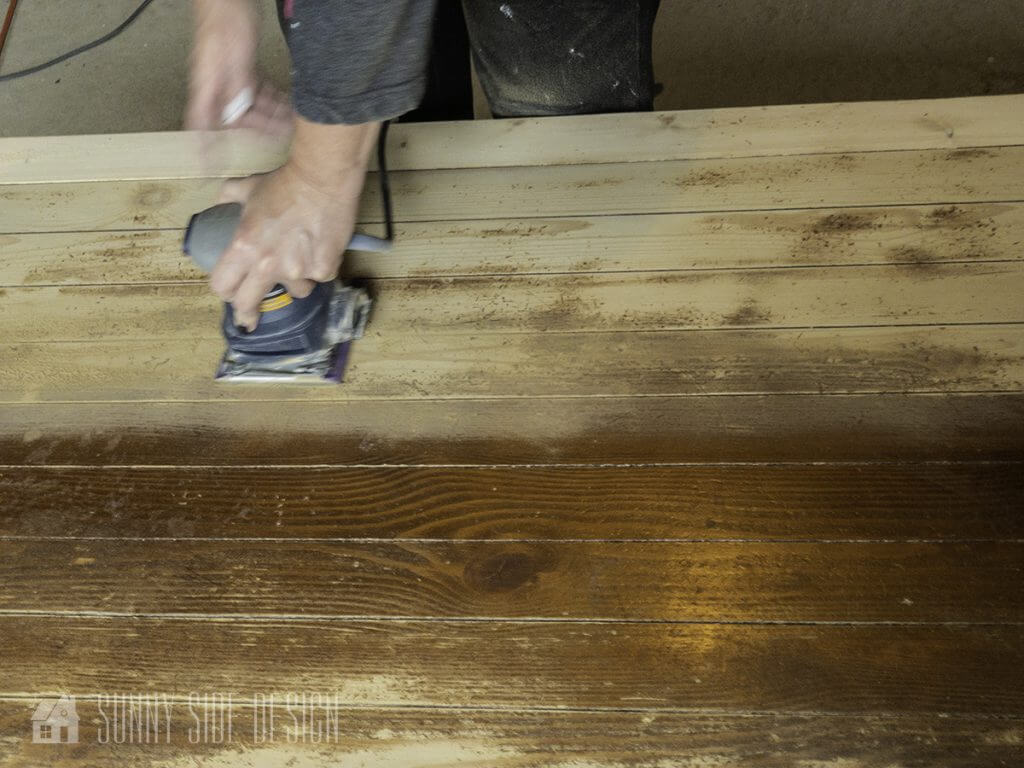
Normally when we refinish a table and use chalk paint, there is no need to sand. However, this table top was in such rough shape that if we did not sand the top, all of the divets would have stuck out like a sore thumb. 🤪 So, we got out our palm sander and began sanding until the surface was smooth.
Are you enjoying this project? Please Pin It, save it for later and share it with a friend.
Sharing is caring!

The spackled nail holes were sanded by hand with a piece of fine grit sand paper. This area was too small for the palm sander.
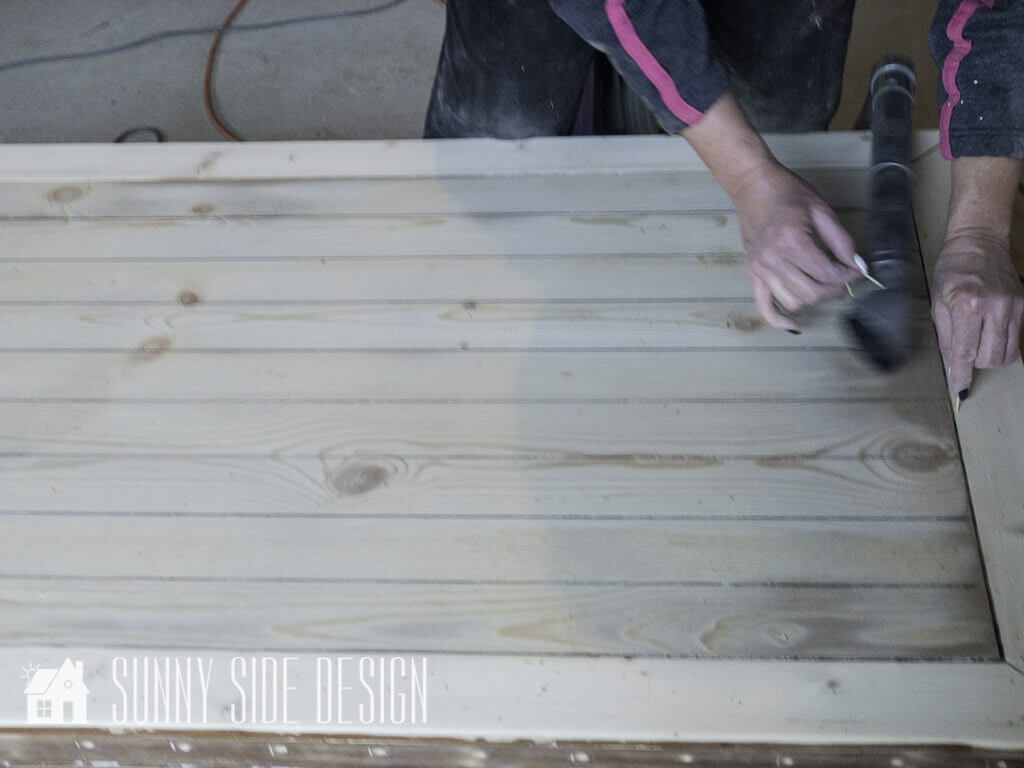
Now it’s time to clean the surface for paint. Since the table top is planks, we used the brush attachment on the vacuum to get the dust out of all the crevices. Then wiped the entire surface with a damp cloth.
Step3 – Chalk Paint


Ok, we are ready for the fun part, the paint. Using our favorite paint, Behr Chalk Paint in Farmhouse White and Purdy paint brush, we applied 3 coats of paint to get complete coverage. Let dry completely before distressing.
If you’re new here, welcome! We’re so glad you’re here.
Let us introduce ourselves, we’re Michelle and Steph, a mom and daughter team who love to DIY and decorate our homes.
Not only are we passionate about making our homes warm, comfortable and unique, but it’s our mission to help you create that same feeling in your own home.
You’ll find ideas for repurposing, creating, decorating and making your home truly yours, while always mindful of a tight budget.
Undoubtedly we love finding ways to make your home look high-end on a small budget.
Plus you’ll also find a recipe or two as we share our family favorites with you.
We’d love it if you’d join our community of doers so you won’t miss any inspiration for your home.
We love new friends.

[mailerlite_form form_id=2]
Step 4 – Distressing
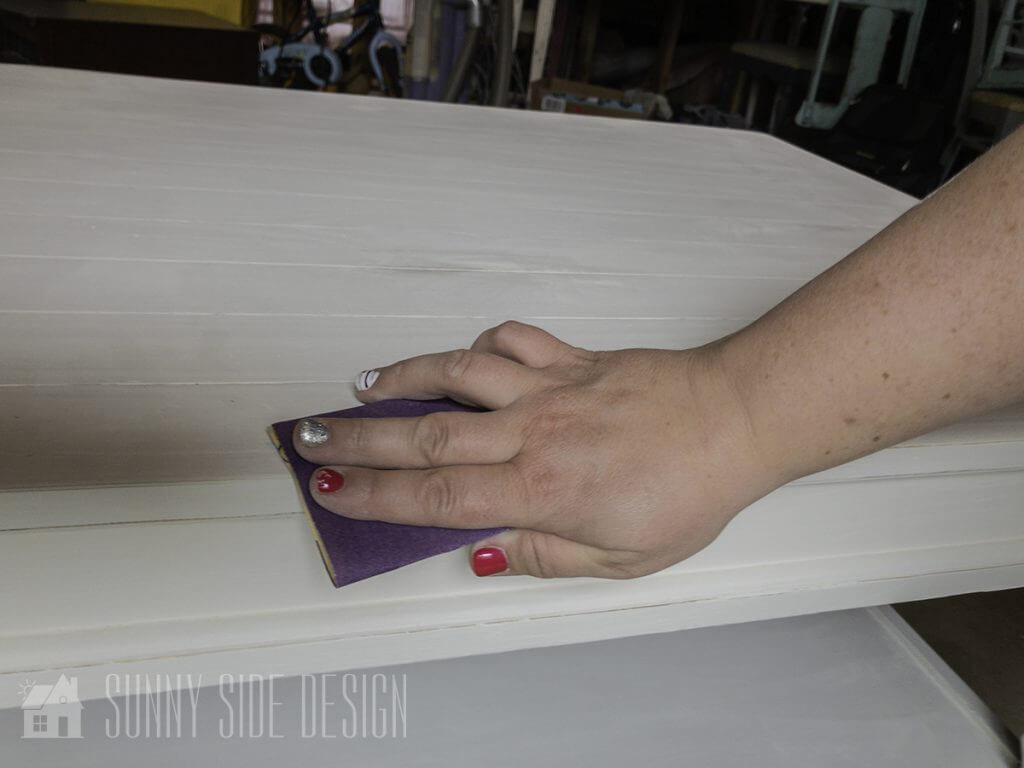

Distressing the finish is a necessary step to get that popular farmhouse style. It is best to do this by hand, this way you are able to better control the amount of distressing you would like.

Using a fine sandpaper, gently sand off some of the chalk paint around the table, focusing on natural wear spots like the corners, as well as a few random spots.


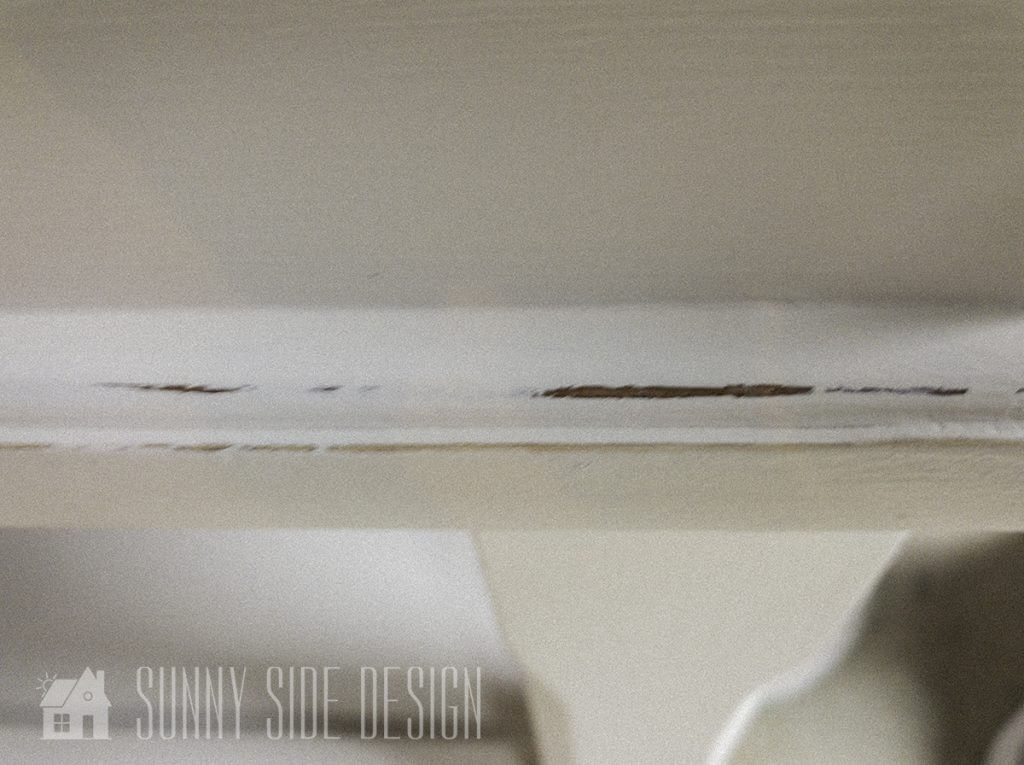
After distressing the table, we realized that the distressed area on the table top didn’t match the distressing on the rest of the table.
The remainder of the table had a darker stained finish that was showing through on the distressed areas.
While on the table top, we had sanded off all of the stained finish and just the bare pine wood was left.
To fix this problem, we used a stain marker to add some color to the distressed areas on the table top. Let it sit for about 10 minutes then wipe off any remaining stain.

This little trick worked perfectly, so that all of the coloring on distressed areas matched.
Let’s stay connected! Follow us on social media!
Step 5 – Protective Finish

All chalk paint requires some sort of protective top coat. Waxing is always a popular choice, however for this table we decided to use a poly finish.
We love to use this Wipe-On Poly finish for all of our DIY furniture projects. It is extremely durable, easy to use and leaves the furniture with a beautiful finish.

Wipe-on Poly is so easy to use. Pour a small amount on a clean cotton cloth. We like to use pieces of old t-shirts. Then simply wipe on the poly covering the entire surface.
It is always better to apply 2 light coats, then you are less likely to get runs. After the first coat is dry, sand lightly with an extra fine steel wool and repeat.
This will ensure you have a beautiful, smooth finish.
For the table top we applied a 3rd coat of poly. This will give the table top a little extra protection, where it will get a little more wear and tear.
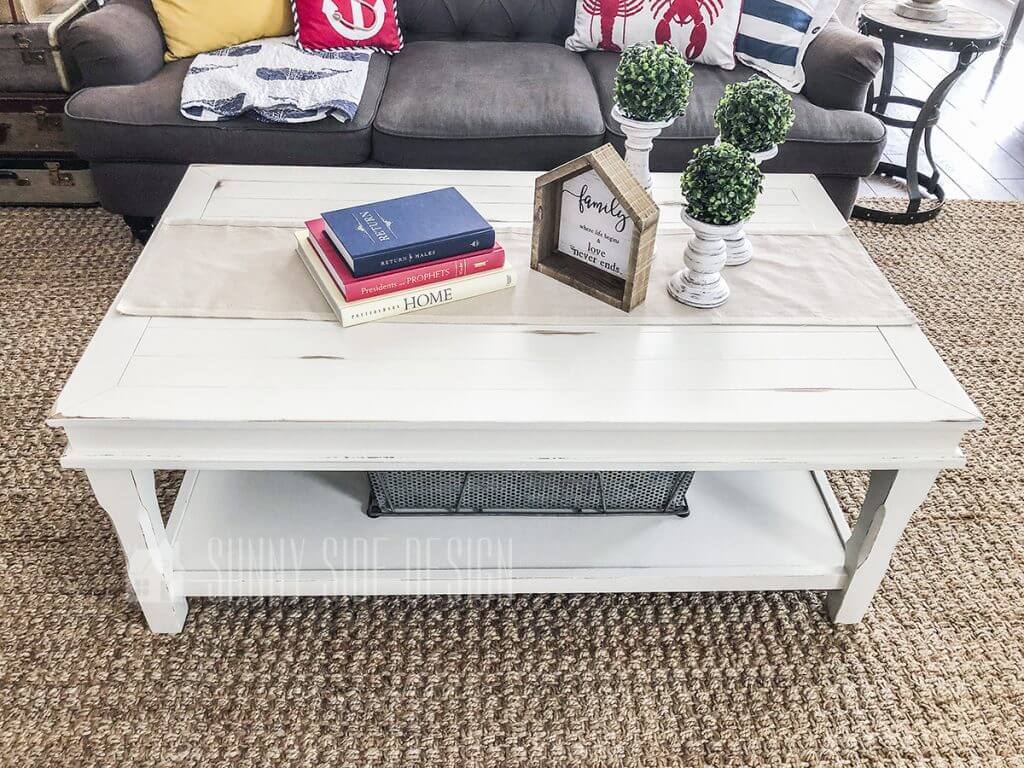
Chalk Paint Coffee Table Makeover

Doesn’t this finish look amazing? Look at that gorgeous, silky and smooth finish. When it turns out this great, I can’t keep my hands off of it, I just need to feel that silky surface.
For another farmhouse style coffee table, see how we turned an old dining table into a round coffee table.

Can you believe the transformation? Remember, I had thought that this table wasn’t worth saving? Boy, was I wrong! It is a real show stopper now!
Also, checkout the china cabinet that we transformed with black chalk paint.

Have you tried using chalk paint? It never ceases to amazing me what a little paint can do. Do you have a piece that you’ve been waiting to revamp? Please share what you are working on, we love to hear from you!
For more furniture ideas for your home, take a look at these ideas:
- Simple Upholstered DIY Ottoman Makeover
- Repurposed Hutch Top
- Stunning Dresser Makeover with Cane
- How to Apply Paint that Looks like Stain: Rift Sawn Oak
- How to Make an Old Bed Frame Look Modern
- Simple DIY Floating Nightstand with a Modern Vibe
- How to Build a Desk with Wood and Pipe
- Desk Makeover with a Modern Vibe
- DIY Round Coffee Table
- Simple Upcycled DIY Sofa Table
- Painting Furniture the Easy Way with a Wagner Sprayer
- Reupholster a Chair with a French Country Boho Flair
- French Country Upholstered Daybed
- How to Refinish Furniture with a Raw Wood Look
- How To Refinish a Beautiful Wood Dining Table
- Makeover a Bar Stool with a Farmhouse Style
- No Sew Upholstery Tutorial
- Cheap & Unique Headboard Idea
- DIY Upholstered Headboard Tutorial
- Tool Chest Inspired Dresser Makeover
- Easy and Inexpensive DIY Side Table with Thrifted Finds
We hope you found some inspiration for your home today.
Please share your tips and ideas with us.
We love hearing from you!
If you’re new here, WELCOME! We love having new readers and friends!
You can learn more about us here.
Let’s stay connected! Join our DIY community of doers and you won’t miss the weekly updates and more inspiration for you always on a budget.
Sharing is caring!

Thanks for stopping by Sunnyside Home. Empowering you to create a home you love!
Retailers We Love
- Anthropologie
- Birch Lane
- Crate & Barrel
- Joss and Main
- Lampsplus
- Mark & Graham
- One Kings Lane
- Pottery Barn
- Rejuvenation
- Serena & Lily
- Wayfair
- West Elm
- Williams Sonoma
- World Market
Be sure to follow us on Pinterest for even more home decor and DIY ideas.
To see what we are working on before it’s on our blog, follow us on Instagram.
You will also find our video tutorials on our YouTube channel.
- The Best ‘Berry in Love’ Bridal Shower Ideas

- Paint an Old World Texture Finish on a Vase
- Easy Strawberry Chicken Salad with Lime Maple Balsamic Vinaigrette
- How to Fix Chipped Kitchen Cabinets with a Pen


