Anyone who has a garden knows how frustrating it is to work day in and day out only to find that deer have eaten your tomatoes, nibbled on the squash and peas or ripped the bark off the trees.
Certainly, we’ve tried all sorts of methods to deter the deer, from human hair to Irish Spring soap, but to no avail.
After much research we decided that the best method would be to create a garden enclosure high enough to keep the deer out.
Clearly when you garden in deer country, growing vegetables can be a real challenge.
To keep out high-jumping deer, many gardeners surround their crops with tall fences that have the look of a maximum-security prison.
However we wanted to keep our beautiful views as well as look good from the street.
Not only did it turn out beautiful, but we have succeeded in keeping the deer out of our vegetable garden!
Looking to protect your garden while adding a touch of modern style?
Our deer fence plans include detailed measured drawings and a step-by-step guide to help you build a sleek, functional fence with a trellis design.
Whether you’re keeping deer out or enhancing your outdoor space, these easy-to-follow plans make the project simple and achievable!
Click here to purchase the plans.
How Tall Should a Deer Fence Be?
After trying many methods that claim to keep the deer out of our vegetable garden, last year we installed a fence around the perimeter of our garden.
It was a temporary fence, which was only 5 feet tall.
Clearly, it did not work!
They were still having a feast nightly in my garden.
Apparently, a 5 to 6-foot fence isn’t enough to keep deer at bay—they can clear it with ease!
To truly keep them out, we needed a fence at least 8 feet tall.
With that in mind, I started sketching out ideas.
It had to be both effective and stylish—a fence that not only keeps deer out but also enhances the look of our yard.
One element I wanted to include on my fence was a trellis to grow wisteria, but also a structure to support my grape vine.
This fence would also been seen from our front yard, so it needed curb appeal.
Are you enjoying this idea?! Please pin it, save it for later and share it with a friend.
Sharing is caring!
Disclosure: This post contains affiliate links or referral links for your convenience. It is a way for this site to earn advertising commissions by advertising or linking to specific products and/or services. Click here to read my full disclosure policy.
What You’ll Need to Build a Deer Fence
To build your own deer fence you need some basic tool like a saw, drill, angle grinder, level and a laser distance meter is also helpful.
We built our deer fence with pressure treated lumber and galvanized hog wire panels for durability, but you could also use cedar or redwood.
- 4x4x10 pressure treated posts
- concrete
- 2×4 pressure treated lumber
- galvanized hog wire
- 2×6 pressure treated lumber
- 2×2 pressure treated boards
- deck screws
- drill
- saw
- angle grinder
- level
- pocket hole jig
- distance laser meter
Click here for the complete plans and measured drawings in our shop.

[mailerlite_form form_id=2]
Determine Measurements
The first step is to plan how many linear feet of deer fencing you will need.
Plan post layout and determine how many posts you will need.
A distance laser meter is the perfect tool for measuring and determining placement of your post.
As you plan, consider gates as well.
We determined we would like 2 gates for our deer fence, one to enter from the backyard and one from the front yard.
Each section of fence will require 6 – 2×4 boards one for the footer, one for the top rail and the other 4 will be ripped down to enclose the 4 sides of the hog panels.
Most of these materials we picked up at our local Home Depot.
However, we purchased the hog wire panel was purchased from Tractor Supply Co.
It was considerable cheaper than the big box home improvement stores.
Install Posts

Using a post hole digger, dig holes 2 feet deep for each post.
Then secure each post in place with concrete.
It took about 2/3’s of a 60lb. bag per post hole.
Pro tip: To keep the posts aligned, run a string from end to end for each side of the deer fence, then align each post with the string.
Install Footer and Top Rail

Once all of the posts are installed and the concrete has cured, install the footer and top rail boards.
Measure the distance between each post and cut the 2×4 boards to length.
We installed our footer boards level and about 9″ from the ground.
The top rail board was installed 60″ above the footer board, this is the height of the hog panel.
We installed our rails using our Kreg jig to create pocket holes for each screw.
The Kreg pocket hole jig has become one of our favorite tools.
We’ve used it to build the following projects:
- farmhouse style bench
- diy closet organizers
- diy round coffee table
- drawer boxes with undermount slides
- built in reading nook
- laundry room fold table
- heirloom piano makeover
- diy floating nightstand
If you don’t have access to a jig, you could also toenail them in or use brackets.
Install the Hog Panels
To enclose each hog panel section, we ripped 2×4 boards into 2 – 1 1/2″x 1 1/2″ pieces.
Secure one of the ripped 1 1/2″ x 1 1/2″ boards to the footer rail and one to the top rail board, aligned with the outer edge of the 2×4.
Secure with deck screws.
Cut to length 2 boards for each side of the opening and secure to the post on each side.
Cut hog wire panel with an angle grinder to fit the opening.
Place hog wire panel into position against the 1 1/2″ x 1 1/2″ boards.

Once the hog wire panel is in position, place the remaining 1 1/2″ x 1 1/2″ boards against the hog wire panel, sandwiching the wire panel between the top board, side boards and footer boards.
Secure in place with deck screws.

We used pressure treated lumber for this deer fence, hoping that it will last for years to come.
Of course redwood or cedar can also be used.
We did not stain our wood, but if using other lumber you may want to stain the wood before installation of the hog wire panels.
Let’s stay connected! Follow us on social media!
The Trellis

To complete our 8 foot height requirement for our deer fence we created a trellis.
Not only would this create that 8 foot barrier for the deer, but it also adds to the appearance of the fence.
In addition, it’s the perfect place to grow a beautiful vine like wisteria.
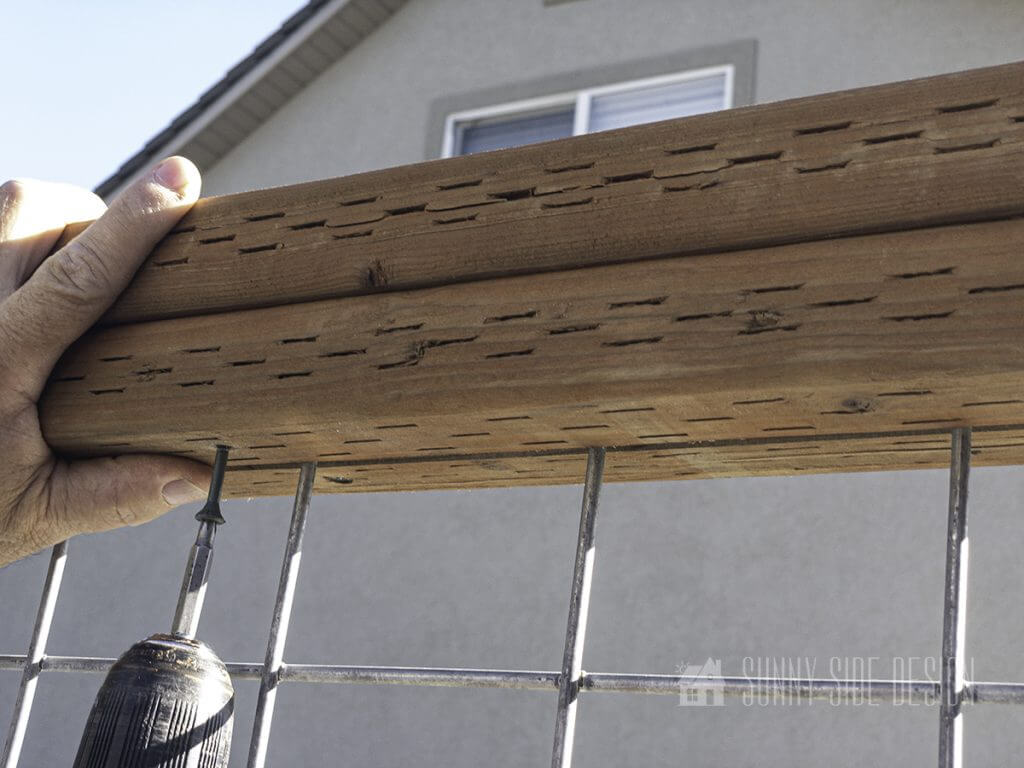
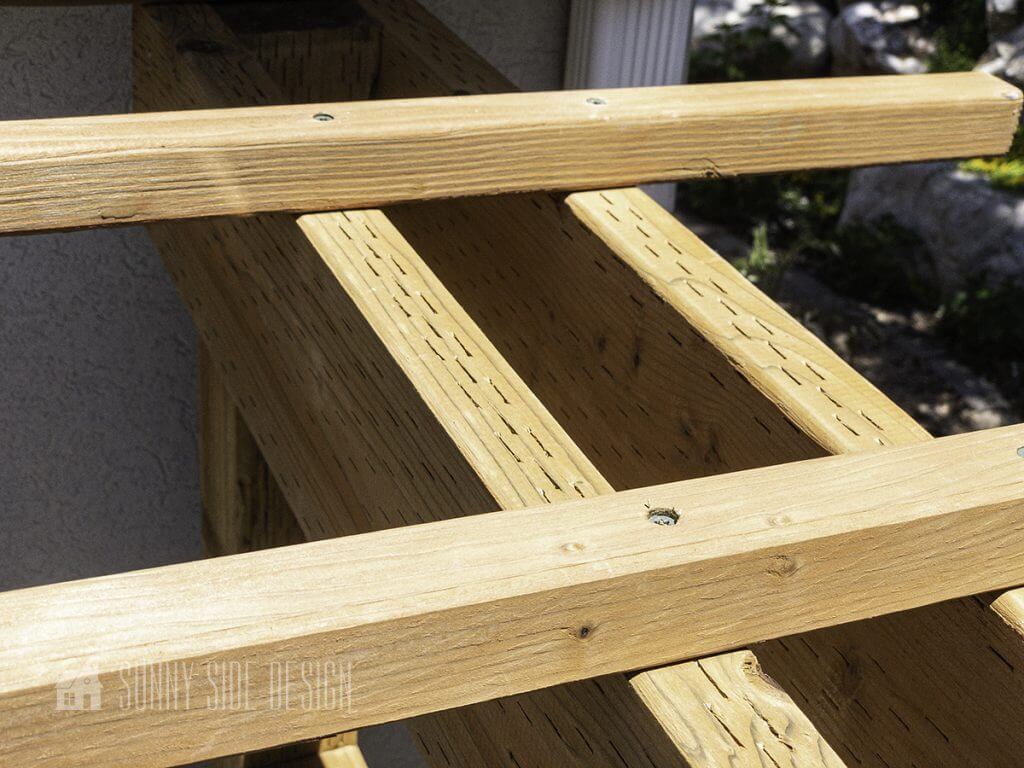
To create the trellis we install 2×6 boards on each side of the 4×4 posts.

Also, I wanted a decorative cut at the end of the 2×6 boards.
So, we used a plate to create an arc and traced that onto the lumber.
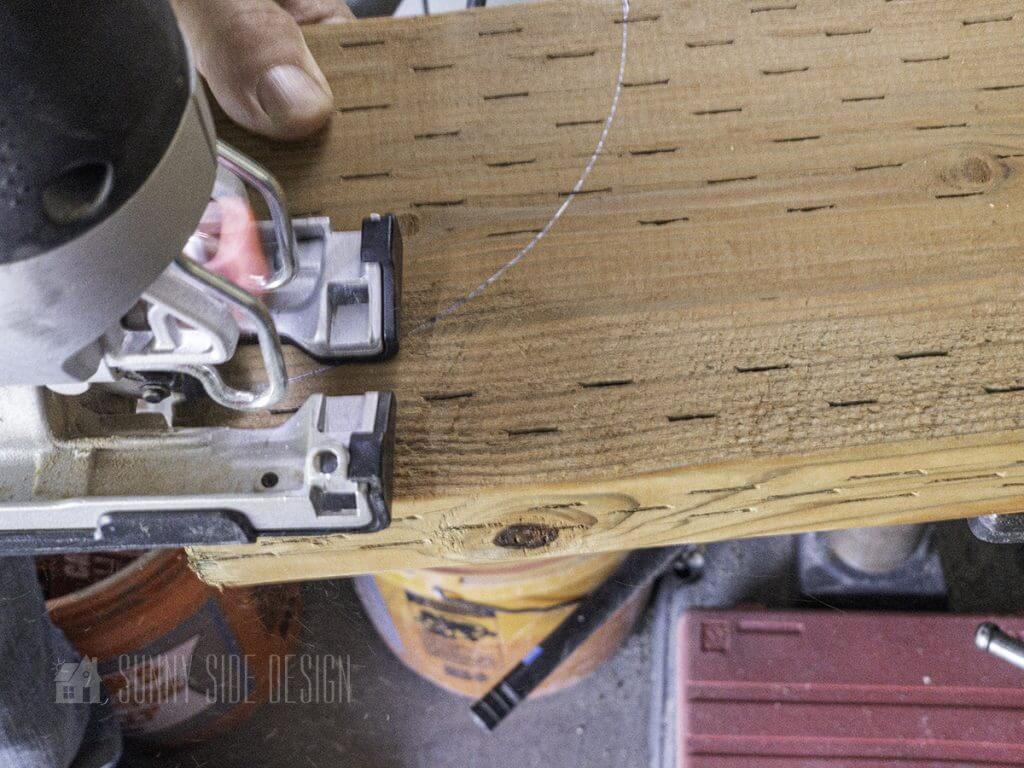
Then cut out the arc with a jigsaw.

We then used this board as a template for the remaining boards. They were then secured to the 4×4 posts with deck screws.
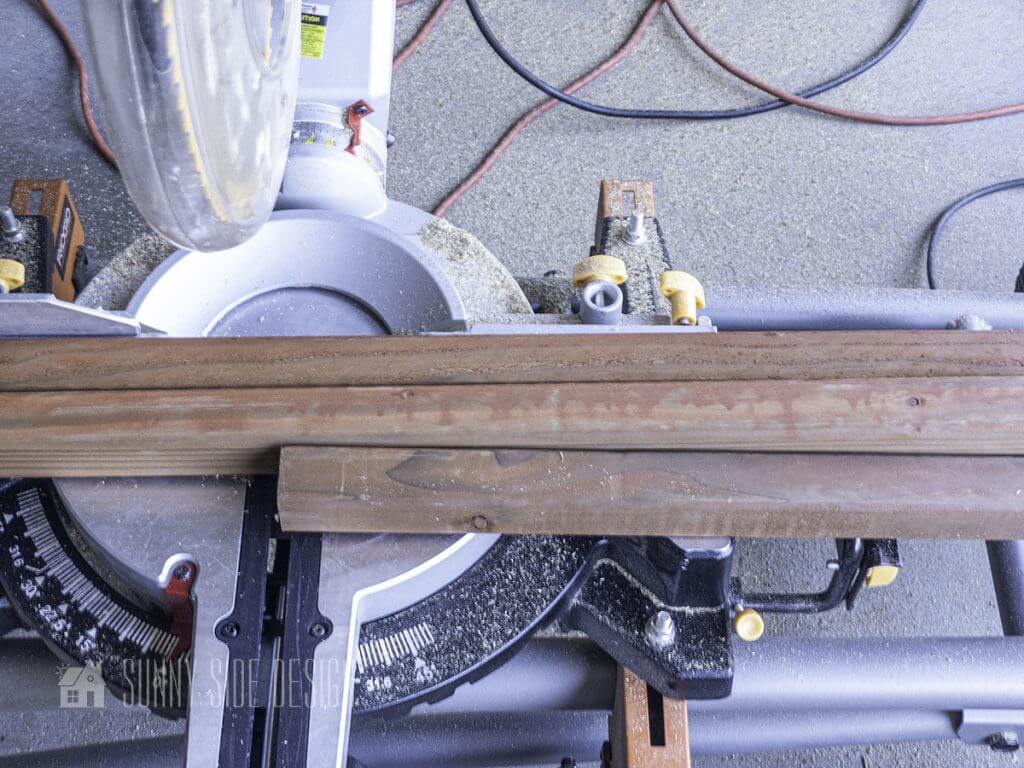
Next cut 2×2 pressure treated boards to 24″ long for the top of the trellis.
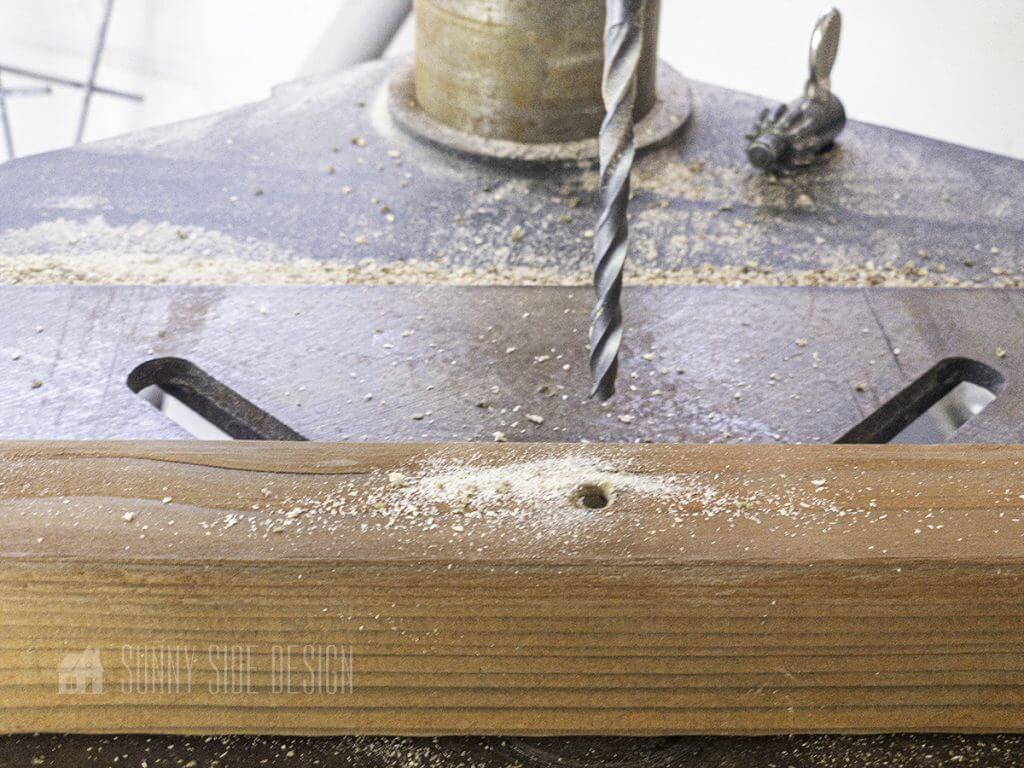
To prevent the wood from splitting, pre-drill holes in each 2×2 board where it will attach to the 2×6 boards.
Each board was drilled with 2 holes.
Then determined the spacing of the boards for the trellis on top of the 2- 2×6 boards.

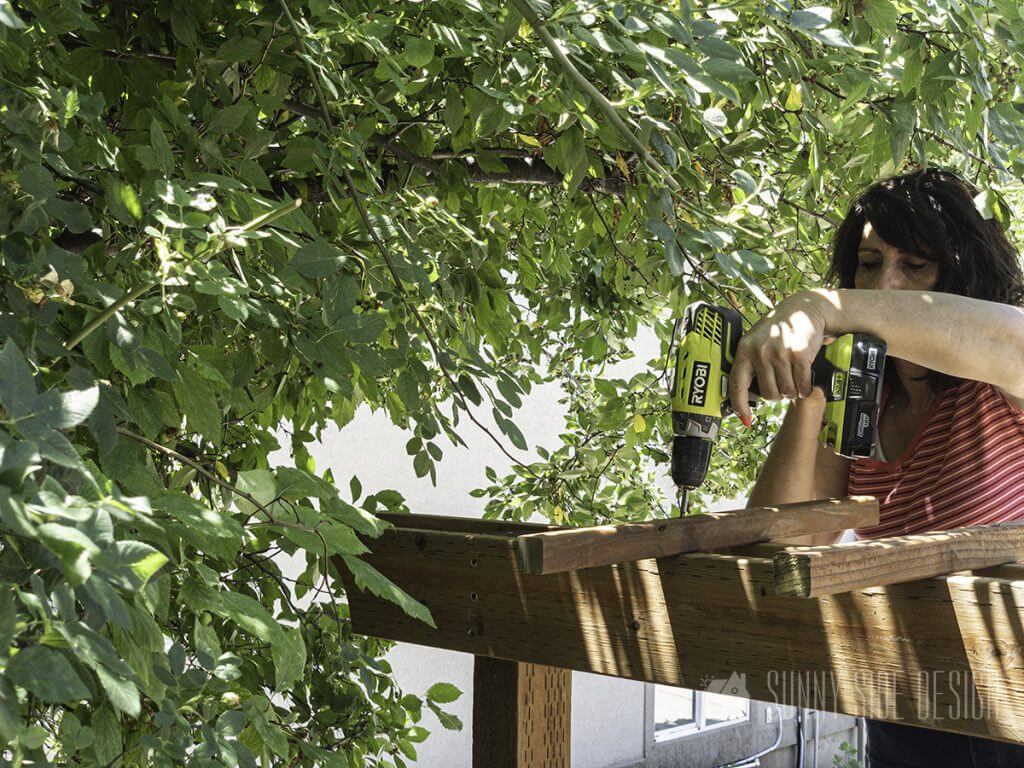
By pre-drilling the holes, you’ll find it’s quick and easy to install the trellis.
Gate

To build a gate for your deer fence, first determine the width.
Create a box out of 2×4 boards for the outer dimensions, securing with deck screws.
Then cut ripped 2×4 boards (1 1/2″ x 1 1/2″) to length to fit inside the 2×4 box.
Secure the top, bottom and sides of the gate frame.
Then cut a piece of hog wire to fit your opening and place against the 1 1/2″ boards.
Next secure the remaining 1 1/2″ boards with deck screws to the gate frame, sandwiching the hog wire panel.
Now all that’s left is to attach your gate to the deer fence with hinges and add a latch.
Shop This Project

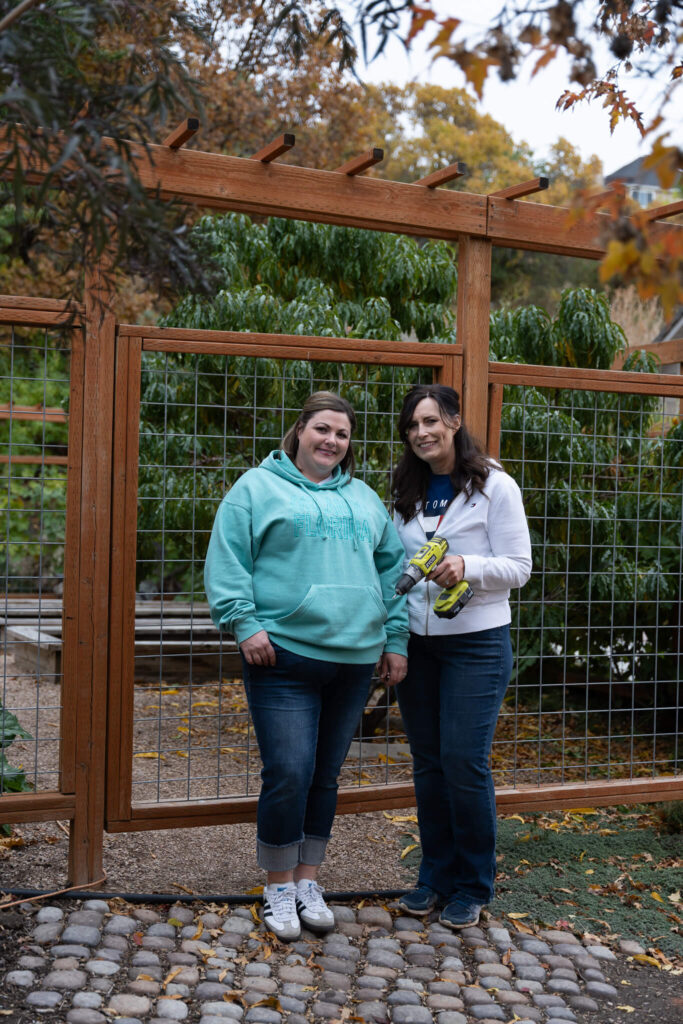
Completed Deer Fence

Ah, we love our deer fence!
Not only has it prevented the deer from munching my veggies, but it has created a beautiful spot to enjoy my garden.
I love that we are still able to enjoy the view, as we can see directly through the fence.
And soon the Wisteria will be draping over the trellis.
If you’d like to build a Modern Deer Fence in your yard, click here to check out the plans.
A few weeks back I wrote an article about slugs in my garden.
If you are struggling with slugs or snails, you’ll want to see my natural way to keep them from munching my strawberries and tomatoes.
Click here for the article.

And I’m happy to report that I’m still enjoying my juicy fresh strawberries. Yum!
For more ideas for your garden and backyard, take a look at these ideas:
- Easy DIY Outdoor Stone Steps on a Slope
- How to Build a Raised Garden Box That Will Last
- How to Extend Growing Season with Walls of Water
- How to Get Rid of Slugs in the Garden with Eggshells
- Growing Tomatoes: Simple Tips You Need to Know for Success
- How to Make a Cheap and Easy Garden Path
- How to Install a Paver Patio
- Simple Stone Retaining Wall
- How to Make a Simple Planter Box on Wheels
- How to Fix Old Rusty Metal Outdoor Furniture
- Create an Outdoor Living Space You’ll Love
- Simple Outdoor Entertaining Ideas on a Budget
- 30 Inexpensive and Easy Backyard Patio Ideas
- Essential Steps to Landscaping your Front Yard
So can you see a deer fence for your garden in your future?
If you have questions or comments about building a deer fence for your yard, drop us a comment below.
We’d love to hear from you!
We hope you found some inspiration here today!
Thank you for spending a little time with us.
Did you enjoy this post?! Please PIN it and share with your friends!
Sharing is caring!
If you’re new here, WELCOME! We love having new readers and friends!
You can learn more about us here.
We love to hear from you!
Let’s stay connected! Join our DIY community of doers and you won’t miss any of our weekly updates.
Please PIN it, save it for later, and share with your friends!
Sharing helps grow our following!

Thanks for stopping by Sunnyside Home, empowering you to create a home you love!
Retailers We Love
- Anthropologie
- Birch Lane
- Crate & Barrel
- Joss and Main
- Lampsplus
- Mark & Graham
- One Kings Lane
- Pottery Barn
- Rejuvenation
- Serena & Lily
- Wayfair
- West Elm
- Williams Sonoma
- World Market
Be sure to follow us on Pinterest for even more home decor and DIY ideas.
To see what we are working on before it’s on our blog, follow us on Instagram.
You will also find our video tutorials on our YouTube channel.
- The Best ‘Berry in Love’ Bridal Shower Ideas

- Paint an Old World Texture Finish on a Vase
- Easy Strawberry Chicken Salad with Lime Maple Balsamic Vinaigrette
- How to Fix Chipped Kitchen Cabinets with a Pen


Hi Michelle, we have bunnies galore in our yard. Any suggestions to address this concern using your deer fence plan as a starting point?
Hi Andrew, I wish I knew more about deterring bunnies. We have never had them in our yard. The fence may keep them out if you placed a barrier down into the ground. I do not know if they burrow and go under fences or not. Good luck, I’m sure that can be just at destructive as the deer.
Hey! I love this garden fence, and I am excited to build it this spring. I have been trying to purchase the plans from your shop, but it seems to not be working. Please let me know if there is another way to purchase the plans. Thank you!
Hi Abrielle, Thanks for your interest in our deer fence plan. I apologize that our shopping link is not currently working. Yesterday we were updating our website and now we are having trouble with our ecommerce plugin. I’ve messed around with it this morning and I got it to work for a test purchase, but it looks like it’s not currently working again. I will not be able to get help to resolve the issue until next week. If you are anxious to purchase the plans you can send payment directly to our paypal, entering our email 2thesunnyside@gmail.com. Then I will email you the plans. If you’d rather wait I will keep you posted when the shopping section of our website is working. Thanks for your understanding.
Good news Abrielle, our shopping on our site is fixed.
Thank you so much!
You’re welcome! And thank you for your purchase. Please let us know if you have any questions. Have a wonderful day!
Hello: I have purchased the plans and will be gifting this project to my mother in law at Christmas. Could you send some other photos? Thank you so much !!! sgrossfeld@louisvillebones.com
Thanks Stacie for purchasing our deer fence plans. I’ve emailed you the images, please let us know if you have any questions. Merry Christmas!
Hello! Gorgeous fenced in garden! Question, does it keep squirrels out? Aside from deer, we also have plenty of neighbors squirrels…do the squirrels jump in via the top opening? Thank you!
Thank you Viviane, we do love our deer fence. No there is really no way to keep squirrels out unless you covered the planter boxes with a netting or something similar. We do have plenty of squirrels in our area too, but it was the deer that caused the most damage in over our garden. Good luck with the squirrels.
I have a question! I am building this fence as we speak for our backyard! I have unlevel ground and will have some panels higher than others as seen in the photos provided. For the 8ft top (I’m going with 7ft as I could only find 4ft high hog panels in my state!) how did you get the 2x6x8 level across the top. How did you measure that with certain panels being a few inches higher/lower than others. Between the left and right post I have approx 1/2ft difference just by eyeballing it. Any help is greatly appreciated!
Thanks for reaching our Phil. Our ground has a slope of about 1/2′ as well. None of your images came through. I will email you with photos I took this morning and hopefully this is helpful. But each panel is level, it is not the same distance to the ground depending on the slope. As for the top 2z6 board, each post was installed with them being level with each other. If your post drop down, I guess you could end the 2×6 a post and then continue with it lower on the next section.
Modern Pressure Treated lumber is safe around garden plants. The bad stuff (CCA) was banned in 2004.
https://extension.oregonstate.edu/ask-extension/featured/raised-bed-lumber-pressure-treated-safe
Yes, that’s true Stephen. Thanks for your comment.
What is the size of the sections of fence between 4x4s?
Most are about 8′, the length of a board. But for across the front, which aligns with the front of my house, they are smaller, so they would be 3 equal sizes. If you’re interested in building your own deer fence, we now have PDF plans on our website with all the details and measured drawings.
How is this holding up? Can you post recent pictures?
Hi Cathie, The deer fence is holding up great. The only issue we’ve had is one of the gates had a bit of sagging and so my husband installed a cable diagonally across it to help. The wood still looks good ad new and it keeps the deer out. I’ll email you some photos I took today.
Isn’t it a bad idea to use pressure treated lumber anywhere near a vegetable garden?
Hi Christopher, That’s a great question. When planting your garden plants should be planted at least 12″ away from the treated lumber. We have allowed for this and have a walkway around the garden boxes.