Who says a desk has to be boring? You can create a stunning desk makeover with just a few simple changes.
It’s week 4 of the One Room Challenge and we’ve made over a desk I picked up for free on Facebook Marketplace.

When I first started making my design plan for Steve’s home office I came across the Dolores cane desk at Pottery Barn.
And I was in love!!!
But not with the price.
So I started looking at the possibility of building a desk.
But I soon realized due to the high price of hardwood these days, it would cost me an arm and a leg.
In spite of this, I had to figure a way to get the look of this desk for the office.
So, I began searching online classifieds and Facebook Marketplace for an old desk with the right lines that I could modify.
And one Sunday afternoon, I spotted a desk I thought would work, and better yet, it was FREE!
Let me tell you, Steve was not very happy when we pulled up and he saw the condition of the desk.
He did not want to bring it home!
But I assured him that I could make it work.
In this blog post, we’ll show you how to give your desk a modern makeover vibe using some simple techniques.
So ditch the old and outdated desk and give your workspace an upgrade today!
Another makeover you’ll love to see is our Modern Floating Desk.
One Room Challenge To-Do List
Let’s take a look at what’s been accomplished and what still needs to be done to complete this moody home office.
Paint room – 2 coatsBuild lower cabinets for built-insBuild shelvesInstall cabinetsBuild window seatInstall shelvesInstall moulding for built-insPaint built-insInstall laminate floor- Install door casing and baseboards
- Paint door casings and baseboards
Build cabinet doors and drawersPaint cabinet doors and drawersInstall crown moulding around room- Install picture frame moulding
- Caulk, putty and paint picture frame and crown moulding
Refinish and modify desk- I
nstall hardware on built-ins - Paint doors
- Paint window frame
- Install window sill
- Install sconces
- Install library lights
- DIY faux tree
- Art on wall
- Style bookshelves
- Roman shade
- Window seat cushion
While we have accomplished a lot on our list, we are still waiting for our moulding to arrive.
I’m so anxious to get that installed!
Be sure to follow us on Instagram for behind the scenes progress and updates!
If you’re new here, WELCOME! You can learn more about us here.
As a reminder you can easily navigate through each week of this dark and mood home office project.
Week 1 | Week 2 | Week 3 | Week 4 you’re here | Week 5 | Week 6 | Week 7 | Week 8
And for more ideas and inspiration head on over to see all of the amazing room makeovers on the One Room Challenge blog.

Supplies & Tools
Here’s a quick run down of the supplies we used in this desk makeover:
Tools we used in this desk makeover:
Desk Makeover Modifications

First of all to get the look of the Dolores cane desk, modifications needed to be made.
The left bank of drawers needed to be removed.
To do this we clamped a saw guide 4″ down from the top of the desk and used our circular saw to make cuts all around the bank of drawers.

This is what the desk looked like once the drawers were cut off the left side.
Are you enjoying this post?! Please Pin it, save it for later and share it with a friend.
Sharing is caring!
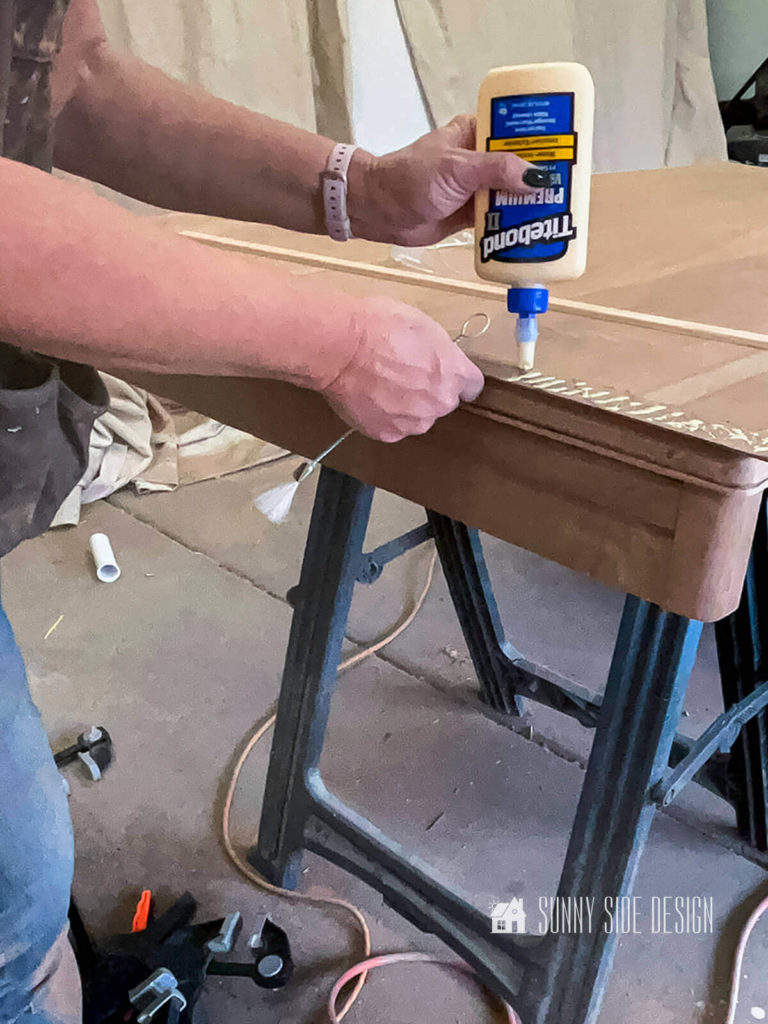
To finish off the edge we cut off a piece of trim moulding from the bottom of the desk and applied wood glue to the backside.

Then we clamped to the moulding along the cut edge and allowed it dry.
We also sanded the edges of the corner pieces to round the edges a bit.

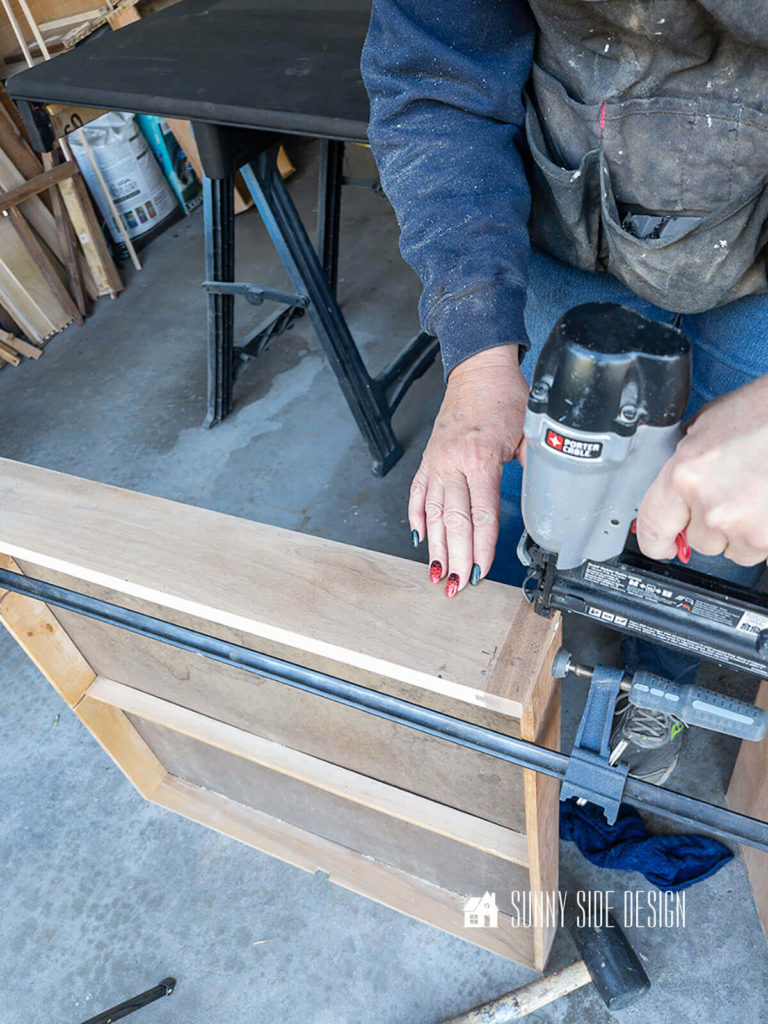
Another modification we needed to make was a faux drawer for the far left side.
To do this we took one of the drawer fronts we removed and cut it down to fit the opening.
Then we drilled pocket holes into the back of the piece.

We then added the rattan and oak trim to the front.
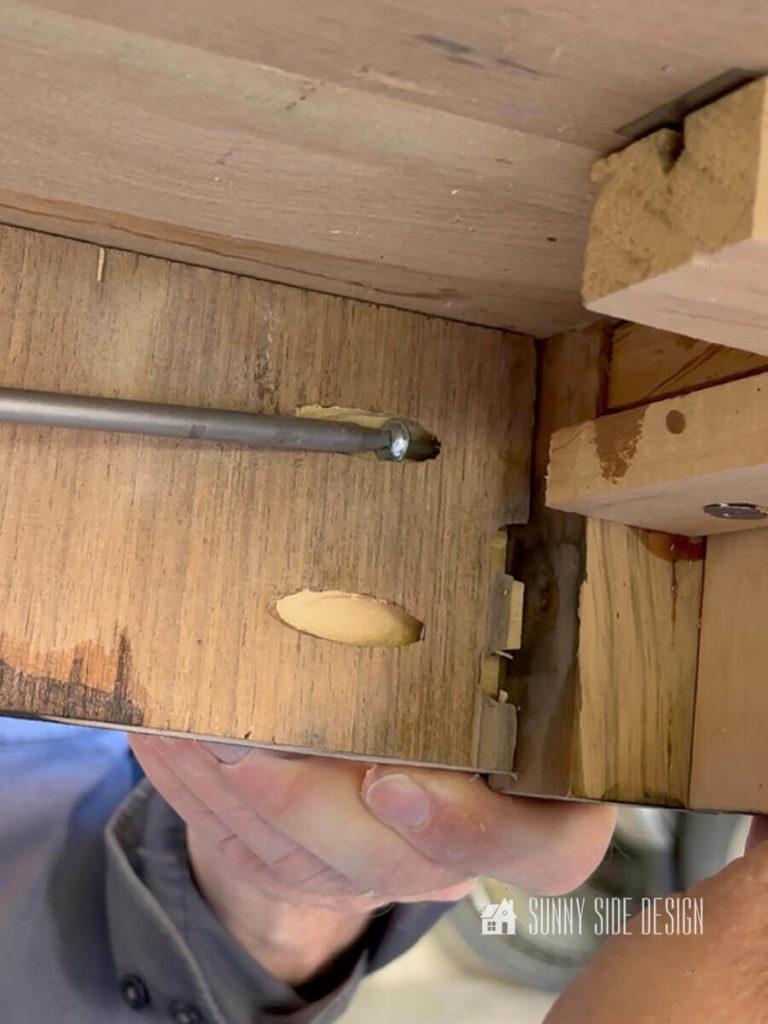
And secured it to the desk on each side with a couple of pocket screws.

[mailerlite_form form_id=2]
Desk Drawer Modifications
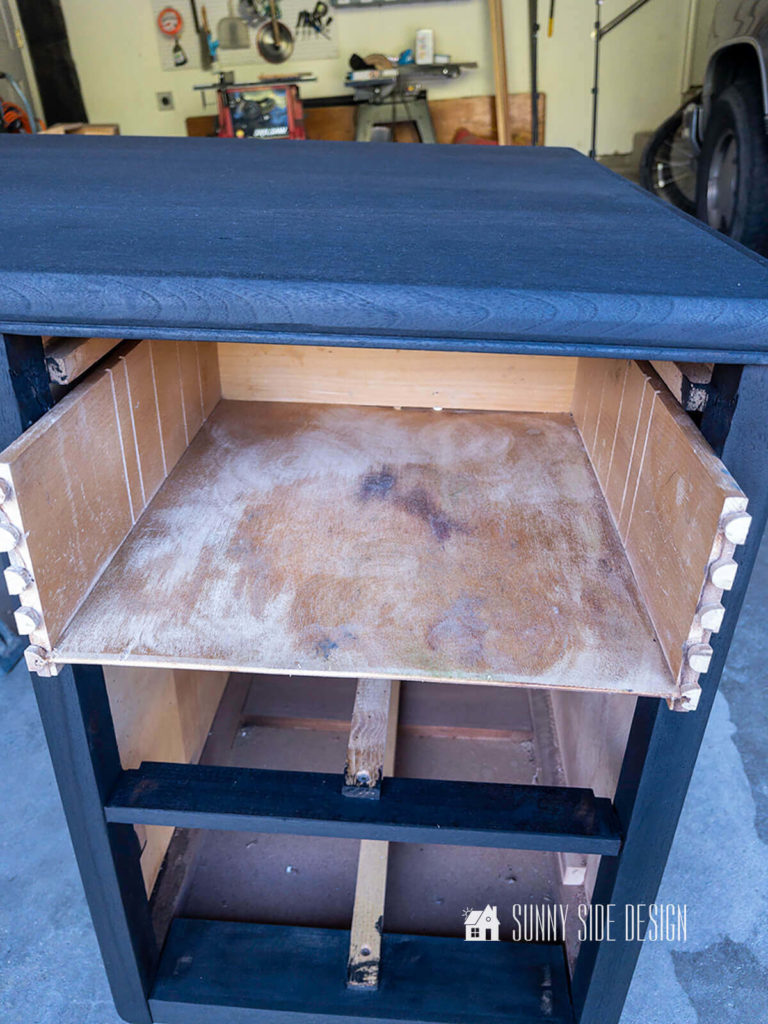
We also made a few modifications to a couple of the drawers.
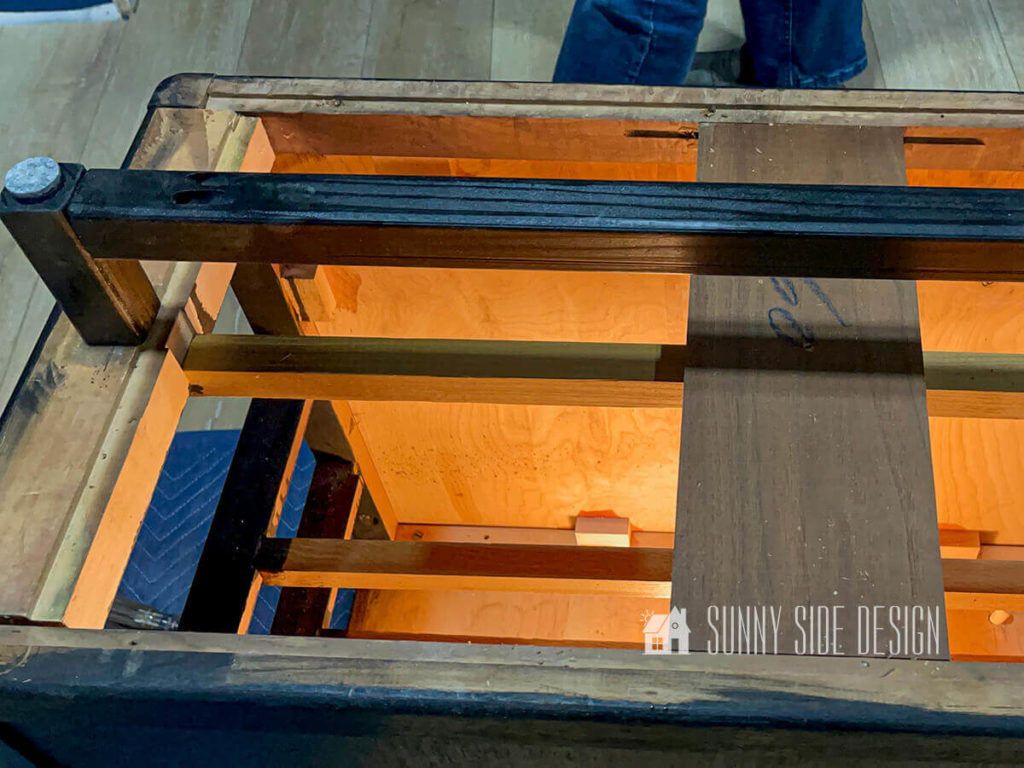
Originally above the top drawer there was a pullout writing board.
So we removed the slides and cross bar for it, so that the top drawer would be a little taller.
The drawer fronts are dovetailed to the drawer box and by tapping on the front with a rubber mallet we easily removed the original door front.
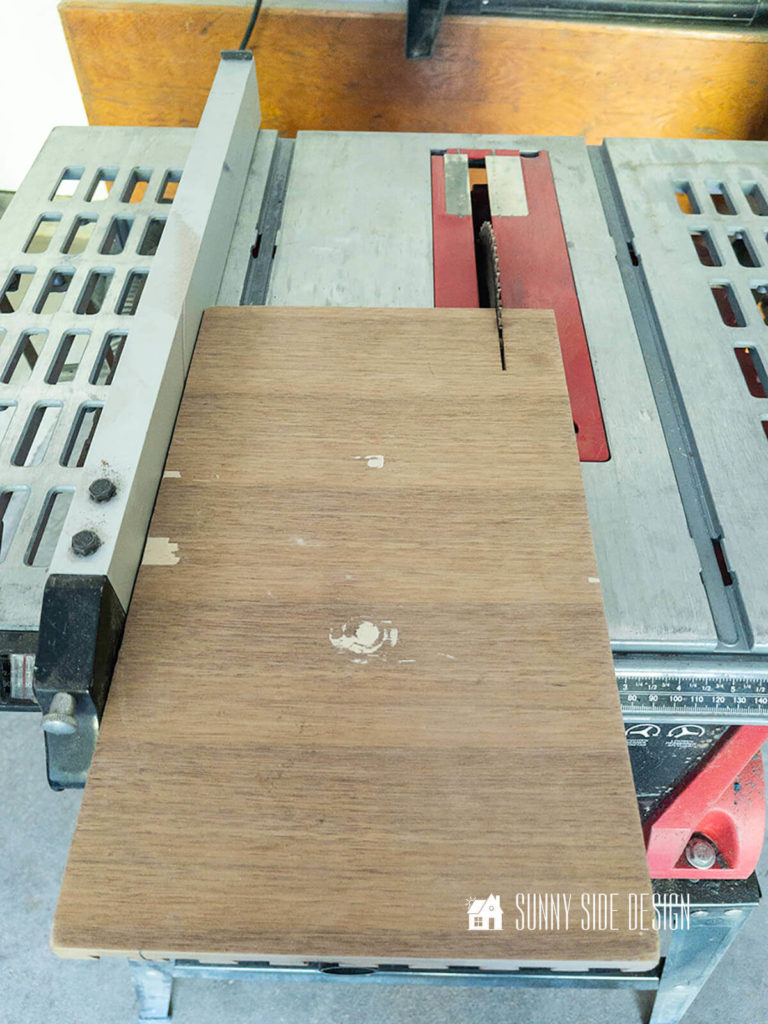
We then took one of the drawer fronts from the left side and cut it to fit the drawer opening.

Next we applied wood glue to the new drawer front and pulled the drawer sides apart slightly, then slid the new drawer front into position.
Then we clamped it together while the glue dried.
We also made the center desk drawer 1″ taller as well.
This time we cut off the original drawer front with an oscillating tool, cut out a new piece of wood and attached it to the drawer box with wood glue and 2″ brads.
We made these adjustments to the drawers to get a uniform look across the front of the desk.
Let’s stay connected! Follow us on social media!
Refinishing Wood Desk

Clearly the original finish of this vintage desk was in rough shape.
To restore its beauty, we sanded the entire desk body.
First with 80 grit sandpaper using our orbital sander, then a medium 150 grit, and then a final sanding with 220 grit.
We then applied Minwax true black stain.
This is an oil-based stain, which is my preference.
But if you’d like to use a water-based stain check out this post first.
Let the stain dry for 4 hours before applying a top coat.
I then applied my favorite top coat for a stained wood surface, Minwax Wipe on Poly.
It’s my favorite stain because you wipe it on, so there’s no brush marks.
In addition, it’s super fast to apply.
Follow the instructions on the container.
I always sand lightly with #0000 steel wool between coats and apply 3 coats for a durable finish.
This poly top coat may amber on lighter finishes, so I only use it on darker toned wood finishes.
Refinished Drawers

Clearly the drawers were in rough shape!
With chipped veneer and random holes, along with damage from the handles.
But I wasn’t too concerned because I knew I wanted to add rattan to the front of each drawer.
However, first I filled in all of the holes and chipped areas with wood putty.
I let it dry and then sanded each one with the orbital sander.

At first I planned on just leaving them the natural wood finish, but I could see the variations of color from the wood putty beneath the rattan.
So we decided to paint the drawer fronts with black chalk paint.
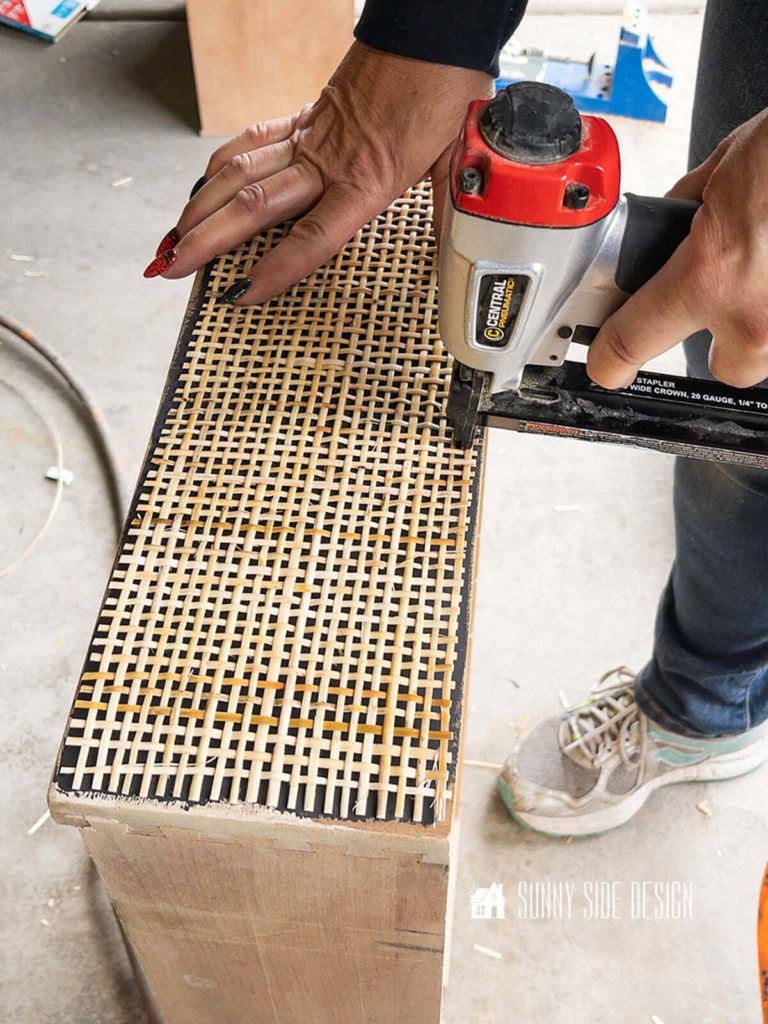
Once it was dry, we stapled on the rattan to each drawer front.
When you purchase rattan it will come rolled.
To flatten it out, cut the rattan to the rough dimensions you’ll need and then place it in a sink or bathtub for about 10 minutes.
You may need to weigh it down to keep it in the water.
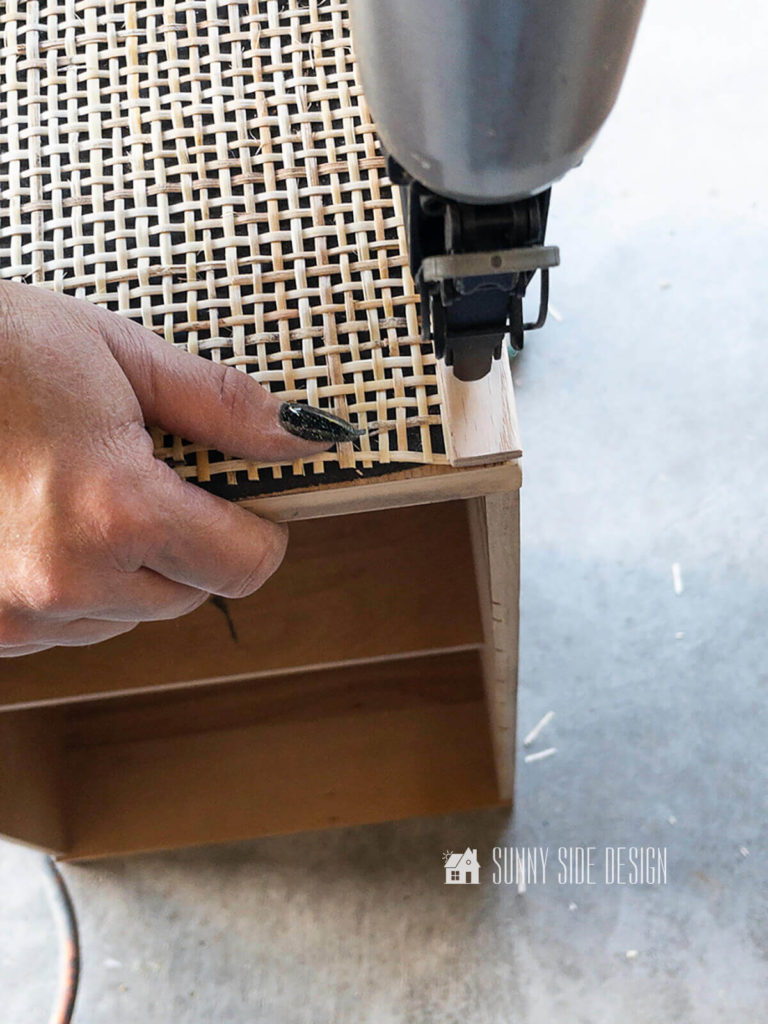
Finally to cover the raw edges of the rattan I cut strips of oak screen molding.
While you can angle cut the joints, I just cut my vertical pieces the height of the drawer.
Then I measured the distance between the vertical pieces and cut all of the horizontal pieces.
I secured them to the drawer fronts with wood glue and brads.
The oak screen moulding is thin and may split.
So to prevent splitting, keep the nails about 1″ from the cut end.
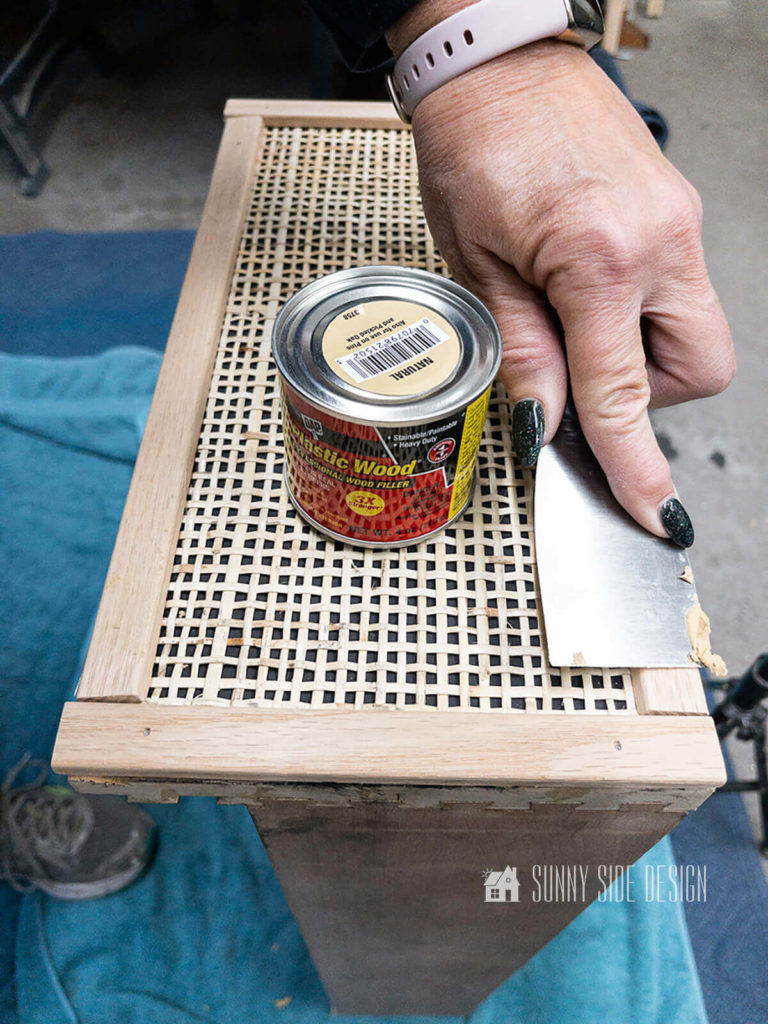
Then fill in the nail holes and seams with wood putty.
We also filled in any gaps on the sides and top of the drawer with wood putty.
Once the wood putty was all dry, we sanded it smooth.

Finally apply a spray top coat to the drawer fronts.
Build and Install Desk Legs

The legs on my inspiration desk were metal, but I don’t have access to a welder.
So I decided to make my desk legs out of 2×2 lumber.
I ended up using redwood because the quality was a lot better than the pine.
But pine would also work if you can find straight boards.
We first determined the length of each leg.
For the right side the length is 4″
And for the left side it is 28″
We then determined the length of the crossbars, which is 28 5/8″
The left side will have 3 crossbars and the right side will have one.

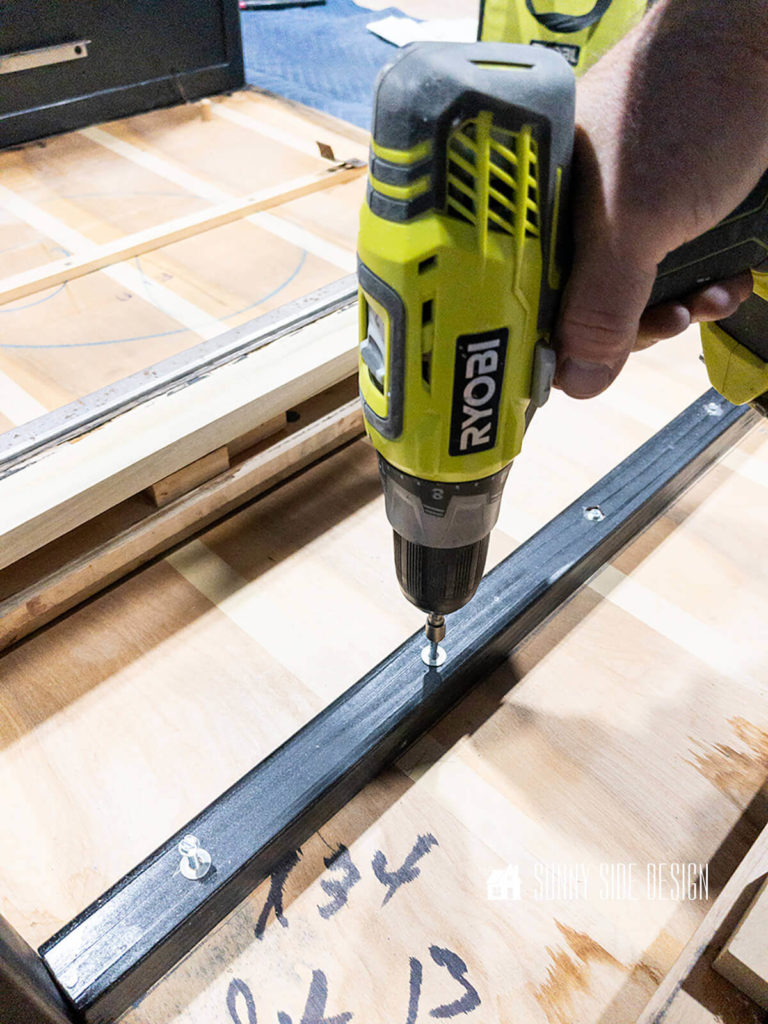
To assemble the legs we made pocket holes at each end of the crossbar pieces.
We then clamped one of the vertical boards to the work table.
Next we applied wood glue to one of the cross bar pieces and clamped it to the vertical board and inserted two pocket screws.
We repeated this process, securing the 3 crossbar pieces to the 28″ vertical pieces.
For the right side, we used this same process connecting the crossbar to each 4″ piece.
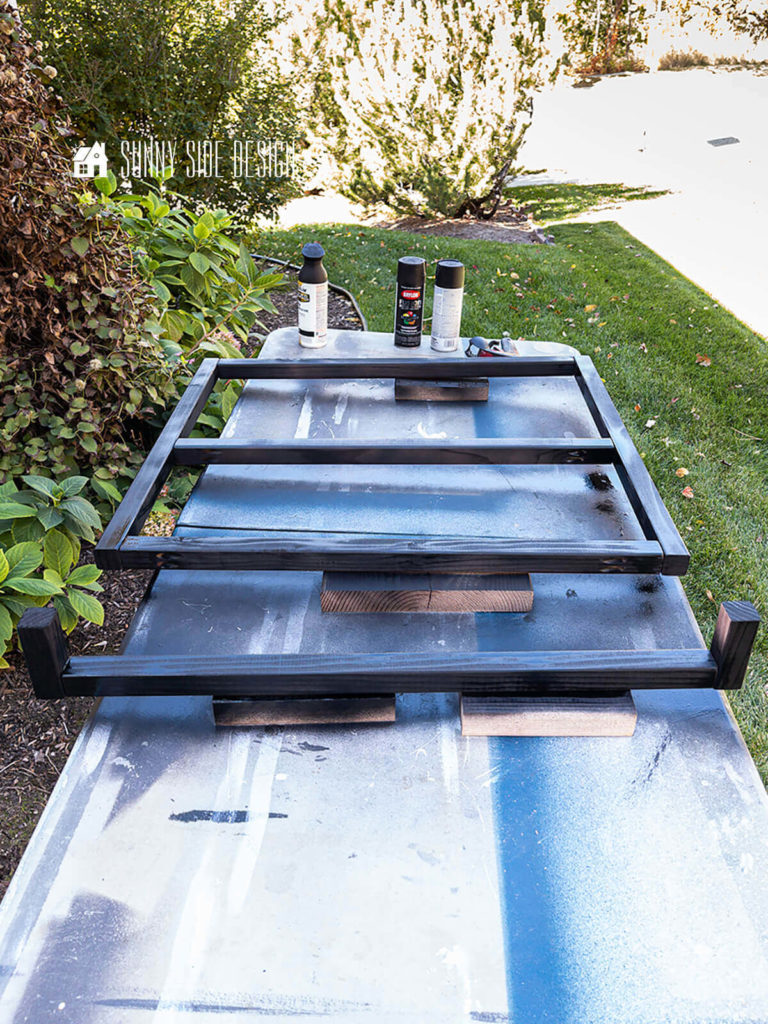
Then we painted them with black satin paint.
To install the leg on the right side of the desk we centered it and inserted a screw through the wood frame at the front and back.
And to install the leg on the left side we drilled 5 pilot holes evenly spaced along the top crossbar and inserted screws with a washer into the desk top.
Then we installed another screw in the vertical boards at the front and back of the desk.
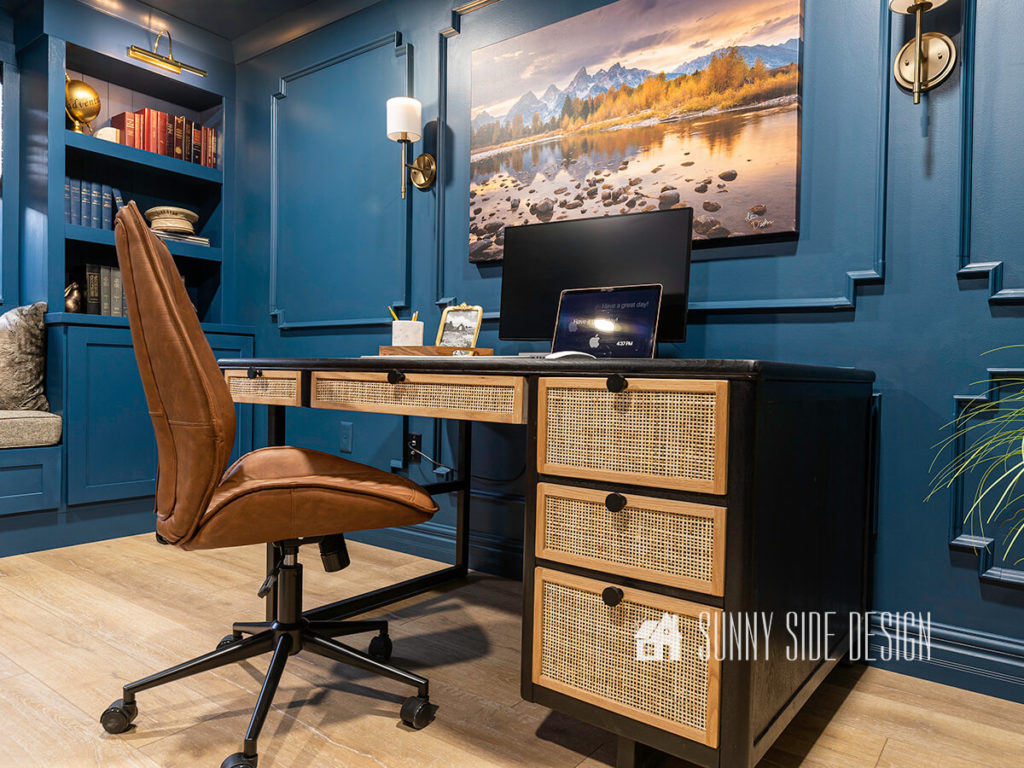
Desk Makeover Reveal
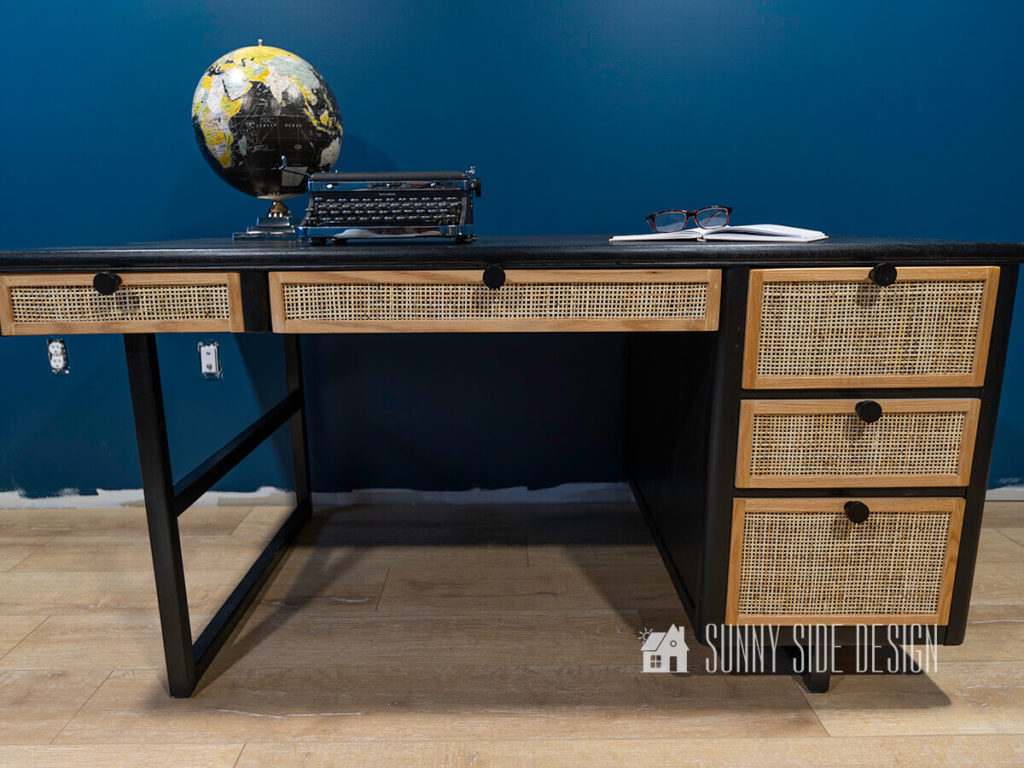
And here she is!!!
What do you think of this sleek modern desk makeover?
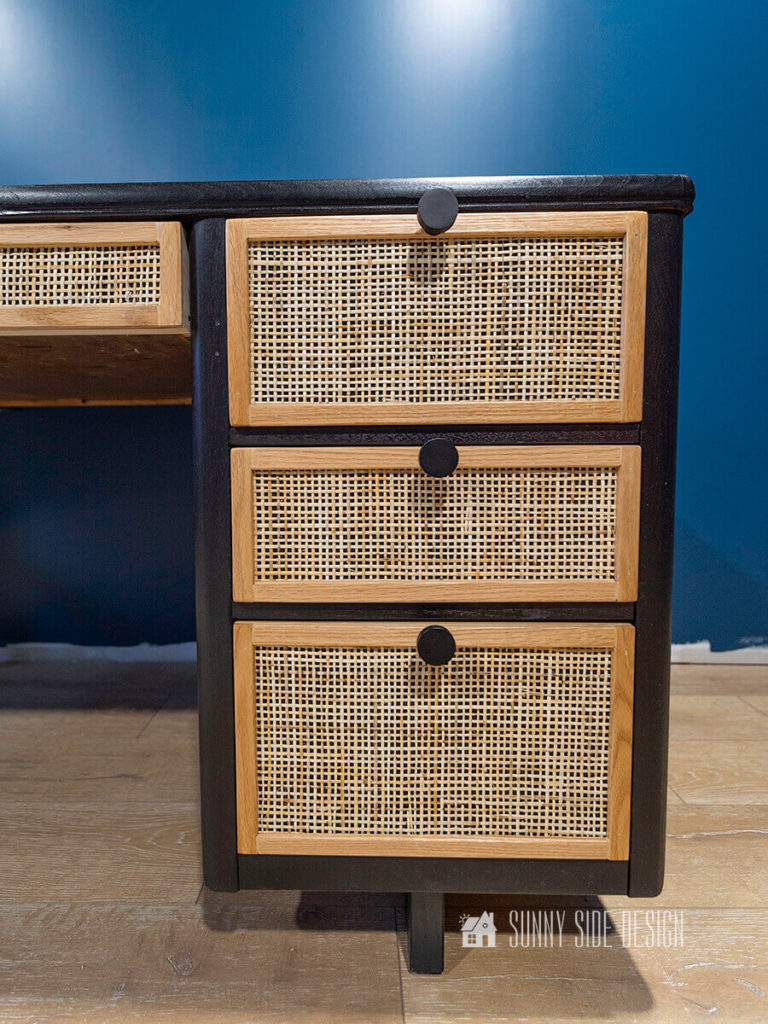
I love how the cane and oak trim compliment the floor.
And take a look at that modern matte black hardware that Amerock gifted us!
For my desk makeover I chose Amerock’s Radius knob.
It’s the perfect finishing touch to this Pottery Barn dupe.
If a modern industrial look is what you’re after, take a look at this desk we built.
Are you enjoying this post?! Please Pin it, save it for later and share it with a friend.
Sharing is caring!
If you’re like me, and have an old desk that’s seen better days, but don’t want to spend the money on a new one, this simple DIY project is for you!
In just a few easy steps, you can give your old desk a modern makeover with a sleek black finish and natural cane and oak accents.
So gather your supplies and let’s get started!
Are you ready now to give your old desk a brand new look?
For more furniture ideas for your home, take a look at these ideas:
- Simple Upholstered DIY Ottoman Makeover
- Repurposed Hutch Top
- Stunning Dresser Makeover with Cane
- How to Apply Paint that Looks like Stain: Rift Sawn Oak
- How to Make an Old Bed Frame Look Modern
- Simple DIY Floating Nightstand with a Modern Vibe
- How to Build a Desk with Wood and Pipe
- Easy and Inexpensive DIY Side Table with Thrifted Finds
- DIY Round Coffee Table
- Simple Upcycled DIY Sofa Table
- French Country Upholstered Daybed
- How to Refinish Furniture with a Raw Wood Look
- How To Refinish a Beautiful Wood Dining Table
- Makeover a Bar Stool with a Farmhouse Style
We hope you found a little inspiration here today.
Please share your thoughts and questions with us.
We’d love to hear from you!
If you’re new here, WELCOME! We love having new readers and friends!
You can learn more about us here.
Let’s stay connected!
Subscribe to our free newsletter so you don’t miss any inspiration for your home.
Please PIN and save for later, and share with your friends!
Sharing helps grow our following!
Thanks for stopping by and as always here at Sunny Side Design…
WE HOPE TO BRING YOUR HOME TO THE SUNNY SIDE OF THE STREET.

Retailers We Love
- Anthropologie
- Birch Lane
- Crate & Barrel
- Joss and Main
- Lampsplus
- Mark & Graham
- One Kings Lane
- Pottery Barn
- Rejuvenation
- Serena & Lily
- Wayfair
- West Elm
- Williams Sonoma
- World Market
Be sure to follow us on Pinterest for even more home decor and DIY ideas.
To see what we are working on before it’s on our blog, follow us on Instagram.
You will also find our video tutorials on our YouTube channel.
- Creating a Cozy Outdoor Living Room with Thrifted Finds

- The Best ‘Berry in Love’ Bridal Shower Ideas
- Paint an Old World Texture Finish on a Vase
- Easy Strawberry Chicken Salad with Lime Maple Balsamic Vinaigrette


Simple & easy you say??? That was more work than any makeover desk I’ve ever seen on this site!! Come on….far from simple & easy!!!
The desk makeover was not quick, we just re-imagined it another way. With basic tools, this is a project that we believe can be accomplished. It’s definitely not a beginner project, but when there’s a will theres a way. We play around until we get the results we want.
Oh my goodness! This is amazing. I love seeing that you are using shared vision. Hugs and blessings to you.
Thank you Renae! We have been working closely with Spencer from Shared Vision to make a product that will be more useful. We are excited to see the upcoming improvements and changes.