Oh my, do we have a fun idea for you!
We are wrapping up with a few final elements in Ellie’s bedroom makeover. Once we decided on a French daybed, we knew we had to add a bed crown. She is our little princess and what better way to show that, than making her bed fit for a princess. You will not believe what we used to create this DIY canopy for her bed.
Looking at the photo, can you guess what we used?
Would you believe it’s sheets and a sofa table?
Yes, it true! Just look at the photo below.
Sunny Side Design is a participant in the Amazon Services LLC Associates Program, an affiliate advertising program designed to provide a means for sites to earn advertising fees by advertising and linking to Amazon.com. As an Amazon Associate, this blog earns from qualifying purchases with no additional cost to you. Click here to read our full disclosure policy.
Upcycle Sofa Table

Thrift stores are the best! You never know what you are gong to find!
Take this table for instance, when we saw the price tag of $5 we snagged it! Not knowing exactly what we would use it for.
We had an idea that the table top could be a fun memo board or chalkboard, however once we took it apart inspiration hit!
The decorative metal trim would make a fantastic canopy for a bed.
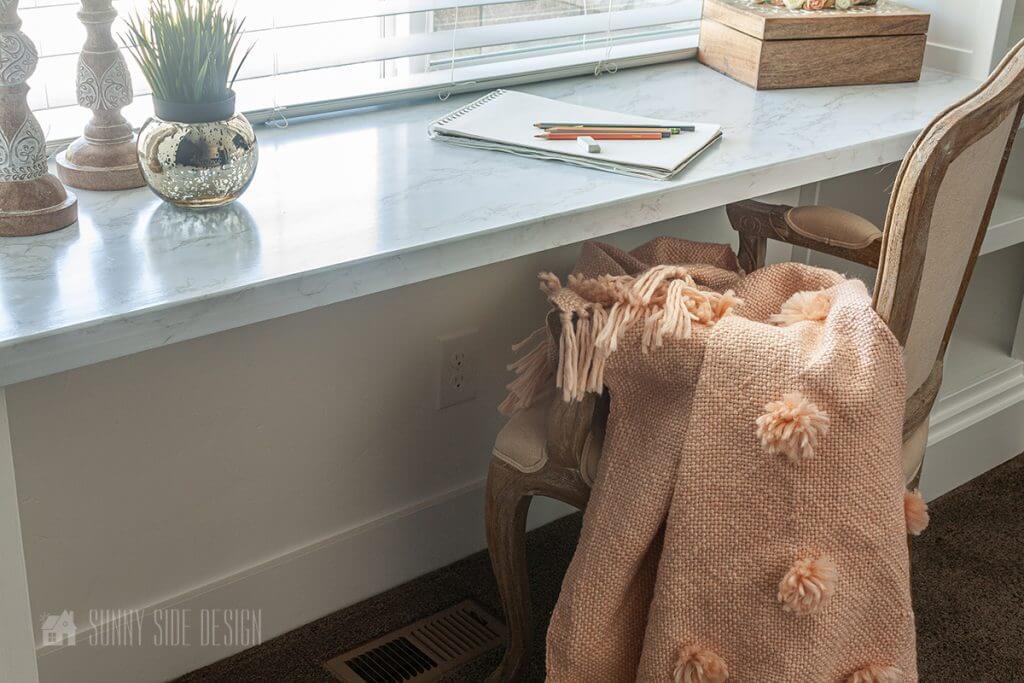
If you love to re-imagine old furniture pieces then you’ll also love our Modern Desk Makeover.
For more DIY ideas for your home checkout our 50 Amazing Flea Market Flips.
And for more bed ideas check out these posts:
- DIY Upholstered Headboard
- Make an Old Bed Frame Look Modern
- Cheap & Unique Headboard Idea
- How to Fix a Broken Bed Rail
You will also find a video tutorial, just click the link below.
Want to see more projects from this bedroom makeover? Tap any link below.
- How To Paint a Room with Pro Results
- Built In Desk | Upcycling At Its Best
- Upcycle Idea | Transforming Twin Bed to Daybed
- How To Refinish Furniture | With a Raw Wood Look
- DIY Canopy for a Bed | Fit for a Princess
- Shelf Decorating Ideas | A Step by Step Guide
- Roman Shade | How to Make Them Yourself
- How To Reupholster a Chair | with French Country & Boho Flair
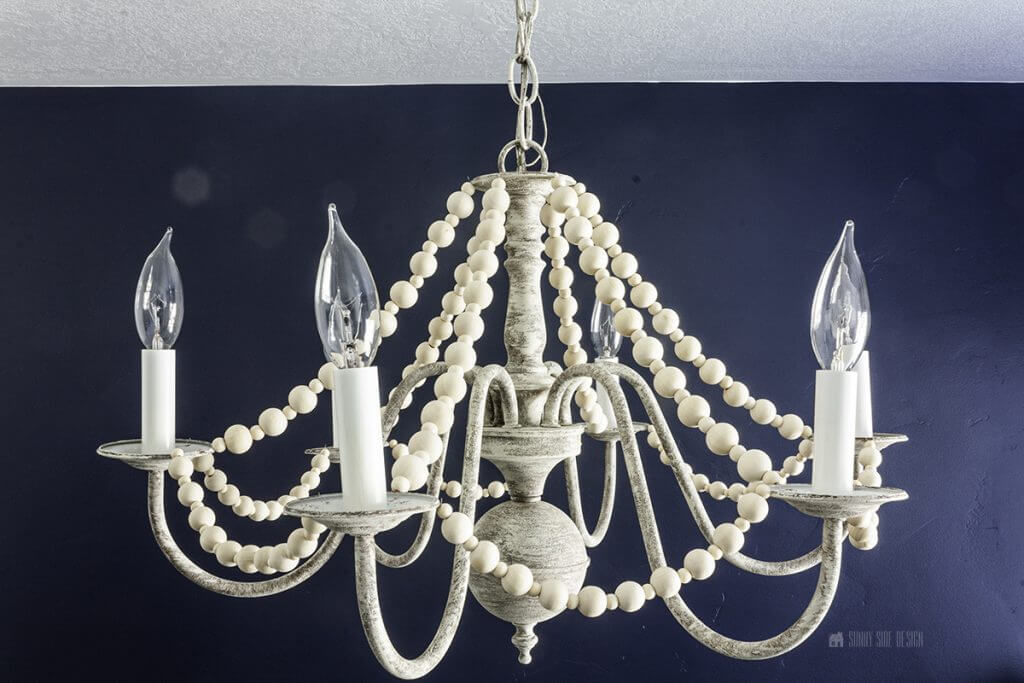
- French Country Chandelier with Boho Flair
- DIY Mirror Frame | Quick and Easy Idea
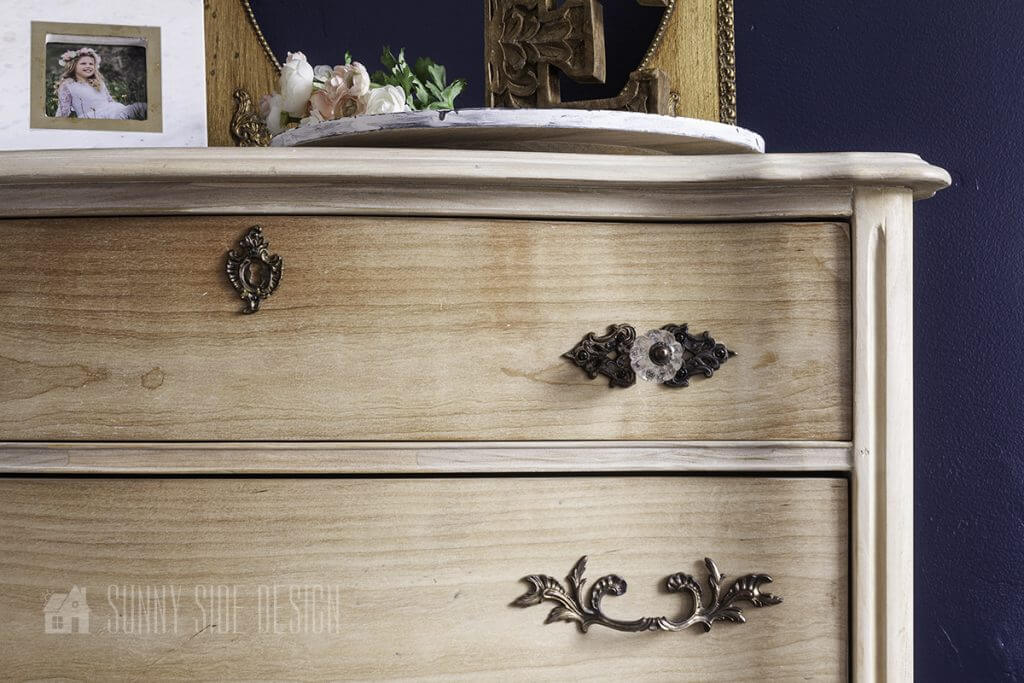
- Antique Hardware For Dresser
- Bedroom Ideas for Tweens |Girl Room
- Area Rug For Bedroom | Top Ideas For Tween Girl
- How To Make a Bolster Pillow
- How To Make an Envelope Pillow
Are you enjoying this project? Please Pin It, save it for later and share it with a friend.
Sharing is caring!
Repurpose Decorative Metal into Canopy for a bed
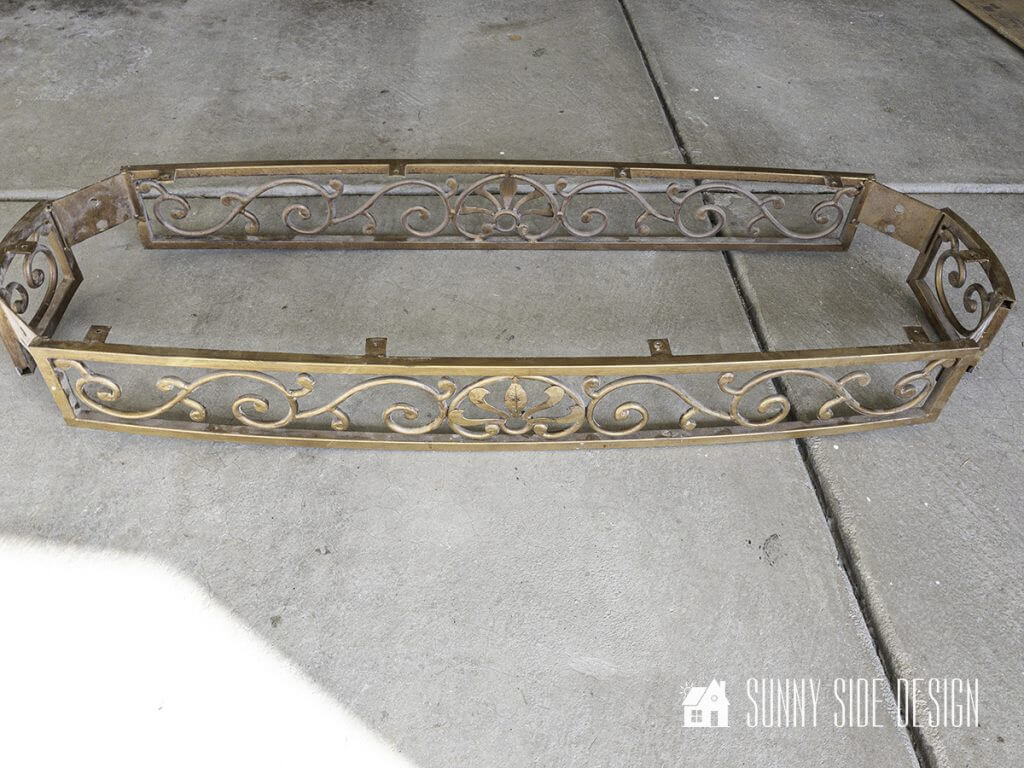
Once the table was disassembled we were able to see where to make cuts to have it fit against the wall.


An angle grinder was able to easily cut through the metal to remove the backside of the metal piece.

The metal piece was then cleaned up and painted with a brushed gold paint.
Now we had one little problem, we needed to find something to cover the metal plate where the legs were attached to the table.
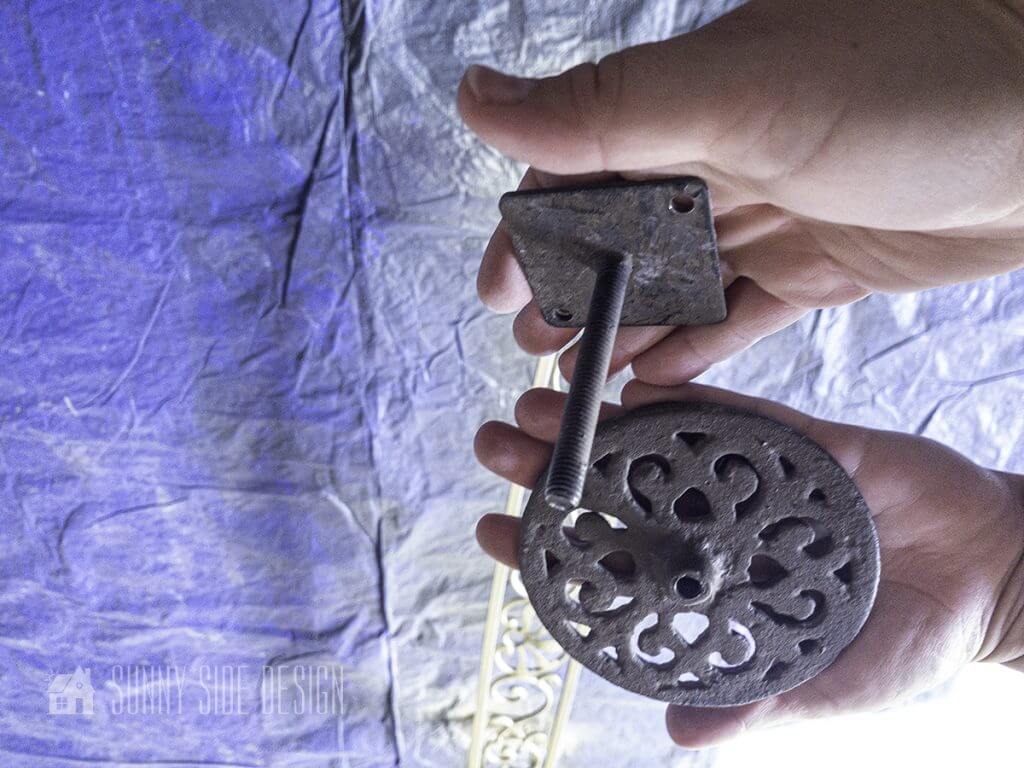
It only took Steph a few minutes to remember that she had some old metal curtain holdbacks that would probably work.
And sure enough they fit perfectly in the space.


They also got a quick coat of the brush gold spray paint and were attached with a bolt in the existing hole in the metal piece.
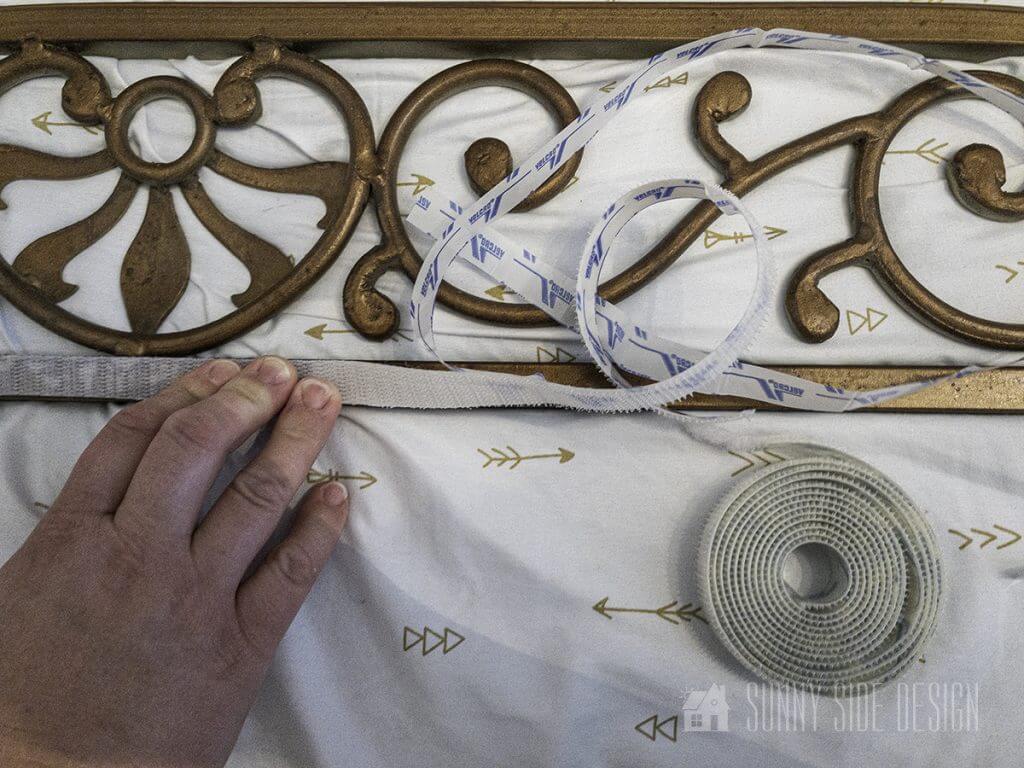
Sticky back Velcro was then applied to the backside of the metal piece for the canopy for a bed.
How to hang DIY canopy for a bed
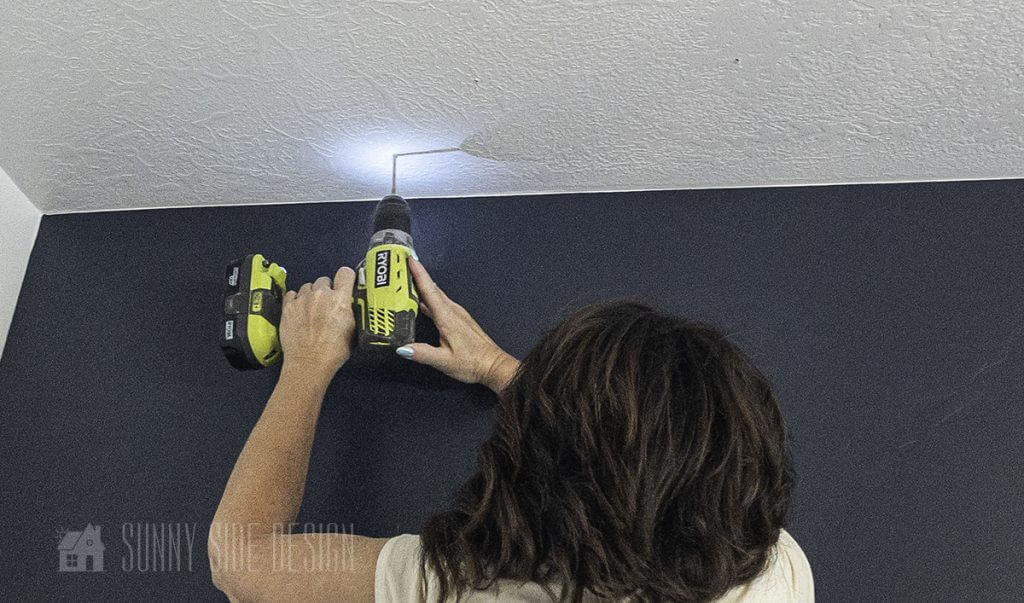
Now we had to decide how to hang our DIY French bed crown on the ceiling.
The decorative metal piece attached to the table top with small brackets. We decided to use those same brackets to attach the metal piece to the ceiling.
Now this metal piece is probably less than 10 lb, but we did not want it to get pulled down by the kiddos.
In order to make sure it was secure, we decided to use 75 lb. drywall anchors.
To insert the drywall anchors we first drilled a pilot hole in the ceiling aligning with each bracket.

Then each anchor was inserted into the ceiling using our Ryobi drill.
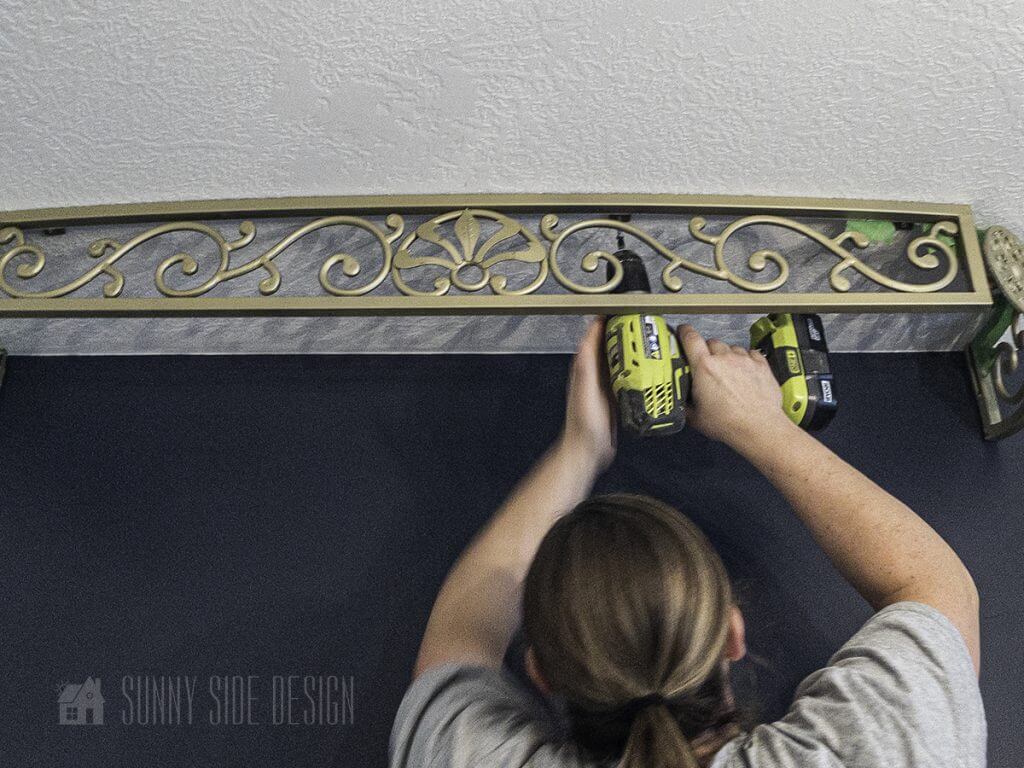
Once all the anchors were installed, we placed the metal piece into position and inserted screws into the dry wall anchors.
If you’re new here, welcome! We’re so glad you’re here.
Let us introduce ourselves, we’re Michelle and Steph, a mom and daughter team who love to DIY and decorate our homes.
Not only are we passionate about making our homes warm, comfortable and unique, but it’s our mission to help you create that same feeling in your own home.
You’ll find ideas for repurposing, creating, decorating and making your home truly yours, while always mindful of a tight budget.
Undoubtedly we love finding ways to make your home look high-end on a small budget.
Plus you’ll also find a recipe or two as we share our family favorites with you.
We’d love it if you’d join our community of doers so you won’t miss any inspiration for your home.
We love new friends.

[mailerlite_form form_id=2]
Repurpose sheets into Canopy for a Bed
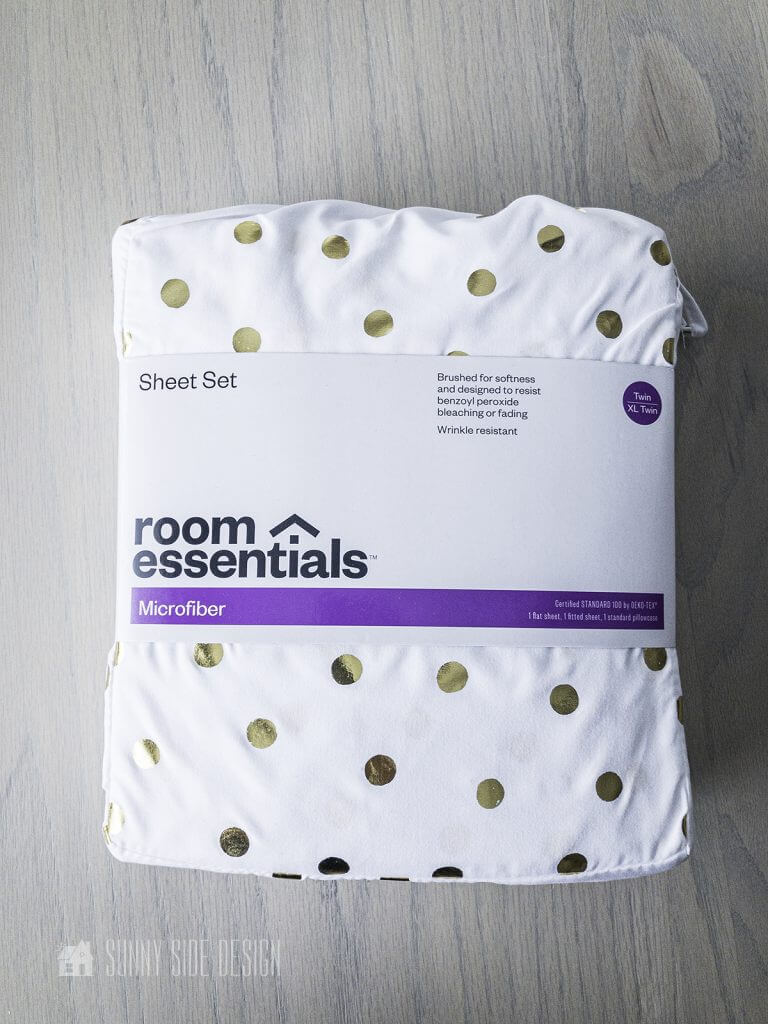
Ellie has been very specific about what she wants for her bedroom makeover.
One specific item was that the canopy be white with gold polka dots.
We scoured the internet looking for curtains that would work, but to no avail.
However we discovered that Target had twin XL sheets that met our needs. And can you believe they were only $10 for a set of sheets?! We purchased 2 packages for our project.
A twin XL set would be the perfect length for an 8′ ceiling, but Ellie’s room has 9′ ceilings. Because of this, we had to add a little to the length of the flat sheets. We were able to cut apart one of the fitted sheets for the additional fabric.

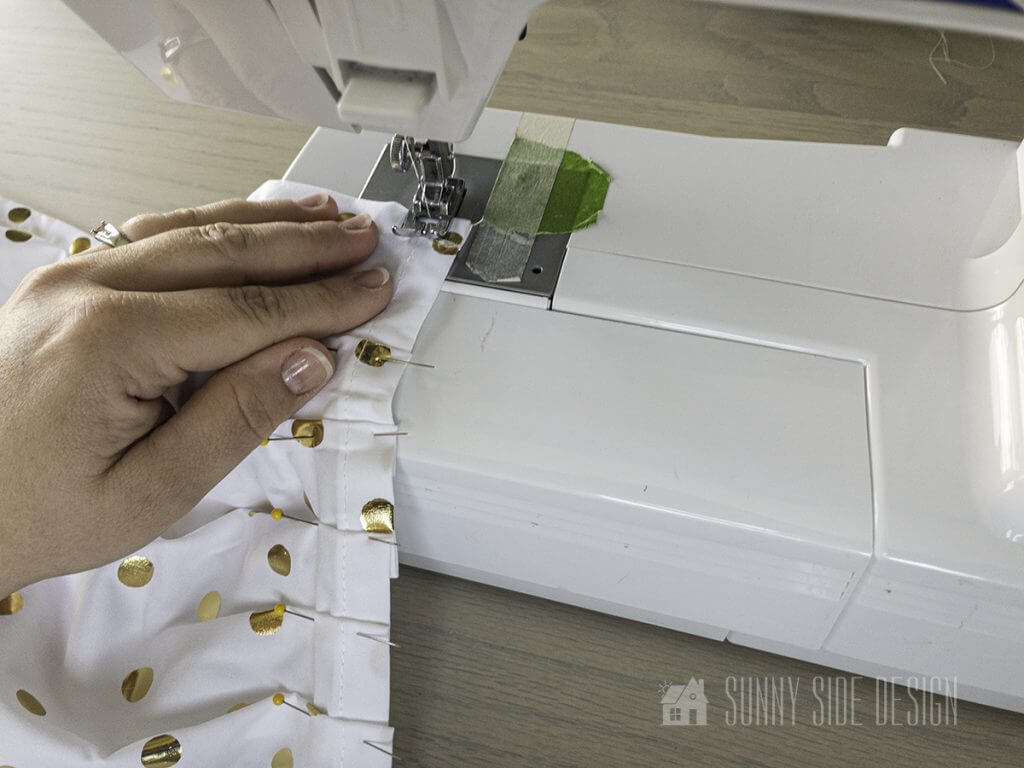
We made small pleats along one end of the sheet about 1″ apart. And stitched it with the sewing machine.

Then Velcro was secured over the stitched pleats.
Let’s stay connected! Follow us on social media!
Hang the Canopy for a Bed

Once we had the velcro attached to both of the flat sheets, we were able to hang them to the our DIY bed crown canopy.
The Reveal – DIY Canopy for a Bed

So, what do you think of our DIY canopy for a bed?
Can you believe that this was once a sofa table?
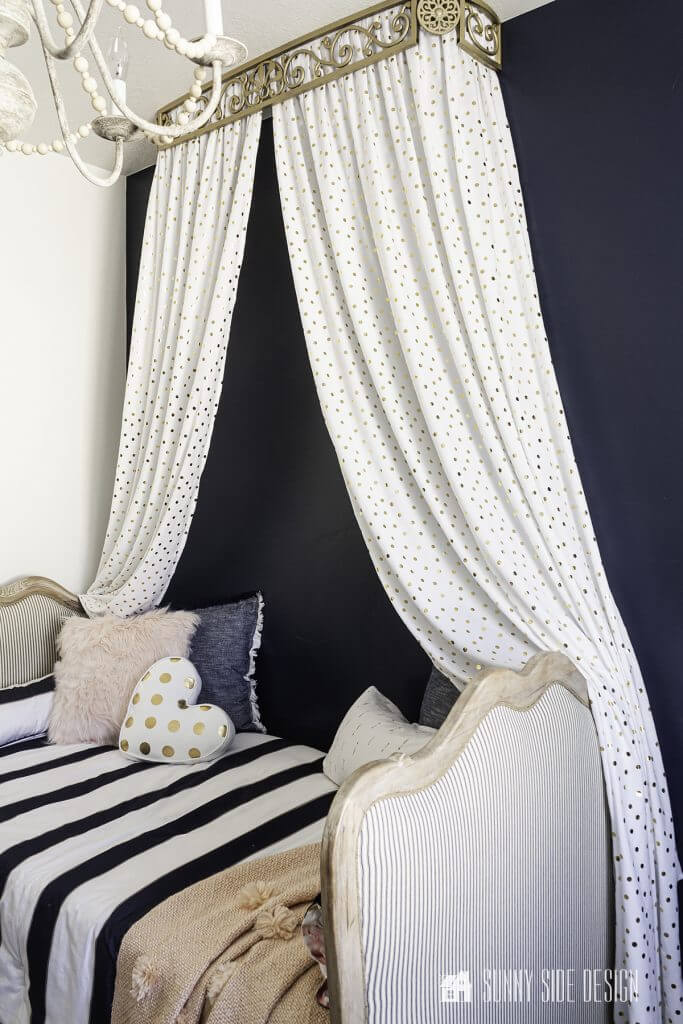
We love the way it perfectly frames Ellie’s charming French country daybed.
The first night that Ellie slept in her bed with the canopy, she pulled the fabric entirely over her bed, just like a tent.
She absolutely loves it! It’s so fun for us to see her excitement as each piece is added in her bedroom.
This post is featured in Southern Crush Collective.
http://southerncrushathome.com/southern-crush-collective-3

Loving the way this French bed crown adds another layer in this gorgeous room.
Other DIY elements that you may want to take a look at in this bedroom makeover are the Built in shelves with desk, Upholstered daybed, French – Boho chair and this pretty chandelier.
We hope you found some inspiration for your home today.
Please share your tips and ideas with us.
We love hearing from you!
If you’re new here, WELCOME! We love having new readers and friends!
You can learn more about us here.
Let’s stay connected! Join our DIY community of doers and you won’t miss the weekly updates and more inspiration for you always on a budget.
Sharing is caring!

Thanks for stopping by Sunny Side Design. Empowering you to create a home you love!
To see more DIY Projects from Ellie’s bedroom makeover click on the images below.

https://www.2thesunnyside.com/shelf-decorating-ideas-a-step-by-step-guide/


DISCLAIMER
This blog’s content is for entertainment purposes only and is not professional advice. By reading this blog and attempting to recreate a project, you assume all responsibility for any injuries or damages incurred. Read my full disclaimer here.
PHOTO USE AND CONTENT SHARING
All of the photographs you see here are the property of Sunny Side Design unless otherwise credited.
We love for others to share our work, so please feel free to use one photo with a link back to our website.
Pinning and sharing is always encouraged!
Please do not reproduce other Sunny Side Design content without permission.
Retailers We Love
- Anthropologie
- Birch Lane
- Crate & Barrel
- Joss and Main
- Lampsplus
- Mark & Graham
- One Kings Lane
- Pottery Barn
- Rejuvenation
- Serena & Lily
- Wayfair
- West Elm
- Williams Sonoma
- World Market
Be sure to follow us on Pinterest for even more home decor and DIY ideas.
To see what we are working on before it’s on our blog, follow us on Instagram.
You will also find our video tutorials on our YouTube channel.
- Creating a Cozy Outdoor Living Room with Thrifted Finds

- The Best ‘Berry in Love’ Bridal Shower Ideas
- Paint an Old World Texture Finish on a Vase
- Easy Strawberry Chicken Salad with Lime Maple Balsamic Vinaigrette


