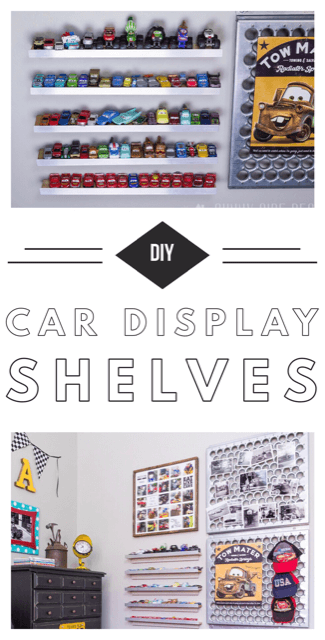
These DIY display shelves are a budget-friendly way to show off a child’s Matchbox car collection. Instead of spending $200 on store-bought floating shelves, I built my own using cedar fence pickets and aluminum angle.
Sunny Side Design is a participant in the Amazon Services LLC Associates Program, an affiliate advertising program designed to provide a means for sites to earn advertising fees by advertising and linking to Amazon.com. As an Amazon Associate, this blog earns from qualifying purchases with no additional cost to you. Click here to read our full disclosure policy.
When my little guy’s pocket-size car collection started taking over every flat surface in his room, I knew it was time for a real display solution.
So I looked into floating shelves, but at around $20 per shelf, it would’ve cost close to $200 for the space I needed to fill—and that just wasn’t happening.
But instead, I DIYed my own car display shelves using aluminum angle strips and cedar fence pickets, and honestly?
They’re perfect.
They’re simple, affordable, and made specifically for Matchbox-sized cars, which makes them ideal for a little boy’s car-themed bedroom.
Functional, budget-friendly, and actually cute—this is one of those DIYs that just makes sense.
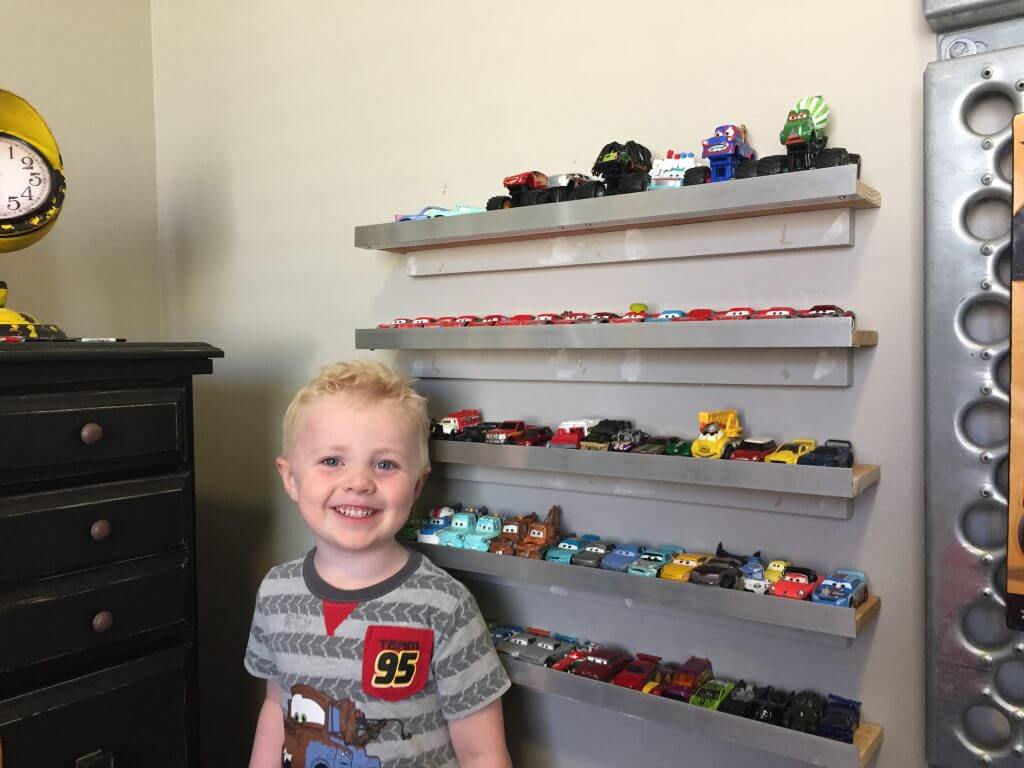
Awe…would you look at that face?!
My little man was so excited when we told him what we were going to build for his cars!
He was too anxious to even let us finish the shelves all the way before he had them completely filled up with his cars! 🤣
The shelves are mostly done in this pic, I just had to paint the putty marks.

Materials We Used
First things first, what materials did we use to make these shelves?
There are quite a few different floating shelves out there, but they come at a cost!
The shelves I found that would look the best in his room were $20 a piece and I would’ve needed 10 to fill the same amount of space!
Don’t know about you, but that’s not in my budget! (These DIY shelves we made cost roughly $25 for ALL 5 of the shelves!)

Off to The Home Depot we went.
We walked up and down the aisles looking for possible materials.
I knew I wanted a metal edge to mimic the metal grates on the wall next to the shelves.
When my eye caught these aluminum angle strips I knew that’s what I wanted to use!
Since this strip was only 3/4″ wide this would make a great front edge of the shelf, but I needed something deep enough for a toy car to sit on.
In the end I decided to use your basic cedar fence slat.
Again I wanted to mimic the metal and wood used together like I did on the wagon shelf. You can see that tutorial here.

Making the Cuts
Decide how long you want your shelf to be, measure and cut.
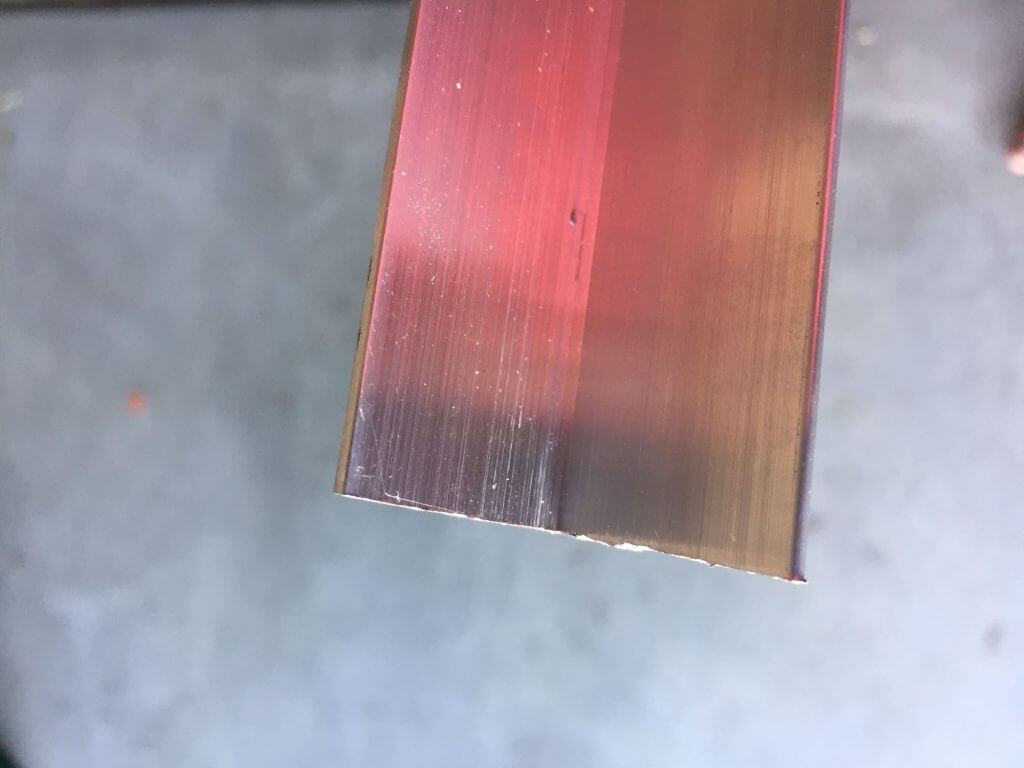
I used the miter saw and made the cut at 24″.
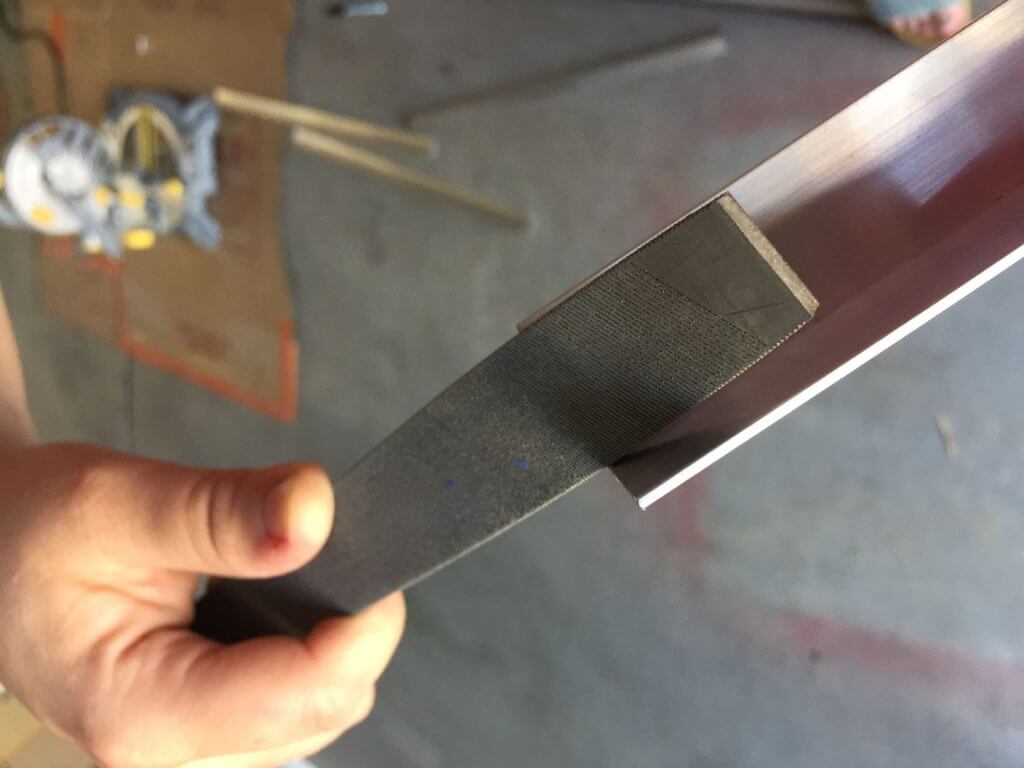
Once the aluminum strip was cut it left a rough edge, so I used a file to remove any sharp edges.
Are you enjoying this project? Please Pin It, save it for later and share it with a friend.
Sharing is caring!


Once the aluminum strip was filed, we lined a fence slat on top of the aluminum edge and put a square at the end of the aluminum strip.
Then make sure everything is lined up and mark the straight edge.
Now that the boards are marked you can cut the fence slat.

Shelf Cleats
To make the shelves appear to be floating we cut strips of wood 1/2″ thick x 1″ tall x 22″ long.
We measured where the top of each shelf would be and made a small pencil mark on the wall.
Then we used a level to line up the wood strip and used a nail gun to attach each strip to the wall.
Make sure to use a stud finder to get the nails in a stud, otherwise if the nails only go through to the sheet rock you’ll be able to pull the shelf right off the wall.
Studs are your friends.
The cleats were also painted the wall color so they would blend into the wall as much as possible.
Remember we don’t really want to see the cleats.
If you’re new here, welcome! We’re so glad you’re here.
Let us introduce ourselves, we’re Michelle and Steph, a mom and daughter team who love to DIY and decorate our homes.
Not only are we passionate about making our homes warm, comfortable and unique, but it’s our mission to help you create that same feeling in your own home.
You’ll find ideas for repurposing, creating, decorating and making your home truly yours, while always mindful of a tight budget.
Undoubtedly we love finding ways to make your home look high-end on a small budget.
Plus you’ll also find a recipe or two as we share our family favorites with you.
Join our community of doers so you won’t miss any inspiration for your home.
We love new friends.

[mailerlite_form form_id=2]
Attach Aluminum Strip
One step that is a little out of order (my fault, I failed to take a picture of this step), you’ll want to screw the aluminum strip onto the front of the fence slat before you screw the shelf into the cleat!
You can do this either right after you cut the fence slat to size or after you drill the pilot holes that will be used to secure the shelf into the cleat…
just save yourself the trouble of trying to attach the aluminum when the shelf is already secured to the wall.
We also drilled a pilot hole for each screw in the aluminum strip.

Now you can simply secure the strip onto the front edge of the fence slat, by screwing from the bottom side of the shelf, again with 3 screws, 1 in the middle and 1 on each end.
Attach DIY Display Shelves to Cleats
Now that all the fence slats are cut to size you can drill pilot holes along the backside of the wood.
Since the wood cleat was only 1/2″ thick we opted to drill pilot holes so we were sure to get the screw into the cleat.

We secured each shelf to each cleat with 3 screws, 1 in the middle and 1 on each side.
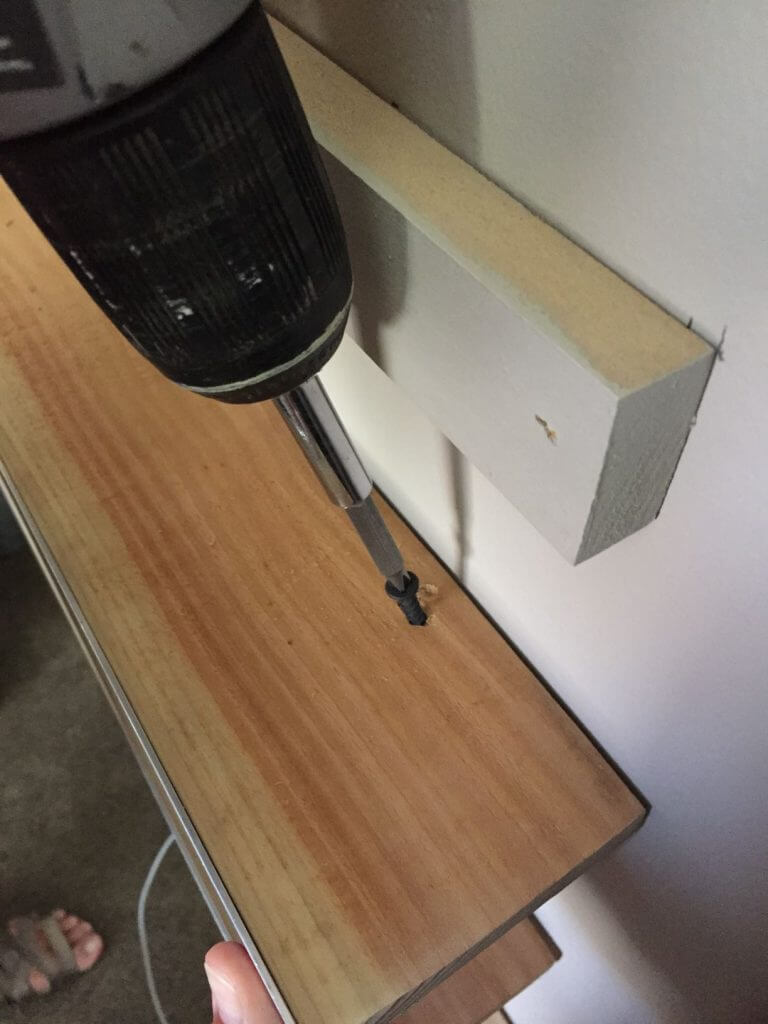


We started securing the shelves to the cleats from the bottom up, otherwise we wouldn’t have been able to get the drill in between the shelves to screw into the top of cleat.
This is also a good time to putty the nail holes in the cleats.
Once the putty has dried, give a light sanding to make sure its smooth and level to the cleat and then paint.
Let’s stay connected! Follow us on social media!

Here’s a good shot of the shelves once they were all secured.
You can see that the front aluminum edge has been secured to the shelves with screws on the bottom of the shelf, and the nail holes in the cleats have been puttied and painted.

Here’s a shot with many of the cars on the shelves.
Most of the cars are the perfect size for the shelves, they but right up to the aluminum edge.
A few cars are a little longer and had to be angled just a little bit.
But you can see how nicely they line up.
You can also see the 3 screws that secure the shelf into the cleat.


Shop This Project

More DIY Shelf Ideas
- Build Simple Basement Storage Shelves That Last
- Simple Bathroom DIY Recessed Shelf in a Wall
- Build Melamine Shelves in a Closet
- Construct Custom Built In Shelves in Wall
- Storage Room Organization Shelves
- DIY Car Display Shelves
- Build an Easy and Affordable DIY Closet Organizer
- How to Build Mudroom Built-ins
To see all of the details in this Cars themed bedroom, click here.
Final Thoughts
I love how involved Mr. A was during this project.
He was thrilled that we were making something for his room.
He loves having these new shelves to display his cars!
He actually picks them up after he’s done playing now because he likes to see them on the shelves, and it allows him to find the ones he wants more easily.
It’s a win for everyone!

We hope you found some inspiration for your home today.
Please share your tips and ideas with us.
We love hearing from you!
If you’re new here, WELCOME! We love having new readers and friends!
You can learn more about us here.
Let’s stay connected! Join our DIY community of doers and you won’t miss the weekly updates and more inspiration for you always on a budget.
Sharing is caring!
Thanks for stopping by Sunnyside Home. Empowering you to create a home you love!
Retailers we love…
- Anthropologie
- Birch Lane
- Crate & Barrel
- Joss and Main
- Lampsplus
- Mark & Graham
- One Kings Lane
- Pottery Barn
- Rejuvenation
- Serena & Lily
- Wayfair
- West Elm
- Williams Sonoma
- World Market
Be sure to follow us on Pinterest for even more home decor and DIY ideas.
To see what we are working on before it’s on our blog, follow us on Instagram.
You will also find our video tutorials on our YouTube channel.
- The Best ‘Berry in Love’ Bridal Shower Ideas

- Paint an Old World Texture Finish on a Vase
- Easy Strawberry Chicken Salad with Lime Maple Balsamic Vinaigrette
- How to Fix Chipped Kitchen Cabinets with a Pen


