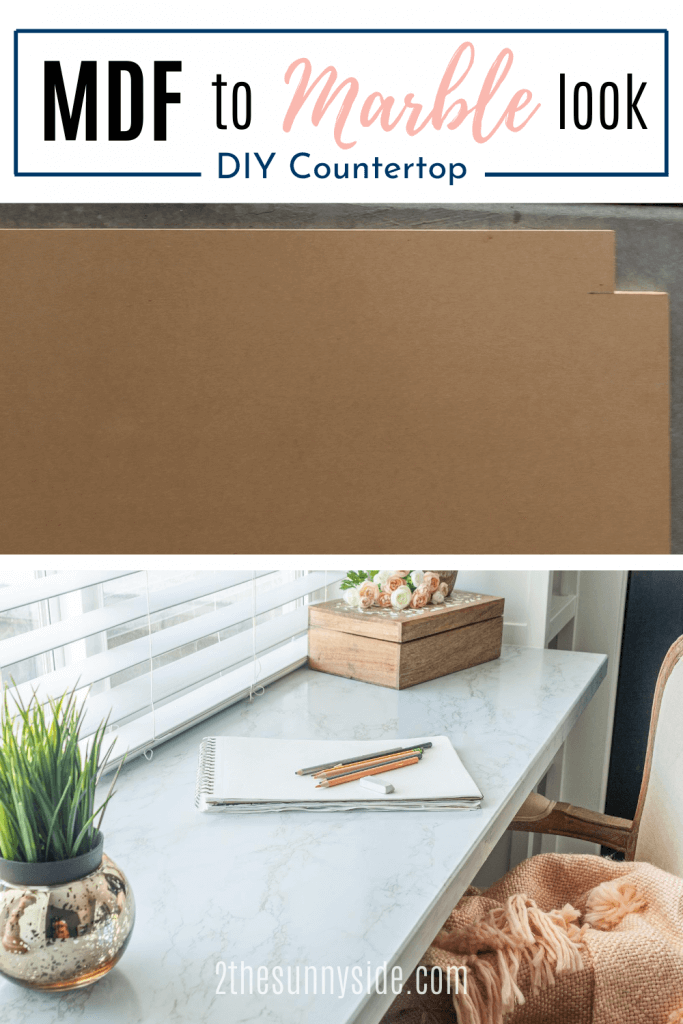
How to make a DIY countertop that looks like marble, without the high end cost!
Ellie loves to create and is always busy working on a new masterpiece. This bedroom makeover was screaming for a large workspace and lots of storage!
Not only does this built-in design offer her a large work surface, but there is now ample storage space for all her art supplies.
Follow along as we show you how you can create this DIY countertop for under $60.
Another option for a DIY countertop would be an epoxy countertop.
While it would be more expensive, the results are stunning.
To see more highlights from this bedroom makeover click any link below.
- How To Paint a Room with Pro Results
- How To Design a Bedroom | Tween Girl Ideas
- Built In Desk | Upcycling At Its Best
- Upcycle Idea | Transforming Twin Bed to Daybed
- How To Refinish Furniture | With a Raw Wood Look
- DIY Canopy for a Bed | Fit for a Princess
- Shelf Decorating Ideas | A Step by Step Guide
- Roman Shade | How to Make Them Yourself
- How To Reupholster a Chair | with French Country & Boho Flair
- French Country Chandelier with Boho Flair
- DIY Mirror Frame | Quick and Easy Idea
- Antique Hardware For Dresser
- Bedroom Ideas for Tweens |Girl Room
- Area Rug For Bedroom | Top Ideas For Tween Girl
- How To Make a Bolster Pillow
- How To Make an Envelope Pillow
Sunny Side Design is a participant in the Amazon Services LLC Associates Program, an affiliate advertising program designed to provide a means for sites to earn advertising fees by advertising and linking to Amazon.com. As an Amazon Associate, this blog earns from qualifying purchases with no additional cost to you. Click here to read our full disclosure policy.
Supplies Used
We already had a lot of the supplies used on hand. The only supplies we purchased for this project were the MDF and contact paper.

Building The DIY Countertop

We purchased a piece of 3/4″ thick 4′ x 8′ MDF board from Home Depot, and had them cut it down into two pieces 21.5″ wide.
(It’s so much easier having them cut it at the store instead of trying to man this huge and heavy piece of wood on the table saw. And it’s easier to get home in smaller pieces as well.)
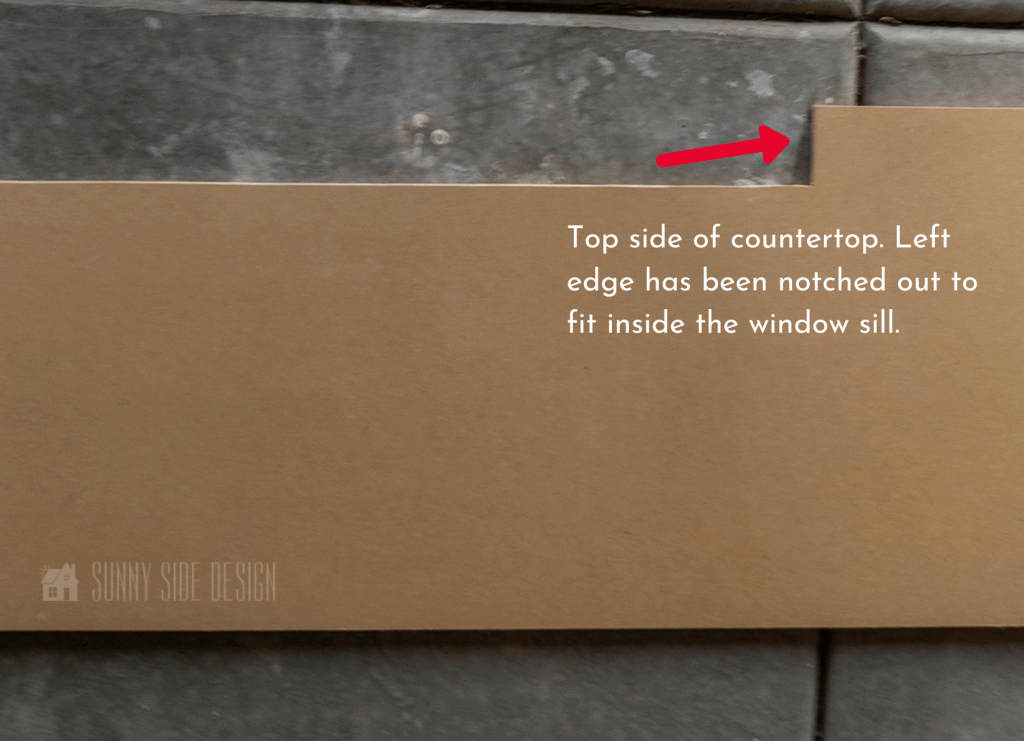
After the wood was home, we measured and marked where the counter top would sit inside the window sill. We then trimmed the MDF with a circular saw to create notches on both ends.
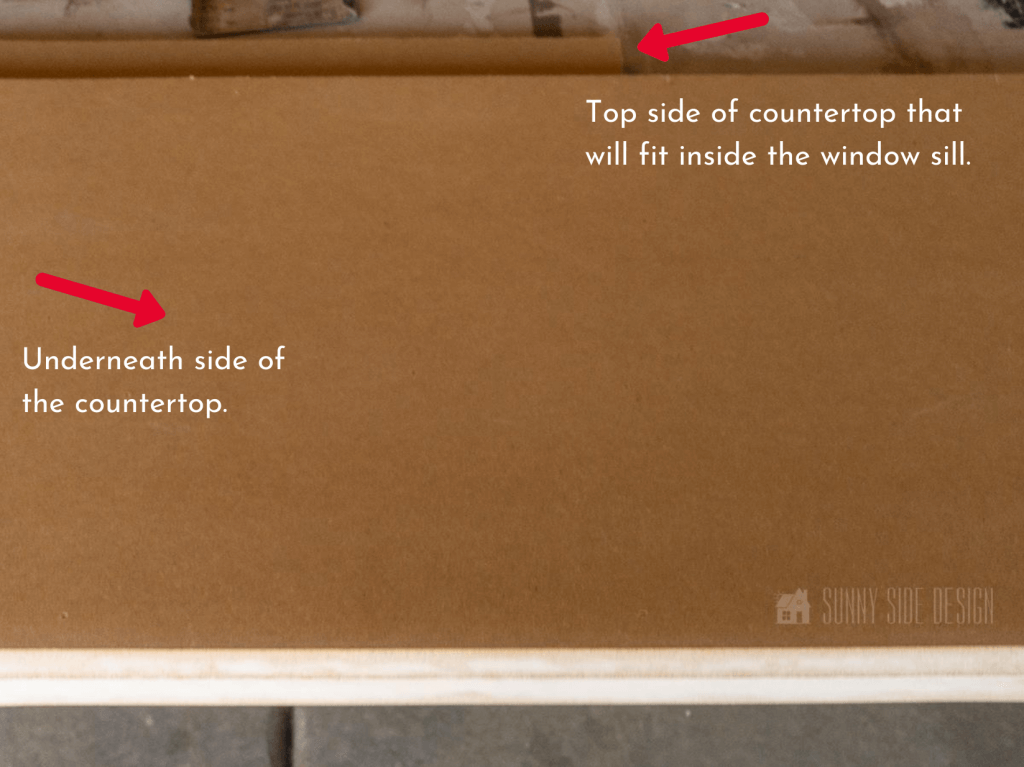
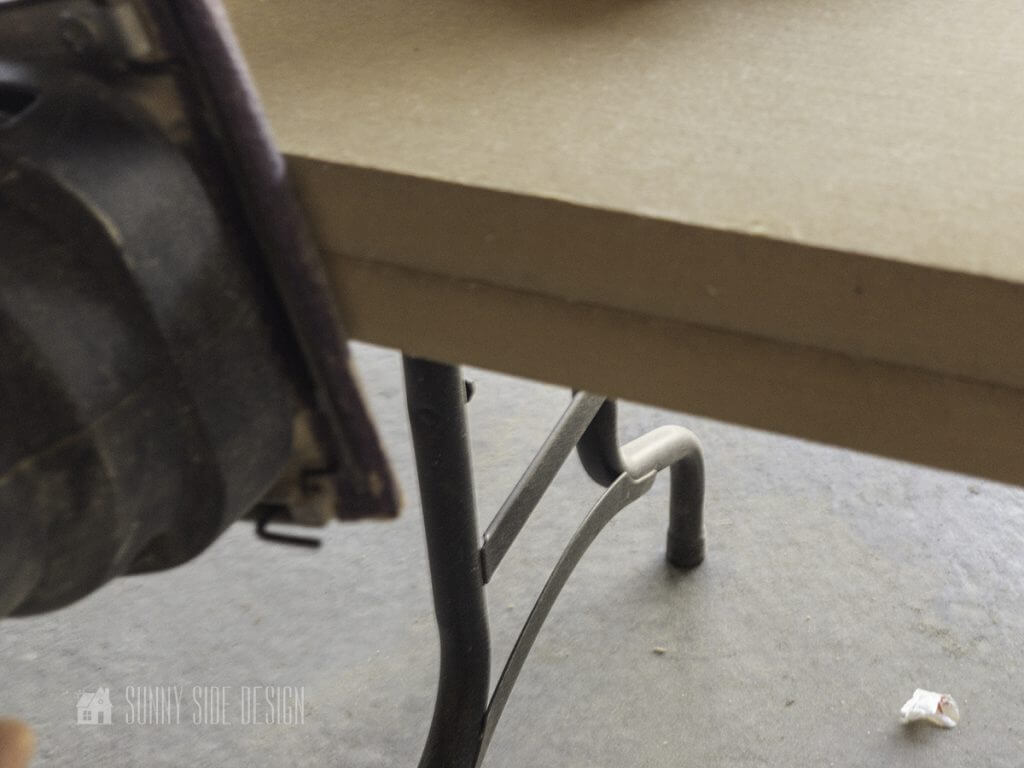
To make the countertop look more substantial we secured the two pieces of MDF together using wood glue and the brad nailer. Brads were driven into the wood from the underneath side of the countertop.
You’ll also notice in the picture above that the bottom piece of MDF is straight so it will fit flush against the wall, where the top piece of MDF has the notched area to sit inside the window sill.
(If both boards were notched to fit in the window sill, it would’ve been too high and covered the window.)
Are you enjoying this project? Please Pin It, save it for later and share it with a friend.
Sharing is caring!
Route Edge of Countertop

The top front edge of the DIY countertop was then slightly rounded with a router. This creates a little softer edge.
Once the edge has been routed, use a palm sander to smooth the front edge of the counter.
Then you’ll want to apply a thin layer of dry dex putty to fill in the seam of the two pieces of MDF.
Once dried, lightly sand until smooth.
Prime MDF
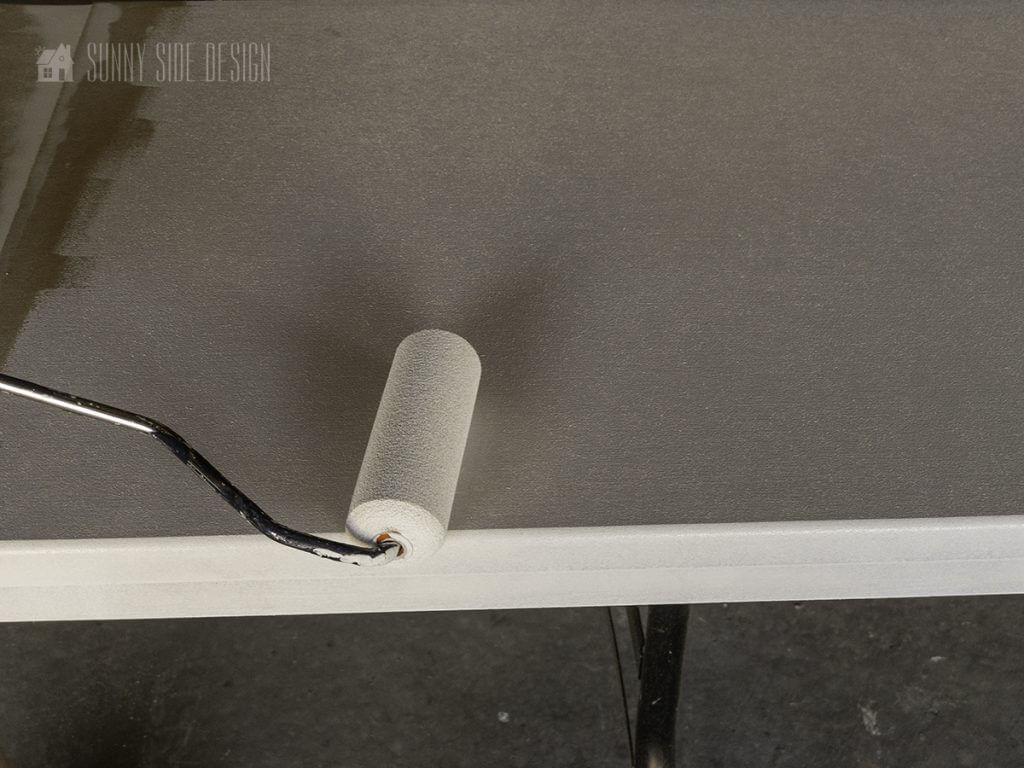

Next, add a layer of primer to the MDF. This will help create a better bond between the MDF and the contact paper.
Once dried, give the entire surface a light sanding with 220 grit paper, so it’s smooth to the touch.
If you’re new here, welcome! We’re so glad you’re here.
Let us introduce ourselves, we’re Michelle and Steph, a mom and daughter team who love to DIY and decorate our homes.
Not only are we passionate about making our homes warm, comfortable and unique, but it’s our mission to help you create that same feeling in your own home.
You’ll find ideas for repurposing, creating, decorating and making your home truly yours, while always mindful of a tight budget.
Undoubtedly we love finding ways to make your home look high-end on a small budget.
Plus you’ll also find a recipe or two as we share our family favorites with you.
We’d love it if you’d join our community of doers so you won’t miss any inspiration for your home.
We love new friends.

[mailerlite_form form_id=2]
How To Apply The Contact Paper

I chose a heavy duty contact paper rated for countertops and furniture that was 24″ x 118″. Purchasing it with these dimensions will allow you to apply the paper to the entire surface without any seams. And that is key to creating this DIY countertop to give it more of a realistic marble look.
Slowly unroll the contact paper over the countertop and trim off the excess leaving a few extra inches. This will make it easier to work with and give you a little wiggle room.
Starting at one end, gently peel the backing away exposing about a 1″ strip of the contact paper.
Carefully line up the contact paper leaving enough to cover the sides of the counter top.
The contact paper is reposition-able, but to maintain the best bond, it’s best not to reposition unless absolutely necessary.
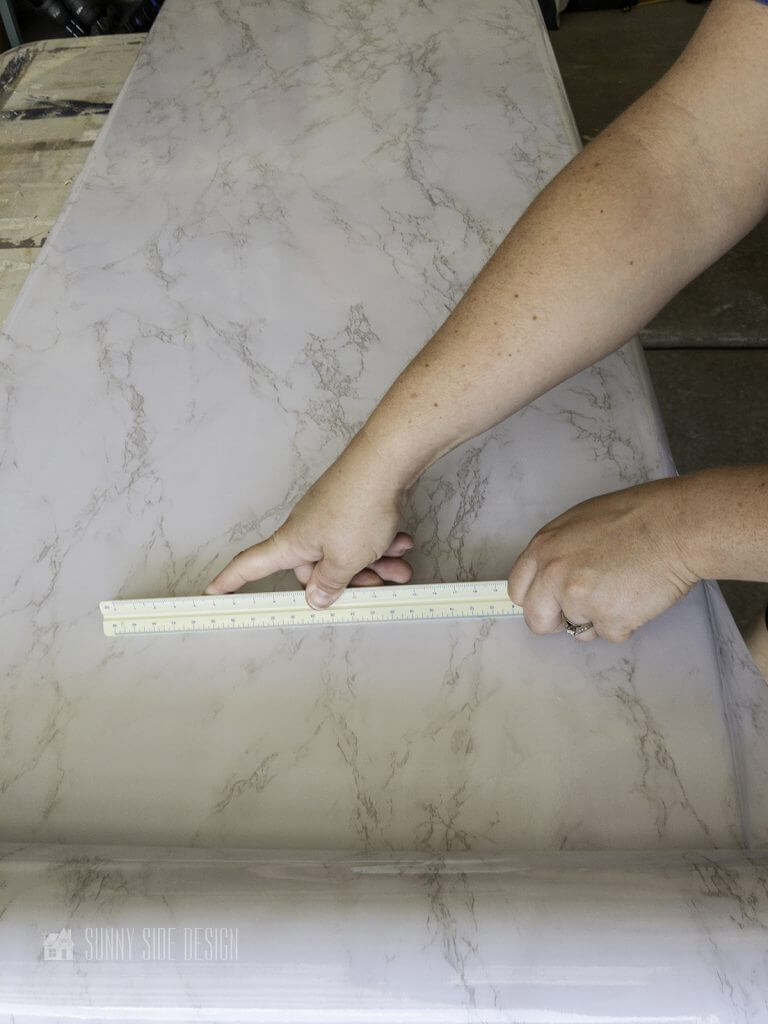
Then slowly pull the backing back a couple inches at a time and smooth the contact paper down with a straight edge (I used a plastic ruler). Be sure to smooth out any air bubbles pushing the ruler in the direction that the contact paper backing is being removed.

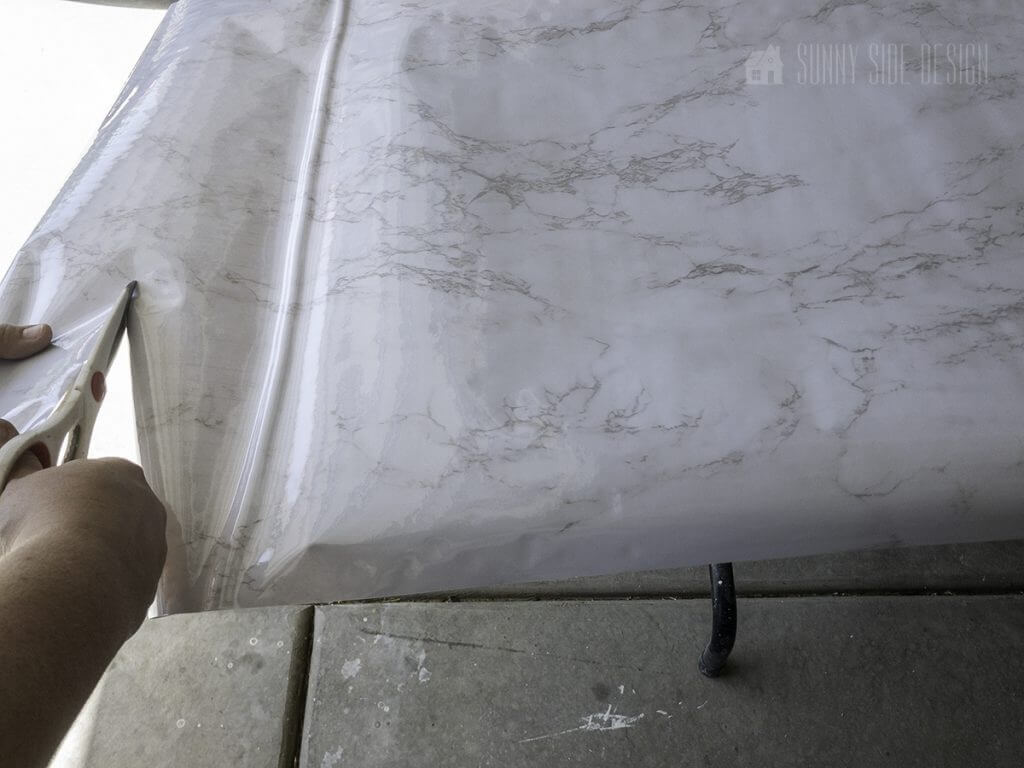
Once the entire top surface of the DIY counter top has been covered with the contact paper, use your fingers to wrap it over the front edge. Using the ruler here may cause scratches or tears, so fingers are best.
Then take a utility knife to trim away the excess contact paper.
*Since this countertop was going to be built in under the book case, I decided to add a sealer to make it even more durable (and prevent it from any possible staining from Ellie’s art supplies). This was the first time I’d used the contact paper, and I would’ve been devastated if it were to get damaged down the road, so I was just taking some extra precautions.
We used the Varathane Polyurethane in a satin finish.
Let’s stay connected! Follow us on social media!
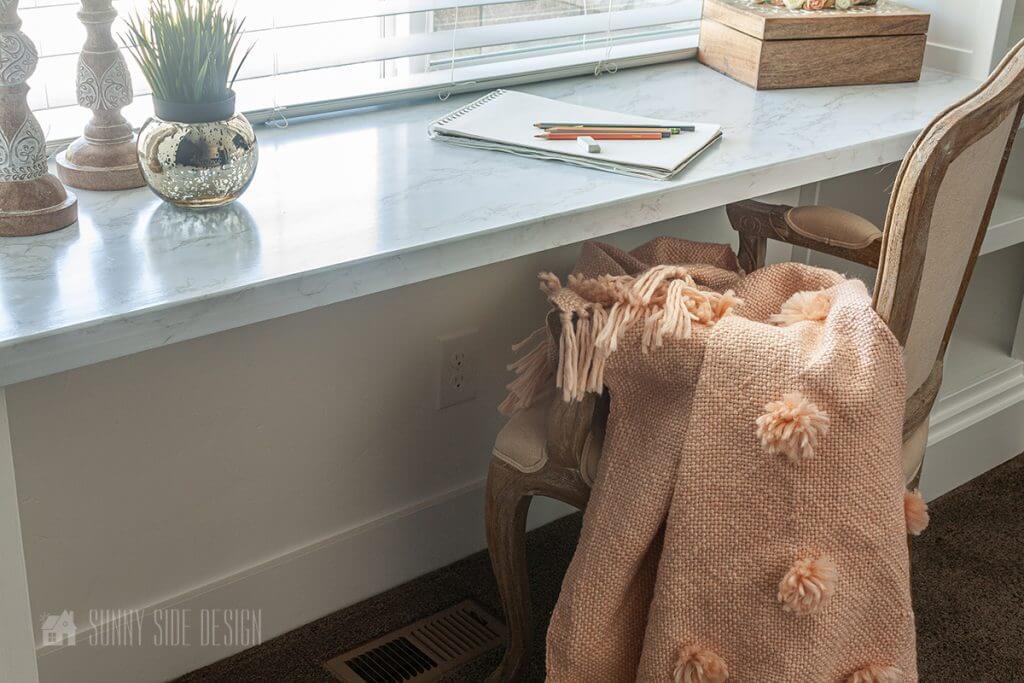
The Finished Marble Look DIY Countertop
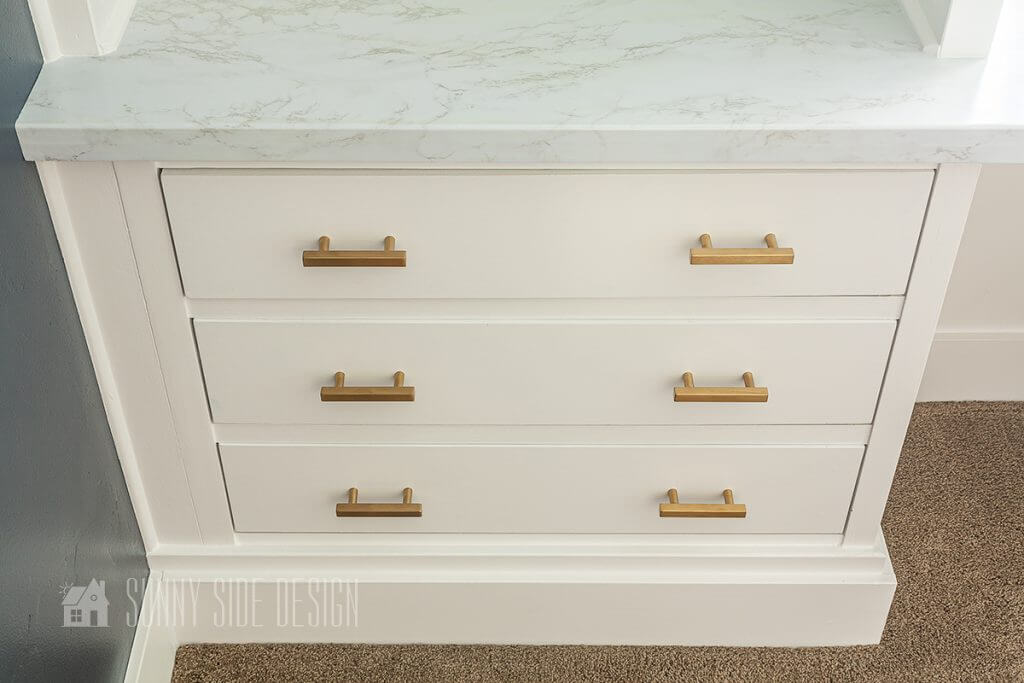
The DIY countertop was then secured to the wall with a cleat as well as the unit of drawers and book case. To see how we secured these all together, visit our post on how we made the built-in desk.
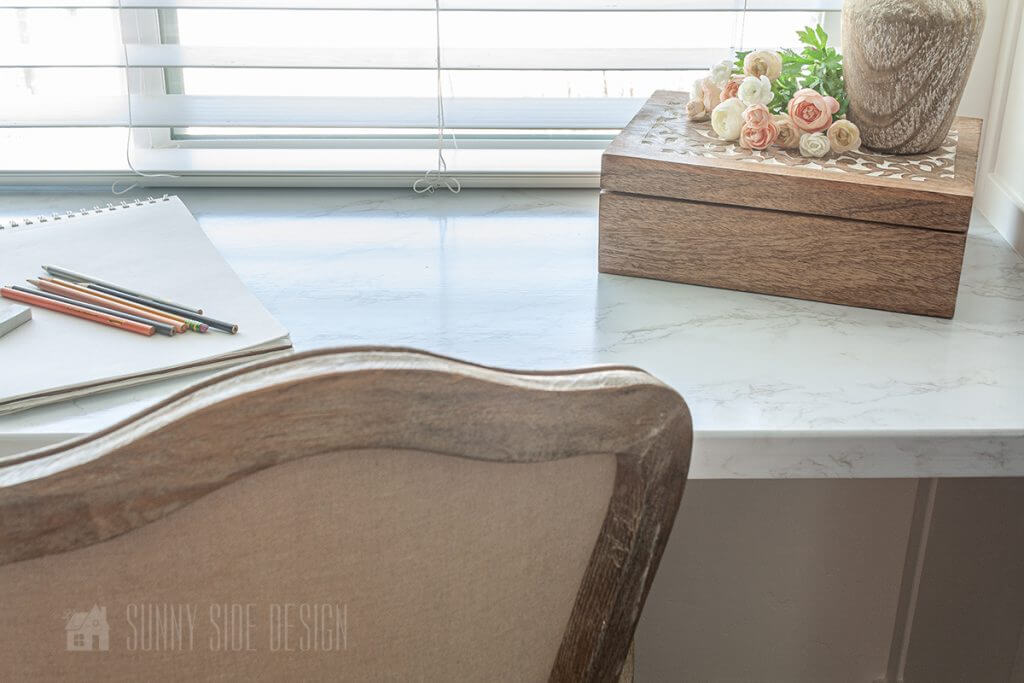
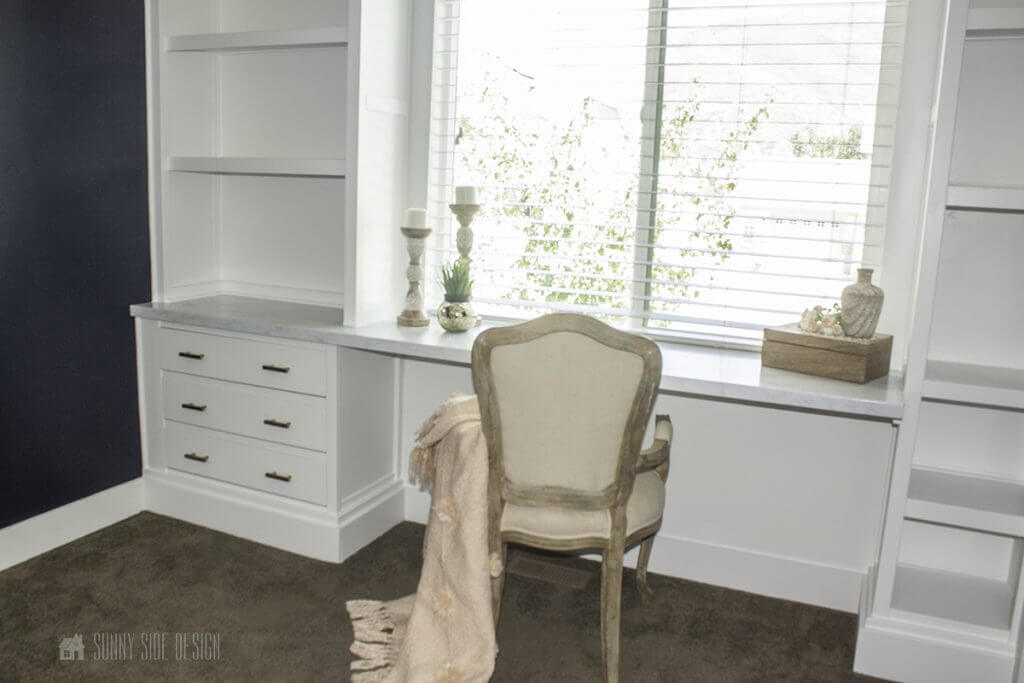
I’m so happy with the way it turned out! It looks just like marble, with extra durability and stain resistance!
We’ll keep you posted on it’s durability and how it’s holding up.

We hope you found some inspiration for your home today.
Please share your tips and ideas with us.
We love hearing from you!
If you’re new here, WELCOME! We love having new readers and friends!
You can learn more about us here.
Let’s stay connected! Join our DIY community of doers and you won’t miss the weekly updates and more inspiration for you always on a budget.
Sharing is caring!
Thanks for stopping by Sunny Side Design. Empowering you to create a home you love!
DISCLAIMER
This blog’s content is for entertainment purposes only and is not professional advice. By reading this blog and attempting to recreate a project, you assume all responsibility for any injuries or damages incurred. Read my full disclaimer here.
PHOTO USE AND CONTENT SHARING
All of the photographs you see here are the property of Sunny Side Design unless otherwise credited.
We love for others to share our work, so please feel free to use one photo with a link back to our website.
Pinning and sharing is always encouraged!
Please do not reproduce other Sunny Side Design content without permission.
Retailers We Love
- Anthropologie
- Birch Lane
- Crate & Barrel
- Joss and Main
- Lampsplus
- Mark & Graham
- One Kings Lane
- Pottery Barn
- Rejuvenation
- Serena & Lily
- Wayfair
- West Elm
- Williams Sonoma
- World Market
Be sure to follow us on Pinterest for even more home decor and DIY ideas.
To see what we are working on before it’s on our blog, follow us on Instagram.
You will also find our video tutorials on our YouTube channel.
- 35 Easy Decorating Ideas for Summer to Welcome the Season

- Fourth of July Decorating Ideas You’ll Love This Summer
- Simple and Creative Planter Container Ideas from Thrifted Finds
- 25 Must See Simple and Creative Reading Nook Ideas