Hey Guys it’s me again! Ready for another tutorial? If you peruse Pinterest you’ve likely seen lots of fun ways to upcycle old wagons. I’ve seen multiple variations of repurposed tables and shelves and I couldn’t wait to get my hands on one! I wanted to have a display shelf for all of the little car treasures Mr. A has. It took me a while to find the perfect wagon. Not because there was a shortage of vintage wagons around, but because I am a frugal gal. I’d keep my eye out for one searching the local classifieds and thrift stores, but I finally decided upon this beauty at a local vintage market. The price was right and I couldn’t pass it up.
Sunny Side Design is a participant in the Amazon Services LLC Associates Program, an affiliate advertising program designed to provide a means for sites to earn advertising fees by advertising and linking to Amazon.com. As an Amazon Associate, this blog earns from qualifying purchases with no additional cost to you. Click here to read our full disclosure policy.

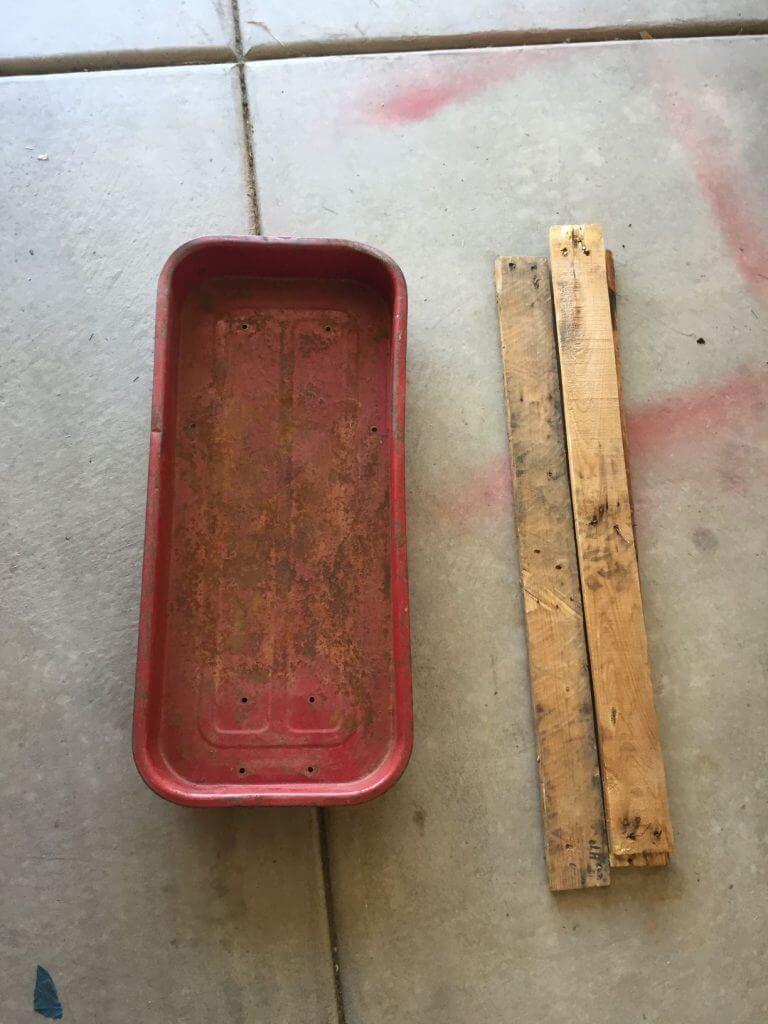
This was a super easy project! The first step is taking the wagon apart. I just used my ol’ trusty screwdriver and off came the wheels and handle. Not much to it. Then I gave it a good wash down! I just used a wet rag and it cleaned up nicely. It was pretty dirty but I LOVED all of the rusty patina hiding under the dirt! This adds character and history to the piece.

Next I measured the inside width of the wagon to determine how long to cut my shelf. My wagon wasn’t the most symmetrical, it had been around the block a few times and was bowed in a bit. So I would suggest you measure for each shelf because mine were definitely different measurements. I used some old pallet wood I had lying around which was FREE! Gotta love that price! And the wood even happened to be the exact depth of the wagon so that was perfect, saved a few cuts.
Are you enjoying this project? Please Pin It, save it for later and share it with a friend.
Sharing is caring!

Then I fit the shelf inside the wagon to see if I needed to make any adjustments. I wanted the shelves to be snug so I did have to use a hammer to get it in there all the way flush to the wagon.

Once the wood was in place, I used a dry erase marker to mark where the shelf would be. (It wiped right off with my finger when I was finished using it as a guide.)

Then we turned the wagon on its side and uses the shelf piece as a straight edge. We lined it up with the mark on the front of the wagon and marked 2 dots where we would then drill the pilot holes for the screws.

I also marked the side of the wagon with the dry erase marker so I knew where I would drill each pilot hole. I held the wagon between my legs to keep it steady and drilled all of the pilot holes.
If you’re new here, welcome! We’re so glad you’re here.
Let us introduce ourselves, we’re Michelle and Steph, a mom and daughter team who love to DIY and decorate our homes.
Not only are we passionate about making our homes warm, comfortable and unique, but it’s our mission to help you create that same feeling in your own home.
You’ll find ideas for repurposing, creating, decorating and making your home truly yours, while always mindful of a tight budget.
Undoubtedly we love finding ways to make your home look high-end on a small budget.
Plus you’ll also find a recipe or two as we share our family favorites with you.
We’d love it if you’d join our community of doers so you won’t miss any inspiration for your home.
We love new friends.

[mailerlite_form form_id=2]

Since pallet wood is often pretty rough, I did sand the edges a bit. Then they were ready to be installed.

Here’s a little tip for ya. If you don’t take out any nails that are sticking out of the wood, they’ll eat up your sand paper. The easiest way to remove nails from pallet wood it to put a screwdriver on the nail and hit it with a hammer. It usually knocks it right out. Sometimes you’ll get a stubborn nail that’s a little harder to remove. You can also take a saw to the nail to trim it down to be flush with the wood. Maybe it’s the vibration when using this method, but it usually makes the nail fall right out.

Almost finished! I placed the shelves back into the wagon and screwed them into place so they are nice and sturdy. Since I had predrilled pilot holes the screws went right into the wood without any problem. The one thing you’ll want to be careful of though is to make sure you hold your drill directly above the hole so you are screwing straight down into the wood. If you’re drilling at even a slight angle your screw may pop through the wood either on top of below the shelf. Just take your time and hold it straight over the hole and you’ll be more likely to avoid having the screw pop through the wood where you don’t want it.
Let’s stay connected! Follow us on social media!

Time to hang this cute DIY wagon shelf. To stay true to the easiness of this project we simply decided where we wanted the wagon to be positioned on the wall and secured it to the wall with a drywall screw, utilizing the holes that were already in the wagon where I had unscrewed and taken the wheels off. Easy Peasy!
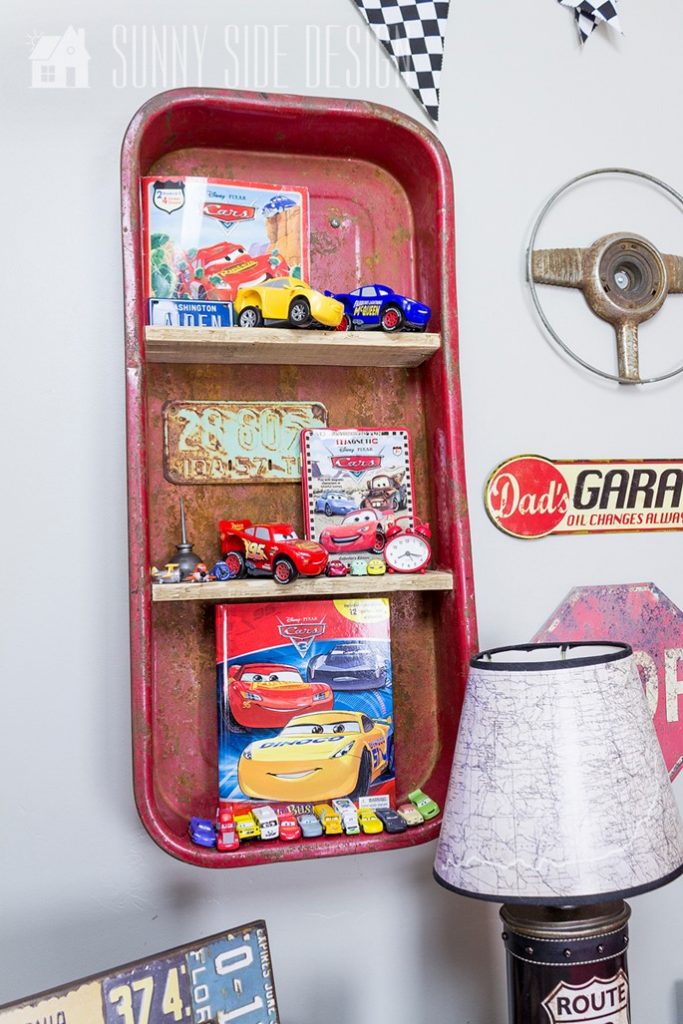

Now the fun part…add all of the fun trinkets and treasures to decorate it up and you’re finished! I enjoy this part so much. See this cute tiny oil can? This was my Grandpa’s. We found in his workspace after his passing and I was able to give this little guy a new home. I love bringing sentimental pieces into my décor especially when I get to tell my kids stories about the particular item or their family members they came from.
So, with about 30 minutes of your time you can turn an old rusty wagon into a darling display shelf! If you have found this tutorial inspiring please SHARE AND PIN IT!
We hope you found some inspiration for your home today.
Please share your tips and ideas with us.
We love hearing from you!
If you’re new here, WELCOME! We love having new readers and friends!
You can learn more about us here.
Let’s stay connected! Join our DIY community of doers and you won’t miss the weekly updates and more inspiration for you always on a budget.
Sharing is caring!

Thanks for stopping by Sunny Side Design. Empowering you to create a home you love!
DISCLAIMER
This blog’s content is for entertainment purposes only and is not professional advice. By reading this blog and attempting to recreate a project, you assume all responsibility for any injuries or damages incurred. Read my full disclaimer here.
PHOTO USE AND CONTENT SHARING
All of the photographs you see here are the property of Sunny Side Design unless otherwise credited.
We love for others to share our work, so please feel free to use one photo with a link back to our website.
Pinning and sharing is always encouraged!
Please do not reproduce other Sunny Side Design content without permission.
Retailers We Love
- Anthropologie
- Birch Lane
- Crate & Barrel
- Joss and Main
- Lampsplus
- Mark & Graham
- One Kings Lane
- Pottery Barn
- Rejuvenation
- Serena & Lily
- Wayfair
- West Elm
- Williams Sonoma
- World Market
Be sure to follow us on Pinterest for even more home decor and DIY ideas.
To see what we are working on before it’s on our blog, follow us on Instagram.
You will also find our video tutorials on our YouTube channel.
- Creating a Cozy Outdoor Living Room with Thrifted Finds

- The Best ‘Berry in Love’ Bridal Shower Ideas
- Paint an Old World Texture Finish on a Vase
- Easy Strawberry Chicken Salad with Lime Maple Balsamic Vinaigrette


