We spotted our first autumn leaves last week and fall is in the air!
After making the fall macrame leaf bunting for my mantle, I’m on a macrame roll.
So I started thinking, why not take the pumpkin wreath form from Dollar Tree and add macrame to it.
As I played around a bit, I remembered we had beads left over from Ellies chandelier makeover, and why not incorporate them into my DIY Fall Macrame wreath?
Personally, I think this pumpkin macrame wreath is so charming and fairly quick to make.
In fact it only took about 1 1/2 hours.
And I can’t wait to share it with you!
Sunnyside home is a participant in the Amazon Services LLC Associates Program, an affiliate advertising program designed to provide a means for sites to earn advertising fees by advertising and linking to Amazon.com. As an Amazon Associate, this blog earns from qualifying purchases with no additional cost to you. Click here to read our full disclosure policy.
What You Will Need to Make a Fall Macrame Wreath
For this project you will need these tools:
You will need these supplies:
For a different look than mine, you can also use a chunky weight yard and of course the flowers are optional.
How to Make a Fall Macrame Wreath
Macrame has made a resurgence in the last several years and is once again very popular.
Let me share a little secret with you…
I first learned how to macrame when I was 10 or 11 years old, way back during the macrame craze of the 70’s.
It’s fun to see it popular again!
Not only can you make beautiful pieces of decor for your home with macrame, but also some very useful pieces, like a plant hanger or even a seat for a chair.
Not to mention, you can begin creating beautiful pieces for your home with only learning a few knots.
Last week Steph shared how to make a square knot with the fun leaf garland.
And today for my DIY Fall Macrame wreath you will only need to learn one knot.
For this project you will learn the spiral stitch, or a half knot sinnet.
I know it sounds like a mouthful, but it’s really very easy to master.
Looking for more fall decor ideas, then check out 65 Simple DIY Fall Decor Ideas You Can Make Today!
Step 1: Cut Macrame Cord
First you’ll need to know how much cord to cut.
You don’t want to run short.
I believe it better to have too much cord, than to run short in the middle of your piece.
As a general rule, you want to measure the length you want the finished macrame piece to be and times it by 8.
For this Fall pumpkin macrame wreath, each rib on the wire form is worked individually.
Measure the length of the wreath form rib, mine is 14-15″.
Then I will take 15″ x 8 and cut my cord to roughly 120″.
I did find that by inserting beads that it used a little less cord.
However, I’d rather not run short and cut the pumpkin rib length to 120″.
Because each rib is worked individually, you can just cut one length of cord and see how it works out for you.
Note: The outer edge of the pumpkin wreath form will be much longer.
But once again you will measure the total length of the outer wire and times it by 8.
I also added a couple of feet to that measurement for wrapping the pumpkin stem.
Step 2: How to Make a Spiral Knot
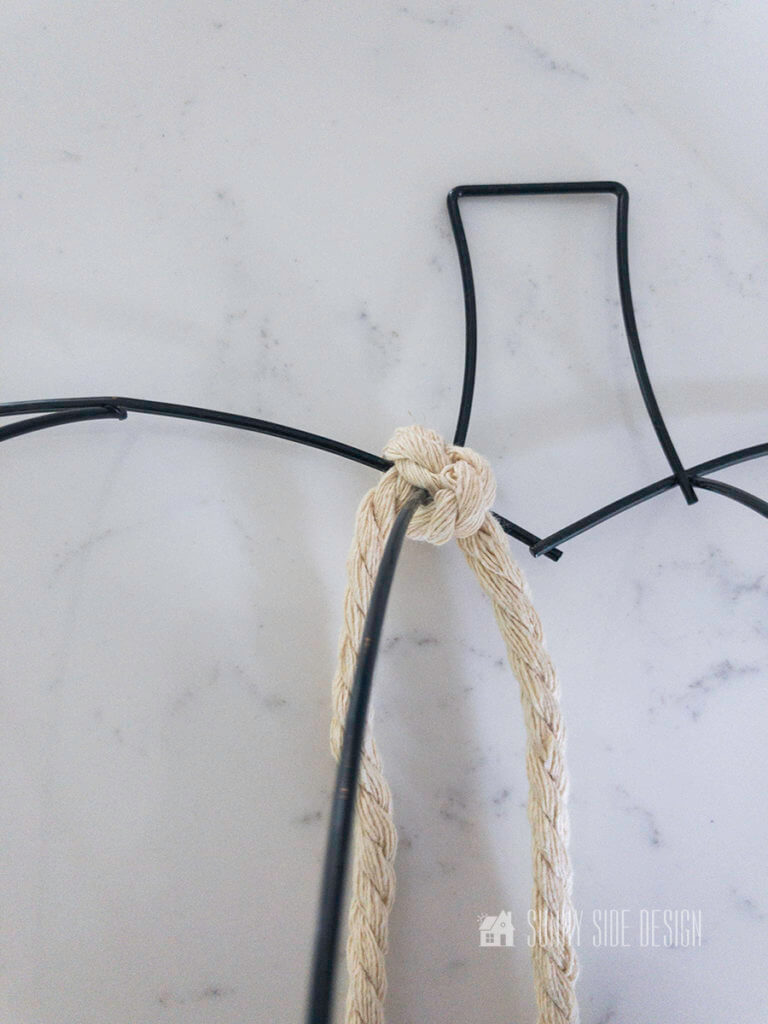
First you’ll want to find the center of your cord and secure it to the pumpkin rib, just like you’re beginning to tie your shoe.
Note: Initially I began at the top of the wire frame.
But once I decided to add beads to my Fall macrame wreath, I thought working from the bottom of the frame to the top was a better idea.
You see why when you see how I added the beads.

At this time you will begin to form your first knot.
Now usually when you macrame, you work your knots over a length of cord.
However in this case, you will work the knot over the wire frame.
Begin by taking the cord on the right and form a loop over the wire frame.
The cord on the left will come across the top of the looped cord.
Then take the cord on the left and bring it under the wire frame and pull the end up through the loop.
Pull both ends of the macrame cord tight.
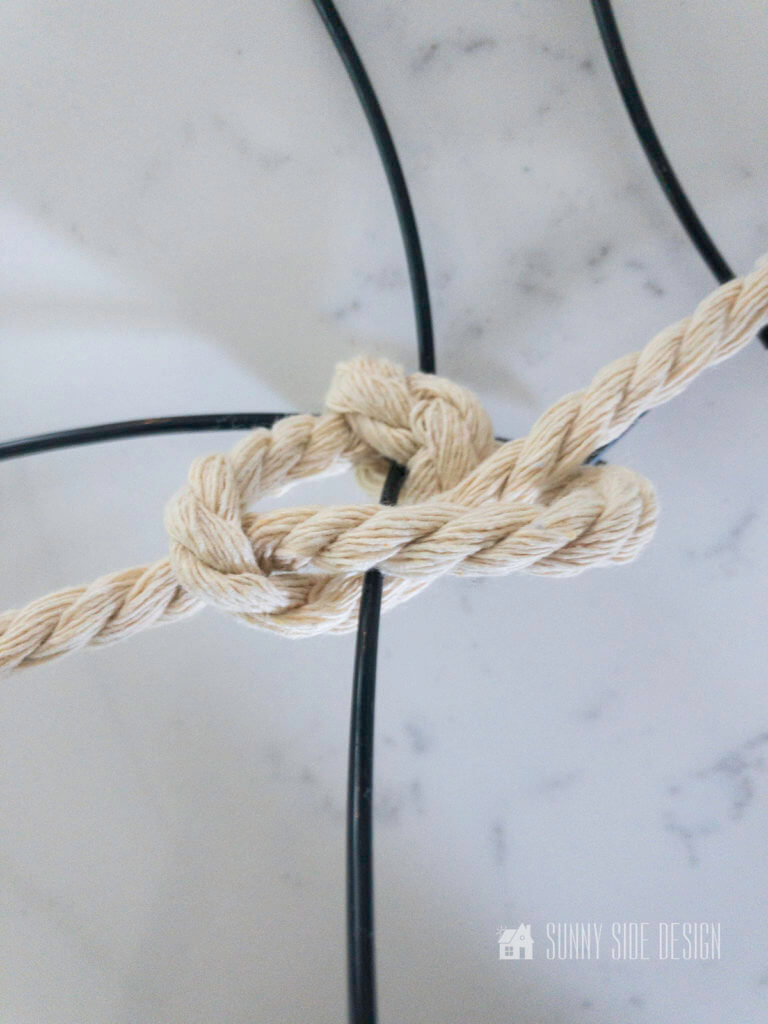
Now you just formed your first half knot.
You will now continue to make more half knots.
Note: You can form the knot by making the loop on the left side as well.
The key is to continue to make the loop on the same side, this will form the spiral effect.

As you can see in this photo, the knots start to spiral around the wire rib on the wreath form.
Of course, you can continue this knot all the way down the rib if you’d like.
However I liked the idea of adding beads to my row of spiral knots.
If you’re new here, welcome!
We are so glad that you are here.
We’re Michelle and Steph, we a mom and daughter team who love to DIY.
Not only are we passionate about making our homes warm comfortable and unique, but we’re also on a mission to help you create that same feeling in your own home.
We’re all about repurposing, creating, decorating and making your home truly yours, but always on a budget.
Undoubtedly we love finding ways to make your home look high-end on a small budget.
Plus you’ll also find a recipe or two as we share our family favorites with you.
We’d love it if you’d join our community of doers and you won’t miss any inspiration for your home.
We love new friends.

[mailerlite_form form_id=2]
Step 3: Adding Beads to Spiral Knots
In the same way as I started before, I found the center of my cord and attached it to the wire frame this time at the bottom of the wreath form.
Work 5 half knots up the wire rib.

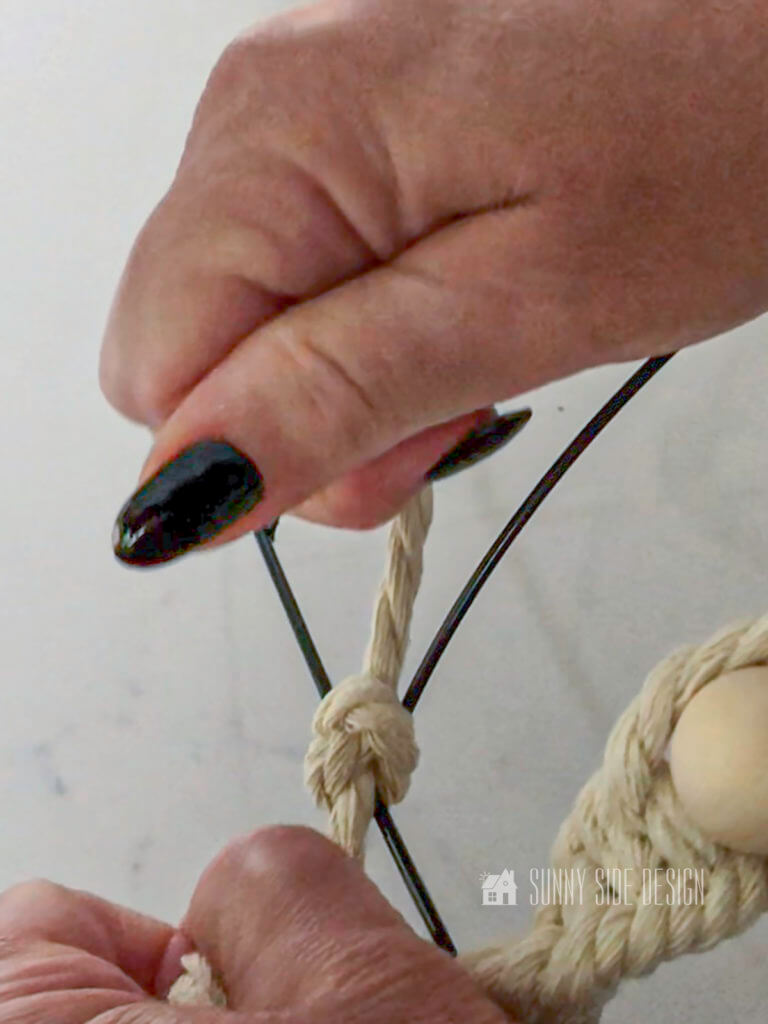
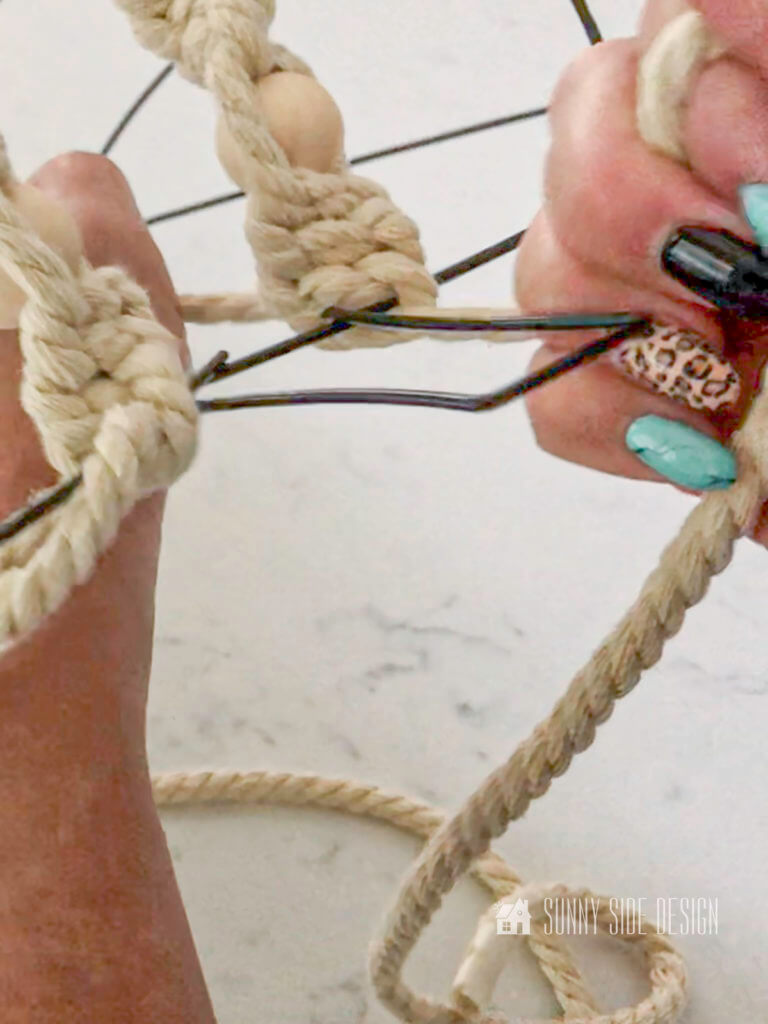
In order to place beads on the wire form, you’ll need to make a cut.
Make a cut with dykes about 1 1/2″ – 2″ from the top of the pumpkin frame.
In my opinion, making the cut at the top would put less pressure on the cut area when I secure it back together.

Next place the beads onto the wire.
Then push the bead up to the last formed half knot.

Now bring the cords around the sides of the bead and begin to form your next half knot.
Are you enjoying this post?! Please pin it, save it for later and share it with a friend.
Sharing is caring!

Continue with 5 more half knots.
Then add your next bead.
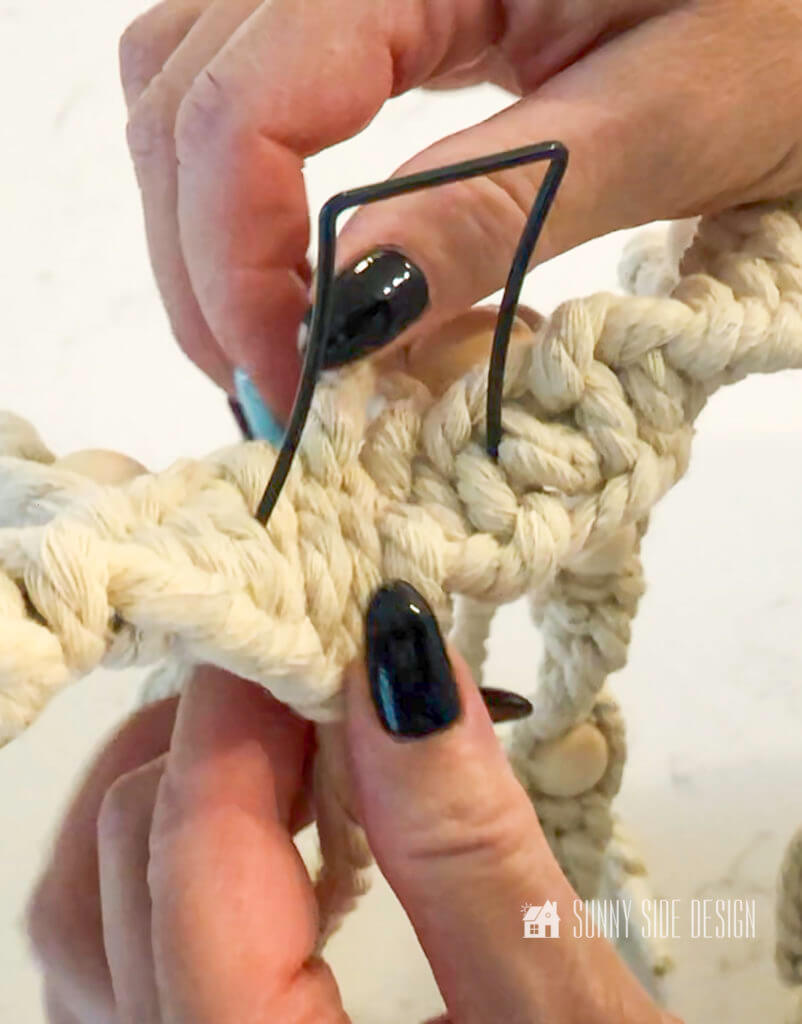
Continue working this pattern until you get near the cut edge of the wire.
At this time place the last bead on the short end of the wire.
Step 4: Secure Cut Wire
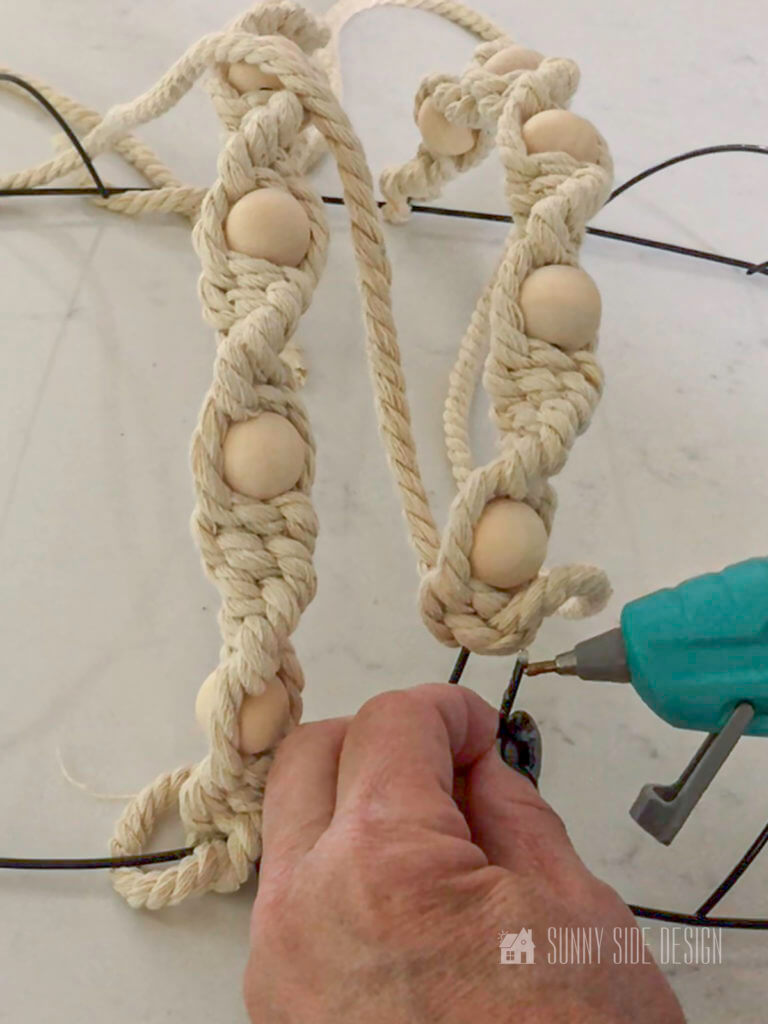
Next place a little hot glue on the end of the wire and secured them together.
Now, I realized that the glue would not hold it together.
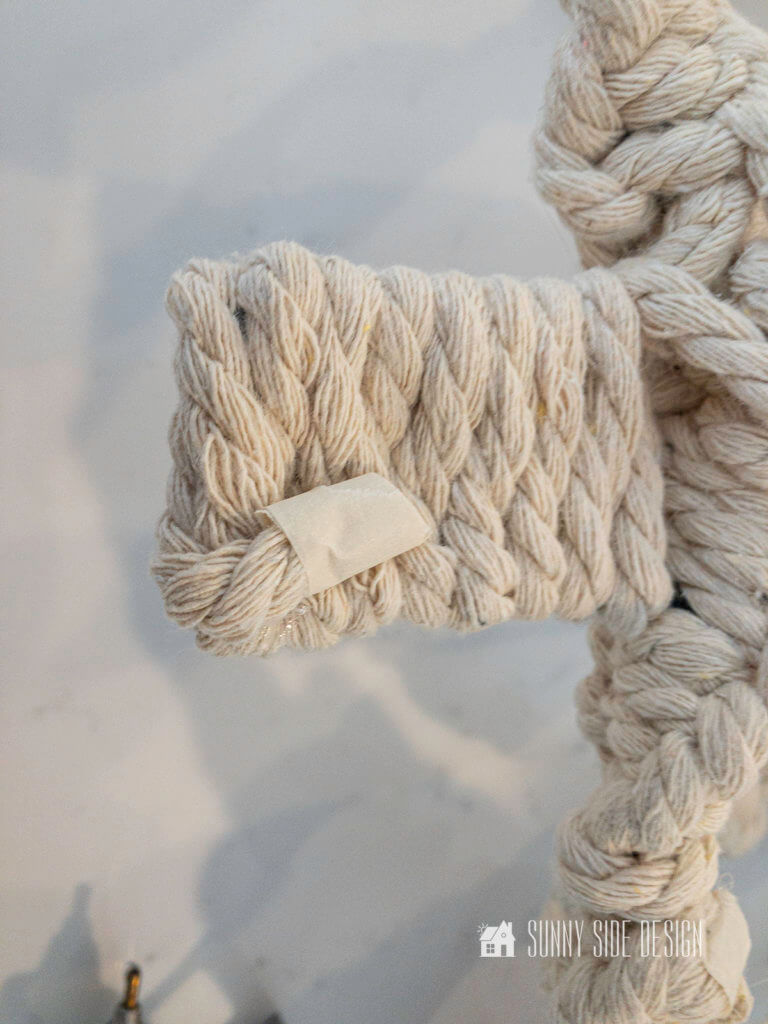
But it did secure it long enough for me to place tape over the seam.

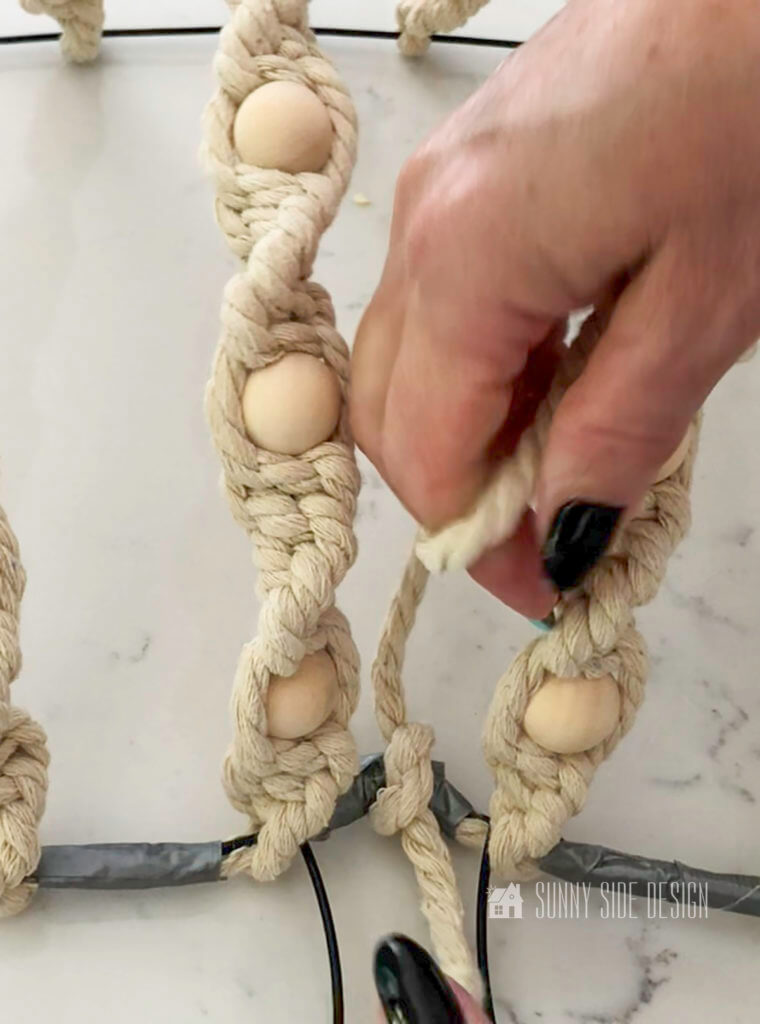
Then I took a small piece of duct tape and wrapped it around the cut area on the wire form.

Just as before, make a total of 5 half knots.
Covering up the taped seam.
Finally, push the last bead up to the last half knot and then work half knots to the end of the wire frame.
The final half knot will loop over the top of the frame.

And as I worked my pattern on the next wires, I decided to place the beads in the center of the pattern of the first 2 rows.
As it turned out, I was not going to have enough large beads.
So, I decided to change up the pattern a little bit on the rows with the smaller beads.
One more item to mention, to have the beads centered on the knots of the previous row, I had to adjust the number of knots I made.
I believe because of the arc of the wire on the outer edges and the smaller size of my beads, I had to adjust my knots to 6-7 between the beads.
Step 5: Securing the Macrame Cord Ends

Now that each of the ribs on the wire pumpkin wreath form are covered it’s time to secure and cut the cording.
First, I placed a bead of hot glue along the top of the wire wreath form.

In order to prevent it from getting too bulky at the top, I secured one cord to the right side and one to the left side.
Then I trimmed the cord.

Then I took a piece of duct tape and wrapped it around the 2 cut cords.
Continue to secure and tape each of the cut cords along the top of the wire wreath frame.
Step: 6 Cover Outer Edge of Wreath Form
In the same way as the wire ribs were covered, find the center of the cord and attach at the top of the form in the center of the stem area.

As before, form half knots around the outer edge of the wire wreath form.
The knots will cover all of the tape and it will look nice and neat.
Continue all the way around the outer edge of the wreath.
Let’s stay connected! Follow us on social media!
Step 7: The Stem
Finally to finish off this DIY Fall Macrame Wreath, I took one of the pieces of cord that was remaining and wrapped in a figure 8 pattern around the stem.

Then at the top I ran a bead of hot glue across and secured the cord in place.
And to finish it off, I trimmed the cord and wrapped it with tape and secured it down with a little hot glue to the back of the stem.
Then trim the remaining cord, tape and secure to the backside with tape.
Step 8: Embellish DIY Fall Macrame Wreath

While I think the finished Fall macrame wreath looks great just the way it is, I decided to add a few fall flowers to mine.

Now there are several options for embellishing from a beautiful fall ribbon, to fall colored leaves.
However, I loved the color of the mums I found.
First, I pulled a few of the flowers and leaves from the stems and attached the leaves directly to the flowers with hot glue.
Then I attached the flowers to the macrame wreath with hot glue.
Hang and Enjoy Your Fall Macrame Wreath


Personally, I think the orange Fall flowers on the macrame wreath really pop off my blue front door.

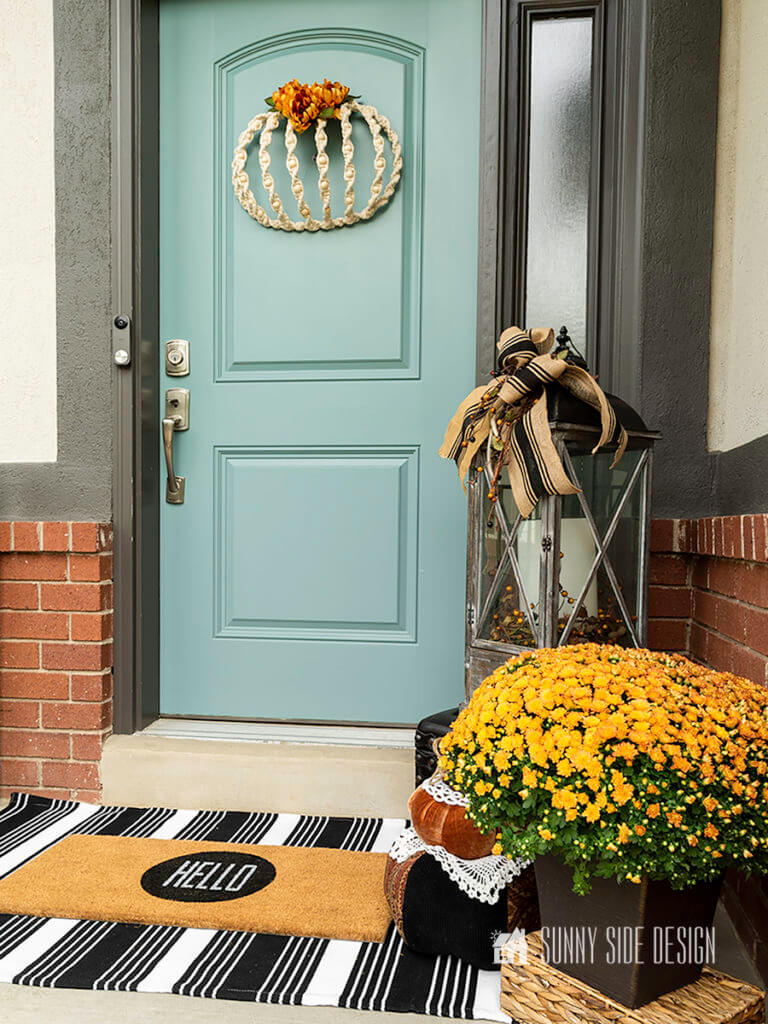
With the DIY Fall Macrame Wreath, my front porch now feels ready for the Fall season.
Definitely it’s perfect for greeting our visitors this Fall.
Shop Pumpkin Wreath Supplies

Shop Pumpkin Wreaths
More Fall Ideas for Your Home
- 5 Simple Pumpkin DIY Ideas That Look Hight-End
- Simple Fall Topiary
- Easy Vintage Lace Pumpkin Decor
- 10 Affordable Fall Decor Ideas that Don’t Look Cheap
- Make Your Home Cozy with Fall Decor
- Cheap and Easy Recycled Paper Fall Leaf Garland
- Fall Macramé Leaves
- The Best Pumpkin Craft Ideas
- Finger Knit Pumpkins
- Pumpkin DIY Ideas that Look High-End
We hope you found a little inspiration for your home this fall!
Is this a project you’d like to try?
How would you do it differently?
Please leave us your comment, we love to hear from you!
Thank you for spending a little time with us.
If you’re new here, WELCOME! We love having new readers and friends!
You can learn more about us here.
We love to hear from you!
Let’s stay connected! Join our community of doers and you won’t miss any inspiration for your home.
Please PIN and save for later, and share with your friends! Sharing helps grow our following!
Sharing is caring!

Thanks for stopping by Sunnyside Home. Empowering you to create a home you love.
Retailers We Love
- Anthropologie
- Birch Lane
- Crate & Barrel
- Joss and Main
- Lampsplus
- Mark & Graham
- One Kings Lane
- Pottery Barn
- Rejuvenation
- Serena & Lily
- Wayfair
- West Elm
- Williams Sonoma
- World Market
Be sure to follow us on Pinterest for even more home decor and DIY ideas.
To see what we are working on before it’s on our blog, follow us on Instagram.
You will also find our video tutorials on our YouTube channel.
- How to Fix Chipped Kitchen Cabinets with a Pen

- Easy 4th of July Door Decor You Can Make in Minutes
- 35 Easy Decorating Ideas for Summer to Welcome the Season
- Fourth of July Decorating Ideas You’ll Love This Summer