Does your home need a little update? This quick and easy DIY project for your home can be completed in 1 hour for less than $10!
Yes, it’s true! Try this project this weekend and update built ins, bookshelves or even a china hutch with this quick and clever decor idea.
Not only does it add character to a piece of furniture, but it’s also easy on the budget.
Can you guess what I used? It’s not wallpaper!
Bookshelves Before DIY Project for My Home

Lets take a look at my DIY built in bookshelves before my little update. They were fine, but I’d been dreaming about adding shiplap, pallet wood, or maybe wallpaper for quite some time.
However, I just couldn’t commit to just one design. What if I changed my mind and I didn’t like it?
Clearly, it would be difficult to undo. Not to mention that I change my mind quite often.
Keep scrolling, and I’ll share what I used that looks terrific, cost me less than $10 and is easily removable if, I were to change my mind.
And for more ideas to add value to your home take a look at 10 Sensational Home Improvement Ideas on a Budget.
Supplies Needed for this Home DIY Project
Clearly, there are many options and patterns for bulletin board paper. I happened to see the brick bulletin board paper at Michaels and knew it was what I was looking for. You will also find shiplap, pallet wood and wood grain designs for example. Look around your area and see what’s available. I’ve also seen many patterns of bulletin board paper at Hobby Lobby.
Supply List:
Are you enjoying this project? Please Pin It, save it for later and share it with a friend.
Sharing is caring!
Sunny Side Design is a participant in the Amazon Services LLC Associates Program, an affiliate advertising program designed to provide a means for sites to earn advertising fees by advertising and linking to Amazon.com. As an Amazon Associate, this blog earns from qualifying purchases with no additional cost to you. Click here to read our full disclosure policy.
Measure and Cut

First, you’ll need to measure the back of the bookshelves or cabinet you would like to cover.
Then, measure and cut paper to fit your area.
In my opinion, a craft knife would be the easiest way to cut each piece. However, my blade was dull and began to tear the paper.
Therefore, I just used scissors. I was too lazy to go to the store and buy a new blade.
If you’re new here, welcome! We’re so glad you’re here.
Let us introduce ourselves, we’re Michelle and Steph, a mom and daughter team who love to DIY and decorate our homes.
Not only are we passionate about making our homes warm, comfortable and unique, but it’s our mission to help you create that same feeling in your own home.
You’ll find ideas for repurposing, creating, decorating and making your home truly yours, while always mindful of a tight budget.
Undoubtedly we love finding ways to make your home look high-end on a small budget.
Plus you’ll also find a recipe or two as we share our family favorites with you.
We’d love it if you’d join our community of doers so you won’t miss any inspiration for your home.
We love new friends.

[mailerlite_form form_id=2]
Dry Fit

Next, you’ll want to dry fit each piece.
Learn from my mistake, my first piece went up perfectly. However, my second piece was not quite cut perfectly. I positioned it and I could see that it needed a little adjusting. Well in the process I tore it a little bit and needed to cut a new piece.
Add Painters Tape

I found painters tape the perfect solution for adhering my bulletin board paper.
Not only did it adhere well, but I know down the road when I want to remove it, it will not damage the painted surface.
Also, I tried both FrogTape and a Blue Painters Tape that I had on hand. I found the FrogTape to stick better.
Where I had used the Blue tape it loosened in a couple of areas and I had to replace the tape with the green FrogTape.
I believe it is easier to place the tape on the paper, than to place the tape to the bookshelf and then add the paper.
In fact, I tried both ways and found it easier to apply the tape directly to the paper.
Position Paper

Next, position the paper along the top edge of the bookshelf and begin pressing from the center towards the sides.

Then, continue to smooth the paper from the center downward adhering the the sides and bottom edge of the paper to the surface.
Let’s stay connected! Follow us on social media!
Before and After View

Take a look at my progress. The back of my shelves on the left side are now completely covered with the paper. It makes quite a difference. I’m loving the change already!

Now take a look at the right side of my bookshelves with the way it looked before this little DIY home project.
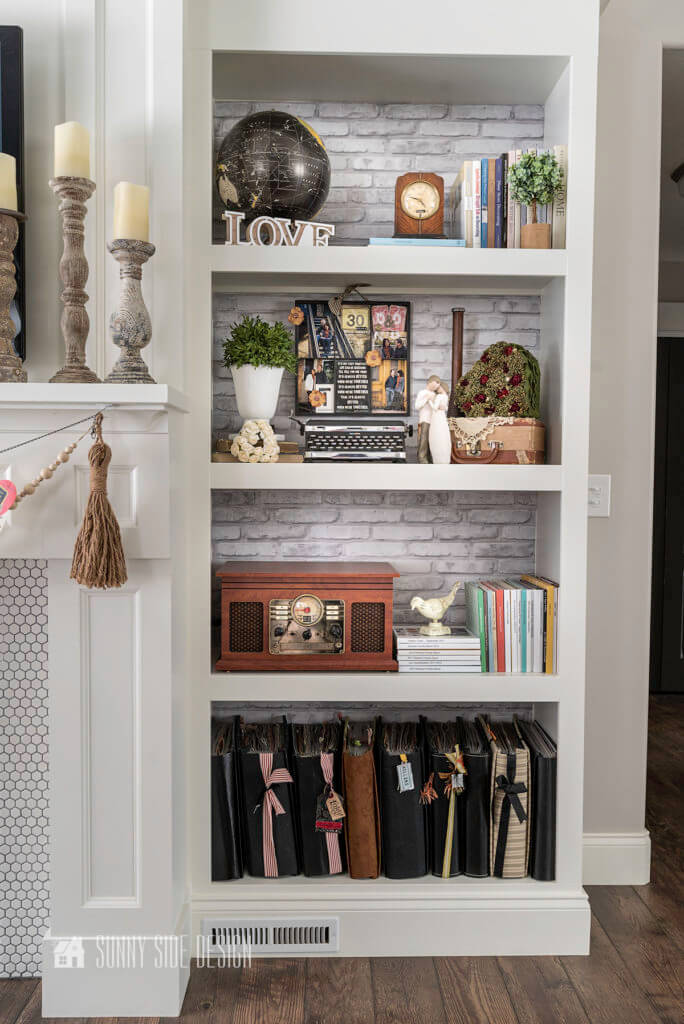
Then, take a look at what it looks like now. I now feel like the bookshelves are much more interesting and have a depth to them that I’m loving!
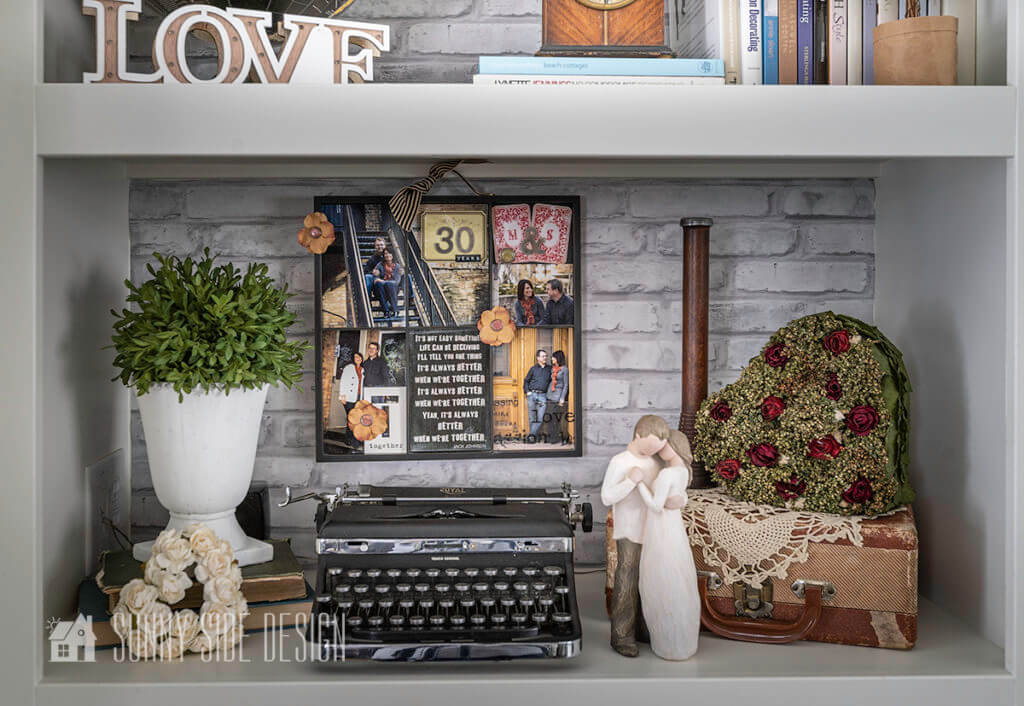
So Realistic, See Who You Can Fool

I have to share I little story with you. The afternoon I did this little DIY project for my home I received a FaceTime call from my son. I was sitting in the chair in front of the built ins.
Right away he noticed and wanted to know if I had tiled the back of the bookshelves. He and his wife had been looking at a tile just like this paper for the backsplash in the their kitchen. They couldn’t believe it was just paper.
Now this solution to add a little depth and interest to my bookshelves will not work as a backsplash. However, think of the possibilities where it could add a bit of drama to your home.
My brain has already been working, deciding where I may do this again.

Ready to Try This DIY Project in Your Home?
Please tell me, is this little DIY project for your home something you’d like to try? Clearly, it’s not expensive and can add a lot of interest to your home.
Please share with us where you would like to try it. We would love to hear your thoughts on this little DIY project. I love the change it made I my home.
We hope you found some inspiration for your home today.
If you’re new here, WELCOME! We love having new readers and friends!
You can learn more about us here.
Let’s stay connected! Join our DIY community of doers and you won’t miss the weekly updates and more inspiration for you always on a budget.
Sharing is caring!

Thanks for stopping by Sunny Side Design. Empowering you to create a home you love!
DISCLAIMER
This blog’s content is for entertainment purposes only and is not professional advice. By reading this blog and attempting to recreate a project, you assume all responsibility for any injuries or damages incurred. Read my full disclaimer here.
PHOTO USE AND CONTENT SHARING
All of the photographs you see here are the property of Sunny Side Design unless otherwise credited.
We love for others to share our work, so please feel free to use one photo with a link back to our website.
Pinning and sharing is always encouraged!
Please do not reproduce other Sunny Side Design content without permission.
Retailers We Love
- Anthropologie
- Birch Lane
- Crate & Barrel
- Joss and Main
- Lampsplus
- Mark & Graham
- One Kings Lane
- Pottery Barn
- Rejuvenation
- Serena & Lily
- Wayfair
- West Elm
- Williams Sonoma
- World Market
Be sure to follow us on Pinterest for even more home decor and DIY ideas.
To see what we are working on before it’s on our blog, follow us on Instagram.
You will also find our video tutorials on our YouTube channel.
- How to Fix Chipped Kitchen Cabinets with a Pen

- Easy 4th of July Door Decor You Can Make in Minutes
- 35 Easy Decorating Ideas for Summer to Welcome the Season
- Fourth of July Decorating Ideas You’ll Love This Summer


