Get ready to turn up the charm in your space with a DIY faux mantle beam.
Today we’re on a DIY journey that’s all about turning simple pine boards into your dream wood mantel!
In this blog post, we’re diving into the wonderful world of faux mantel beams – your ticket to adding rustic charm to any space.
Okay, I’ve been dreaming of a fireplace with a chunky beam mantle for 5 years and it feels so good to get this checked off my to do list.
Don’t you feel a fireplace just make a room feel cozy?
Not to mention that it also adds charm and architectural interest while creating a focal point in any room!
Have you ever wondered how to make a faux mantel beam, or how to make a floating mantel, or install one?
If you’re joining us from last week’s post, Part 1: How To Install a Fireplace Insert, welcome back!
We’re excited to share part 2: How To Make and Install a Faux Mantel Beam.
And be sure to join us for part 3 Restoring Vintage Corbels, Part 4 Building a Mantel and Surround and part 5 How to Install a Brick Veneer, as we complete this fireplace.
So, roll up your sleeves and let’s craft some character into your home.
Disclosure: This post contains affiliate links or referral links for your convenience. It is a way for this site to earn advertising commissions by advertising or linking to specific products and/or services. Click here to read my full disclosure policy.
Materials and Tools to Build a Faux Mantle Beam
Before we dive in to this project, here is a list of the supplies that you’ll need.
- Lumber
- Measuring Tape
- Wood Glue
- Table Saw
- Brad Nail Gun
- (2″) Brads
- Plastic Wood All Purpose Wood Filler
- Putty Knife
- Palm Sander
- Sandpaper
- Stain
- Paint Brush
- Sealer
- Level
- Cordless Drill
Before you begin, decide what type of wood you’d like to use and source the materials.
For the top and bottom boards of the faux wood beam, I went with a pine whitewood board. (1″ x 12″ x 8′ about $19 each.)
These have a knotty texture and add a more rustic look. I don’t mind having a knot in the wood here and there, so these were great for the top and bottom surfaces and were a little cheaper.
On the front of the faux wood beam mantel, I went with a select pine whitewood board. (1″ x 10″ x 8″, about $25.)
The select boards are a premium solid pine with smooth surfaces on all edges. I chose this board for the front edge because I didn’t want the focal point of the mantel to have a large knot right at eye level.

When choosing your boards it’s important to look for any warping.
Try to get the boards as straight as you can.
An easy way look for warping is to hold the board on end and look down the length of the board.
This board is a little warped, but it was one of the better choices.
And the faux mantel beam still turned out beautifully!
Enjoying this post?! Please Pin it, save it for later and share it with a friend.
Sharing is caring!
Click on the video below to see step by step how this entire faux mantel beam is built.
Cut All Boards Size
Once you get your lumber home, the first thing you’ll need to do is measure each board and cut to length.
The dimensions of our faux mantel beam is 10.75″ deep x 7″ tall x 6.5′ long.
Miter Cuts Create a Seamless Joint
Adjust the blade on the table saw to a 45° angle to cut the mitered edges.

Making a faux mantel beam with a mitered edge sets it apart from other do it yourself versions I’ve seen.
The mitered edges will allow you to assemble your faux wood beam with seamless joints!
After all, we’re going for the look of a real beam, so we don’t want to see any seams where we’ve assembled it.
Being a visual learner, I hope this labeled picture above is helpful.
You’ll notice that we have the top and bottom boards stacked on top of each other.
Using a pencil, draw an angled line in the direction of the mitered cut.
Notice that the front edges of the beam will be mitered, while the back edges will remain straight.
The straight edges will be flush with the wall upon installation.
If you’re new here, welcome! We’re so glad you’re here.
Let us introduce ourselves, we’re Michelle and Steph, a mom and daughter team who love to DIY and decorate our homes.
Not only are we passionate about making our homes warm, comfortable and unique, but it’s our mission to help you create that same feeling in your own home.
You’ll find ideas for repurposing, creating, decorating and making your home truly yours, while always mindful of a tight budget.
Undoubtedly we love finding ways to make your home look high-end on a small budget.
Plus you’ll also find a recipe or two as we share our family favorites with you.
We’d love it if you’d join our community of doers so you won’t miss any inspiration for your home.
We love new friends.

[mailerlite_form form_id=2]

After each of the boards have been cut to size (to both the correct width and length), miter all edges where the faux wood beam will join together.
See image below for a better visual of which edges will be mitered and which will have a straight edge.
Basically any edge that will be on the back of the faux wood beam will have a straight edge so it will be flush with the wall.

Referring to the picture above, the board on the left will be lifted up toward the right to form a 90° angle where each of the mitered edges will meet.
This will be the top of the faux wood beam mantel.
Repeating this with the board on the right, it will be lifted up toward the left to form a 90° angle where each of the mitered edges meet.
This will be the bottom of the faux wood beam mantel.
The middle board will be the front surface of the mantel.
Essentially we’re building a hollow box.

PRO TIP: Be sure to label the inside surface of your boards.
This will make it so much easier when assembling the faux wood beam!
We labeled which edge would be flush to the wall as well as which board was the top and bottom, and also marked the inside area of the beam.

Each of the end pieces of the faux wood beam have been cut to 10.75″ x 7″.
Then miter the top, bottom and front edge of the end pieces.
Leave the back edge straight so it will be flush with the wall.
PRO TIP: Securing the fence into place will help ensure you get nice square cuts.
And it will save you time from stopping to measure each time you cut.
Measure once, secure the fence and make all mitered cuts.
Let’s stay connected! Follow us on social media!
Assemble Faux Mantel Beam
To assemble the faux mantle beam, use wood glue and a brad nailer with 2″ brads.

This step is especially helpful with a couple extra sets of hands.
After applying glue all along the long mitered edge, two of us held it into place while the third secured it into place with the brad nailer.
Be sure to wipe away any excess glue from the seams with a damp washcloth before moving onto the next board.
Complete this step to secure all of the mitered edges together to create the seamless joint.
First secure the front edge of the faux wood beam to the bottom piece.
Then secure the top piece to the front edge.
Followed by each of the two end pieces.
Once all edges have been secured together, you’ll have a box with 5 sides.
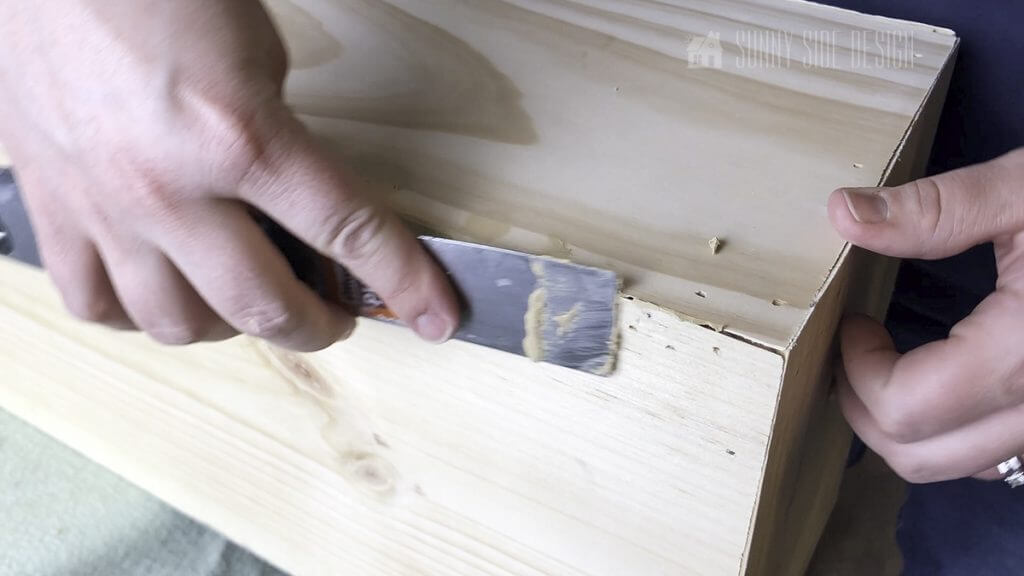
Apply Wood Filler & Sand Joints
Once the box is assembled and the wood glue is dry, apply stainable wood filler to every joint/seam, and nail holes.
This particular filler is a great option if you’re intending to stain your faux wood beam.
It acts and looks like real wood, and will take on the color of the stain.

If you’ll be painting your faux wood beam, you could also use Dry Dex Dry Time Indicator Spackling.
This will go on pink and dry to a white finish.
It will accept paint well, but won’t take the color of a stain.
Follow the directions per the wood filler you’re using.
The plastic wood filler is a little different to apply than the dry dex spackling.
Usually when applyling spackling, less is more.
You’ll apply just what you need and scrape off any excess which will make the next step of sanding a lot easier.
To apply the plastic wood filler, you’ll need to apply it a bit thicker.
The directions said to apply liberally, and while attempting to scrape off the excess, it actually pulled everything right off!
More is better with this type of wood filler.
A small putty knife works well to apply the wood filler.
At some points, my finger worked better to push the filler into the joint!
You may need to play around a little to see which method works best for you.
If you have questions about different types of wood filler, spackle and caulk check out this post.
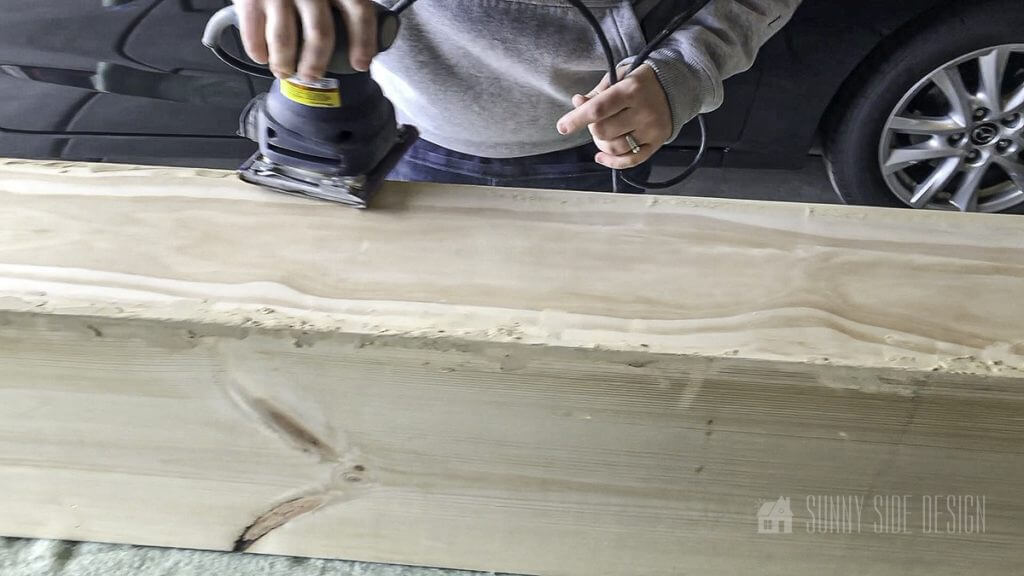
Once the wood filler has completely dried, use a sander to remove the excess filler.
Then use a medium grit sandpaper to remove most of the filler since it was a bit thicker.
And finally use a fine grit sandpaper for the final sanding.
This will give you a nice smooth finish on the faux wood beam.
Apply Stain & Poly
After the beam has is sanded, wipe away the dust with a wet washcloth and allow the wood to dry.
Apply a stain of your choice.
For my faux wood beam mantel to look natural and have a little whitewashed and weathered finish, the original pine color was a little too light for me.
So, I played around with a few different stain colors on scrap lumber.
Finally I ended up using my own stain recipe.
First, mix 2 parts of Minwax Golden Oak with 1 part Minwax Classic Gray.
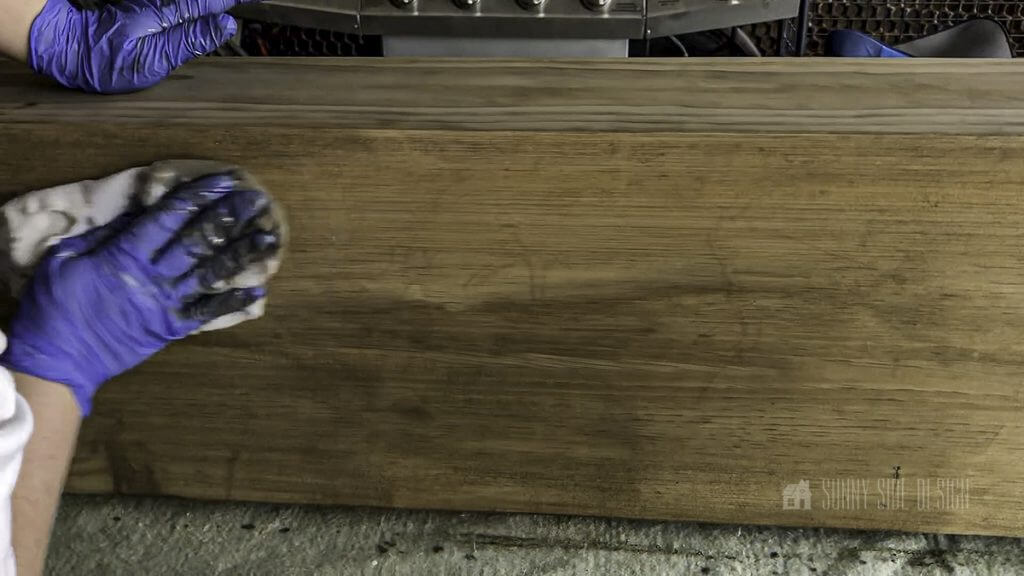
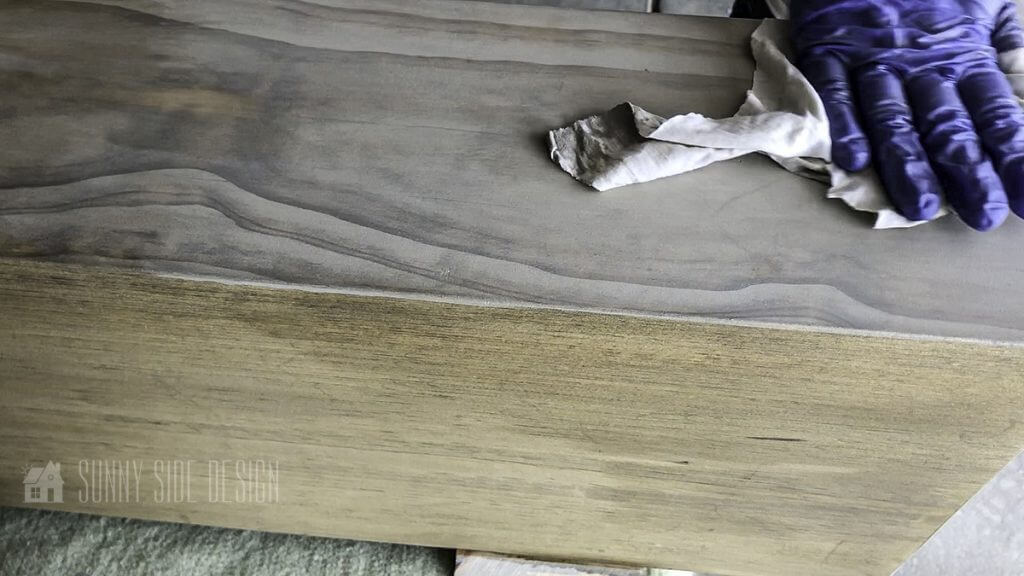
Then I applied this mixture on the faux wood beam with a cloth.
I immediately wiped off any wet stain because I didn’t want this to get too dark.

Finally, to achieve the desired weathered look, I added a layer of Varathane Sunbleached over the beam once the first mixture was dry.
Applying the stain can be done in a couple different ways.
You can use a paint brush to apply in long even strokes, going with the grain of the wood.
Or you can use an old cotton rag to simply wipe it on.
The brush will give you a finish that is a little more neat.
Using the cloth as I did with the first layer of stain can leave some areas of blotching or other imperfections.
As I was going for a more weathered and worn look, I didn’t mind having these imperfections from using a rag.
Work on one surface area at a time.
Also it’s best to play around on a scrap piece of wood first to test the coloring.
The longer you allow the stain to penetrate the wood, the more color will be absorbed.
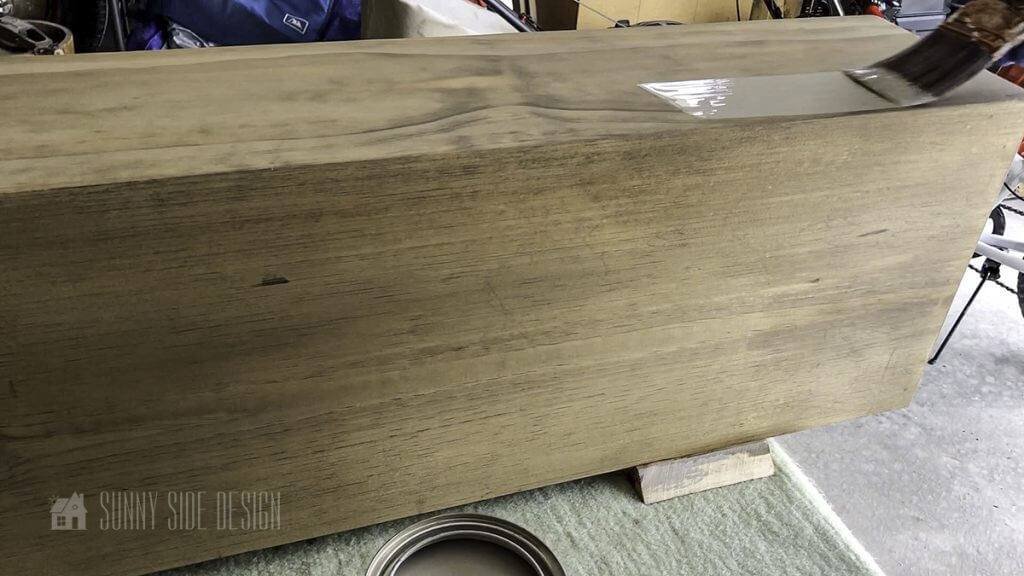
After allowing the first layer of stain to dry to touch, I applied the Varathane Sunbleached stain with a good quality paint brush.
Again, I let this layer of stain sit on just for a minute or two and wiped away the excess.
This brought out a little bit of the first layer of stain coloring and the second layer accentuated the grain of the wood.

Follow the directions for dry time per the specific stain you’re using.
Once the faux wood beam has completely dried, a topcoat can be applied.
I used the Varathane Triple Thick Polyurethane with a matte finish.
The first time I used this product on the Hidden TV Cabinet I discovered I LOVED it!
I’d never used this sealer before but it has a couple of features I really like!
First, application is really easy.
Simply apply with a soft bristle paint brush.
The softer the bristles, the less chance of having visible brush marks.
Second, it’s made with an advanced self-leveling formula, and 1 coat equals 3 coats to other sealers!
So you’re getting a lot of protection out of 1 layer which means less product used, and less work!
And third, it has a clear matte finish.
Usually I use a wipe on poly with a satin finish which adds a little sheen to the finished piece … but having a clear matte finish on this faux wood beam mantle makes it look even more like a real thick wood beam!
It’s also a water based sealer so clean up is so easy!

For added protection apply 2 coats of sealer, allowing it to completely dry before reapplying.
When applying be sure to use long even brush strokes following the grain of the wood.
This gave me peace of mind that there wouldn’t be any small visible brush strokes.
Allow topcoat to completely dry before installation.
Install Faux Mantel Beam
To install the faux wood beam mantel we first built a cleat which will be secured to the wall.
Using scraps of 2 x 4’s we cut a board to length so it would fit just inside of the faux wood beam box we made.

Then three shorter are secured to the cleat for support.
Once the height placement of the mantel has been determined, secure the cleat to studs using long screws
Use a level to make sure the cleat is level.

After the cleat has been secured to the wall, the faux wood beam mantel will slide onto the cleat.
The mantle will then be secured to the cleat by drilling long screws down into the cleat from the top of the mantel.
You’ll want to drill the screws into the cleat as close to the back of the mantel, by the wall, as you can.
If possible, secure the screws deep enough into the mantel that they are below the mantel surface.
Then you can use a little wood filler to cover up the screws.
Touch up those spots with a little stain and sealer, and you’ll have a beautiful floating mantel!

Join us next Saturday to see how we built some pretty amazing corbels!
Which I might add are completely for aesthetics since the mantel is completely secured and supported without the corbels.
Quick links to more posts in this series:
- How to Install a Fireplace Insert
- How to Restore Vintage Corbels
- Fireplace Mantel and Surround a Beginners Guide
- How to Install Brick Veneer
Shop This Project
Disclosure: This post contains affiliate links or referral links for your convenience. It is a way for this site to earn advertising commissions by advertising or linking to specific products and/or services. Click here to read my full disclosure policy.
As we wrap up our faux mantel beam adventure, can you see yourself crafting your own faux mantel beam?
Is this a project you’d like to try?
Would you have built or installed it differently?
Please drop us a comment, we love hearing from you.
Thanks for spending some time with us, we hope you found a little inspiration here today!
If you’re new here, WELCOME! We love having new readers and friends!
You can learn more about us here.
Let’s stay connected! Join our DIY community of doers so you won’t miss any of our weekly updates.
Please PIN and save for later, and share with your friends! Sharing helps grow our following!
Sharing is caring!

Thanks for stopping by Sunnyside Home. Empowering you to create a home you love.
Retailers We Love
- Anthropologie
- Birch Lane
- Crate & Barrel
- Joss and Main
- Lampsplus
- Mark & Graham
- One Kings Lane
- Pottery Barn
- Rejuvenation
- Serena & Lily
- Wayfair
- West Elm
- Williams Sonoma
- World Market
Be sure to follow us on Pinterest for even more home decor and DIY ideas.
To see what we are working on before it’s on our blog, follow us on Instagram.
You will also find our video tutorials on our YouTube channel.
- Creating a Cozy Outdoor Living Room with Thrifted Finds

- The Best ‘Berry in Love’ Bridal Shower Ideas
- Paint an Old World Texture Finish on a Vase
- Easy Strawberry Chicken Salad with Lime Maple Balsamic Vinaigrette