You’ve just spent hours working on your latest project and walk away feeling elated because you’ve just painted the perfect masterpiece, free from blemishes! Only to notice drips and runs after the project has dried that weren’t there before. We’ve all been there right?! This is so frustrating to say the least! Don’t panic, your project isn’t ruined! Keep reading to see our little secret on How To Fix Paint Drips!
Sunny Side Design is a participant in the Amazon Services LLC Associates Program, an affiliate advertising program designed to provide a means for sites to earn advertising fees by advertising and linking to Amazon.com. As an Amazon Associate, this blog earns from qualifying purchases with no additional cost to you. Click here to read our full disclosure policy.
The Problem | Paint Drips
Paint drips are a common problem when painting cabinets, furniture, moldings, or walls. But what causes this problem?
The biggest culprit is loading your brush with too much paint while trying to “stretch” the paint as far as it will go.
Before you know it, you’ve moved on with your painting and come back to notice a drip has formed. This happens because the excess paint is pulled downward by gravity.
Before you get too frustrated, don’t panic, we’ll give you tips how to fix this problem while still wet and even after the paint has dried!
Are you enjoying this project? Please Pin It, save it for later and share it with a friend.
Sharing is caring!
Fixing Paint Drips While Still Wet
The easiest and quickest way to fix a paint drip is to catch it while it’s still wet. Simply take your brush and stroke across the drip area in the same direction you previously painted.
If you try to knock down the paint drip by brushing in the opposite direction, you’ll end up creating a bigger mess and create cross strokes! Then you’ll have a larger area to fix.
It’s best to try a few brush strokes at a time and see if it’s making a difference. If the drips smooth out simply wait for your project to dry.
If this doesn’t seem to be helping, or the paint feels tacky, then the paint is likely already too dry to manipulate. At this point it’s best to wait for it to completely dry before fixing the problem.
Fixing the Paint Drips When Dry
The other option to fixing paint drips is to allow the paint to completely dry! And by completely dry, we mean ALL THE WAY DRY.
Trying to fix the problem too soon will only cause more area that needs fixing.
If the paint is even a little wet it can peel or bubble up when scraping or sanding.
If you’re new here, welcome! We’re so glad you’re here.
Let us introduce ourselves, we’re Michelle and Steph, a mom and daughter team who love to DIY and decorate our homes.
Not only are we passionate about making our homes warm, comfortable and unique, but it’s our mission to help you create that same feeling in your own home.
You’ll find ideas for repurposing, creating, decorating and making your home truly yours, while always mindful of a tight budget.
Undoubtedly we love finding ways to make your home look high-end on a small budget.
Plus you’ll also find a recipe or two as we share our family favorites with you.
We’d love it if you’d join our community of doers so you won’t miss any inspiration for your home.
We love new friends.

[mailerlite_form form_id=2]
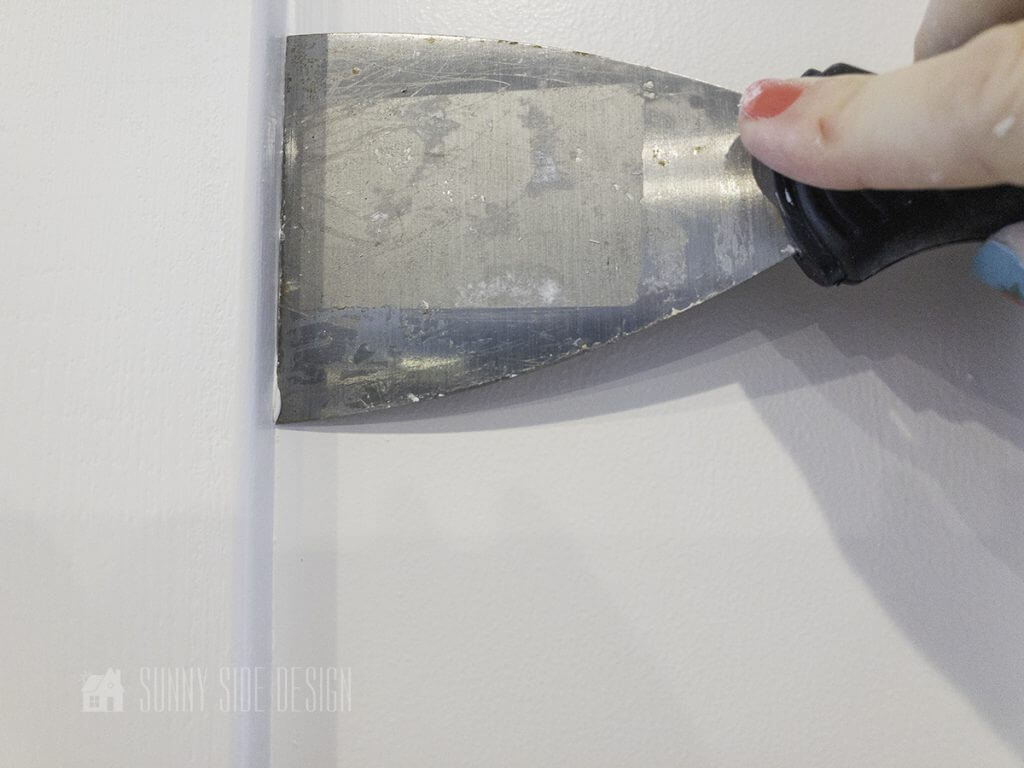
How To Fix A Dried Paint Drip
The first step to fix a dried paint drip is to take a utility knife, razor blade or 5-in-1 painters tool, and start scraping down the bumped up drip surface.
Try to limit the scraping to the paint dripped area only.

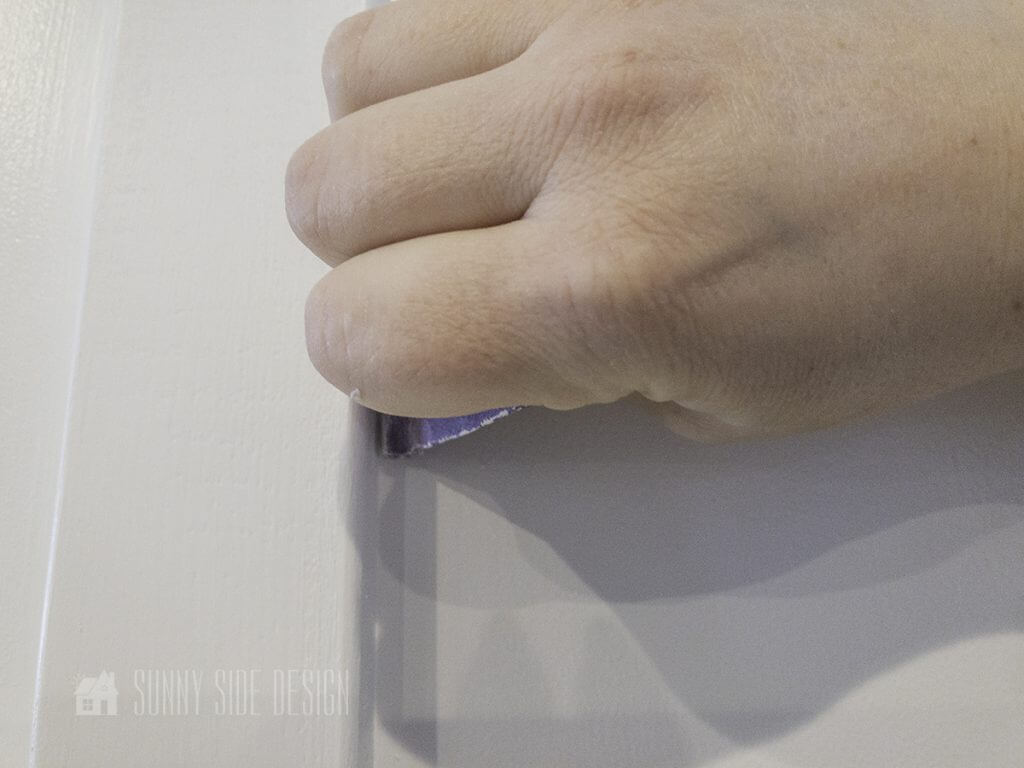
Once the raised paint drip has been removed, use a 220 fine grit sandpaper to lightly smooth out the surface.
Be sure to sand in the same direction as it was painted (as well as trying to only sand the paint drip area), again to avoid causing a bigger area to fix.
Let’s stay connected! Follow us on social media!
After the paint drip area has been smoothed out, you’re ready to add on another coat or two of paint.
Once the paint has been applied and dried this area will blend in nicely with the surrounding area.
We hope you’ll give these tips a try when fixing paint drips on your next project! Watch for MORE painting tips to come!
We hope you found some inspiration for your home today.
Please share your tips and ideas with us.
We love hearing from you!
If you’re new here, WELCOME! We love having new readers and friends!
You can learn more about us here.
Let’s stay connected! Join our DIY community of doers and you won’t miss the weekly updates and more inspiration for you always on a budget.
Sharing is caring!

Thanks for stopping by Sunny Side Design. Empowering you to create a home you love!
DISCLAIMER
This blog’s content is for entertainment purposes only and is not professional advice. By reading this blog and attempting to recreate a project, you assume all responsibility for any injuries or damages incurred. Read my full disclaimer here.
PHOTO USE AND CONTENT SHARING
All of the photographs you see here are the property of Sunny Side Design unless otherwise credited.
We love for others to share our work, so please feel free to use one photo with a link back to our website.
Pinning and sharing is always encouraged!
Please do not reproduce other Sunny Side Design content without permission.
Retailers We Love
- Anthropologie
- Birch Lane
- Crate & Barrel
- Joss and Main
- Lampsplus
- Mark & Graham
- One Kings Lane
- Pottery Barn
- Rejuvenation
- Serena & Lily
- Wayfair
- West Elm
- Williams Sonoma
- World Market
Be sure to follow us on Pinterest for even more home decor and DIY ideas.
To see what we are working on before it’s on our blog, follow us on Instagram.
You will also find our video tutorials on our YouTube channel.
- Paint an Old World Texture Finish on a Vase

- Easy Strawberry Chicken Salad with Lime Maple Balsamic Vinaigrette
- How to Fix Chipped Kitchen Cabinets with a Pen
- Easy 4th of July Door Decor You Can Make in Minutes