Are you looking for your next DIY project? Maybe you would like to create some built-in storage? Looking at building your own custom built-ins may seem like it’s just too hard, but it’s not. Just follow our steps and you too can have a custom built-in mudroom cabinet at a fraction of the cost of hiring a professional.
Sunny Side Design is a participant in the Amazon Services LLC Associates Program, an affiliate advertising program designed to provide a means for sites to earn advertising fees by advertising and linking to Amazon.com. As an Amazon Associate, this blog earns from qualifying purchases with no additional cost to you. Click here to read our full disclosure policy.
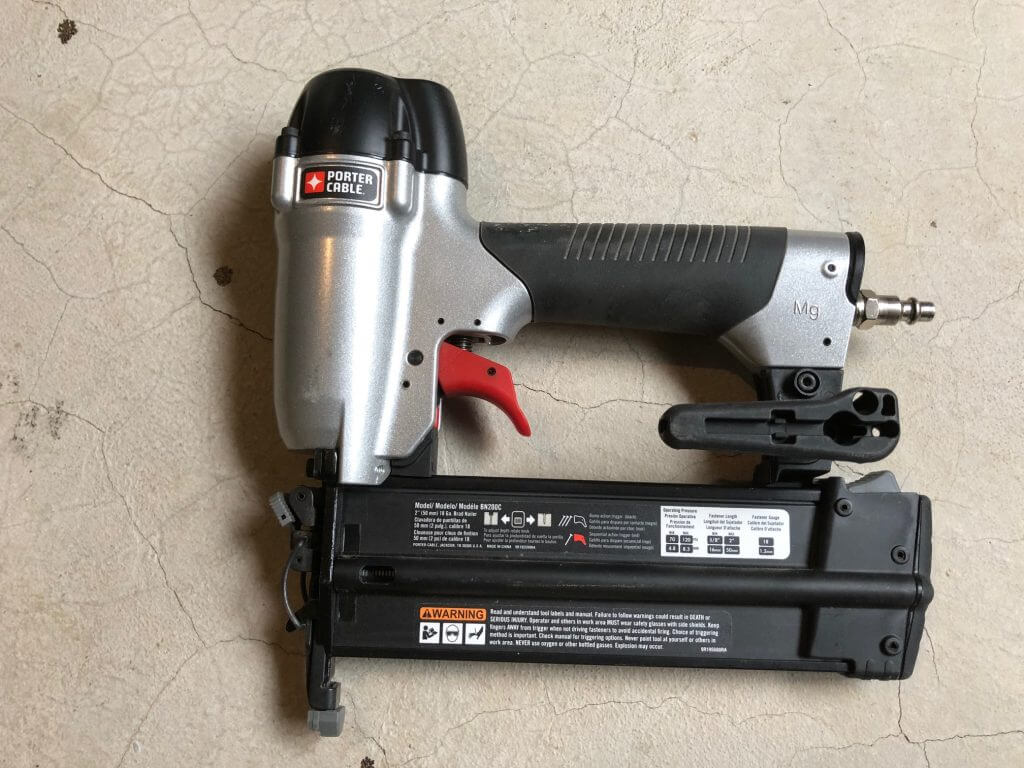

You will need a few wood working tools to complete this project. Here are the tools we used:
1- Router with a 3/4” Dado router bit
2- Circular saw or table saw
4- Jigsaw
3- Pneumatic finish nail gun
Supplies we used.
MDF 4’ X 8’ wood panels (we had them cut to the width we wanted at Home Depot) This saves a lot of time trying to cut this on the table saw at home.
1/2” X 1 1/2” common primed MDF board
1/2” X 2 1/2” common primed MDF board
3/4” X 11 1/4” primed MDF board
1” X 5 1/2” pine boards
Oak 1” X 2” oak board
Let get started! We mapped out how to cut our 4’ X 8’ sheets of MDF wood before heading to Home Depot. We had them cut the sheets of wood into 24” width pieces for the base unit and 13 3/4” width pieces for all of the upper pieces. Then we cut them to length for each piece at home with the table saw.
We chose MDF wood sheets for this project because it paints up great and when using a router you get better results, plywood tends to chip.

This project is made into 4 separate units that will be nailed together as it is assembled in place.

Let’s begin with the base unit. Cut the 24” wide MDF wood as follows:
58 3/4” X 24”
57 1/4” X 24”
57 1/4” X 4”
Cut 3 pieces to 13 3/4”
Cut 2 pieces to 17 3/4”


We made a jig out of scrap wood to position the router. We used a framing square to make sure the jig was square. (Notice the dado grove in the jig that will line up where the dado will be cut.)

Router 3/8” deep with a 3/4” Dado router bit. On the 58 3/4” and 57 1/4” pieces. Refer to the diagram for placement of dado cut.
Are you enjoying this project? Please Pin It, save it for later and share it with a friend.
Sharing is caring!

Sand the edges of the three 13 3/4” pieces, this will make it easier to insert them into the dado.

Once all of the dados have been made it will be time to assemble the base unit.

Mark with a pencil the center of the dado on the other side of the wood. This is the line for brad placement.


Spread wood glue in the dado, place 13 3/4” piece in the dado, tap with a rubber malletif necessary to get into position.


Place 3 brads along the pencil line, securing the piece in place, repeat for each section. Secure the 2 side pieces with glue and brads, as well as the 4” front base piece. (refer to the base diagram)
Now that one of the sections is finished, take a breather and admire your masterpiece! It will be a breeze to complete the other sections. The same methods are used just with different dimension.

For the coat hook section, cut the boards that are 13 3/4” wide as follows:
Cut 1 57 1/4” X 13 3/4”
Cut 2 44 1/8” X 13 3/4”
Cut 3 43 3/4” X 13 3/4”
Cut 2 5 1/2” X 57 1/4” pine boards
Cut 8 5 1/2” X 11” pine boards
Dado the 57 1/4” piece, the same way that the base unit was done, see diagram for placement.
If you’re new here, welcome! We’re so glad you’re here.
Let us introduce ourselves, we’re Michelle and Steph, a mom and daughter team who love to DIY and decorate our homes.
Not only are we passionate about making our homes warm, comfortable and unique, but it’s our mission to help you create that same feeling in your own home.
You’ll find ideas for repurposing, creating, decorating and making your home truly yours, while always mindful of a tight budget.
Undoubtedly we love finding ways to make your home look high-end on a small budget.
Plus you’ll also find a recipe or two as we share our family favorites with you.
We’d love it if you’d join our community of doers so you won’t miss any inspiration for your home.
We love new friends.

[mailerlite_form form_id=2]

Cut 2 5 1/2” pine boards to 57 1/4”. Using a jigsaw cut 2 notches in the 43 3/4” boards (1” X 5 1/2”) at the top and 13 1/2” from the top. These notches are where the pine board will be mounted (coat hooks will be mounted here.) This will also add stability to this piece. (Note that the back of this storage piece is just the wall that it is mounted to.)
Apply glue in the dado, place the 43 3/4” pieces in the dado, nail into place.
Add the side pieces (44 1/8”) glue and nail into position. Also nail into the 2. 1” X 5 1/2” boards. Nail into position the 11” X 5 1/2” boards at the top of each cubby section. See the diagram for placement.

Now that the 2nd section is completed it’s time to move on to the upper cubby section. (This is 2 separate pieces with 4 cubbies each.) Cut the boards that are 13 3/4” wide as follows:
Cut 4 58 3/4” X 13 3/4”
Cut 6 14” X 13 3/4”
Cut 4. 13 1/4” X 13 3/4”
Dado the 58 3/4” pieces, the same way that the base was done, see diagram for placement.
Apply glue in the dados, insert 14” boards, nail into place as before.
Apple glue to the side pieces, nail into place as before.
These top cubbies are 2 separate pieces.


The seat is made from a piece of oak plywood cut to 24” X 60 1/2”, a piece of 1” X 2” oak trim is glued and nailed around the edge. We applied a dark wax on it before we assembled the entire piece.
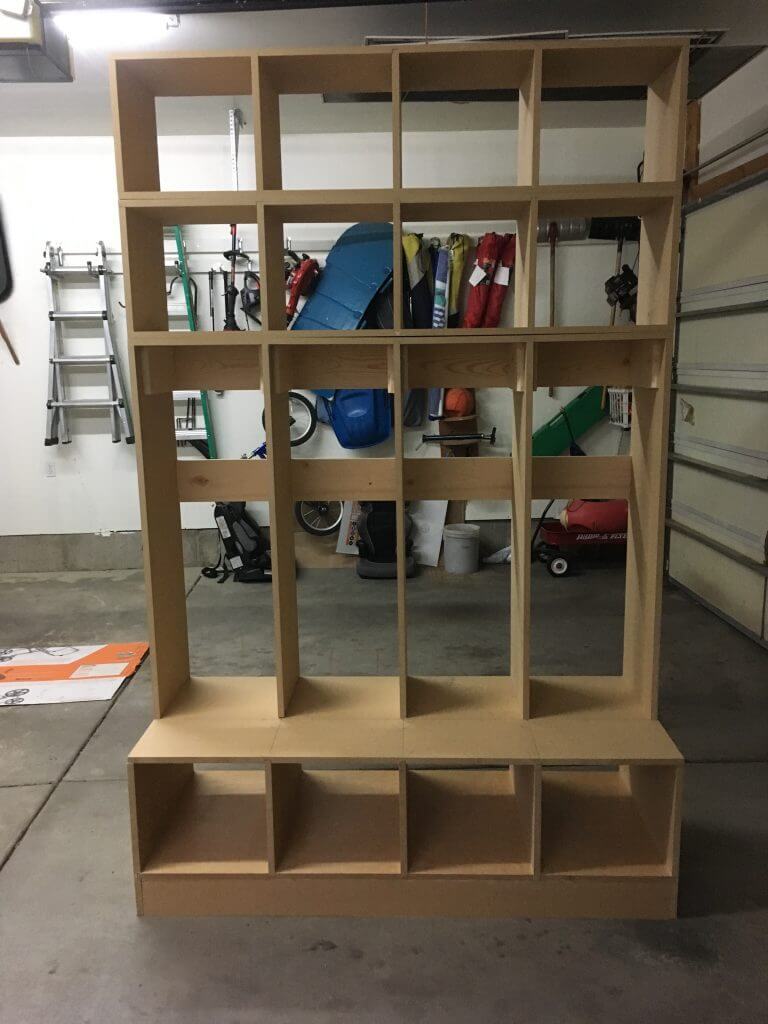
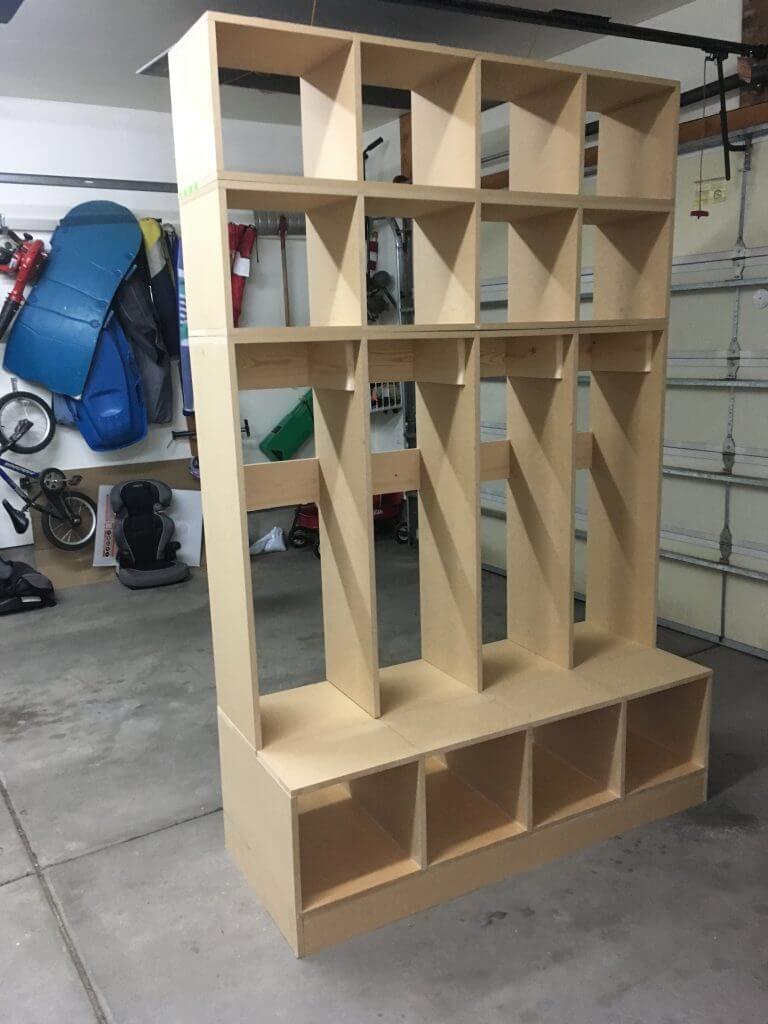
Take a look at all 4 sections stacked together. Now we are ready to install this masterpiece!

Next the oak seat is mounted to the bottom of the coat rack section with brads. Then that section is placed on top of the base and secured with a few brads from inside the base cubby up into the oak plywood.
Finally the upper cubbies are added and once again nailed together to the coat hook section and then the final cubby is mounted with brads to the other upper cubby section. Then once again, we used angle iron brackets to mount the top of the storage unit to the wall, into studs.

To mount the top header piece (11 1/4”) we attached some 2 X 4’s along the ceiling, lining up with the built-in. Cut the header to length then aligned it with the bottom edge of the top cubby and nailed into place. To complete the cabinet at the top we installed crown molding.
Let’s stay connected! Follow us on social media!

We applied 1/2” X 1 1/2” MDF primed boards to the front of the storage unit. This covers all the joints of the wood. We applied all the vertical pieces first, then the horizontal pieces. On the side of the storage unit we applied 1/2” X 2 1/2 MDF primed board to add some interest to the piece. See the photograph for placement. Finally we applied the 5” Craftsman base molding.

To finish the piece we caulked all the seams and filled in all the nail holes with putty and painted the piece. Finally we installed the hooks and could sit back and admire all our hard work!
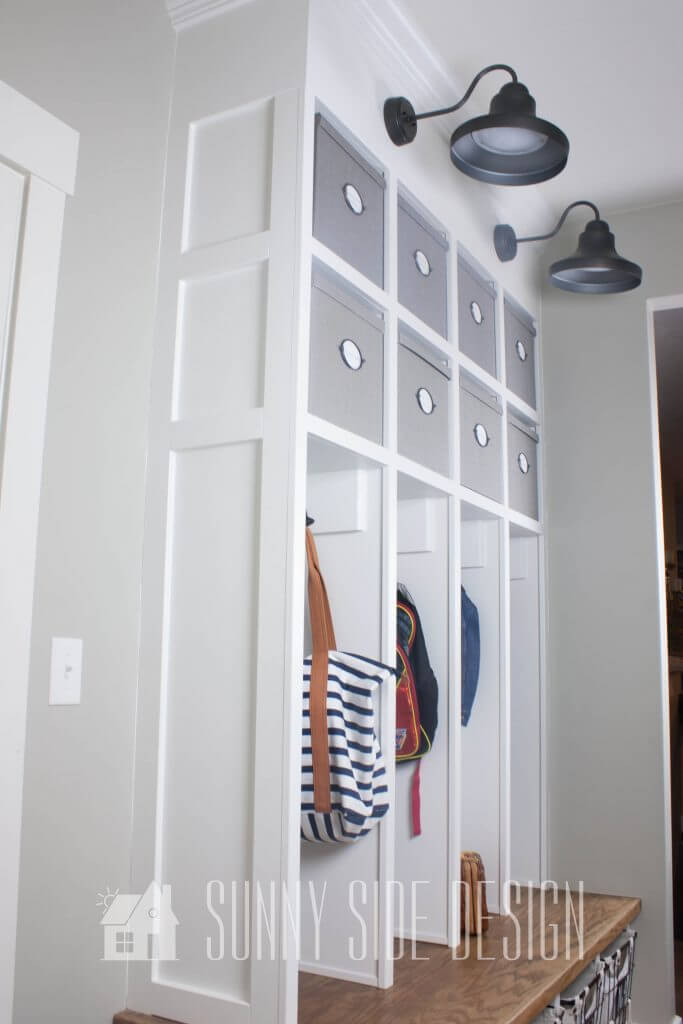

It took one day to assemble all of the pieces together and another day for installation. Caulking, puttying the holes and paint take a few more hours.
We hope this gives you a little inspiration and encouragement to try a built-in storage piece for your home.
We love the architectural interest that built-ins add to any room, plus we LOVE the storage.
This same technique used to build this mudroom storage was also used to build our built-in entertainment center.
Not only does is add great architectural interest to our family room, but it also adds so much storage!
To see our mudroom organizational post click here.

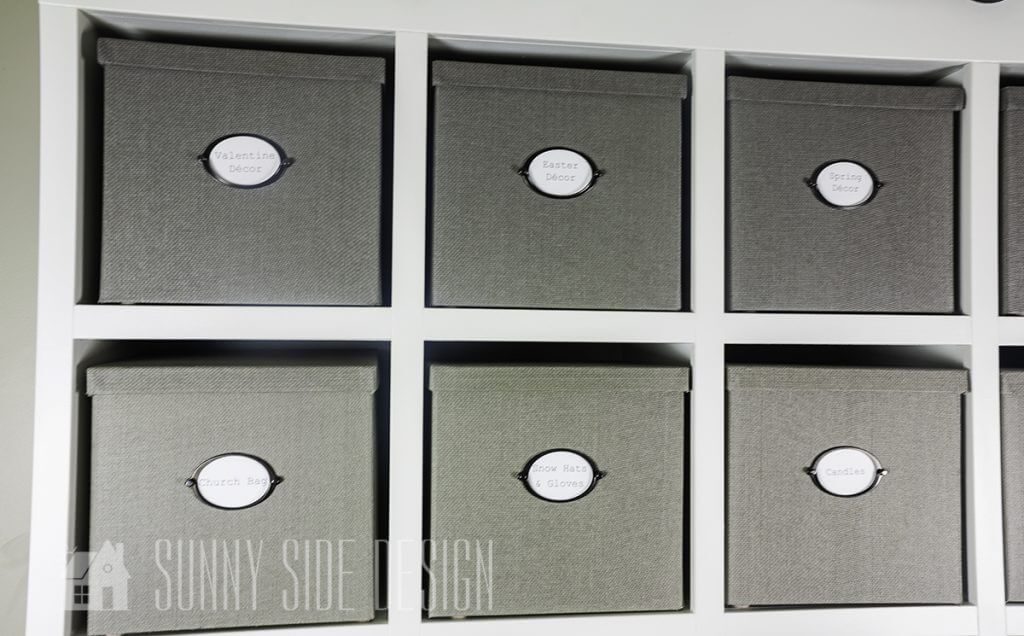

We hope you found some inspiration for your home today.
Please share your tips and ideas with us.
We love hearing from you!
If you’re new here, WELCOME! We love having new readers and friends!
You can learn more about us here.
Let’s stay connected! Join our DIY community of doers and you won’t miss the weekly updates and more inspiration for you always on a budget.
Sharing is caring!

Thanks for stopping by Sunny Side Design. Empowering you to create a home you love!
DISCLAIMER
This blog’s content is for entertainment purposes only and is not professional advice. By reading this blog and attempting to recreate a project, you assume all responsibility for any injuries or damages incurred. Read my full disclaimer here.
PHOTO USE AND CONTENT SHARING
All of the photographs you see here are the property of Sunny Side Design unless otherwise credited.
We love for others to share our work, so please feel free to use one photo with a link back to our website.
Pinning and sharing is always encouraged!
Please do not reproduce other Sunny Side Design content without permission.
Retailers We Love
- Anthropologie
- Birch Lane
- Crate & Barrel
- Joss and Main
- Lampsplus
- Mark & Graham
- One Kings Lane
- Pottery Barn
- Rejuvenation
- Serena & Lily
- Wayfair
- West Elm
- Williams Sonoma
- World Market
Be sure to follow us on Pinterest for even more home decor and DIY ideas.
To see what we are working on before it’s on our blog, follow us on Instagram.
You will also find our video tutorials on our YouTube channel.
- Simple and Pretty Decorating Ideas with Scalloped Decor

- 25 Easy Ways to Decorate with Blue and White
- Creating a Cozy Outdoor Living Room with Thrifted Finds

- The Best ‘Berry in Love’ Bridal Shower Ideas