HOW TO FLOCK A TREE THAT WILL LAST
Have you ever wanted to have a flocked tree in your home for Christmas but just couldn’t swallow the cost?
Well, last year we tackled the project of flocking a tree ourselves.
We learned a few tips and tricks along the way, so we thought we’d give it a go again this year and share how to flock a tree with you today!
It really is much more simple than you may expect! It’s very affordable and doesn’t take much time at all…30 minutes tops (plus drying time).
Sunny Side Design is a participant in the Amazon Services LLC Associates Program, an affiliate advertising program designed to provide a means for sites to earn advertising fees by advertising and linking to Amazon.com. As an Amazon Associate, this blog earns from qualifying purchases with no additional cost to you. Click here to read our full disclosure policy.
Supplies Needed
Again flocking a tree really is pretty simple to do, and goes pretty fast. But you will need a few specific supplies to create this light and fluffy snowy texture:
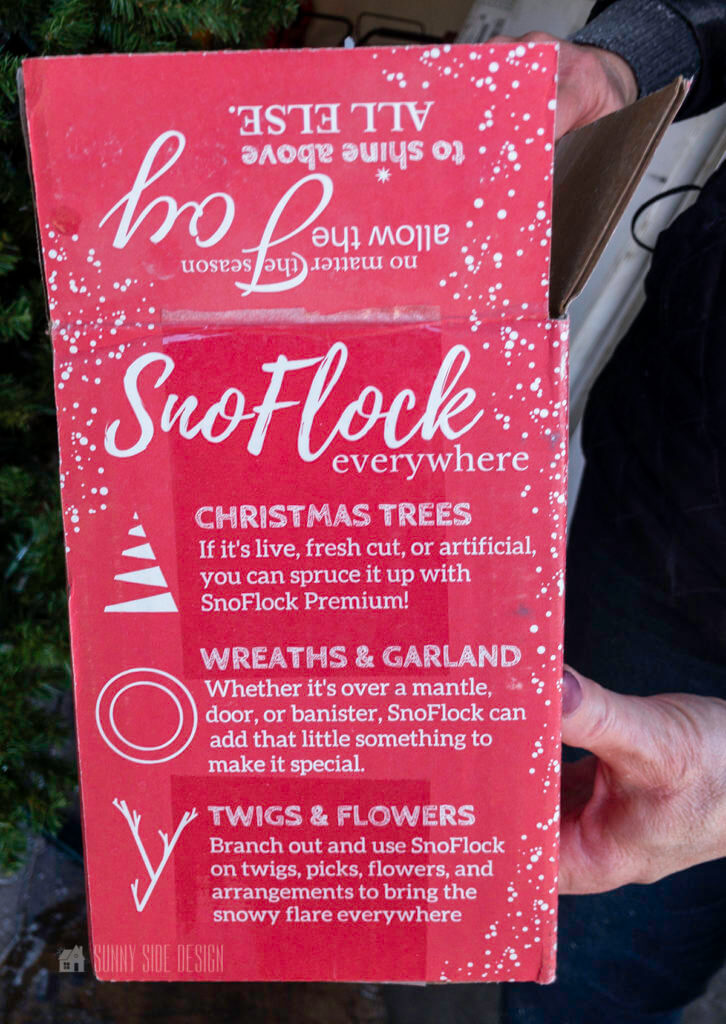
–Artificial or real Christmas tree
–SnoFlock (flocking powder) OR our friend Carrie at Lovelyetc. found that Flock in a box works well too, if you can’t find the SnoFlock. It may be in short supply during the Christmas season.
–Spray bottle of water
How Much Flock Will I Need?
Last year when we first tried our hands at flocking a tree, we weren’t sure how much flocking powder we’d need. We opted to get a 5lb. box of SnoFlock just to be on the safe side.
Having flocked an 8′ tree last year, we had plenty leftover to flock 2 additional 7′ trees!
(The amount of flocking powder you’ll need will also be dependent on how heavy of a snow look you’re going for. We gave each of the trees a light dusting of snow. If you’re going for a heavier snow look you’ll want to plan on using more product.)
Are you enjoying this project? Please Pin It, save it for later and share it with a friend.
Sharing is caring!
How To Flock A Tree

Again the actual process of flocking a tree is quite simple.
Be mindful that it is pretty messy, so you’ll either want to tackle this DIY project outside or be sure to protect your floor with a drop cloth or tarp.
Flocking can be applied to any artificial or real tree. We opted to string the lights onto the tree before adding the flocking powder, but this is completely optional.

The first step is to set up the tree and fluff the branches.
Then using a spray bottle (or if you’re outside you can use a mister attachment for the hose), liberally wet the tree.
The tree needs to be fairly wet, just not dripping wet.
(If your tree is pre-lit, be sure that the lights are rated for outdoor use and can get wet.)
If you’re new here, welcome! We’re so glad you’re here.
Let us introduce ourselves, we’re Michelle and Steph, a mom and daughter team who love to DIY and decorate our homes.
Not only are we passionate about making our homes warm, comfortable and unique, but it’s our mission to help you create that same feeling in your own home.
You’ll find ideas for repurposing, creating, decorating and making your home truly yours, while always mindful of a tight budget.
Undoubtedly we love finding ways to make your home look high-end on a small budget.
Plus you’ll also find a recipe or two as we share our family favorites with you.
We’d love it if you’d join our community of doers so you won’t miss any inspiration for your home.
We love new friends.

[mailerlite_form form_id=2]
How To Add Flocking Powder

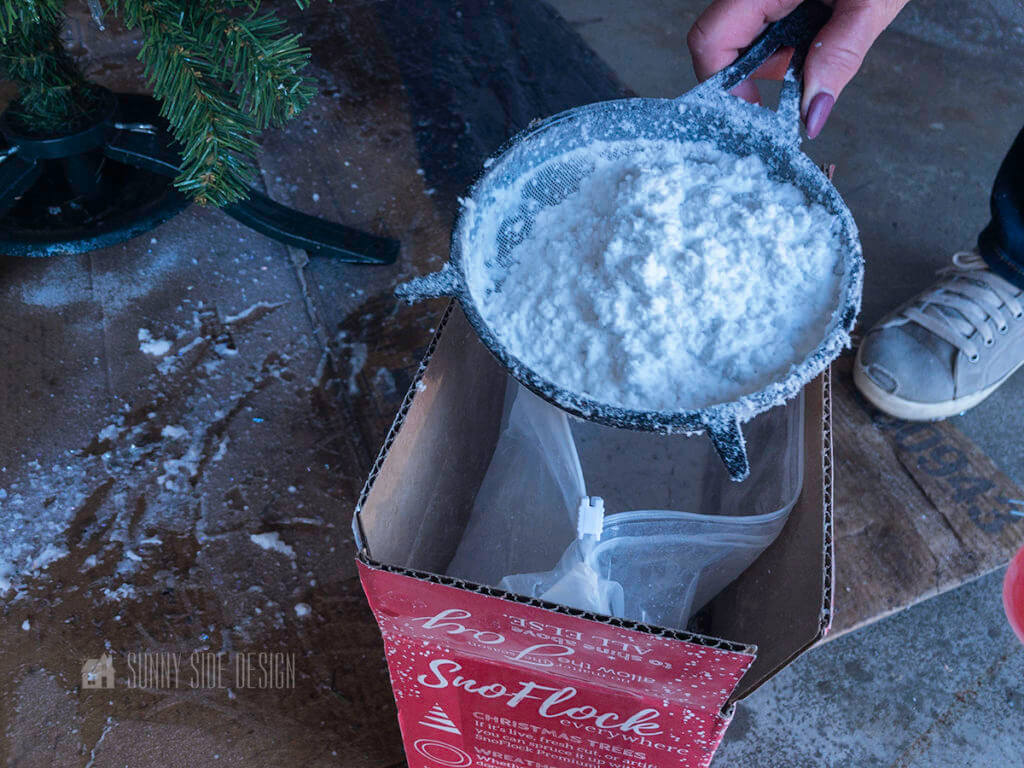
Using an old measuring cup or scoop, add plenty of flocking powder into a strainer.
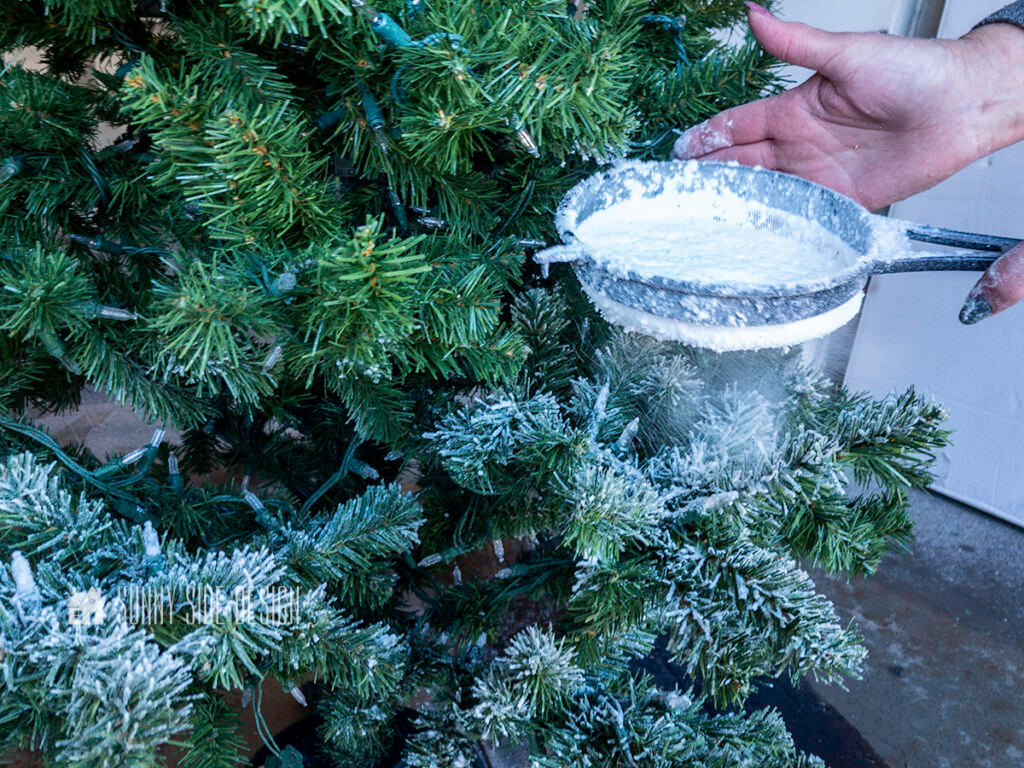
Then, gently tap the side of the strainer as you hold it over the tree.
It’s similar to adding confectioners sugar to a treat after baking.
The powder will sift through the strainer and fall onto each branch like falling snow.
Play around with this step until you’re happy with the look of snowfall you’ve achieved.
Let’s stay connected! Follow us on social media!
Set The Flocking Powder

Once you’re happy with the overall look of the tree, take the water-bottle and spray the entire tree. Adding water on top of the flocking powder will activate the adhesive, which will allow the flocking powder to seal and harden.
(This is where we learned from our experience last year!)
Last year, we didn’t apply enough water on top of the flocking, and as we brought it upstairs to decorate, the flocking came off in spots making a huge mess.
This year, we added quite a bit of water. The key is to get it as wet as you can without it dripping! Play around with it until you get the feel for how much you’ll need and you should be good to go!
Each of the 2 trees we flocked this year turned out much better than the tree we flocked last year. The key is to add enough water after the flocking powder is applied that it will harden and stick to the needles.

Isn’t it pretty?! Again we didn’t want to add too heavy of a snow fall look, so we have a bit of the greenery of the tree exposed. This creates the look of a soft fallen snowfall.

Overall, this really is a simple project to do!
It took maybe 30 minutes to wet flock each tree.
Of course, you’ll need to follow drying times according to the flocking material used. Take into account also the temperature where you let the tree dry. If it’s super cold it will take longer. We let ours dry overnight.
Does this whole process seem manageable now? Do you think you’ll give it a try this year? Thanks for being here with us today!


We hope you found some inspiration for your home today.
Please share your tips and ideas with us.
We love hearing from you!
If you’re new here, WELCOME! We love having new readers and friends!
You can learn more about us here.
Let’s stay connected! Join our DIY community of doers and you won’t miss the weekly updates and more inspiration for you always on a budget.
Sharing is caring!

Thanks for stopping by Sunny Side Design. Empowering you to create a home you love!
DISCLAIMER
This blog’s content is for entertainment purposes only and is not professional advice. By reading this blog and attempting to recreate a project, you assume all responsibility for any injuries or damages incurred. Read my full disclaimer here.
PHOTO USE AND CONTENT SHARING
All of the photographs you see here are the property of Sunny Side Design unless otherwise credited.
We love for others to share our work, so please feel free to use one photo with a link back to our website.
Pinning and sharing is always encouraged!
Please do not reproduce other Sunny Side Design content without permission.
Retailers We Love
- Anthropologie
- Birch Lane
- Crate & Barrel
- Joss and Main
- Lampsplus
- Mark & Graham
- One Kings Lane
- Pottery Barn
- Rejuvenation
- Serena & Lily
- Wayfair
- West Elm
- Williams Sonoma
- World Market
Be sure to follow us on Pinterest for even more home decor and DIY ideas.
To see what we are working on before it’s on our blog, follow us on Instagram.
You will also find our video tutorials on our YouTube channel.
- Creating a Cozy Outdoor Living Room with Thrifted Finds

- The Best ‘Berry in Love’ Bridal Shower Ideas
- Paint an Old World Texture Finish on a Vase
- Easy Strawberry Chicken Salad with Lime Maple Balsamic Vinaigrette


