Are you looking to update vintage, antique or dated furniture? See how to refinish furniture with a raw wood look for a fresh modern feel. Learn how to get this rustic modern furniture makeover in just 3 easy steps!
Not only will you learn how to quickly and easily strip off paint, but we will also share the best way to bleach wood. Then you can show off the natural beauty of the wood.
For years now we have seen the trend to paint all wood surfaces. But now I’m loving the trend, getting back to the natural wood look. It’s so refreshing!
Have you been wondering how to refinish furniture? It may look like a daunting task, but with the right products it can be done quickly and easily.
Just follow along and see how we transformed this old dresser into this beautiful natural wood look.
If you are look for tips for evenly staining pine wood click here.
And if you love to re-imagine old furniture pieces like us,then you’ll love our Modern Desk Makeover.
Sunny Side Design is a participant in the Amazon Services LLC Associates Program, an affiliate advertising program designed to provide a means for sites to earn advertising fees by advertising and linking to Amazon.com. As an Amazon Associate, this blog earns from qualifying purchases with no additional cost to you. Click here to read our full disclosure policy.
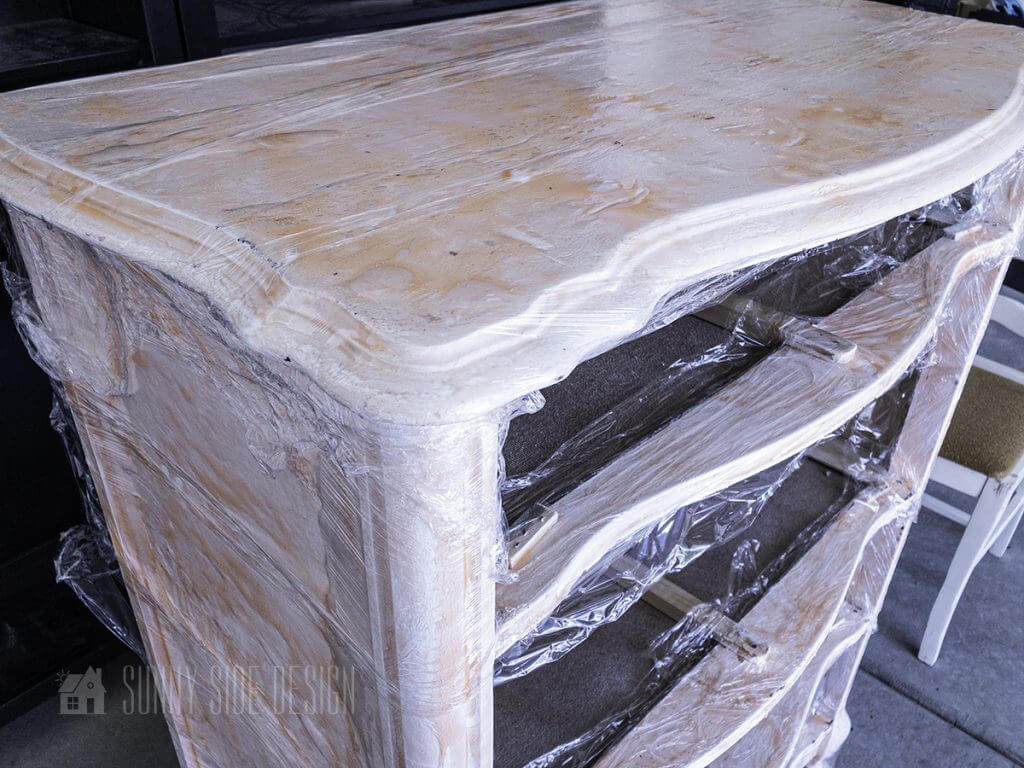
Dresser Before Makeover
At first glance, you may think that this dresser is great just as is. Steph purchased this dresser for Little Miss’ bedroom makeover, but on closer inspection we realized that the paint finish was not up to par.

The dresser was painted poorly, brush marks every which way. It would need to be sanded down or stripped, even if it was to just be repainted.
After some thought, Steph decided she would like to try a natural or raw look finish. I’m so glad she did, we love the results!
Supplies: How to Refinish Furniture

Strip Off Old Finish
Between the two of us we have probably refinished more than 100 pieces of furniture. It is something we love to do!
To take an old discarded piece of furniture and turn it into an heirloom is so rewarding. Not to mention the thrill of the hunt at flea markets and thrift stores.

Are you wondering how to refinish furniture for a special piece in your home?
We have tried many products over the years for removing old paint finishes. However, we decided to try something new this time, Citristrip™ and we are thrilled with the results.
If you are looking for an easy way to remove an old painted finish, this is the product to use.
This is not an endorsed post, we genuinely loved the results we got and want to share it with you.
Are you enjoying this project? Please Pin It, save it for later and share it with a friend.
Sharing is caring!
Safety First
When working with chemicals be sure to use protective gloves and goggles. Even though Citristrip™ smells citrusy and doesn’t have any strong fumes, it is still important to protect your eyes and skin. A chemical burn really hurts, trust me, I know.
We would also suggest that you wear long sleeves and pants. If it flips and hits your arms or legs, you’ll be glad you did.
If you’re new here, welcome! We’re so glad you’re here.
Let us introduce ourselves, we’re Michelle and Steph, a mom and daughter team who love to DIY and decorate our homes.
Not only are we passionate about making our homes warm, comfortable and unique, but it’s our mission to help you create that same feeling in your own home.
You’ll find ideas for repurposing, creating, decorating and making your home truly yours, while always mindful of a tight budget.
Undoubtedly we love finding ways to make your home look high-end on a small budget.
Plus you’ll also find a recipe or two as we share our family favorites with you.
We’d love it if you’d join our community of doers so you won’t miss any inspiration for your home.
We love new friends.

[mailerlite_form form_id=2]
If you are more of a visual learner, we have created a short video of how to refinish furniture. Just click on the link below.
Apply Paint and Varnish Stripper

Apply Citristrip™ generously with an old paint brush. Let sit for at least 30 minutes or up to 24 hours.
If you let it sit longer than 30 minutes, cover the furniture with plastic wrap. This will keep the product moist and actively lifting the old paint finish.

We let the stripper sit on for 2 hours.
Test an area with a plastic scraper and see if the paint has softened and lifts easily from the wood.
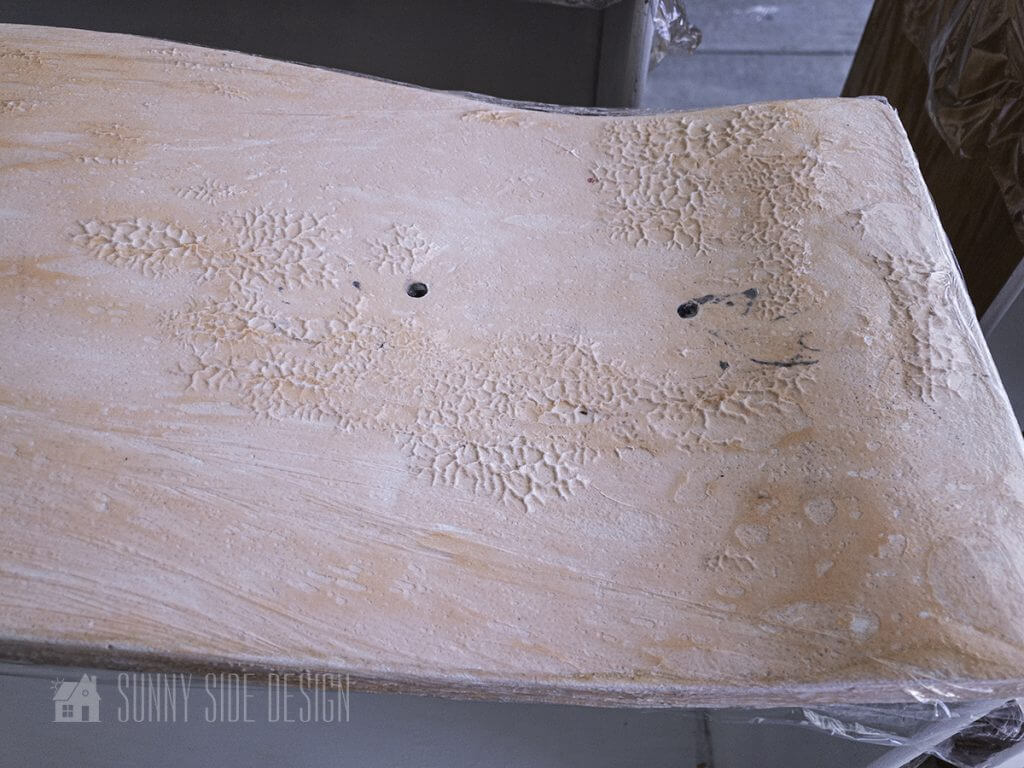
You can see here that the paint is already starting to pull away from the furniture piece.

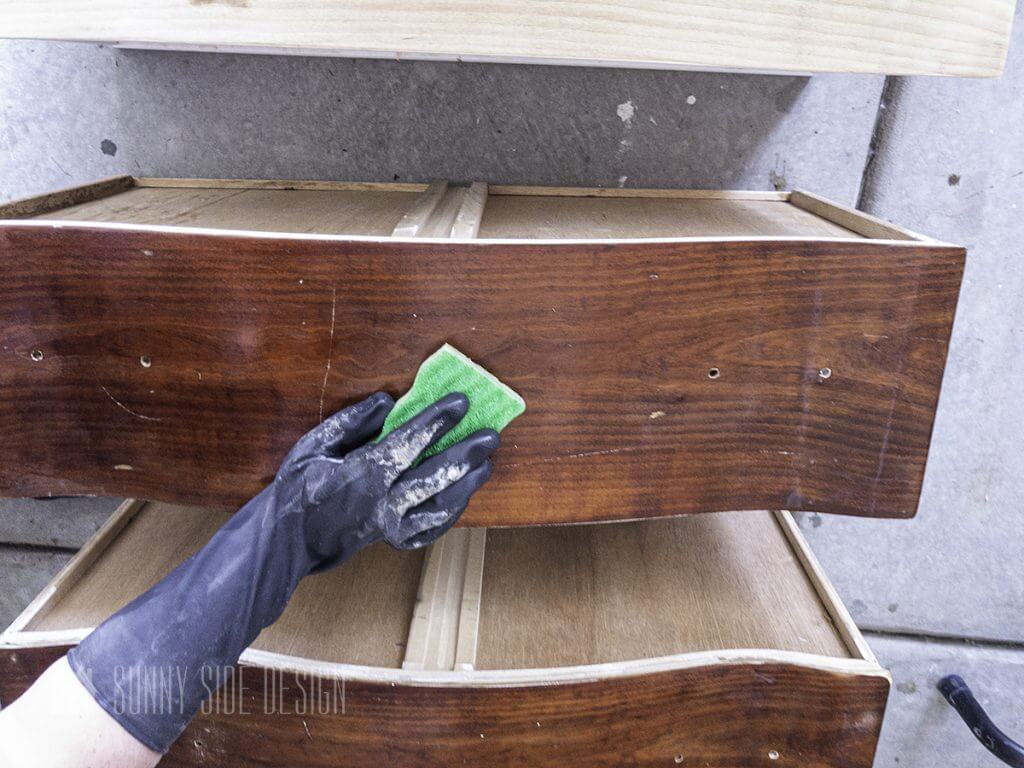
Once the paint has softened and has lifted from the wood, take a plastic paint scraper and scrape off the old paint in the direction of the wood grain.

This is what one of the drawers looked like after one application of the Citristrip™.

The dresser had many more curves and grooves where the paint finish remained. However, we will show you how this is easily removed as well.
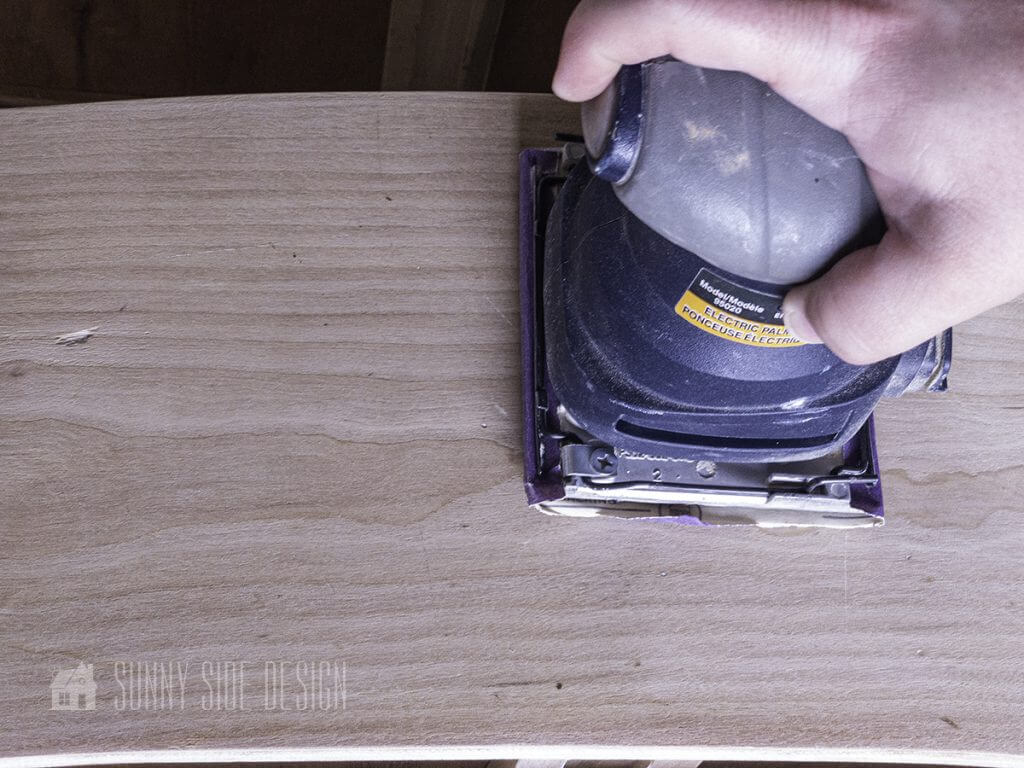
Sand Furniture

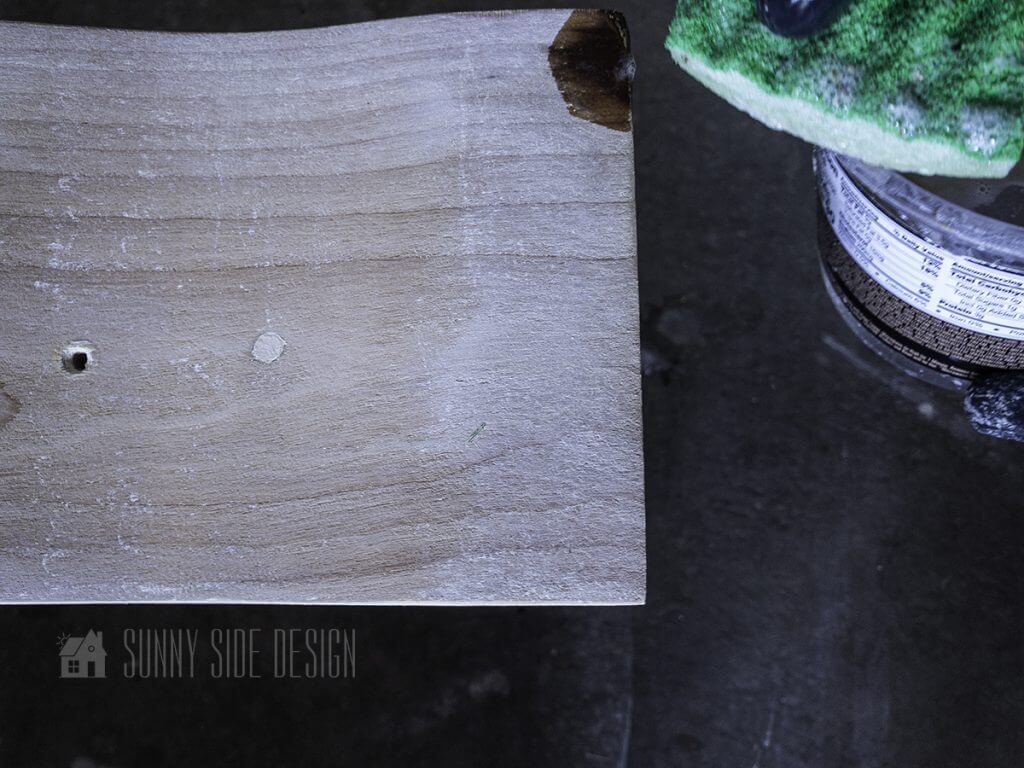
On the areas of the drawers and dresser that did not have grooves or curves we used our palm sander with medium grit sandpaper to remove any remaining finish. This was really quick and easy to do.
Another way to remove the remaining finish would be to reapply the stripper, wait for it to soften the paint and scrap with the plastic scraper.

This is what the drawer looked like after sanding with the medium grit sandpaper.

We did have some areas that had molding and curves that we were unable to sand.
To remove the paint from these areas apply more stripper. We ran out of Citristrip™ and used Jasco paint remover for this part.
Wait a few minutes for the product to dissolve the paint then scrape with an old toothbrush or a wire brush. Brush in the direction of the grain of the wood, then follow up with a medium grit steel wool pad.
We prefer to use a wire brush. It quickly pulls out the paint from the grooves.
Bleaching Wood

Bleaching the wood is totally optional. Steph wanted a lighter natural wood finish for this dresser. We believe this dresser is cherrywood and that was not the look she was going for.
We have bleached wood a couple of other times using household bleach. But, did you know there is a specific bleach for wood?
Wood bleach is easy to use and much more effective. Usually you will achieve the desired look in just one application, instead of multiple applications with household bleach.
It also does not have the strong smell associated with household bleach.
Pro tip: You will want to wear protective clothing and eye coverings with this also. Believe me, I was just the photographer for this portion of the project and some of the solution flipped onto my hand and it really burns. But, it is easily neutralized with vinegar.
Solution A

We used Zinnser Wood Bleach, which is a 2 part solution. We were unable to find this at any of our local hardware stores, but you can find online. A link for it is in our supply section.
Do not mix solutions A and B, the instructions say you will get an adverse reaction. We don’t know what that is, but be safe! Also use a seperate sponge for each when applying.
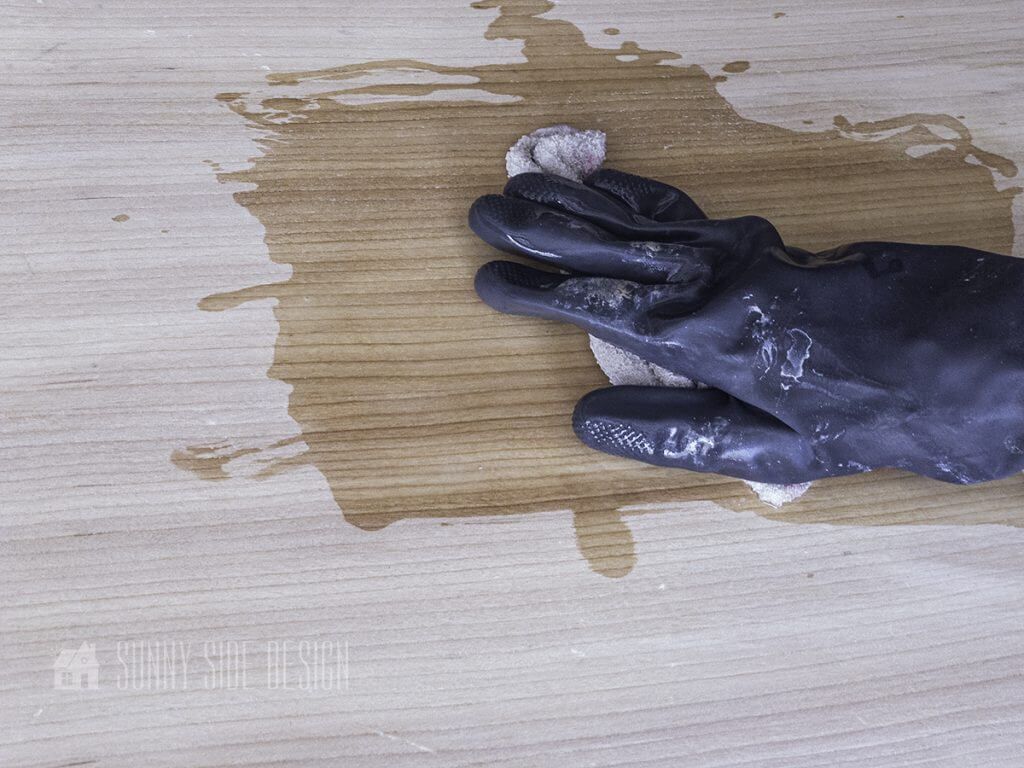
Wearing chemical resistant gloves, pour solution A into a container. Apply solution A with a sponge over the entire wood surface to be lightened.
Let this solution sit on the wood for 5 minutes for a soft wood and 10 minutes for a hard wood.
We let it sit for 10 minutes. You do need to keep it wet the entire time, so you may need to reapply.
Solution B

After 10 minutes, it is time to apply solution B.
Pour solution B into another container and apply to the wet wood surface.

Here you can see the difference between the drawers. The one on the top has not been bleached. The drawer on the bottom has had one application of the wood bleaching solutions.
Let’s stay connected! Follow us on social media!
Touch Up If Necessary

Somehow we had 2 spots that did not get one or more of the solutions.

This was a quick fix!
We reapplied solution A and let it sit, then reapplied solution B just on the spots that were missed.
Neutralize the Bleaching Solution
Once you are happy with the results from bleaching the wood, the surface will need to be neutralized.
To do this make a vinegar mixture of 50% vinegar and 50% water. Wipe down the entire piece with this mixture and let dry.
Top Coat
To prepare the wood for the topcoat, sand with a fine grit sandpaper. We used a 220 grit sandpaper.
Once you are satisfied, wipe down all the surfaces with a tack cloth or a damp cloth to remove all the dust.
There are several different options for a protective topcoat. Each will have it’s own pros and cons.
You can apply an oil-based polyurethane. My favorite is Minwax™ Wipe On Poly. However, an oil-based product will yellow on lighter finishes, so we didn’t want to use this.
A water-based polyurethane would also provide great protection. We love Varathane™ Triple Thick Polyurethane in a matte finish. This will need to be applied with a brush and is a little more time consuming.
However, this time we wanted the beauty of a hand rubbed finish, a more natural look. We chose to use a clear wax. We like to use Behr Clear Wax.

Apply the Behr Clear Wax with a stiff bristled waxing brush using a circular motion. This will ensure that the wax is worked into the grain and grooves of the wood furniture.
Take a clean cotton cloth and gently wipe off any excess wax. Let dry until it is no longer tacky.
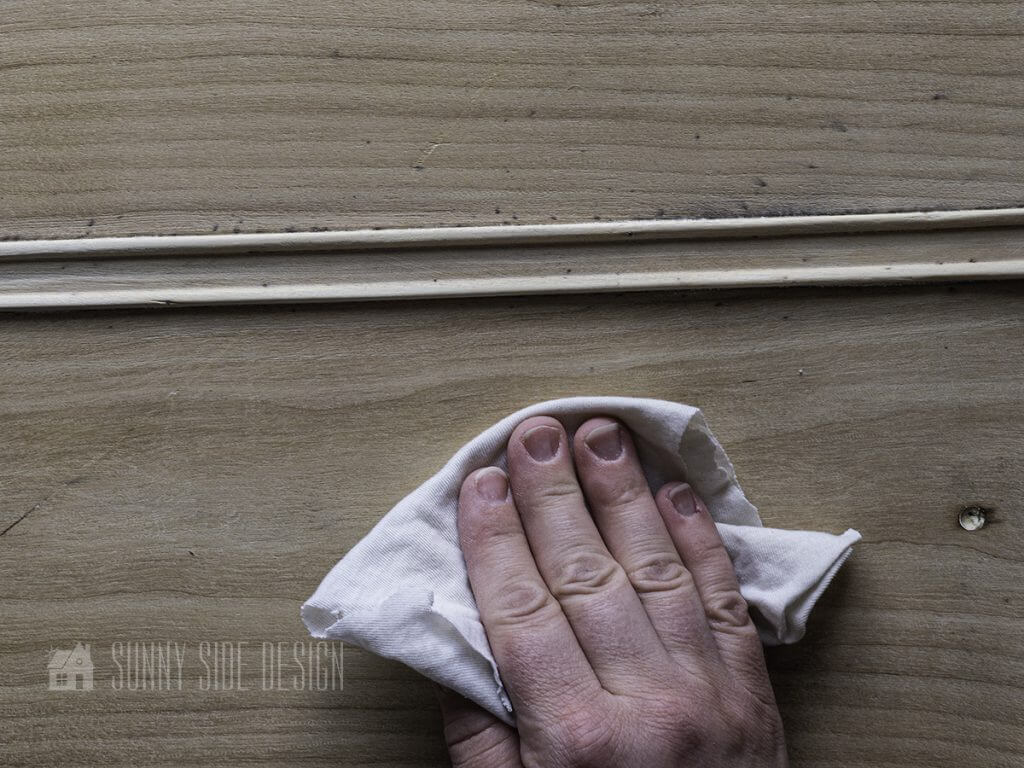
Using a clean cotton cloth, buff to a beautiful hand rubbed finish. We like to use old cotton t-shirts for this.
Reveal Refinished Furniture with a Raw Wood Look

Isn’t she beautiful?! I love the beauty of the natural and light wood grain.
We cleaned up the original hardware, which had been spray painted silver. Also, the top drawer had a few challenges, you can see how we removed the spray paint from the hardware and fixed our dilemma with the top drawer here.

The natural wood look is a gorgeous contrast against the navy wall.
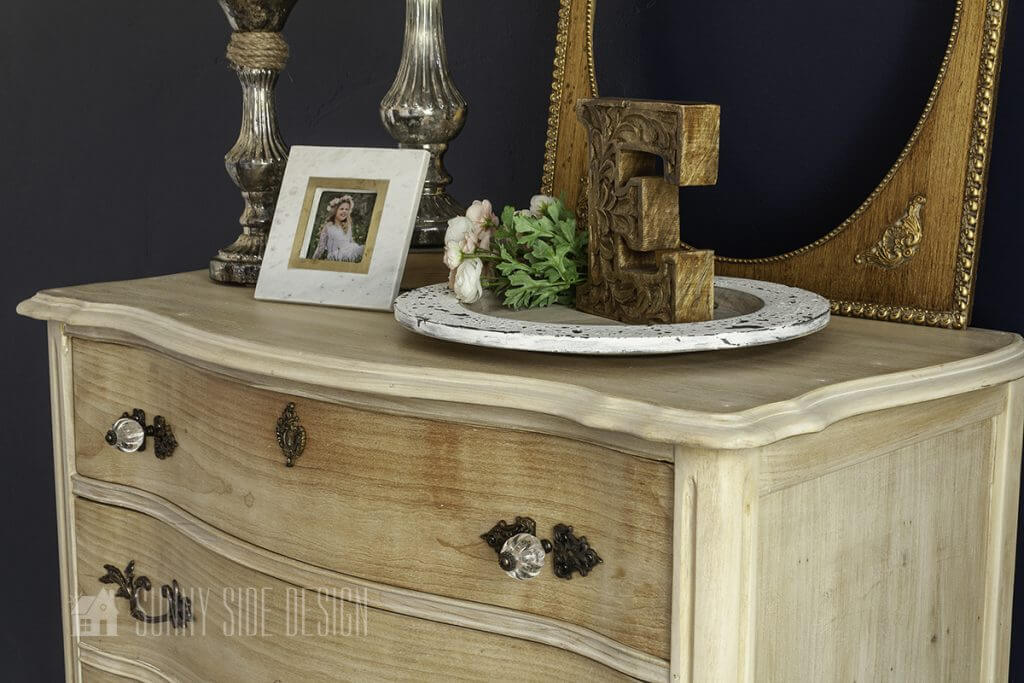
This dresser really did have lovely lines that really didn’t stand out in it’s former state.
We’ve also made a round coffee table that has that beautiful raw wood look.
You can see our technique for it here.
Do you feel confident now learning how to refinish furniture?
Do you have an heirloom at your home that needs an update or facelift?
It’s so rewarding to bring back your old furniture and antiques back to life.
Love this idea? Then take a look at even more furniture makeover ideas:
- Simple Dresser Refresh
- $5 Hutch Top Repurposed to an Attractive French Inspired Cabinet
- Re-image Thrift Store Furniture into a Tool Chest Dresser
- DIY Floating Nightstand
- DIY Round Coffee Table
- Easy Chalk Painted China Cabinet
- Painting Furniture the Easy Way with a Wagner Sprayer
- Paint Furniture with Professional Results
- Transform Twin Beds into a Daybed
- How to Refinish Furniture with a Raw Wood Look
- Beautiful Wood Dining Table
- How to Use SaltWash for a Worn and Weathered Finish
More DIY Projects in This Bedroom Makeover
To see more highlights from this bedroom makeover click any link below.
- How To Paint a Room with Pro Results
- Built In Desk | Upcycling At Its Best
- Upcycle Idea | Transforming Twin Bed to Daybed
- DIY Canopy for a Bed | Fit for a Princess
- Shelf Decorating Ideas | A Step by Step Guide
- Roman Shade | How to Make Them Yourself
- How To Reupholster a Chair | with French Country & Boho Flair
- French Country Chandelier with Boho Flair
- DIY Mirror Frame | Quick and Easy Idea
- Antique Hardware For Dresser
- Bedroom Ideas for Tweens |Girl Room
- Area Rug For Bedroom | Top Ideas For Tween Girl
- How To Make a Bolster Pillow
- How To Make an Envelope Pillow
We hope you found some inspiration for your home today.
Please share your tips and ideas with us.
We love hearing from you!
If you’re new here, WELCOME! We love having new readers and friends!
You can learn more about us here.
Let’s stay connected! Join our DIY community of doers and you won’t miss the weekly updates and more inspiration for you always on a budget.
Sharing is caring!

Thanks for stopping by Sunny Side Design. Empowering you to create a home you love!
Disclaimer
This blog’s content is for entertainment purposes only and is not professional advice. By reading this blog and attempting to recreate a project, you assume all responsibility for any injuries or damages incurred. Read my full disclaimer here.
PHOTO USE AND CONTENT SHARING
All of the photographs you see here are the property of Sunny Side Design unless otherwise credited.
We love for others to share our work, so please feel free to use one photo with a link back to our website.
Pinning and sharing is always encouraged!
Please do not reproduce other Sunny Side Design content without permission.
Retailers We Love
- Anthropologie
- Birch Lane
- Crate & Barrel
- Joss and Main
- Lampsplus
- Mark & Graham
- One Kings Lane
- Pottery Barn
- Rejuvenation
- Serena & Lily
- Wayfair
- West Elm
- Williams Sonoma
- World Market
Be sure to follow us on Pinterest for even more home decor and DIY ideas.
To see what we are working on before it’s on our blog, follow us on Instagram.
You will also find our video tutorials on our YouTube channel.
- Paint an Old World Texture Finish on a Vase

- Easy Strawberry Chicken Salad with Lime Maple Balsamic Vinaigrette
- How to Fix Chipped Kitchen Cabinets with a Pen
- Easy 4th of July Door Decor You Can Make in Minutes


Can this technique be done with a cherry wood finish?
Yes, the wood bleach will remove the red tones of cherry wood. We believe our dresser is cherry wood and we wanted to remove the red tones and lighten it up and it does a great job. Please let us know if you have any other questions.