Welcome! Hope you’ve been having a great day! Have you ever fallen in love with a piece of artwork, but it was the wrong size for your space? Today we’ll show you how EASY it is to resize a canvas so you can still use it in your space and love it!
*This is Part 2 of “The Most Clever DIY Hidden TV Cabinet” post.
To see ALL the highlights from this master bedroom makeover on a budget click any link below.
–How To DIY Your Own Bay Window Curtain Rod
–Easy DIY Board & Batten Wall For Only $50!
–How To Use Saltwash for an Amazing Worn & Weathered Finish
–How To Weather Wood with Vinegar & Steel Wool Stain
–How To Repair Light Fixture Ceiling Hole
–Adding Coastal Style to an Orb Chandelier
–The Most Clever DIY Hidden TV Cabinet
–Master Bedroom Makeover on a Budget
Sunny Side Design is a participant in the Amazon Services LLC Associates Program, an affiliate advertising program designed to provide a means for sites to earn advertising fees by advertising and linking to Amazon.com. As an Amazon Associate, this blog earns from qualifying purchases with no additional cost to you. Click here to read our full disclosure policy.

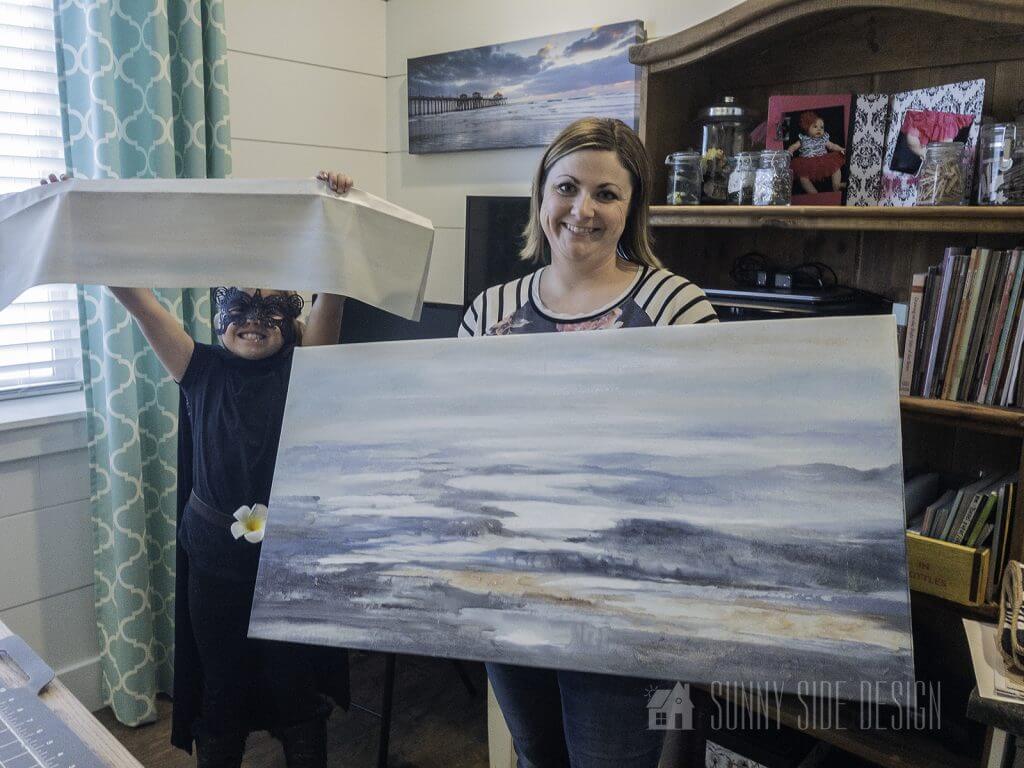
The final project in the master bedroom makeover (The Most Clever DIY Hidden TV Cabinet) was almost complete. The cabinet was built, all it was lacking was the perfect piece of artwork to hang on the front! My Mom and I found ourselves going up and down every aisle in At Home. We considered all the options. Perhaps using 2 smaller pieces of artwork and hanging them side by side. We were even seriously contemplating using a floor rug and fitting it to size (which would’ve been cool to bring in some amazing texture), but when I laid my eyes on this seascape I fell in love with it! There was just one problem…it wasn’t the right size! I decided to buy it anyway and planned to return it if I found anything else that would work better.
Well it turns out that once I got the artwork home and brought it in our bedroom, I loved it even more! I’m a pretty stubborn person and will do just about anything to make my ideas work sometimes! Now I just needed to come up with “The Plan”. The other obstacle to this hidden TV cabinet was finding the right hardware that would allow us to conceal the TV and slide the artwork out of the way easily. Once we finally figured out a solution for the hardware we had a better idea of how we would use this artwork, and we were able to formulate our plan.

We knew the canvas would be too tall when I bought it, so we took measurements to figure out how much would need to be cut off. The plan was to center the canvas on a piece of MDF which would be large enough to conceal the TV. The MDF would create a border around the canvas, like a mat would in a picture frame. After doing some math (which was honestly a bit too much for my brain) we knew the exact dimensions the canvas would need to be.
Are you enjoying this project? Please Pin It, save it for later and share it with a friend.
Sharing is caring!


The back side of the canvas had a border of tape all the way around to cover the staples. We first peeled the tape off the top section on both sides. Then we were able to pull the staples out with a painters tool. Some of them were a bit stubborn and we had to use needle nose pliers to pull them out.


The hardware that came mounted to the canvas for hanging was also removed. Then we were able to peel back the canvas and mark the wood where we planned to cut the frame.


To ensure that we didn’t accidentally cut the canvas, we placed a cutting board in between the canvas and the wood. We also used one on the side of the wood to retract the canvas back a little and protect it from getting cut. We used a Cordless Oscillating Multi-Tool to cut through the wood. The wood cut pretty easily, the trickier part was keeping the blade straight to cut perpendicular. To help with this, we marked the wood with a speed square on the top and side so we could visually see if we were staying on our cut line.
If you’re new here, welcome! We’re so glad you’re here.
Let us introduce ourselves, we’re Michelle and Steph, a mom and daughter team who love to DIY and decorate our homes.
Not only are we passionate about making our homes warm, comfortable and unique, but it’s our mission to help you create that same feeling in your own home.
You’ll find ideas for repurposing, creating, decorating and making your home truly yours, while always mindful of a tight budget.
Undoubtedly we love finding ways to make your home look high-end on a small budget.
Plus you’ll also find a recipe or two as we share our family favorites with you.
We’d love it if you’d join our community of doers so you won’t miss any inspiration for your home.
We love new friends.

8 cuts were made to detach the wood from the rest of the frame. Remove the 3 vertical pieces of wood that have been cut off, and you’ll be left us with the top piece and 2 diagonal pieces still attached to one another. (See above pictures for reference.)


Once all of the pieces have been cut off and removed you can slide the top section of the frame down into place. Use a little wood glue at each of the joints. To prevent glue from dripping on the canvas we folded up 5 pieces of paper and positioned them underneath each joint to be glued. Then secure the frame with a pneumatic brad nailer.

Allow the glue to dry before removing the folded pieces of paper.
Let’s stay connected! Follow us on social media!


While the glue is drying you can measure the thickness of the wood at the top of the frame. Be sure to include the backside of the wood in your measurement. This will give you the measurement of how much canvas will be wrapped around the wood. Mark the measurements on the backside of the canvas and cut away the excess. We used a rotary cutter, but you could also use scissors.
Using a hand held staple gun secure the canvas back into place. We began by pulling the canvas tight over the back of the frame and secured the sides. We then pulled the canvas tight and wrapped it over the top part of the frame. We secured the canvas to the frame working from the middle going out to the sides. This allowed us to avoid any puckering.


As you get closer to the edges you can now fold in the corners and staple them into place. Make sure to keep the excess canvas you’ve cut away to see how the corners have been folded on your particular piece of art. You’ll want to make the same fold so the whole canvas is uniform and professional looking. For this canvas we folded the side piece in first, then wrapped the top edge over the frame (almost like you would wrap a present). Once the corners have been folded and pulled tightly into place, you will secure them with the staple gun.


I will admit I was a little hesitant to begin this project. Afterall I loved the original artwork (and paid $80 for it) what if I ruined it? Once we figured out how much wood we were going to cut away the rest of the project actually went pretty smoothly! Begin by planning out your measurements. Be sure to use caution when cutting the wood to avoid cutting the canvas. Nail it all back together and you have a brand new piece of custom artwork perfect for your space! It really is pretty simple to do! (My little Miss is, or shall I say The Princess in black is holding up the excess canvas that we cut off. She’s been practicing her part for a book character convention at school, and costumes are a must. 😜)

Behold the finished product 😁 I LOVE the way it turned out! By looking at it you wouldn’t even know there is a TV behind this beautiful artwork!


I’m just so proud of us. I feel like we were little inventors. Don’t get me wrong, there are some cool hidden TV cabinets out there on the market, and the inspiration behind this project came from a similar one at Pier1. The objective behind this project was to come up with a budget friendly solution that would work in our space. By taking this project on ourselves we also had more freedom in designing how the art would slide. Others out there seemed to poke out into the room when opened, which I wasn’t too fond of, or would even split the artwork in half and open sideways. This design is sleek and slides parallel to the TV, and it’s perfect for our space.

Be sure to check out Part 1 of this project to see how to DIY your own hidden TV cabinet!
We hope you found some inspiration for your home today.
Please share your tips and ideas with us.
More DIY home decor projects to try:
- Easy Fiber Wall Art a West Elm Dupe
- How to Make a Topiary Tree That Looks Real
- How to Decoupage a Vase with Blue and White Napkins
- Guide to Free Printable Wall Art Online
- Simple and Stylish Cane Tray
- Pottery Barn Color Block Vase Dupe
- Easy Pedestal Tray from Thrift Store Finds
- Paint a Vase with an Aged Look
- Simple Painted Lamp Base
- Make a Beautiful Faux Tree
- Pottery Barn Brooks Cross Bar Hurricane Dupe
- Faux Concrete Planter with Plaster
- Quick and Easy DIY Mirror Frame
- Update a Vintage Lampshade
- Decorating a Pillow with Paint
- Easy Coffee Filter Flowers with Bling
- Easy Embellished Lampshades
We love hearing from you!
If you’re new here, WELCOME! We love having new readers and friends!
You can learn more about us here.
Let’s stay connected! Join our DIY community of doers and you won’t miss the weekly updates and more inspiration for you always on a budget.
Sharing is caring!

Thanks for stopping by Sunnyside Home. Empowering you to create a home you love!
Retailers We Love
- Anthropologie
- Birch Lane
- Crate & Barrel
- Joss and Main
- Lampsplus
- Mark & Graham
- One Kings Lane
- Pottery Barn
- Rejuvenation
- Serena & Lily
- Wayfair
- West Elm
- Williams Sonoma
- World Market
Be sure to follow us on Pinterest for even more home decor and DIY ideas.
To see what we are working on before it’s on our blog, follow us on Instagram.
You will also find our video tutorials on our YouTube channel.
- Creating a Cozy Outdoor Living Room with Thrifted Finds

- The Best ‘Berry in Love’ Bridal Shower Ideas
- Paint an Old World Texture Finish on a Vase
- Easy Strawberry Chicken Salad with Lime Maple Balsamic Vinaigrette


