Are you looking to add some extra flair to your walls?
Installing picture frame moulding is a great way to elevate your space and add a touch of class to your walls.
Don’t let the task intimidate you – with just a few simple steps, you can easily install picture frame moulding in your own home.
This post is sponsored by Ornamental.com, but all the opinions are my own.
I am thrilled to work with this beautiful millwork.
From contemporary to traditional home accent products, Ornamental has evolved into one of the largest decorative millwork companies in the United States.
Ornamental has a commitment to provide start-to-finish solutions to Home Centers, Pro Dealers, Millwork Dealers, Architects, Designers, Cabinet Manufacturers, and Furniture Makers around the world.
In fact, you can find their beautiful millwork at your local Lowes.
I’ll provide links below.
One Room Challenge To-Do List
Welcome to week 6 of the One Room Challenge!
We are finally wrapping up the last few projects in our dark and moody home office and this week the picture frame moulding went up.
Let’s take a look at what still needs to be finished in the next couple of weeks.
Paint room – 2 coatsBuild lower cabinets for built-insBuild shelvesInstall cabinetsBuild window seatInstall shelvesInstall moulding for built-insPaint built-insInstall laminate floorInstall door casing and baseboardsPaint door casings and baseboardsBuild cabinet doors and drawersPaint cabinet doors and drawersCrown mouldingInstall picture frame moulding- Caulk, putty and paint picture frame and crown moulding
Refinish and modify desk- I
nstall hardware on built-ins Paint doors- Paint window frame
- Window sill
- Install sconce
- Library lights
DIY faux tree- Art on wall
- Style bookshelves
- Roman shade
- Window seat cushion
Be sure to follow us on Instagram for behind the scenes progress and updates!
If you’re new here, WELCOME! You can learn more about us here.
As a reminder you can easily navigate through each week of this dark and mood home office project.
Week 1 | Week 2 | Week 3 | Week 4 | Week 5 | Week 6 you’re here | Week 7 | Week 8
And for more ideas and inspiration head on over to see all of the amazing room makeovers on the One Room Challenge blog.

I hope we can pull this off, I’m a little under the weather.
In fact, I just tested positive for the dreaded Covid.
History of Picture Frame Moulding
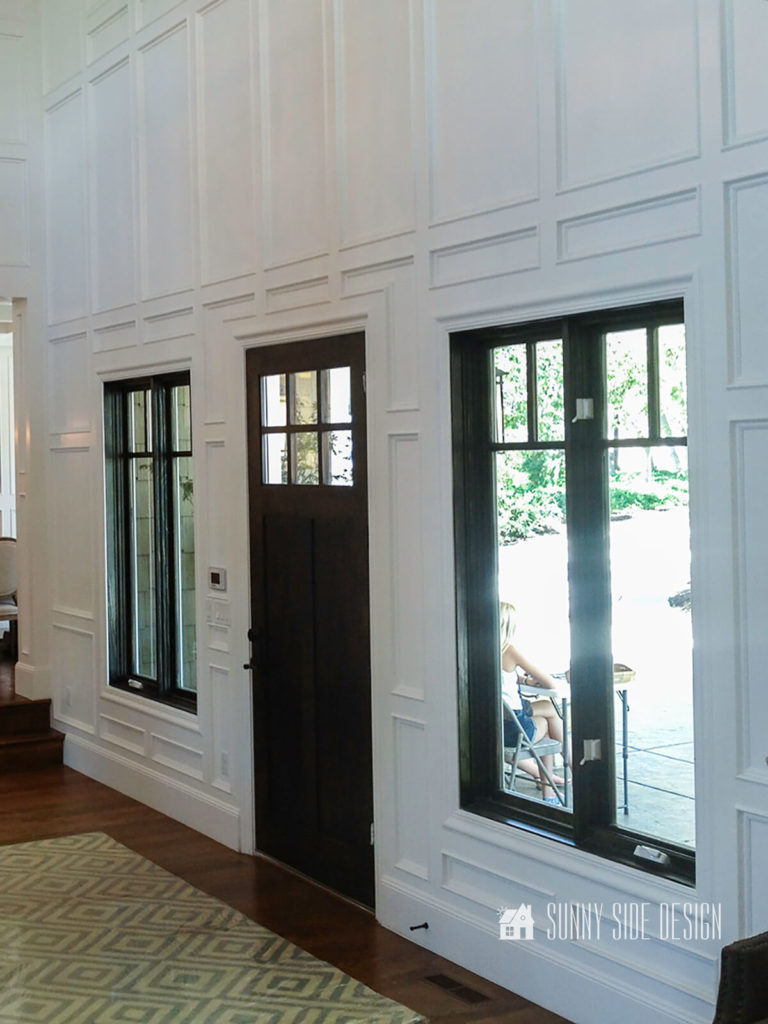
The use of picture frame moulding, also known as box moulding, dates back to the18th century in Europe, it became popular for framing paintings and mirrors in grand homes and palaces.
Today, picture frame moulding is commonly used on walls to add dimension and visual interest.
It can be used to frame family photos, artwork, mirrors, or even architectural features like doorways and windows.
When choosing a picture frame moulding for your home, consider the style of your space and choose a design that complements it.
Thin, sleek mouldings work well in modern spaces while ornate mouldings can add a touch of elegance to traditional or classical interiors.
And while this moulding looks high-end, it doesn’t require tons of skill to pull it off.
Installing picture frame moulding is relatively easy and can be done as a simple DIY project.
Either way, adding picture frame moulding is a simple and affordable way to elevate the look of any room in your home.
Enjoying this post? Pin It, save it and share it with a friend.
Sharing is caring!
The Basic Materials and Tools Needed
Because we used the prefab corners on our walls, we did not need to make any miter cuts.
However the same method and technique would work even if you chose to miter your own corners.
Here’s a list of supplies and tools we used:
- Traditional picture frame moulding
- Traditional corner panel moulding
- Construction adhesive
- Painters tape
- Primed poplar wood crosshead
- Aspen door casing
- Aspen baseboard moulding
Measure and Plan design
Before starting your picture frame moulding project, it’s important to measure and plan the design layout.
First, determine where you want to add the moulding and what you will be framing (photos, artwork, etc.).
Then, measure the dimensions of these pieces and mark them on the wall with a pencil.
In my case, I wanted one box moulding piece to be directly centered over the desk.
This is where I want to hang a large piece of art.
Then I planned for 2 smaller boxes on each side.
In these boxes I will install sconces.
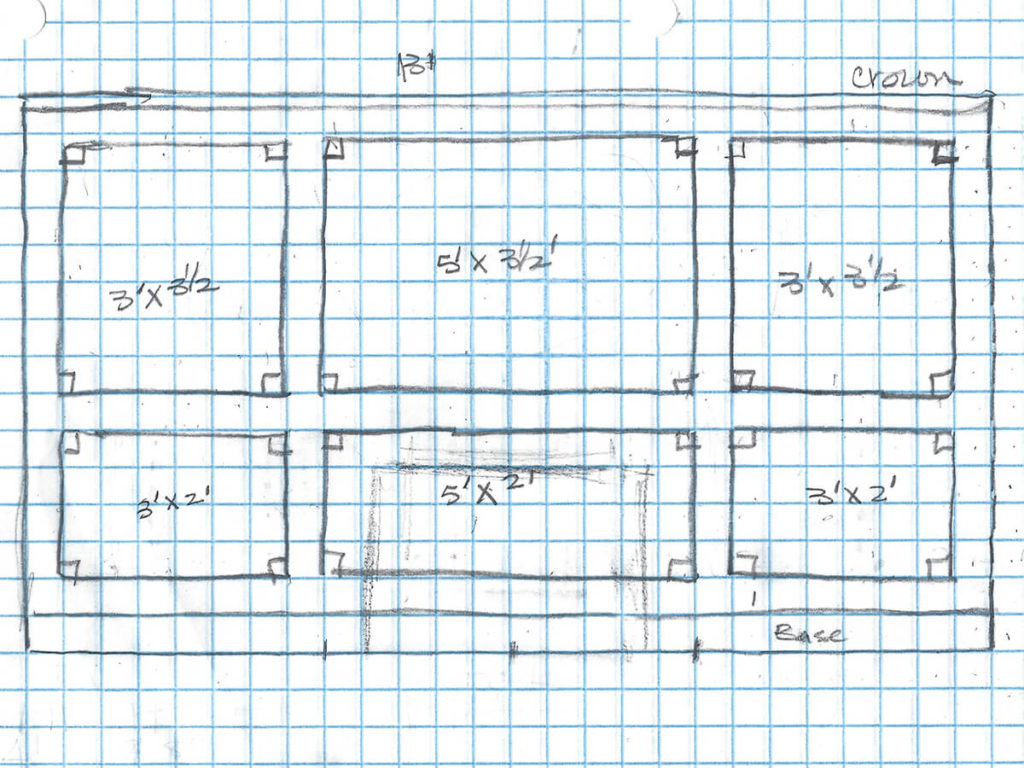
I first made a plan on graph paper, then take these measurements to the wall.
Take into account windows, doorways as you map out your plan. You’ll want to also take into consideration outlets and light switches.
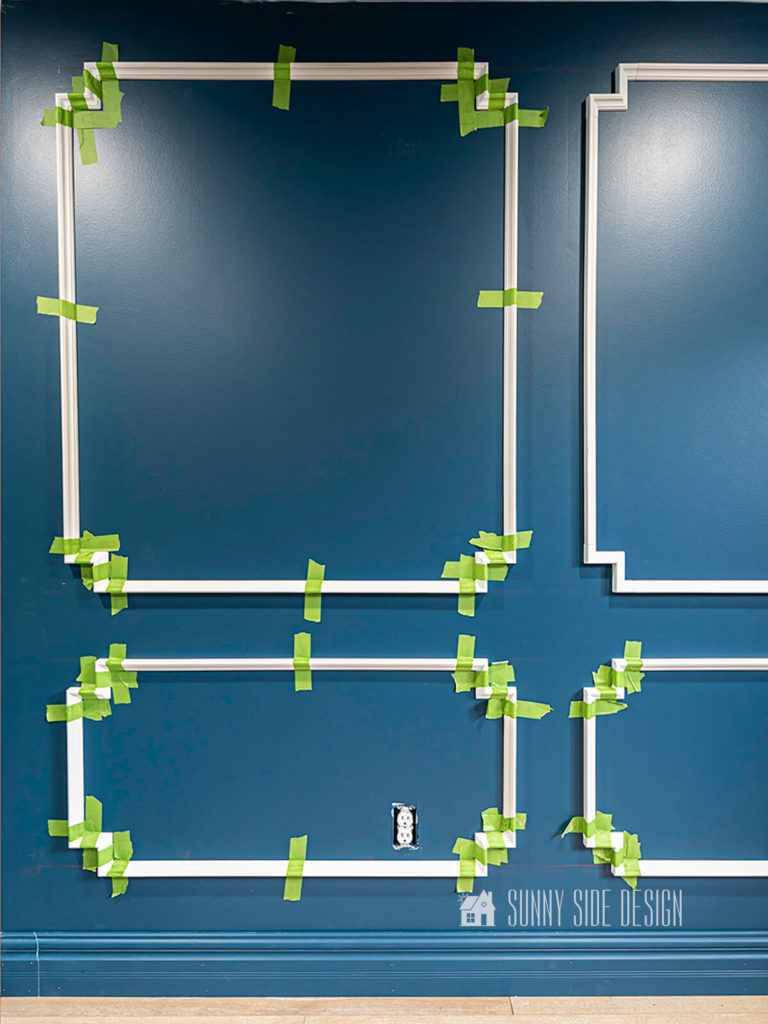
To get a good visual of what the design will look like, we made our horizontal and vertical lines with a pencil and a chalkline.

Then we placed painters tape along these lines, checking with a level to make sure everything is perfect.
By doing this, we can stand back and look to see if the design feels balanced in the room.

Also by placing the painters tape on the wall we found that we needed to adjust our design in a few places to avoid electrical outlets.
Certainly it’s so much easier to figure out these technical difficulties before you start cutting and installing the moulding.
Taking the extra time to use a level will result in clean and professional looking picture frames.
In addition, the painters tape is aligned where we’ll install each picture frame moulding piece to make installation much faster.

[mailerlite_form form_id=2]
Calculate How Much Moulding You’ll Need
Once I had the plan on graph paper, I could easily figure how many corners and how many feet of picture frame moulding I needed.
Just a little side note, Ornamental decorative millwork also sells rectangular picture frame moulding pieces that you simply attach to the wall.
It would be perfect for a wainscoting application and super easy to do!
Paint Wall First
Over the years we installed several accent walls, and have found it easier to paint the wall first.
Then once the moulding is installed, you just need to brush the moulding with paint.
Trust me, it’s a lot easier to paint your wall before installing your accent moulding.
Let’s stay connected! Follow us on social media!
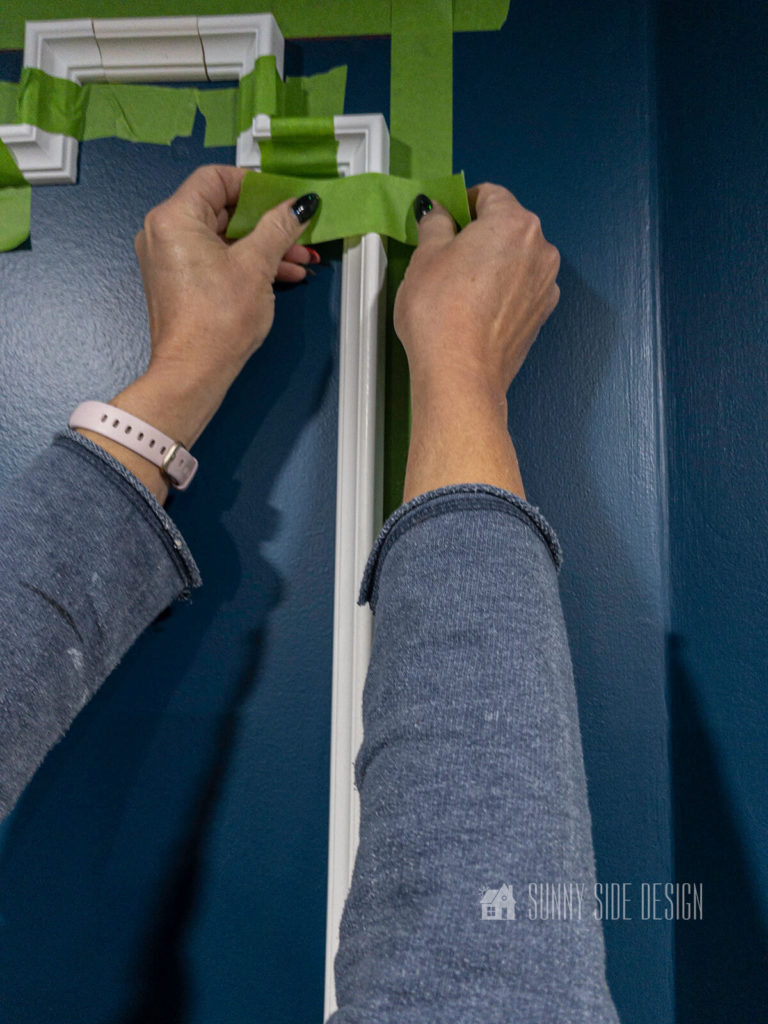
Attach Corner Pieces
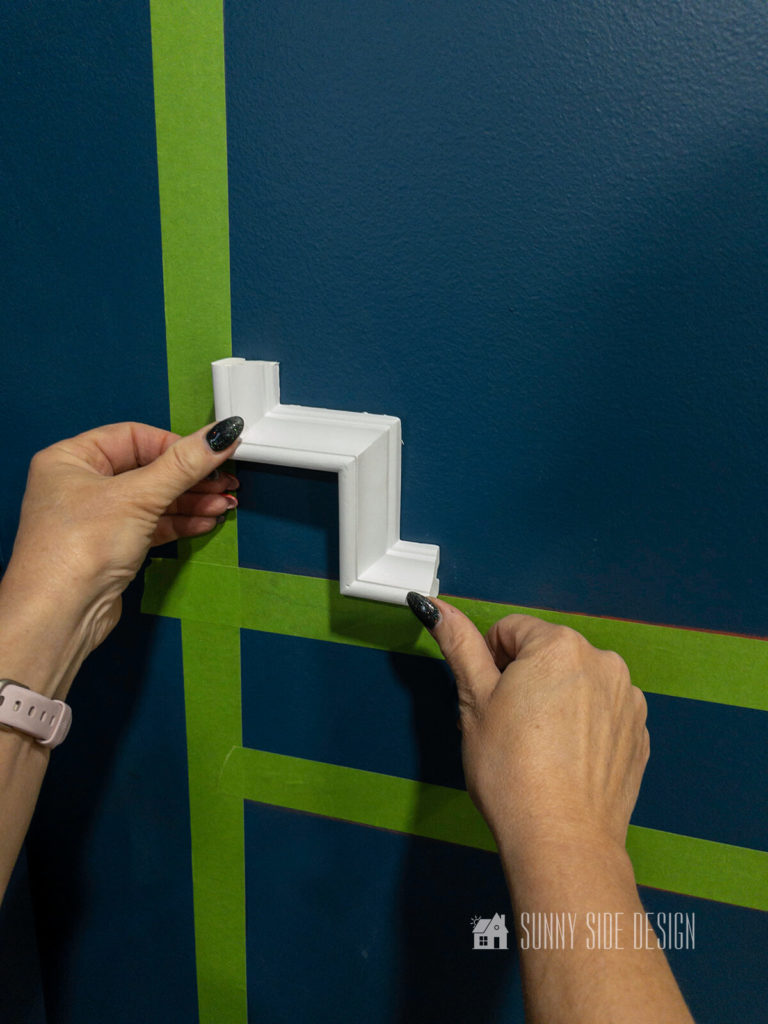
Begin by attaching the four corner pieces to your first box.
We applied a small about of construction adhesive and aligned it with the tape.

Then we placed a couple of pieces of painters tape to hold it into position while the adhesive dried.
Measure and Attach Picture Frame Moulding
Once all of the 4 corners are installed, measure the distance between each of the corners and cut the picture frame moulding to fit.
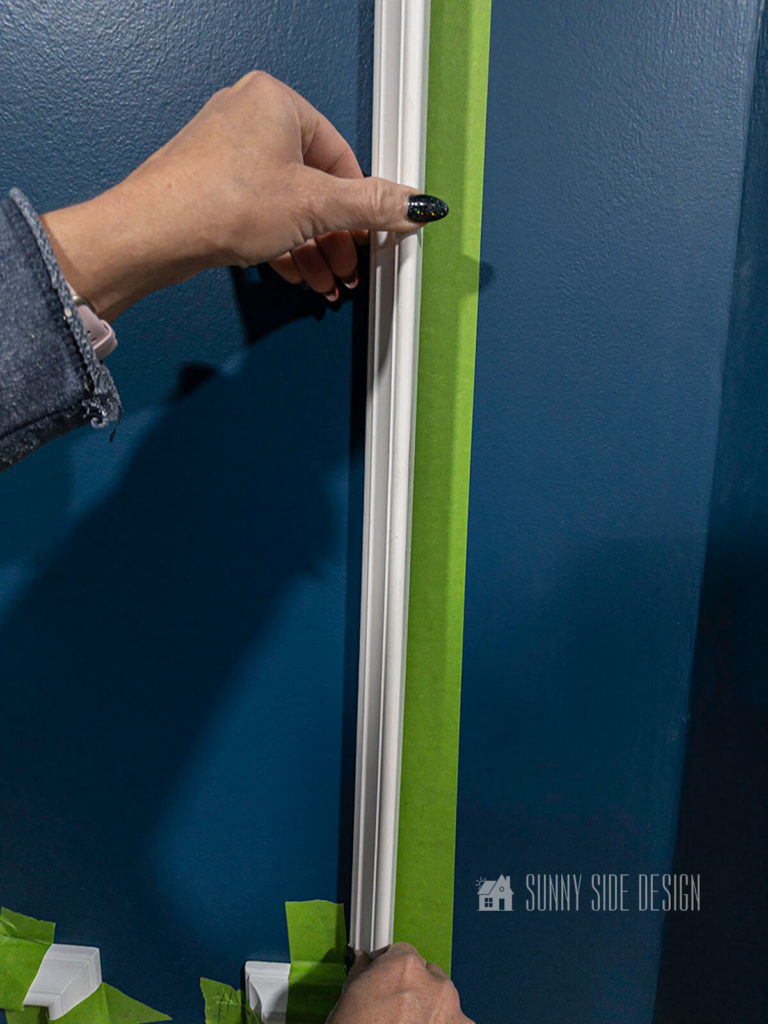
Then we applied a little construction adhesive to the back of the picture frame moulding and placed it into position.
Again we used painters tape to hold it in place while the adhesive dries.
Tips for Installing Picture Frame Moulding
When installing picture frame moulding, it’s easy to make the mistake of using the ceiling or floor as a guide for determining what is level.
However, these surfaces may not actually be level themselves and can result in wonky frames.
Instead, use a level tool to ensure each piece of moulding is properly aligned.
Start by attaching the top piece of moulding first, using a level to make sure it is straight.
Then, continue installing the other pieces, using the top piece as a guide for ensuring they are also straight.
Also I’d recommend using a longer level like a 4 ft. level.
It will help ensure that each piece is aligned properly.
A laser level isn’t necessary here, but it will definitely makes this process easier!
Always measure 2 or even 3 times and cut once.
I’ve been know to make a wrong cut a time or two.
Take the time to map out your design with painters tape.
By doing this you may find you’ll need to make adjustments for outlets.
Complete one entire box frame before moving to the next.
This way the adhesive is still wet if you need to make any adjustments.
You may need to place a few brads in your moulding if your wall are bowed.
That was the case on our largest box.
We knew the wall bowed, but we thought the tape would hold it in position as the adhevive dried.
But when we removed the tape we noticed it was loose in a couple of places.
It was a quick and easy fix.
We simply squirted a little construction adhesive in the gap and shot in a couple of brads.

Caulk, Putty, Paint
The last step to beautiful box paneled walls is to caulk, putty and paint.
And that’s a job in it’s self.
Be sure to check back next week as we caulk, putty and paint.
You are going to want to see Steph’s caulking technique!
It’s a game changer!
Plus we’ll share tips on when to use caulk, wood filler, wood putty and spackle.
Are you enjoying this post? Please Pin It, save it for later and share it with a friend.
Sharing is caring!
The Reveal
As you can see, adding picture frame moulding can add dimension and visual interest to any space.
Overall, adding picture frame moulding is a simple and affordable way to enhance the look of any room in your home.

Are you ready to try your hand at installing picture frame moulding in your home?
If you try this out in your home, please share your results!
Drop us a comment and let us know what you think of this project.
We’d love to hear from you!
Please share your thoughts and questions with us.
If you’re new here, WELCOME! We love having new readers and friends!
You can learn more about us here.
Let’s stay connected!
Subscribe to our free newsletter so you don’t miss any inspiration for your home.
Please PIN and save for later, and share with your friends!
Sharing helps grow our following!
Thanks for stopping by and as always here at Sunny Side Design…
WE HOPE TO BRING YOUR HOME TO THE SUNNY SIDE OF THE STREET.

Retailers We Love
- Anthropologie
- Birch Lane
- Crate & Barrel
- Joss and Main
- Lampsplus
- Mark & Graham
- One Kings Lane
- Pottery Barn
- Rejuvenation
- Serena & Lily
- Wayfair
- West Elm
- Williams Sonoma
- World Market
Be sure to follow us on Pinterest for even more home decor and DIY ideas.
To see what we are working on before it’s on our blog, follow us on Instagram.
You will also find our video tutorials on our YouTube channel.
- Easy Strawberry Chicken Salad with Lime Maple Balsamic Vinaigrette

- How to Fix Chipped Kitchen Cabinets with a Pen
- Easy 4th of July Door Decor You Can Make in Minutes
- 35 Easy Decorating Ideas for Summer to Welcome the Season


I absolutely LOVE this! It makes doing box panels so much easier. Thank you so much for sharing. I definitely want to do this. Hugs and blessings to you.
Thank you Renae, I’ve been dreaming of doing this for years. I’m so pleased with it so far. I can’t wait to finish it up this week.