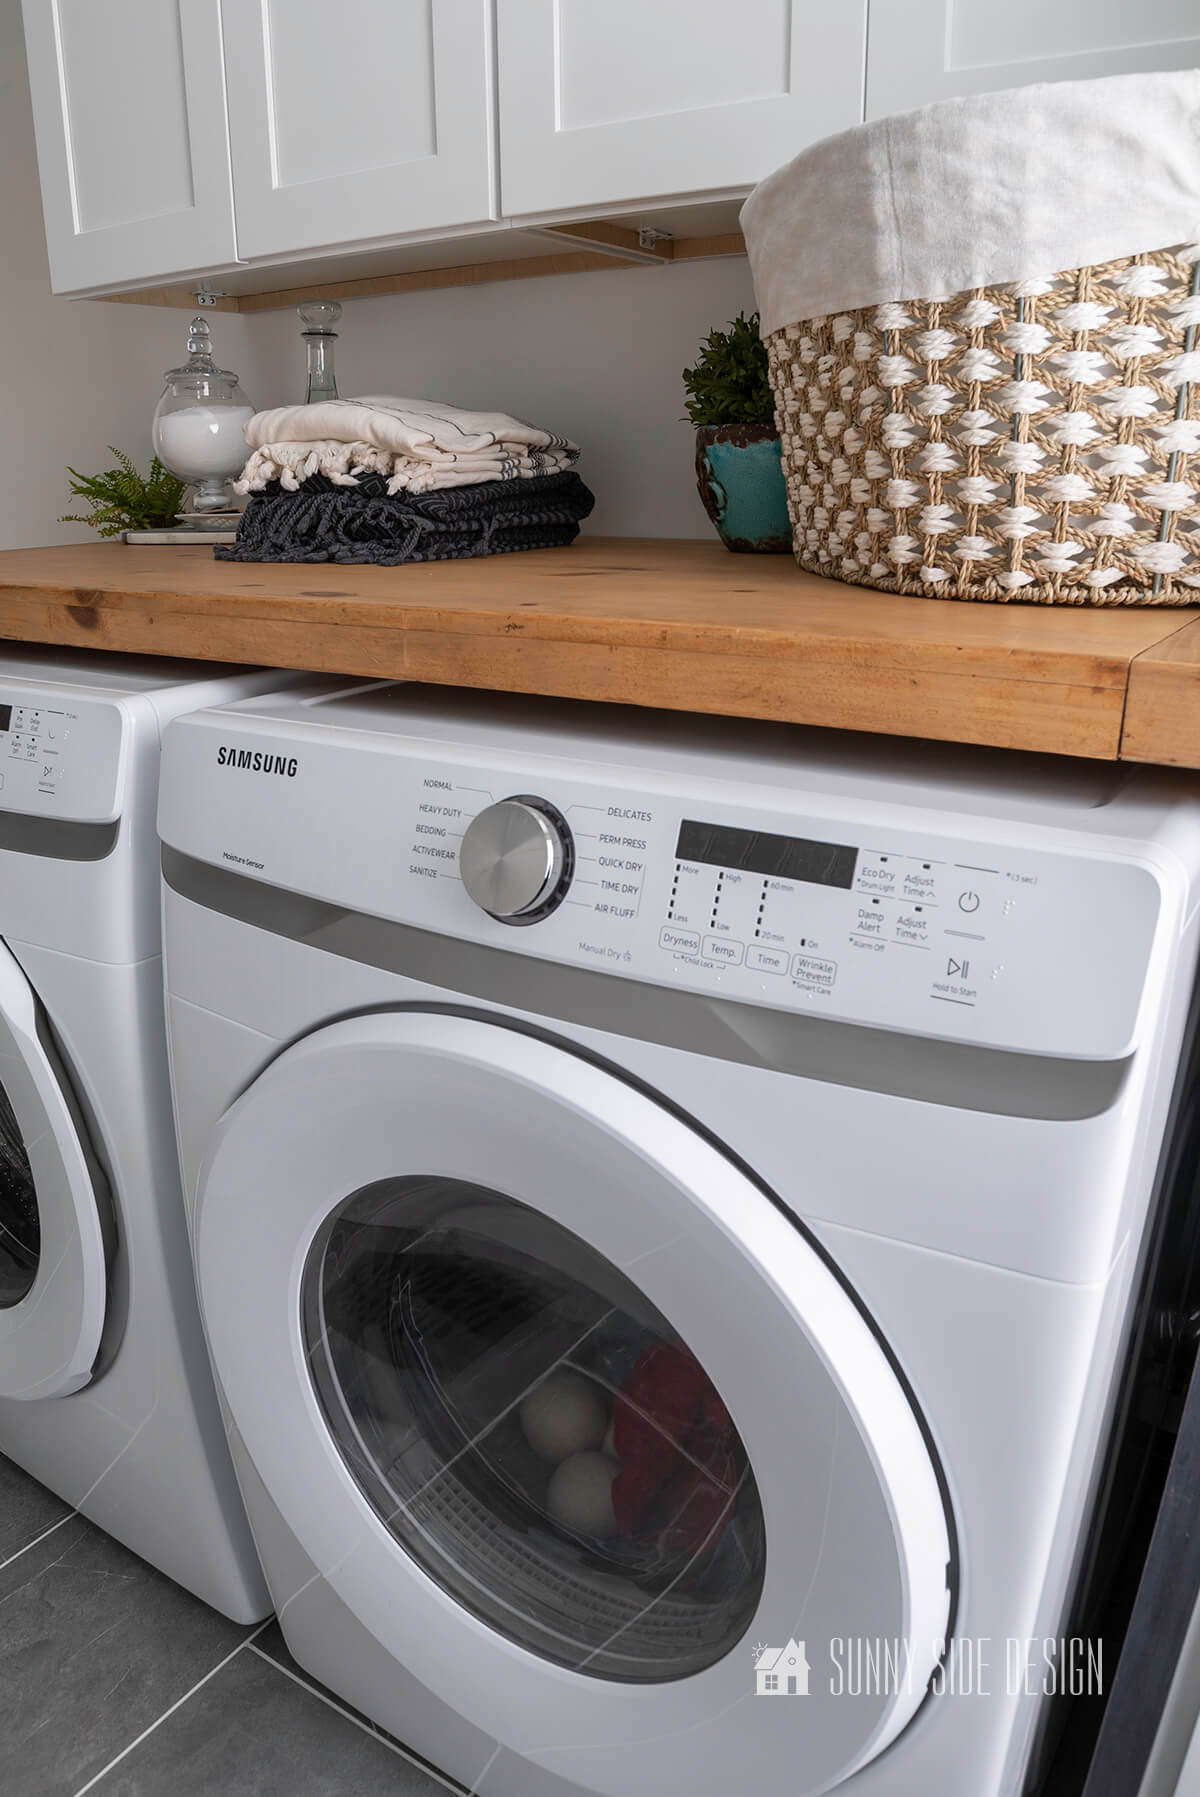
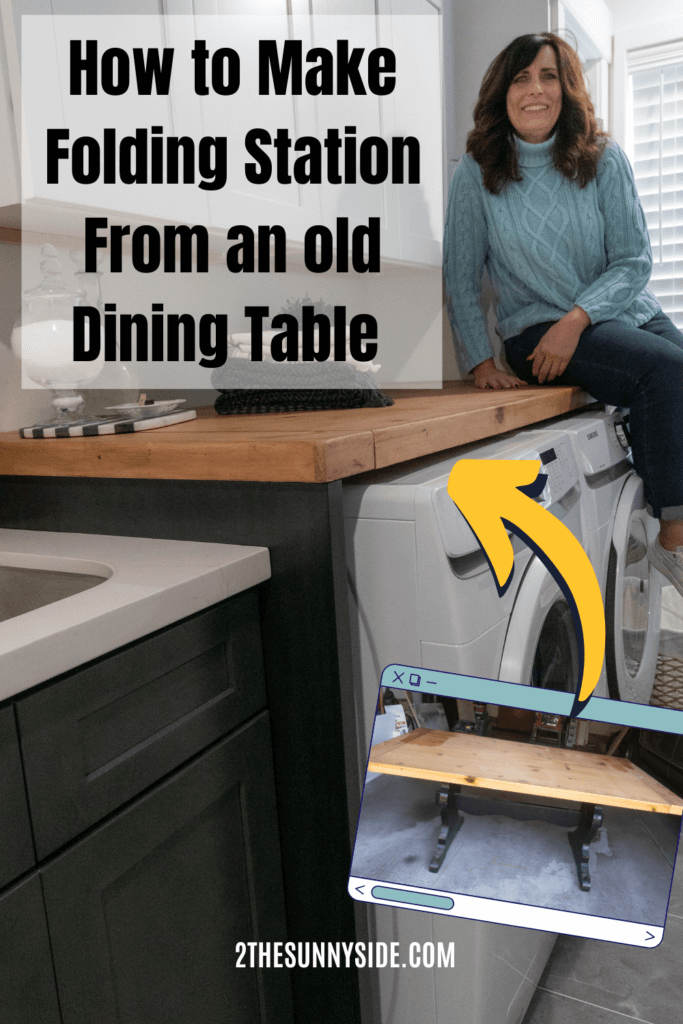
It’s week 3 of the One Room Challenge and it’s certainly been a busy week for us in my laundry room. Not only did we install new cabinets, but we also built a simple laundry room fold table.
Clearly, this folding station makes my laundry room much more functional.
It makes me want to do the happy dance!
In fact, would you believe I’m almost excited for laundry day.
If you’ve been looking for a way to add a folding table to your laundry room scroll on down and see how we put ours together.
Just as a reminder, you can easily navigate through each week of this Modern Cottage Laundry Room project.
- Week 1: 12 Ideas for Creating a Functional Laundry Room You’ll Love
- Week 2: Installing Tile: Practical Tips for the Beginner
- Week 3: You are here!
- Week 4: How to make a Broom Closet in the Laundry Room
- Week 5: How to Update a Laundry Room Light Fixture
- Week 6: 8 Tips for Beginners: Installing a Simple Tile Backsplash
- Week 7: 14 Useful Laundry Room Organization Ideas You Need to See
- Week 8: The Best Laundry Room Makeover on a Budget

Determine Size for Laundry Room Fold Table

First, you’ll want to determine the height and depth for your laundry room folding table.
I began by measuring the height of my washing machine and then added 1″.
This would be the size I would cut the sides for my laundry fold table base.

Next, you’ll want to determine how deep your folding table can be.
In my laundry room, I don’t have enough room to have the table top extend all the way to the front edge of my appliances.
If I did extend it that far, I wouldn’t have room to get my appliances in and out.
So, my folding table will sit back about 4″ from the front of my appliances.
The sides for the base of my folding table will be cut to 39 1/2″ x 29″
Laundry Room Fold Table Supplies
For this project you will need the following tools:
- saw
- pneumatic brad nailer
- drill
- level
- tape measure
Disclosure: This post contains affiliate links or referral links for your convenience. It is a way for this site to earn advertising commissions by advertising or linking to specific products and/or services. Click here to read my full disclosure policy.
You will also need the following supplies:
- plywood
- wood trim
- table top wood (we used an old dining table, but you could use plywood too.)
- wood glue
- stain or paint
- topcoat or wax
How to Build Folding Table Base
Cut lumber

Certainly to make it easier, have the basic cuts made at the home improvement store.
In fact, Home Depot will happily cut your wood for you.
For instance, I had the plywood cut to 39 1/2″, the height of each side of my base.
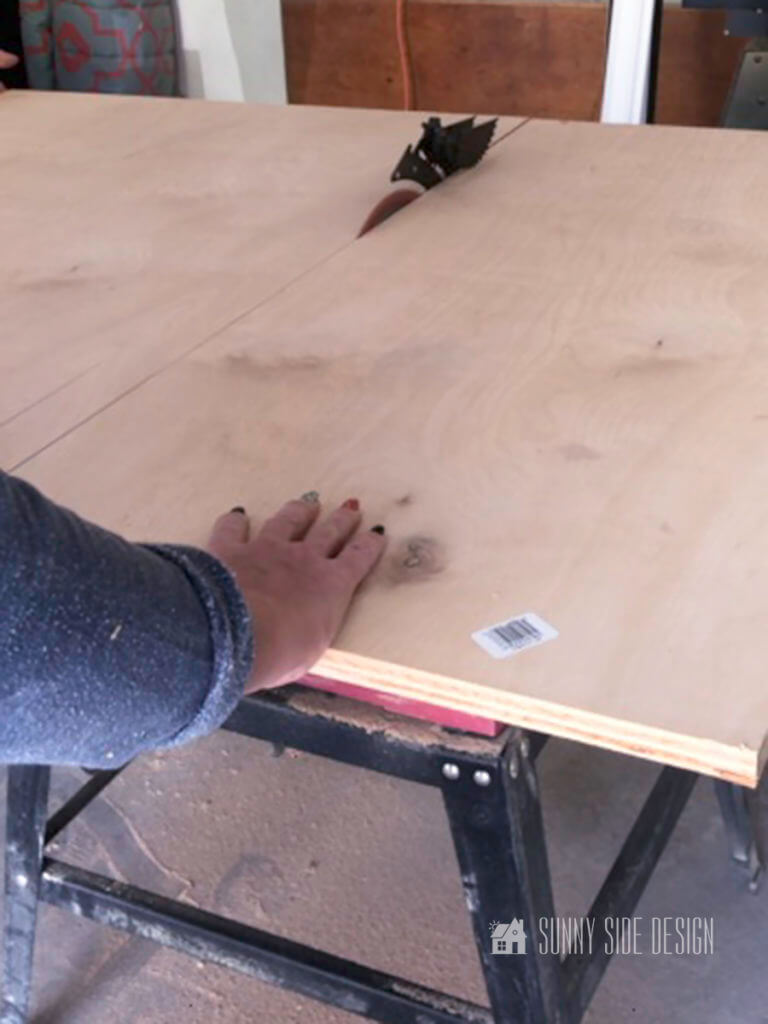
Then, at home we cut it to the depth that we needed, 29″.

The right side of my laundry room folding table base needed an additional cut for the dryer vent and gas line.

If you need to make any adjustments or other cuts, do a dry fit and make sure it fits in your space.
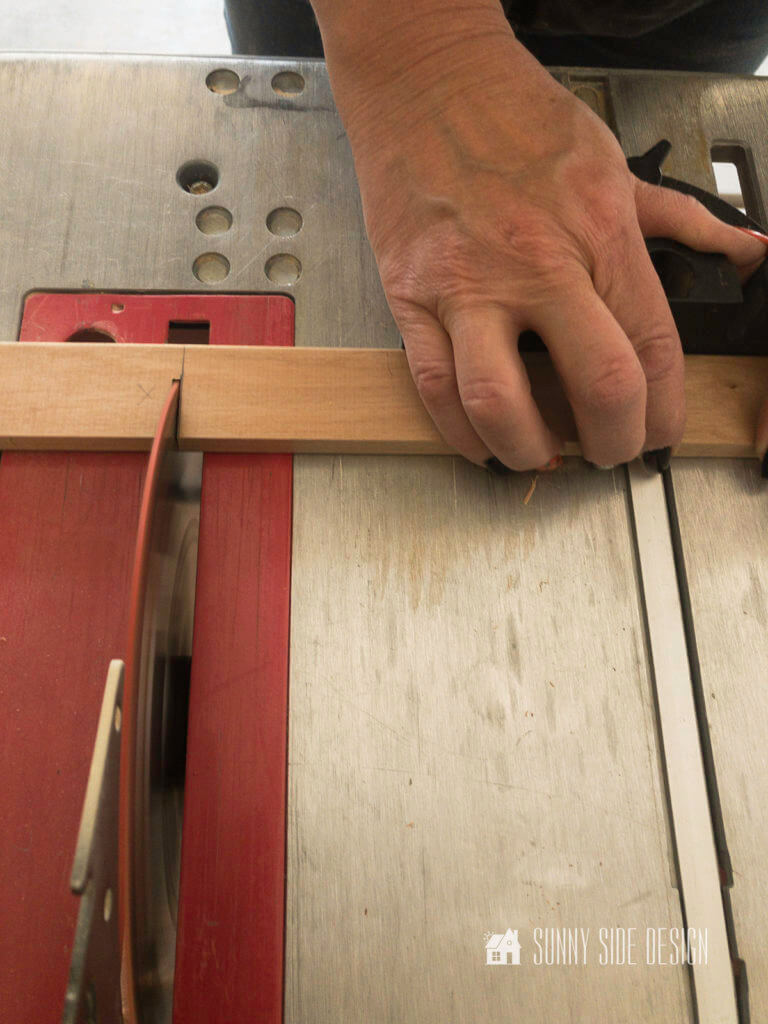
Next, cut the wood trim to the height of the base sides.
In my case, mine is cut to 39 1/2″.
Assemble Base

Then, run a bead of wood glue along the wood trim.
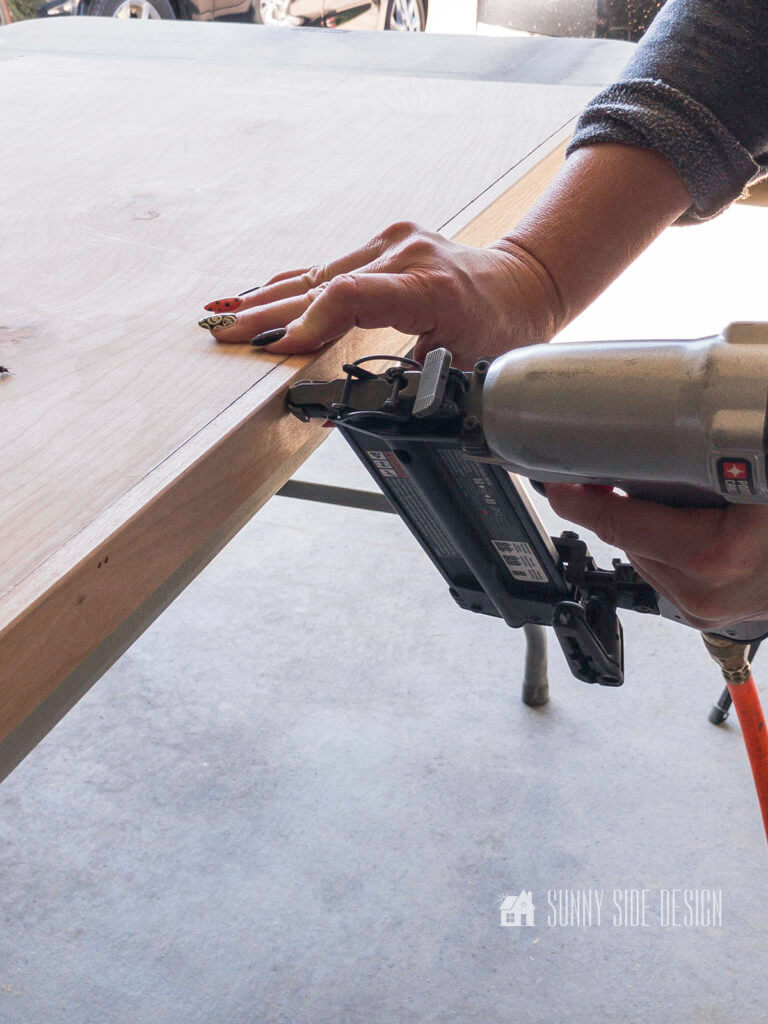
And secure it to the front edge of the plywood with the brad nailer.
Also you’ll want to keep the wood trim flush with the outside edge of the plywood base.
Finally, lightly sand the wood and apply either a stain or paint finish.
I chose an ebony stain for my base.
Once it was dry, I applied a grey stain over the top and immediately wiped it off.
This gave me the exact match to my cabinet finish.
Also, I tried out a few different stain combinations on scrap plywood before I actually stained my pieces.
Once the stain was completely dry, I applied 2 coats of a Wipe on Poly, sanding in between with steel wool.
Are you enjoying this project?! Please pin it, save it for later and share it with a friend.
Sharing is caring!
Install Base for Laundry Room Fold Table

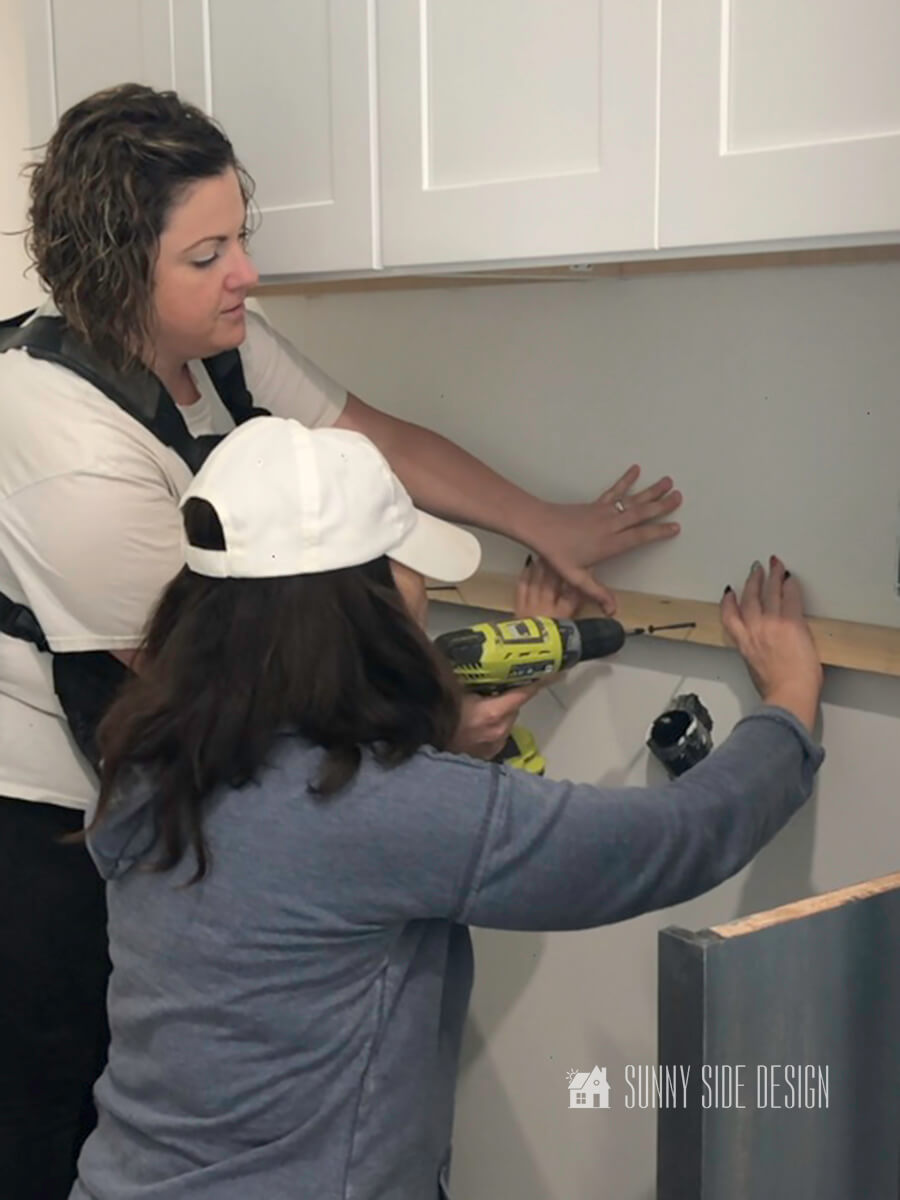
Before you install the side panels, determine the location of the studs in the wall.
Then secure the side panel to the wall with 2″ nails at each of the studs.

The left side of my folding table base will be secured to the cabinets.
Then I marked the panel where I wanted to place the brads before hand.
Since the front edge of my cabinet sits out 1/4″ further than the back of the cabinet, I inserted a shim before securing the back edge of the panel with the brads.

[mailerlite_form form_id=2]
Fold Table Top

Because I really wanted a chunky natural wood top for my laundry room folding table, I decided to look for an old dining table on the online classifieds.
With the cost of wood these days, this was very cost effective.
In fact, I found this pine table that worked perfectly.
In addition, I have two benches and the table base.
And then we decided to use the benches to make two sofa tables behind Steph’s sectional couch.
It’s definitely a win, win when you upcycle pieces like this.
If you like to upcycle, check out our Favorite Flea Market Flips for a little inspiration.
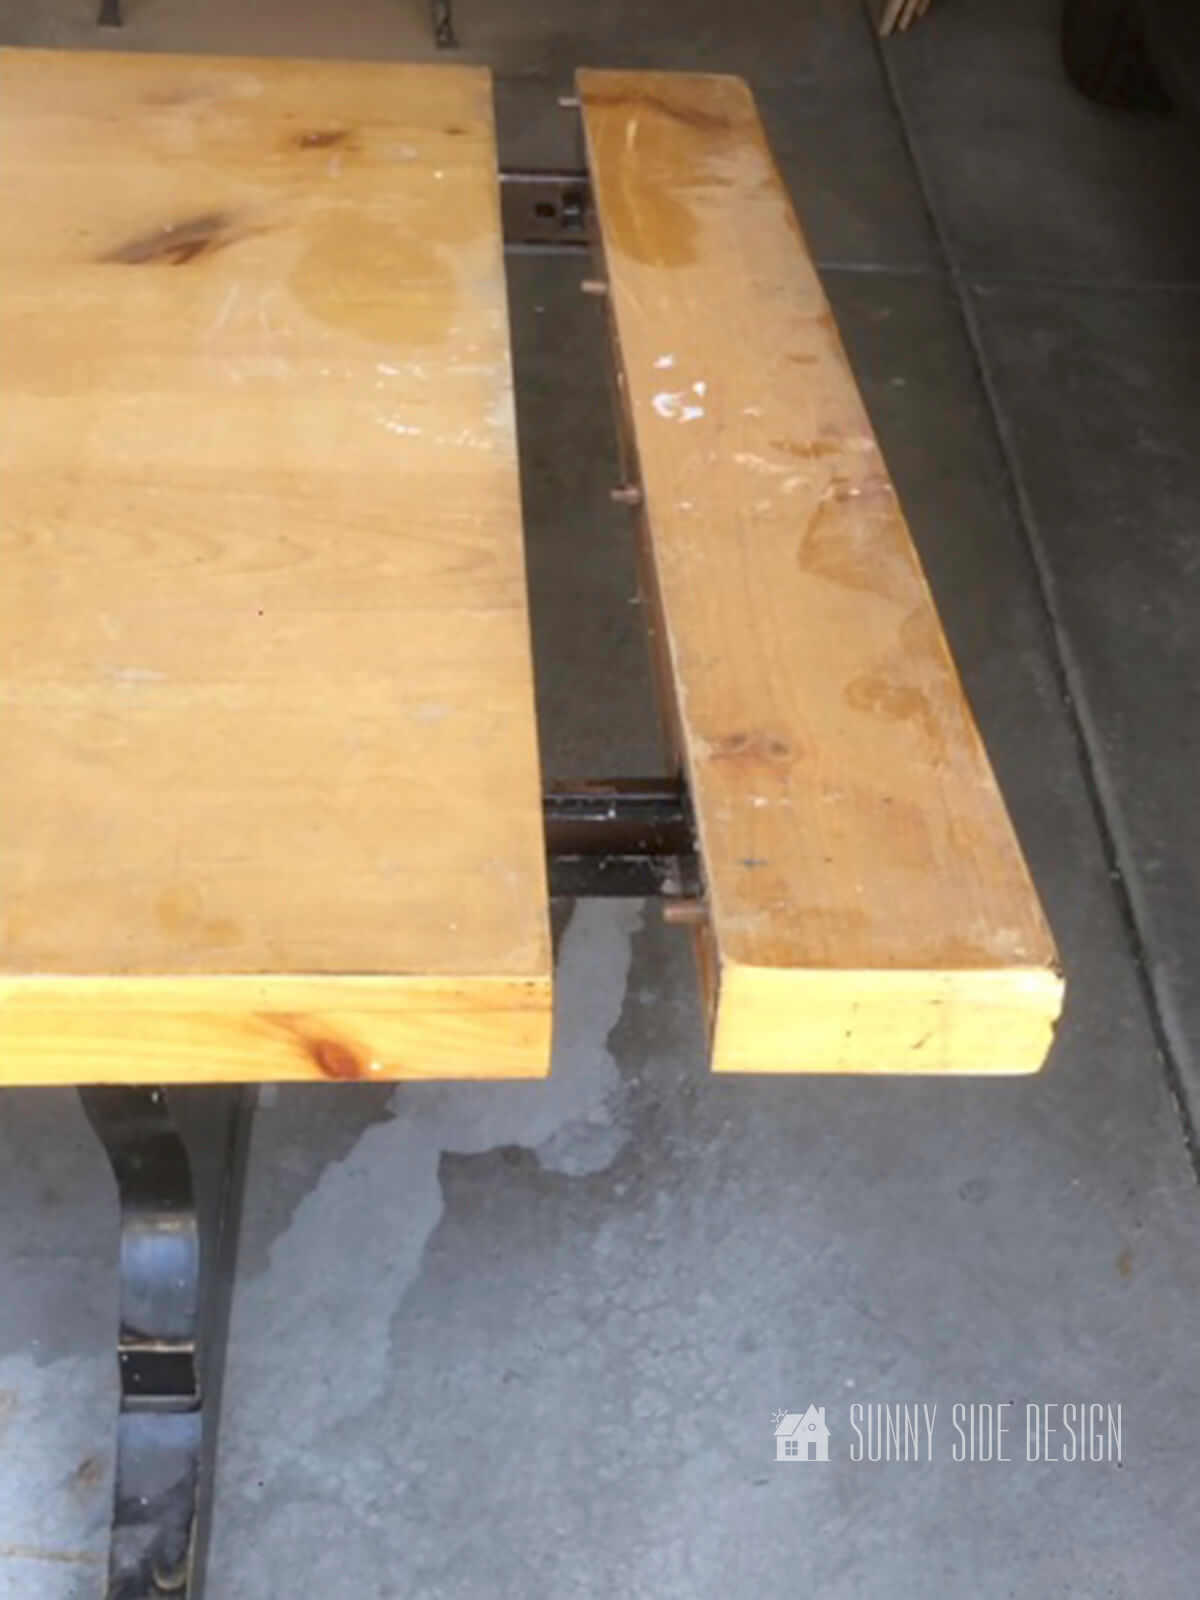
Because of the unique way the leaves are inserted, making adjustments to the width of the table was pretty easy.
First, we took off all of the hardware from the backside of the table.
And then I stripped the finish off of the table top.
Cut table top to Size
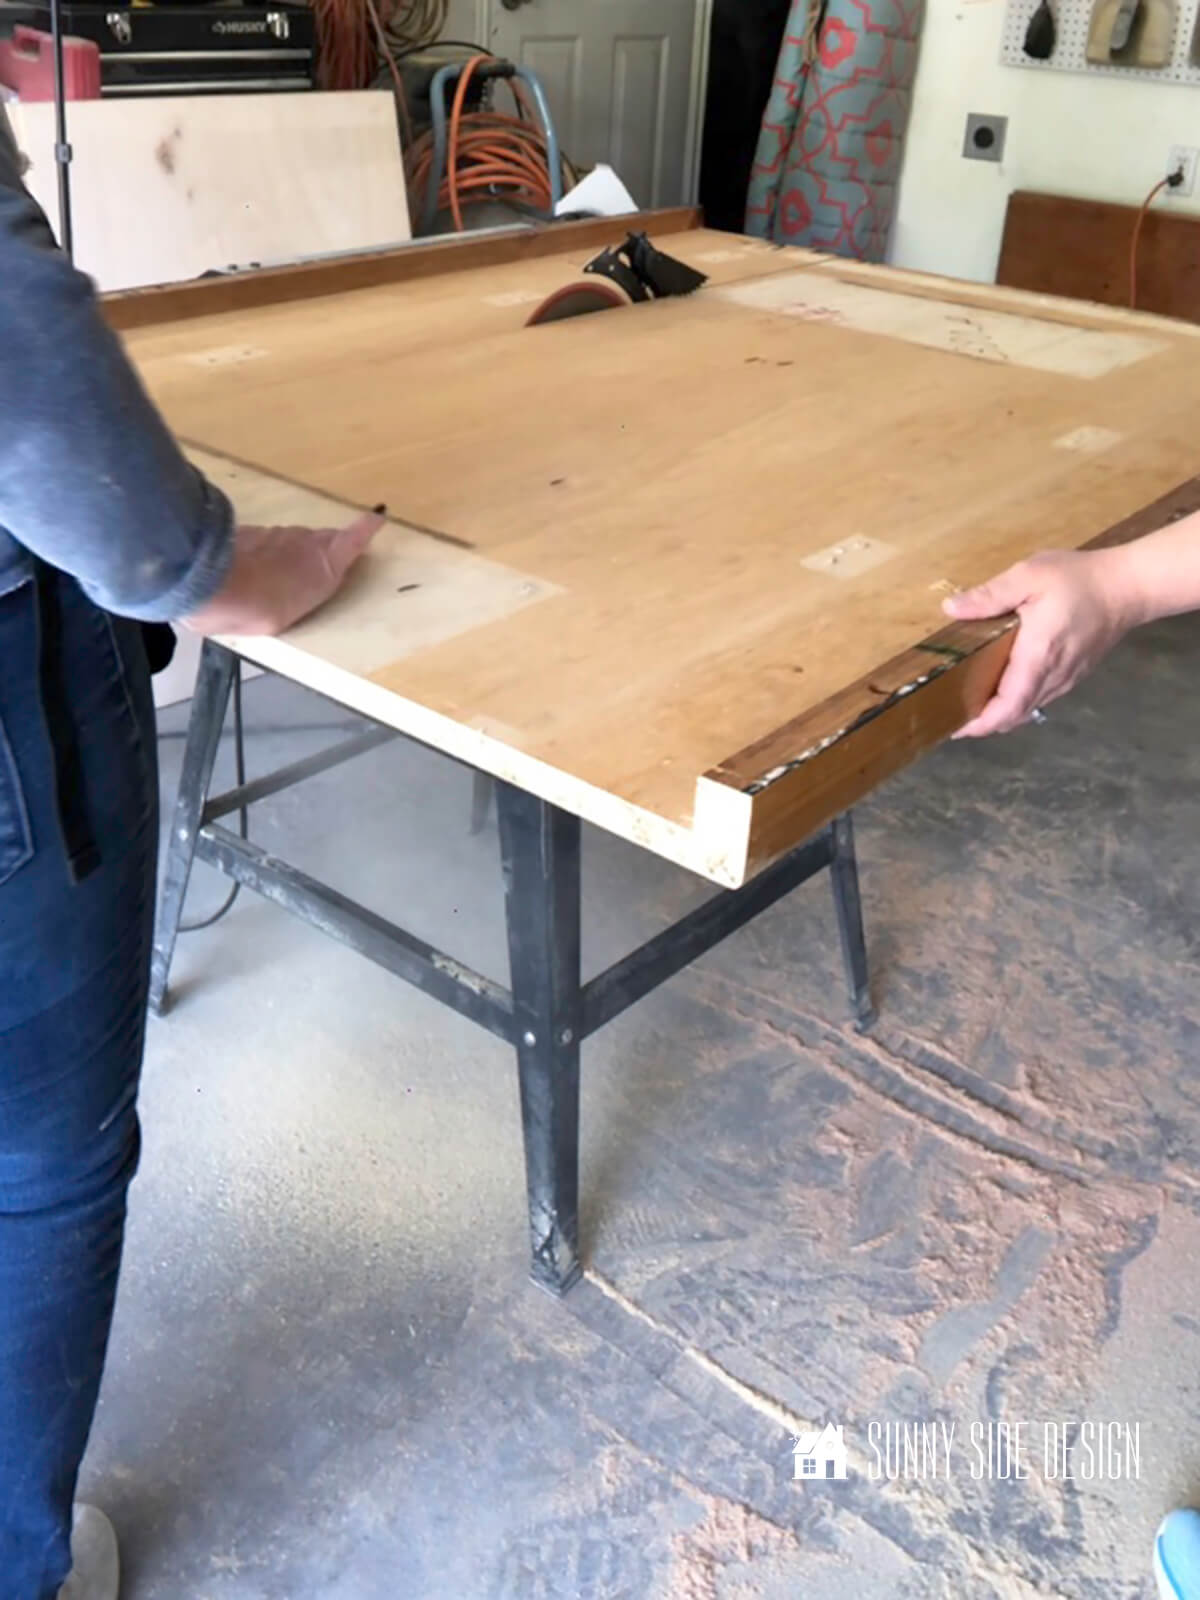
Once the 2 side pieces were removed we were able to cut down the center section by 10″.
Then we also trimmed the depth of the table, so that our table would measure 29 1/2″ deep.
All of the cuts were made on the table saw.
Because of the size of the wood, it took both Steph and I to manage this.

At this time we are ready to reattach the side pieces of the table to the center section of the table top.
For this we are going to make pocket holes and screw the sides to the center piece.
I think the Kreg jig is the perfect tool for this.
First, we placed the end of the tabletop into the jig.
This is the view from the backside.
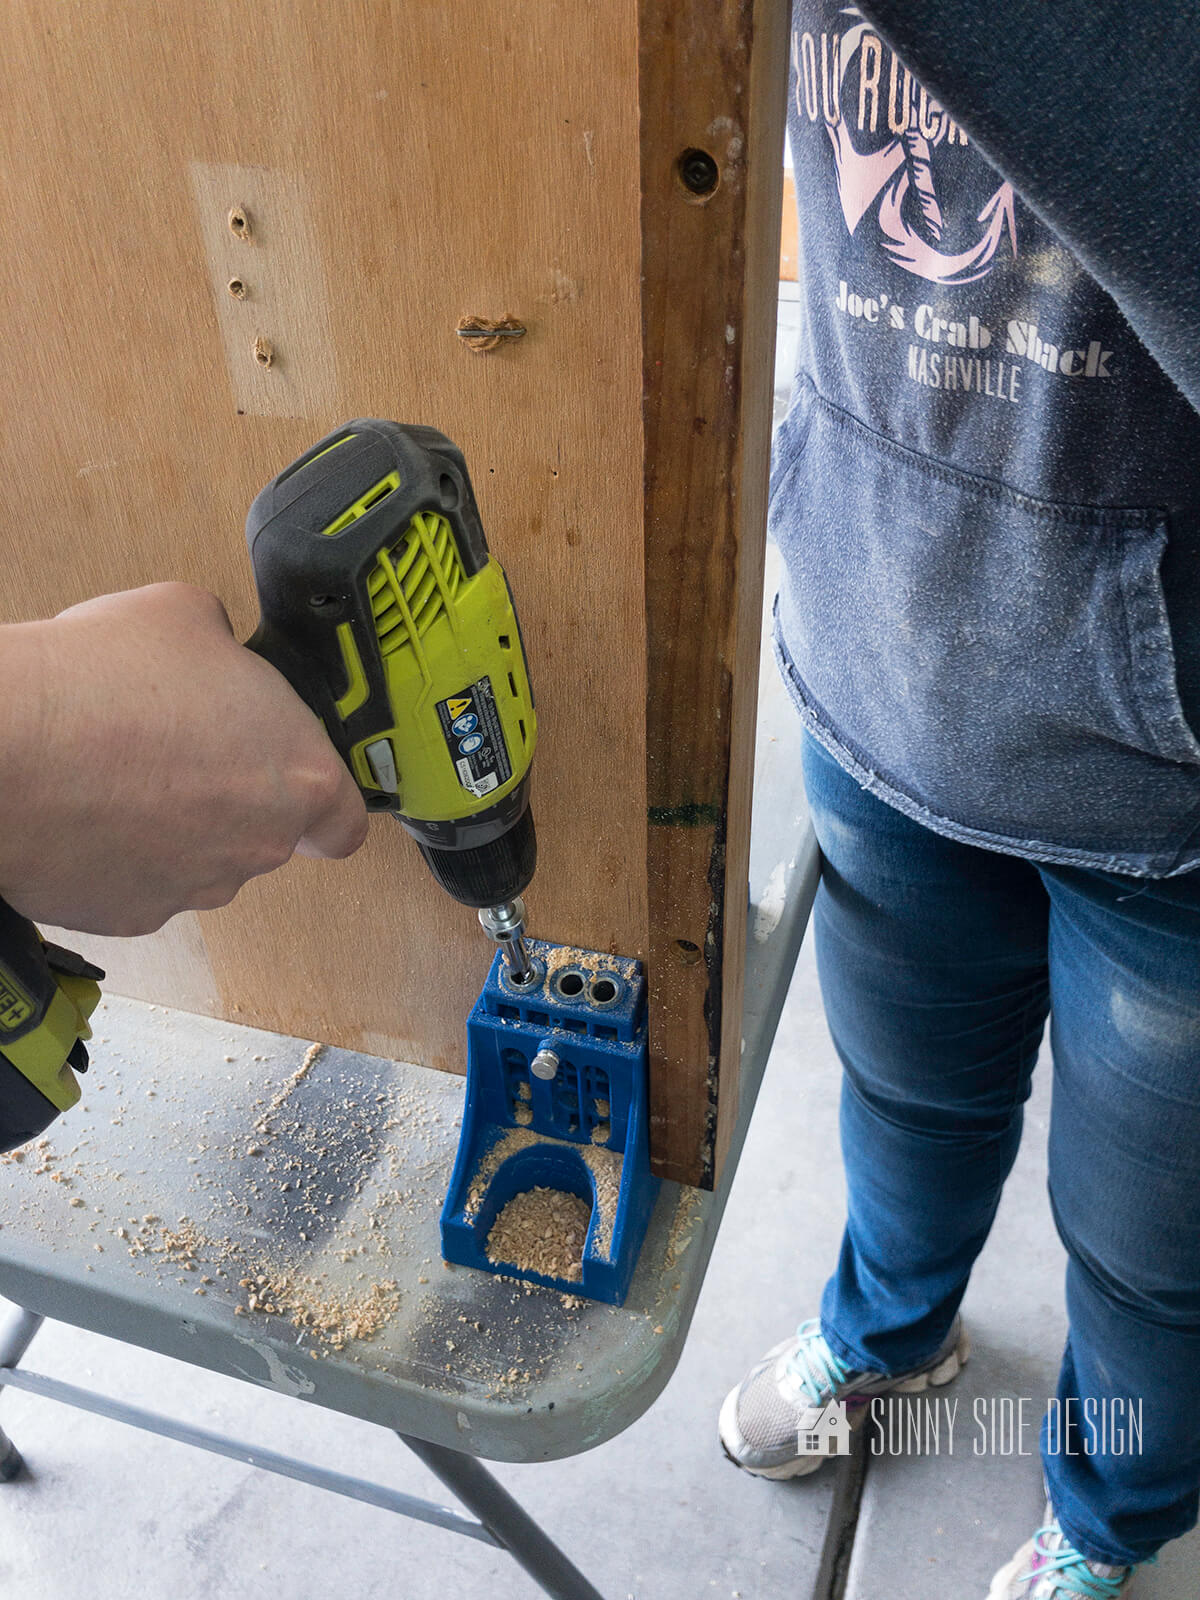
Because this is such a large piece of wood, one of us kept the wood steady while the other one made 2 pocket holes.
To make sure it would be secure, we placed 2 pocket holes on each side and 2 pocket holes in the center.

Keeping the 2 pieces of wood flush is very important when securing the pieces together.
So, we screwed a cleat to the bottom side of the table in the center.
And then applied wood glue to the side piece we were attaching.

Using 2 clamps we secured the cleat to the side piece we were attaching and placed 2 pocket hole screws on each side.
Then we removed the clamps and inserted 2 screws into the 2 center pocket holes.
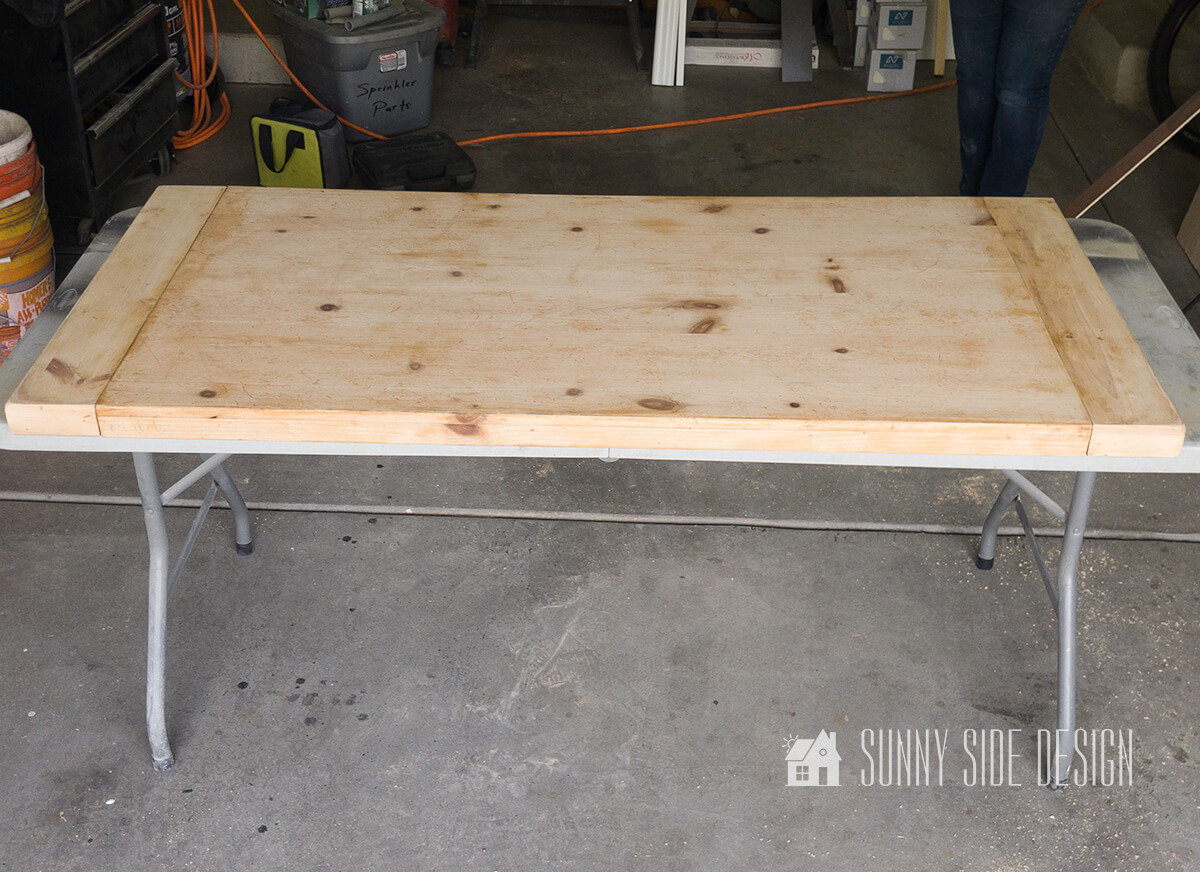
Here is what the table top looked like once the sides were attached.
Apply Finish
I really want a modern cottage feel in my laundry room.
Overall, I want this laundry room folding table to feel old and a little worn with lots of character.
With this in mind, the finish is very important.
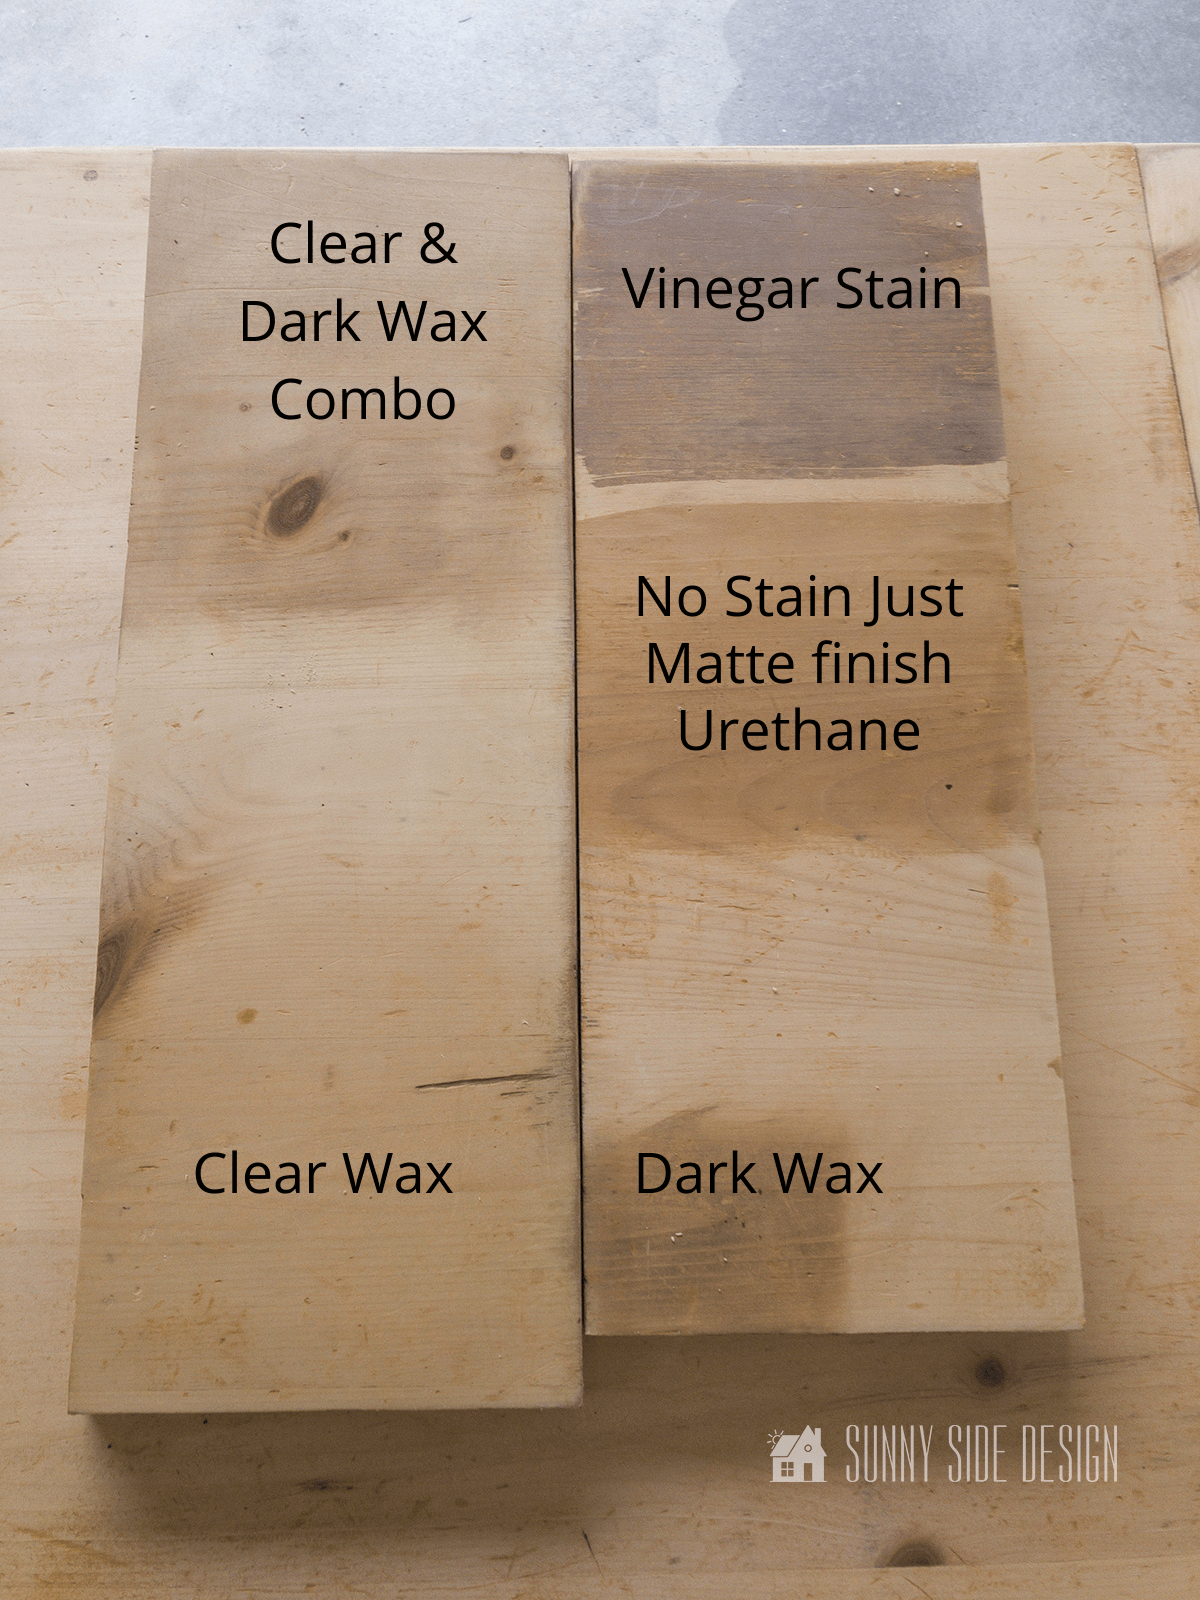
Taking scraps of the wood I began to try different options.
And the winner was the clear and dark wax combination.
Not only did I want to mask the yellow color of the pine, but I wanted it to have dark spots in the divots of the wood.
By using a combination of the 2 waxes I was able to achieve just that.

For this technique you will need a waxing brush.
First, I placed some clear wax and some dark wax on a paper plate.
Then I tapped my brush in the clear wax, then a light tap of the dark wax.

You want to have more clear wax on the brush than dark wax.
Then apply it to the wood surface in a circular motion.
This circular motion will press the dark wax into the divots and imperfections of the wood.
Creating that worn and aged look that I’m going after.

over the entire surface with the wax combination.
Then take an old cotton cloth and lightly wipe off any excess wax.
Let dry, until no longer tacky.

Finally buff it to a beautiful smooth finish.
This can be done by hand or with a buffer.
Let’s stay connected! Follow us on social media!
Attach Laundry Room Fold Table Top to Base
At this time, we brought in the table top and set it on our 2 side bases.
We then made a mark under the table top marking where to place the cleat.
First, we drilled pilot holes in the cleat and then attached it to the the studs in the wall.

Because of the thickness of our table top, we decided to secure the table top to the bases with a little construction adhesive.

And finally we placed a few brads along the back edge of the fold table, into the cleat with the pneumatic brad nailer.


So, what do you think of my new, old looking folding table for my laundry room?
Is this something you’d like to add to your laundry room?
Please share your comments, we love hearing from you!
Please pin this post, save it for later and share it with a friend.
Sharing is caring!
We hope you found a little inspiration here today.
Please share your thoughts and questions with us.
We love to hear from you!
If you’re new here, WELCOME! We love having new readers and friends!
You can learn more about us here.
Now let’s stay connected! Join our community of doers and you won’t miss any inspiration for your home.
Please PIN and save for later, and share with your friends!
Sharing helps grow our following!
Thanks for stopping by and as always here at Sunny Side Design…
WE HOPE TO BRING YOUR HOME TO THE SUNNY SIDE OF THE STREET.
Retailers We Love
- Anthropologie
- Birch Lane
- Crate & Barrel
- Joss and Main
- Lampsplus
- Mark & Graham
- One Kings Lane
- Pottery Barn
- Rejuvenation
- Serena & Lily
- Wayfair
- West Elm
- Williams Sonoma
- World Market
Be sure to follow us on Pinterest for even more home decor and DIY ideas.
To see what we are working on before it’s on our blog, follow us on Instagram.
You will also find our video tutorials on our YouTube channel.
- How to Fix Chipped Kitchen Cabinets with a Pen

- Easy 4th of July Door Decor You Can Make in Minutes
- 35 Easy Decorating Ideas for Summer to Welcome the Season
- Fourth of July Decorating Ideas You’ll Love This Summer


