Hi Friends! It’s finally finish, my master bedroom makeover on a budget is complete! I can’t wait to show you the final reveal. It’s been a long time coming.
I hope you’re all doing well today and that you enjoyed your Halloween festivities this year. My kids had the day after Halloween off from school for a teacher prep day…which pretty much means they were all hopped up on sugar the whole day excited to have a day off!
I survived the weekend…barely! Between the 3 kids they collected more than 15lbs of candy! We’ve had a super cold spell here, so my theory is that everyone wanted trick-or-treaters finish quickly so they were handing out candy in bulk so they could just be finished for the night!
- Master Bedroom Before the Makeover
- Master Bedroom Mood Board
- Master Bedroom Makeover Video Tour
- Master Bedroom Makeover Dresser Refresh
- Master Bedroom Makeover Feature Wall
- Master Bedroom Makeover Accessories
- Master Bedroom Makeover Refinished Bed
- Master Bedroom Makeover Window Treatments
- Master Bedroom Makeover Upholstered Chairs
- Master Bedroom Makeover Art to Hide TV
- Master Bedroom Makeover The Lighting
To see ALL the highlights from this master bedroom makeover on a budget click any link below.
–How To DIY Your Own Bay Window Curtain Rod
–Easy DIY Board & Batten Wall For Only $50!
–How To Use Saltwash for an Amazing Worn & Weathered Finish
–How To Weather Wood with Vinegar & Steel Wool Stain
–How To Repair Light Fixture Ceiling Hole
–Adding Coastal Style to an Orb Chandelier
–The Most Clever DIY Hidden TV Cabinet
–Master Bedroom Makeover on a Budget
Sunny Side Design is a participant in the Amazon Services LLC Associates Program, an affiliate advertising program designed to provide a means for sites to earn advertising fees by advertising and linking to Amazon.com. As an Amazon Associate, this blog earns from qualifying purchases with no additional cost to you. Click here to read our full disclosure policy.
Master Bedroom Before the Makeover

Today I’m excited to bring you on a tour of our newly finished master bedroom makeover! It feels like this post has been a long time coming, but then I have to remind myself how many tutorials and posts we’ve worked on prior to this to get everything ready for the full room reveal!
First lets start off with some visuals of our previous bedroom look. It wasn’t bad per se, we (or maybe more I) was just ready for a change! I really do like the wall color we had before, Smokey Slate by Behr. It’s calming and restful. The furniture we had was also really nice.
My Hubby worked for a furniture store when we were first married so we were a little bit spoiled. Our bedroom isn’t as large as our previous one, and the dark furniture made the space feel smaller and tight. Plus you know me and my love for all things coastal…it was high time our bedroom got some attention!
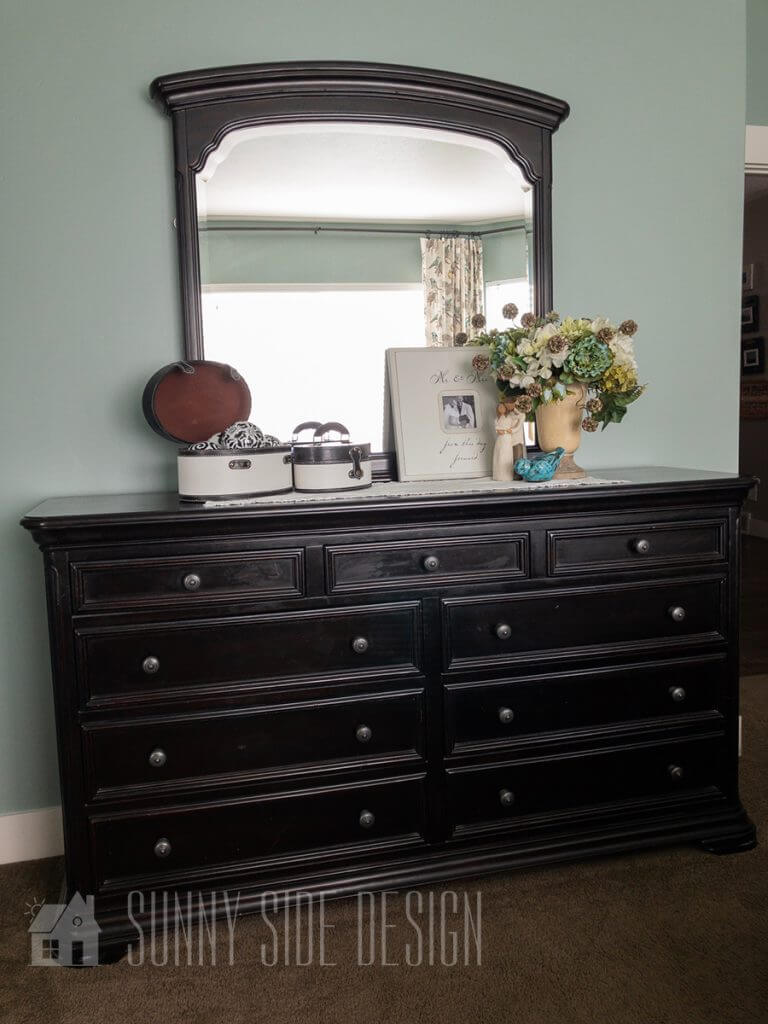
We had this huge dresser which fit on the wall, but we also have a large walk in closet in this home so our dresser was pretty much empty. I’d been wanting to get a smaller dresser to fill the space for a long time I just hadn’t really gotten around to it.
And that, my dear friends is how this whole makeover began I found a beautiful dresser at a local vintage market and knew I had to have it! That was the first purchase and step to this new calming coastal look!
Master Bedroom Mood Board

If you’ll take a walk down memory lane I first introduced my vision for this room with “A Vintage Chic Coastal Master Bedroom Mood Board“ with second hand elements and budget friendly decor ideas.
You can take a look at this post again to see what items were pieces of inspiration to me, how much they cost, and how we were able to create this look on a budget!
Master Bedroom Makeover Video Tour
Join me in this video as I take you on a tour of our new master bedroom makeover! You’ll also want to scroll through the post below to see detailed photos of our projects and decor. (We’ve even added links to shop this look for your convenience!)
Are you enjoying this project? Please Pin It, save it for later and share it with a friend.
Sharing is caring!
Master Bedroom Makeover Dresser Refresh

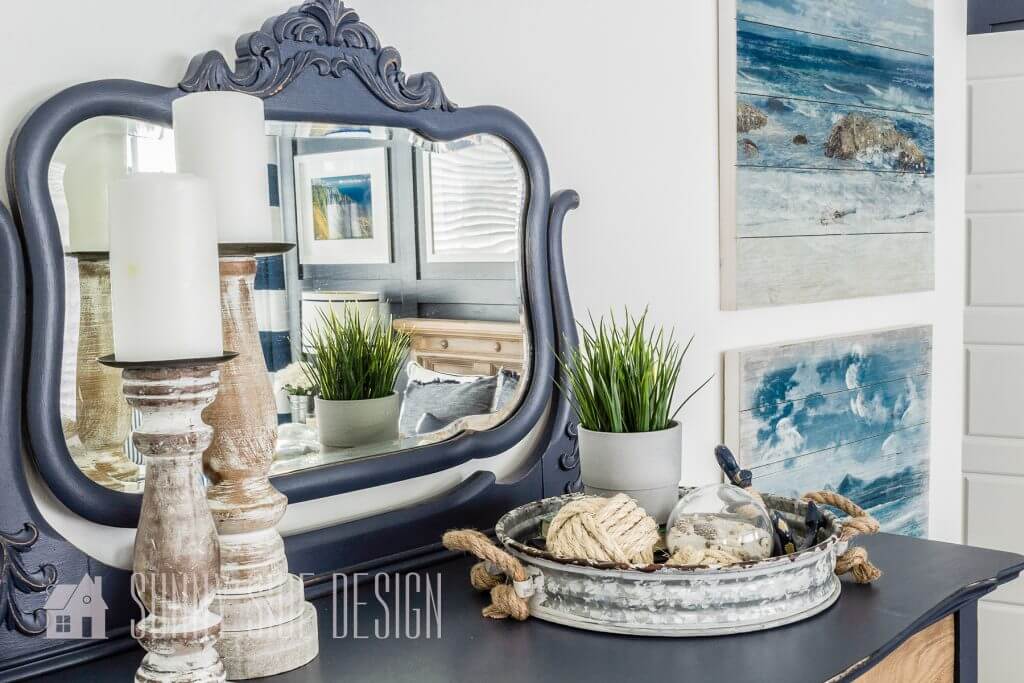
Awe…here it is! The beautiful dresser that started this whole project! Click here to see what the dresser looked like when I first snatched it up. It really was in great condition, I just wanted to change a few details to fit the new coastal scheme a bit better.

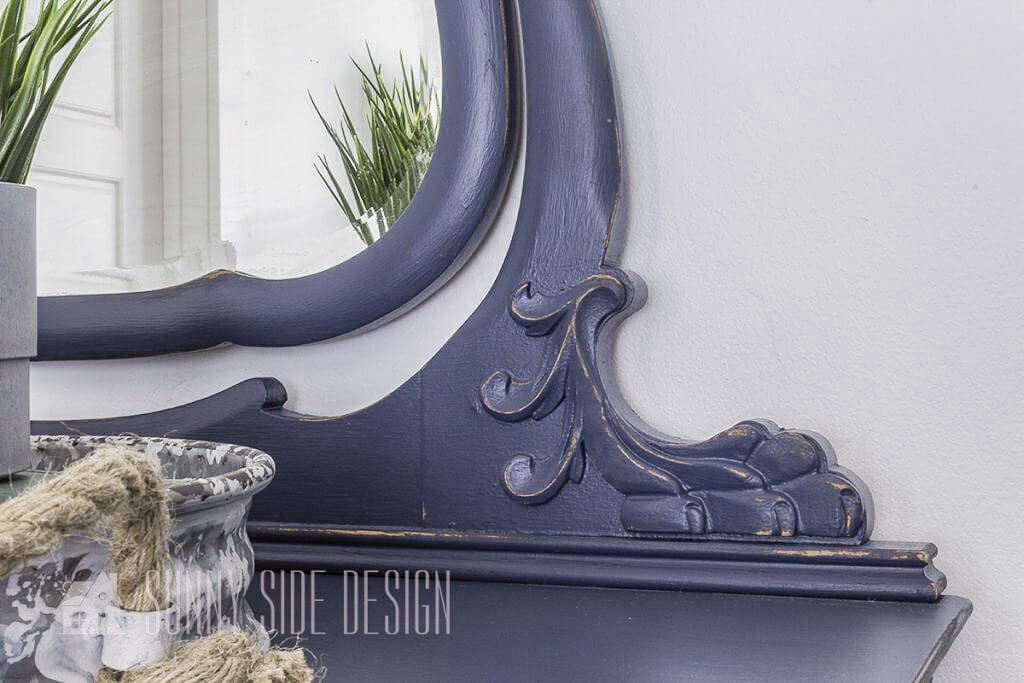
When I first saw this dresser I was instantly drawn to the vintage detailing around the mirror to the keyholes on the dresser drawers. I also knew that this dresser would work much better in our space!
It was half the width of our previous dresser and I loved how the dresser was lifted off of the floor. Our previous furniture went all the way down to the floor which just made the furniture feel heavy and extra bulky in our space.
While I can’t tell you where to find your own dresser exactly like this one, I can give you some suggestions on where to find a similar one if not the same one. When I’m hunting for a new piece of furniture in a space, first I head to my local classifieds and thrift stores, and if the weather permits, yard sales.
If you find a piece you love through the classifieds you can always negotiate the price, especially if it’s been listed for a while. Generally others are willing to come down in price because they’re anxious to get rid of their stuff!
There are those who may be firm on their pricing, but if you really love it and feel it’s a good deal then go for it! Otherwise keep looking and hold out for that perfect piece!
The color I chose to paint the dresser is the same as the wall color. Hale Navy by Benjamin Moore. It’s the perfect shade of blue! It’s deep, yet calming and is free from any purple hue! I also found some vintage looking drawer pulls on Etsy that matched the keyholes and the whole look of the dresser.
(Seascape artwork to the side of the dresser is from Hobby Lobby.)
If you’re new here, welcome! We’re so glad you’re here.
Let us introduce ourselves, we’re Michelle and Steph, a mom and daughter team who love to DIY and decorate our homes.
Not only are we passionate about making our homes warm, comfortable and unique, but it’s our mission to help you create that same feeling in your own home.
You’ll find ideas for repurposing, creating, decorating and making your home truly yours, while always mindful of a tight budget.
Undoubtedly we love finding ways to make your home look high-end on a small budget.
Plus you’ll also find a recipe or two as we share our family favorites with you.
We’d love it if you’d join our community of doers so you won’t miss any inspiration for your home.
We love new friends.

[mailerlite_form form_id=2]
Master Bedroom Makeover Feature Wall

Our bedroom was in dire need of an accent wall! I wanted something simple with straight lines, yet something that would have a large impact in the space!
My Hubby and I installed and EASY DIY Board and Batten Wall for under $50! (You can see some of our tips and tricks in the link above as well as a detailed list of the products used and where you can get them.)
I LOVE how this accent wall turned out! I love the symmetry and how it frames out the artwork. It looks nice and neat!
I also love how the white bedding pops against the navy wall! I found this bedding on Amazon. It was half the cost of other options out there that had a very similar look. The fabric is made from Egyptian Cotton Sateen and is soft. I feel like we’re sleeping in a luxury hotel! 😍 I purchased the duvet cover and 2 shams.
(I’m sure I’ll eventually splurge and get those too!) The navy throw pillows came from Home Goods.

Master Bedroom Makeover Accessories
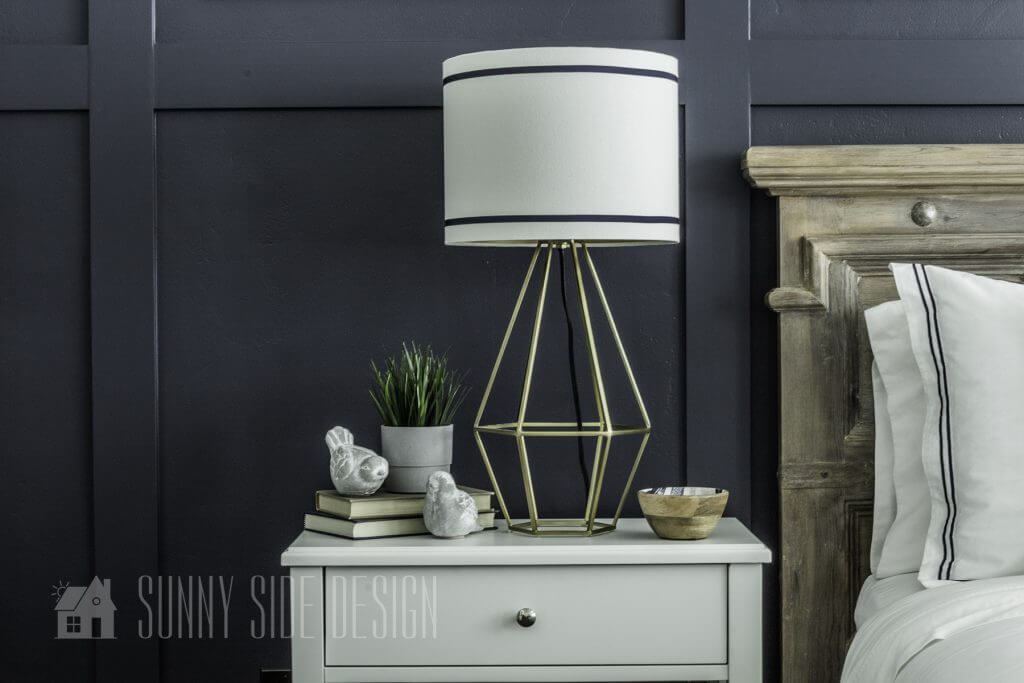
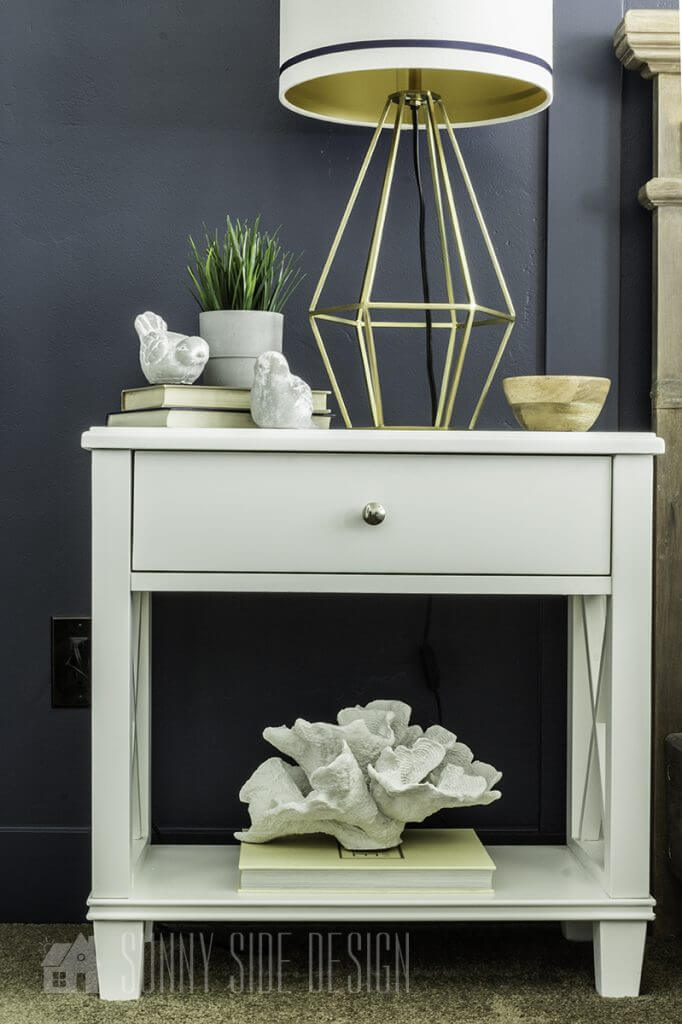
I found these adorable lamps at World Market and knew the gold would really pop off the navy wall. The shade was a simple white shade with gold on the inside. Once I started putting the room together and received our new bedding, I decided to add a bit of character to these shades and add a couple of navy stripes.
You can see how to create a designer look at Easy Embellished Lampshades for under $10 in this post! Now the shades mimic the stripes on the bedding, chairs and curtains.
(Cement birds from RodWorks. Grass in faux cement vase from IKEA. Small dish to hold car keys and wallet etc from JoAnn.)
You know I have a love for refinishing furniture. I spent a long time searching the classifieds for the perfect nightstands for our room. There were some pretty neat ones out there, but none of them quite spoke to me and had that coastal touch.
I ended up finding these darling night stands on Wayfair. I love that they too, like the dresser, are off the floor a little bit. They also have an opening for decor under the drawer. This really helps our space feel light and airy!
(Large faux coral decor from At Home.)

On this nightstand we have added a few small decor items on a wooden charger from World Market.
Grouping items on a tray, or charger can help make your decor look neat and organized. We have a grouping of fresh white flowers in a metal tin we found at the thrift store. Then we have a cool old piece of coral I found at a vintage market and an Italian linen scented Wickology candle from Hobby Lobby.
Which smells divine by the way!

Again I love that there is space on the bottom of these night stands to display a little decor. I like to keep a couple books that I’m reading nearby. And this nightstand wouldn’t be complete without a real conch shell right? My Parents brought this back for me as a souvenir from St. Lucia.
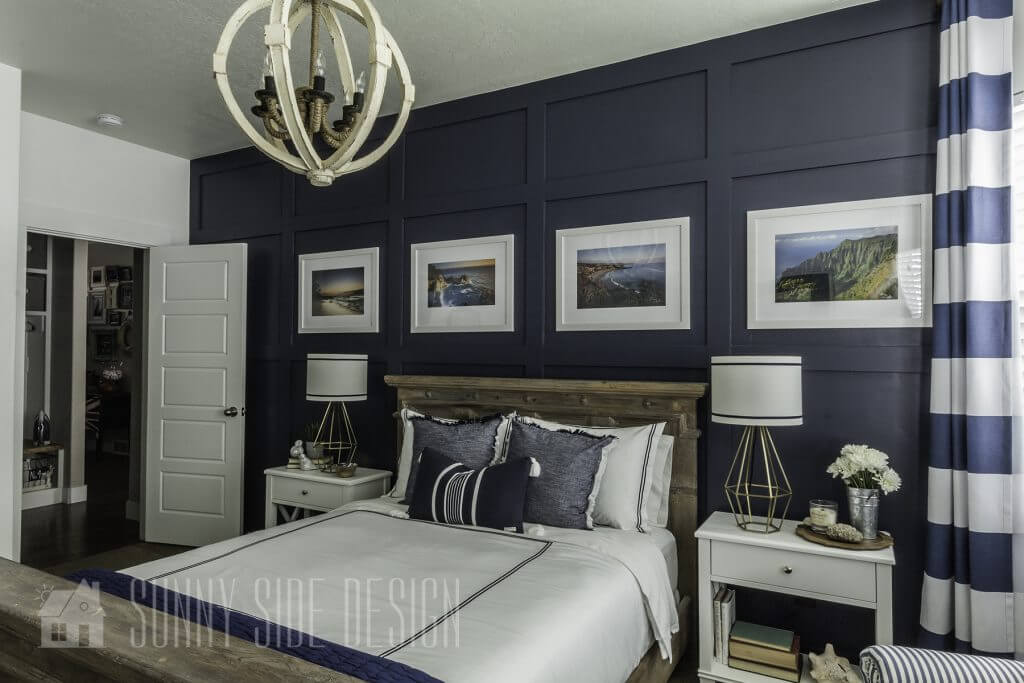
The accent wall wouldn’t feel complete without a bit of artwork. Here we have added some of my favorite seascapes taken by my brother.
He’s an AMAZING photographer!
Currently his website is undergoing a makeover itself, so when it’s up and running again, we’ll get the link in here so you can check out all his work.
I found the frames at Michaels and they happened to be 70% OFF! I snatched them up and we cut white matte board to fit and they look so awesome in our room!
Let’s stay connected! Follow us on social media!
Master Bedroom Makeover Refinished Bed

This next element in our room has been a favorite so far among our viewers!
I’m always drawn to expensive design elements, but can’t afford much of what I like. Insert my love for DIYing! I found a bed I loved at Restoration Hardware for almost $3000! I don’t think I could even pay that much if I had that much to spend!
So here’s our take on this amazing bed. I had this bed frame just sitting downstairs in our basement. It hadn’t been used in quite some time because our styles had changed.
Well for less than $30 we took this bed from a dated rustic look to this amazing Restoration Hardware finish! You can see how we achieved this look in our tutorial here. Now it almost mimics the appearance of driftwood popping off the navy wall.
Master Bedroom Makeover Window Treatments
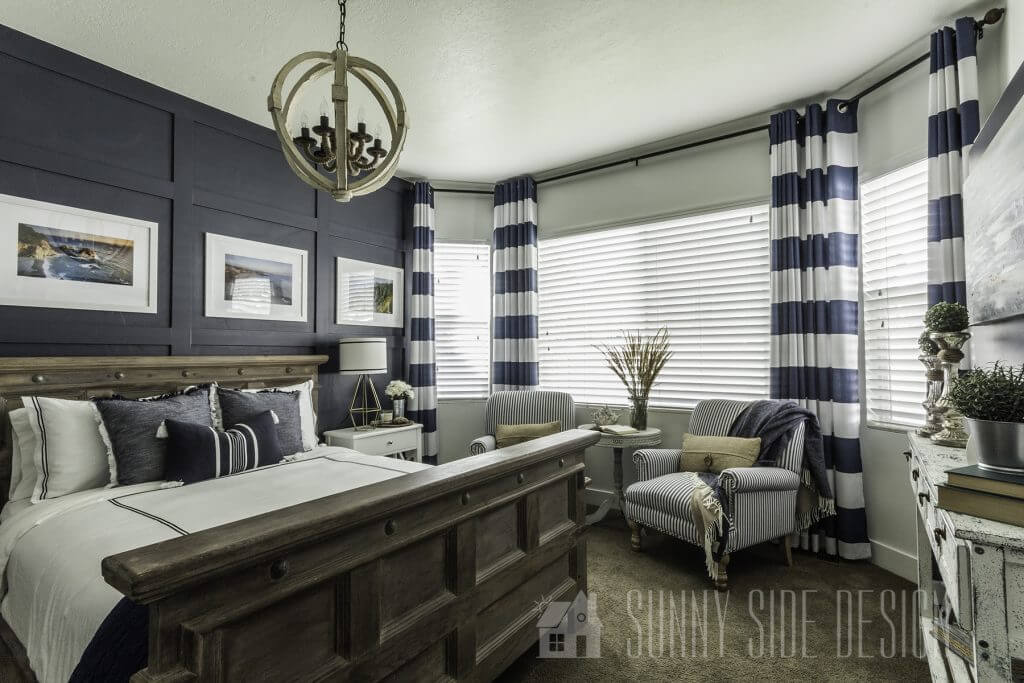
I’m ok admitting that I’m pretty picky about my window treatments. I’ve been known to paint a number of curtain panels in our home to achieve a certain look, 12 to be exact! You can see my favorite curtains here.
But since we were already doing so many DIY projects in this room makeover I opted to buy premade curtain panels this time.
I found these wide striped curtain panels on Overstock. Since our ceilings are 9′ tall, I ordered them at 108″ and hemmed them a little bit.
You can see the NO sew hemming tutorial and How to DIY a curtain rod for a bay window tutorial in these links.
These curtain panels are a little thinner than I would’ve liked, but I didn’t need room darkening curtains since we already have blinds installed. We do close them on occasion and it does block some light, but not much.
Overall I really like them and love the way they look in our room and make our space feel.
Master Bedroom Makeover Upholstered Chairs

I also spent my fare share of time searching the classifieds for the perfect accent chairs for our room. When I finally found some I liked, I took into account the cost of fabric to reupholster them and refinish the wood accents, I opted to buy new chairs. It would’ve likely cost more money to refinish the chairs the way I envisioned them to be.
I found these darling accent chairs on Wayfair! They’re the perfect size and color for our room! I immediately fell in love with them when I saw them online! I love them even more in person! I love the texture of the chambray, detailing of the nail heads and the worn and weathered finish on the legs. They are perfect for this relaxing coastal retreat!
(And now I even want some in our living room too 😂!) The throw pillows came from At Home.

I found this side table at Hobby Lobby years ago. (Here’s one that’s similar.) It was brown and I planned to paint it white. I started painting it with a little primer and ended up keeping it that way. It gave it a white washed finish leaving the wood grain visible and I really liked that instead of a completely opaque white finish.
The faux coral decor is from At Home. To add a soft wispy touch I added these grasses which were trimmed from my front yard. The blue throw is from Home Goods.
The navy Pottery Barn quilt at the bottom of the bed came from my dear friends consignment store, Gitt In Style. For all of you Utah locals you need to go check out her store! She has fun home decor, furniture and designer brand clothing, shoes and jewelry at a fraction of the cost of new items!
(And she’s pretty picky about the items she consigns which pretty much means her store is loaded with amazing finds! Some of the clothes I’ve gotten there still had new tags on them but I spent next to nothing for them!)
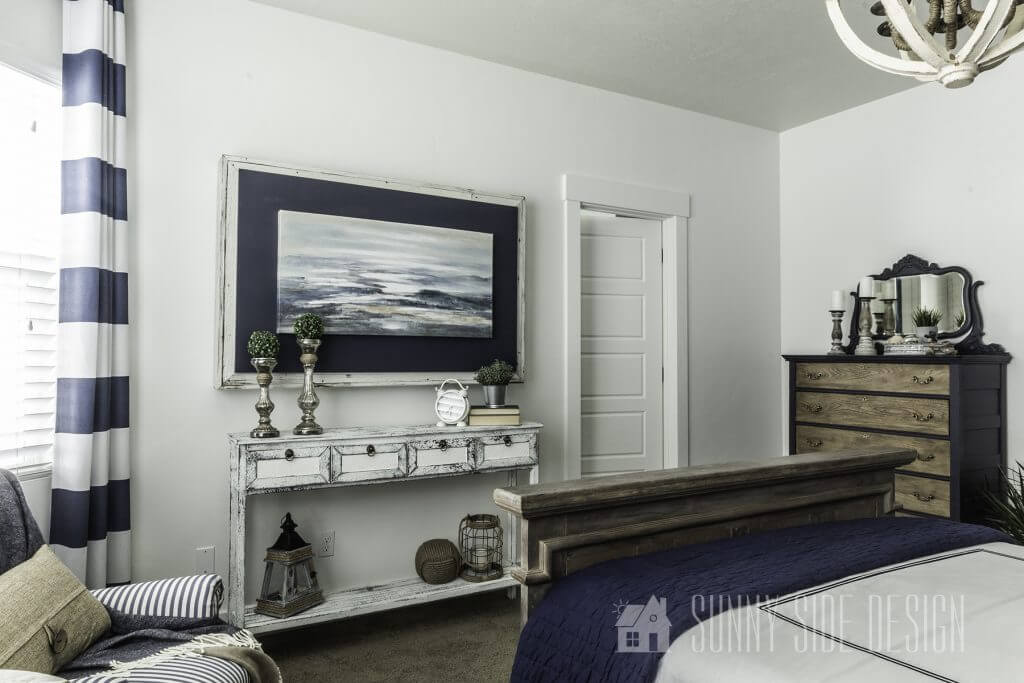
Master Bedroom Makeover Art to Hide TV
There are so many elements I love in our master bedroom makeover.
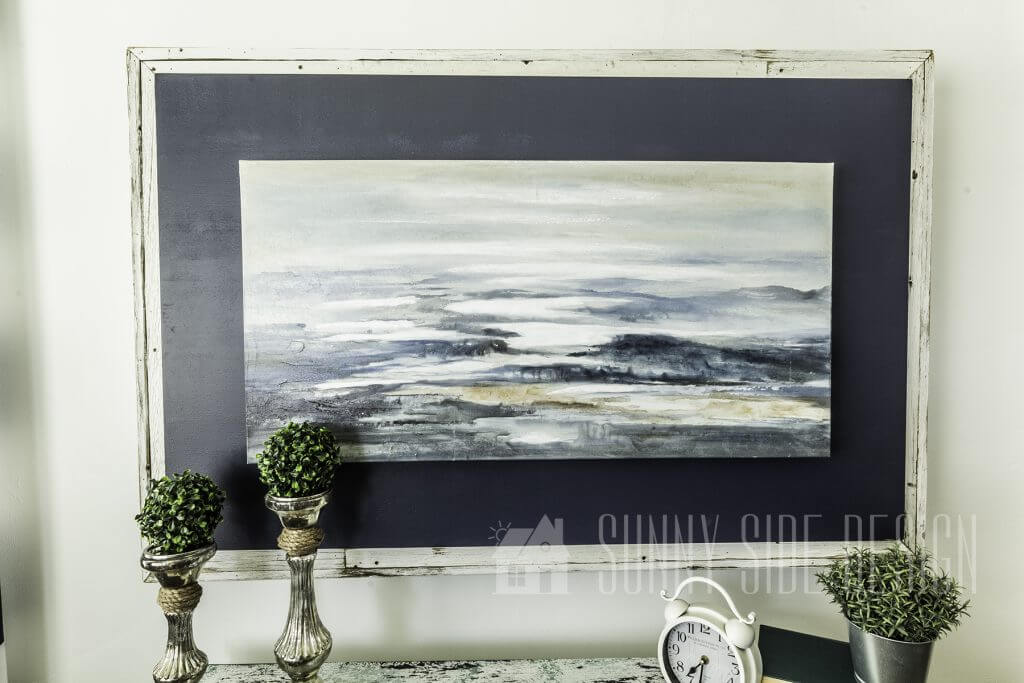
When I saw this piece of artwork in At Home I instantly fell in love with it! I bought it even though I knew the dimensions were wrong for the intended space. I knew I could always return it if I found something that fit better.
Well, it turns out that once I got it home and in my bedroom, I loved it even more! I knew I had to keep it! I just had to figure out how I was going to make it work!
You can see what we did to this canvas here to make it work in this space!


But wait! It gets even better! This amazing piece of artwork isn’t just beautiful, it also hides the TV in our room when we’re not watching it!
This whole project is one of my favorites, probably because I feel like we were little inventors. We’ve never DIYed anything quite like this before and it was pretty cool!
You can see how we made this Hidden TV Cabinet in our tutorial.
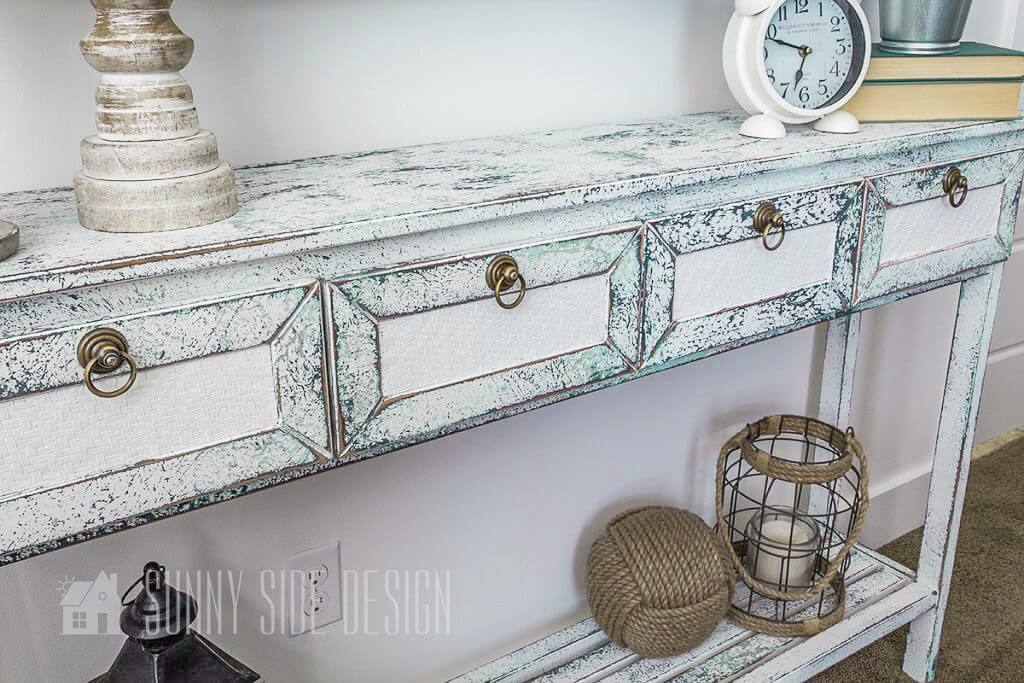
This console table is another fun piece of furniture that we refinished. I picked it up on our local classified for only $40. It had a dark cherry wood finish which didn’t exactly feel like a calm coastal piece.
So we worked our magic using Saltwash™ to give this table a cool weathered and worn patina. You can see how we transformed this piece here.


Candlesticks also came from Gitt In Style. I simply added a little jute around the top part of each candlestick to add a bit of coastal touch.
The faux greenery balls came from Tai Pan trading (before they closed 😭).

This large monkey fist knot came from At Home. I’ve had this rustic lantern for so long I can’t even remember where I picked it up! But I’ve seen similar ones at Hobby Lobby, At Home, pretty much anywhere that sells home decor.
Master Bedroom Makeover The Lighting

Builders grade light fixtures were installed throughout our home. I knew I could change them out here and there and save a ton of money in the process!
This light fixture can be found on Wayfair for nearly $500, but I found mine on our local classifieds for only $40! HUGE savings! We did spruce it up a little bit…see how we added a little coastal flair to it here.

Overall I only spent maybe $200 on this complete room makeover!
Shortly after I purchased the new vintage dresser I listed our entire bedroom set and all the decor items for sell on our local classifieds (Lamps, pillows, curtains, candles, flower arrangements…I truly mean I listed it all!)
Each piece sold little by little and all of the money I made from selling our previous bedroom set and decor paid for this new room makeover! You can’t beat that right?!
And if you’re working with a small bedroom, you’ll want to see 16 ways to make a small bedroom look bigger.
We hope you found some inspiration for your home today.
Please share your tips and ideas with us.
We love hearing from you!
If you’re new here, WELCOME! We love having new readers and friends!
You can learn more about us here.
Let’s stay connected! Join our DIY community of doers and you won’t miss the weekly updates and more inspiration for you always on a budget.
Sharing is caring!

Thanks for stopping by Sunny Side Design. Empowering you to create a home you love!
Retailers We Love
- Anthropologie
- Birch Lane
- Crate & Barrel
- Joss and Main
- Lampsplus
- Mark & Graham
- One Kings Lane
- Pottery Barn
- Rejuvenation
- Serena & Lily
- Wayfair
- West Elm
- Williams Sonoma
- World Market
Be sure to follow us on Pinterest for even more home decor and DIY ideas.
To see what we are working on before it’s on our blog, follow us on Instagram.
You will also find our video tutorials on our YouTube channel.
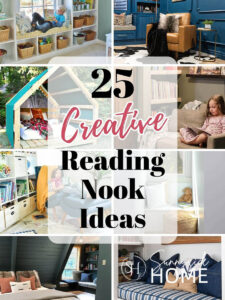
- 25 Must See Simple and Creative Reading Nook Ideas

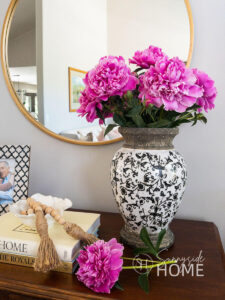
- How to Make Peonies Last Longer with 7 Simple Tricks
- How to Build a Birdhouse with CharmingThrift Store Finds
- Simple Clay Pot Lighthouse Garden Decor Project