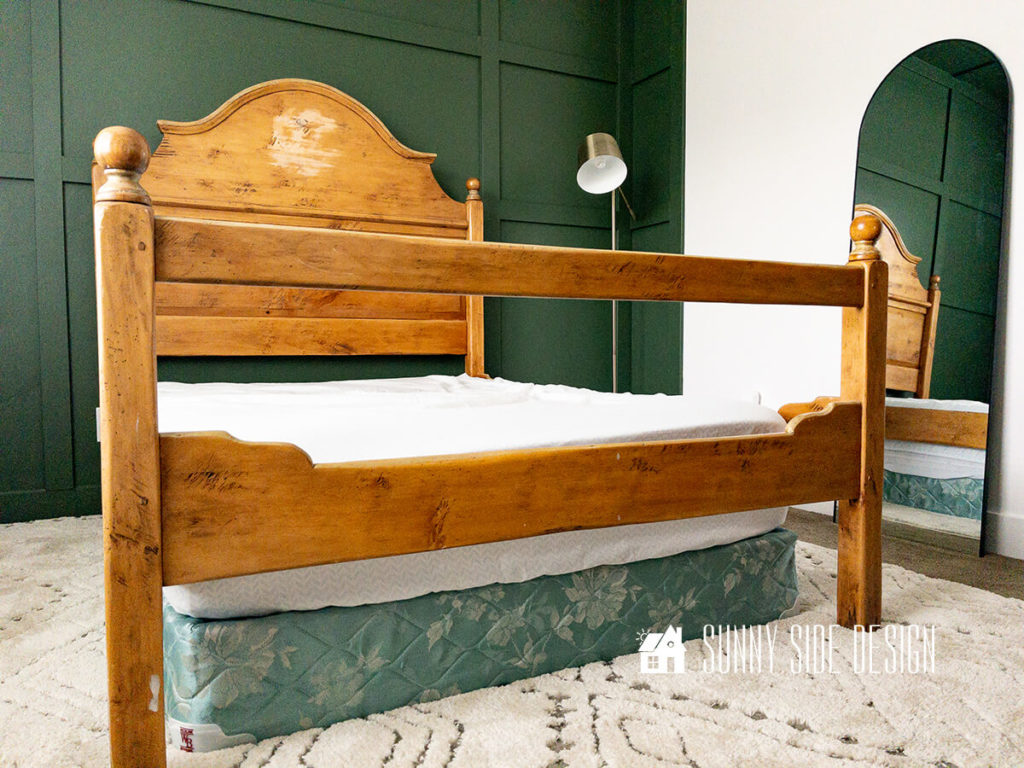
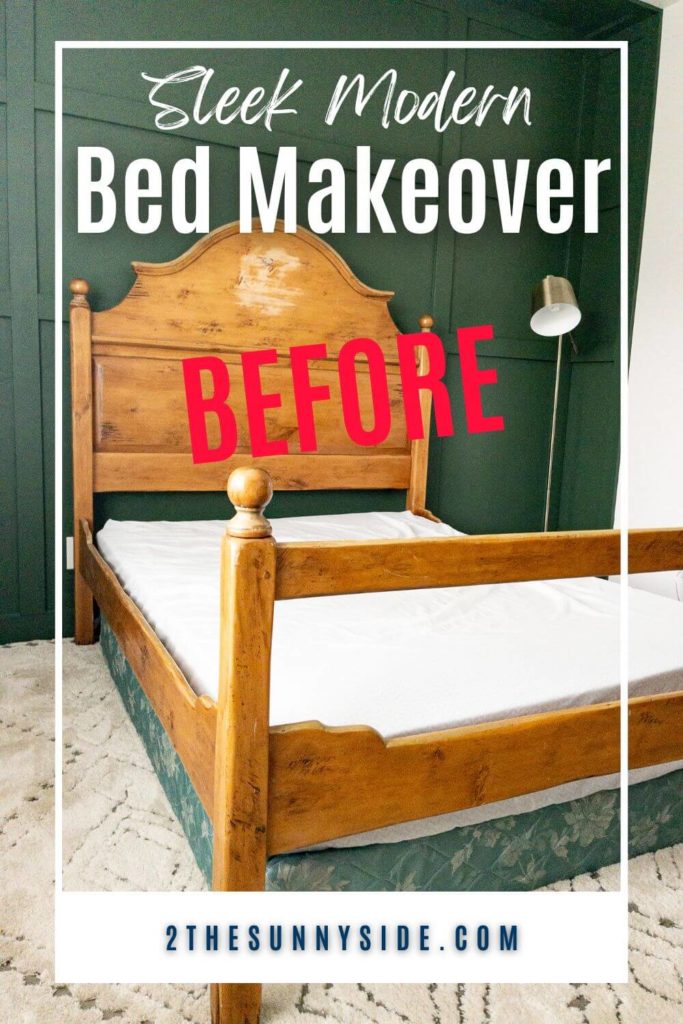
Have you ever stumbled upon a hidden gem while thrifting or on Facebook Marketplace? That’s exactly what happened when we snagged a $50 solid wood bed frame from the Marketplace.
Over the past couple of months I’ve been searching for a modern, minimalistic bed for Gavin’s bedroom that didn’t cost an arm and a leg.
While I found several I liked the look of and were affordable, however when I read the reviews, none were great.
So I began searching for a solid wood headboard and bed frame that we could refinish.
As we looked at this worn and rustic wooden bed frame, an intriguing thought crossed our minds: Could we turn this rustic piece into something that would rival the look of a Pottery Barn bed?
With determination and a vision in mind, we set about to transform this rustic bed frame into a modern masterpiece that would be perfect for Gavin’s room.
Scroll on down and see this rustic bed frame transform into a modern bed.
Click here to see the video tutorial.
The Initial Surprise
Upon our first glimpse, the bed frame seemed promising, however once we placed it in the room we were shocked at the distressing on this bed frame.
Maybe it was the poor lighting in the garage, but our first thoughts were “did we make a big mistake?!”
Gouges and textures that weren’t initially apparent came into view, giving the bed frame an even more rustic appearance than we anticipated.
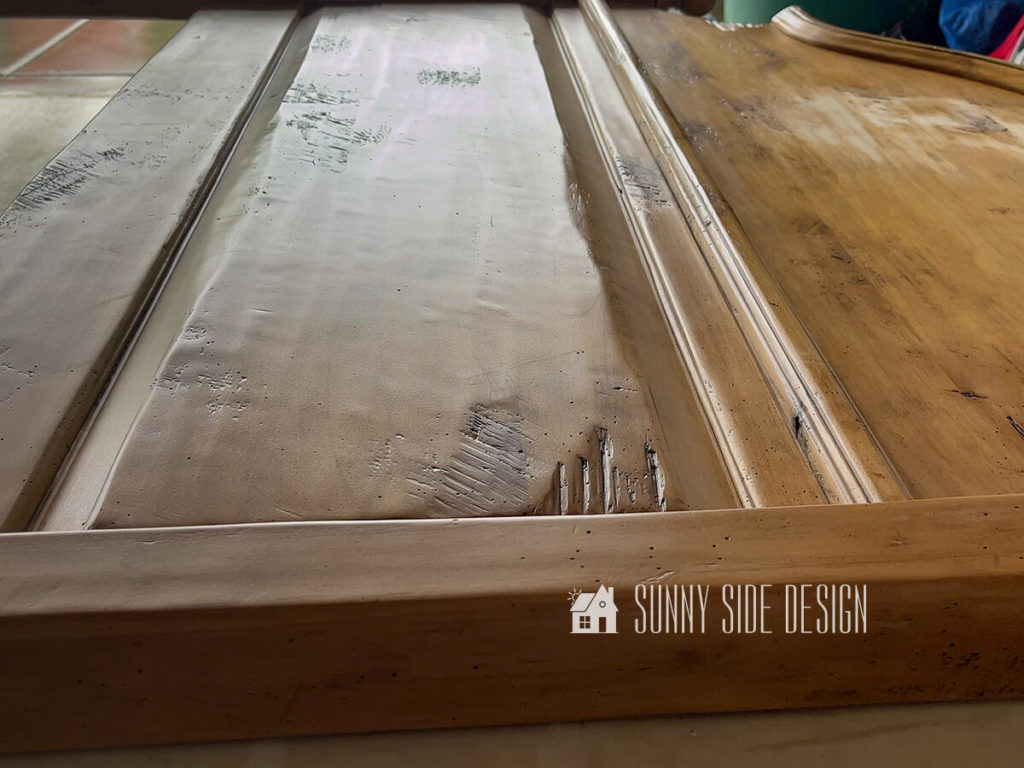
Clearly we were not going to be able to sand out all of the imperfections in the wood.
With our hearts set on achieving a modern aesthetic, we decided to face the challenge head-on.
Determined to turn this rustic find into a piece that would seamlessly blend into the design for Gavin’s room.
We embraced the idea of a complete makeover, confident that with creativity and a bit of elbow grease, we could bring this bed frame into the 21st century.
You may also enjoy these bed makeovers too:
- Twin Bed to a French Day Bed
- DIY Upholstered Headboard
- Cheap and Unique Headboard Idea
- How to Fix a Broken Bed Rail
- Easy DIY Canopy for a Bed
Supplies and Tools
Before we jump into this bed frame makeover let’s take a look at the supplies and tools we used.
- wood glue
- 80, 150, 200 grit sandpaper
- painters tape
- 1x6x8 select pine boards
- 1x4x8 select pine boards
Modifying the Footboard
Our first step was to infuse modern lines into the footboard.
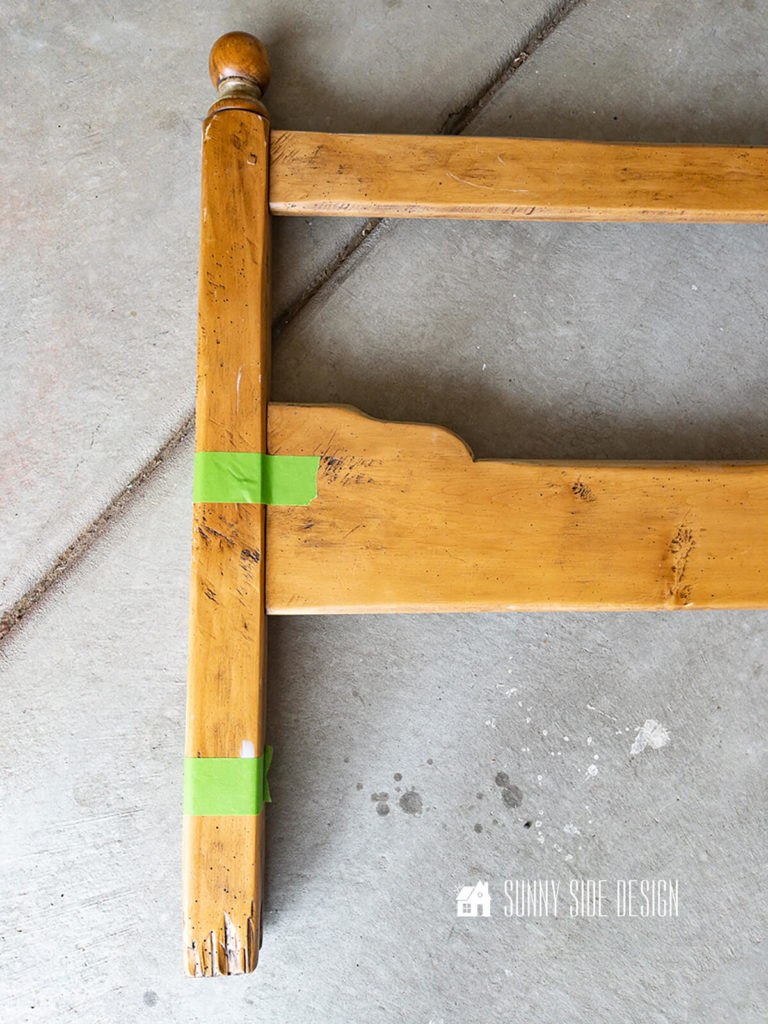
Armed with a measuring tape and framing square, we carefully marked the cut lines to ensure clean, straight edges.
Using the dimensions and height from our inspiration bed from Pottery Barn, we began to mark where to make the cuts.
We used tape first to get an idea of where we’d like to make our cuts.
It gave us a good visual before we actually began to cut into this bed.
First we cut off 6″ from the bottom of each leg and then used a chalkline to mark where to cut off the top of the footboard.
All of the cuts were made with the compound miter saw.
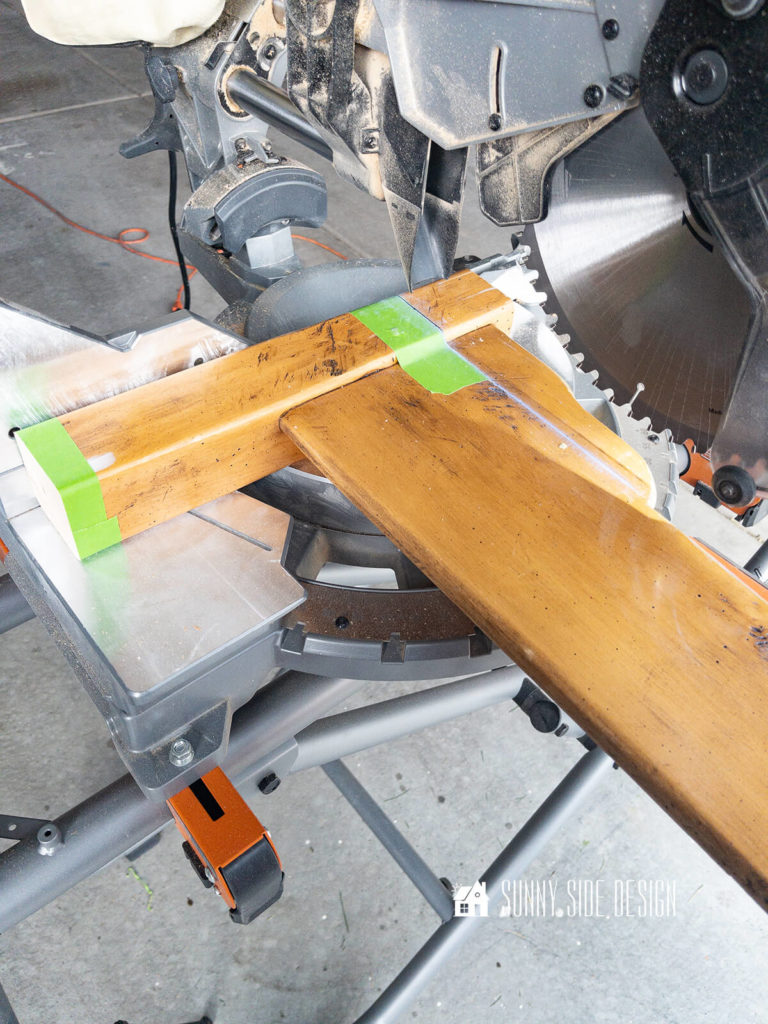
And we were thrilled the saw reached far enough to trim the top of the footboard as well.
Our inspiration bed frame sits 12″ off the floor and with the cuts we made that’s also the height of our frame.
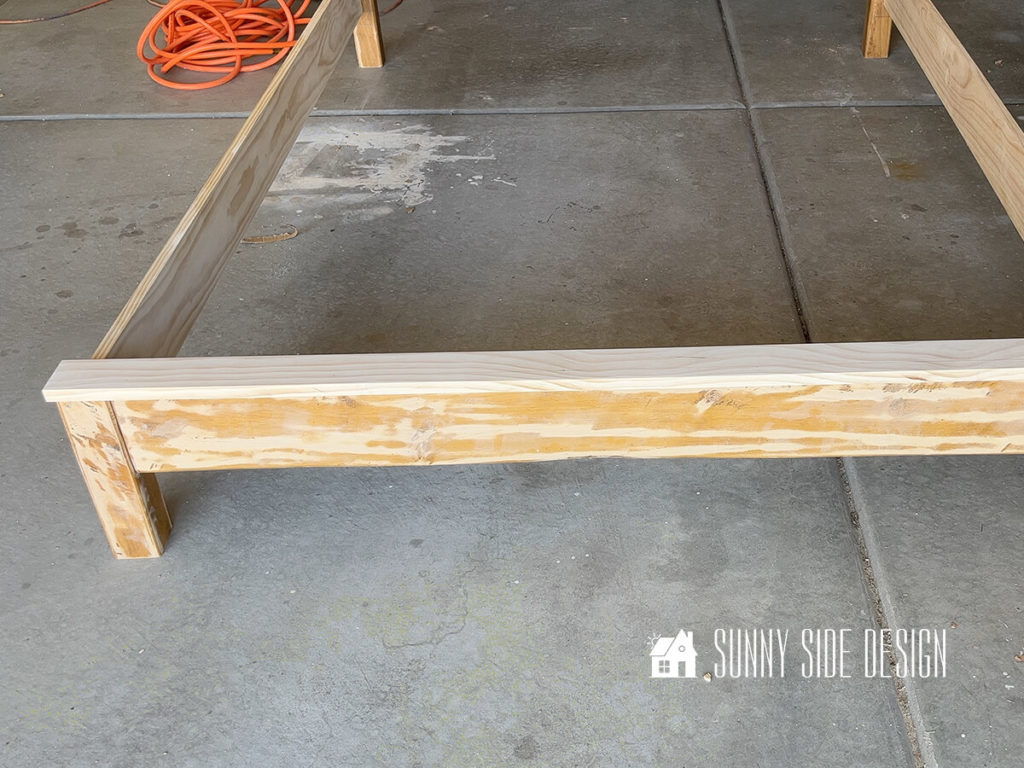
To finish off the top of the bed frame footboard we cut a 1×4 select pine board to length and ripped it to the width of the footboard.

And then secured it to the footboard with wood glue and a few 2″ brads.
Are you enjoying this post?! Please pin it, save it for later and share it with a friend.
Sharing is caring!
Modifying the Headboard
The headboard presented its own set of challenges due to its rustic texture and distressed areas.
As we looked over the headboard and discussed our options, we decided to flip the headboard around and use the back side as the new front.

You can see on the back of this custom made headboard an inscription and date it was made.
We do feel kind of bad about making so many changes.
But we’re the third owners of this bed, saving it from the landfill and bringing it up to date, giving it at least another 20 years of life.
First we cut off 6″ from each leg of the headboard to match the footboard.
By doing this we were able to cut off much of the distressed areas of each leg.
Again we used painters tape along the area we wanted to remove from the headboard.
We marked the headboard with a chalkline and used our circular saw set into the Kreg Rip Cut jig.
This is an easy way to make long and accurate cuts.
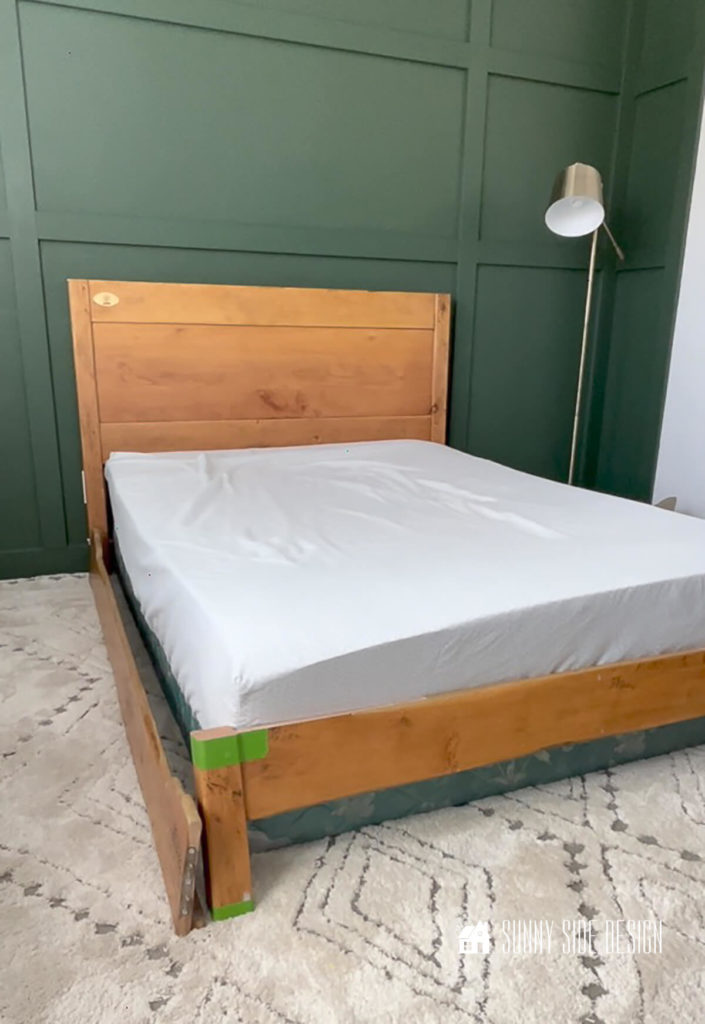
Once we’d modified the headboard and footboard of the bed frame, we set it up in the bedroom to take a look at the new design.
It looks great!
The clean lines feel much more masculine and fit the design aesthetic for Gavin’s room.
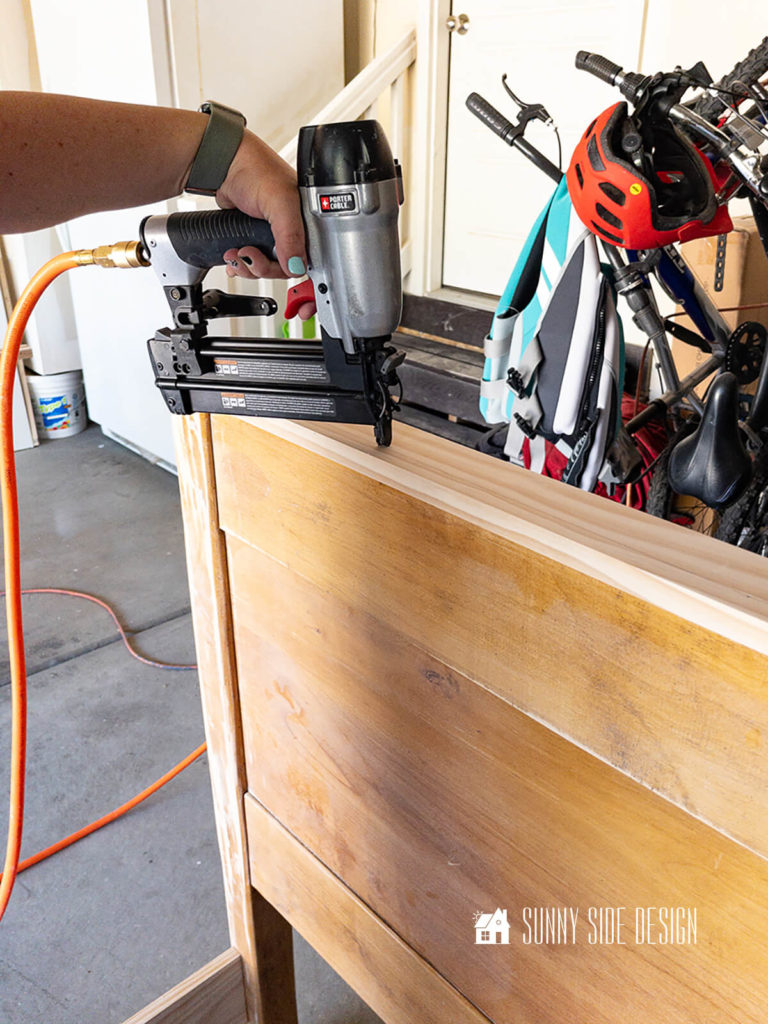
One last thing to finish off the headboard, we cut a piece of select pine to fit across the top and secured it to the headboard with wood glue and brads.
Welcome to Our Site
If you’re new here, welcome!
We’re so glad that you’re here.
We’re Michelle and Steph, a mom and daughter team who love to DIY.
Not only are we passionate about making our homes warm comfortable and unique, but we’re also on a mission to help you create that same feeling in your own home.
We’re all about repurposing, creating, decorating and making your home truly yours, but always on a budget.
Undoubtedly we love finding ways to make your home look high-end on a small budget.
Plus you’ll also find a recipe or two as we share our family favorites with you.
We’d love it if you’d join our community of doers and you won’t miss any inspiration for your home.
We love new friends.

[mailerlite_form form_id=2]
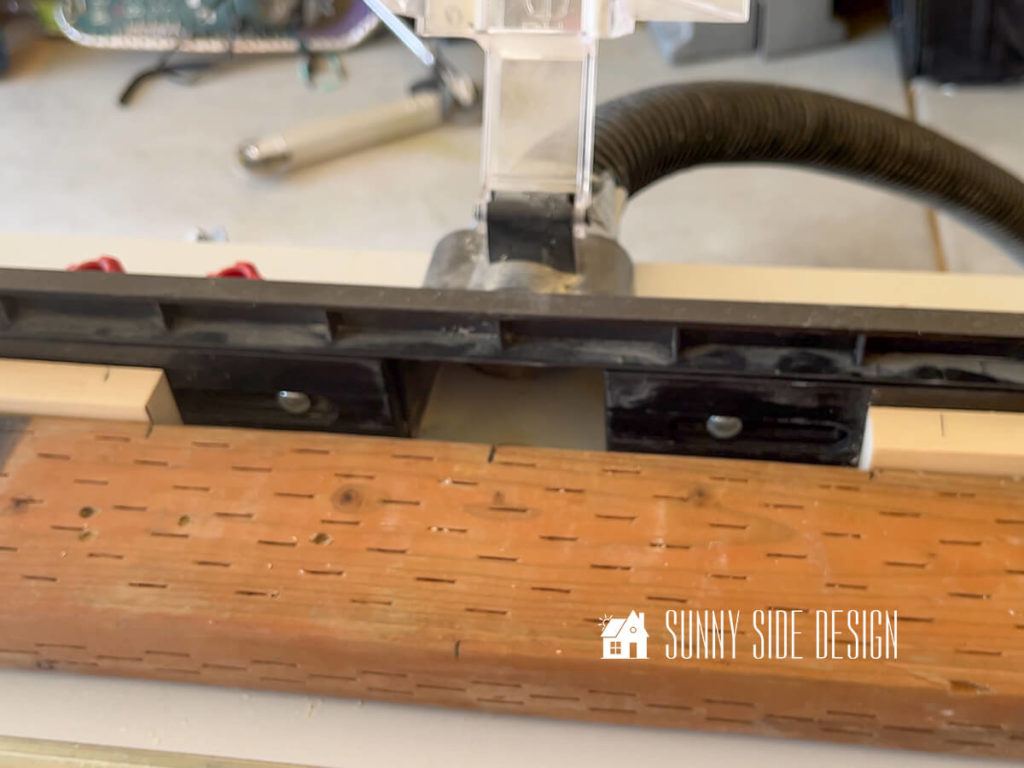
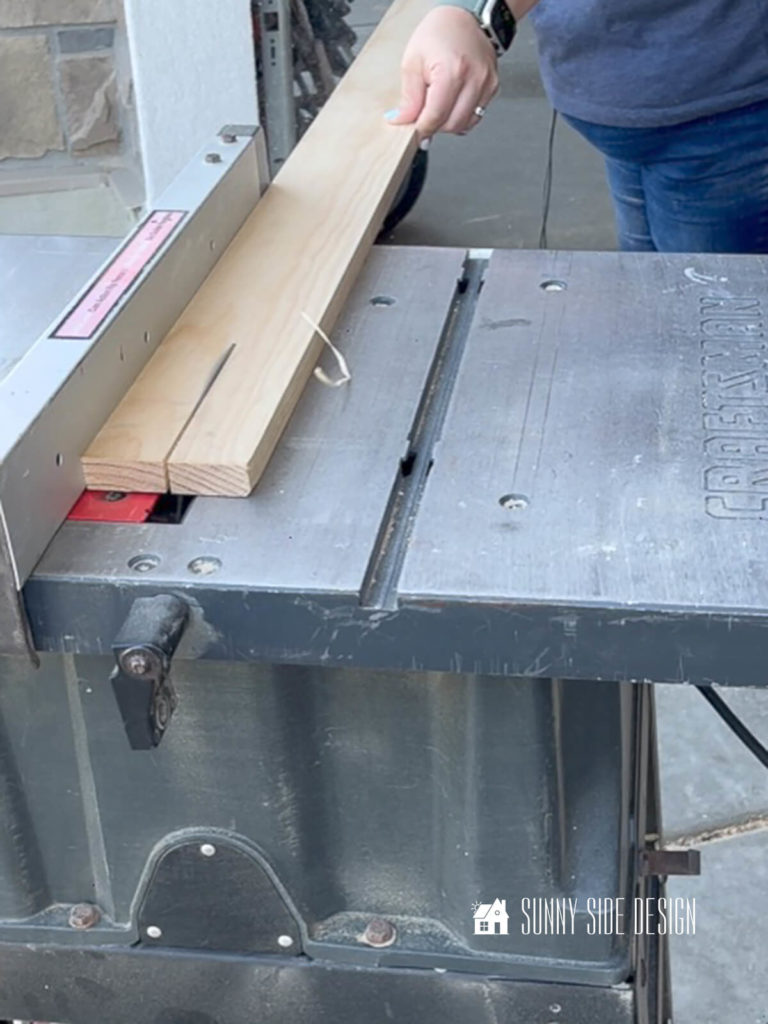
Crafting New Bed Frame Rails
With the rustic appearance of the side rails we decided to save ourselves some sanding and fill work and just replace the wood.
We chose select pine for the new rails because it has no knot holes and a smooth finish.
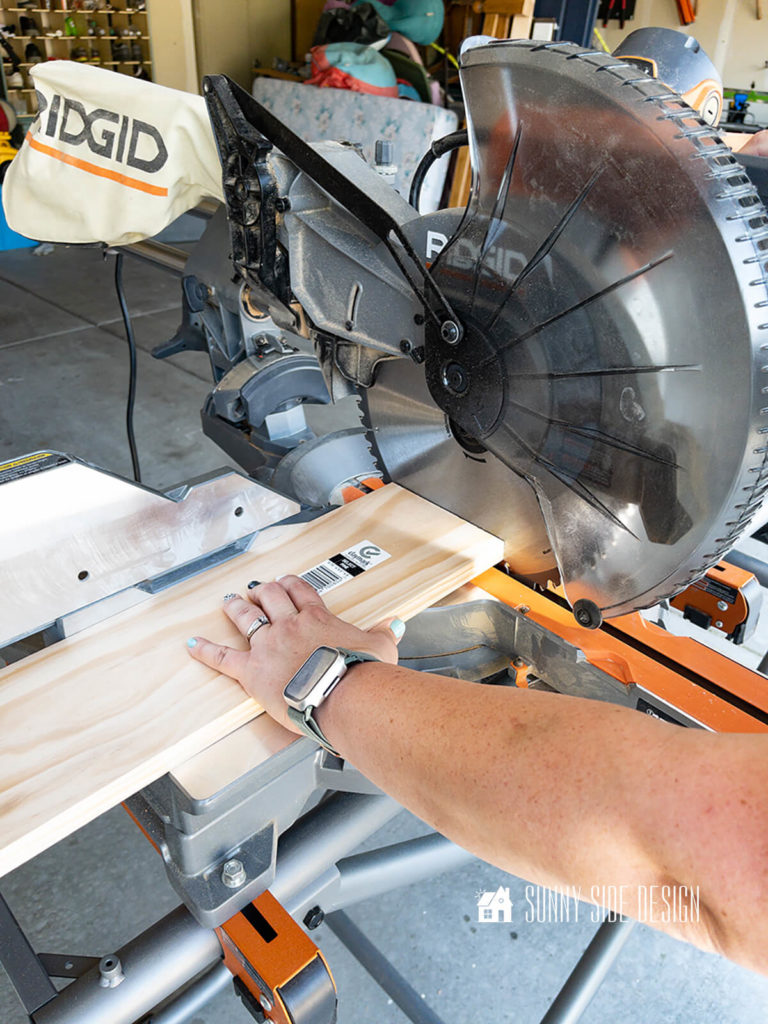
First we cut them to length with the compound miter saw.
Then we removed the cleat that holds the slats from the original bed along with the hardware.

The cleat was reattached to our new bed frame rails with wood glue and screws.
Bed Frame Hardware
Clearly it seems logical to reuse the original hardware.
It was recessed into the side rails and each leg of the headboard and footboard.

So we would need to recreate that groove with a router.
Side Rail Hardware
First we’ll show how we did the side rails.
And a special thanks to my dad for adjusting the router and making a jig to make this easier.
First the router is mounted to the router table with a 1/2″ bit.
The bit is set to cut an 1/8″ depth.
Next, two pieces of 3/4″ scrap wood are placed against the fence, with another piece of scrap wood.
This is all secured in place with two clamps.
The 3/4″ wood acts as a stop on each side, so we’ll be able to take out just as much material as we need.
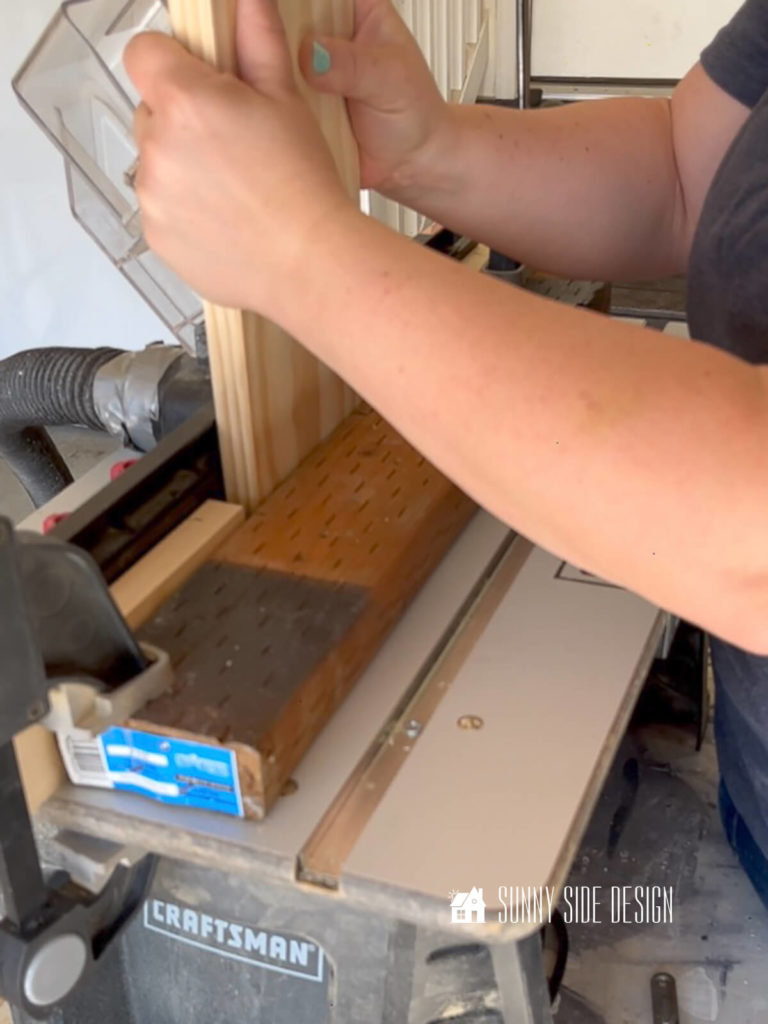
Of course before we began on our actual bed frame rails we practiced on scrap lumber.
Then once we were satisfied and the groove fit the hardware, we placed one end of the bed rail into the jig on the router table.
We began in the middle of the board and then moved to the right stop and then to the left stop.
It was really slick! Worked like a charm!
Repeat with the opposite end and then the remaining bed rail.
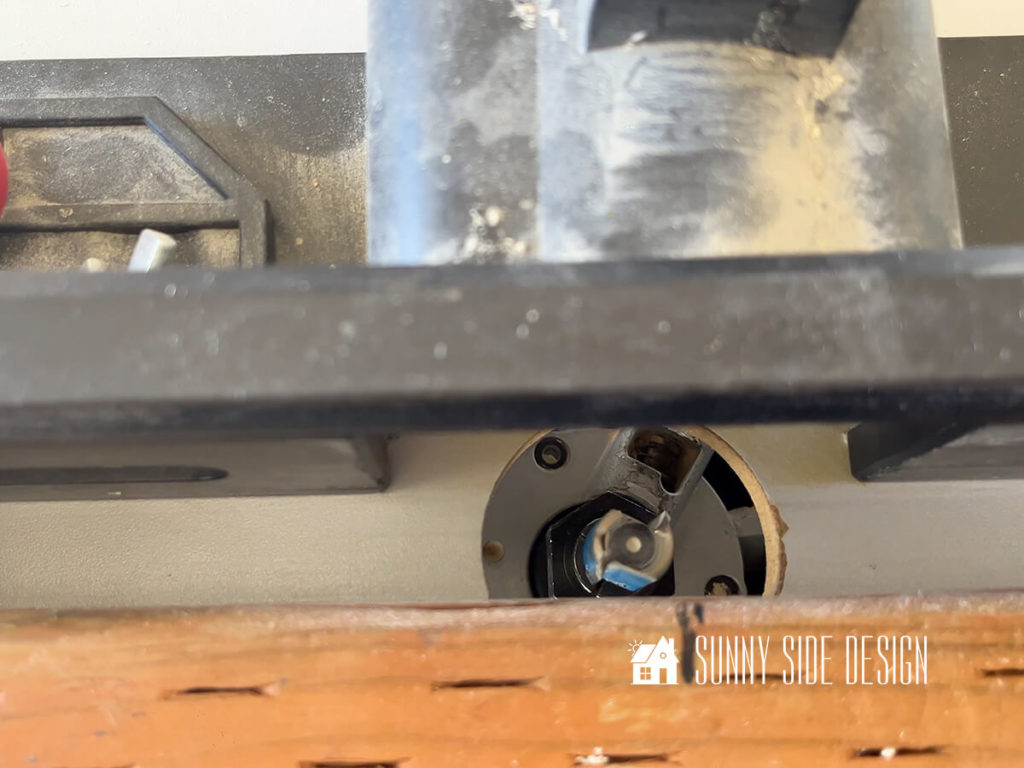
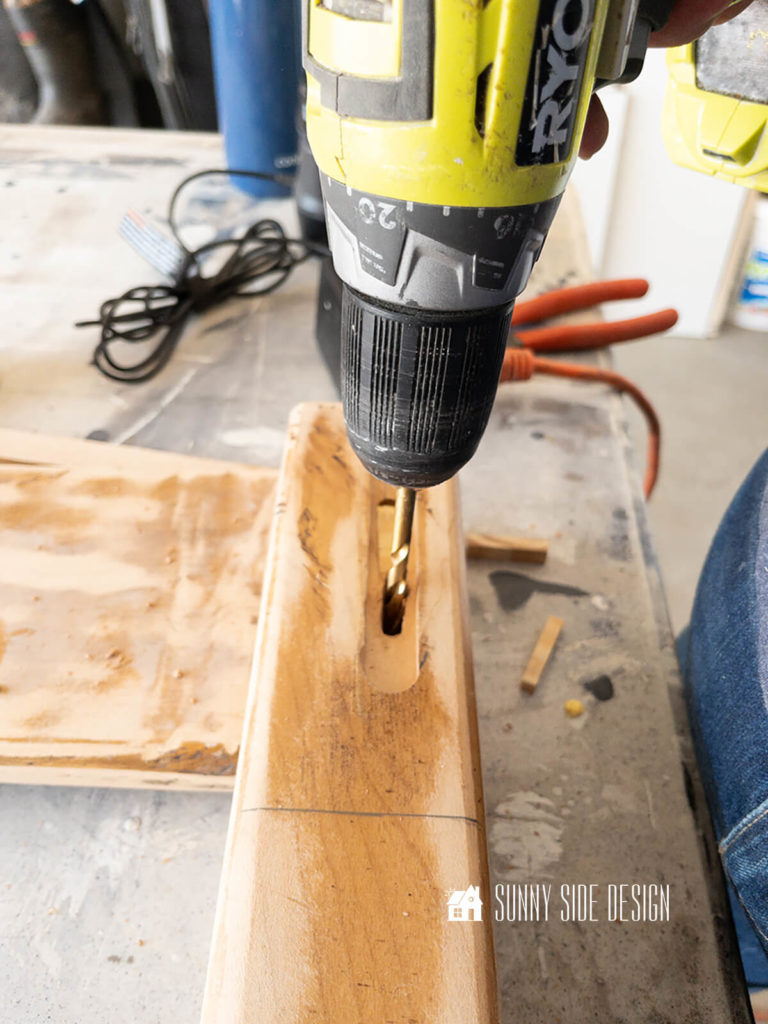
On the back side of the rail hardware there is a raised area that we would need to recess as well.

So we placed the hardware in the slot and tapped it with a hammer, which left small indentations.

Then using a drill we were able to remove the material so the hardware sat flush with the end of the bed rail.
We also drilled pilot holes for the screws and then inserted three wood screws.
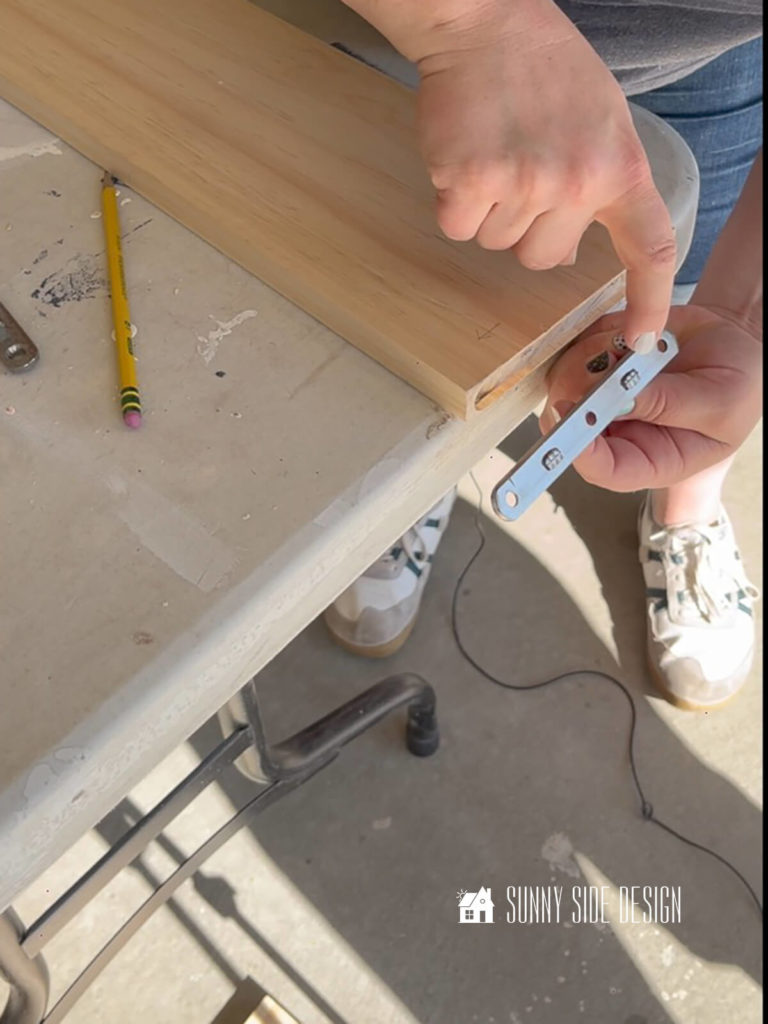
Headboard and Footboard Hardware
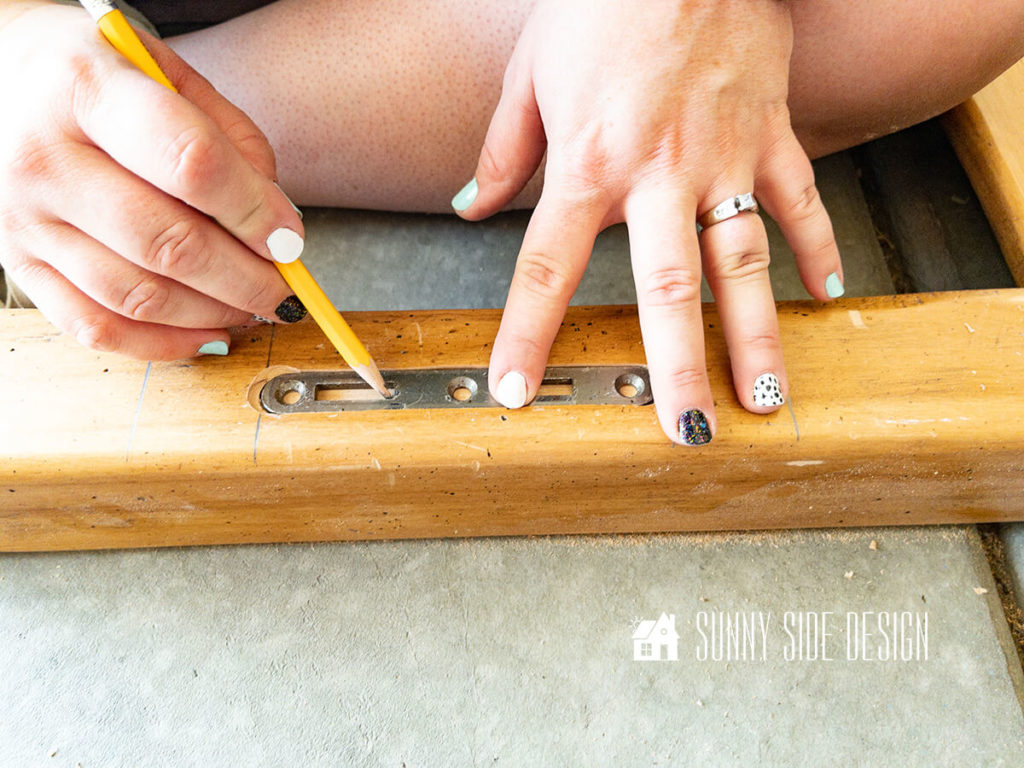
Because we cut off 6″ from each leg of the bed frame, the placement for that hardware also needed to be adjusted.

We placed the hardware in the same location as the footboard for consistency and then made a pencil mark.
Next we made a pencil mark 1 1/2″ from the first pencil line on each side.
From the router bit to the edge of the guide is 1 1/2″.
This way we can see where to stop the router.
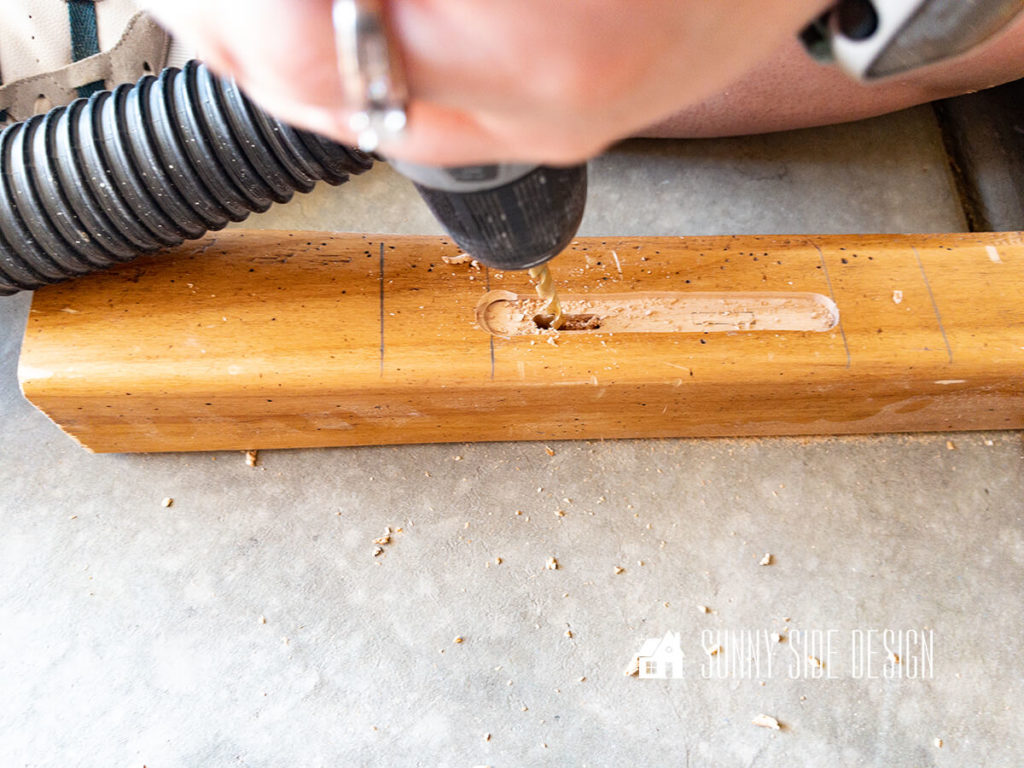
Another jig is set up with a couple of pieces of wood clamped to the leg.
Then the router is placed next to the jig and can slide along from one placement line to the other, giving us the perfectly straight and routed recessed area for the hardware.
Next the hardware is placed in the recessed area and then we marked the area for the hooks on the side rails.
About 3/4″ depth of material needs to be removed for the hook to fit in.
We found this easiest by drilling a number of holes in the area and then chiseling out any remaining material.
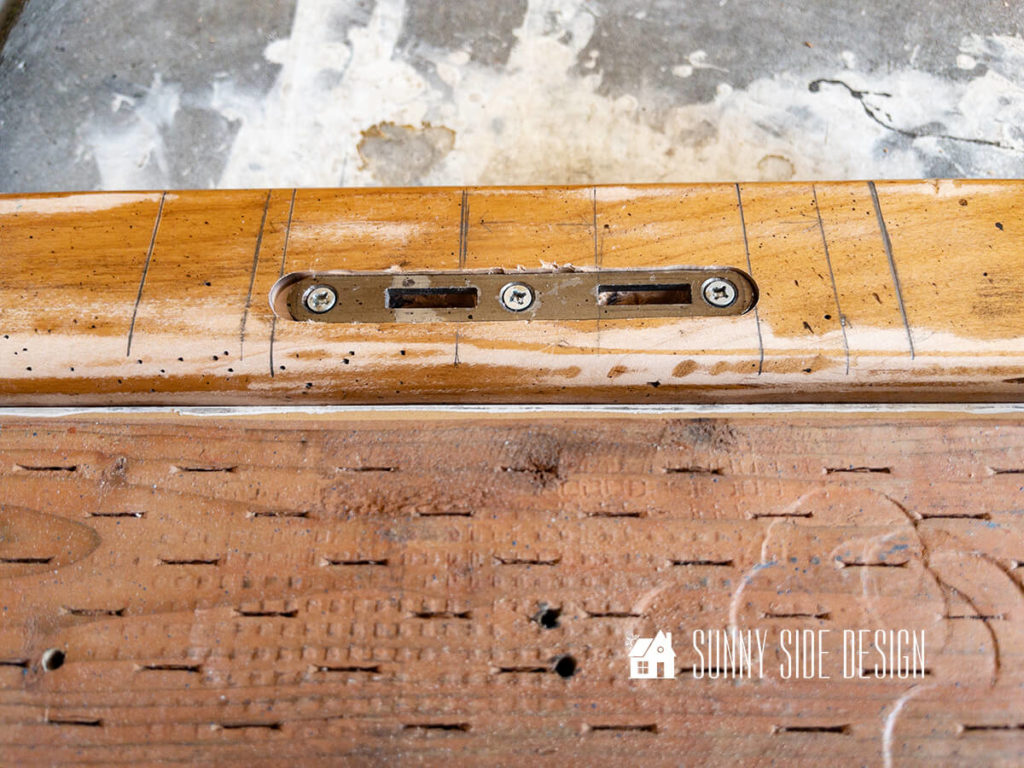
This doesn’t need to be perfect or pretty, it will be covered by the hardware plate.
Because we turned the headboard to the backside we didn’t run into the challenges of the footboard.

However on the footboard we had to adjust the placement of the hardware lower, which made the original holes for the hooks where we needed to place screws.
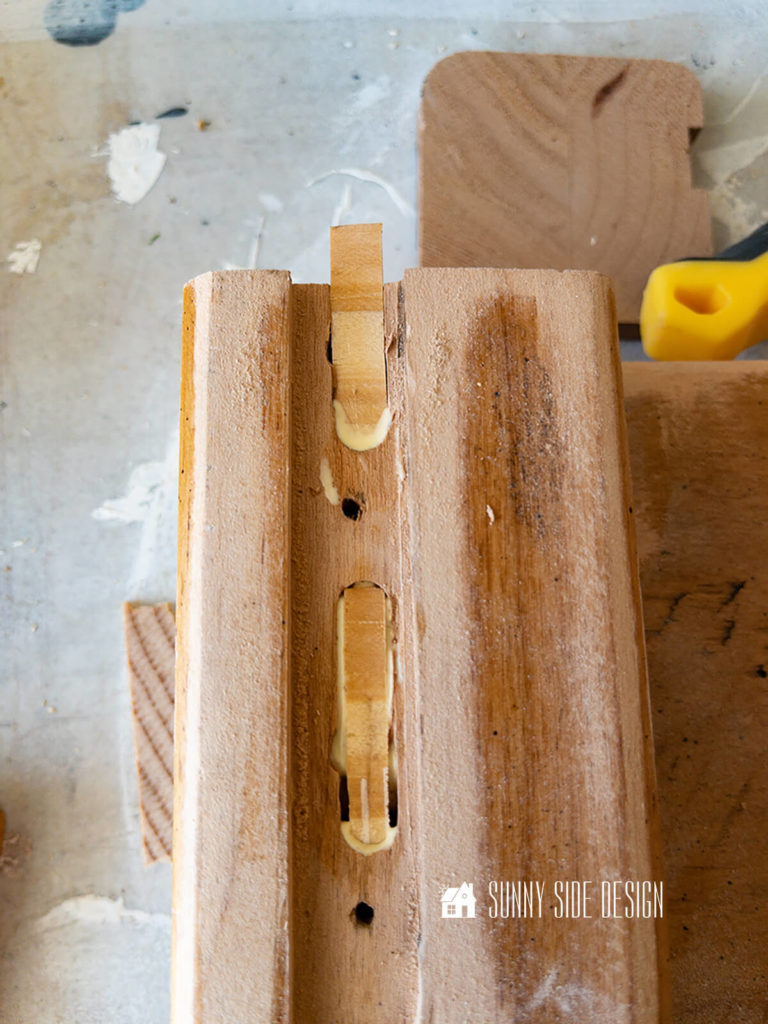
So we cut some pieces of scrap wood to fill the holes and secured them into place with wood glue.
Once the glue was dry, we were able to drill the recessed area for the footboard hardware.
The hardware was then placed in each groove, drilled pilot holes and inserted the screws.
Cap Boards
For cohesion, just like we added cap boards to the headboard and footboard, we’ll add cap boards to the bed frame rails.
First we cut a 1×4 select pine board to the length of our side rails.
Then we cut it in half so we had two equal pieces, 1 for each side rail.
Next we sanded them smooth and set up the bed in the garage.
We definitely wanted the rail cap board to align with the foot board.

Once everything was aligned we secured each cap board with wood glue and brads.
Let’s stay connected! Follow us on social media!
Preparing the Bed Frame for a Finish
Before the finish could be applied we needed to address all of the imperfections in the wood.

We began sanding the superficial imperfections and distressing with 80 grit sandpaper, followed by 150 grit and then finally 220.

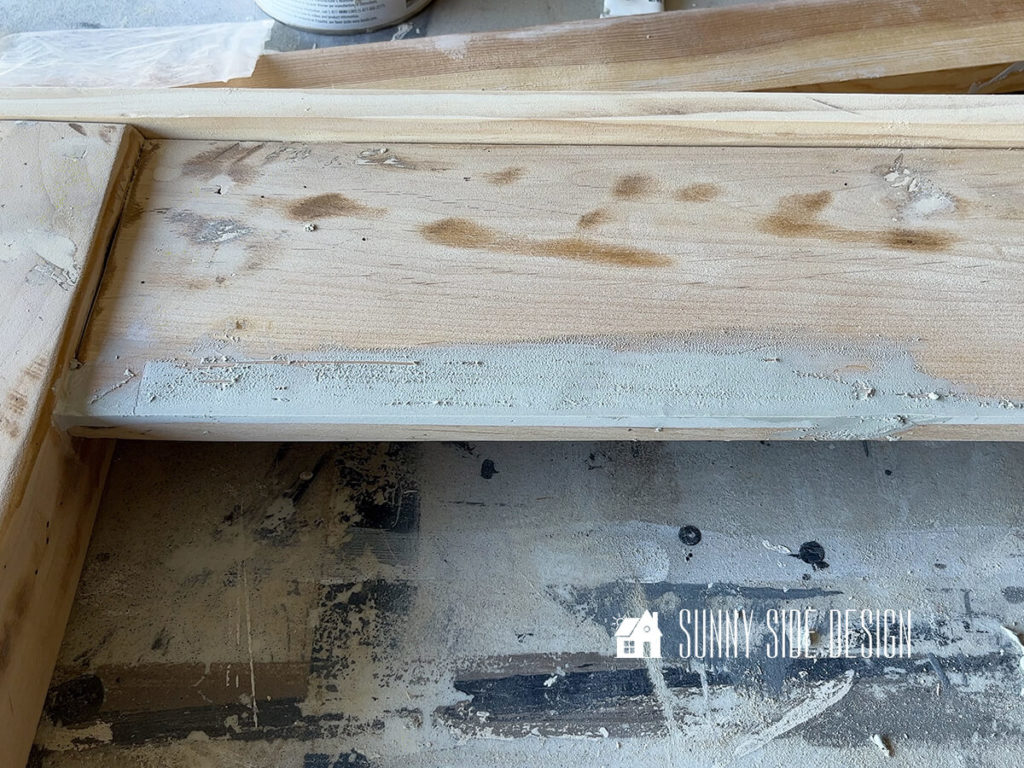
Wood filler was used for gouges that were relatively small and Bondo was applied to larger and deeper imperfections.

The largest area that needed addressing was the bottom of the footboard.
This area was extremely distressed and uneven.
That’s were Bondo comes into play!
A scrap piece of wood was clamped to the bottom of the footboard and then I was able to apply Bondo with a craft stick, pressing it into the large gaps.
This worked beautifully to straighten out the bottom of the footboard.
If you’ve never used Bondo before, let me tell you a little about it and how to use it.
It’s a two part epoxy all-purpose filler that literally bonds to the wood and sands to a beautifully smooth finish.
You mix it up in small amounts that can be worked in 2 to 3 minutes.
It really starts to set up fast, in fact it’s ready to sand in 15 minutes!
It also has a strong odor, so I’d recommend working in a well ventilated area or outside if you can.
You’ll place about a 3″ circle x 1/2″ thick layer of Bondo on a paper plate and then squeeze out a 3″ long strip of the hardener cream.
Mix with a craft stick and then it’s ready to use.
You really only have about 2 to 3 minutes to work it, so work quickly.
After about 15 minutes it’s ready to sand.
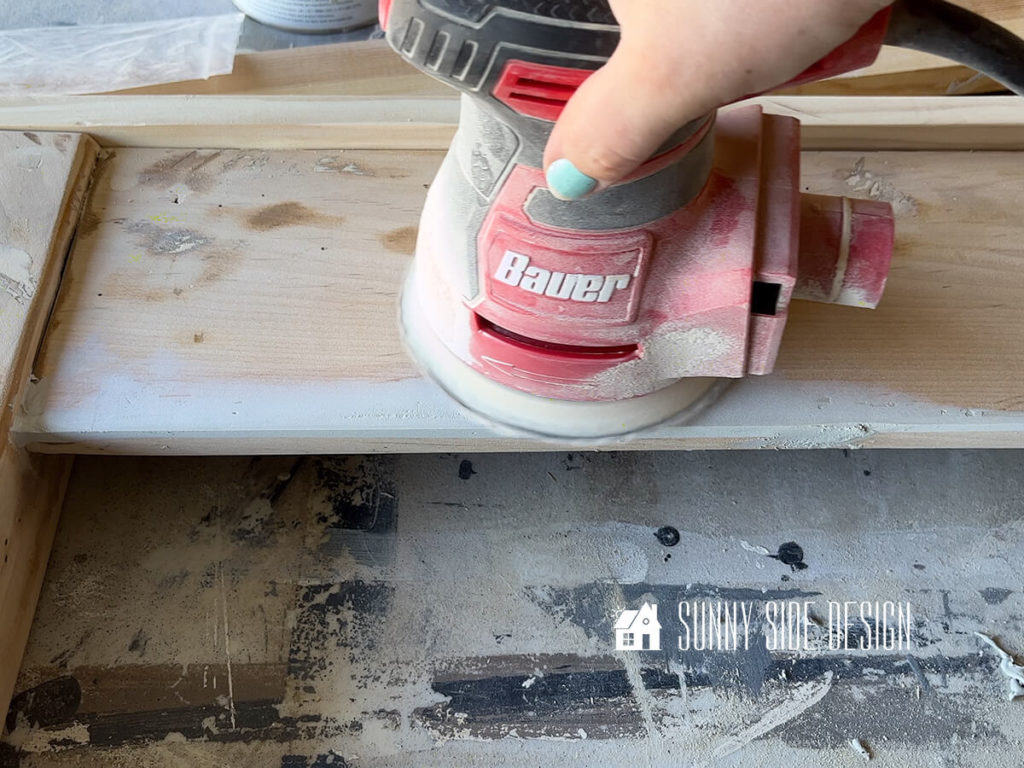
We started with an 80 grit sandpaper on the Bondo area and then worked our way down with a 150 grit and finally a 220 to prepare it for our final finish.
For the areas that were filled in with wood filler, we just used 220 grit sandpaper.

As you can see the Bondo really helped add the straight clean lines we were looking for on this bed frame makeover.
You can also see how uneven the bottom of the footboard was.

To Sum It Up
As we reached the final stages of our old bed frame makeover, we were excited at the before-and-after transformation.
With each step, we’ve witnessed the bed frame shedding its rustic charm and embracing modern aesthetics.
We’re so excited with the way that this seamlessly blends with the room’s design, a testament to the power of creativity and a little bit of DIY magic.
This concludes part 1 of this bed frame makeover.
Click here to see our faux rifted oak finish for this bed frame.
And let me tell you, we’re so excited for this!
Another project we just finished in Gavin’s bedroom makeover was updating his closet doors with bifold sliding barn door hardware.
It’s a game changer for small bedroom closets!
Our journey from discovering a rustic bed frame to unveiling a modern masterpiece is a true labor of love.
The challenges we faced and the surprises we encountered only added to the satisfaction of seeing our vision come to life.
This DIY furniture makeover reminded us that with determination, planning, and a touch of ingenuity, even the most dated pieces can be transformed into something remarkable.
We hope this tutorial has inspired you to unleash your creativity and reimagine a piece of furniture in your home.
For more furniture ideas for your home, take a look at these ideas:
- Easy and Inexpensive DIY Side Table with Thrifted Finds
- Simple Upholstered DIY Ottoman Makeover
- Repurposed Hutch Top
- Simple DIY Floating Nightstand with a Modern Vibe
- How to Build a Desk with Wood and Pipe
- Desk Makeover with a Modern Vibe
- DIY Round Coffee Table
- Simple Upcycled DIY Sofa Table
Thanks for spending some time with us today, we hope you’ve been inspired!
Drop us a comment, we love to hear from you.
If you’re new here, WELCOME! We love having new readers and friends!
You can learn more about us here.
Let’s stay connected! Join our DIY community of doers so you won’t miss any of our weekly updates.
Please PIN and save for later, and share with your friends! Sharing helps grow our following!
Sharing is caring!
Thanks for stopping by Sunnyside Home.
Empowering you to create a home you love!
Retailers We Love
- Anthropologie
- Birch Lane
- Crate & Barrel
- Joss and Main
- Lampsplus
- Mark & Graham
- One Kings Lane
- Pottery Barn
- Rejuvenation
- Serena & Lily
- Wayfair
- West Elm
- Williams Sonoma
- World Market
Be sure to follow us on Pinterest for even more home decor and DIY ideas.
To see what we are working on before it’s on our blog, follow us on Instagram.
You will also find our video tutorials on our YouTube channel.
- Easy Strawberry Chicken Salad with Lime Maple Balsamic Vinaigrette

- How to Fix Chipped Kitchen Cabinets with a Pen
- Easy 4th of July Door Decor You Can Make in Minutes
- 35 Easy Decorating Ideas for Summer to Welcome the Season


You two ALWAYS amaze me! I cannot wait to see the finished bed.
You are so kind Ginger. Sometimes we wonder what we get ourselves into. But we are pleased with the results so far. And we can’t wait to share our finish for this bed! We’ve been perfecting the technique and it looks so good! We just need to actually finish the bed!😂 Have a wonderful weekend my friend!
Unbelievable! You two are amazing! The bed looks great.
You are the sweetest Renae! You’re always cheering us on. We are thrilled with the results so far and are so excited to share our finishing technique. We’ve been perfecting it over the last couple of weeks and it’s looking so good. Have a wonderful weekend. Thanks for your love and support!