Does the thought of painting furniture seem overwhelming? Over the years we’ve painted over 100 pieces of furniture and learned a few tips and tricks along the way. Since we started using the Wagner sprayer we felt like we’ve died and gone to painter’s heaven. In fact, using a paint sprayer is so much easier than you think!
We’ve shared how quickly we were able to paint all of the interior doors in Steph’s house with the Wagner sprayer.
While today we’d like to share how to use the detailed spray nozzle to get a beautiful smooth finish while painting furniture.
You’ll also find tips for prepping the furniture before paint, tips for sticky drawers, as well as how to apply gilding for a little bit of glam.
These furniture pieces were painted for a client. You’ll see the transformation of a vintage dresser and vanity. Once we were finished, they looked so beautiful I wanted to keep them for myself.
If you love to re-imagine old furniture pieces then you’ll love our Modern Desk Makeover and the transformation of this bed frame.
Or you may like to take a look at our Floating Nightstand.
Before Painting Furniture

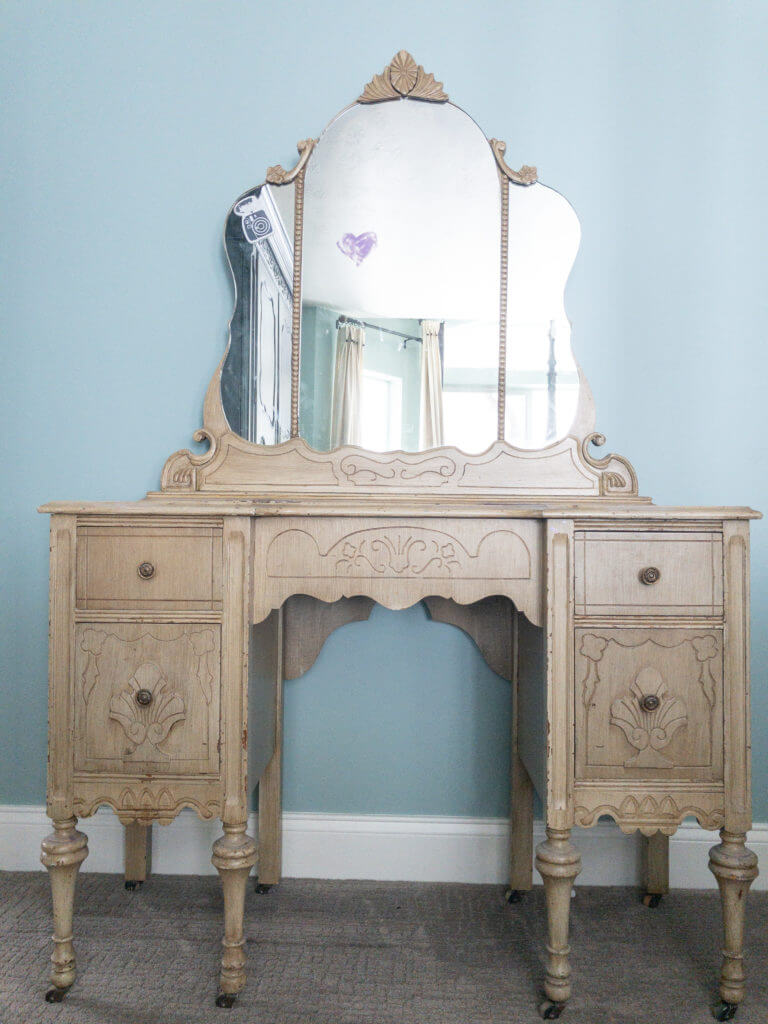
Here’s a peek of what the furniture looked like before painting them. The finish had definitely seen better days and the glaze just dated the pieces.
This 6 piece bedroom set we found on Facebook Marketplace and would you believe all 6 pieces were only $50! I mentioned it to my hairdresser and she immediately wanted it for her daughter.
Scroll down to see how this dresser and vanity were transformed into beautiful farmhouse furniture with a bit of glam.
Prepping Furniture Before Painting
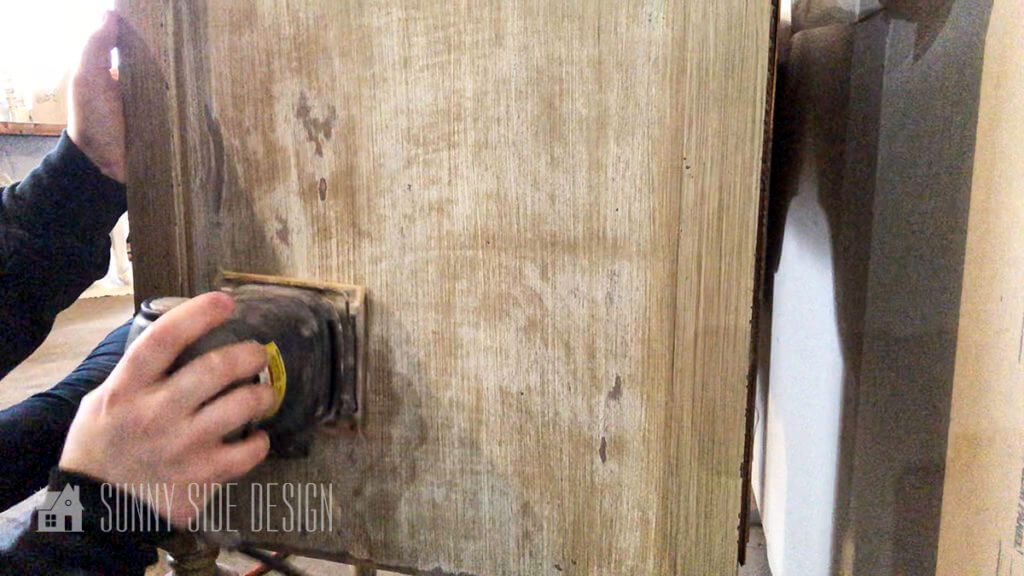
While there is paint that doesn’t require sanding before painting the furniture, in our case sanding was a must.
Clearly, the paint on both the dresser and vanity were loose and chipping in many areas, therefore sanding was necessary.
In fact, we decided to give the entire piece a light sanding to make sure the paint had good adhesion.
If there is no chipping on your furniture piece, you can use chalk paint without sanding like we did on my china cabinet.
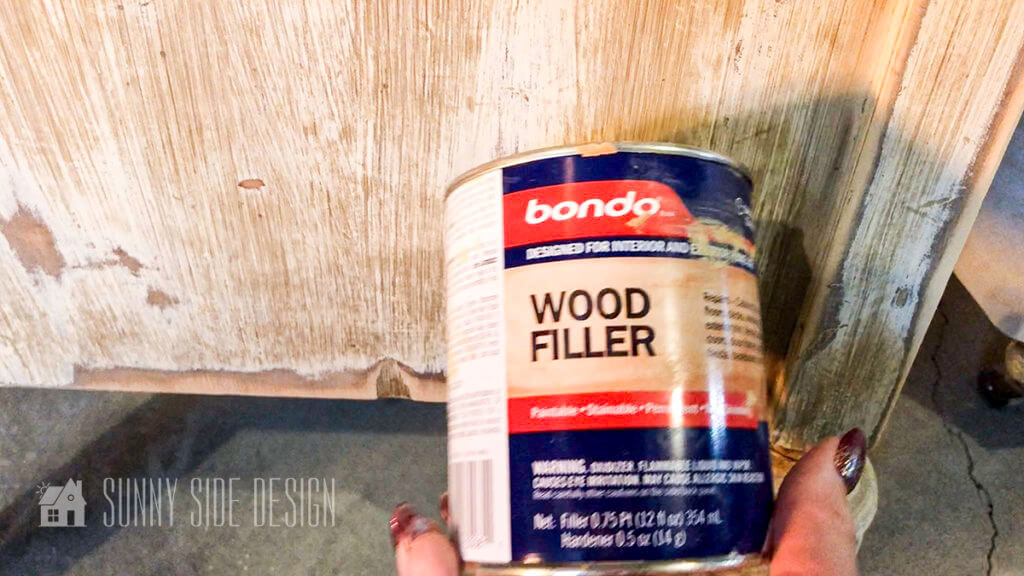
Next, while looking over the dresser we notice a couple of places where chunks of wood were missing.
Recently, we’ve discovered Bondo wood filler. It is a two-part epoxy filler that bonds really well to wood.
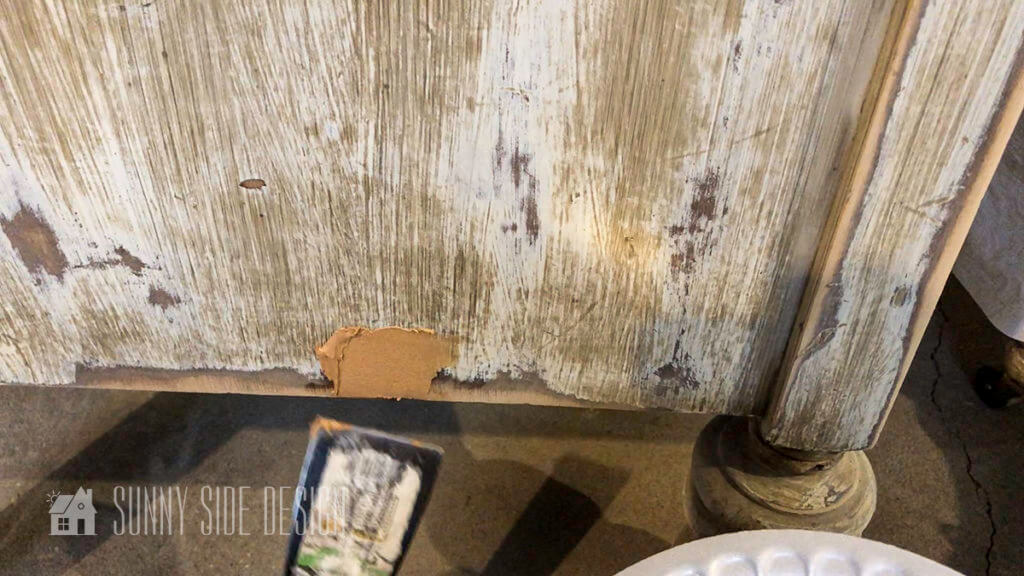
Not only does it dry quickly (within 15 minutes), but it sands easily for a smooth, flawless finish.
Apply the wood filler with a putty knife, let dry and sand.
Stripping Off Old Paint

Also, we did decide to strip off the old painted finish on the vanity top. It will give the piece a unique look and keep the piece from looking too matchy matchy.
Another reason for this, is that the vanity will be used by a teenage girl. There will certainly be spills of makeup, fingernail polish and hair product. We felt that a polyurethane finish for the top would certainly be more durable.

Citristrip is our new favorite stripping product. You simply paint on a thick layer of the product, cover it with plastic wrap so that it does not dry out. Then let the magic happen.
You can wait for up to 24 hours before removing the Citristrip. Which is what we generally do. Simply brush it on, cover with plastic wrap and come back the next day.

It’s absolutely amazing that when you pull back the plastic wrap, a good deal of the paint comes off with the plastic.

Then to remove the remaining paint, scrape it with a plastic scraper.
Note: Citristrip does not have a strong odor, however it is still a chemical stripper. Be safe and wear chemical resistant gloves, long sleeves and protective eyewear.

Once the paint is removed from the furniture piece, sand lightly with fine #0000 steel wool and mineral spirits with the grain of the wood.
If you would like to see a more in depth tutorial along with more tips on stripping furniture click here.
At this time, we covered the natural wood top of the vanity to prepare it for painting.
Sharing is caring!
How to Use the Wagner Sprayer Detail Nozzle

When painting furniture clearly we want to achieve a fine smooth finish. With this in mind, we will use the detail spray nozzle.
The detail nozzle is designed for spraying thinner materials to achieve that smooth professional looking finish.
First place the suction tube on the nozzle.
- If you are going to be spraying in a downward direction, the angled end of the suction tube should be pointing toward the front of the gun.
- If you are going to be spraying in an upward direction, the angled end of the suction tube should be pointing toward the rear of the gun.

Prepare your paint to add to the material cup.
For our project we chose to use Behr cabinet and trim enamel. We chose this paint for its durability without needing to add a protective topcoat.
This paint is thinner than a paint with primer and there is no need to thin.
However to achieve a fine smooth finish you may need to thin your paint. Water-based, latex paints can be thinned by adding a little water.
Oil-based painted must be thinned with paint thinner. Be sure to read the label on your specific paint along with recommendations for thinning.
When using a paint sprayer it is wise to pour the paint through a strainer to remove and impurities. Otherwise the sprayer may clog.
At this time attach the materials container to the spray nozzle.
If you’re new here, welcome! We’re so glad you’re here.
Let us introduce ourselves, we’re Michelle and Steph, a mom and daughter team who love to DIY and decorate our homes.
Not only are we passionate about making our homes warm, comfortable and unique, but it’s our mission to help you create that same feeling in your own home.
You’ll find ideas for repurposing, creating, decorating and making your home truly yours, while always mindful of a tight budget.
Undoubtedly we love finding ways to make your home look high-end on a small budget.
Plus you’ll also find a recipe or two as we share our family favorites with you.
We’d love it if you’d join our community of doers so you won’t miss any inspiration for your home.
We love new friends.

[mailerlite_form form_id=5]
Detail Nozzle


Located on the front of the detail nozzle (the blue piece) is the air cap ears. This piece can be rotated for either a vertical, horizontal or diagonal pattern.
For a horizontal painting pattern the air cap ears will be at the top and bottom.
When they are rotated side by side, the pattern will be vertical.
At this time, align the arrow on the spray gun with the “unlock” symbol on the spray gun handle.
Insert and twist the spray gun into the handle toward the “lock” symbol on the spray gun handle.
The tab below the trigger will lock the two pieces into place.
Insert the air hose tightly into the connection on the spray handle.
Finally, insert the air hose tightly into the connection into the turbine.
Located on the back of the spray handle is a red knob. This knob controls the material or paint flow. When using a thinner material begin the dial set low.
Test the spray pattern on piece of cardboard or scrap wood and gradually increase the flow until the you achieve the desired look.
Painting Furniture the Quick & Easy Way
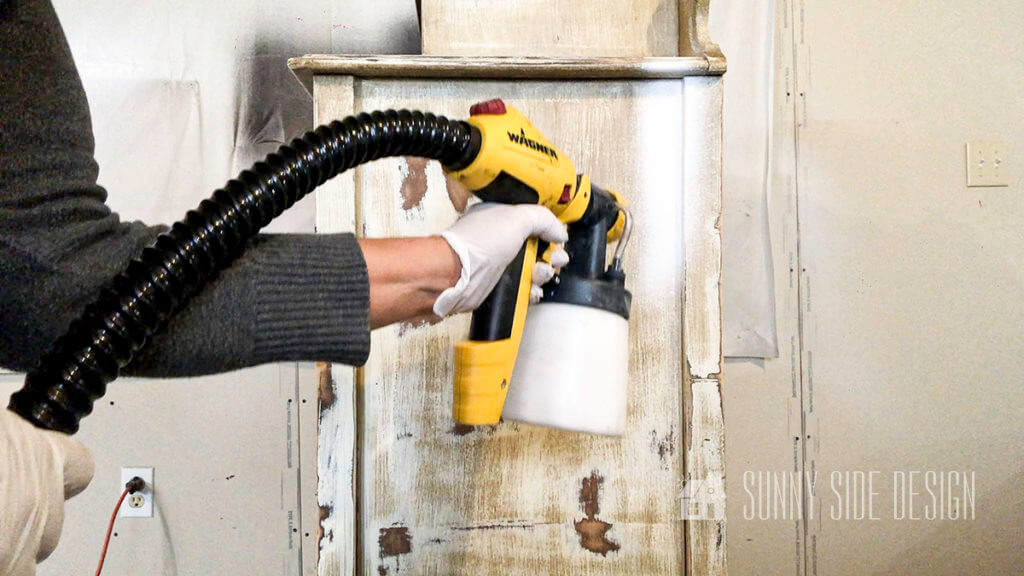
To start with, I adjusted the nozzle for a vertical pattern and sprayed the recessed areas first. I then rotated the air cap ears for a horizontal pattern and sprayed the dresser from the top to bottom in smooth and even strokes, overlapping each row slightly.

Tips:
- Spraying with the control set too high will result in a spray pattern that runs and sags (too much material).
- Spraying with the control set too low will result in a spray pattern that does not cover (not enough material).
- To ensure desired results are achieved with the controls, test your spray pattern on the spray poster or a scrap piece of wood or cardboard.
You can spray your pattern up and down or side to side, whatever is comfortable for you.
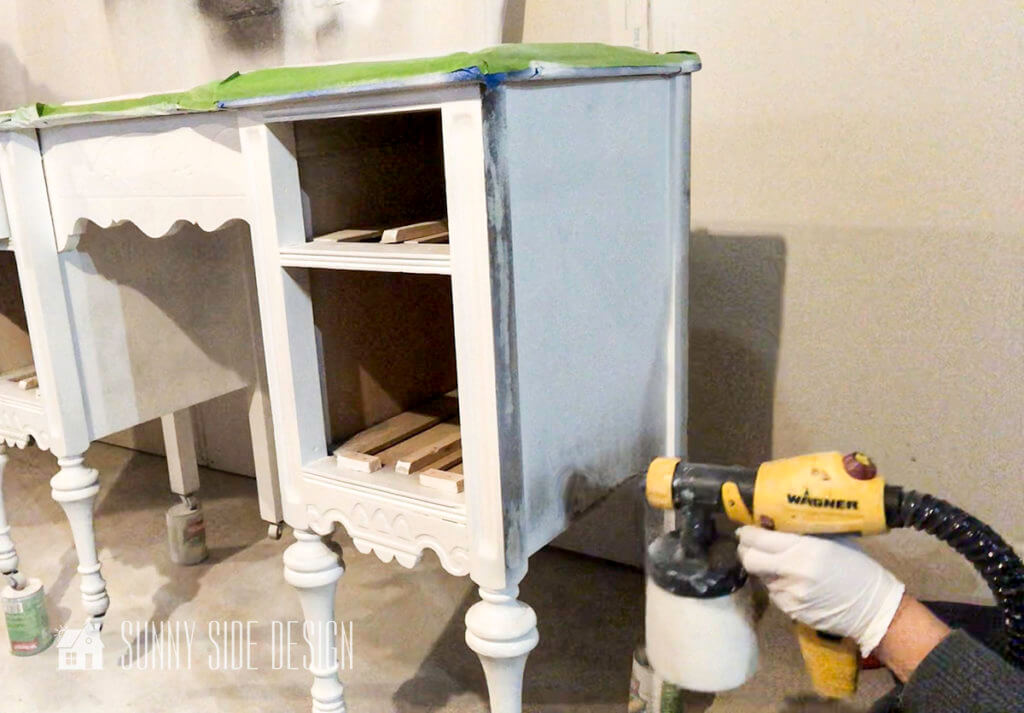
Spraying detailed pieces such as the turned legs on this vanity is a breeze with the paint sprayer.
Clearly, it also simplifies painting in the carved and detailed areas of furniture.
While the prep work is time consuming, it is so very necessary whether you are painting your furniture with a sprayer or a brush. However you will find that applying the paint is so much quicker with a good quality sprayer.
For a tutorial on painting furniture with a brush and chalk paint, click here.
Proper Spraying Technique
- It is important to keep your arm moving whenever the trigger of the gun is pulled.If you pause in one spot, too much paint will be sprayed on the surface.
- Spray parallel to the surface with smooth passes at a consistent speed. As a result of doing this you will avoid runs and sags.
- Also position the spray gun perpendicular to the surface and 6-8″ from the spray surface.
- It should be noted that the first coat should be light, then when the second coat is applied it can be a little heavier. Always do at least 2 coats of paint for a durable paint finish.
- When spraying, always trigger the spray gun after spray pass has begun and release trigger before stopping the pass. Always keep the gun pointed squarely at the spray surface and overlap passes slightly to obtain the most consistent and professional finish possible.Note: During a project, periodically wipe the nozzle tip with a damp cloth to remove any dried paint.
Sealing the Vanity Top

The vanity top would require some sort of sealer to protect the wood. The options would be a clear wax or a water or oil-based polyurethane.
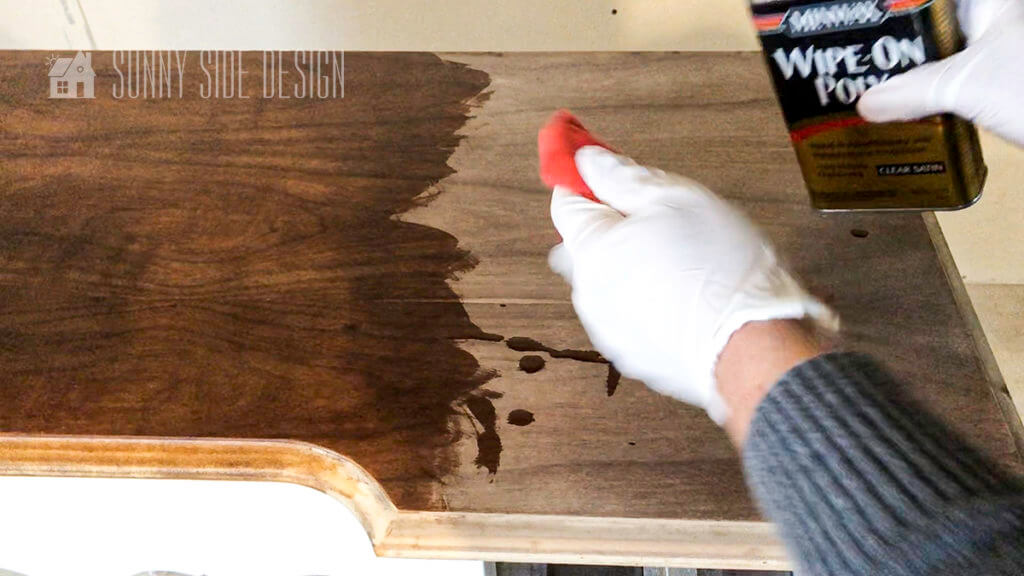
We chose the oil-based Polyurethane for it’s durability. My preference is Minwax Wipe On Poly. Not only is it easy to use, but it’s also very durable.
Before the topcoat is applied I took a fine grit sandpaper over the surface to ensure that it was smooth.
Then I wipe the surface with a tack cloth to remove the dust.
Following that, apply the Wipe On Poly. You simply pour a little of the product on a lint free cloth and wipe over the surface. Keep the strokes long and in the direction of the grain.
Once the first coat has dried, sand lightly with a #0000 steel wool pad and wipe again with a tack cloth.
Repeat 2 more times for a total of 3 coats.
If you are staining a piece of furniture with a water based stain, checkout our pro tips for applying a water based stain.
The Painting is Finished

Once the paint was cured we re-installed the original hardware.
It is so unusual to find the original hardware on a piece this old, that’s been previously painted.
We cleaned up the hardware a bit and it looks amazing!

Now, we think that it’s beautiful just the way it is. We are absolutely loving the white paint with the natural wood top on the vanity. The white paint helped camouflage some of the carving in these pieces. To me it seemed to be a little excessive.
However, we wanted to add a little extra something special to these furniture pieces.
Glamming It Up

We thought of possibly doing a gold dipped leg. However I’ve been wanting to try gold leafing on a piece of furniture.
We’ve used gold leaf on crafts before, but never tried it on a furniture piece.
It’s really quite easy to do.
For this you will need a water-based craft glue, a soft paint brush and metal leaf.
First the glue needs to be thinned down a bit. The glue should fall off the brush when lifted.
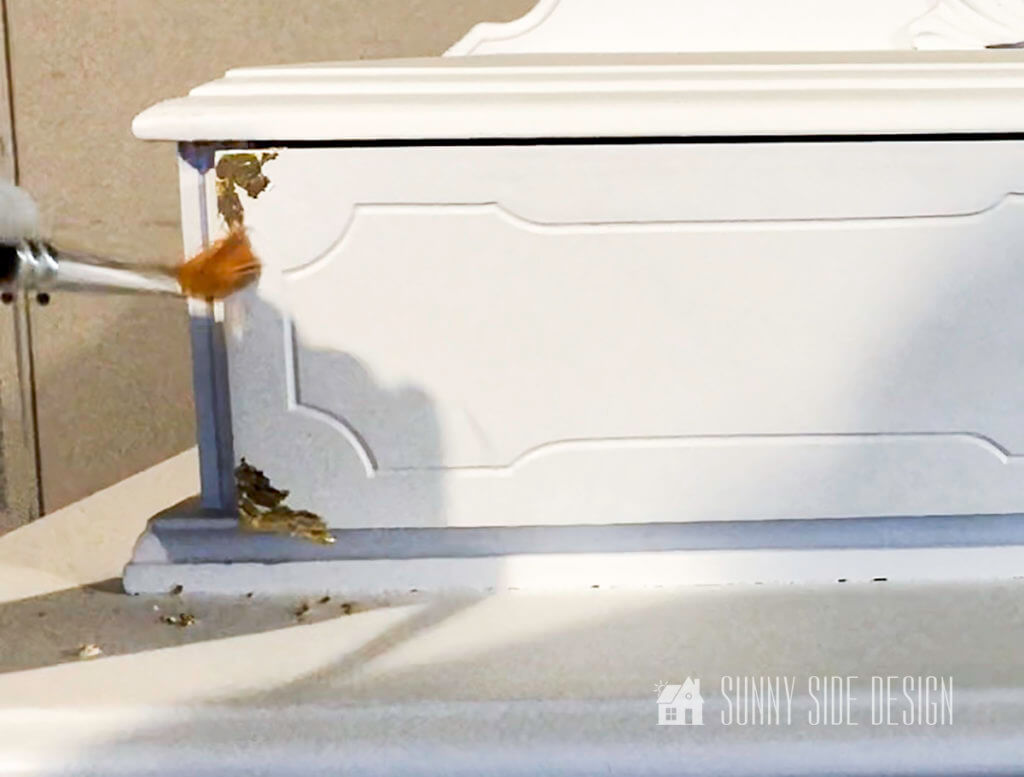
Brush the glue on where you want to apply the metal leaf.
Let dry for about 5 minutes until it’s tacky when touched, but does not get on your finger.

Each metal leaf sheet is on a piece of tissue paper. Cut a small section of the leafing material.
The leafing material is delicate and easily tears, so you will use the tissue paper to help apply it.
It’s also a good idea to wear gloves while applying the leafing material so that it doesn’t stick to our hands.
Press the metal leafing against the tacky glue area and tap into position with a dry soft brush.
Repeat this process with each area where the glue has been applied.
Then go back and brush away any loose metal leafing material with a soft paint brush.
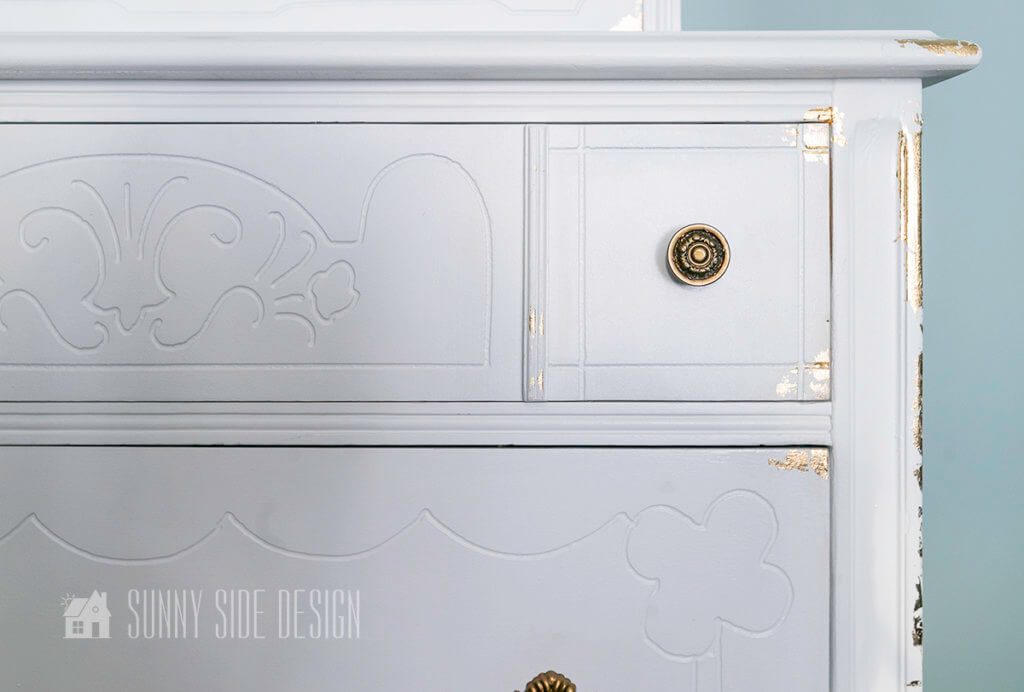
That’s it. Easy Peasy and you get an amazing glam look. We chose to apply the gold leafing like we would distress a piece of furniture.
We applied it to the corners of the drawers, a couple of spots of the decorative molding and a few spots on the legs and edges of the dresser and vanity.
A topcoat may be applied, but it’s not necessary over the metal leafing.
Let’s stay connected! Follow us on social media!
Sticky Drawer Fix


Certainly, with the age of these furniture pieces one would expect to have sticky drawers.
But we found an easy fix.
We took a votive candle and rubbed wax on the both sides of the drawer guides.
As a result of this, they now slide perfectly.
We are so excited to reveal the makeover to you!
The Reveal

Doesn’t the dresser look amazing! It’s quite a transformation from the dingy glazed dresser it was before our makeover.

And look at that beautiful original hardware!


By restoring the natural wood finish to the top of the vanity, added interest and makes it feel unique.

In addition, the gold gilding here and there add that bit of glam we wanted for this farmhouse vanity.

The completed vanity is simply stunning. Look at the details in this piece.
This was such a fun project for us to work on. Clearly, using the Wagner paint sprayer made it quick and easy to get that flawless, smooth finish.
Have you tried using a paint sprayer? It never ceases to amazing me what a little paint can do.
Love this idea? Then take a look at even more furniture makeover ideas:
- Simple Dresser Refresh
- $5 Hutch Top Repurposed to an Attractive French Inspired Cabinet
- Re-image Thrift Store Furniture into a Tool Chest Dresser
- DIY Floating Nightstand
- DIY Round Coffee Table
- Easy Chalk Painted China Cabinet
- Paint Furniture with Professional Results
- Transform Twin Beds into a Daybed
- How to Refinish Furniture with a Raw Wood Look
- Beautiful Wood Dining Table
- How to Use SaltWash for a Worn and Weathered Finish
Do you have a piece that you’ve been waiting to revamp? Will you now consider using a sprayer to transform your piece?
Please share what you are working on, we love to hear from you!
We hope you found some inspiration here today.
If you’re new here, WELCOME! We love having new readers and friends!
You can learn more about us here.
Let’s stay connected! Join our DIY community of doers and you won’t miss the weekly updates and more inspiration for you always on a budget.
Disclosure: This post contains affiliate links or referral links for your convenience. It is a way for this site to earn advertising commissions by advertising or linking to specific products and/or services. Click here to read my full disclosure policy.
Sharing is caring!

Thanks for stopping by Sunny Side Design. Empowering you to create a home you love!
Retailers We Love
- Anthropologie
- Birch Lane
- Crate & Barrel
- Joss and Main
- Lampsplus
- Mark & Graham
- One Kings Lane
- Pottery Barn
- Rejuvenation
- Serena & Lily
- Wayfair
- West Elm
- Williams Sonoma
- World Market
Be sure to follow us on Pinterest for even more home decor and DIY ideas.
To see what we are working on before it’s on our blog, follow us on Instagram.
You will also find our video tutorials on our YouTube channel.
- How to Make Peonies Last Longer with 7 Simple Tricks

- How to Build a Birdhouse with CharmingThrift Store Finds
- Simple Clay Pot Lighthouse Garden Decor Project
- Simple Tabletop Fire Bowl DIY in Under 10 Minutes