It’s that time of year again!
The leaves are changing colors, the air is getting crisp, and pumpkin spice everything is back in season.
Well almost!
If you’re looking for some simple pumpkin DIY ideas to add a touch of fall flair to your home, you’re in the right place.
In this article, we will show you how to make five easy pumpkins that look like your favorite high end dupes from Pottery Barn, Anthropologie, West Elm and Grandin Road.
Are you excited?!
But before we get started . . .
Are you frustrated you can’t find supplies we use at your local Dollar Tree?
Did you know you can order pumpkins from Dollar tree online?
Try these pumpkin essentials, Halloween craft supplies and early bird Christmas items from Dollar Tree.
It’s a great way to find what you want before it’s at your local store.
Ok, now let’s get started with these fun Pumpkin DIYs.

Pumpkin DIY Anthropologie Dupe

Our first pumpkin DIY is inspired from Anthropologie.
While scrolling through the Anthropologie website I fell in love with the metallic gold candle.
The timeless elegant feel just spoke to me.
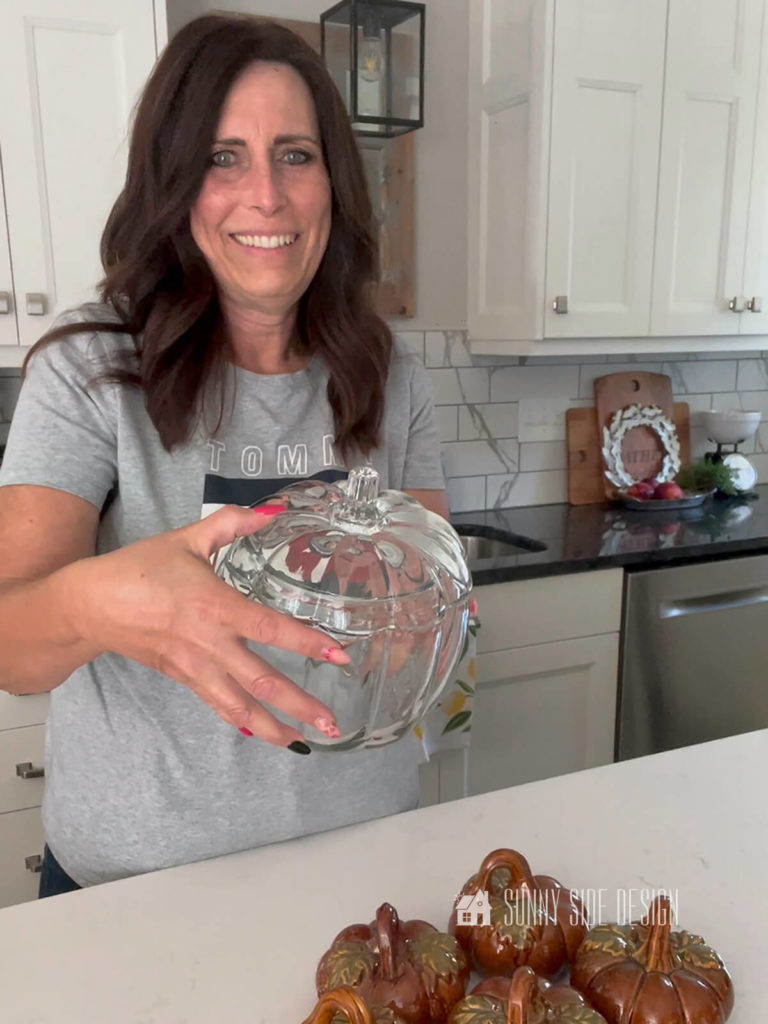
And as luck would have it, I had found the perfect glass pumpkin container while thrifting.
Paint Pumpkin Container

First, I painted the outside of the glass pumpkin container with a flat black paint and primer in one.
The black paint will act as a base for applying the metallic finish and give it an aged look like the inspiration piece.
Also the black paint will add depth and dimension to the pumpkin DIY as well.
Apply Rub ‘n Buff
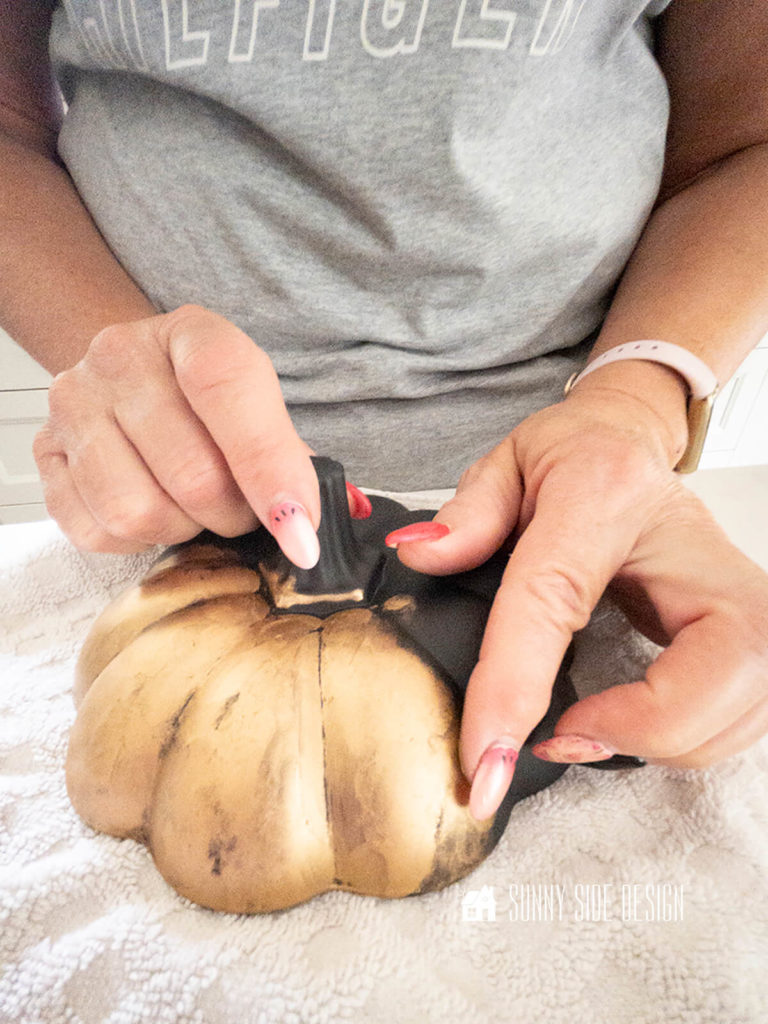
Once the black paint is dry, apply antique gold Rub ‘n Buff with your finger, cloth or a soft brush.
If Rub ‘n Buff is new to you, let me tell you a little about this product.
Rub ‘n Buff is a metallic wax that can be applied to metal, furniture, frames, ceramic, glass and home decor.
You can apply it with your finger, brush or cloth.
Generally I will use my finger, because I feel I have more control.
And after a minute or two you buff it with a soft cloth and you get a lustrous, metallic finish.
Not only does it come in gold, but there are 16 beautiful finishes from gold to copper and silver.
It’s really the easiest way to achieve a realistic metallic finish.
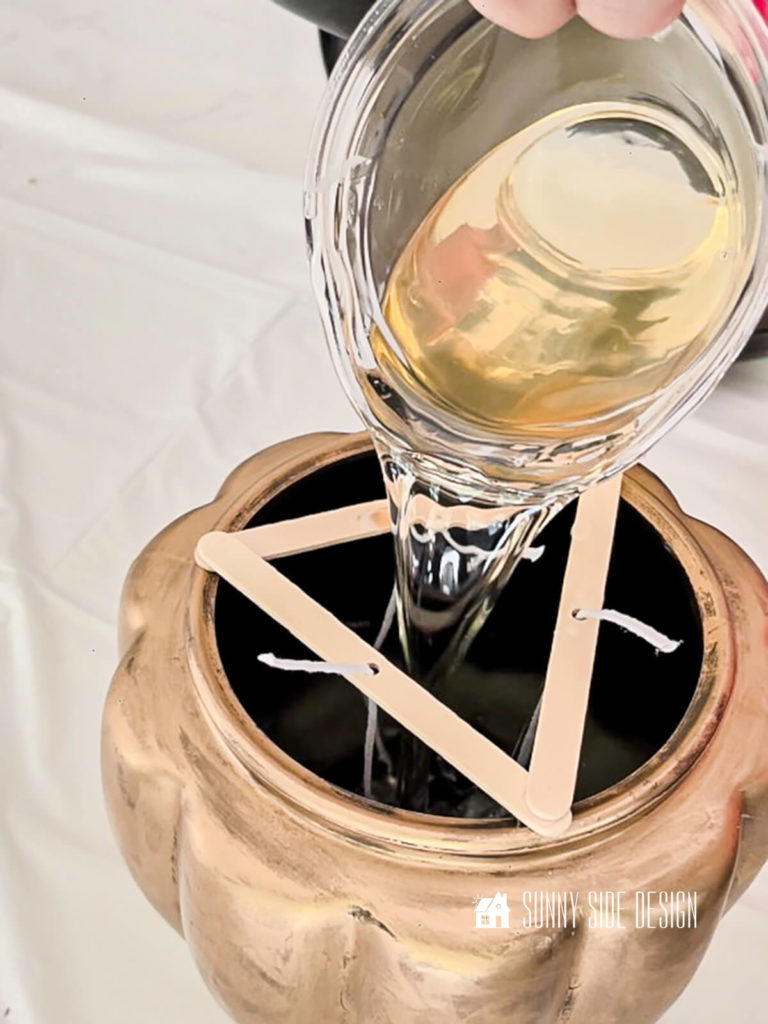
Now you can stop right here if you just want pumpkin decor.
But because my inspiration piece was a candle and I already had beeswax I went ahead and made mine a pumpkin spice scented candle.
However, I’m not an expert at candle making, so I’ll refer you to the recipe and directions I used to make my candle.
This is a quick and easy pumpkin DIY and I LOVE the gorgeous metallic finish.
In addition, it adds just a warmth and cozy feel to my fall decorations.
Are you enjoying this post?!
Please Pin It, save it for later and share it with a friend.
Sharing is caring!
Looking for more ideas for fall, try one of these 10 Affordable Fall Decor Ideas That Don’t Look Cheap.
Pottery Barn Inspired Pumpkin DIY
As you probably already know we love decor from Pottery Barn.
It just doesn’t always fit within our budget.
We were drawn to these handmade terracotta pumpkins and knew with a little paint we could recreate this look.
Prime Ceramic Pumpkins

On a recent shopping spree at our local thrift store we found a set of 5 ceramic pumpkins and at only $.75 they were a steal.
While the shape of the pumpkins is a little different than our inspiration pumpkins, we feel that we were able to achieve the desired finish with paint.
First, spray the pumpkins with two coats of white primer.
Apply Paint
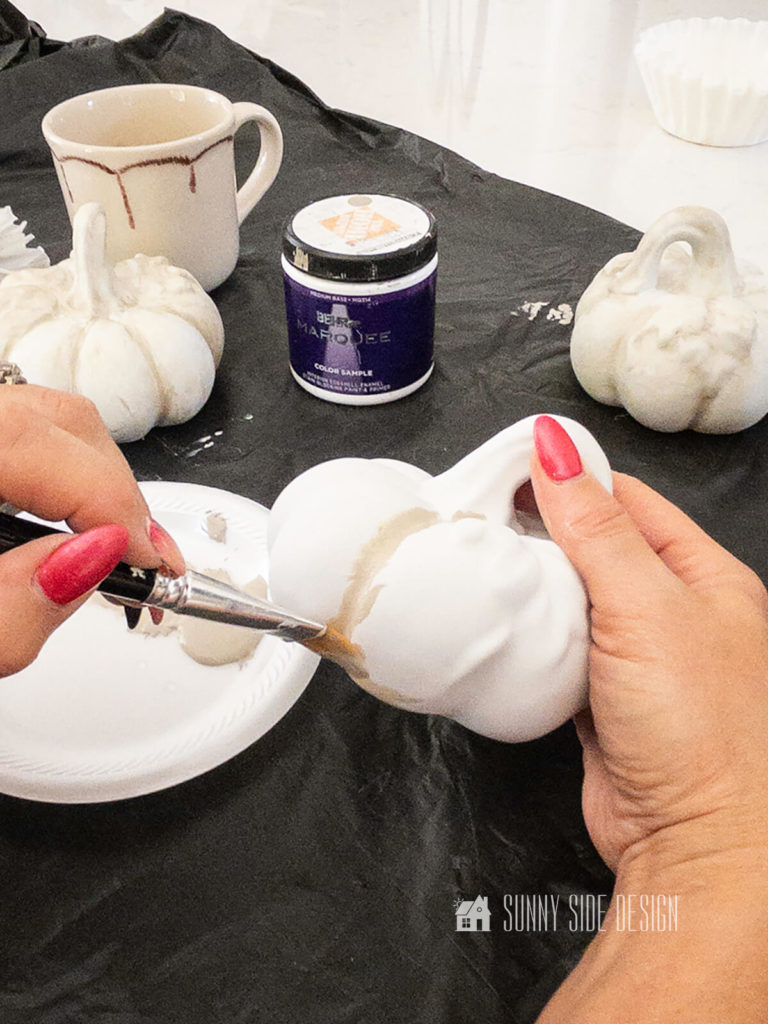
For the look on this pumpkin DIY, we went for a flat finish.
Begin by dipping your paint brush in water and tap on a paper towel to release some of the water.
Then pick up a little paint and dab it into the crevices of the pumpkin.
The paint I’m using is a paint sample from Behr called Garden Wall.
It a good greige/taupe color that will add depth and dimension to the pumpkin.

Then take a damp coffee filter and blend the color around the pumpkin.
You’ll want to keep more paint in the crevices, but mottle the color around the pumpkin to add texture.
Let the paint dry.

Next pick up more paint on the paintbrush, this time with less water in the brush and dab more paint into the crevices of the pumpkin.

And then dab the color with a dry coffee filter.
You’ll want to blend the color, but leave more paint this time in the crevices.
And that’s it!
This technique it really fast and I love the results.

[mailerlite_form form_id=2]
In addition, there are even more Stunning Fall Diy Decorating Ideas that are cheap.
West Elm Inspired Half-Dipped Pumpkin DIY

The elegant look of the West Elm Half-dipped Ceramic Pumpkin immediately caught my eye.
It feels sophisticated and modern.
But I must say, I think I like our pumpkin DIY version better than the inspiration.
Apply Primer and Paint to Ceramic Pumpkins

To achieve this sophisticated pumpkin decor, we first applied a white primer to our thrift store ceramic pumpkins.
Once dry, we applied two coats of a gloss white spray paint.
Let dry overnight to make sure it’s cured before the next step.
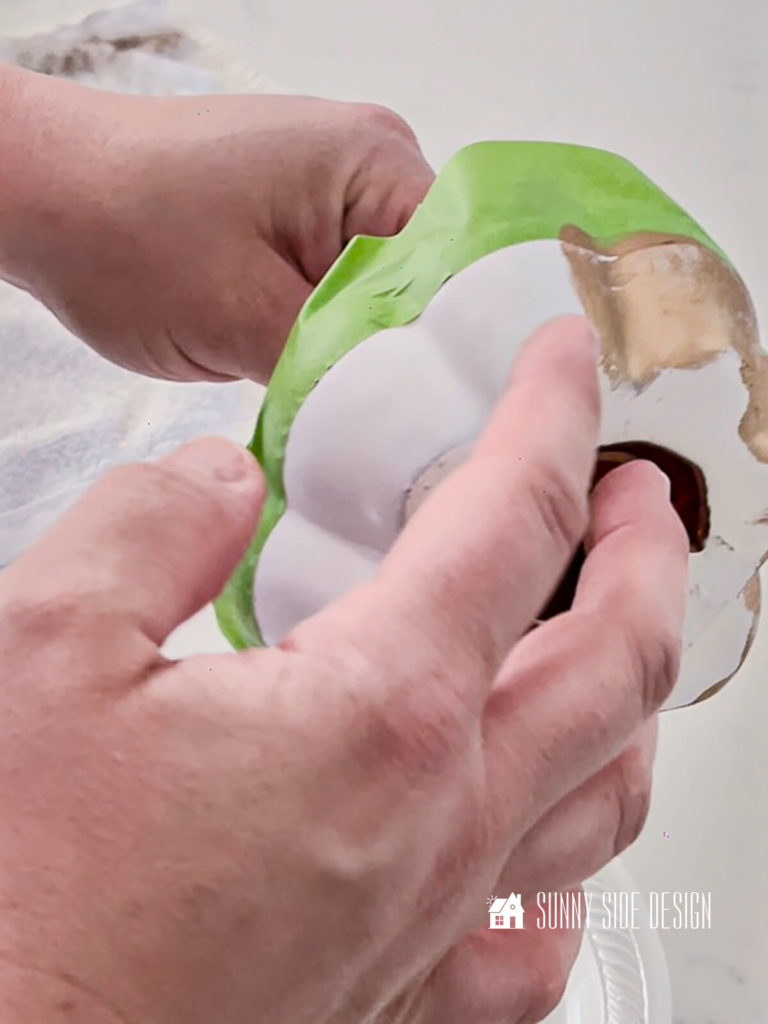
Mask Pumpkin and Apply Rub ‘n Buff

Be sure to allow the paint to fully cure, then apply masking tape around the pumpkin.
Press firmly along the edge of the tape to seal the edge.
And to achieve that beautiful metallic half-dipped look, apply antique gold Rub ‘n Buff with your finger to the lower portion of the pumpkin.
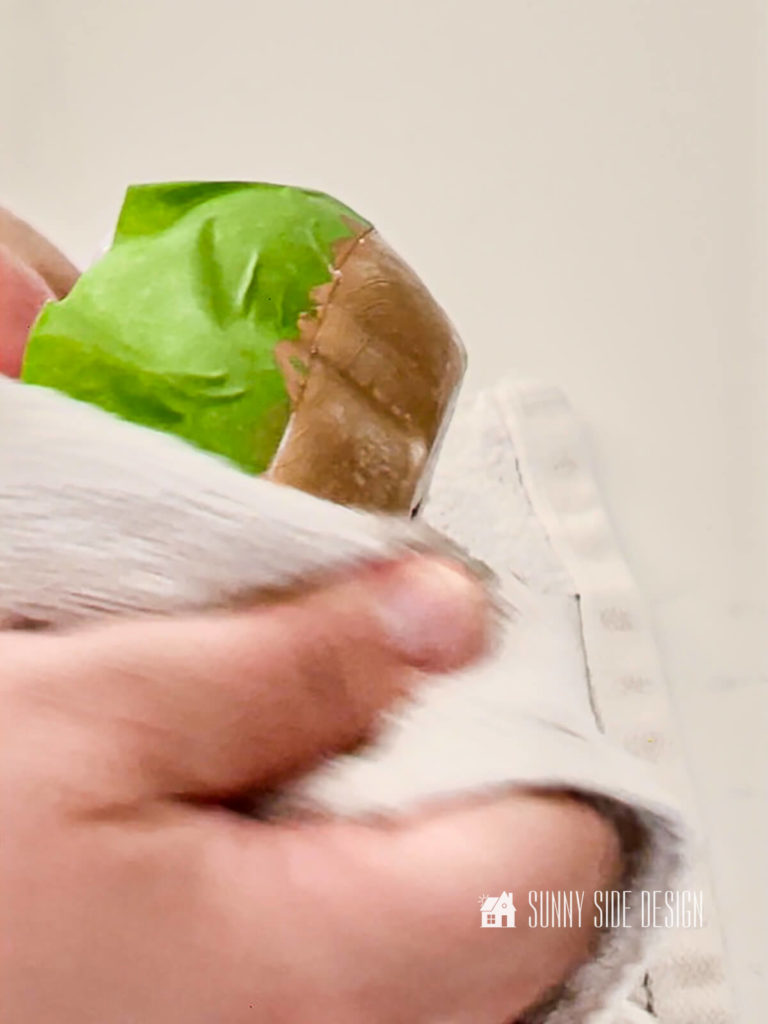
Wait a minute or two and allow the wax to dry and then buff with a soft cloth.
That’s it!
Another quick and easy pumpkin DIY!
Are you ready to try one of these pumpkin decor ideas?
Make your home cozy and inviting with these ideas.
Natural Braided Pumpkin DIY

Our next high-end dupe is also from West Elm, a natural braided pumpkin.
The West Elm pumpkin is $35 and our DIY natural braided pumpkin cost us less than $5.
Out of all of the the pumpkin DIYs, this one is the most time consuming, but well worth the look.
It would look great on a rustic tablescape or styled with a farmhouse, coastal feel.
Paint Foam Pumpkin

For this pumpkin DIY we used a cheap dollar store pumpkin.
You’ll want to first paint it tan, you don’t want any of that bright orange paint slipping through.
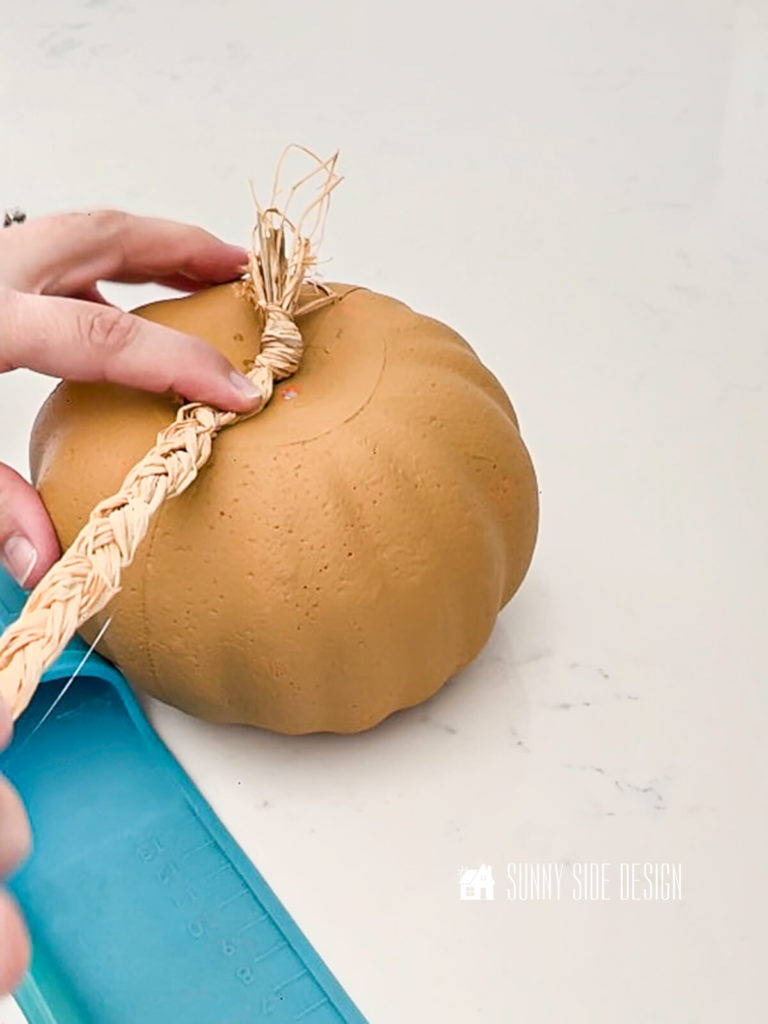
Braid Raffia

The inspiration pumpkin is made from braided water hyacinth.
For our pumpkin we braided raffia.
Gather together 12-16 piece of raffia, knot at one end and secure it to a surface with tape.
Then begin braiding.
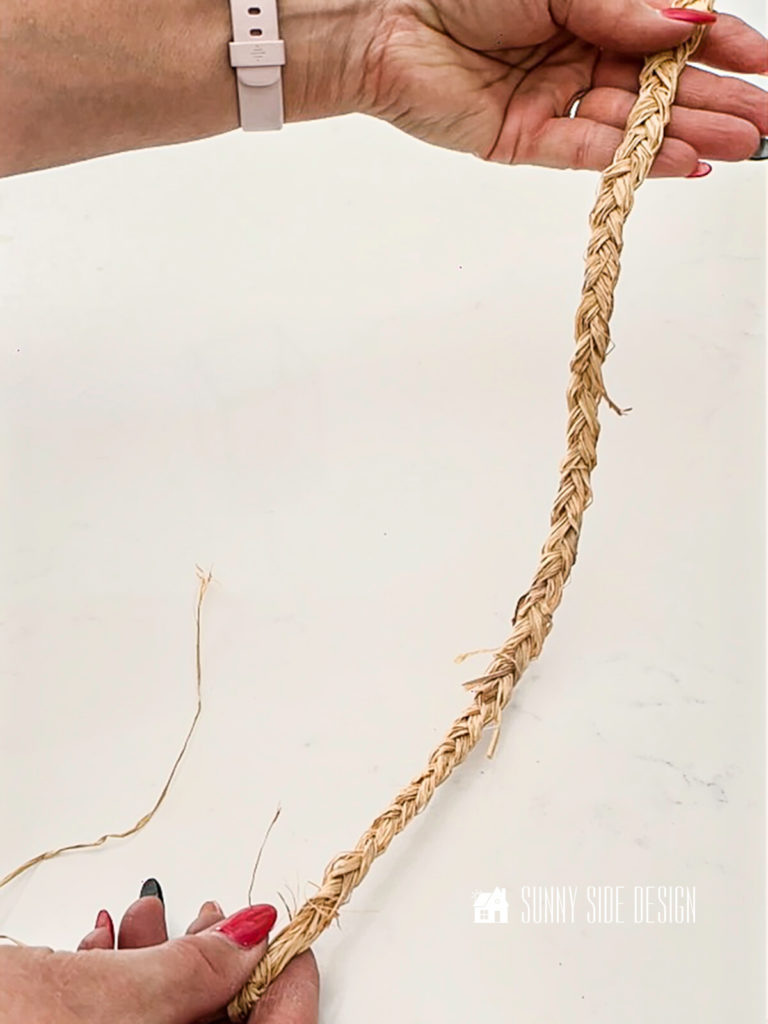
We braided the entire length of the raffia and then cut it apart to make the pumpkin.
Once you’re close to the end, tie a loop knot.
Glue Braided Raffia to Pumpkin
Begin gluing one end of the braided raffia to the top of the pumpkin.

Next trim off the knot.

And secure the loose ends of raffia with the hot glue.
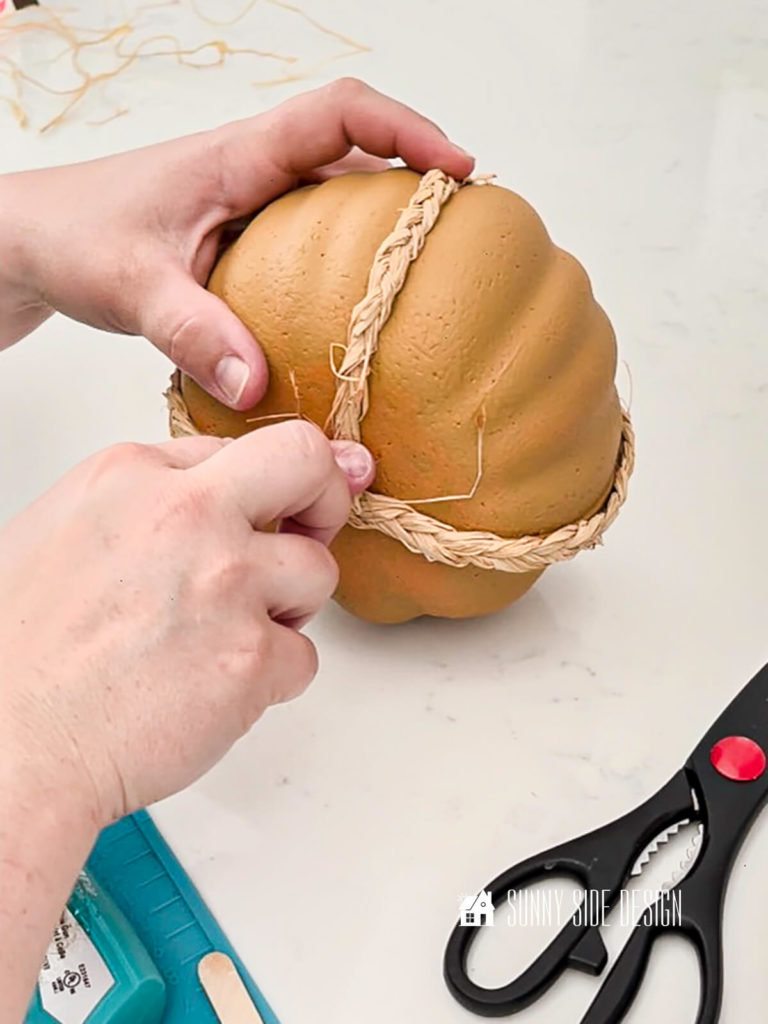
Continue applying braided strips of raffia, first in all of the grooves in the pumpkin.
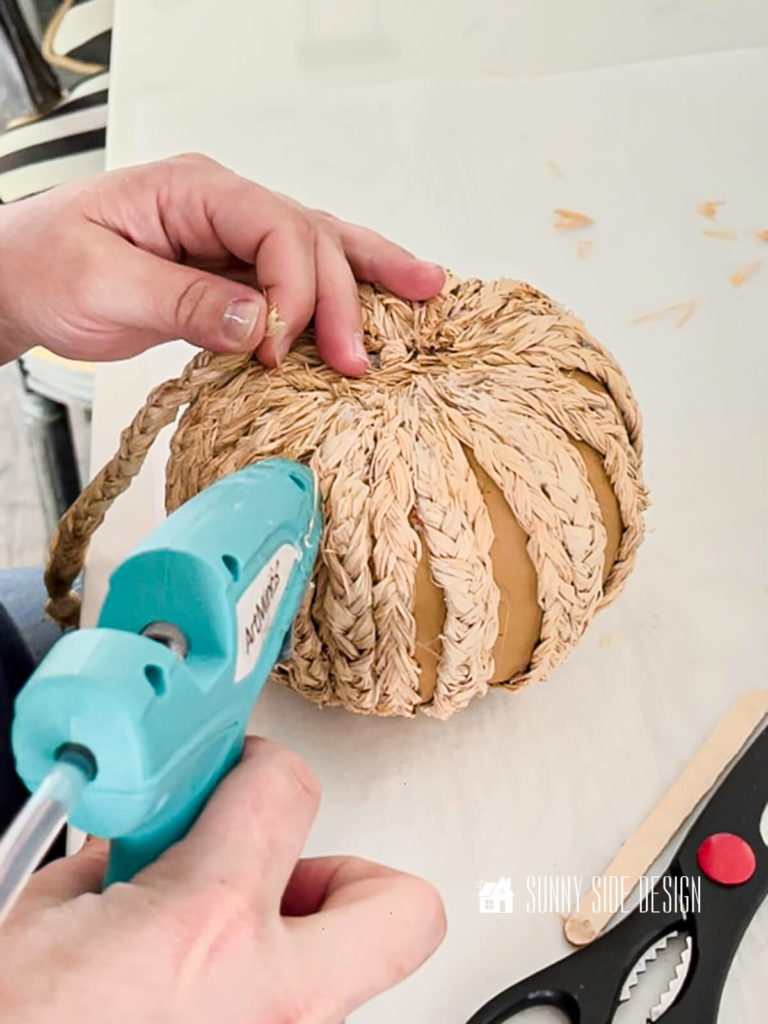
Then begin to fill in each section with more braided raffia pieces, securing at the top and the bottom of the pumpkin.

You may find it helpful to use a popsicle stick to hold the raffia braid while the glue cools.
Add Natural Stem to Pumpkin

For the stem, clip a small branch from a tree and push into the foam pumpkin.
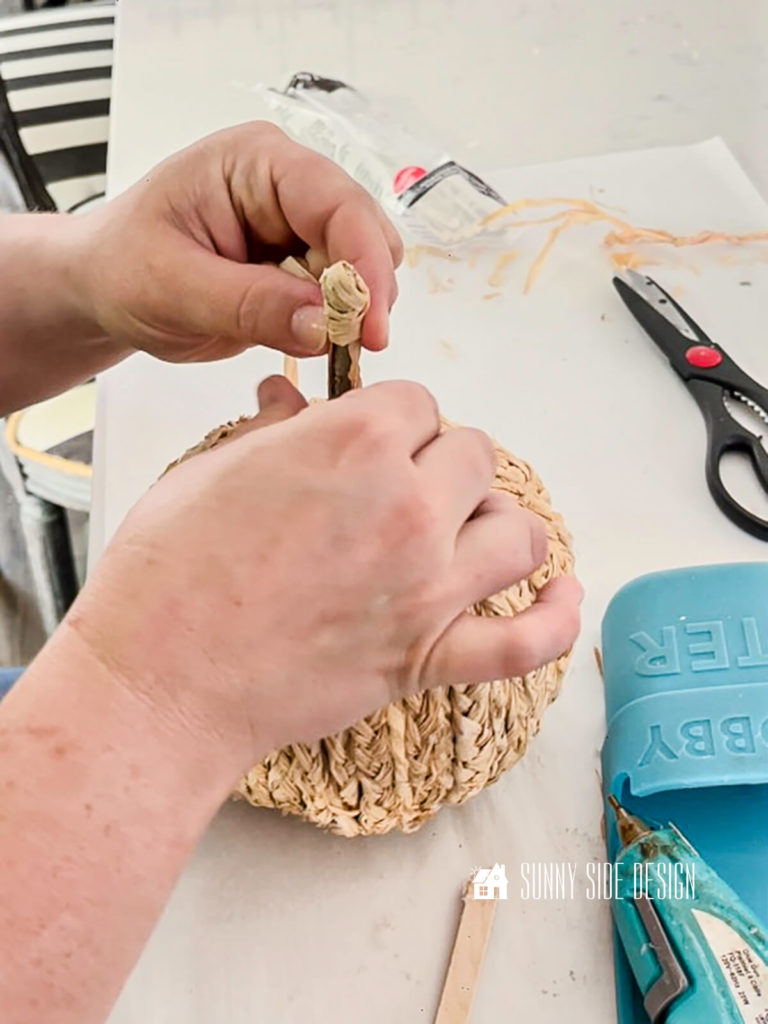
Then secure a piece of raffia to the top of the branch, wrapping the raffia around the stem.
Finally secure with glue at the end.
While this pumpkin DIY does take a bit of time, we LOVE the results.
If you love this look, put on your favorite movie and spend the evening making braids for your natural pumpkin DIY.
Let’s stay connected! Follow us on social media!
Check out these Easy Fall Decorating Ideas on a Dime!
Gold Studded Pumpkin DIY Inspired by Grandin Road

Our last pumpkin diy inspiration is from Grandin Road.
Without a doubt Grandin Road is one of my favorite sites to find great holiday decor.
And these metallic textured pumpkins will not disappoint.
Segment DIY Pumpkin with Cord
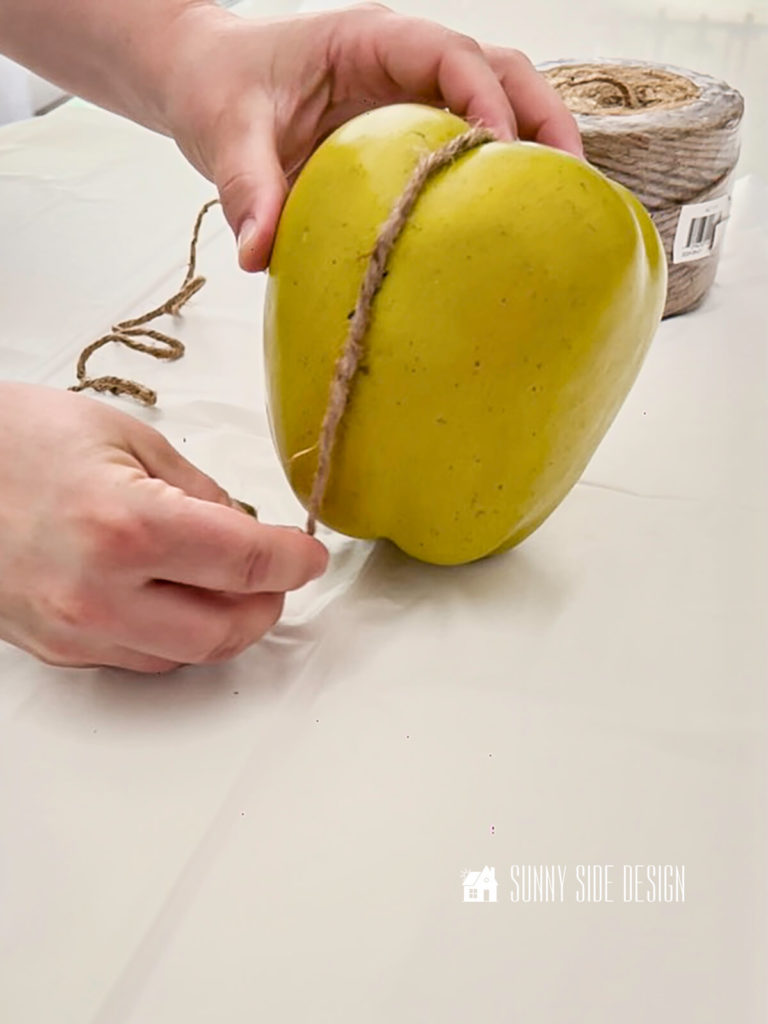
Ok this is really not a pumpkin, but by the time we’re through it will look like a pumpkin.
We found this large faux apple while thrifting and thought we would re-imagine it as a pumpkin.
First, we placed twine around the apple to segment it.
However, after it was all finished we wished we would have used a cotton cord.
You’ll see when it’s all finished that the twine left little fibers.
So if you’re going to try this pumpkin DIY I’d highly recommend using a cotton cord to segment the pumpkin.
Insert Thumbtacks
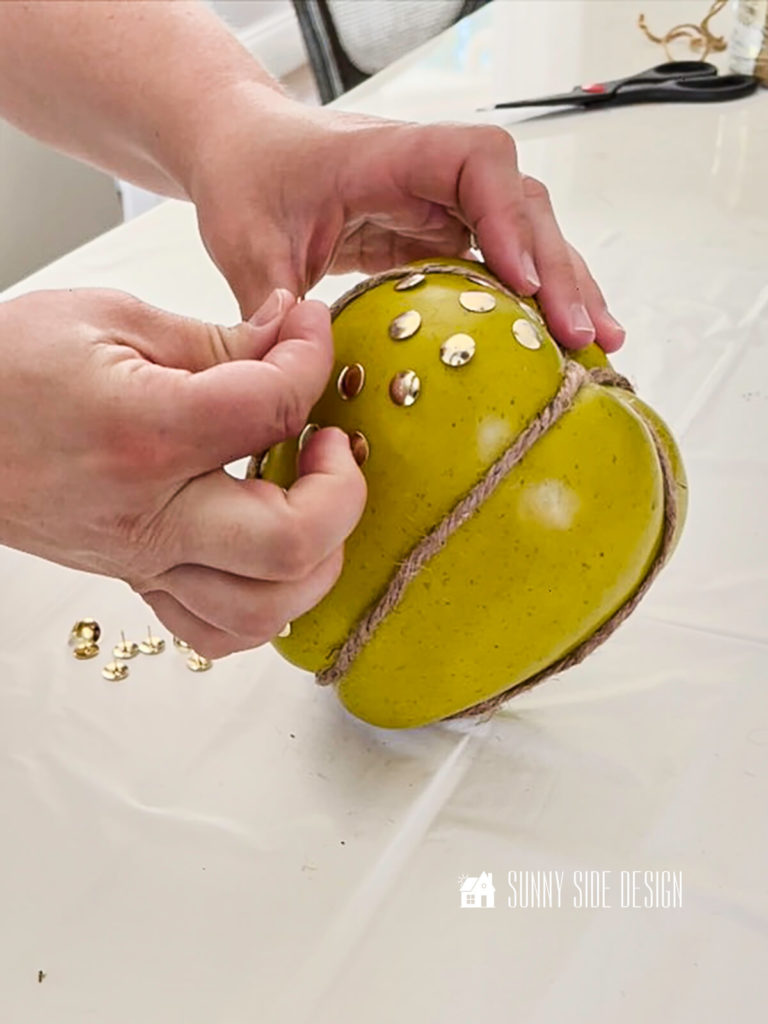
To give our DIY pumpkin the texture of the inspiration piece we pressed thumbtacks into the faux apple.
DIY Pumpkin Stem and Curly-Q

Once it’s covered in thumbtacks cut a small piece from a branch and attach it to the top with glue.

Then wet a 18″ piece of twine or cotton cord and wind it around a metal knitting needle.
Bake in a 350° oven for 10 minutes.
This will give you the perfect curly-q to glue to your pumpkin stem.
Paint DIY Pumpkin

And finally paint your DIY textured pumpkin with a metallic gold spray paint.
While painting the pumpkin I used a stir stick to hold up the curly-q to get paint over the entire surface of the pumpkin.

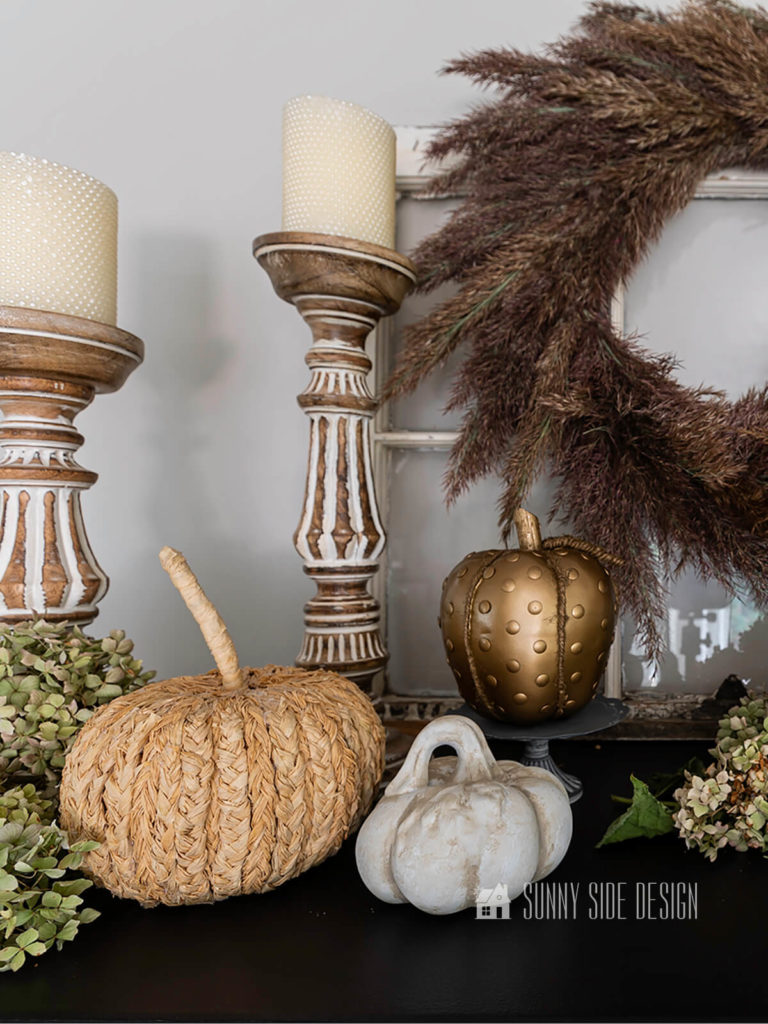
So, there you have it!
Five easy and inexpensive pumpkin DIYs that will add a touch of luxury to your fall decor.
My personal favorite is the gold dipped pumpkin – it’s so simple but looks amazing!
What about you?
Which of these pumpkins is your favorite?
Let us know in the comments below.
And if you want even more pumpkin inspiration, be sure to check out our post “The Best Pumpkin Craft Ideas“.
Happy crafting!
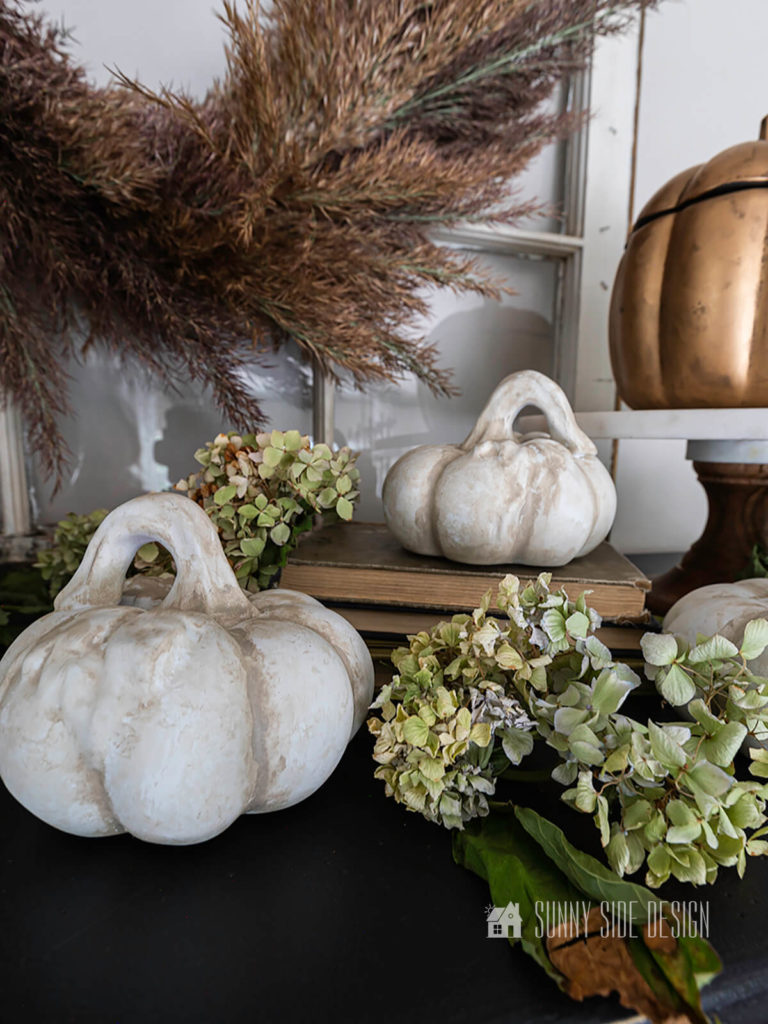
More Fall Decor Ideas
- Ideas for Fall Decorating that are Simple and Affordable
- Easy Vintage Lace Pumpkin Decor
- Easy Acorn Craft with Real Caps and Wool Balls
- Simple Fall Topiary
- Easy DIY Fall Macrame Wreath
- How to Macrame for Beginners Easy Fall Leaves
- Modern Metal Hoop Sunflower Wreath

Shop Pumpkin Craft Supplies
Anthropolgie Inspired Metallic Pumpkin Candle
Pottery Barn Inspired Pumpkin DIY
West Elm Inspired Gold Dipped Pumpkin
West Elm Inspired Natural Braid Pumpkin
Grandin Road Inspired Textured Pumpkin
Did you enjoy these pumpkin DIY ideas?
If you’re new here, WELCOME! We love having new readers and friends!
You can learn more about us here.
Let’s stay connected! Join our DIY community of doers and you won’t miss the weekly updates and more inspiration for you always on a budget.
Please Pin It, save it for later and share it with a friend.
Sharing is caring!

Thanks for stopping by Sunnyside Home. Empowering you to create a home you love!
Retailers We Love
- Anthropologie
- Birch Lane
- Crate & Barrel
- Joss and Main
- Lampsplus
- Mark & Graham
- One Kings Lane
- Pottery Barn
- Rejuvenation
- Serena & Lily
- Wayfair
- West Elm
- Williams Sonoma
- World Market
Be sure to follow us on Pinterest for even more home decor and DIY ideas.
To see what we are working on before it’s on our blog, follow us on Instagram.
You will also find our video tutorials on our YouTube channel.


These are great ideas! You two are so creative. Happy Fall, my friends.
Thank you Renae, same to you.