Welcome to our comprehensive guide on how to enhance your bathroom’s functionality and aesthetic appeal with a DIY recessed shelf in a wall.
Join us as we walk you through the process of creating a chic and practical storage solution that seamlessly blends into your bathroom design.
From determining the ideal location to selecting the perfect dimensions, we’ll cover everything you need to know to bring this project to life.
Get ready to transform your bathroom with this simple DIY tutorial!
It’s week 6 of the of the One Room Challenge!
We’re coming to the homestretch of this challenge and we’re excited to share our progress this week in our bathroom renovation!
As a reminder you can easily navigate through each week of this master bathroom renovation by clicking on the links below.
Week 1 | Week 2 | Week 3 | Week 4 | Week 5 | Week 6 you’re here | Week 7 | Week 8

This Weeks Renovation Progress
This week the bathroom is really starting to take shape!
Not only were we able to install the vanity, but we also installed the floor, the baseboards, crown moulding and recessed shelf in a wall.
We planned to share our flooring this week, but I wasn’t happy with the transition pieces.
I’ve now purchased different transition pieces, but we haven’t had a chance to install them yet.
So we’ll share the floor with you next week, once it’s completely finished.
Let’s take a quick peek at what we still need to complete to finish this master bathroom renovation.
Bathroom Remodel To Do List
demo bathroommove closet wallrough in plumbing and electricalchange swing of doorrepair walls and ceilinginstall shiplap ceiling, paint- paint doors
install shower panpaint wallsinstall vanityprime and paint baseboardsinstall crown mouldinginstall cement backer boardinstall shower nichewaterproof showertiling & grout- i
nstall waterproof luxury vinyl plank floors - install flooring transition pieces
- install soaker tub
- install plumbing fixtures
- install toilet
- shower enclosure
recessed shelves- install lighting
- mirrors
- curtains
- towel hooks
- art and decor
It’s now starting to feel like we will complete this project on time!
Yippee!!!
Materials and Tools to Build a Recessed Shelf
- 3/4″ MDF board
- shiplap panel
- wood glue
- 1/1/2″ primed trim board (for shelves)
- 2 1/2″ primed trim board (trim out side of recessed shelf)
- 3 1/2″ primed trim board (trim out top & bottom of recessed shelf)
- 18 gauge brad nailer
- Kreg Rip-cut
- router
- oscillating tool
- miter saw or circular saw
- stud finder
- wood filler
- caulk
Sunny Side Design is a participant in the Amazon Services LLC Associates Program, an affiliate advertising program designed to provide a means for sites to earn advertising fees by advertising and linking to Amazon.com. As an Amazon Associate, this blog earns from qualifying purchases with no additional cost to you. Click here to read our full disclosure policy.
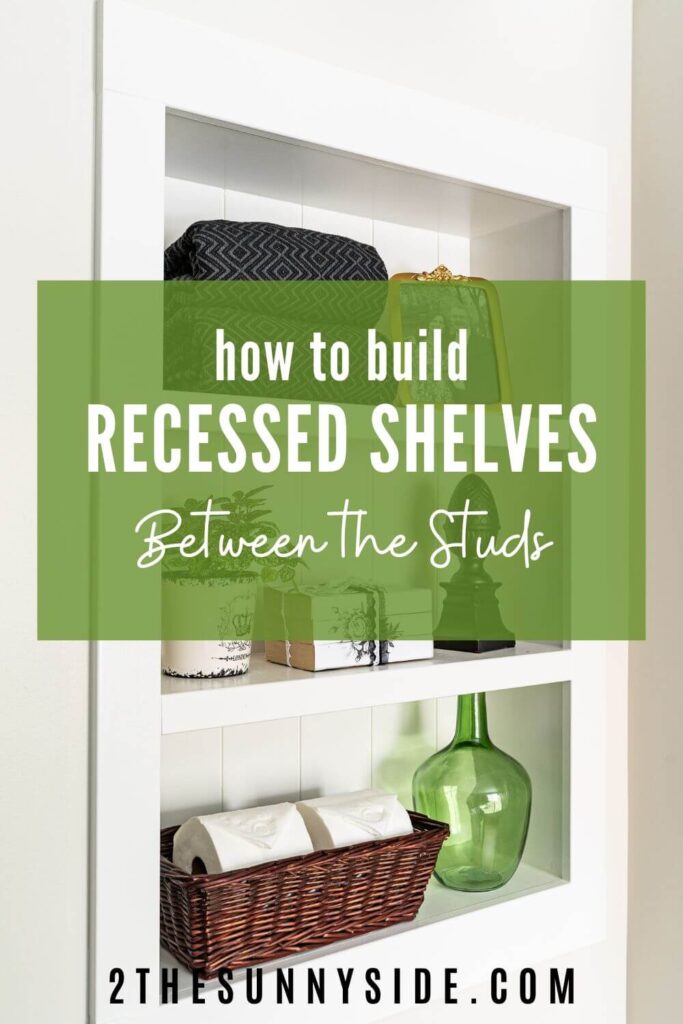
How to Build a Recessed Shelf in a Wall
Building a recessed shelf in a wall is pretty straightforward and can significantly enhance both the functionality and aesthetics of your space.
But if you don’t want to build the actual shelves, you can install ready made recessed shelves.
While we are installing this recessed shelf in our bathroom, this project can be used really in any room in your home.
We installed similar shelves for our hair stylist and added a ton of storage in her home.
Once we installed one, she wanted recessed shelves on every available wall in her salon as well as the bathroom.
Locate Studs in Wall
To begin, carefully select the location for your shelf, locate the studs in your wall and look for the best place for the shelf.
A stud finder is a helpful tool when selecting the right place for your recessed shelves.
Many stud finders will also alert you if there is wiring in the wall.
You’ll want to ensure it’s between studs and free from electrical wiring or plumbing.
In our case the drywall came down when we removed the tile in our demolition phase, so our wall was wide open and easy to make a plan for the location of our recessed shelves.
Once you’ve identified the spot, mark the area and first cut a small opening in the drywall and make sure you’re free from pipes or wiring.
We located our bathroom recessed shelves above the toilet for extra storage and a little decor, but another great location would be on a side wall by the vanity.
Cut Hole in Drywall For Recessed Shelf in a Wall
Before you begin to cut out your drywall for your recessed shelves, determine how tall you want your shelves to be.
Now you have your location for your recessed shelf in your wall, mark out your dimensions on the wall, then cut back the drywall to the edge of the 2×4 on each side and to your desired length.
Cut Shelf Pieces
Now that you have your opening and know the dimensions you’d like to build your recessed shelf in your wall, you can cut your wood to size.
For example, our wall is the depth of two 2x4s, so we will make our recessed shelf 7″ deep.
The outside dimensions of our shelf will be 23.5 x 36.5.
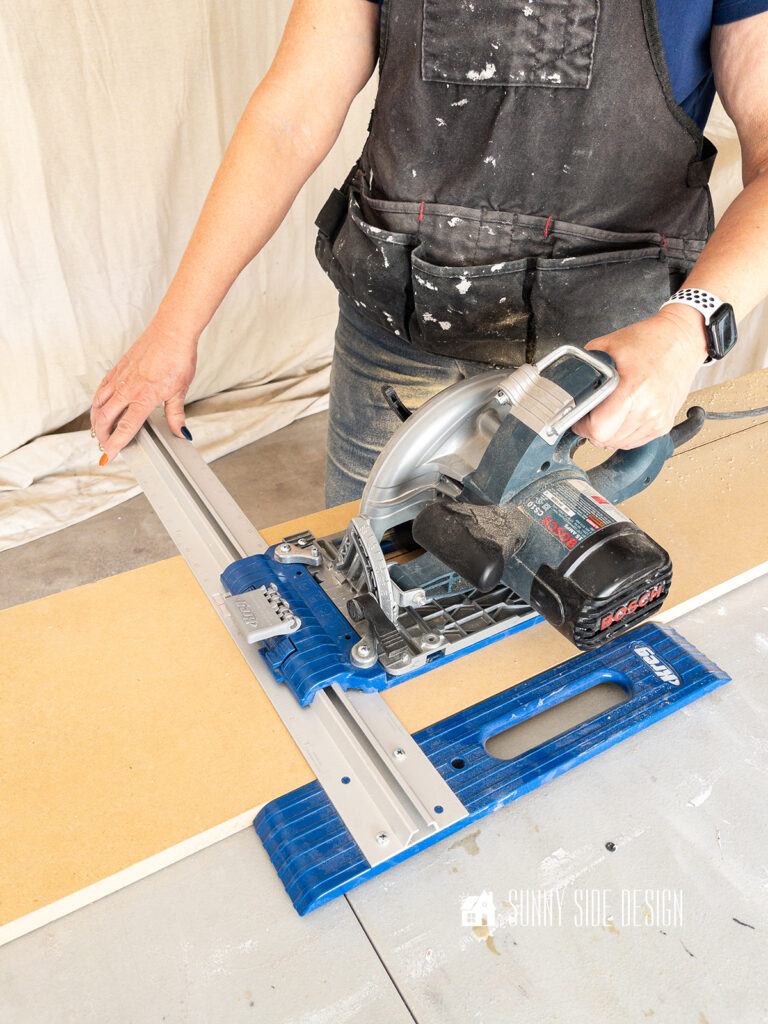
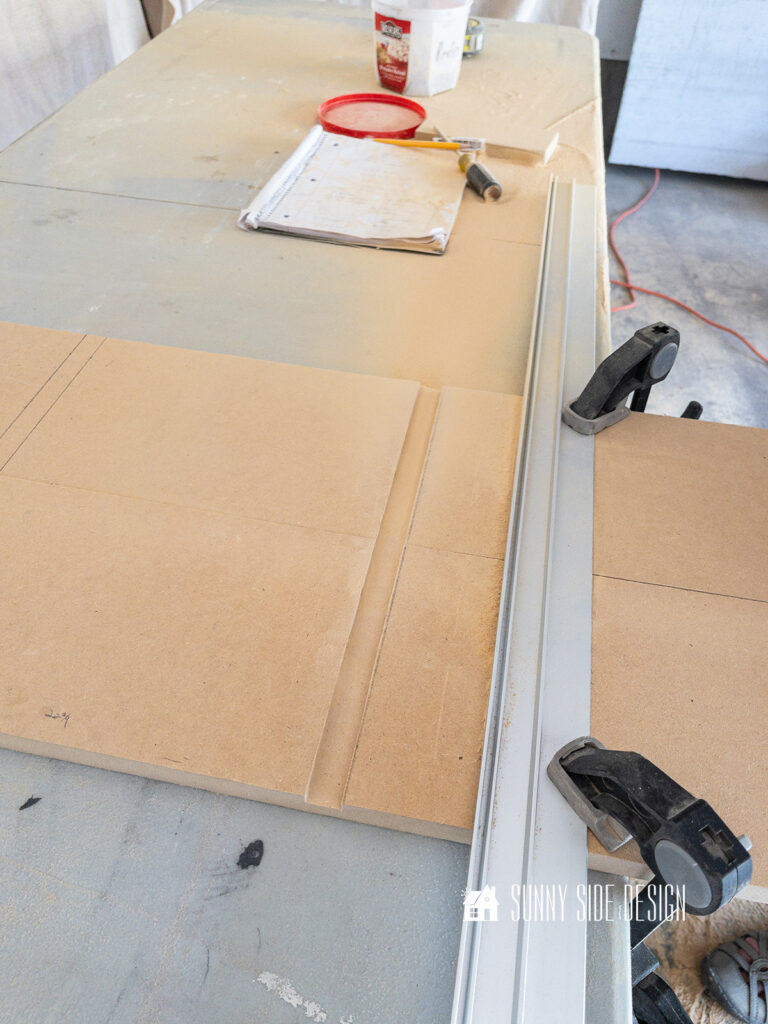
First rip down your wood to the depth you plan to build your shelves.
The Kreg Rip-cut makes this job so easy.
We used 3/4″ MDF to build our recessed shelves, but you can also use 3/4″ plywood.
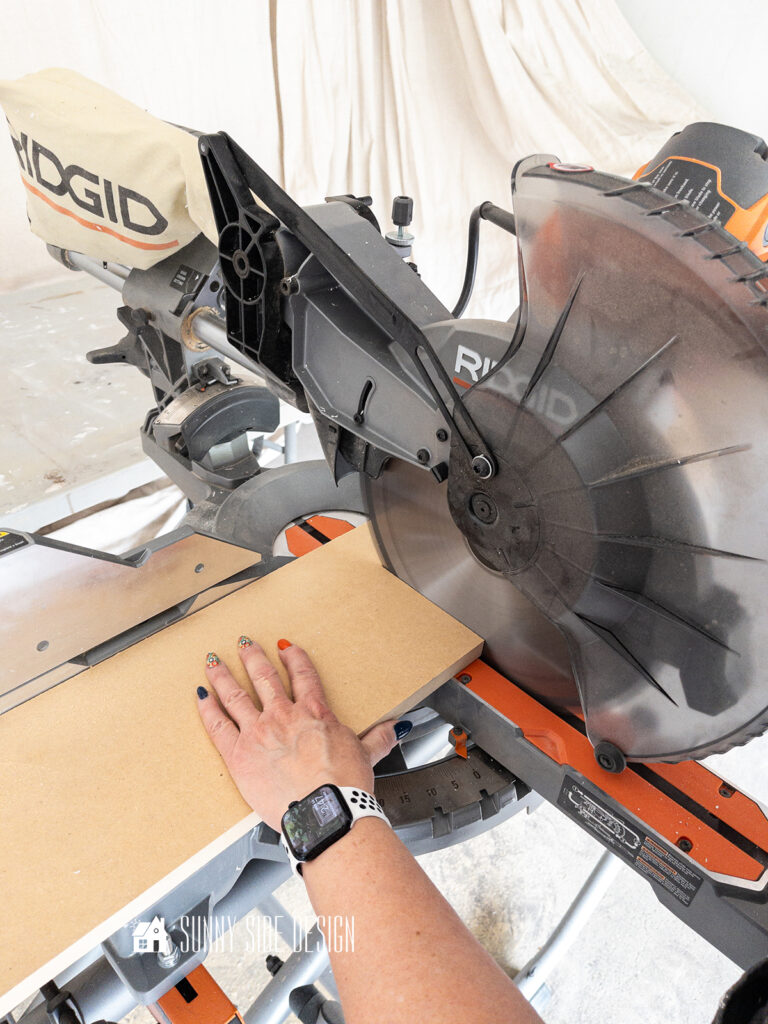
To construct our shelves we cut our wood as follows using our miter saw:
- cut 2 7″x36.5″ for the two shelf sides
- cut 2 7″x22″ for the top and bottom of the recessed shelf
- cut 2 7″x22.75″ for the two shelves
- cut 36.6 x 23.5 shiplap panel for backing (make sure to center the pattern to your dimensions)
Our recessed shelf is built using a router and making a groove to accept our two shelf pieces.
But an alternative way to build these shelves would be to assemble them using a pocket hole jig.
That’s the method we used when constructing the shelves for Gavin’s closet organizer.
Both methods will create a strong and well built shelf.
However, you will need to fill in the pocket holes with a plug.
We have used the router method to construct the built-in entertainment center, the reading nook, the built-ins in Steve’s office and the built-in bookshelves around my fireplace.
Assemble Recessed Shelf
Before we begin to assemble our shelves, we placed our two side pieces side by side and marked the placement for our shelves.
Our shelves are spaced about 11″ apart.
Then we clamped a straight edge to the wood and work table.
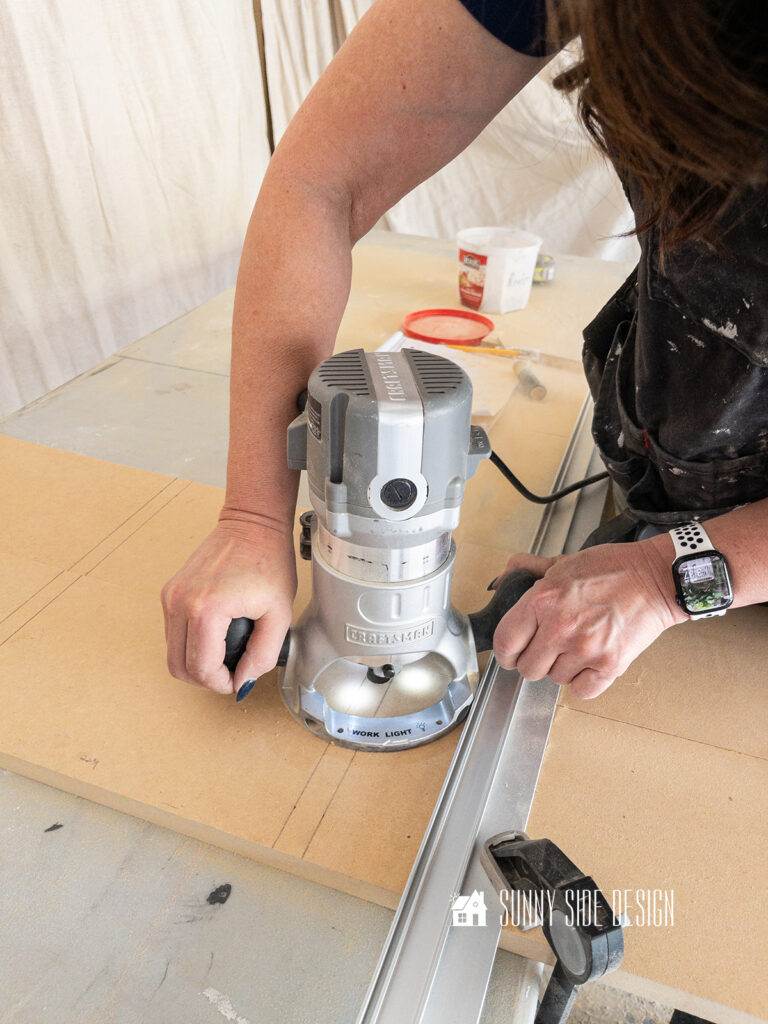
Next we placed a 3/4″ straight cut router bit in our router, adjusting the depth of the bit to 3/8″.
Turn on the router and let it get up to speed before placing it against your wood.
Guided it along the straight edge, cutting a 3/4″ groove into the side pieces of your recessed shelves.
Repeat for the second shelf.
Are you enjoying this project?! Please Pin It, save it for later and share it with a friend.
Sharing is caring!
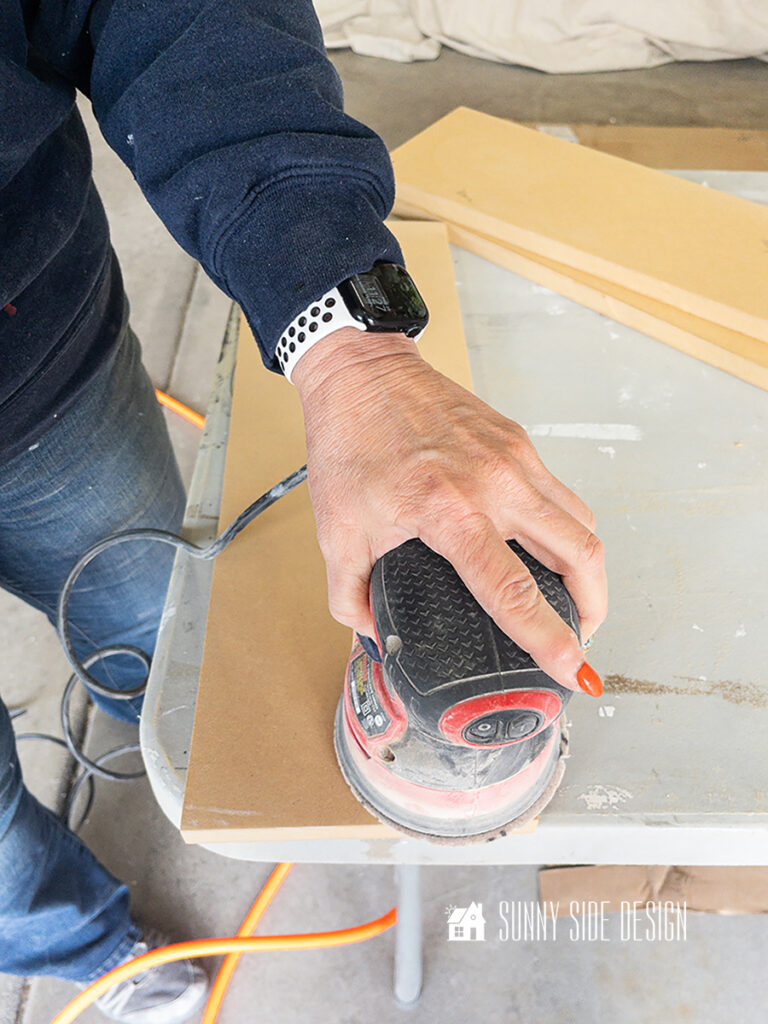
Sand the shelf pieces, taking a little more off the edges that will fit into the groove.
Place one of the side pieces on a work table or floor and place wood glue along the groove.
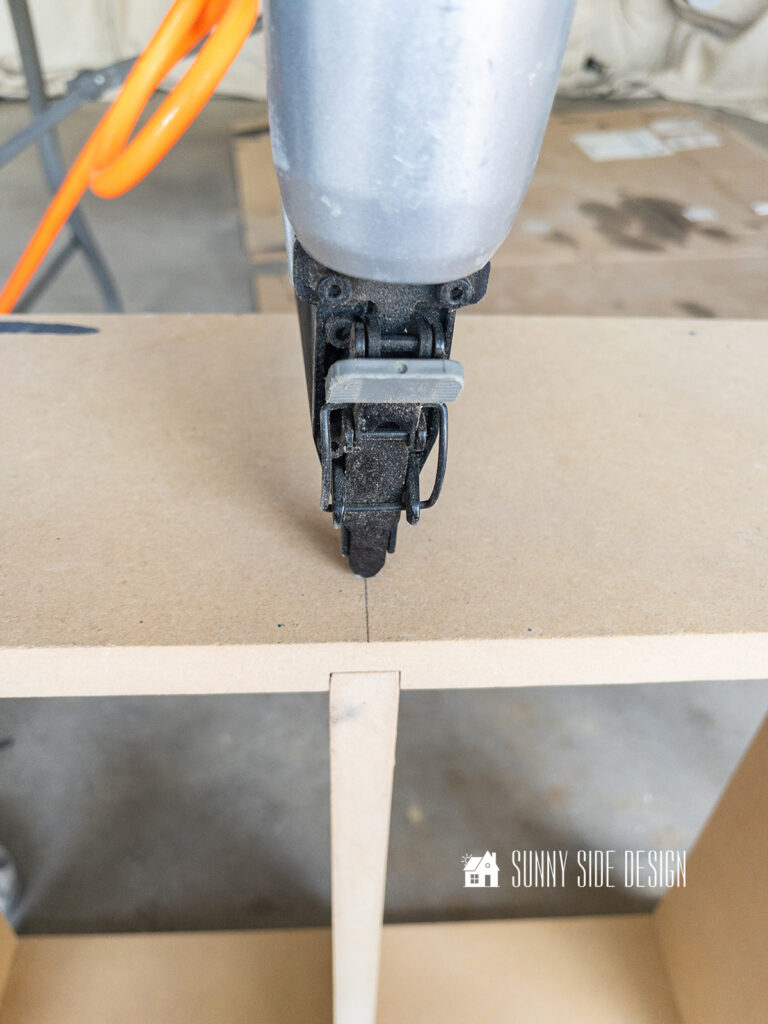
Then place the two shelves into the groove and insert a couple of brads through the side piece into the shelf.
Repeat with the other side piece.
TIP: Draw a line on the area you’ll be placing the brad nails. This will ensure you don’t miss your shelf.
Place wood glue on the ends of the bottom section of your recessed shelf.
Fit into position and insert a few brad nails on each side.
Repeat for the top piece.
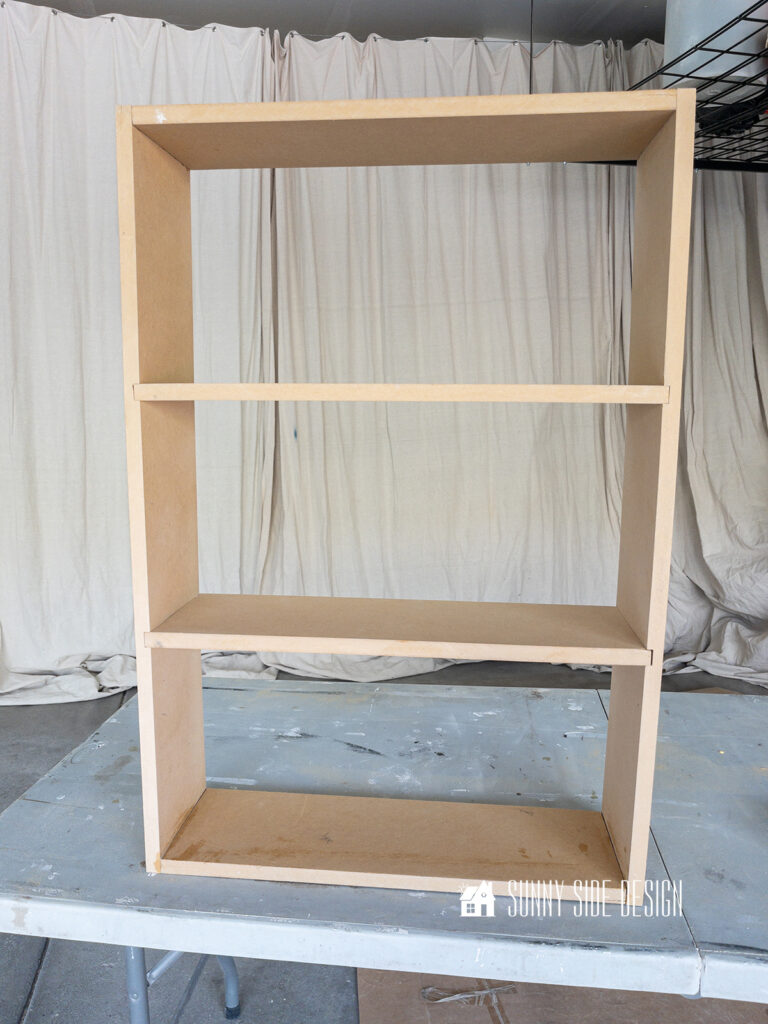
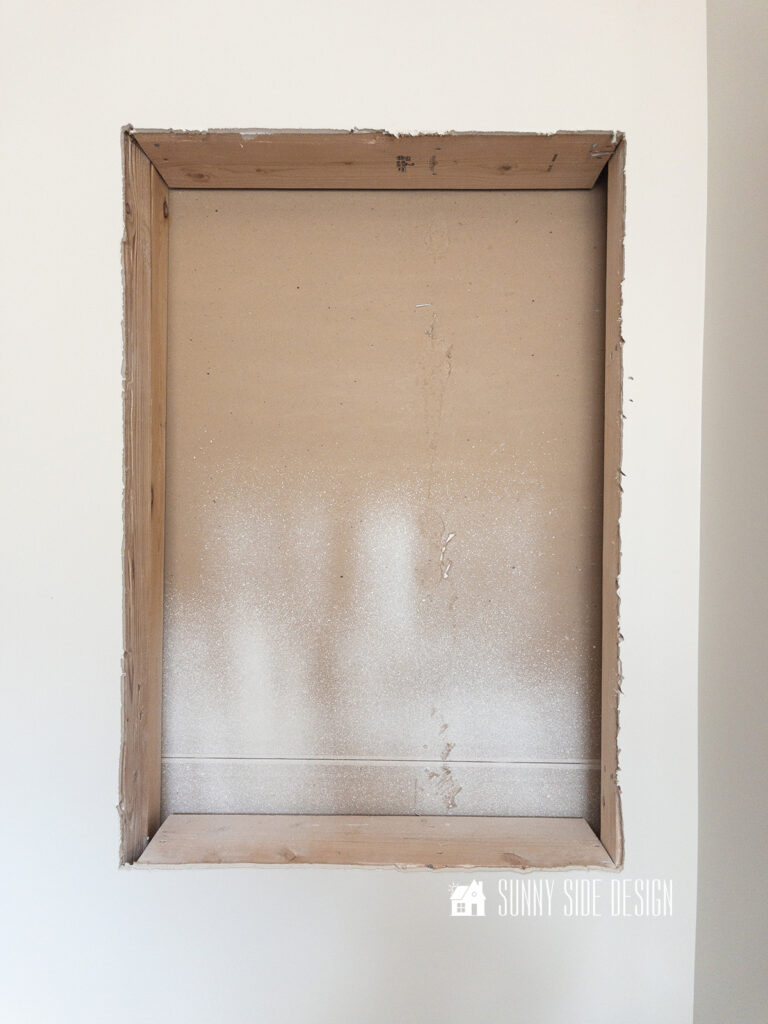
The recessed shelves should look something like this now.
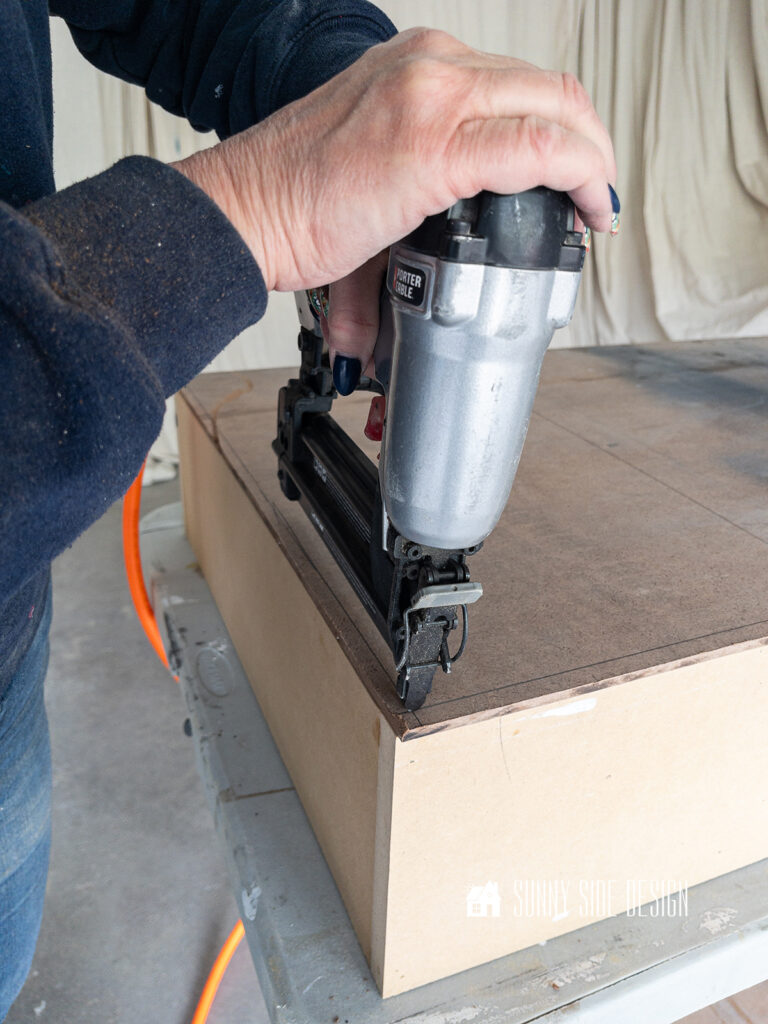
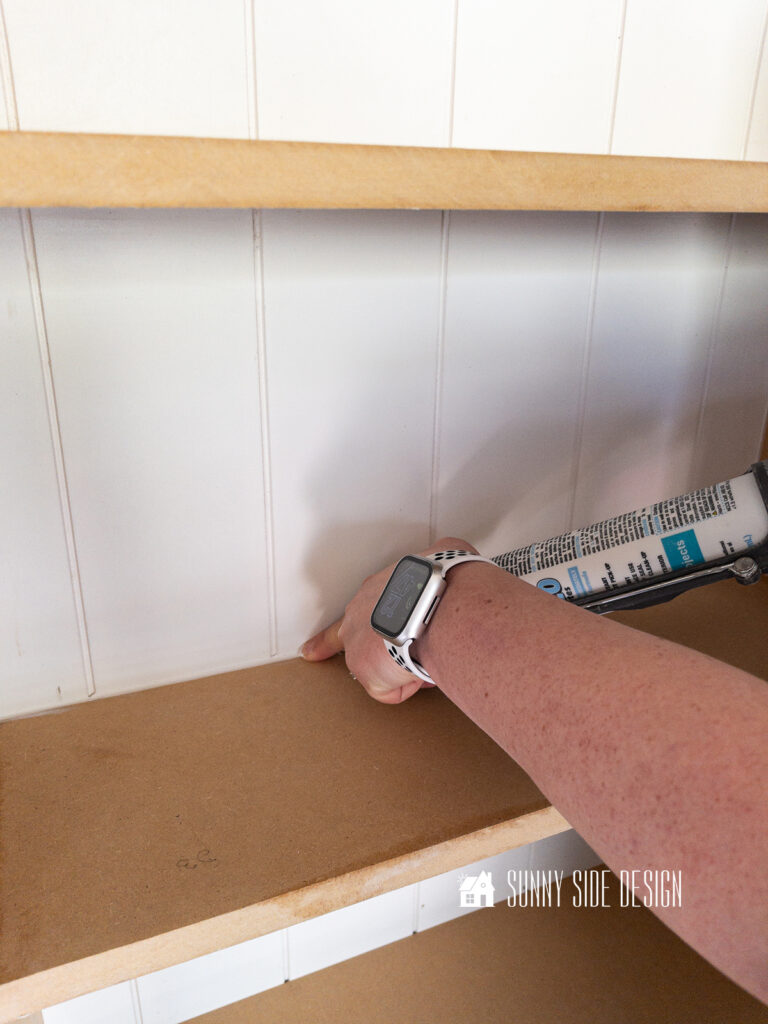
To finish off your recessed shelf box, place the shiplap panel on the back of the shelf and place brad nails in each corner and a few on each side and along the shelves.
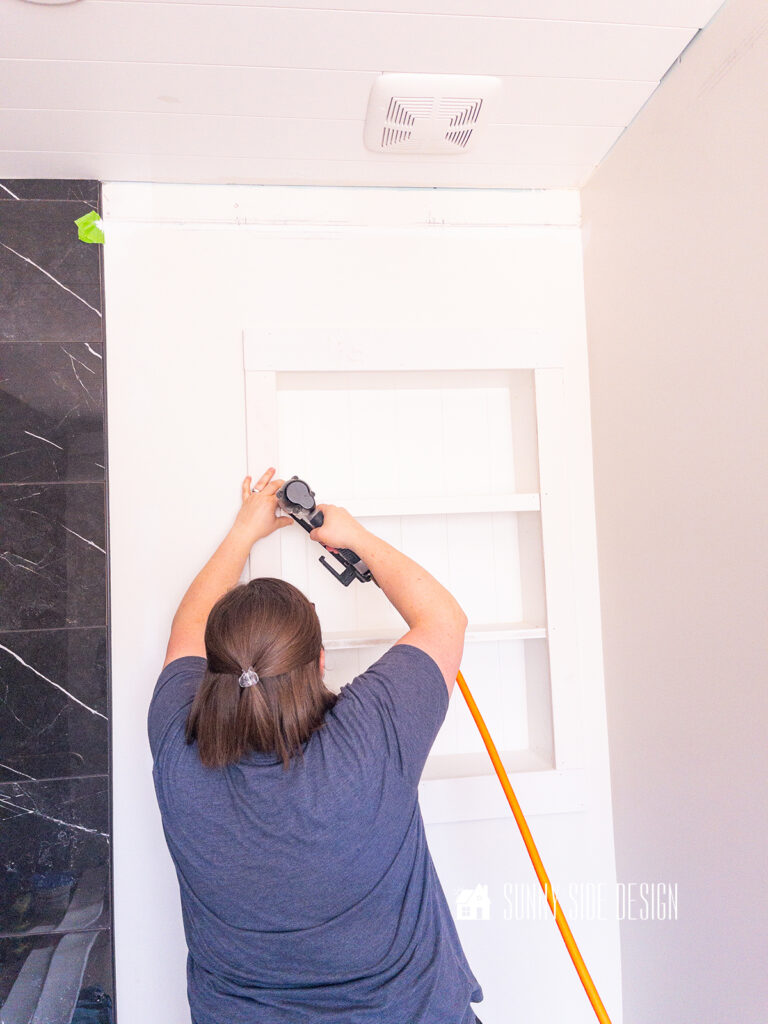
Install Recessed Shelf in Wall
Place the recessed shelf box into the opening in your wall between the studs.
If you do not have a board along the bottom of your opening you’ll need to hold it into position as you level it up with shims.
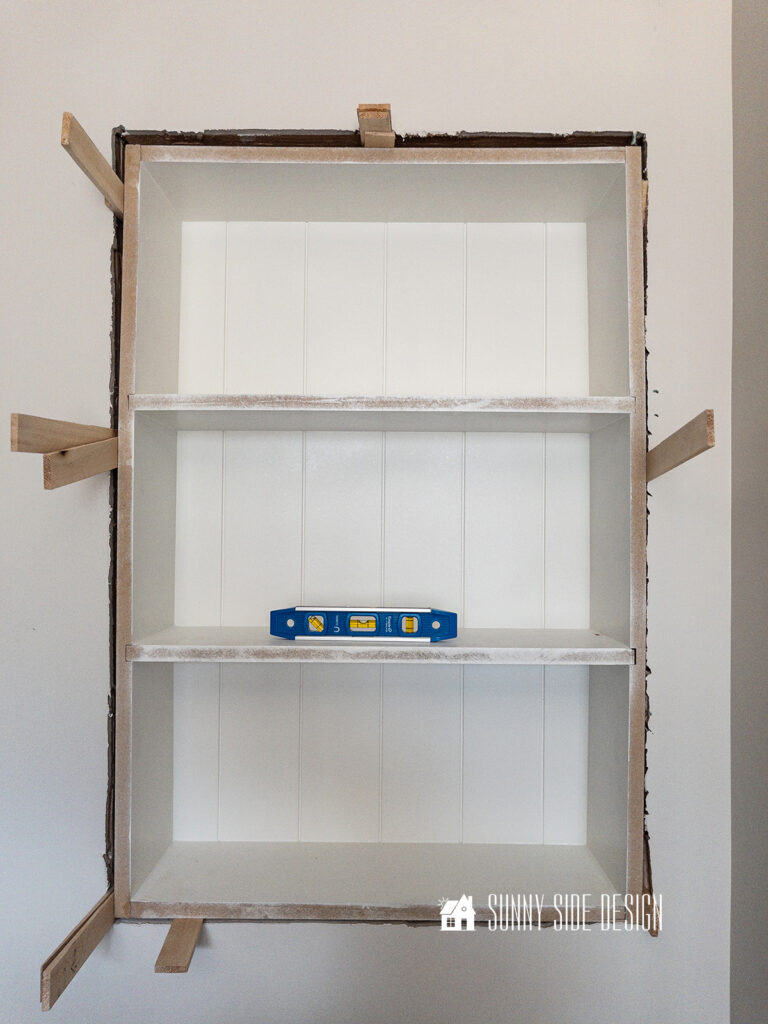
We’ve built many recessed shelves without a support board along the bottom.
It will take another person to hold it as you shim and level it, and then secure it to the 2×4 boards on each side with 2″ brad nails.
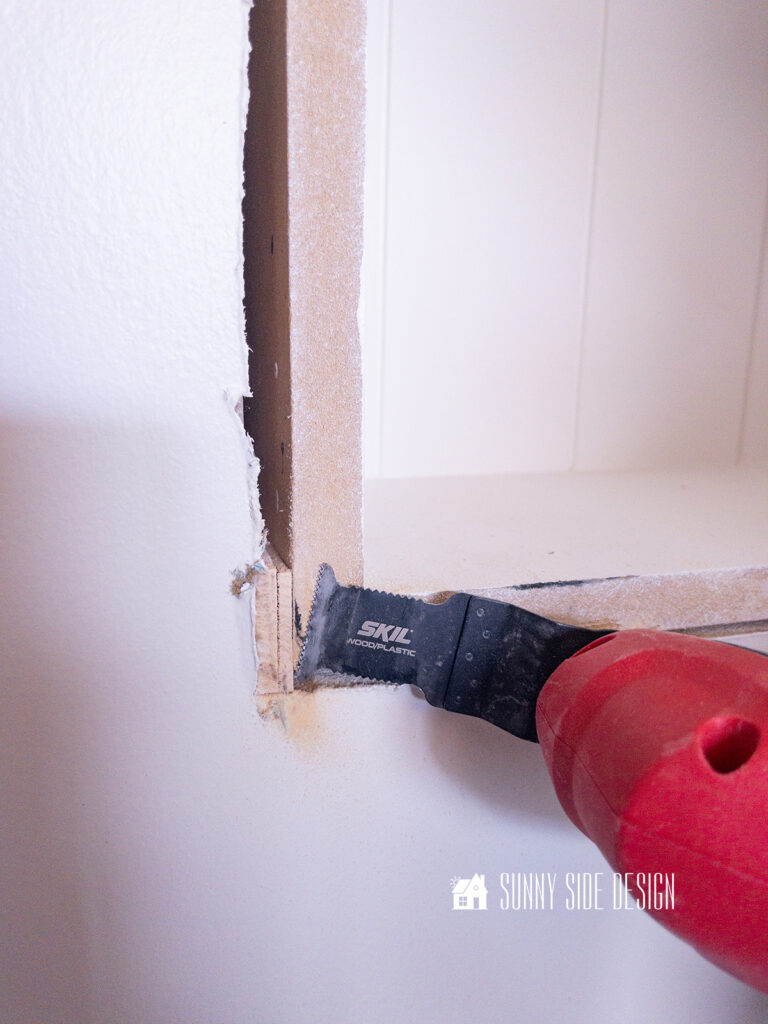
Once the shelf is secured into place, cut off the excess shims with an oscillating tool or saw.
If you’re new here, welcome! We’re so glad you’re here.
Let us introduce ourselves, we’re Michelle and Steph, a mom and daughter team who love to DIY and decorate our homes.
Not only are we passionate about making our homes warm, comfortable and unique, but it’s our mission to help you create that same feeling in your own home.
You’ll find ideas for repurposing, creating, decorating and making your home truly yours, while always mindful of a tight budget.
Undoubtedly we love finding ways to make your home look high-end on a small budget.
Plus you’ll also find a recipe or two as we share our family favorites with you.
We’d love it if you’d join our community of doers so you won’t miss any inspiration for your home.
We love new friends.

[mailerlite_form form_id=2]
Attach Trim Moulding
Finally, it’s time to finish the edges with trim moulding.
This will cover the raw edges of the shelves and cover the edge of the drywall.
Measure the two pieces for the side of your recessed shelf.
It will be the length of the inside measurement of the recess shelf box.
Cut this from the 2 1/2″ trim moulding.
Secure to each side of the recessed shelf aligning the board with the inside of the shelf box.
Measure along the top of the shelf from the left to the right moulding, repeat for the bottom trim piece.
Cut each top and bottom trim piece from the 3 1/2″ trim moulding and secure with brad nails.
Finally measure and cut two 1 1/2″ trim boards to fit on the front of each shelf.
Secure with a couple of brad nails.
Paint Shelves
We are on the homestretch now!
To prepare your recessed shelves for paint, fill in the nail holes with wood filler.
This one is my favorite.
Once dry sand smooth.
Then with a paintable caulk, caulk all of the seams.
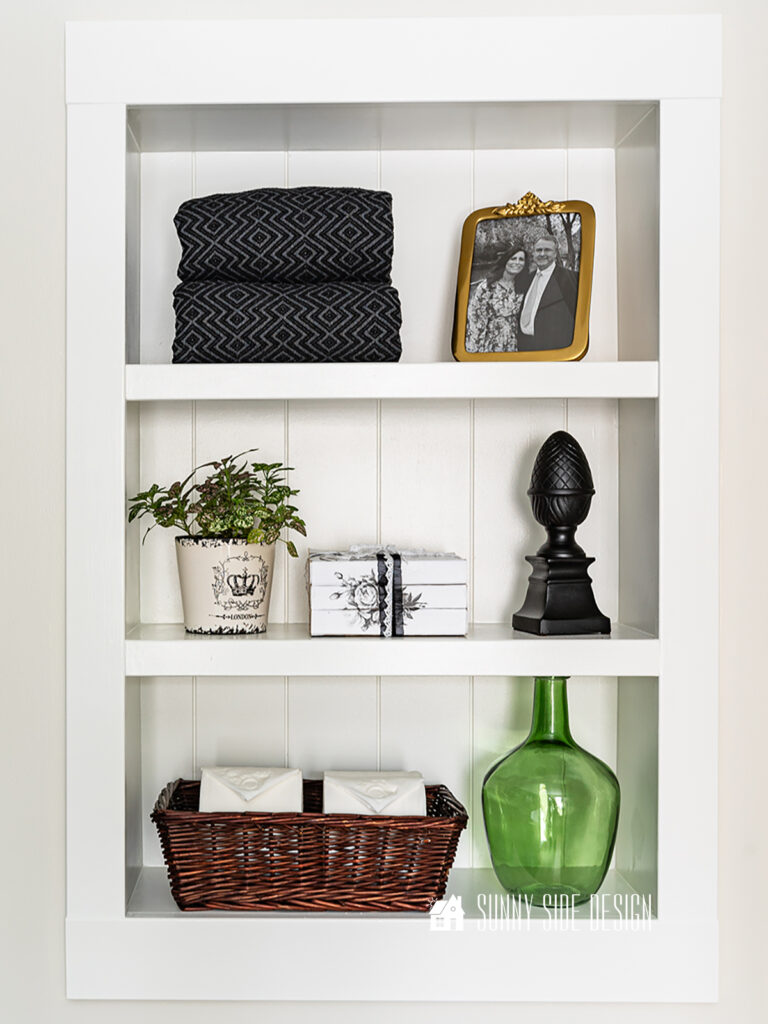
Then prime and paint your recessed shelves, style and enjoy.
I used the paint sprayer to paint my recessed shelves, I believe it’s easier to get onto the grooves of the shiplap.
Let’s stay connected! Follow us on social media!
More DIY Shelf Ideas
- Build Melamine Shelves in a Closet
- Construct Custom Built In Shelves in Wall
- Storage Room Organization Shelves
- Simple Basement Storage Shelves That Last
- DIY Car Display Shelves
- Build an Easy and Affordable DIY Closet Organizer
- How to Build Mudroom Built-ins
Final Thoughts
Building a recessed shelf in a wall is a fantastic way to optimize your space and add character to your bathroom or any room for that matter.

By following these simple steps you too can enjoy recessed shelves in your home.
Whether you’re aiming for a modern, farmhouse, or craftsman-inspired design, a recessed shelf provides a stylish solution for storing essentials while keeping your bathroom organized and clutter-free.
Is this a project you’d like to try in your home?
We are loving the charm of these recessed shelves in the bathroom.
I’m so excited to see this bathroom coming together!
Don’t forget to check out the many other room transformations taking place on the One Room Challenge blog this season.
I believe you’ll be inspired with countless design styles and creative ideas.
If you’re new here, WELCOME! We love having new readers and friends!
You can learn more about us here.
Let’s stay connected! Join our DIY community of doers and you won’t miss the weekly updates on our One Room Challenge and more inspiration for you always on a budget.
Please Pin It and save for later, and share with your friends! Sharing helps grow our following!
Sharing is caring!
Thanks for stopping by Sunny Side Design. Empowering you to create a home you love!
DISCLAIMER
This blog’s content is for entertainment purposes only and is not professional advice. By reading this blog and attempting to recreate a project, you assume all responsibility for any injuries or damages incurred. Read my full disclaimer here.
PHOTO USE AND CONTENT SHARING
All of the photographs you see here are the property of Sunny Side Design unless otherwise credited.
We love for others to share our work, so please feel free to use one photo with a link back to our website.
Pinning and sharing is always encouraged!
Please do not reproduce other Sunny Side Design content without permission.
Retailers We Love
- Anthropologie
- Birch Lane
- Crate & Barrel
- Joss and Main
- Lampsplus
- Mark & Graham
- One Kings Lane
- Pottery Barn
- Rejuvenation
- Serena & Lily
- Wayfair
- West Elm
- Williams Sonoma
- World Market
Be sure to follow us on Pinterest for even more home decor and DIY ideas.
To see what we are working on before it’s on our blog, follow us on Instagram.
You will also find our video tutorials on our YouTube channel.
- The Best ‘Berry in Love’ Bridal Shower Ideas

- Paint an Old World Texture Finish on a Vase
- Easy Strawberry Chicken Salad with Lime Maple Balsamic Vinaigrette
- How to Fix Chipped Kitchen Cabinets with a Pen


