Have you ever wondered how to refinish furniture? Perhaps the whole process seems too daunting to give it a try?
Here at Sunny Side Design, we love getting our hands on many kinds of projects, but we especially love to refinish furniture!
In this post specifically we’ll show you how to refinish a wood table that I found for FREE many years ago! It’s been in dire need of some love and care for far too long, now it’s finally finished, and it couldn’t be more gorgeous!
Continue reading to see how we transformed this sad little table from the side of the road to this amazing dining room table that will now be a family heirloom!
If you love to re-imagine old furniture pieces like us you’ve got to see our Modern Desk Makeover!
Or you may like to see our Floating Nightstand.
- Wood Table Before & The Story
- Condition Of The Wooden Table
- Steps To Refinish Furnitre
- Supplies Needed
- Refinish Furniture Step 1: Strip Paint
- Optional Step: Bleach Wood
- Using Household Bleach On Wood Table
- Using Wood Bleach On Table
- Refinish Furniture Step 2: Sanding
- Refinish Furniture Step 3: Apply Stain
- Refinish Furniture Step 4: Apply Paint
- Refinish Furniture Step 5: Seal Furniture
- Wood Dining Table After
Sunny Side Design is a participant in the Amazon Services LLC Associates Program, an affiliate advertising program designed to provide a means for sites to earn advertising fees by advertising and linking to Amazon.com. As an Amazon Associate, this blog earns from qualifying purchases with no additional cost to you. Click here to read our full disclosure policy.
Wood Table Before & The Story

While on a morning run about 10 years ago, my Mom and I came across this sad little table along the side of the road with a sign attached that read “free”.
At the time neither of us were in need of a table, but how do you pass up a free piece of furniture on the side of the road?
After finishing up our run, we drove back to the spot and loaded it up before anyone else could snatch it!
It sat in our basement for a number of years waiting for the day to be refinished and used as a game table.
Some time later I brought it up to use in our kitchen in efforts to brighten up our space. We used it as is for about 5 years before I couldn’t stand it anymore!
Condition Of The Wooden Table

When we brought the table home with us, it was attached to a base with claw foot legs, and had 1 leaf for extending the table.
The original paint job had been finished poorly. We believe chalk paint was used but it was not properly sealed. The longer we used this table the worse the finish became!
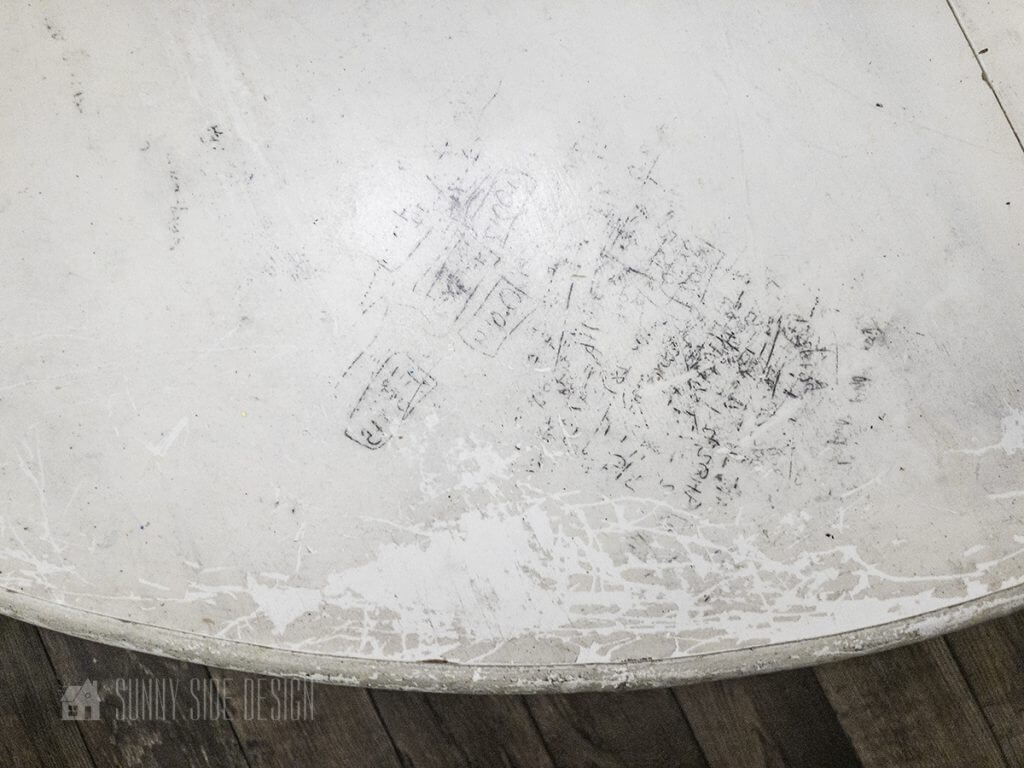
After every attempt at wiping the table down after each use, the surface began to have a constant sticky feel.
My kids would do homework here and traces of their math had been transferred onto the surface.
The top layer could even be scratched off, and I’d often catch them peeling paint off!
It’s embarrassing to say that we used this as our dining table in this condition for so long!
The only good thing this table had going for it was that it was made of solid wood. You can’t find a decent piece of furniture made from solid wood anymore! I knew this could be a lovely table some day.
At long last, as I was sitting at the table one evening talking with my Hubby, I found myself scratching off long strips of paint. I just couldn’t handle it anymore! I thought, if the paint can come off that easily then surely it will come off easier if I just applied some stripper!
So on a whim, at 9:00 pm after kids had been put to bed, I began to strip this sad looking tabletop! And this marked the beginning of long process that led to refinishing this wooden dining table!
Are you enjoying this project? Please Pin It, save it for later and share it with a friend.
Sharing is caring!
Steps To Refinish Furnitre
So what are the steps to refinish furniture?
1. Remove old finish. You may need to use a paint stripper to aid in the process.
2. Sand surface to remove any residual finish, and achieve a smooth touch.
3. Apply new finish whether it be paint, or a stain.
4. Seal the surface.
These steps can be used on a wide variety of projects when refinishing furniture. Below I will go into more depth with each step to better show you how to carry out each step.
Supplies Needed
For your convenience here is a list of supplies needed to complete this project.

Refinish Furniture Step 1: Strip Paint
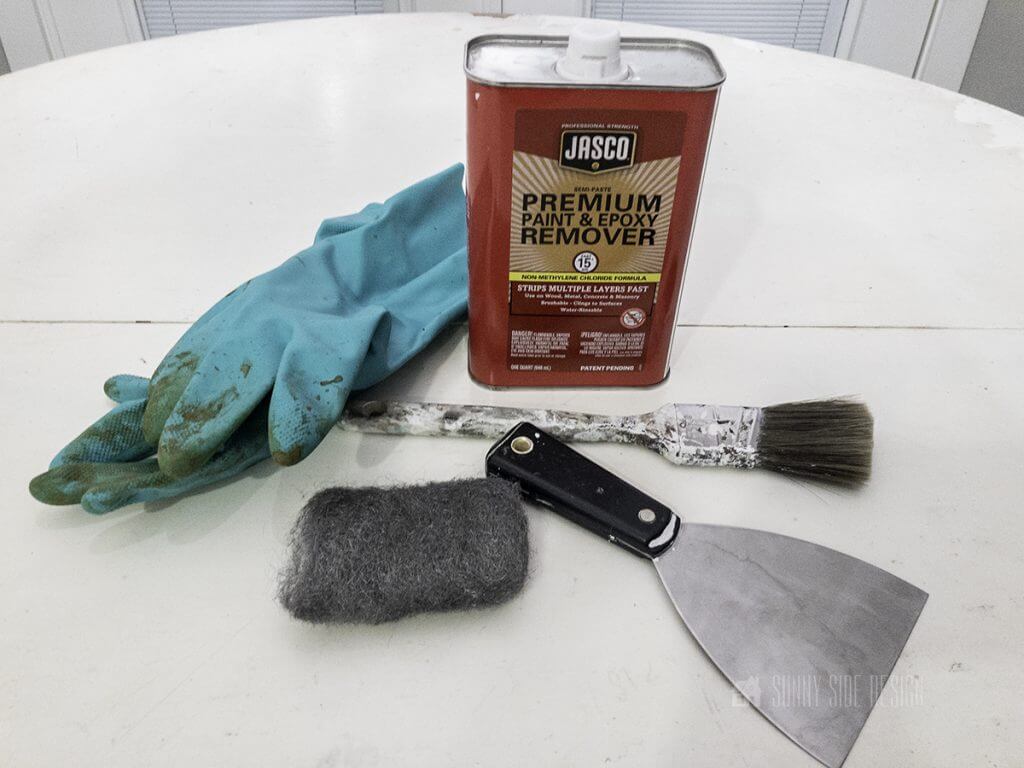
The first step to refinish this wooden dining table is to remove all of the old finish. I used a paint remover by Jasco because I’ve had good results with it in the past and I had some on hand from a previous project.

Follow directions carefully from the specific brand you’re using. Brush stripper on and allow to sit on the wood long enough before scraping the paint off with a plastic putty knife.
Safety Precautions: Be sure to wear chemical resistant gloves. If you don’t the stripper will dissolve your gloves. Wear goggles and long sleeves. Chemical stripper can cause burns on your skin.
(Use mineral spirits to clean brush after use.)
PRO TIP: Be sure to keep the surface wet with stripper during the whole wait time listed on the product. It’s much easier to remove paint while stripper is still wet vs. when it has dried.


The stripper and putty knife should remove most of the paint. You may find some spots where the paint is in the grain of the wood.
To remove paint from these areas apply the stripper as before and use a fine steel wool pad to buff out any remaining paint.
If you’re new here, welcome! We’re so glad you’re here.
Let us introduce ourselves, we’re Michelle and Steph, a mom and daughter team who love to DIY and decorate our homes.
Not only are we passionate about making our homes warm, comfortable and unique, but it’s our mission to help you create that same feeling in your own home.
You’ll find ideas for repurposing, creating, decorating and making your home truly yours, while always mindful of a tight budget.
Undoubtedly we love finding ways to make your home look high-end on a small budget.
Plus you’ll also find a recipe or two as we share our family favorites with you.
We’d love it if you’d join our community of doers so you won’t miss any inspiration for your home.
We love new friends.

[mailerlite_form form_id=2]
Optional Step: Bleach Wood

Once all of the original finish had been removed I was clearly able to see that the leaf was a different shade than the rest of the table.
If planning to paint the tabletop this will not matter, you’ll only need the finish to be removed and have a smooth surface.
I was loving the look of the raw wood and wanted to apply a top coat to keep the natural color showing. But I knew I couldn’t do this until I was able to get the leaf to match the other wood surfaces.
Using Household Bleach On Wood Table

I had heard about bleaching furniture before so I thought I’d give it a try. My first efforts worked somewhat, using household bleach.
It did lighten the wood, but after 2 coats and many hours of waiting time in-between drying times, I wasn’t getting the results I was after. Not to mention that our home smelled like an indoor swimming pool!
Let’s stay connected! Follow us on social media!
Using Wood Bleach On Table

We searched our local home improvement stores as well as a couple paint stores for this Zinsser Wood Bleach. I’m not sure if it’s a product not in stock all the time, or if the shelves were sparse with the unusual shopping habits of Covid-19.
I ended up ordering mine on Amazon and it was well worth the wait!


I followed the directions to the T and was amazed at the results!
Be sure to wear the appropriate safety attire: rubber gloves, goggles and a face mask. This wasn’t near as potent as the household bleach (or paint stripper for that matter), but it’s probably best to not breath it in either. Also this will burn your skin if you get any on you, so be mindful of all the precautions mentioned in the directions.

After just one application it was looking more uniform than the previous 2 applications of household bleach.
And the whole look of the wood was brightening up which I loved as well! It removed that yellow hue of oak.
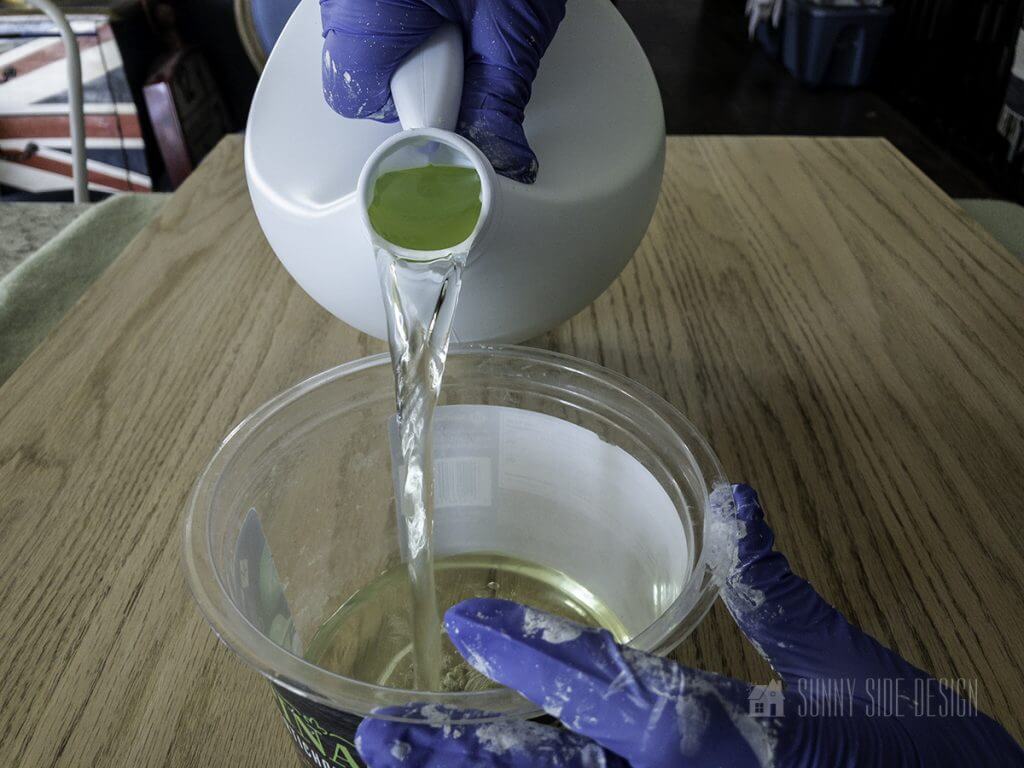
Once you’re satisfied with the results, be sure to neutralize the wood by applying a 50-50 mixture of vinegar and water. If you avoid this step the bleaching components will remain active in the wood!
Refinish Furniture Step 2: Sanding


After the wood table had completely dried from bleaching and neutralizing, I used a 220 fine grit sandpaper to smooth out the surface.
Again if you’re not bleaching your wood, you’ll want to be sure to include the sanding step after all of the old finish has been removed.
Refinish Furniture Step 3: Apply Stain

As previously mentioned I was loving the texture and grain of the wood that was hiding underneath all of that grimy paint! And after all that work removing the paint I really didn’t want to cover it all up again!
I’d originally thought to simply apply a clear coat and keep the existing wood color, until I realized the leaf was a different shade.
Even after the amazing results I achieved with the Zinsser wood bleach, the leaf was still a slightly different color.
Because of this, I decided to apply 1 thin coat of stain to unify the whole table.
I used the Sunbleached stain left over from our mantel project.


Be sure to mix the stain well before applying, and throughout application if working on a large surface.
Apply in long smooth strokes following the grain of the wood.
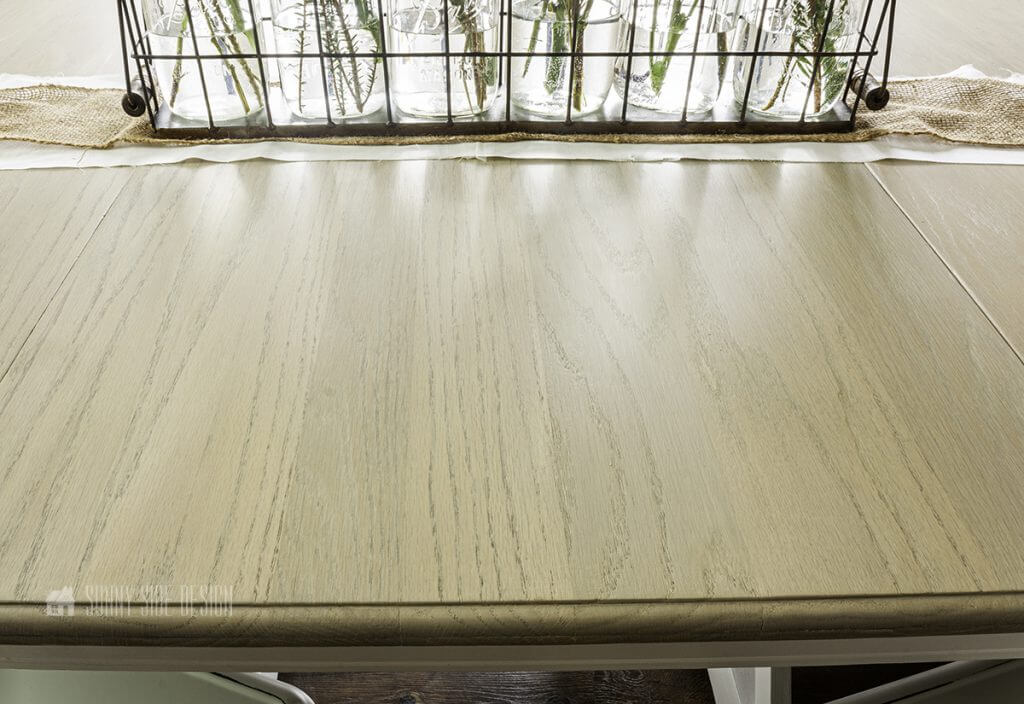
The longer the stain penetrates the wood, the darker the finish will be. I immediately wiped off the excess stain with cotton cloth after applying it. I didn’t want to add much color, I was just trying to get each surface of the table to match.

Here’s a look at the finished surface of the wood table. Again not much color was added, but I love how the grain of the wood is now accentuated with a slightly darker color.
Refinish Furniture Step 4: Apply Paint

So, you know I have a furniture problem!
The wood table that is being refinished was always intended to be the game table when our basement was finished.
I came across this farmhouse table on our local classifieds for only $75 and had to get it! This was to be our new kitchen table.
But unlike the table I am refinishing, this tabletop has a layer of veneer which has been warped from heat and water damage. Eventually I plan to research how to fix this and will use this table in our dining space.
For now however, we removed the legs from this table and are borrowing them for the current kitchen table.
The legs are much more stylish and I’m not a fan of having claw feet under my table! The original claw foot base was also more of a pedestal. When the leaf was installed the legs remained in the middle of the table. This would cause the table to wobble if any pressure was added to either end. So not only were we upgrading the look, these legs now provide a much more sturdy table!

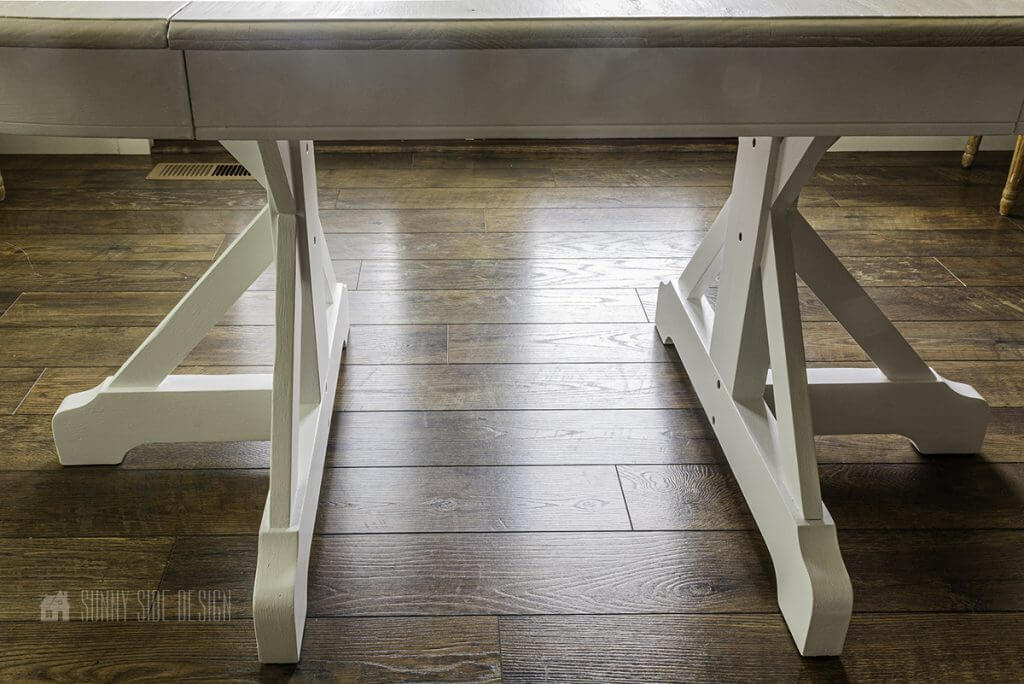
The white paint creates a much more relaxing feel, unlike the dark stain that feels heavy.
To save time and avoid sanding the legs prior to painting, I used the primer and paint leftover from finishing our fireplace.
For the primer we used Zinsser Cover Stain Primer Bond Coat. This stuff is amazing! It requires NO sanding, blocks stains and has great adhesion.
For the paint we used Behr Urethane Alkyd Satin Enamel Paint. This paint is specifically designed for use in high traffic areas. It’s great for cabinetry, molding anywhere it would have regular use. The finish also has self leveling properties that help minimize brush marks. This is sure to hold up way better than whatever was previously on our table!
Checkout my mom’s china cabinet makeover. I love the black chalk paint finish.
Refinish Furniture Step 5: Seal Furniture

The final step to refinishing this wood dining table is to apply sealer. I used the Varathane Triple Thick Polyurethane with a matte finish. I first used this matte finish sealer on our Hidden TV Cabinet, then on our mantel. Each time I love it even more.
It’s water based for easy clean up, it also has a self leveling property which will minimize brush strokes and has a triple thick formulation which means it’s 3x as durable in just 1 application!
(And this quart has been plenty for all three of these projects! The quart is still even about half way full!)

Apply the sealer in long even brush strokes following the grain of the wood. Since a dining table is used multiple times a day, I applied 2 coats which will give us 6 layers of protection.
It will have a slight sheen as it is applied and dries to a clear matte finish with no sheen. This finish also will not yellow over time.
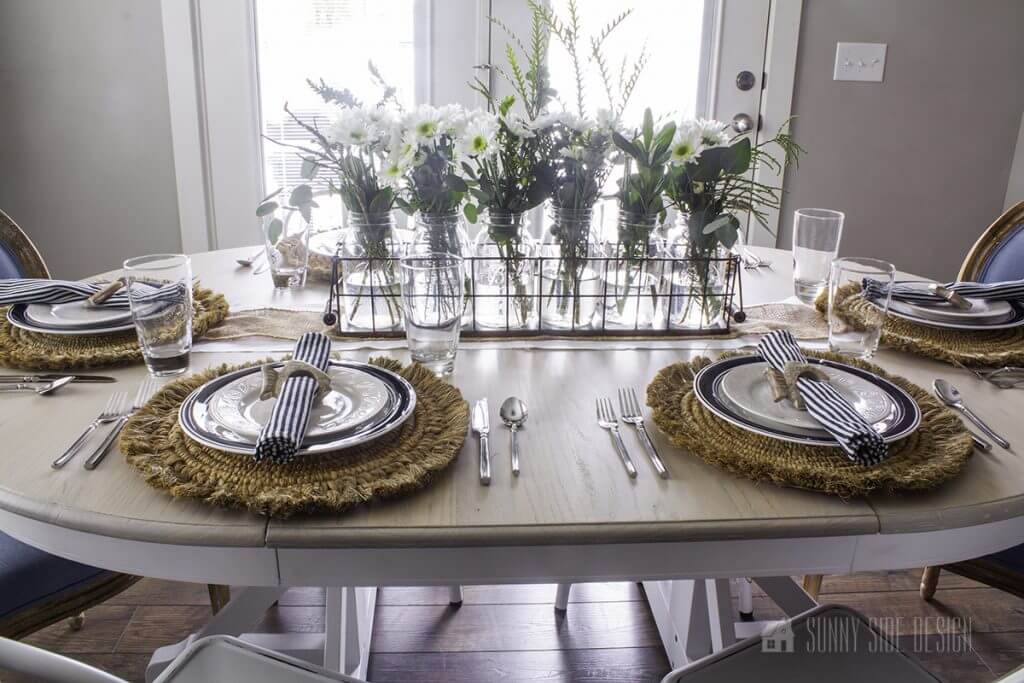
Wood Dining Table After
It feels SO good to finally have this dining table completed! Many hours were spent refinishing this furniture, but they were well worth it!
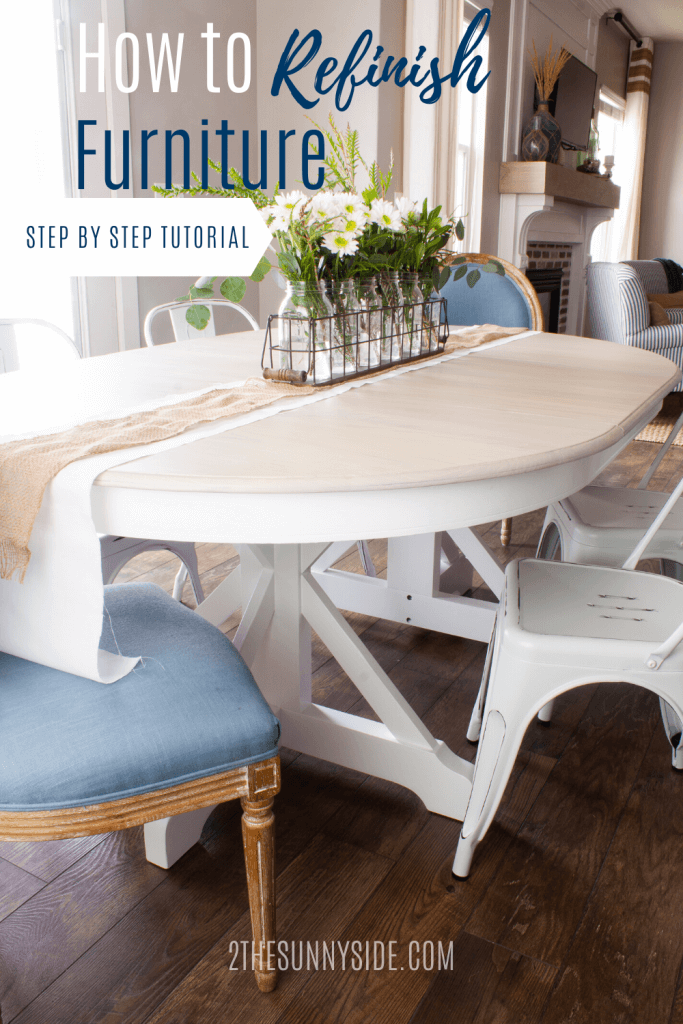
It now has a light and airy coastal farmhouse look without a sticky tabletop!


I found these two blue round back upholstered dining chairs on our local classifieds for only $30 for both! What a steal!
You can find similar ones here at World Market.
I added 4 distressed metal chairs on both sides to complete the look.
If you like this dining table look, you can get one pretty darn similar from Pottery Barn. Tap the picture below to see more info.
(Makes me feel pretty proud I know how to refinish furniture, if I do say so myself.) And now YOU CAN TOO!
Love this idea? Then take a look at even more furniture makeover ideas:
- Simple Dresser Refresh
- $5 Hutch Top Repurposed to an Attractive French Inspired Cabinet
- Re-image Thrift Store Furniture into a Tool Chest Dresser
- DIY Floating Nightstand
- DIY Round Coffee Table
- Easy Chalk Painted China Cabinet
- Painting Furniture the Easy Way with a Wagner Sprayer
- Paint Furniture with Professional Results
- Transform Twin Beds into a Daybed
- How to Refinish Furniture with a Raw Wood Look
- Easy and Inexpensive DIY Side Table with Thrifted Finds
- How to Use SaltWash for a Worn and Weathered Finish

We hope you found some inspiration for your home today.
Please share your tips and ideas with us.
We love hearing from you!
If you’re new here, WELCOME! We love having new readers and friends!
You can learn more about us here.
Let’s stay connected! Join our DIY community of doers and you won’t miss the weekly updates and more inspiration for you always on a budget.
Sharing is caring!
Thanks for stopping by Sunny Side Design. Empowering you to create a home you love!
DISCLAIMER
This blog’s content is for entertainment purposes only and is not professional advice. By reading this blog and attempting to recreate a project, you assume all responsibility for any injuries or damages incurred. Read my full disclaimer here.
PHOTO USE AND CONTENT SHARING
All of the photographs you see here are the property of Sunny Side Design unless otherwise credited.
We love for others to share our work, so please feel free to use one photo with a link back to our website.
Pinning and sharing is always encouraged!
Please do not reproduce other Sunny Side Design content without permission.
Retailers We Love
- Anthropologie
- Birch Lane
- Crate & Barrel
- Joss and Main
- Lampsplus
- Mark & Graham
- One Kings Lane
- Pottery Barn
- Rejuvenation
- Serena & Lily
- Wayfair
- West Elm
- Williams Sonoma
- World Market
Be sure to follow us on Pinterest for even more home decor and DIY ideas.
To see what we are working on before it’s on our blog, follow us on Instagram.
You will also find our video tutorials on our YouTube channel.
- Paint an Old World Texture Finish on a Vase

- Easy Strawberry Chicken Salad with Lime Maple Balsamic Vinaigrette
- How to Fix Chipped Kitchen Cabinets with a Pen
- Easy 4th of July Door Decor You Can Make in Minutes