The final touches are going in Ellie’s bedroom now and we are down to the window treatment. She has been pretty vocal about what she would like in her room. For the window treatment, she wanted blackout curtains. However, with her built in desk with shelves below the window, curtains would not work well. With this in mind, we started looking at a Roman shade.
We love the look of Roman shades. However, have you ever priced custom Roman shades? Yikes, they are expensive! Clearly, we knew that if we made them ourselves we would save hundreds of dollars! With this in mind, we would like to share our version of Roman shades – how to make them yourself.
Sunny Side Design is a participant in the Amazon Services LLC Associates Program, an affiliate advertising program designed to provide a means for sites to earn advertising fees by advertising and linking to Amazon.com. As an Amazon Associate, this blog earns from qualifying purchases with no additional cost to you. Click here to read our full disclosure policy.
Take a look at our video tutorial. Sometimes it’s just easier to see it in motion.
To see more highlights from this bedroom makeover click any link below.
- How To Paint a Room with Pro Results
- Built In Desk | Upcycling At Its Best
- Upcycle Idea | Transforming Twin Bed to Daybed
- How To Refinish Furniture | With a Raw Wood Look
- DIY Canopy for a Bed | Fit for a Princess
- Shelf Decorating Ideas | A Step by Step Guide
- Roman Shade | How to Make Them Yourself
- How To Reupholster a Chair | with French Country & Boho Flair
- French Country Chandelier with Boho Flair
- DIY Mirror Frame | Quick and Easy Idea
- Antique Hardware For Dresser
- Bedroom Ideas for Tweens |Girl Room
- Area Rug For Bedroom | Top Ideas For Tween Girl
- How To Make a Bolster Pillow
- How To Make an Envelope Pillow
Supplies needed:

Step 1: Take Measurements for Roman Shade

The first step is to determine the size the Roman shade will be. They can be mounted inside or outside of the window frame.
Once the finished measurement is determined, add 1″ to the width and 4″ to the length.
The window in Ellie’s bedroom is large and since we also wanted to hang it outside the window frame, we needed to piece the fabric together.
If piecing is required, cut the center section first to the length that is needed. Then with the remaining fabric, line up the pattern, pin and stitch together along one side.
The fabric was then trimmed, keeping a little extra fabric than what was needed. Repeat for the other side.
Once fabric was added to both sides then we took a final measurement and trimmed to the desired width.
Are you enjoying this project? Please Pin It, save it for later and share it with a friend.
Sharing is caring!
Add Embellishment


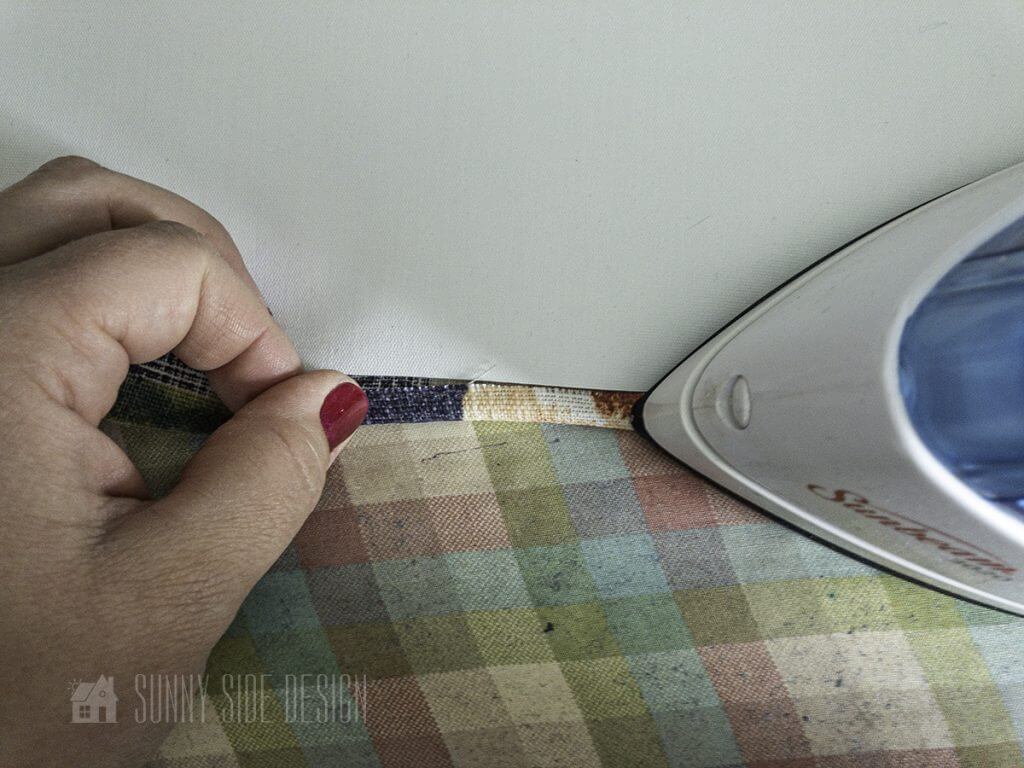
To add a bit of embellishment to the Roman shade, we placed a length of ribbon along the pieced seams.
Once the ribbon was pinned in place, we stitched along both sides of the ribbon.
Lining a Roman Shade
Adding a lining fabric is always optional, but I always think it looks more finished and professional if it is lined.
The lining that we chose for our Roman shade was a blackout lining. It’s quite a bit heavier as well and feels a bit rubbery.
Cut a piece of lining fabric the same dimensions as the front fabric.
Because of the width of our window, we had to piece the lining fabric together as well.


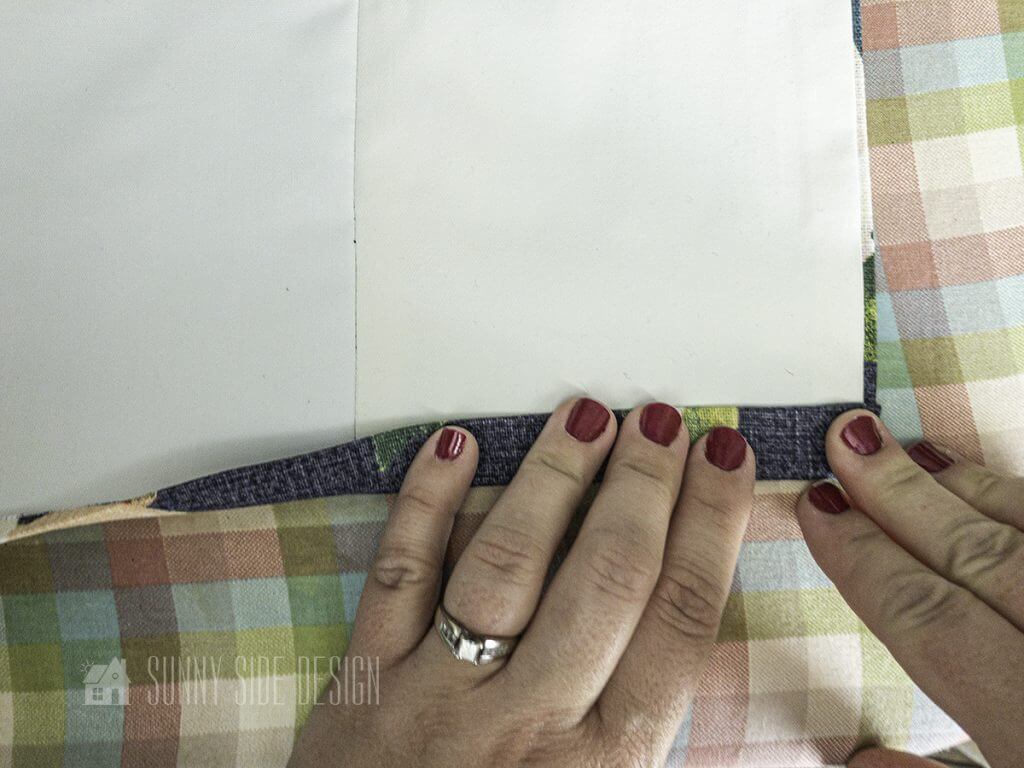
Place right side of the fabric and lining together, pin in place and stitch a 1/2″ seam the two sides.
Turn right sides out and press along the seams.
If you’re new here, welcome! We’re so glad you’re here.
Let us introduce ourselves, we’re Michelle and Steph, a mom and daughter team who love to DIY and decorate our homes.
Not only are we passionate about making our homes warm, comfortable and unique, but it’s our mission to help you create that same feeling in your own home.
You’ll find ideas for repurposing, creating, decorating and making your home truly yours, while always mindful of a tight budget.
Undoubtedly we love finding ways to make your home look high-end on a small budget.
Plus you’ll also find a recipe or two as we share our family favorites with you.
We’d love it if you’d join our community of doers so you won’t miss any inspiration for your home.
We love new friends.

[mailerlite_form form_id=2]
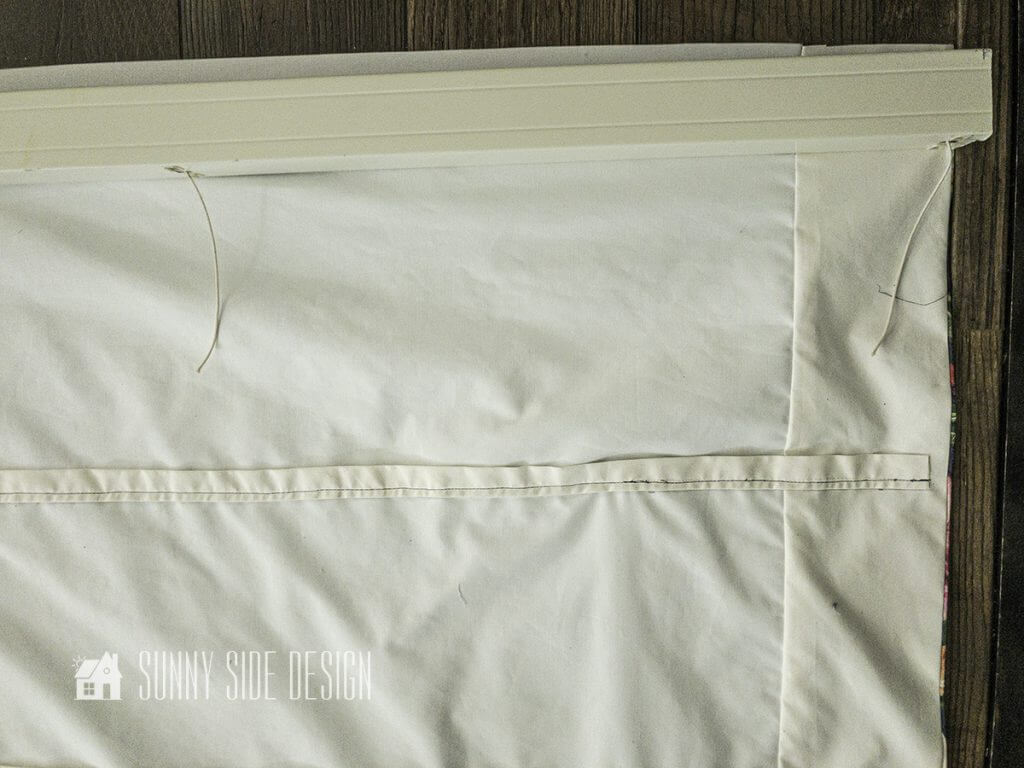
Create a hem for a Roman Shade
At the lower edge, fold over 1/4″ and press with a steam iron. Fold over 3/4″, press and pin in place.
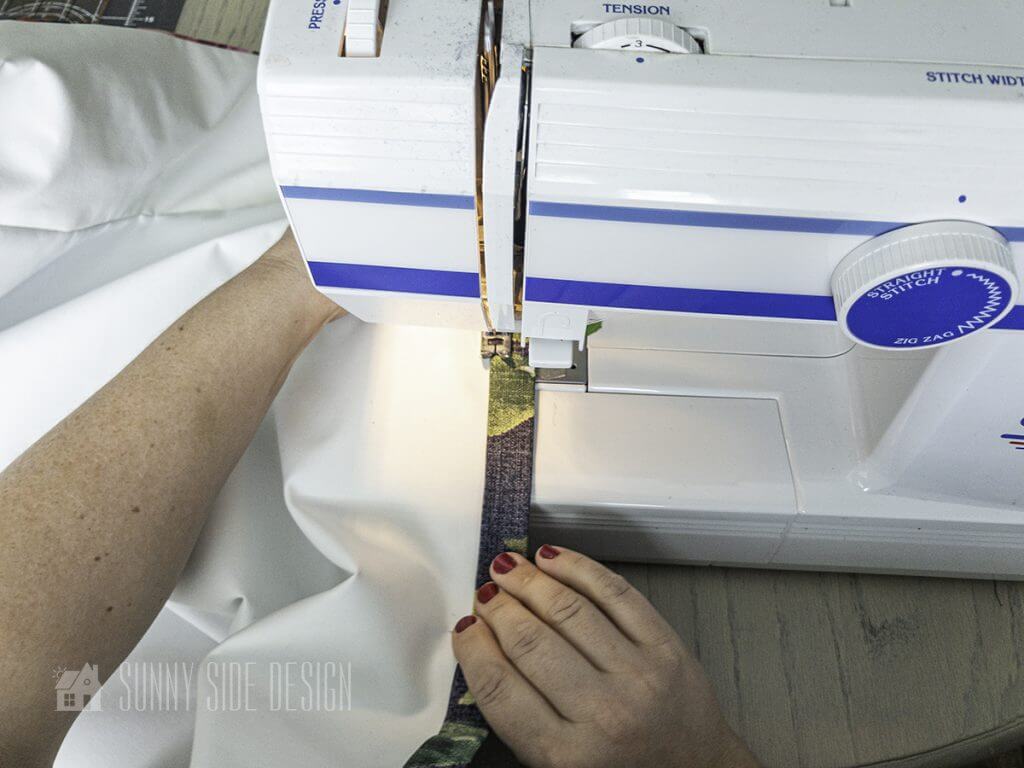
Stitch the hem in place. Leave the sides open for placing a dowel.
Mark Placement for Dowels

Dowel placement can be anywhere from 8″ to 12″ apart. This is where you will want to measure your finished Roman shade length to determine your spacing.
This is how we determined our spacing. The first dowel placement should be at least 1″ longer than the folds.
First, we made a mark 7″ from the bottom of the shade and measured the remaining length.
Next, we divided it by 9″ and 10″ and so forth, seeing what the placement would look like.
You will want the top dowel to be about 10″ from the top of the Roman shade. It turned out a 9″ spacing was perfect for our shade. As a result our folds would be 4 1/2″.
Make a line with a pencil where each dowel will be placed.
Make dowel guides


The dowel guides are narrow pockets that the dowels will slide into. The dowels will help pull the fabric up evenly when the Roman shade is open.
To make the guides cut a 3″ wide strip of the lining fabric the width of the Roman shade.
Fold the strip in half (1 1/2″ wide) and press. Then fold up the cut edges 1/2″ and press.

Align the bottom edge of the dowel guides with the pencil marks and secure with pins.

Stitch the dowel guide to the Roman shade only along the lower edge. Try to keep the fabric as smooth as possible while sewing.

We had a couple of spots that had puckered when we stitched.
Adding more pins to the guides may have prevented this from happening.
It’s an easy fix, however. Remove the stitching in these areas with a seam ripper, smooth out the fabric and stitch again.
Let’s stay connected! Follow us on social media!
Preparing the top of the Roman Shade

For the top edge of the Roman shade, fold down 1/2″ and press with a steam iron.
Pin on velcro and stitch in place.
If your header is a piece of wood, there is no need to sew. Just fold over and staple to the board and mount the board to the wall with L-brackets.
Ring Placement
A series of rings need to be sewn on to the lining for the cords to slide through.
The width of the Roman shade will determine how many rows of rings you will need.
A narrow shade will need only 2 rows, whereas our wide Roman shade will need 4 rows.
We decided to repurpose an old wood blind that was removed from my home. By doing this we can use the mechanism that will hold the shades up without the need of a bracket to wrap the cord around.
With this in mind, we placed the header from the old blinds along the back side of our Roman shade to determine the placement for our rings.
Four small marks were then made across on each dowel guide.

Stitch the rings to the dowel guides at each mark.
Insert dowels

A little disclaimer here: Because of the width of our Roman shade, dowels would be too short. We would have had to tape them together and we weren’t sure how that would work.
Solution: Since we were re-purposing the old wooden blinds, we just cut the wood slats into 1/4″ wide strips.
Once you have all the dowels or wood strips in our case, cut to size, slide them into each pocket.
You can see in the photo, the ring attached to the dowel guide. The guides are left open on each side to easily insert each dowel.
If you do need to take down your Roman shade to launder it, simply remove the dowels first.
Prepping the Header

The header can simply be a piece of wood cut to the length of the Roman shade.
For a wood header insert eye screws, aligning with the rings that are sewn on the dowel guides.
Since we are using an existing header from wood blinds, we did need to cut it to size. It was a few inches too long.
The desired length was marked and we cut it with a hacksaw.
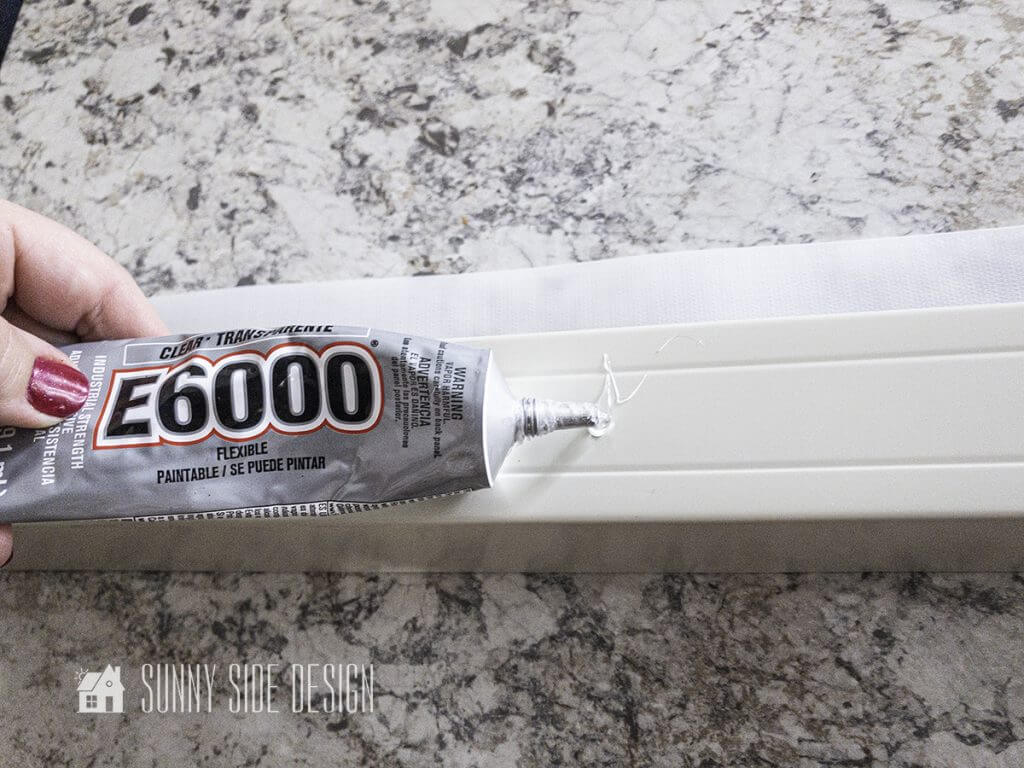
Next, Velcro was attached to the header using E6000 glue.
Mount the Header

First, we made a line on the wall where the header would be placed. Next, we located the studs in the wall.

Then, four small L-brackets were installed across the wall.

Next the header was centered over the window and small pilot holes were drilled into the header.
Finally metal screws were then installed into the bottom of the header.
You may notice a lot of holes in the wall below the header. We ran into a little snag… It appears that there were studs above our mounting line, but no studs below. So, we simply placed our L-brackets above the line.
The Reveal
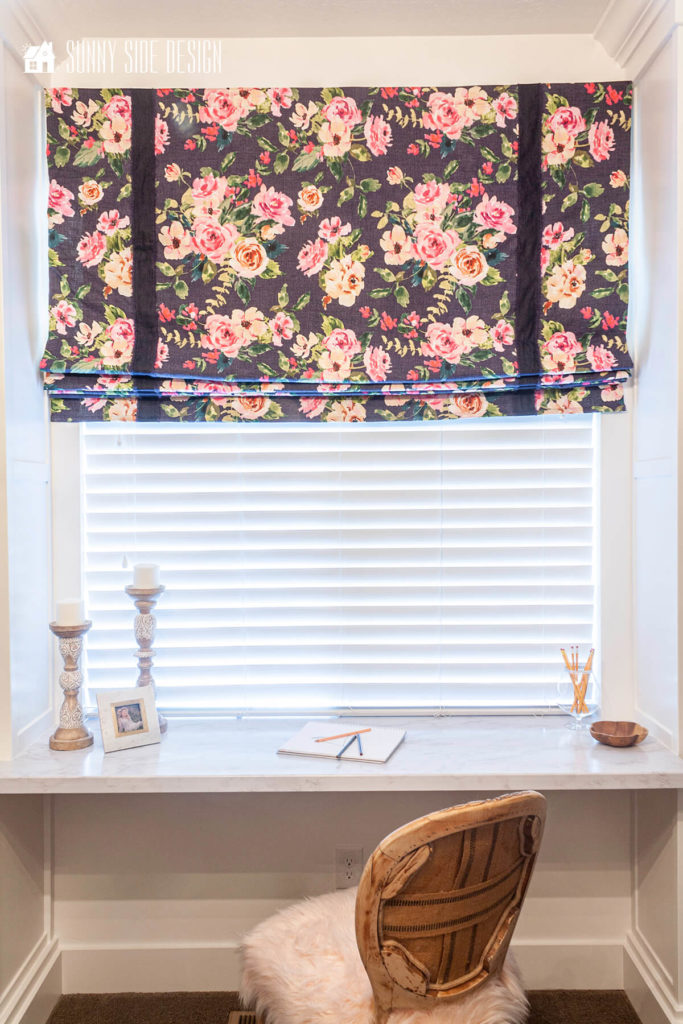
Not only do we love the way this Roman shade turned out, but we also have one happy little girl.
When Ellie arrived home from school yesterday and saw it she was sooooo excited. She immediately wanted to lower it and see how dark her room was going to be. 😂
So tell us what you think of our Roman shade. Is this a project you would like to try? Do you have any suggestions for us? We would love to hear from you.
We hope you found some inspiration for your home today.
Please share your tips and ideas with us.
We love hearing from you!
If you’re new here, WELCOME! We love having new readers and friends!
You can learn more about us here.
Let’s stay connected! Join our DIY community of doers and you won’t miss the weekly updates and more inspiration for you always on a budget.
Sharing is caring!

Thanks for stopping by Sunnyside Home. Empowering you to create a home you love!
Retailers We Love
- Anthropologie
- Birch Lane
- Crate & Barrel
- Joss and Main
- Lampsplus
- Mark & Graham
- One Kings Lane
- Pottery Barn
- Rejuvenation
- Serena & Lily
- Wayfair
- West Elm
- Williams Sonoma
- World Market
Be sure to follow us on Pinterest for even more home decor and DIY ideas.
To see what we are working on before it’s on our blog, follow us on Instagram.
You will also find our video tutorials on our YouTube channel.
- Easy Strawberry Chicken Salad with Lime Maple Balsamic Vinaigrette

- How to Fix Chipped Kitchen Cabinets with a Pen
- Easy 4th of July Door Decor You Can Make in Minutes
- 35 Easy Decorating Ideas for Summer to Welcome the Season


