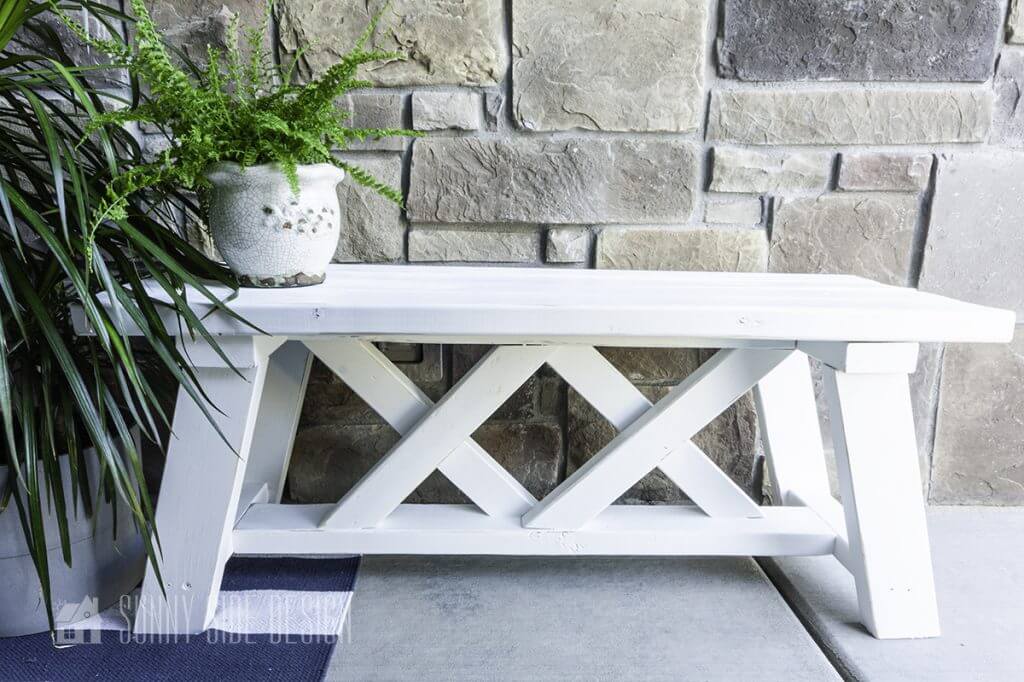
In this guide, we’ll show you how to make a simple farmhouse bench using just 2×4 lumber. With easy-to-follow plans and minimal tools required, this DIY project is perfect for both beginners
Are you looking for a little extra seating for your porch or outdoor space? We have been looking for a small bench or table to add to Steph’s front porch. Her porch is fairly narrow at a little over 4’ x 6’, so we needed something small to fit her space. While scrolling through Pinterest we came across this simple 2×4 bench with plans and knew it would be perfect for her porch. And this farmhouse bench was easy enough to build in an evening.
We found the plans for this simple 2×4 bench from Amy at HerToolBench.com. Amy’s original plans for this bench included using a pocket hole jig.
I got a Kreg pocket hole jig for Christmas and was anxious to try it on a project. But if you don’t have a pocket hole jig, don’t worry. On Amy’s website she has a plan for this bench that does not require the jig.
You can see Amy’s revised bench here.
We made our bench from her original bench plans and the measured drawing can be found here.
Sunny Side Design is a participant in the Amazon Services LLC Associates Program, an affiliate advertising program designed to provide a means for sites to earn advertising fees by advertising and linking to Amazon.com. As an Amazon Associate, this blog earns from qualifying purchases with no additional cost to you. Click here to read our full disclosure policy.
Tools & Materials Needed for Simple 2×4 Bench
- Mitre Saw
- Drill
- Pocket Jig (optional)
- Tape Measure
- Countersink Bit
- Sander
- 4- 2″x4″x8″ boards
- 1- 2″x3″x8′ board
- 8- 2 1/2″ pocket hole screws
- 32- 2 1/2″ wood screws
- sandpaper
- wood glue
- paint

Steph and Dan have been working on finishing their basement and had a bunch of scrap 2×4 lumber. Steph was able to get quite a few scrap pieces to use for this bench.
She only needed to by one 2×4 and one 2×3 along with the screws. So this turned out to be a really inexpensive project for her.
But even if you had to buy all of the lumber it would be a cheap project.
Cut List
- 4- 2″x4″ x42″
- 1- 2″x4″ x 34 1/2″
- 1- 2″x4″ x 27″
- 2- 2″x4″ x 13″
- 4- 2″x4″ x 15 1/2″ cut with a 15 degree mitre cut on both ends
- 2- 2″x3″ x 9″
- 4- 2″x3″ x 16 1/4″ cut with a 45 degree mitre cut on both ends.
If you are more of a visual learner, we created a video tutorial of this Simple 2×4 bench with plans.
Cut the 2×4 Boards
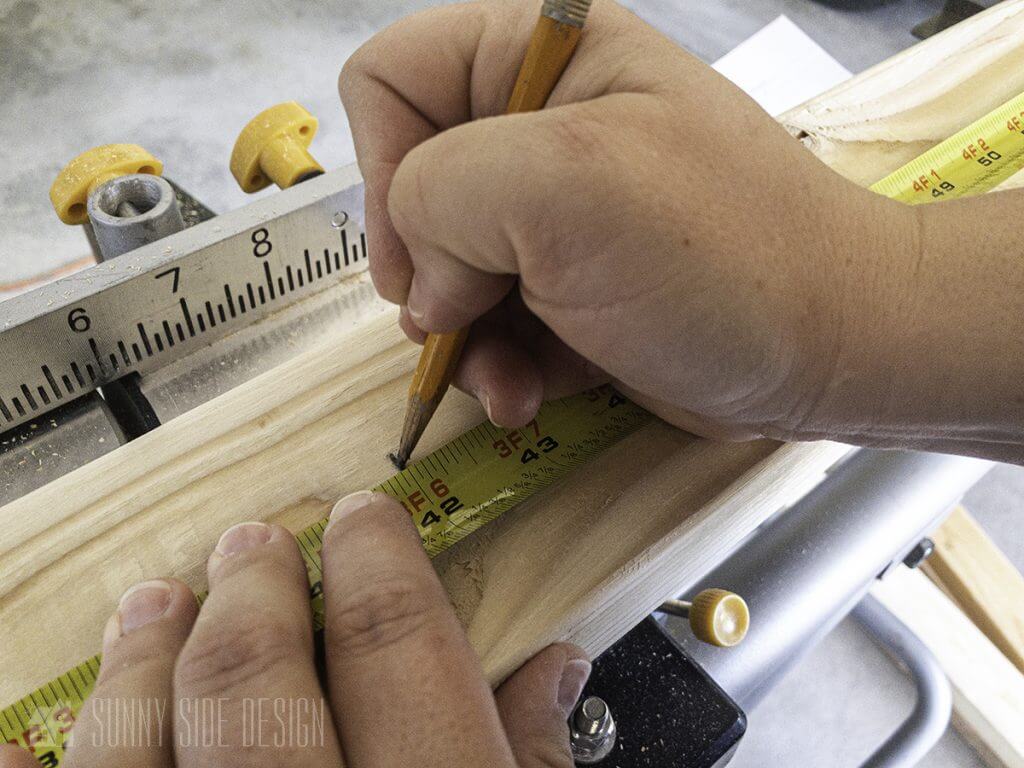

Measure the 2×4 boards and cut all of the straight cuts first.
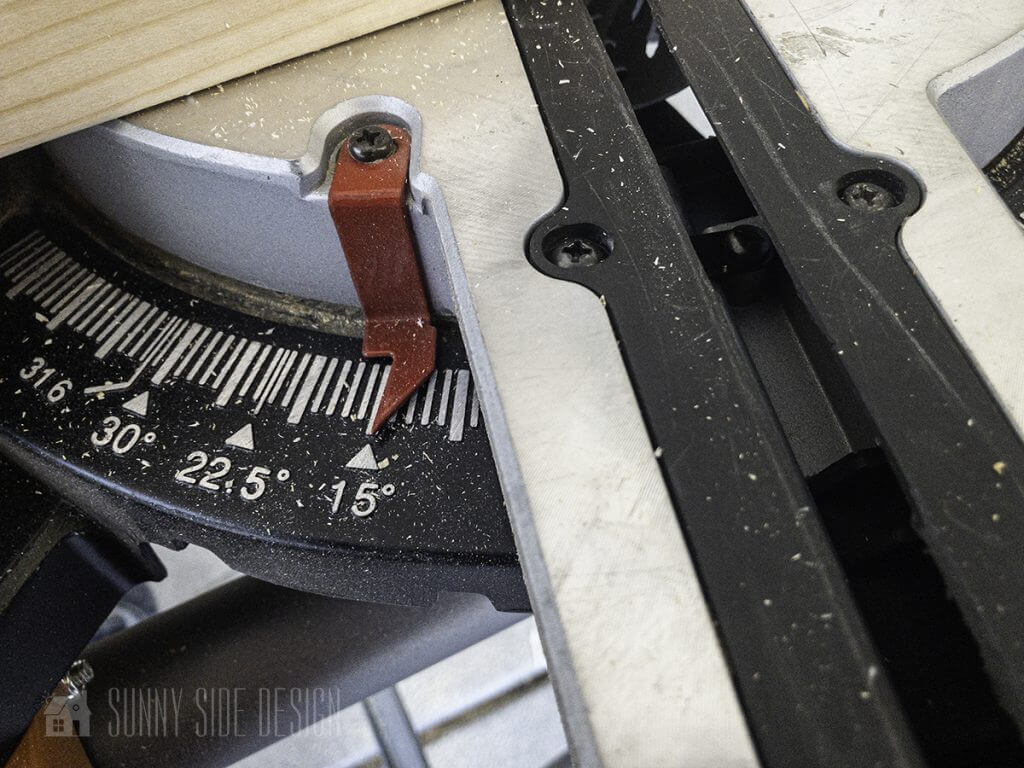

Adjust the setting on the chop saw to 15 degrees and make the first angle cut on one end.

Measure 15 1/2″ and make another 15 degree cut. Repeat so you will have a total of 4 pieces that are 15 1/2″ with the 15 degree angles on both ends. These will be the legs of the bench.
Are you enjoying this project? Please Pin It, save it for later and share it with a friend.
Sharing is caring!
Cut the 2×3 Board

This will give you a visual of what all of the cut boards will look like and a general placement idea.
You may want to sand your boards if they are rough before assembling the bench.
If you’re new here, welcome! We’re so glad you’re here.
Let us introduce ourselves, we’re Michelle and Steph, a mom and daughter team who love to DIY and decorate our homes.
Not only are we passionate about making our homes warm, comfortable and unique, but it’s our mission to help you create that same feeling in your own home.
You’ll find ideas for repurposing, creating, decorating and making your home truly yours, while always mindful of a tight budget.
Undoubtedly we love finding ways to make your home look high-end on a small budget.
Plus you’ll also find a recipe or two as we share our family favorites with you.
We’d love it if you’d join our community of doers so you won’t miss any inspiration for your home.
We love new friends.

[mailerlite_form form_id=2]
How to Use a Pocket Hole Jig
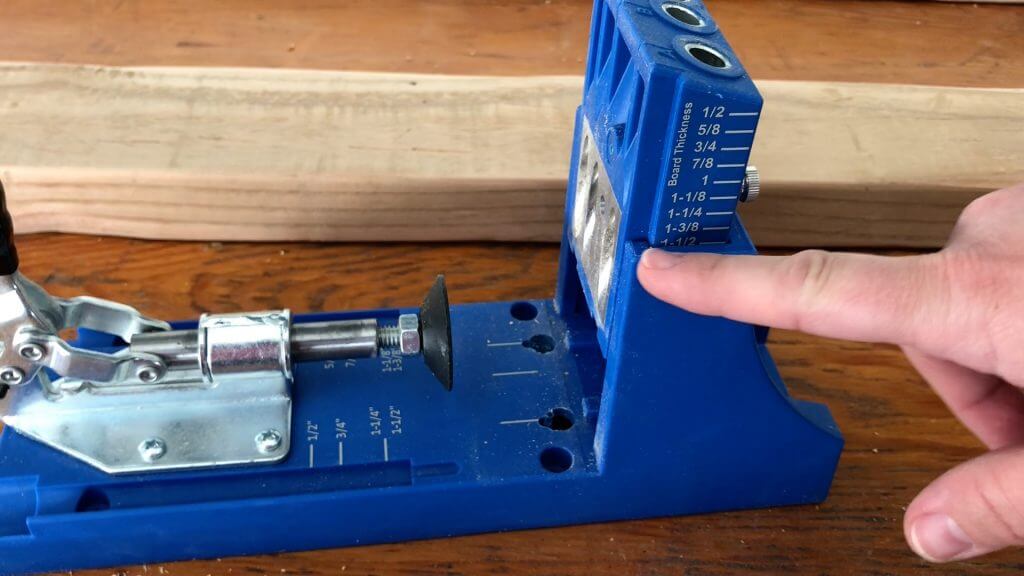
There are adjustments on the jig for varying thickness of wood. Our boards were 1 1/2″ thick, so we first adjusted the board thickness guide. There is a screw on the back that you loosen and slide the hole jig up or down. Once at the correct position, tighten the screw.

The next adjustment will be the collar on the drill bit. This will allow the drill bit to go to the proper depth.
First place the drill bit in the setup gauge. Align the step shoulder (the edge where the bit increases in size) with the thickness of the wood.
We aligned the step shoulder with the 1 1/2″ mark.
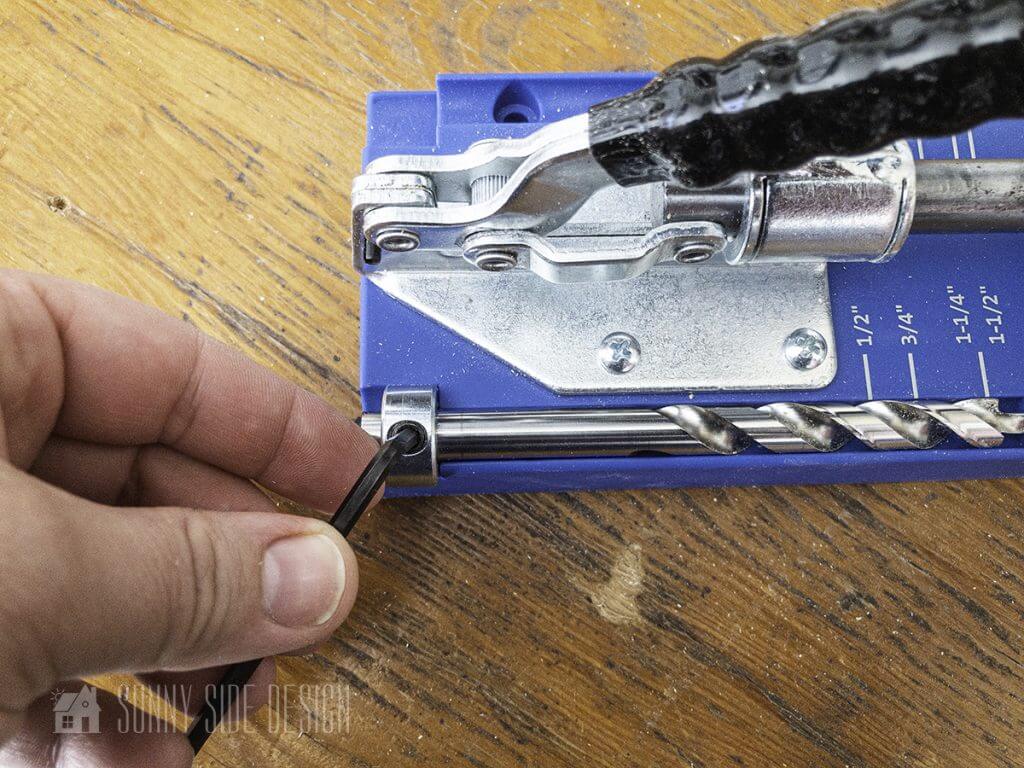
Slide the collar against the guide and tighten the screw with the Hex wrench.

For the bench the 27″ and 34 1/2″ boards will be drilled on both ends with the pocket jig.
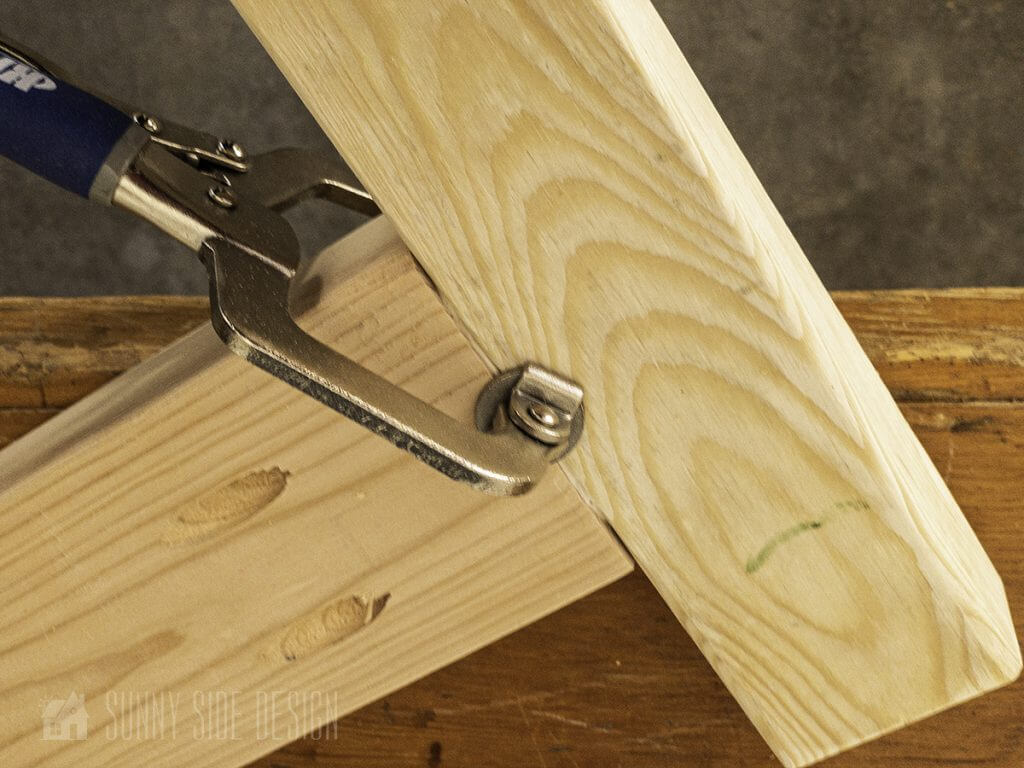
Place the end of the board into the jig, clamp into position. Place the drill bit into the guide until it hits the wood. Pull back about 1/4″ and start the drill, then proceed to create the pocket hole. The collar will stop the drill at the proper depth.
Place 2 holes in each end using the A & C guides.
Attach Board Using Pocket Screws


For the bottom crossbar mark the center of the 9″ boards and the center of the 34 1/2″ board where the pocket holes are.
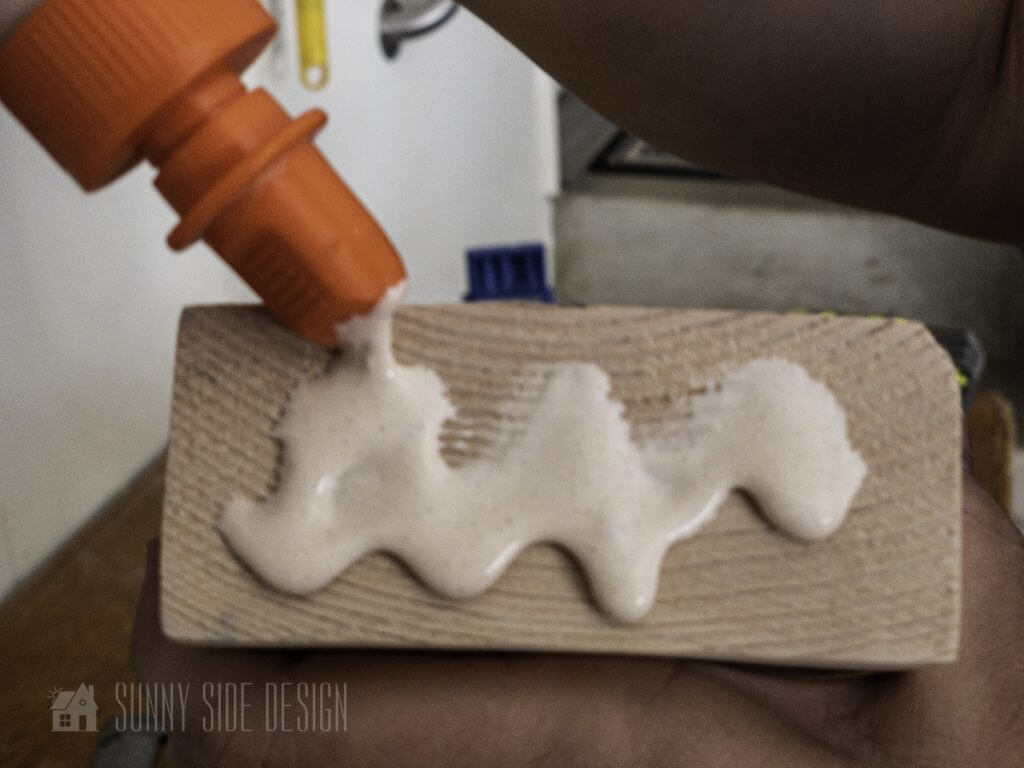
Place wood glue on the end of the board, align the marks and clamp together to keep the edges flush while inserting the pocket screws.

Using the long driver, insert the screws into each pocket hole. Repeat for the other side.
For the top cross bar, using this same method connecting the 13″ boards with the 27″ board.

You will end up with 2 pieces that look like this.
Let’s stay connected! Follow us on social media!
Attach the Legs to the Top crossbar


Mark 1/2″ in on the 13″ piece on each end. This will be the mark for the leg placement.
Drill 3 pilot holes on each side.
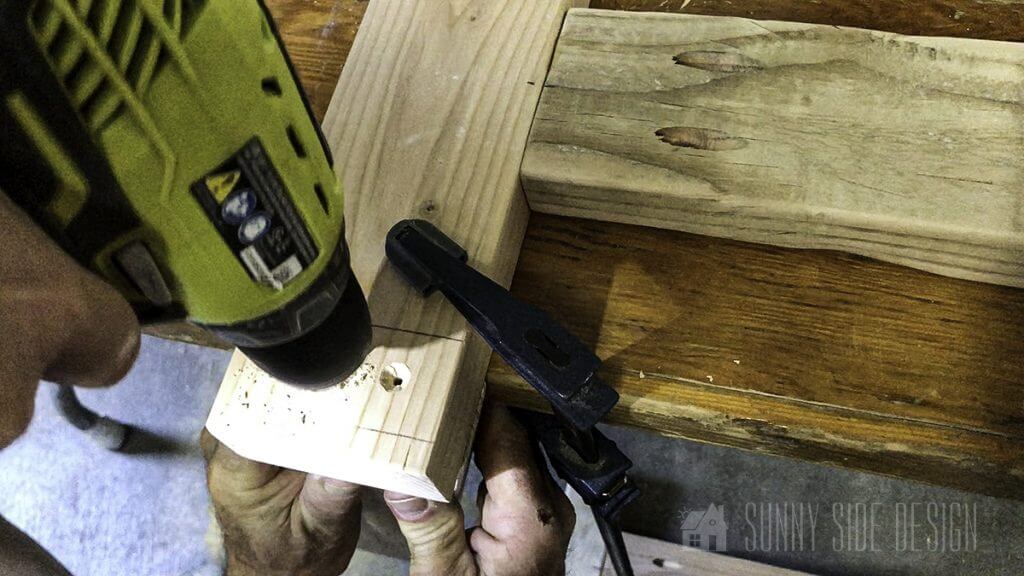
Then using a countersink bit, drill into each hole.
We also held the leg piece in position and drilled pilot holes into the leg as well.

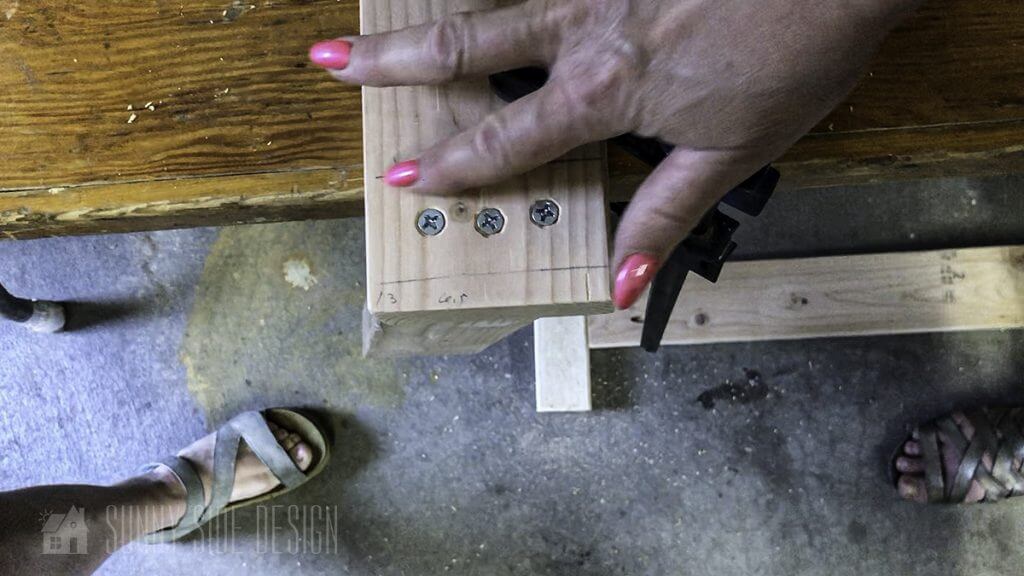
Spread some wood glue on the leg piece, hold in position and insert 3 wood screws.
Repeat for each of the 4 legs.
Attach Bottom Crossbar to Legs

Turn the bench upside down and mark 2″ down on each leg. This will be the placement for the bottom crossbar.

Drill 2 pilot holes and countersink into each leg and into the crossbar piece. Insert the wood screws. Repeat at each leg.
Add the Double X


To prepare to attach the double X, measure and mark the center of the length and width of the 27″ board and the 34 1/2″ board.
Place a mark 3/4″ to the right and to the left of the center mark. This is the placement for the center boards.
Place 2 of the 16 1/4″ boards between the 2 support crossbar boards with one end placed on the 3/4″ mark.
Drill and countersink pilot holes, then insert the wood screws.
Repeat with the 2 other 16 1/4″ boards, aligning on the 3/4″ mark on the opposite crossbar board.

We first secured the top crossbar board with screws, then flipped the bench over and inserted the screw on the bottom crossbar board.
Now the base is finished.
Mount Top to 2×4 Bench


Place the 42″ boards on the top, center on the base. Drill and countersink pilot holes into the top boards. These holes will be in about 6″ on each side. Place one screw on each end of each board.
The top will overhang 1/2″ from the 13″ pieces on the side and about 4″ on the ends.
Apply Finish

There are several options for finishing this simple 2×4 bench. We chose to apply 2 coats of an exterior paint, then lightly distressed it with sand paper.
It could also be stained, or sealed with a clear coat finish.
While there were quite a few steps, to complete this simple 2×4 bench, if you follow the plans it’s really quite simple to build.
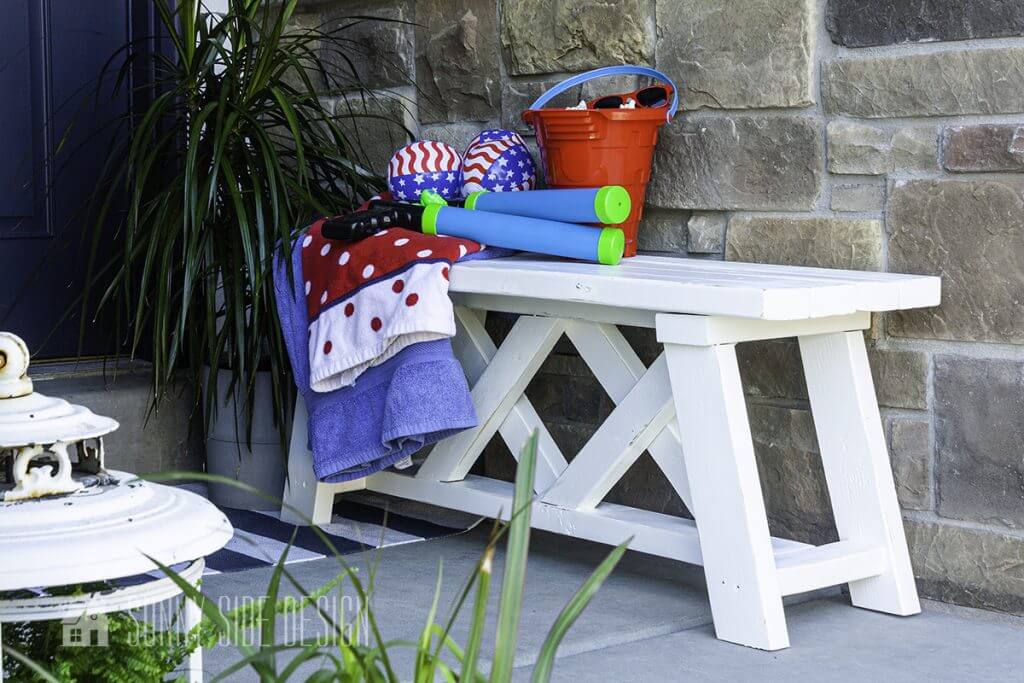
We were thrilled with the results.
Have you every tried a project like this?
If so, we would love to hear about it. Drop us a comment below.
We hope you found some inspiration for your home today.
Please share your tips and ideas with us.
We love hearing from you!
If you’re new here, WELCOME! We love having new readers and friends!
You can learn more about us here.
Let’s stay connected! Join our DIY community of doers and you won’t miss the weekly updates and more inspiration for you always on a budget.
Sharing is caring!

Thanks for stopping by Sunny Side Design. Empowering you to create a home you love!
DISCLAIMER
This blog’s content is for entertainment purposes only and is not professional advice. By reading this blog and attempting to recreate a project, you assume all responsibility for any injuries or damages incurred. Read my full disclaimer here.
PHOTO USE AND CONTENT SHARING
All of the photographs you see here are the property of Sunny Side Design unless otherwise credited.
We love for others to share our work, so please feel free to use one photo with a link back to our website.
Pinning and sharing is always encouraged!
Please do not reproduce other Sunny Side Design content without permission.
Retailers We Love
- Anthropologie
- Birch Lane
- Crate & Barrel
- Joss and Main
- Lampsplus
- Mark & Graham
- One Kings Lane
- Pottery Barn
- Rejuvenation
- Serena & Lily
- Wayfair
- West Elm
- Williams Sonoma
- World Market
Be sure to follow us on Pinterest for even more home decor and DIY ideas.
To see what we are working on before it’s on our blog, follow us on Instagram.
You will also find our video tutorials on our YouTube channel.
- Paint an Old World Texture Finish on a Vase

- Easy Strawberry Chicken Salad with Lime Maple Balsamic Vinaigrette
- How to Fix Chipped Kitchen Cabinets with a Pen
- Easy 4th of July Door Decor You Can Make in Minutes


