Welcome to week 5 of the One Room Challenge!
Clearly we are thrilled with the progress we are making in our ultimate family hangout room!
While it is a lot of hard work, it feels good to look back at what we’ve accomplished so far.
And this week we are delighted to share how to install a brick backsplash with old world charm.
We are grateful for Old Mill Brick for sponsoring this post.
And we are excited to share their product with you, but all of the thoughts are my own.
If you’re new here, WELCOME! You can learn more about us here.
For the next 3 weeks we will be transforming an unfinished basement room into the ultimate family hangout room!
Make sure you’re subscribed to our newsletter so you don’t miss any of the projects in this basement family room.
And be sure to follow us on Instagram for behind the scenes progress and updates!
Be sure to join us each week to check our progress!
Also on the One Room Challenge website, you’ll find tons of ideas for updating any space in your home.

Projects in Our One Room Challenge
You can easily navigate through each week of this ultimate modern coastal family room project below.
- Week 1 – How to Make a Built In Entertainment Center
- Week 2 – How to Make a Simple Cabinet Box
- Week 3 – How to DIY an Epoxy Countertop to Look Like Marble!
- Week 4 – How to Easily Install a Laminate Floor Over Concrete
- Week 5 – You are here!
- Week 6 – How to Make a Built In Reading Nook in a Closet
- Week 7 – How to Make a Simple Upcycled DIY Sofa Table
- Week 8 – Reveal Day! Basement Family Room Ideas on a Budget
Do Bricks Make a Good Backsplash?
A brick backsplash is strong and durable, so yes it does make a great backsplash.
As long as it’s installed properly and maintained, a brick backsplash with last you a long time.
Also a brick back splash is easy to install with the thin brick veneer.
The brick comes on a mesh backing with makes installation quick and easy.
Are you enjoying this post?!
Please save it for later and share is with your friends.
Sharing is caring!
How Thick Is a Brick Backsplash?
A thin brick backsplash or brick veneer backsplash gives you that authentic brick look you’re dreaming of, because it is real brick.
But it’s only 1/2″ thick.
So it’s easier to work with, for a backsplash or even on a large wall.
Can Thin Brick Be Installed Over Drywall?
Old Mill brickwebb can be installed on almost any surface.
However, some surfaces take some prep work.
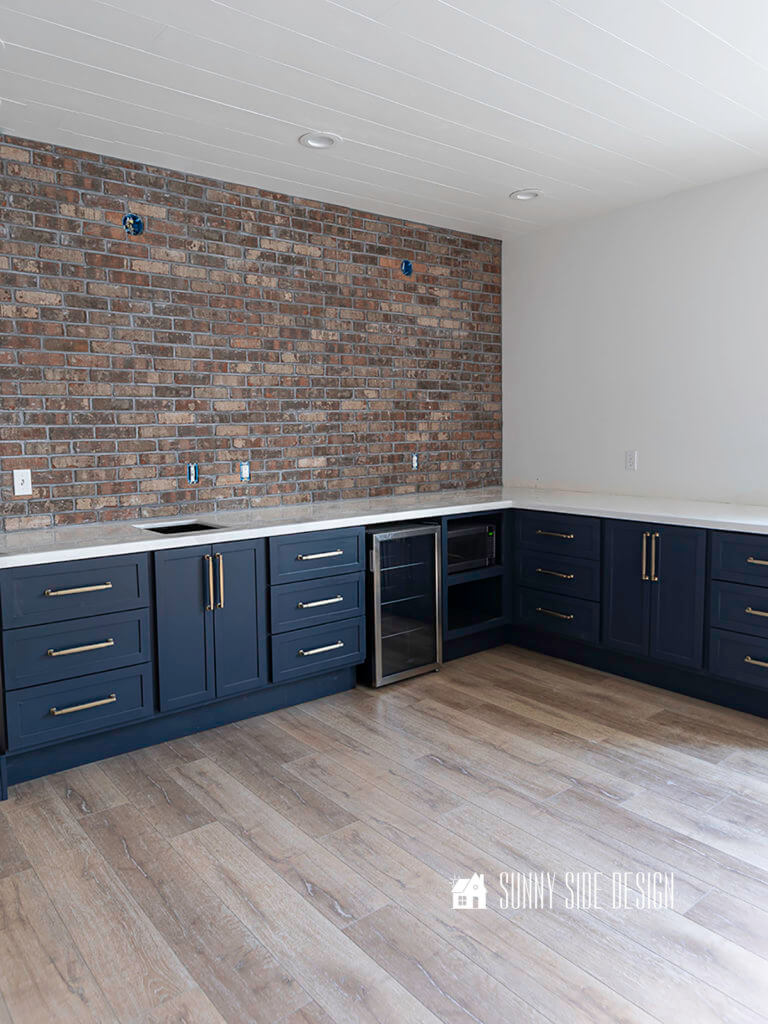
For a common painted wall, there are just a few steps you’ll need to take to prep the wall for your thin brick project.
Prep Drywall for Brick
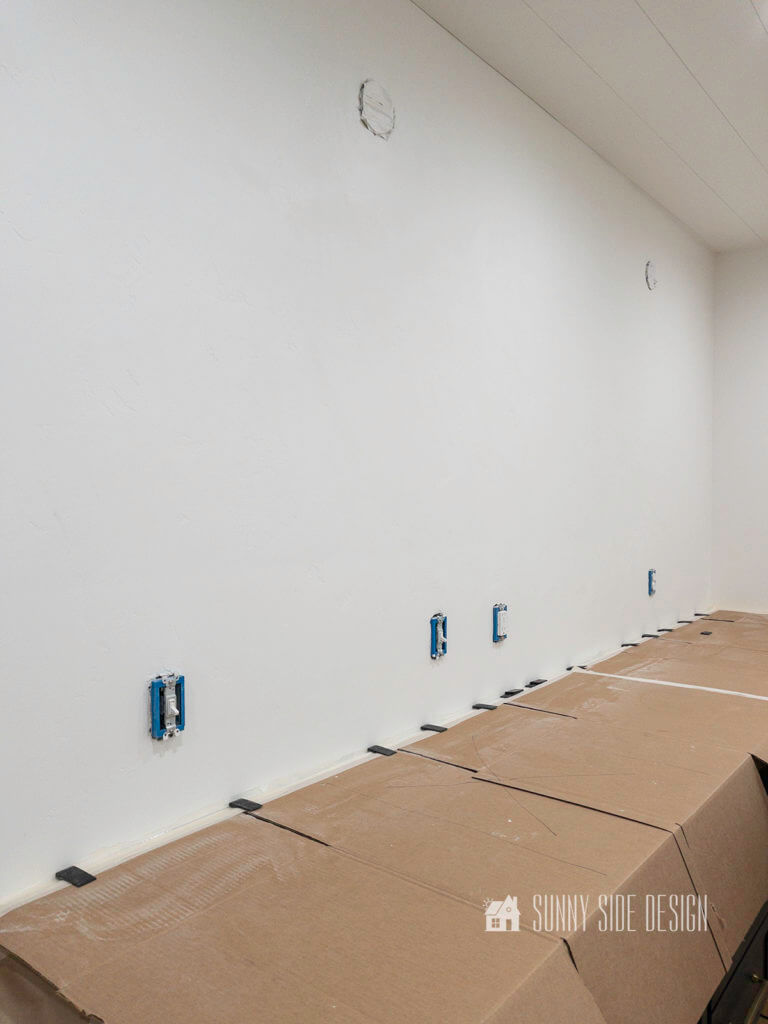
To prepare your drywall for a thin brick, first remove any outlet covers and the baseboard if you are installing the brick to the floor.
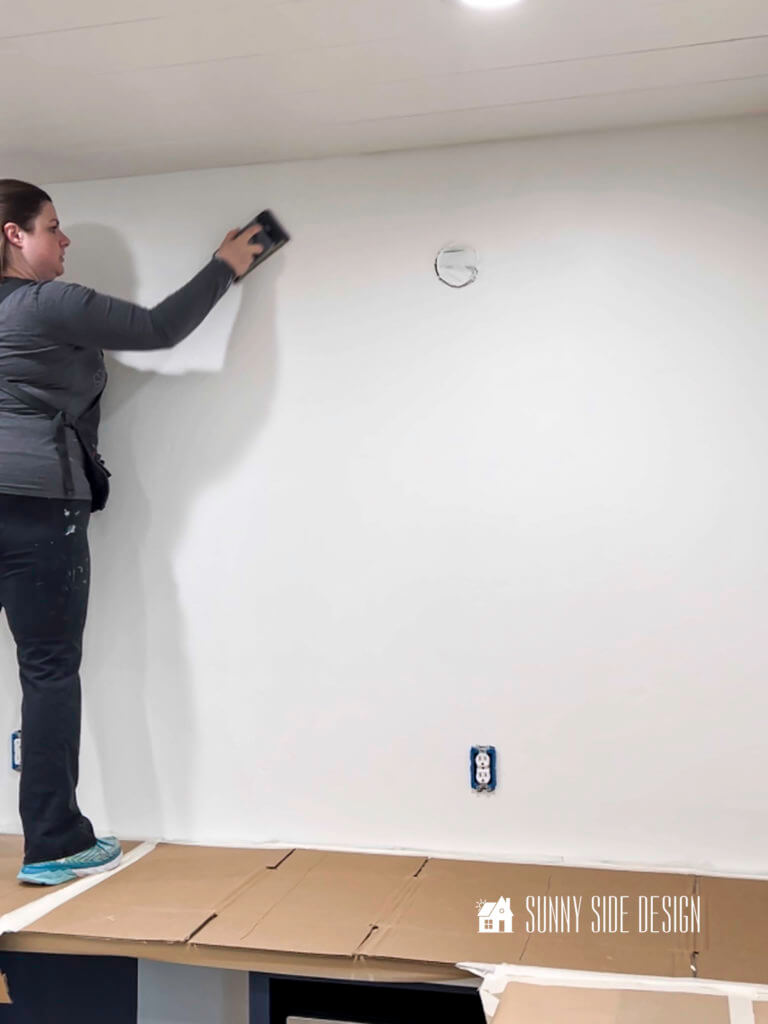
Then you’ll need to scuff up the wall with an 80 grit sandpaper.
Use a small circular motion and go over the entire surface of the wall.
You don’t need to push hard.
The goal is to simply rough up the surface so your wall will have grip for the adhesive.
Once you’ve finished sanding the wall, take a duster or damp cloth and remove the dust.
Now you’re ready to install your thin brick web.
Protect Countertop
Since this job can get messy, you’ll want to cover and protect your countertop.
Because we have just finished our epoxy countertop, we were extra cautious.
And we not only covered them with kraft paper, but we also added a layer of cardboard for extra protection.
Supplies & Tools
Installing thin brick on a web is easy and you will just need a few items to get started.
- Old Mill Brickwebb
- tile adhesive or mastic
- 3/8″ x 1/4″ notched trowel
- tile saw
- level
- measuring tape
- pencil
- sanded grout or type S mortar mix
- grout bag
- brick jointer
- stiff bristle brush
The Old Mill Brickwebb we chose is call Highland, however this color has been discontinued, but Castle Gate is very similar in color and style.
Plus take a look at all of their amazing choices to find a color you’d love in your home.
Determine Square Footage and Layout
Before you begin a project like this you’ll want to determine how many square feet of brick you’ll need.
Measure the width and height of your wall and multiply them together to get the total square footage needed.
When purchasing your thin brickwebb, calculate an extra 10% for cuts.
And before you begin to install your brick backsplash, lay out your brick and determine placement along your wall.
And if you’re a more visual learner, check out our video on YouTube.
Install Brick Backsplash
When installing your backsplash you can begin at the top of the wall or the bottom.
We chose to install from the countertop up since we knew that our countertop was level.
However as we got into this project and as we troweled the tile adhesive on the wall, it would drip onto the previously installed brick.
As a result, we were constantly wiping off the bricks.
So you may want to consider starting at the top and working your way down.
We also placed 1/4″ thick spacers along the edge of the countertop.
This would create a space along the lower edge for grout.
Trowel on Adhesive

First, trowel on the tile adhesive using the smooth edge of the trowel.

Then flip the trowel over to the notched side and pull the trowel across the adhesive creating ridges in the adhesive.
Install Brick web
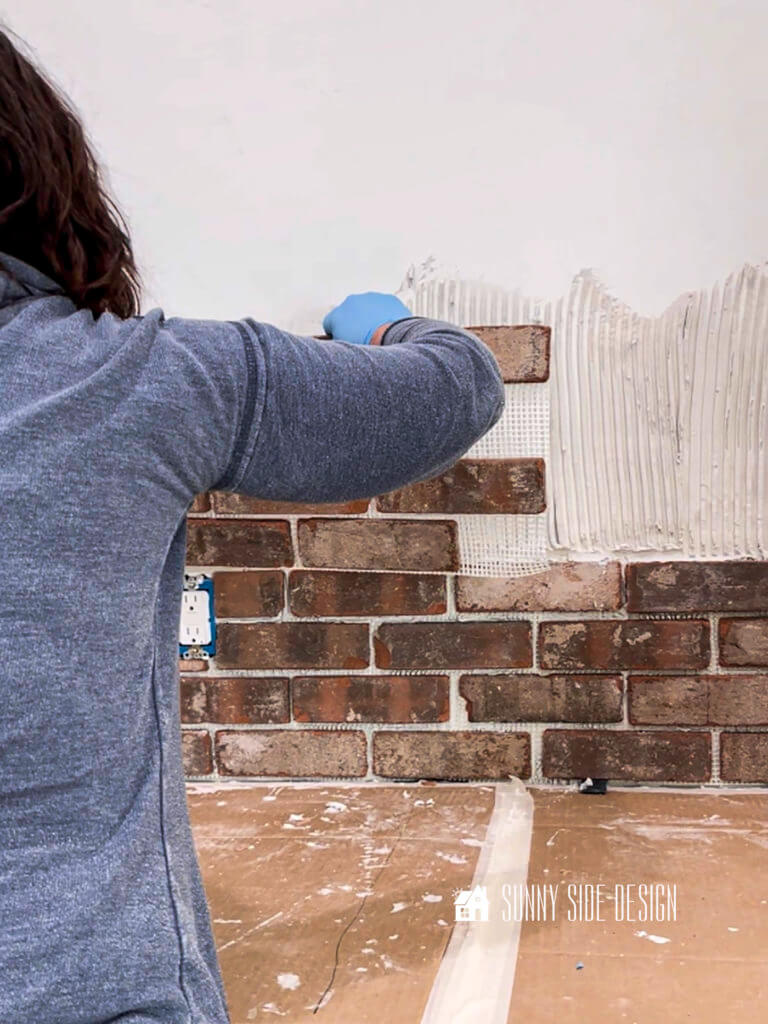
Now you’re ready to install a sheet of brickwebb.
For the first row, align bricks with the spacers along the edge of the countertop.
And for subsequent sheets align the brick web with the previously installed row, allowing for a 3/8″ grout line.
We did not use spacers to keep them all align evenly because this brick backsplash is supposed to look like an old exposed brick wall with lots of imperfections.
However you can used tile spacers if you’d like to keep all of your brick evenly spaced.
Cutting the Brick

Of course, at some point when installing the brick backsplash you’ll need to make cuts around electrical outlets or other obstacles.
To make the cuts we first pulled the brick off the web where we would need to make cuts.
Then we trimmed the mesh so that the brickwebb sheet could be installed.
Next take each brick that will need to be cut and mark with the a pencil where it needs to be trimmed.

Since most of our cuts around the electrical outlets required multiple cuts, we chose to use our wet tile saw.
And we are so grateful that my hubby was willing to be the tile cutter.
Not only did this save us time, but we stayed a lot cleaner!

Just take a look at Dan!
What a good sport!
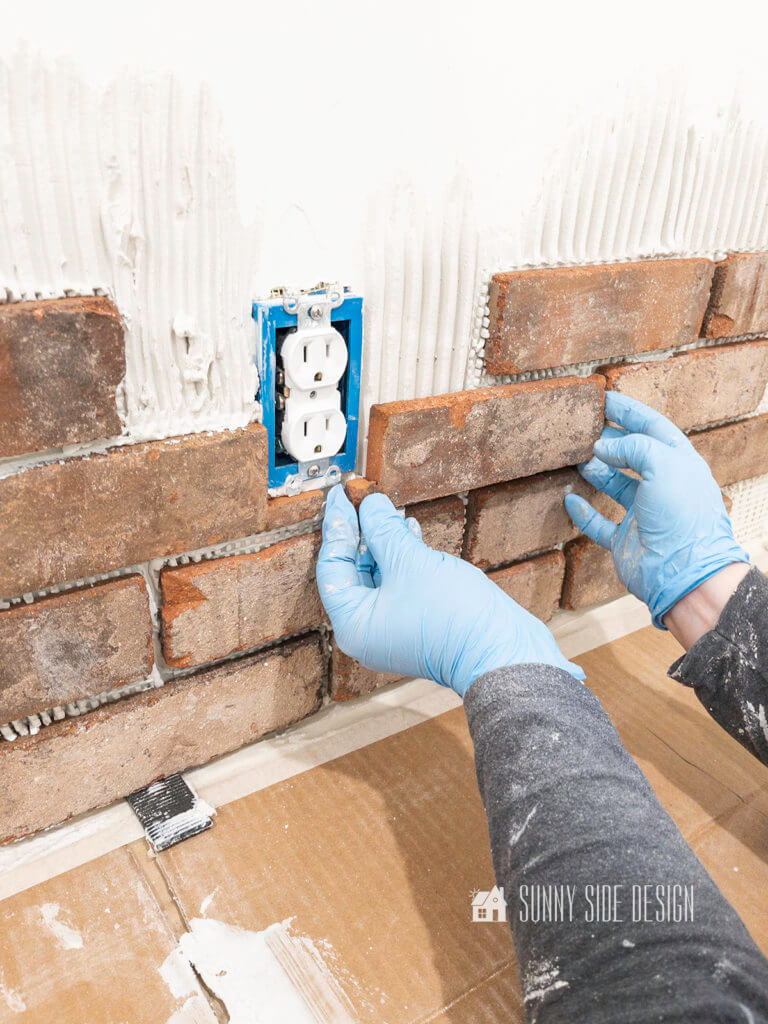
Once the piece was cut, we first made a dry fit, then back buttered the brick with adhesive and placed it into position.
Clearly the first row with all of the outlets and the top with the electrical boxes for the lights took the most time.

Once we had the first row installed, we used the laser level to make sure our first row was good and level.

But once you get in your groove it goes fairly quickly.
I would spread on the adhesive and my mom would place the bricks, while my hubby made all of the cuts.

And even my dad got into the action and would hand the tile sheets so we didn’t need to climb up and down so much.
You’ll want your tile adhesive to dry for at least 24 hours before you grout your brick.
Grouting the Brick Backsplash
There are a couple of options for grouting the brick backsplash.
You can use a type S mortar mix or a sanded grout.
Since we were more familiar with using a sanded grout, we decided to use that.
We mixed the grout according to the directions on the package.
However we mixed it in small batches, mixing only 6.25 lbs. of grout at a time.
You don’t want to mix more than you can apply in about 20 minutes time.
Because it will start to harden before you can use it all.
Using a Grout Bag
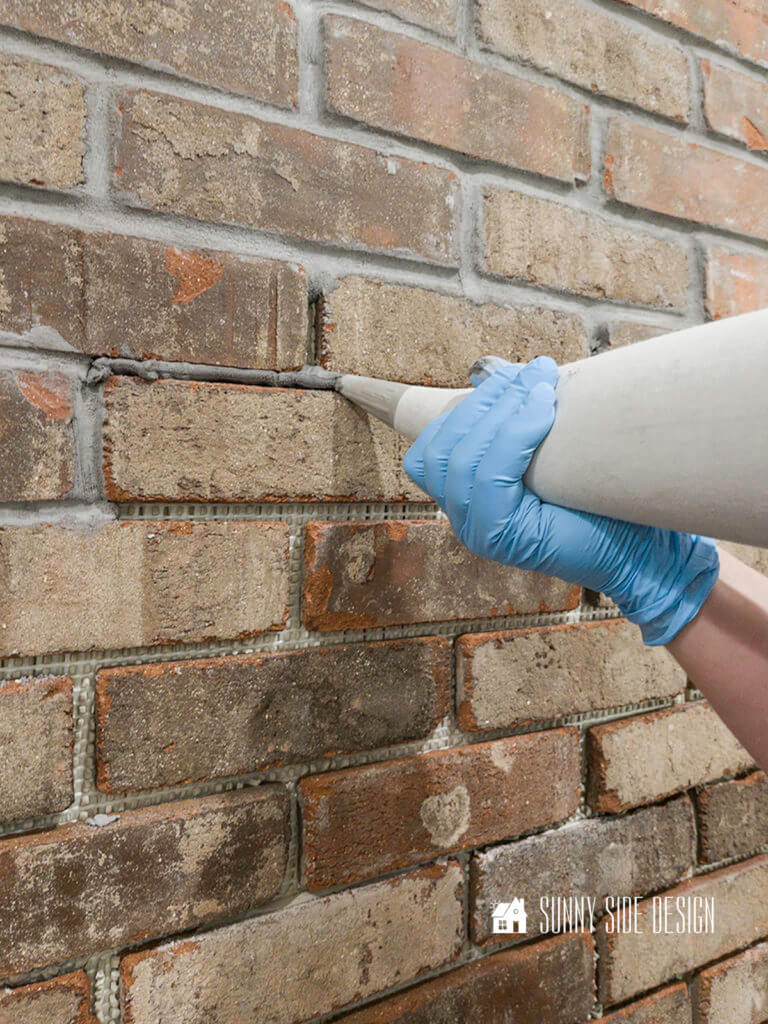
First the grout is applied with a mortar grout bag.
Basically it’s like a huge canvas pastry bag.
You’ll want to snip off about 1/4″ off the tip of the bag, so that the tip is about 3/8″ wide.
To fill your bag, fold down the top of the bag 4″ to 5″ and step on the tip of the bag as you fill it with the mortar or grout.
Use a trowel to fill the bag about half way.
Unfold the top of the bag and shake the bag over your bucket of grout.
This will shake out any air bubbles and then twist the top of the bag until the grout begins to come out of the tip of the bag.
The grout should come out when squeezed, but not so runny that it drips out on it’s own.
Then put the tip of the bag in between the bricks and squeeze as you move the bag across the joint between the bricks.
You’ll want to overfill the gap just a little, so you’ll have enough to tool with.
Start at the top of your brick backsplash and work in small sections, no larger that 4’x4′.
Then let the section dry for about 15 minutes.
When the grout is dry enough to the touch that it doesn’t stick to your finger, but it’s still soft enough to squish a little, it’s ready to start tooling.
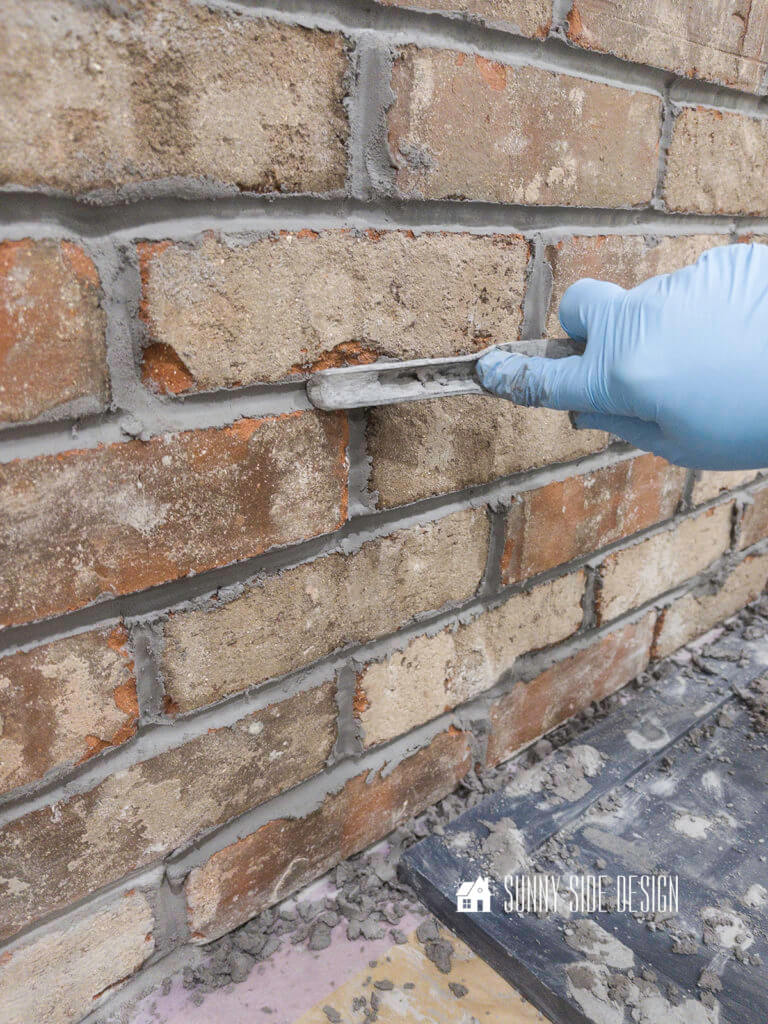
Tooling the Brick Joints
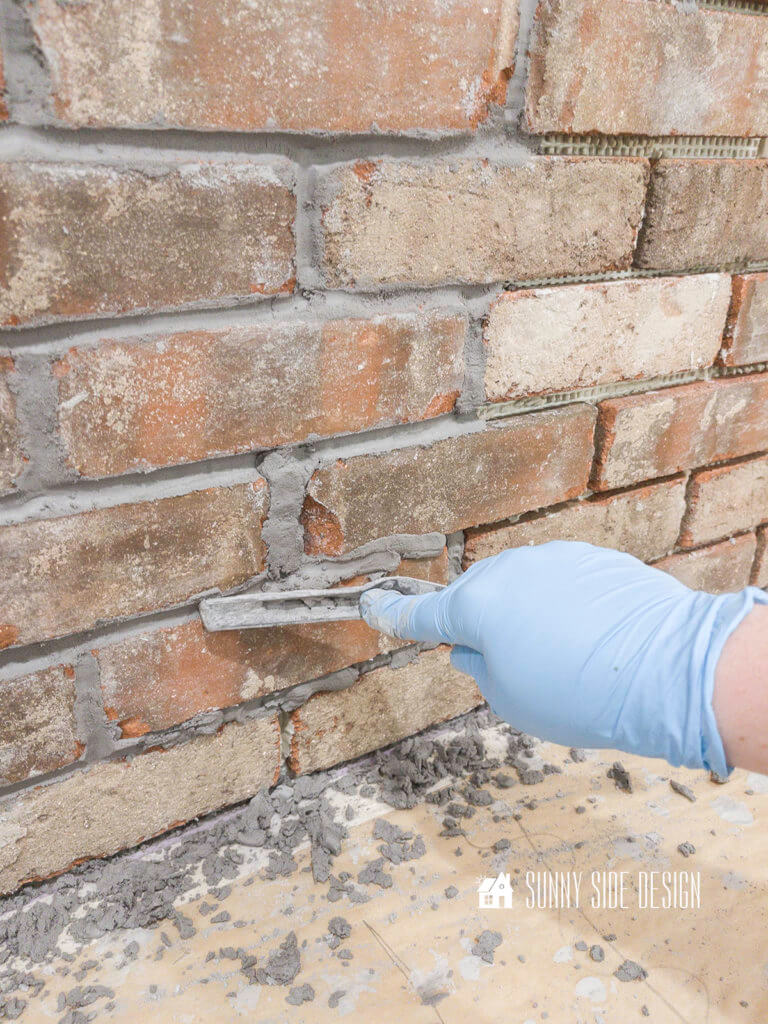
Then take the toe edge of your brick jointer and press the grout into the joint.
The excess grout or mortar should fall away freely and not stick to the brick face.
If you find a spot that’s missing some grout you can pick up a piece of grout that’s fallen and place it into the gap.
This will ensure that the mortar you add has the same amount of moisture as the area you are working on.

Repeat this process until the entire brick backsplash is complete.
Brush Brick

Then let it dry a little and brush away the excess grout with a stiff bristled brush.
Brush at a 45° angle.
If the brush leaves streaks on the brick face or leaves mortar on the brush, the mortar is still too wet.
The brush will remove any high edges and leave a nice smooth look.
Let your grout dry according to the package directions then apply a sealer to the entire brick backsplash.
Let’s stay connected! Follow us on social media!
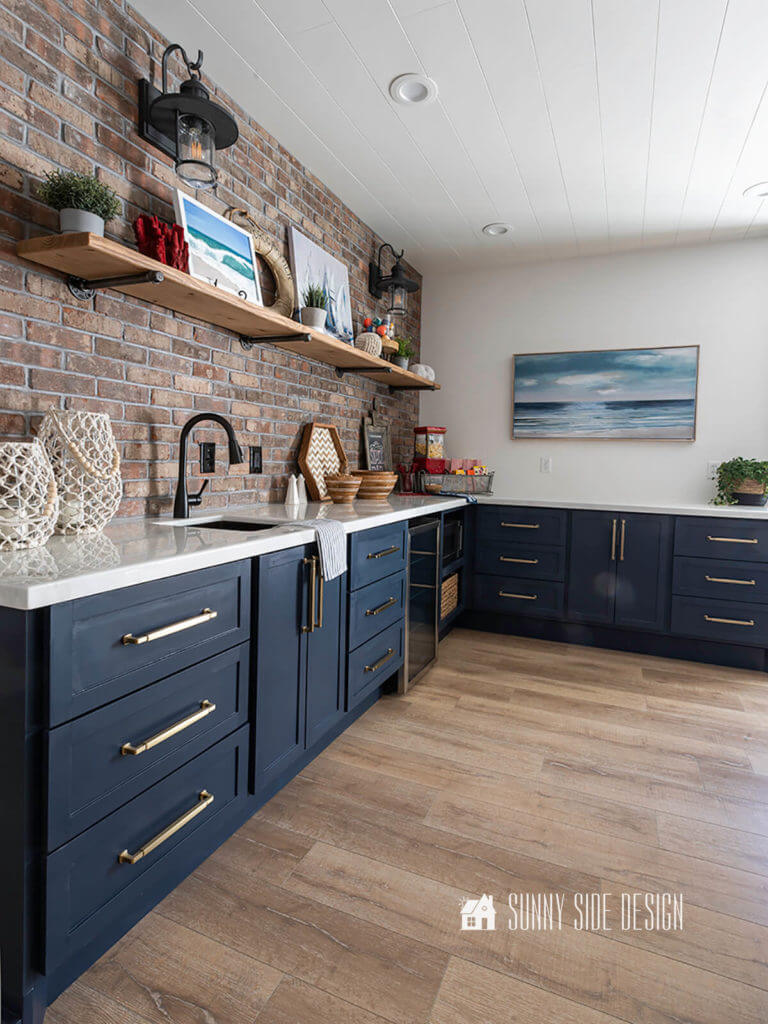
Brick Backsplash Reveal
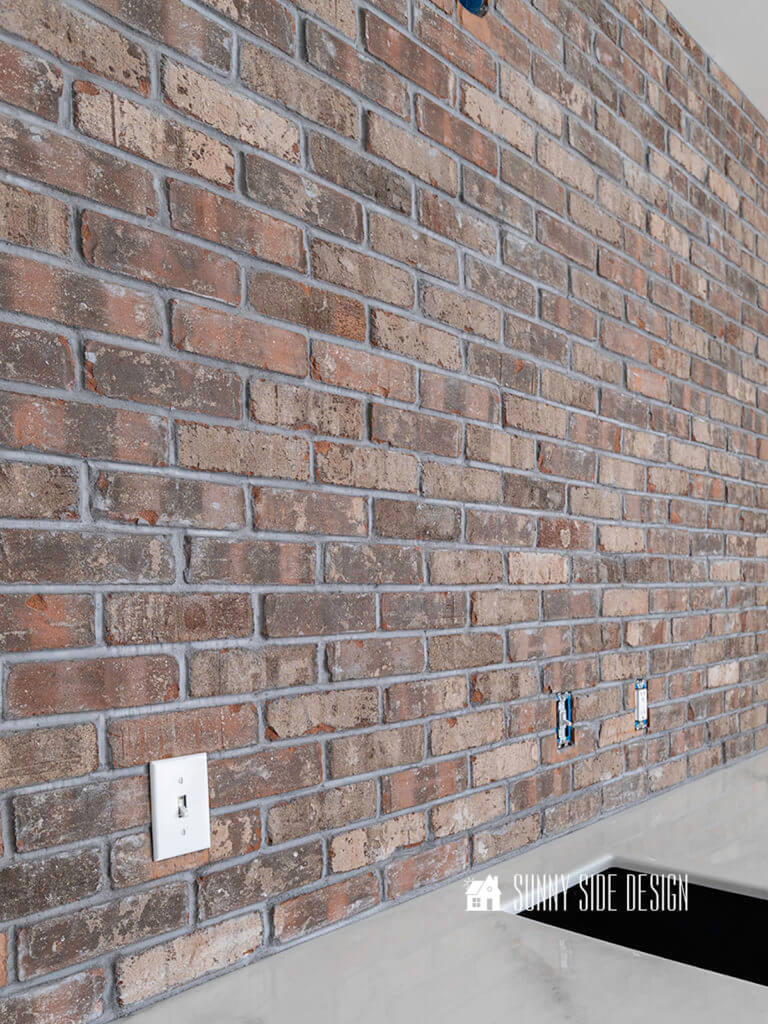
I am absolutely in love with this brick backsplash.
Not only does it have that old world charm, but it adds a warmth to the room that I love.

One of my favorite elements about the brick is that each brick is slightly different thickness.
This really adds to the character and rustic vibe of the brick backsplash.
Plus I think the brick looks amazing with the navy blue cabinets!
Are you enjoying this post?!
Please pin it and save it for later, share it with your friends.
Sharing is caring!
We hope you found a little inspiration here today.
Are you ready to install some brickwebb in your home?
Do you love the look of brick?
Remember to check back each week as we continue the One Room Challenge.
Each week we’ll share a new DIY project.
Next week we’ll share how we turned a closet space into a reading nook.
You are going to want to see this!
What are your favorite elements in this room so far?
We’d love to hear from you!
Please share your thoughts and questions with us.
If you’re new here, WELCOME! We love having new readers and friends!
You can learn more about us here.
Let’s stay connected!
Subscribe to our free newsletter so you don’t miss any inspiration for your home.
Please PIN and save for later, and share with your friends!

Sharing helps grow our following!
Thanks for stopping by Sunnyside Home. Empowering you to create a home you love.
Be sure to follow us on Pinterest for even more home decor and DIY ideas.
To see what we are working on before it’s on our blog, follow us on Instagram.
You will also find our video tutorials on our YouTube channel.


May I ask what is the paint color of the cabinets are? It is gorgeous, and I am planning my dream kitchen with brick accents.
Thanks for stopping by our site Staci. The color for our cabinets is Sherwin Williams Hale Navy. Good luck on your project.
Really amazing love that brick wall you ladies inspire me so much
Thank you so much Candace! We are so excited to reveal the entire space next week. Today on Instagram we are showing the lights we just installed on the brick wall. They look amazing! Thanks for following along, we appreciate you!