Do you have dated and ugly tile floors? We’ll show you how to transform your tile flooring without stencil painting or the hassle of removing old tile. Learn how to give your tile floor a makeover on a budget that will give jaw dropping results with minimal effort!
Are you joining from the Inexpensive Master Bathroom Makeover post? We’re glad to have you here with us again! We can’t wait to tell you ALL about this floor transformation today!
Sunny Side Design is a participant in the Amazon Services LLC Associates Program, an affiliate advertising program designed to provide a means for sites to earn advertising fees by advertising and linking to Amazon.com. As an Amazon Associate, this blog earns from qualifying purchases with no additional cost to you. Click here to read our full disclosure policy.
Before The Tile Floor Makeover
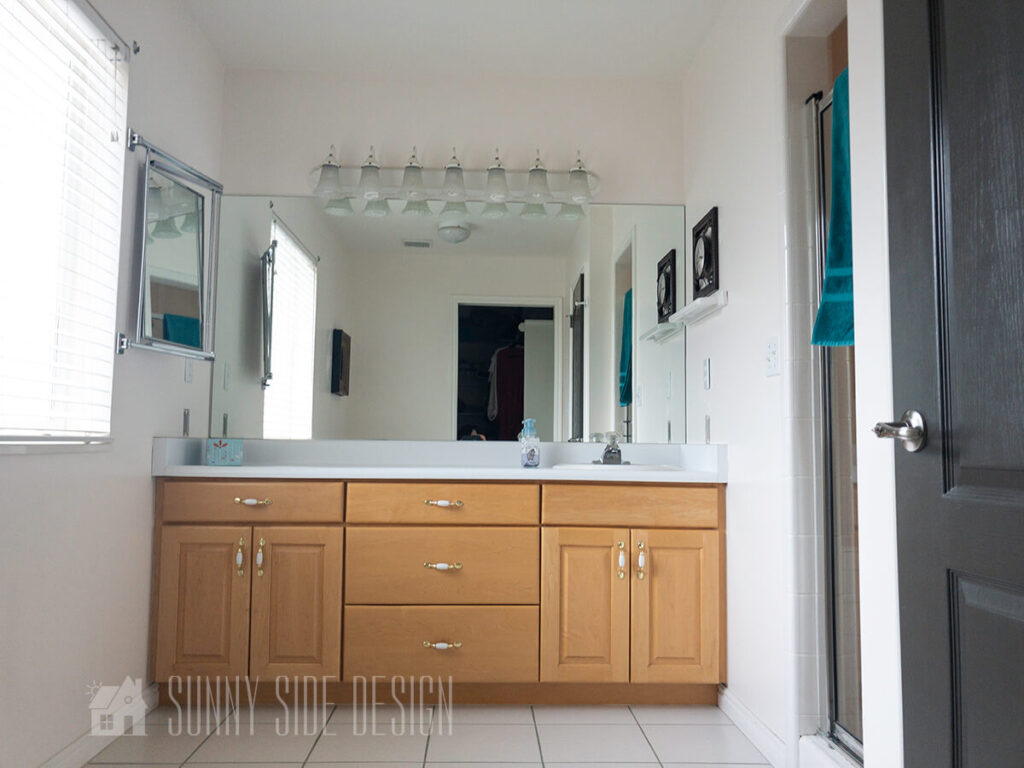
Lets just take a peek at this before picture for a minute. This dated bathroom started with this sterile feel. Large white floor tiles, green grout, maple cabinetry with a yellow hue, an old white laminate counter top that was cracking and peeling from water damage…this bathroom was pretty much lacking any sense of style or design!
Are you enjoying this project? Please Pin It, save it for later and share it with a friend.
Sharing is caring!
How To Prep The Tile Floor

To prep the tile floors we cleaned them using TSP. Using a scrub brush we went to town cleaning all of the grout lines and surface area of each of the tiles. We were actually a little shocked at how much gunk we removed.
We wore rubber gloves to protect our hands from the chemicals but were surprised that this mixture had no odor! It’s a very effective cleaner that pulled up layers of grime built up over the years.


Once the tiles and grout had dried we covered up all of that ugly green grout! Did you know there are grout pens out there? They’re intended to touch up existing grout using the same color pen as the grout. We ordered ours from Amazon, but we also found them at Home Depot after the fact as well.
For this tile floor makeover we knew we couldn’t leave the existing green grout! Why not change the color of the grout using these awesome grout pens? We had nothing to lose but to give it a try. These pens essentially have waterproof, mold resistant properties in the paint. We knew it wasn’t going to hurt anything to give it a try.
We covered about 65 square feet of grout using 2 grout pens. Since we were trying to conceal the green grout we ended up applying 2 coats to all the grout.


Here’s a look at the tile floor before and after applying the grout paint. It’s amazing what a big difference just changing the grout color made!

They say big things come in small packages and this time it couldn’t be more true! Can you believe that this little box could hold all of the WOW factor for this amazing tile floor makeover?
Where has SnazzyDecal been all my life? (Or at least in the last 5 years?) I’m still a little amazed that these tile decals totally transformed this dated bathroom floor to a designer look, in just 2 hours!
We’re both amazed at how quick and easy these tile decals are to install! (Not to mention that the company is very easy to work with and we received them very quickly!)
Take a look at our video installation tutorial to see how easy it really is.
SOME AWESOME FEATURES TO THESE DECALS:
- Waterproof
- Scratch Proof
- Heat Resistant
- Removable
- Customized Sizing
- Great for tile floors, vinyl flooring, backsplash, fireplace surround, stair risers, creating an accent wall, adding a decorative element to the back of a bookcase…there are SO many possibilities!
If you’re new here, welcome! We’re so glad you’re here.
Let us introduce ourselves, we’re Michelle and Steph, a mom and daughter team who love to DIY and decorate our homes.
Not only are we passionate about making our homes warm, comfortable and unique, but it’s our mission to help you create that same feeling in your own home.
You’ll find ideas for repurposing, creating, decorating and making your home truly yours, while always mindful of a tight budget.
Undoubtedly we love finding ways to make your home look high-end on a small budget.
Plus you’ll also find a recipe or two as we share our family favorites with you.
We’d love it if you’d join our community of doers so you won’t miss any inspiration for your home.
We love new friends.

[mailerlite_form form_id=2]
Tile Floor Makeover: How To Install SnazzyDecal Tiles
Installing the SnazzyDecal tiles really couldn’t be any easier! You’ll need a few supplies on hand to get started.
- scissors
- pencil or sharpie
- ruler or straight edge
- cutting mat
- utility knife
- paper trimmer (optional if your trimmer is large enough for the tiles.)
Take The Proper Measurements
As mentioned above, these decals are printed to custom sizes. Before ordering you’ll take the proper measurements to ensure you’ll receive the right size.
Using a flexible seamstress measuring tape, measure from grout line to grout line over each tile.
Before installing, do a dry fit of the tile. Simply place the decal on top of the tile. The decal should fit the entire tile from grout line to grout line. The decals will only stick to the tile, not the grout, so you’ll really want to make sure you have the proper measurements before ordering.


After the decal has been dry fit, simply pull up about 1″ of the backing. Then fold and make a crease along the entire backing.


Now with the top edge peeled from the backing, carefully line up the edges of the decal to the top edges of the tile. Stick it into place and again do a dry fit before removing the entire piece of backing.
At this point if you notice that the dry fit is a little crooked or off centered simply lift up the 1″ strip, re-position and stick into place.
Once the dry fit is straight, lift up the decal to slowly begin removing the backing.
Let’s stay connected! Follow us on social media!


As the backing is slowly being pulled toward you, use a ruler or straight edge to help flatten the front side of the decal as the backing is being removed. This will help to avoid any air bubbles, and give you a nice flat surface.
The slower you pull, the less likely it will be to get air bubbles.

Every now and again we would need to remove an entire tile decal and start over. Simply because we either didn’t have it quite lined up just right and the existing tile was showing, or there was an air bubble we couldn’t smooth out.
To do this we peeled up one corner and pulled the decal up (which is actually harder than you think it’d be!) These are removable but definitely stick well, and leave behind no sticky residue.
Once the decal has been removed, place a backing piece onto the sticky surface, line it up for a dry fit and try again.
(I think we only re-positioned 2 tiles out of the whole tile floor makeover! If you take your time you will have great results!)


For the most part, installing these SnazzyDecal tiles is easy and went pretty quickly! There were a few tricky parts working around the toilet and molding that took a little bit more time, however it wasn’t as hard as you might think.
BE SURE TO WATCH THE VIDEO TUTORIAL, IT’S DEFINITELY EASIER TO SEE THESE STEPS VISUALLY!
Be sure to take the time to dry fit your pieces and you’ll have great results. Since the decals are pliable it’s not too difficult to mark around these tricky spots.
To work around the water valve we measured over from the side of the tile then slit the decal down a little bit. Then we were able to dry fit it around the valve. Using our finger we were able to press the decal around the valve as well as the edge of the toilet. This will leave a slight pattern on the backside of the decal.


With the decal flipped upside down, take the scissors and cut about 1/4″ larger than the pattern mark. This will allow some wiggle room so you can get the exact fitting.
After the tile decal was trimmed to the pattern we placed it down for another dry fit. Then we folded back the top edge of backing and dry fit sticking the top into place. Once it was lined up we slowly pulled the backing off, this time using our hands to help push down the decal and smooth out any bubbles. It was a little tricky getting a straight edge in the tight quarters around the toilet. Using our hands also made it easier to mold it around the curve of the toilet.
After the decal is stuck into place, use your finger to secure the edges around the curve of the toilet. Then take the utility knife (or Xacto knife) and trim away the excess decal.

It might seem a little intimidating, but it was really quite simple to do! The key is to cut your pattern a little larger than where you marked. If you’re afraid of cutting off too much, start removing a little bit at a time. You can always cut more away if you need to.

We used this same method around the molding and curves of the shower tile. Just take your time and cut a little bit of decal away at a time and you’ll be able to get great results.

This is about halfway through laying the tile decals. We love that you can see the texture of the tile through the decal! It really helps make it look like the real thing!

And after working together for about 2 hours the floor is completely finished! We still can’t get over what a dramatic change this is! This has to be the easiest tile floor makeover hands down! At about $200 it’s an amazing transformation that’s easy to install, removable and looks like the real deal!
This would be a great alternative to living with dated and ugly tile floors for a short term living situation like renting. The landlord may even like it so much they’ll ask you to leave it when you move, and/or recruit you to install more in other units. Seriously, it’s that amazing!

Each little element in this Inexpensive Master Bathroom Makeover adds a lot of style to this space! Our personal favorite is this tile floor makeover hands down! It adds the perfect amount of drama and designer look to this space!
Shop
We hope you found some inspiration for your home today.
Please share your tips and ideas with us.
We love hearing from you!
If you’re new here, WELCOME! We love having new readers and friends!
You can learn more about us here.
Let’s stay connected! Join our DIY community of doers and you won’t miss the weekly updates and more inspiration for you always on a budget.
Sharing is caring!

Thanks for stopping by Sunny Side Design. Empowering you to create a home you love!
DISCLAIMER
This blog’s content is for entertainment purposes only and is not professional advice. By reading this blog and attempting to recreate a project, you assume all responsibility for any injuries or damages incurred. Read my full disclaimer here.
PHOTO USE AND CONTENT SHARING
All of the photographs you see here are the property of Sunny Side Design unless otherwise credited.
We love for others to share our work, so please feel free to use one photo with a link back to our website.
Pinning and sharing is always encouraged!
Please do not reproduce other Sunny Side Design content without permission.
Retailers We Love
- Anthropologie
- Birch Lane
- Crate & Barrel
- Joss and Main
- Lampsplus
- Mark & Graham
- One Kings Lane
- Pottery Barn
- Rejuvenation
- Serena & Lily
- Wayfair
- West Elm
- Williams Sonoma
- World Market
Be sure to follow us on Pinterest for even more home decor and DIY ideas.
To see what we are working on before it’s on our blog, follow us on Instagram.
You will also find our video tutorials on our YouTube channel.
- How to Fix Chipped Kitchen Cabinets with a Pen

- Easy 4th of July Door Decor You Can Make in Minutes
- 35 Easy Decorating Ideas for Summer to Welcome the Season
- Fourth of July Decorating Ideas You’ll Love This Summer