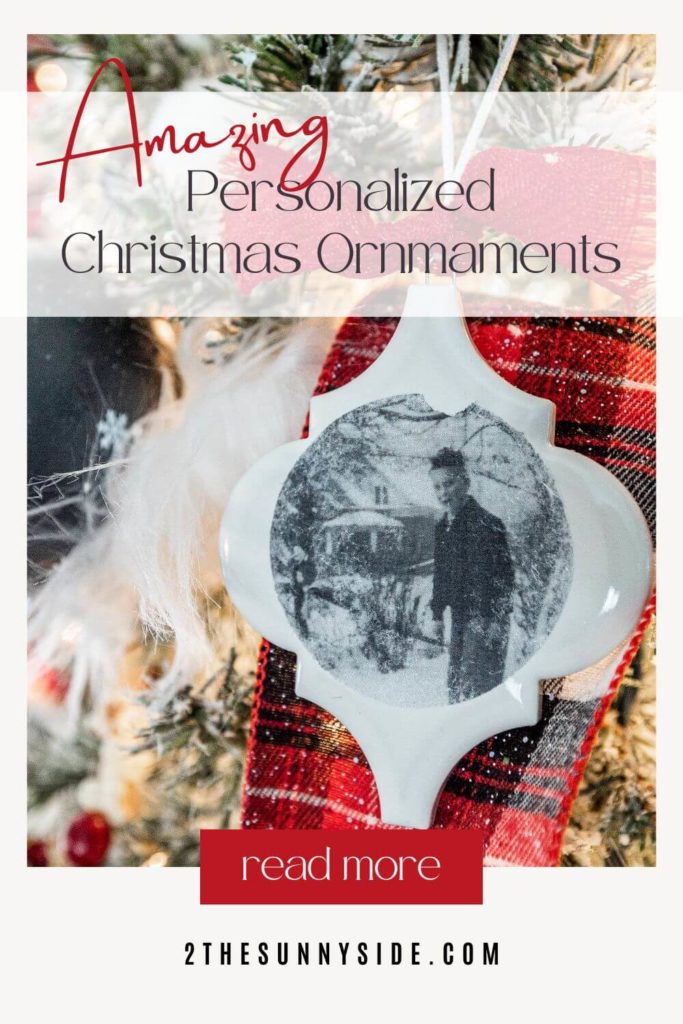
To express our gratitude for our blessings this year, we chose to create meaningful nostalgic personalized Christmas ornaments.
Certainly, gratitude for family is top on my list.
And what better way to honor and remember your family members than with unique, personalized Christmas ornaments on your tree this year.
Not only will these ornaments help us remember our loved ones, but also will evoke fond memories of those loved ones who are no longer with us and cherish Christmases past.
With this in mind, we hope you’ll follow along and learn how to transfer photos onto an ordinary ceramic tile to create a cherished personalized Christmas ornament keepsake.
Truly, we are grateful to have you here, following along on our blogging journey!
In fact, reading your comments and engaging with you excites us.
In particular, we wish the very best to each of you and your families as we enter the Holiday season of Thanksgiving and celebrating Christ’s birth.
We hope you’ll experience peace, joy and good health and join us in sharing our gratitude for all that have blessed our lives. #GiveThanks
And if you love making Christmas ornaments, take a look at these ideas:
- Quick and Easy Cameo Christmas Ornaments
- Simple Frosted Pinecone Christmas Ornaments
- Make a Christmas Star Ornament with Bottlebrush Trees
- Vintage Doorplate Christmas Ornaments
- Stunning DIY Glitter Ornaments
- Easy Metal Tinsel Christmas Ornaments
If you like to upcycle, you need to see this Christmas decor DIY using toilet paper rolls!
You won’t believe the transformation!
Click here for tips for storing and organizing your ornaments and Christmas decorations.

Please Pin this post, save it for later and share it with a friend.
Sharing is caring!
- Personalized Christmas Ornament Supplies:
- Video: How to Make Personalized Ornaments
- Ornament Base
- Prepare Photographs for Personalized Christmas Ornaments
- Transfer Photos onto Ceramic Tile
- Revealing the Photos
- Attach Hanger to Personalized Christmas Ornaments
- Embellish Personalized Christmas Ornament
- Personalized Christmas Ornaments
Personalized Christmas Ornament Supplies:
To create these unique handmade personalized Christmas ornaments you’ll need:
- arabesque tile
- laser copies, black & white or color
- paper punch, scissors, paper trimmer
- photo transfer medium
- paint brush
- sponge
- E6000 adhesive
- paperclips
- ribbon
Disclosure: This post contains affiliate links or referral links for your convenience. It is a way for this site to earn advertising commissions by advertising or linking to specific products and/or services. Click here to read my full disclosure policy.
Do you always feel that you’re running around with your head cut off during the holiday season?
There’s always so much to do!
Not only are there gifts to buy, parties to plan, and Christmas baking on your to do list, but you also want to enjoy the season.
After all it is the most wonderful time of the year.
To help you stay organized this Christmas we’ve put together a FREE printable Christmas planner.
Get a handle on all of your Christmas to-dos early this year.
Just click on the button below to download your planner today!
And if you’re looking for more ideas to reduce Christmas stress, click here for 10 ways to prepare for Christmas early.

Video: How to Make Personalized Ornaments
Ornament Base

If you’ve been following along for a while now, you know that we like to use things we already have on hand.
These arabesque ceramic tiles were left over from another project and we thought they’d be a darling base for our personalized Christmas ornaments!

In order to have plenty of ornaments, we bought a couple more sheets of tiles at Lowe’s.
In fact, the tiles come 15 on a sheet for $8, so that’s pretty reasonable per ornament.
First, pull each tile from the mesh tile backing.
If you’re new here, welcome! We’re so glad you’re here.
Let us introduce ourselves, we’re Michelle and Steph, a mom and daughter team who love to DIY and decorate our homes.
Not only are we passionate about making our homes warm, comfortable and unique, but it’s our mission to help you create that same feeling in your own home.
You’ll find ideas for repurposing, creating, decorating and making your home truly yours, while always mindful of a tight budget.
Undoubtedly we love finding ways to make your home look high-end on a small budget.
Plus you’ll also find a recipe or two as we share our family favorites with you.
We’d love it if you’d join our community of doers so you won’t miss any inspiration for your home.
We love new friends.
Prepare Photographs for Personalized Christmas Ornaments

To create a warm and cozy nostalgic feel this Christmas season, we gathered many old family photos from Christmases past.
Using a digital program, to scan the images and sized them each to a 2 1/2″ square.
Once sized print, black and white or color with a laser printer on regular printer paper.
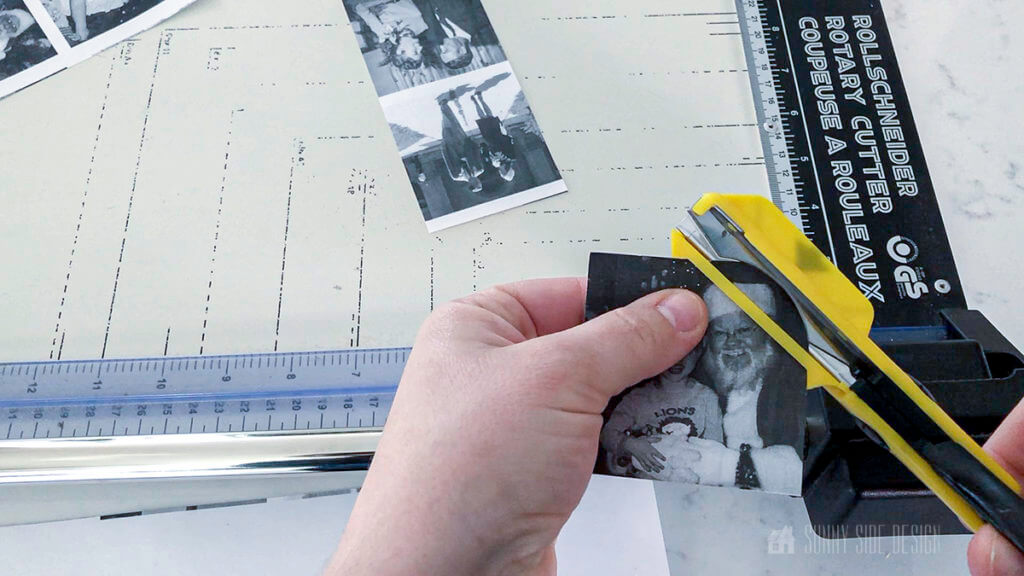
It should be noted, the images can then be cut to any shape or size.
Most of ours were cut in a circle with a paper punch.

NOTE: The images must be printed with toner for the photo transfer medium to work properly.
If you don’t have access to a laser printer, you can have your photos copied at your local print shop.
Images can be black and white OR color.
Let’s stay connected! Follow us on social media!
Transfer Photos onto Ceramic Tile
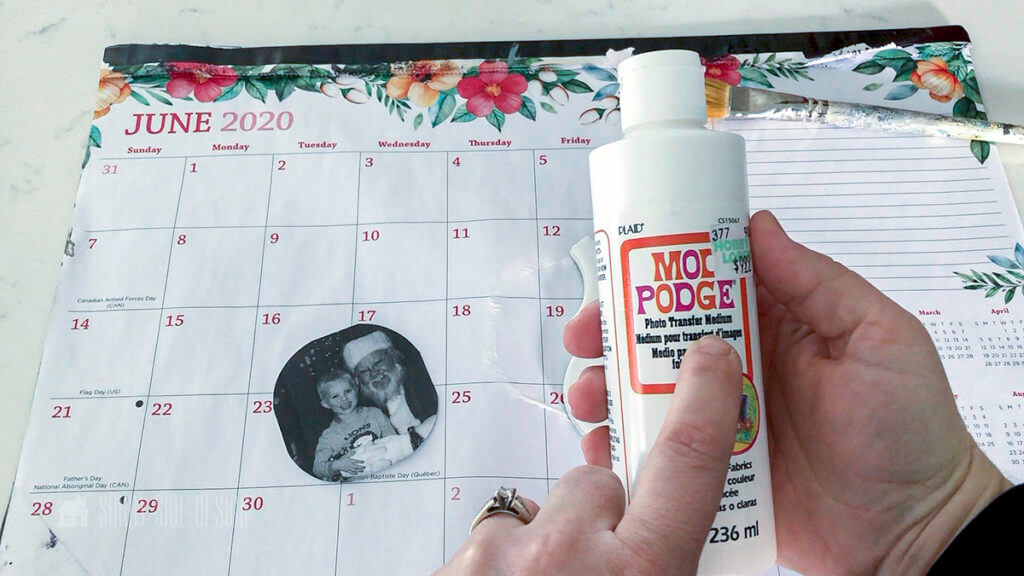
After each of the images have been cut to size, we used photo transfer medium by Mod Podge to apply the images to the ceramic tile.
First, apply a layer of photo transfer medium onto the front surface of an image.
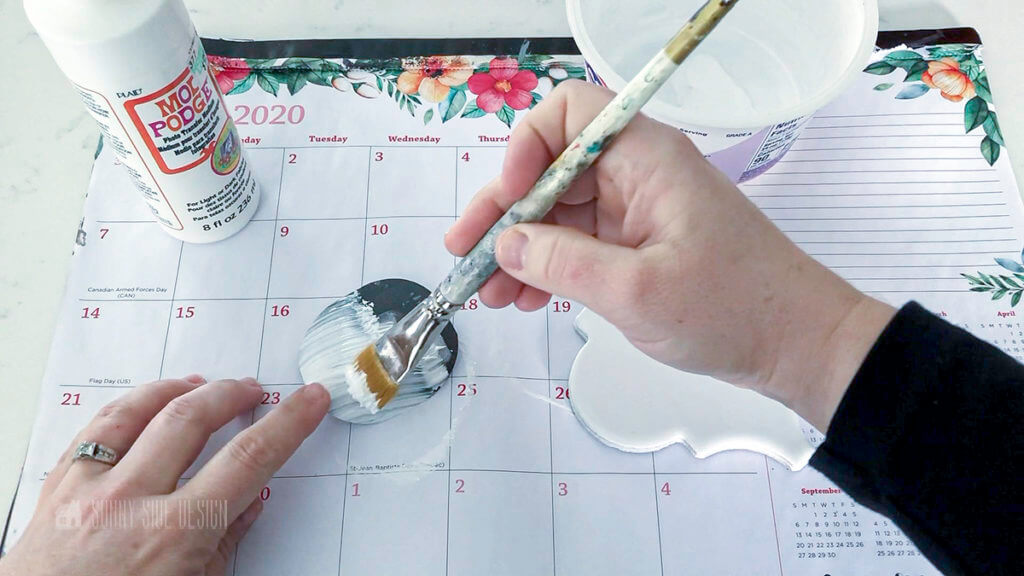
Then press it into place onto the ceramic tile with the printed image against the tile.

Rub the surface to release any air bubbles and wipe off any excess product that may squish out.
Then allow to sit for 24 hours.
Revealing the Photos

These personalized Christmas ornaments really start to come to life with this next step.
After they have dried for 24 hours, take a wet sponge and ring out as much water as you can.
Then firmly press the sponge in a dabbing motion to penetrate the paper.
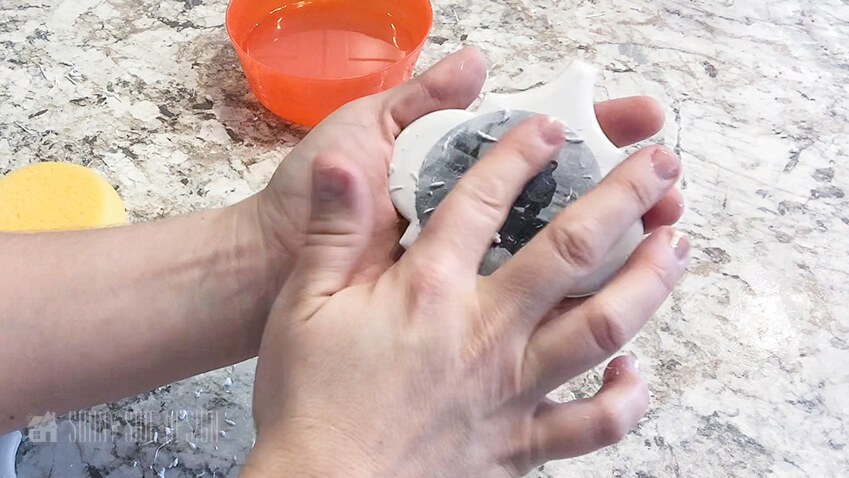
Allow to sit for 2 minutes.
Then take the sponge, again removing any excess water, gently rub the paper surface in a circular motion.
The paper will start to pull up and peel off of the ceramic tile.

For best results, this step may need to be repeated a few times, removing thin layers of paper at a time.
After working on the first layer, we’d let ours sit for another minute or so.
Then again dab the tile with the sponge, using our fingers, we were able to rub the excess paper off of the tile surface.
NOTE: This process may be easier to see in our video tutorial.
Through trial and error we found that the less wet the paper is in this step we achieved better results.
If the paper was too wet, some of our ornaments resulted in a few torn looking edges.
Which in our case does look kind of cool seeing that we’re going for a vintage feel.
Attach Hanger to Personalized Christmas Ornaments
After each image has been revealed, the hanger for each personalized Christmas ornament can be attached.
We used a large paperclip cut in half to create a loop on the top edge for ribbon. Initially we used gorilla glue to attach each paperclip, but that didn’t adhere well enough to hold the weight of the tile.
So then we used E6000 adhesive, which worked much better! Finally, allow it each to dry for 24 hours.
Another option for creating a hanger for your personalized Christmas ornament would be to drill a small hole at the top of the tile with a ceramic tile bit.
Then a small cord or monofilament line can be threaded through the hole.
Embellish Personalized Christmas Ornament
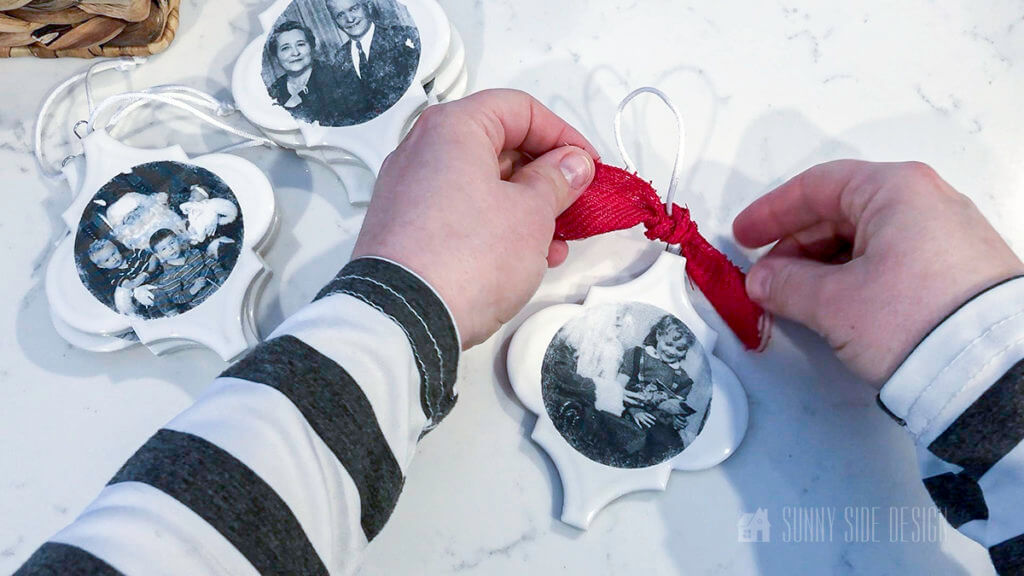
Last but not least, we embellished our personalized Christmas ornaments.
First we looped a piece of white satin cord through the paperclip to create a hanging loop.
Then we embellished each with a little red ribbon.
Personalized Christmas Ornaments

Creating these personalized Christmas ornaments are really pretty simple.
However, they do require a bit of wait time because of the cure time for the photo transfer medium and glue.
Overall, I must say I LOVE the way they turned out.
Not to mention the fact, that they’ve become quite a conversation piece around my Christmas tree.

They looks so beautiful on my Christmas tree and would also be great package topper.
And who wouldn’t love to receive a few of these heirloom personalized Christmas ornaments as a gift this year.

Certainly these personalized sentimental Christmas ornaments are a treasured keepsake!

Click here for more than 75 handmade Christmas ornament ideas.
You’ll find more ideas for decorating your Christmas tree with a cozy traditional feel here.
And for more decorating ideas for your home this Christmas see my Christmas home tour.
Also you’ll want to check out Steph’s family room decorated for Christmas.
She has definitely put her personality into decorating her home for Christmas!
If you’re looking for some festive ideas for your yard then you’ll want to see the best outdoor Christmas decorating ideas made easy.
Enjoying this post?! Please Pin It, save it for later and share it with a friend.
Sharing is caring!
Looking for more DIY ornament ideas, then see how to make stunning Glitter Ornaments.
We hope you’ve enjoyed this tutorial for making these personalized Christmas ornaments.
Please comment below and share how you would like to use them this Christmas.
We’d love to know if you have other ideas using tiles for Christmas ornaments too.
Of course, we are always look for new and creative ideas to decorate our homes for Christmas.
If you’re new here, WELCOME! We love having new readers and friends!
You can learn more about us here.
Let’s stay connected! Subscribe to our free newsletter so you don’t miss any inspiration for your home.
Please PIN and save for later, and share with your friends! Sharing helps grow our following!
Thanks for stopping by Sunnyside Home. Empowering you to create a home you love!
Retailers We Love
- Anthropologie
- Birch Lane
- Crate & Barrel
- Joss and Main
- Lampsplus
- Mark & Graham
- One Kings Lane
- Pottery Barn
- Rejuvenation
- Serena & Lily
- Wayfair
- West Elm
- Williams Sonoma
- World Market
Be sure to follow us on Pinterest for even more home decor and DIY ideas.
To see what we are working on before it’s on our blog, follow us on Instagram.
You will also find our video tutorials on our YouTube channel.