Ready to add a spooky touch to your Halloween decor? Making your own witch broom is a fun and easy DIY project that anyone can do!
Halloween is just around the corner, and the kids are already buzzing with excitement, ready to dive into spooky decorations!
While I’ve been creating that spooky vibe in my home, my youngest has had a blast decorating the front yard.
I just gave him a bunch of Halloween decor and let him go at it and let me tell you he got pretty creative.
Plus he had so much fun!
Do you think it’s too early to add Halloween decorations around your home?
It’s never too early for my kids.
If you’re looking for a fun, easy and affordable Halloween decoration, making your own witch’s broom is the perfect project.
With just a few simple materials—like sticks foraged from the yard and a dollar store plunger—you can create a charming Halloween witch broomstick that’s the perfect table top decor.
Let’s roll up our sleeves, get creative, and make some magic together!
Sunny Side Design is a participant in the Amazon Services LLC Associates Program, an affiliate advertising program designed to provide a means for sites to earn advertising fees by advertising and linking to Amazon.com. As an Amazon Associate, this blog earns from qualifying purchases with no additional cost to you. Click here to read our full disclosure policy.
Witch Broom Supplies

For this easy Halloween decor you’ll need a spooky looking stick.
We went out in my parents backyard and found the perfect sticks, covered in moss.
For the base of the witch broom we’re using a dollar store plunger, leftover from the Christmas bells we made last year.
Of course you can also make your witch broom with the attached plunger handle, but I think the stick looks spookier!
And to create the broom bristles we’re using jute.
We found this huge spool of jute at the thrift store a few months back and it’s come in handy for quite a few projects.
You’ll also need a glue gun and scissors.
That’s it!
Are you enjoying this project? Please Pin It, save it for later and share it with a friend.
Sharing is caring!
Attach Stick to Plunger
To find the perfect sticks for our witch brooms we foraged through my parents backyard looking for sticks with twists and knobs.
Cut the stick to the desired length you would like for your witch broom.
Ours are about 18-24″ long, as I plan to use my witch brooms as table top decor.

Then remove the handle from the plunger and liberally apply hot glue inside the hole and attach your stick.
If you’re new here, welcome! We’re so glad you’re here.
Let us introduce ourselves, we’re Michelle and Steph, a mom and daughter team who love to DIY and decorate our homes.
Not only are we passionate about making our homes warm, comfortable and unique, but it’s our mission to help you create that same feeling in your own home.
You’ll find ideas for repurposing, creating, decorating and making your home truly yours, while always mindful of a tight budget.
Undoubtedly we love finding ways to make your home look high-end on a small budget.
Plus you’ll also find a recipe or two as we share our family favorites with you.
We’d love it if you’d join our community of doers so you won’t miss any inspiration for your home.
We love new friends.

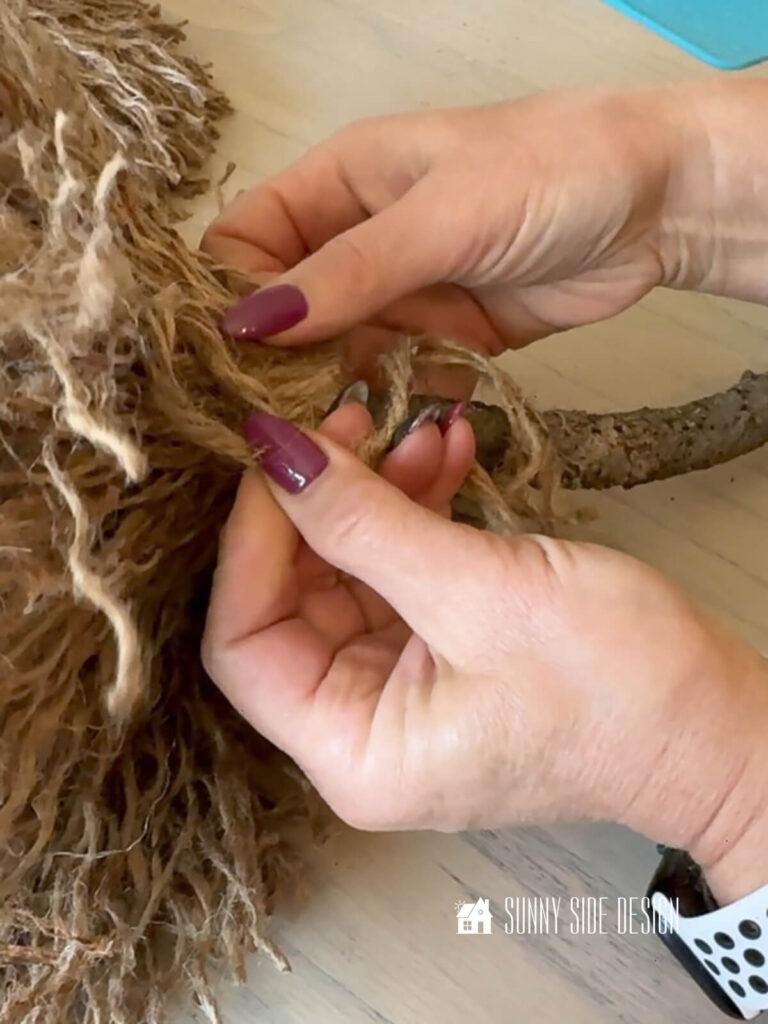
Attach Jute
First you’ll want to cut several lengths of jute.
By the way, the thicker the jute, the fewer pieces you’ll need.
Our jute is 6 ply.
To determine how long to cut them, hold up the jute on the stick to decide how long to cut it.
Then cut 10-20 pieces so you can begin to attach them.

For our tabletop witch broom we placed the top of the jute about 2″ up from the top of the plunger and let it trail off the plunger 2-3″.
Use hot glue to secure your first row around the stick.

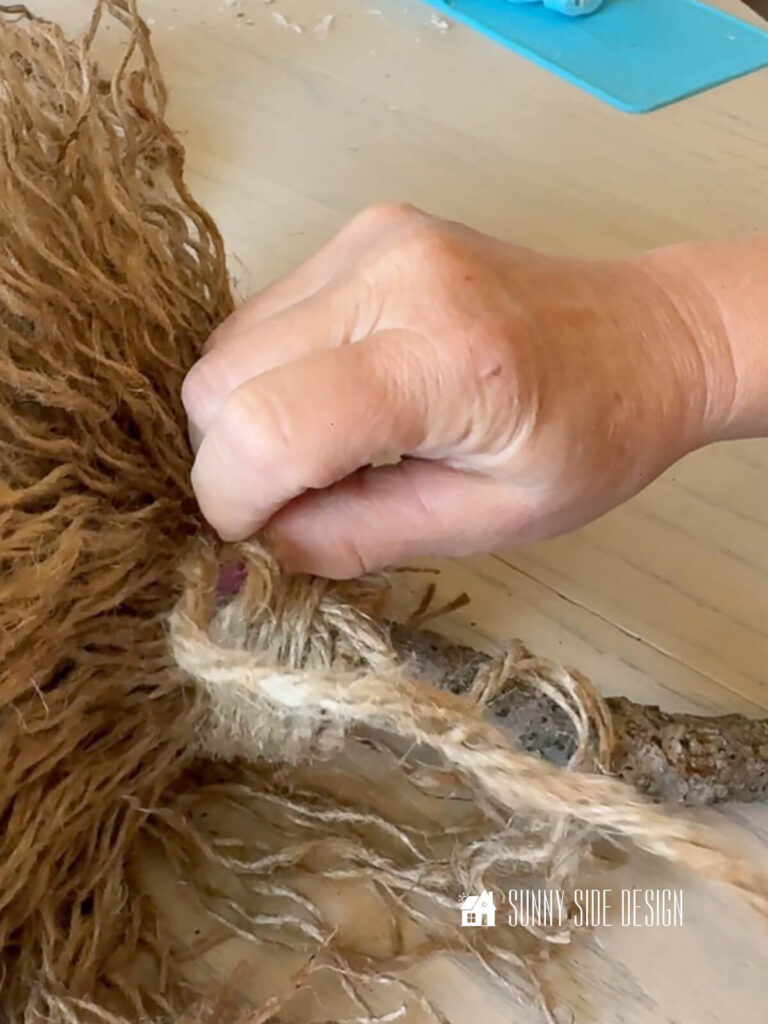
Continue adding jute with a second row
After two rows of jute was secured around our stick we felt like we needed to add shorter pieces of jute on the the plunger itself.

Continue to add jute until it starts to cover the plunger.
Trim and even out the jute as you go.

When the plunger is mostly covered unravel each piece of jute and then you’ll be able to see if you need to fill in any areas with more jute.

Once ours was unraveled we decided to add one more row of jute.
Then unravel that row and fill in any areas as necessary.

Let’s stay connected! Follow us on social media!
Finish with a Macrame Wrapping Knot
To finish off our witch broom we used a macrame loop knot.
Begin by forming a loop with jute (we used 4 ply jute) and leave a tail that’s about 6″ long.
Then wrap the jute over the folded jute near the tail and continue wrapping to desired the width.


Once it’s wrapped around as much as you’d like cut the jute and leave a 6-8″ tail.
Then take the tail and place it through the loop, while keeping it held tight.
And finally take the tail near the stick side and pull.
This will pull the loop and the other tail and hide it in the wrapped section.
Then clip the tails.


Style and Enjoy
We created two witch brooms as part of my Halloween tablescape.
I believe they look so cute and spooky along with my skull napkin rings.
Now I think I need to plan a Halloween dinner party for my friends.
Is this a project you’d like to make for your Halloween decorations this year?
How would you style them?


Shop Witch’s Brooms

We hope you found some inspiration for your home this Halloween.
Please share your tips and ideas with us.
We love hearing from you!
If you’re new here, WELCOME! We love having new readers and friends!
You can learn more about us here.
Let’s stay connected! Join our DIY community of doers and you won’t miss the weekly updates and more inspiration for you always on a budget.
Sharing is caring!

Thanks for stopping by Sunny Side Design. Empowering you to create a home you love!
Retailers We Love
- Anthropologie
- Birch Lane
- Crate & Barrel
- Joss and Main
- Lampsplus
- Mark & Graham
- One Kings Lane
- Pottery Barn
- Rejuvenation
- Serena & Lily
- Wayfair
- West Elm
- Williams Sonoma
- World Market
Be sure to follow us on Pinterest for even more home decor and DIY ideas.
To see what we are working on before it’s on our blog, follow us on Instagram.
You will also find our video tutorials on our YouTube channel.
- Easy One Pot Beef and Cabbage Soup with a Kick

- Simple Valentine Heart Decor Using Vintage Linens & Lace
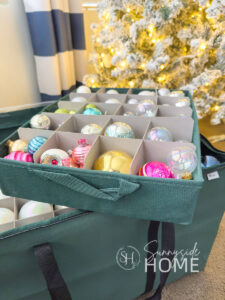
- How to Store and Organize Christmas Decorations
- Easy Last Minute Neighbor Christmas Gifts with PrintableTag