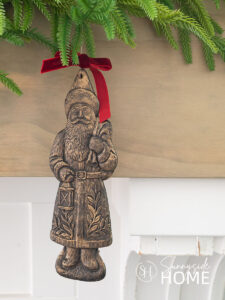
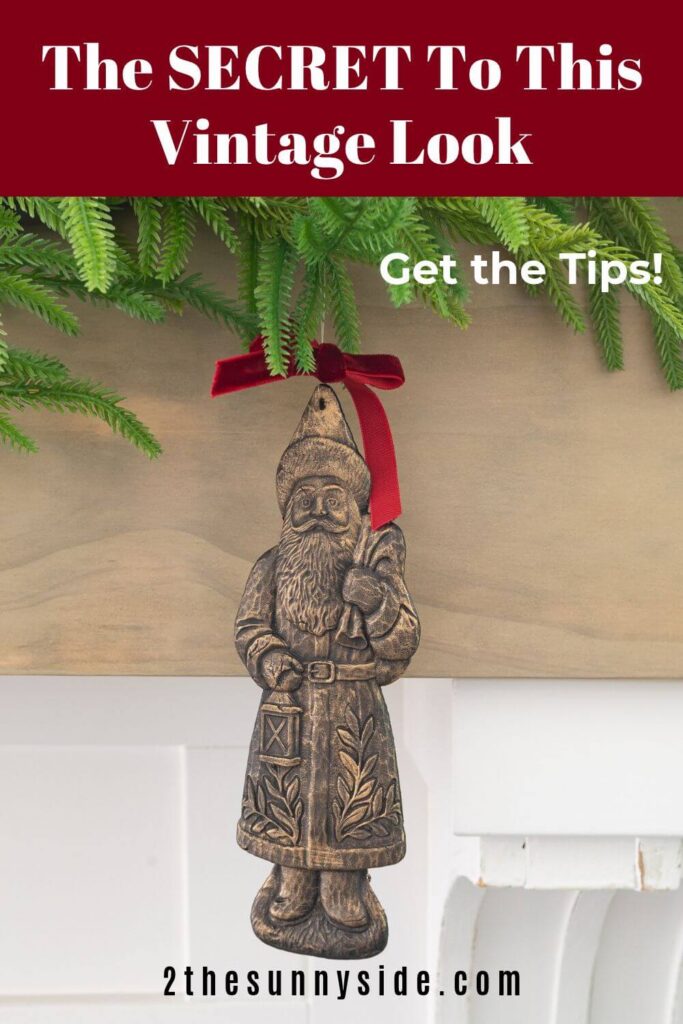
Create beautiful vintage-inspired faux brass Santa ornaments with this easy, budget-friendly DIY! You can make12 stunning ornaments for less than $30, and the aged brass finish looks just like an expensive antique.
You know how much I love adding a little vintage charm to our Christmas tree, especially when I can get that high-end look without the high-end price tag!
While browsing online, I came across the most beautiful aged brass Santa ornament, but at $27 a piece, I just couldn’t justify the cost.
That’s when I decided a little DIY was in order!
We ended up making 12 gorgeous faux brass Santa ornaments for less than $30.
Can you believe that?
Buying them would have cost me more than $300!
Not only did I save a bundle, but this turned out to be such a fun, relaxing little project.
I love creating a new ornament for my tree each year, and I’m absolutely thrilled with how these turned out.
The finish looks so much like aged brass that you’d never guess they were homemade!
The best part?
You only need a few simple supplies, and you might already have some tucked away in your craft stash.
So grab a cup of something cozy, and let’s make some beautiful vintage-inspired Santa ornaments together!
Sunnyside home is a participant in the Amazon Services LLC Associates Program, an affiliate advertising program designed to provide a means for sites to earn advertising fees by advertising and linking to Amazon.com. As an Amazon Associate, this blog earns from qualifying purchases with no additional cost to you. Click here to read our full disclosure policy.
What You’ll Need to Make Vintage Santa Ornaments
The best part about this DIY is that you only need a handful of simple supplies to create these beautiful vintage-inspired Santa ornaments!
You may even have a few of these tucked away in your craft stash already, making this project even more budget-friendly.
Here’s what you’ll need to get started:
- Santa mold
- air dry clay
- corn starch (optional)
- black paint
- European gold Rub ‘n Buff
- ribbon (optional)
- ornament hook or fishing line
Are you enjoying this project? Please Pin It, save it for later and share it with a friend.
Sharing is caring!
Making the Clay Santa Ornaments
Start by preparing your mold.
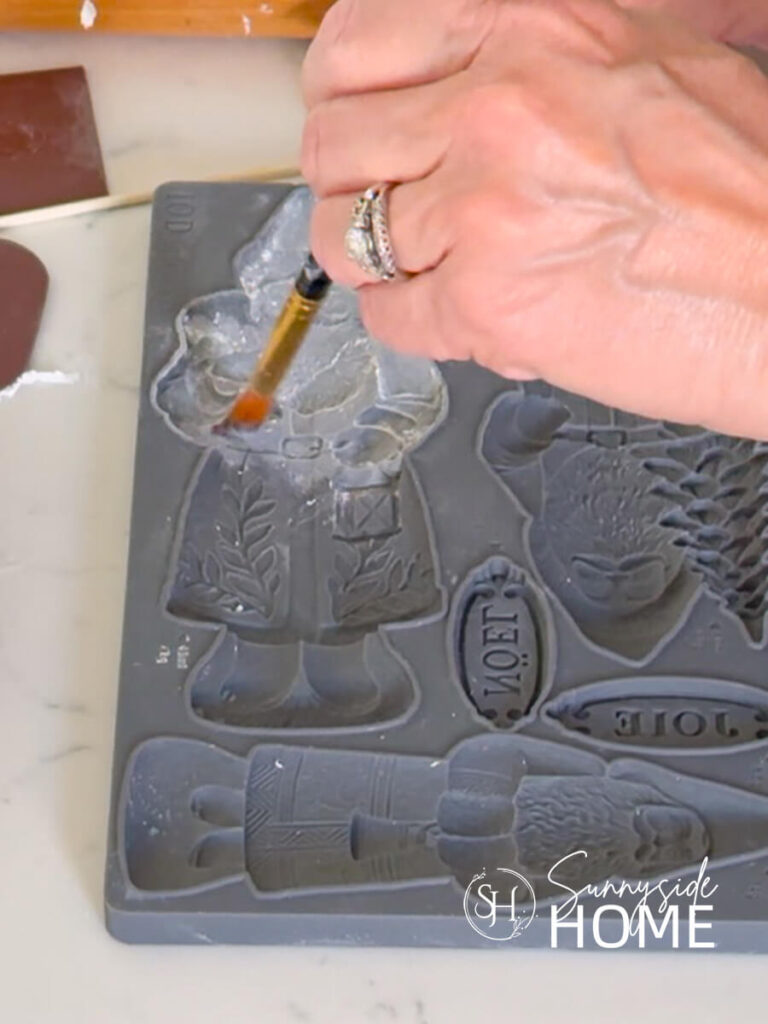
Using a small paintbrush, dust the inside with cornstarch to help the clay release more easily.
This step is optional, but after trying it both ways, I definitely prefer using the cornstarch!
Next, take a piece of air-dry clay and knead it in your hands until it softens and becomes pliable.
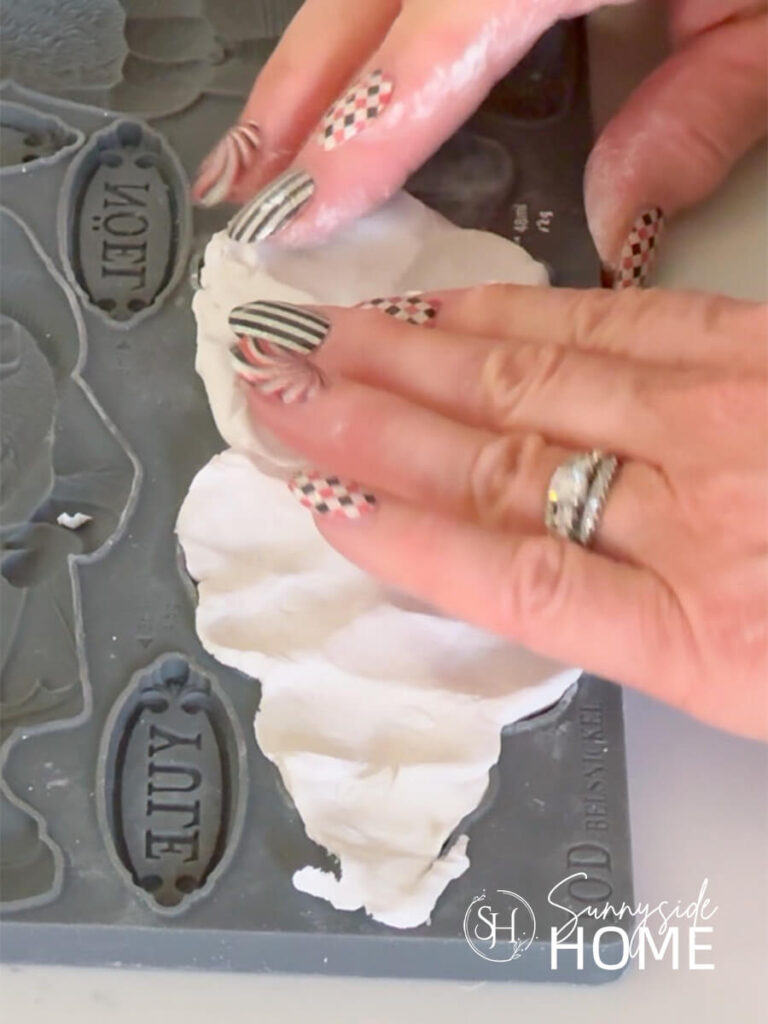
Press the clay firmly into the Santa mold, making sure to fill every little detail.
I found it helpful to use a rolling pin to smooth the surface and press the clay evenly into the mold.
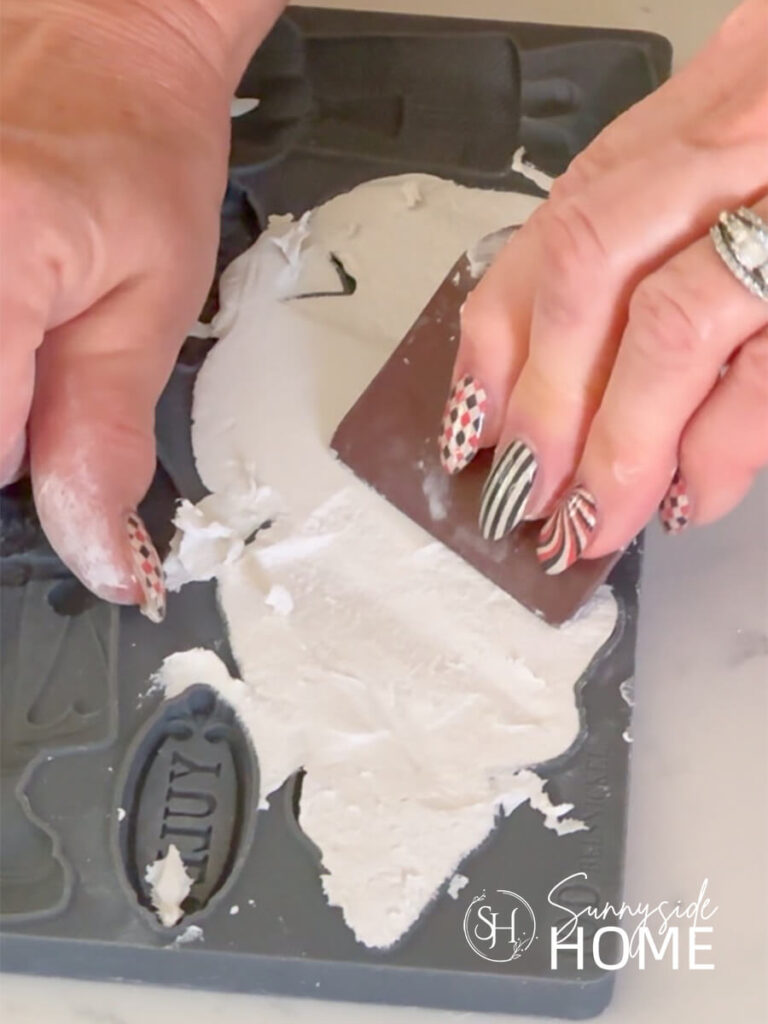
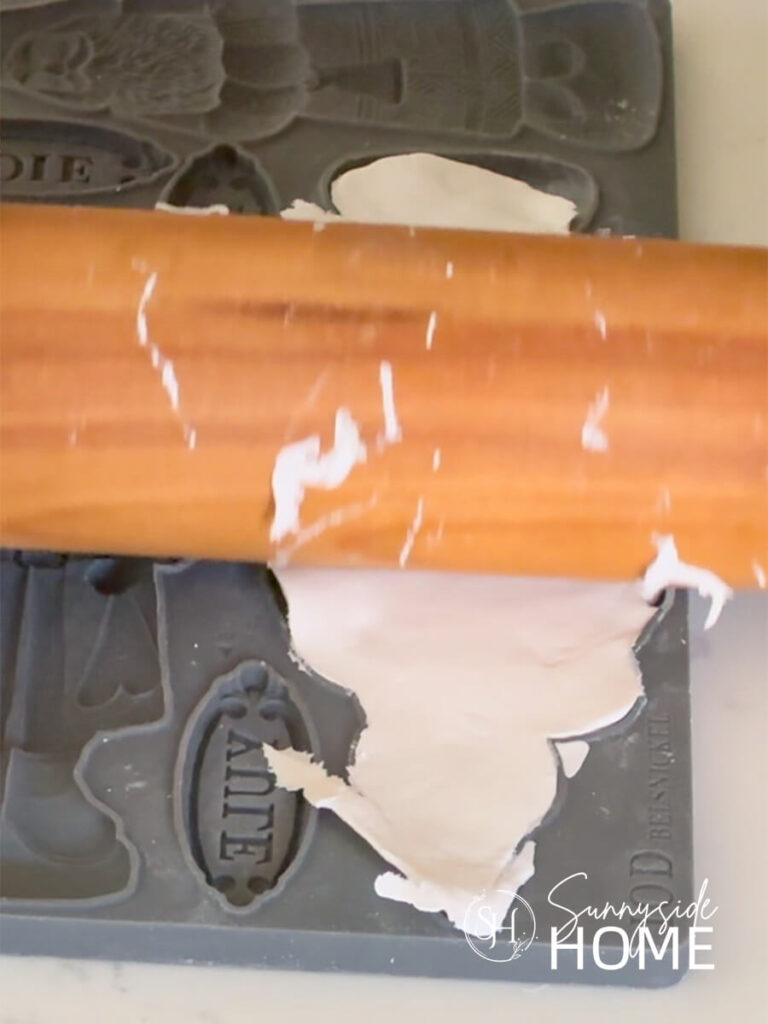
Then, using a plastic scraper, remove the excess clay by starting in the center and pulling toward the outer edge.
Repeat until the clay is level with the border of the mold.
You can give it one more gentle roll to smooth the back before flipping the mold over and carefully releasing your Santa.
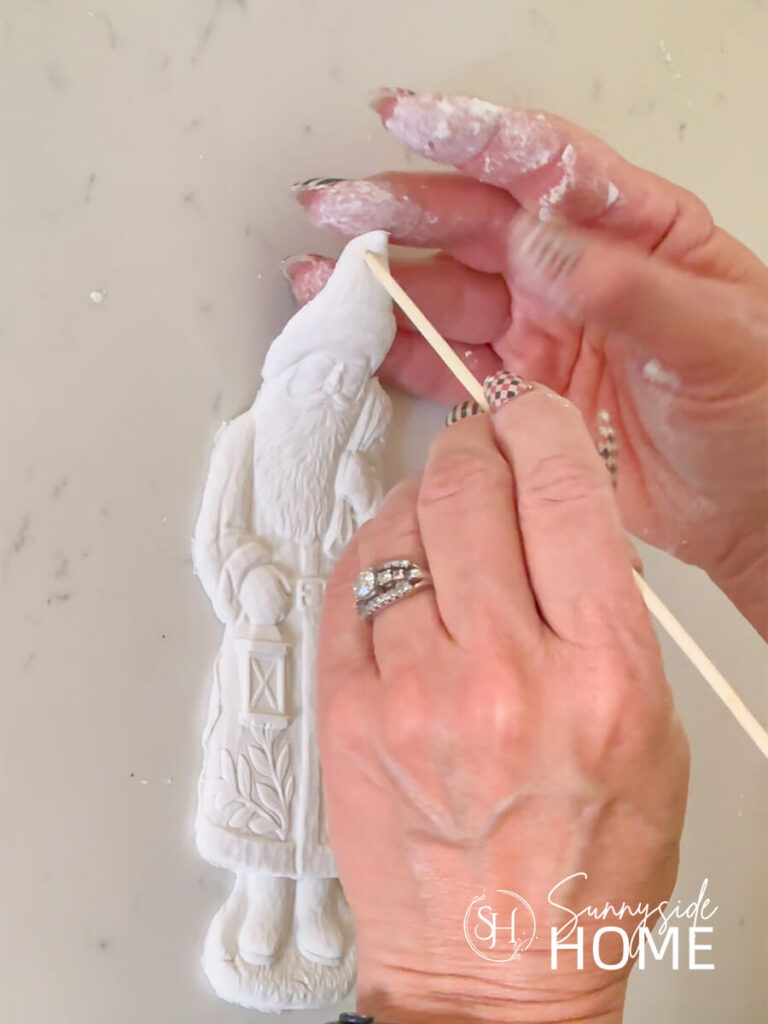
Finally create a hole in the top of your Santa with either a small straw or a skewer.
Place each molded Santa on a piece of parchment paper set on a cooling rack.
This allows air to circulate around the entire ornament as it dries.
Let them dry for approximately 24 hours, or until they’re completely dry.
Once dry, use fine-grit sandpaper to smooth any rough edges or imperfections before moving on to that beautiful faux brass finish.
If you’re new here, welcome! We’re so glad you’re here.
Let us introduce ourselves, we’re Michelle and Steph, a mom and daughter team who love to DIY and decorate our homes.
Not only are we passionate about making our homes warm, comfortable and unique, but it’s our mission to help you create that same feeling in your own home.
You’ll find ideas for repurposing, creating, decorating and making your home truly yours, while always mindful of a tight budget.
Undoubtedly we love finding ways to make your home look high-end on a small budget.
Plus you’ll also find a recipe or two as we share our family favorites with you.
We’d love it if you’d join our community of doers so you won’t miss any inspiration for your home.
We love new friends.
Applying the Faux Brass Finish
To create that beautiful faux brass finish, start by painting your completely dry Santa ornaments black.
This dark undercoat is the secret to achieving that realistic, aged brass look!
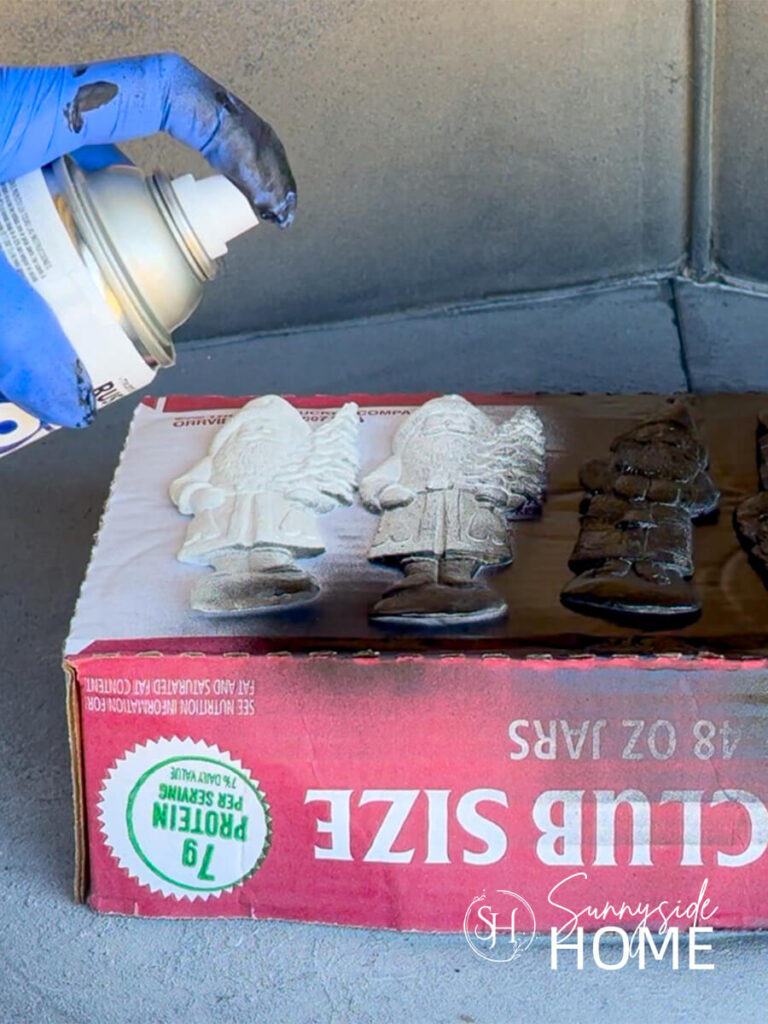
I used flat black spray paint, but black craft paint or chalk paint will work just as well.
Once the paint is completely dry and cured, it’s time for the fun part, bringing your Santas to life with Rub ’n Buff!
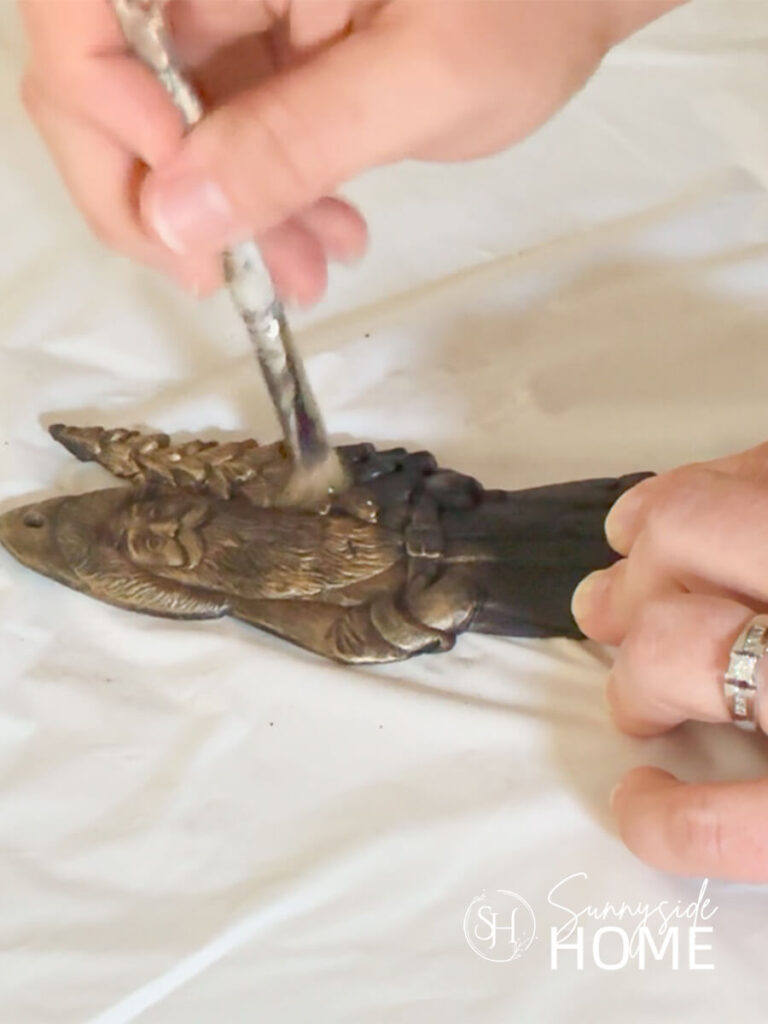
After experimenting, I found that European Gold Rub ’n Buff over black gives the most convincing aged brass finish.
Place a small dab of Rub ’n Buff on a paper plate or paint palette, then pick up just a little with an old, sprung slightly stiff paintbrush.
Using a light touch, gently work the finish onto your Santa in a circular motion.
Start with a small amount and gradually build up the finish until you achieve that beautiful, antique brass look.
You can always add more as you go, so there’s no need to rush!
Once your ornaments are completely covered and you’re happy with the finish, let them dry for about an hour.
Finally, gently buff each Santa with a soft, lint-free cloth to bring out that gorgeous, vintage-inspired sheen.
Adding the Finishing Touches
Now for the finishing touches!
To hang your beautiful vintage-inspired Santa ornaments, simply add a hook, ribbon, or loop of your choice.
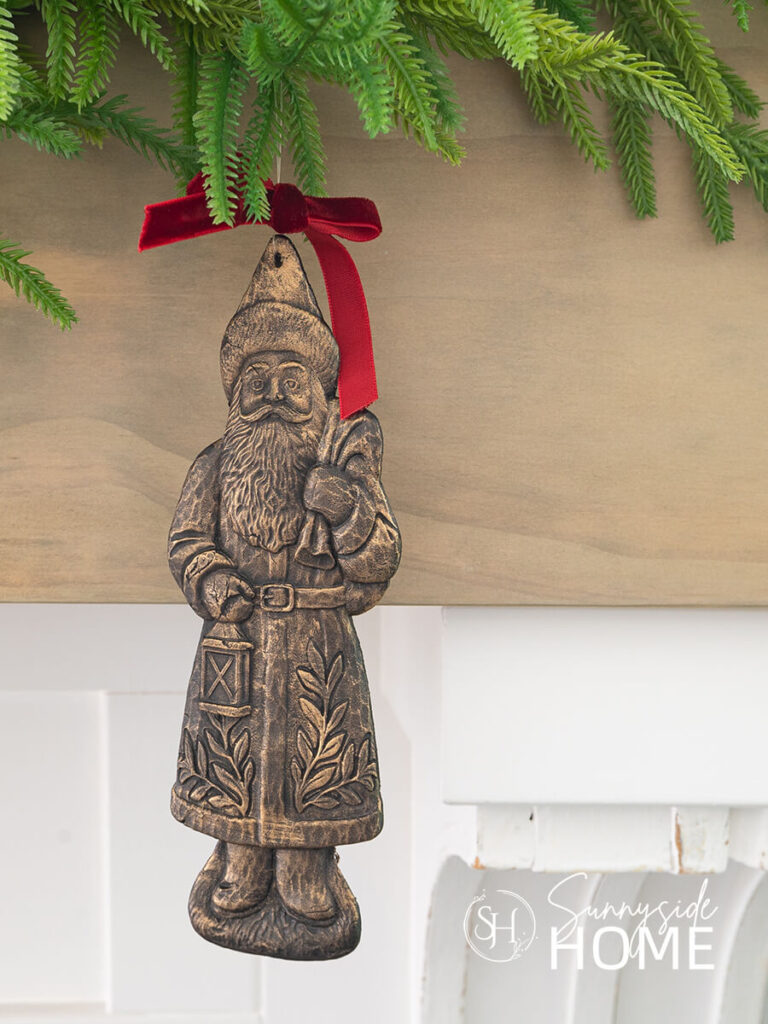
I used a small loop of fishing line for a nearly invisible hanger, then tied a pretty red velvet bow onto each one.
I love how the rich red velvet adds that classic Christmas touch and complements the aged brass finish beautifully.
It’s such a simple detail, but it really makes these little Santas feel like treasured vintage ornaments!
Let’s stay connected! Follow us on social media!
Style and Enjoy Your Vintage Santa Ornaments
These beautiful vintage-inspired Santa ornaments are such a charming addition to your Christmas decorating!
Of course, they look lovely hanging on the Christmas tree, but don’t stop there.
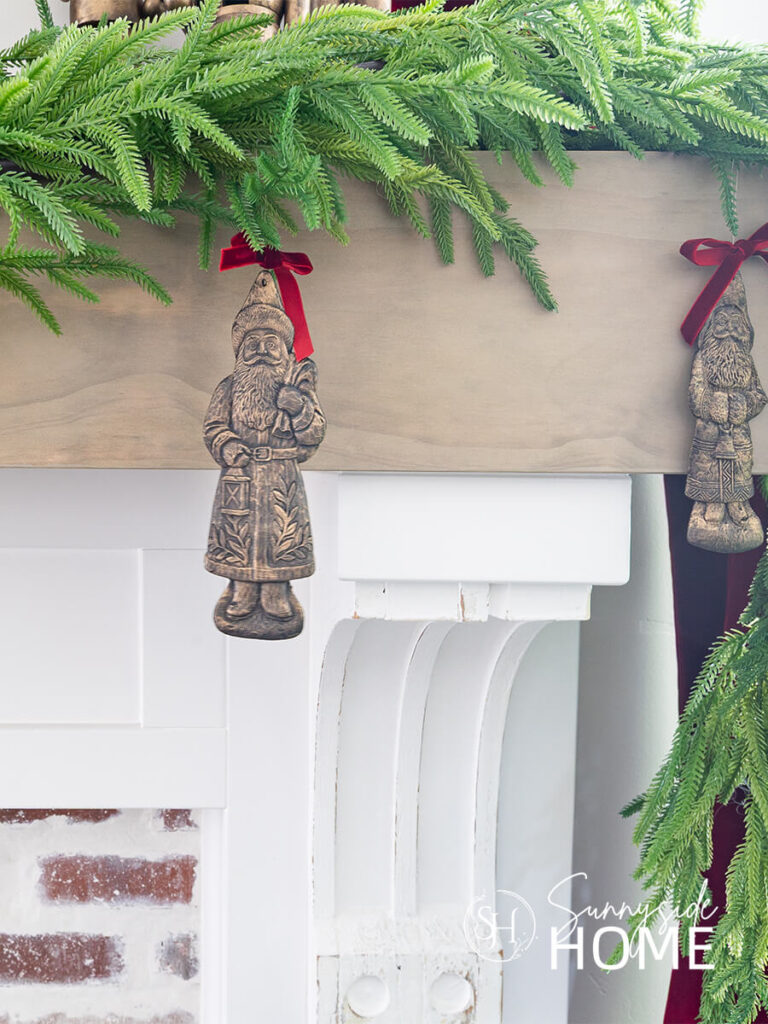
I think they’d be equally stunning tucked into a garland draped across your mantel or nestled among the greenery of an evergreen wreath in an entryway.
That gorgeous aged brass finish paired with a little red velvet adds such a timeless, old-world charm wherever you display them.
Now I’m curious, where will you hang your Santa ornaments?
On the tree, the mantel, or somewhere unexpected?
I’d love to hear how you plan to use yours
Frequently Asked Questions
How long does air-dry clay take to dry? Air-dry clay typically takes 24–72 hours to dry completely, depending on the thickness of your project, the brand of clay, and the humidity in your home. These Santa ornaments should take about 24 hours to dry, especially if they’re fairly thin. Placing them on a cooling rack allows air to circulate around the ornaments and helps them dry evenly. If they’re still a little damp after 24 hours, you can speed things up by placing them in an oven at 200°F for about 20 minutes, provided your clay manufacturer’s instructions allow it. Let them cool completely and make sure they’re thoroughly dry before applying the paint and faux brass finish.
Will the faux brass finish last? Yes! The faux brass finish should last for many Christmases when properly applied and stored with care. Handle your Santa ornaments gently and store them in a cool, dry place, ideally wrapped in tissue paper to prevent any chipping.
Shop

More Christmas Ornament DIY Ideas to Try
- Simple Frosted Pinecone Christmas Ornaments
- Christmas Star with Bottlebrush Trees
- Metal Tinsel Christmas Ornaments
- Quick and Easy Cameo Christmas Ornaments to Make
- 75+ Easy Homemade Christmas Ornament Ideas
- How We Made Christmas Bells Using Dollar Tree Items
- How to Make Christmas Bell Decorations
- Personalized Christmas Ornaments with Nostalgic Memories
- Stunning DIY Glitter Ornaments
- How to Make Vintage Door Plates into Christmas Ornaments
Final Thoughts
We just love how these vintage-inspired faux brass Santa ornaments turned out!
What started as a $27-per-ornament splurge turned into a fun, relaxing DIY that gave me 12 beautiful ornaments for less than $30.
The aged brass finish looks so convincing, and I love that I can add a little old-world charm to my Christmas tree without spending a fortune.
There’s something special about creating a new ornament each year and adding another little piece of handmade charm to our holiday memories.
I’d love to hear what you think!
Would you try making these Santa ornaments for your own Christmas tree?
Leave me a comment below and let us know.
And if you make them, I’d love to see how you style them in your home!
Please share your tips and ideas with us.
We love hearing from you!
If you’re new here, WELCOME! We love having new readers and friends!
You can learn more about us here.
Let’s stay connected! Join our DIY community of doers and you won’t miss the weekly updates and more inspiration for you always on a budget.
Sharing is caring!
Thanks for stopping by Sunnyside Home. Empowering you to create a home you love!

Retailers We Love
- Anthropologie
- Birch Lane
- Crate & Barrel
- Joss and Main
- Lampsplus
- Mark & Graham
- One Kings Lane
- Pottery Barn
- Rejuvenation
- Serena & Lily
- Wayfair
- West Elm
- Williams Sonoma
- World Market
Be sure to follow us on Pinterest for even more home decor and DIY ideas.
To see what we are working on before it’s on our blog, follow us on Instagram.
You will also find our video tutorials on our YouTube channel.
What’s New . . .
- How to Make Vintage Inspired Santa Ornaments

- The Best Sweet Potato Casserole with a Pecan Topping
- 25 Beautiful Thanksgiving Centerpiece Ideas You Can Create

- Last Minute Outdoor Halloween Decorations with Thrifted Finds