A few weeks back we took you on a before and after home tour of my parents dated 90’s home renovation. Clearly they have transformed the look and feel of their home with a re-imagined floor plan and new finishes, all while working with a modest budget.
Our home on the other hand is a new build. While we had the privilege of choosing all the finishes in our home prior to construction, we also planned for upgrades down the road.
To keep building costs down, we opted to go with several builders grade finishes. Over the past 8 years we’ve been able to tackle some of these areas creating a custom high end look on a budget.
Even though there are still several projects around our home I’d like to tackle, the upgrades we’ve added so far make a dramatic difference.
Join us today for my home tour. You’ll learn some of our favorite design hacks to make your home look more expensive on a budget.
Sunny Side Design is a participant in the Amazon Services LLC Associates Program, an affiliate advertising program designed to provide a means for sites to earn advertising fees by advertising and linking to Amazon.com. As an Amazon Associate, this blog earns from qualifying purchases with no additional cost to you. Click here to read our full disclosure policy.
Design Hacks That Create a High-End Look
If funds weren’t in the equation and you’re drawn to a high-end look, chances are you’d already be halfway there. You know what you like, items would be purchased, then all the elements would just need to be put together.
Reality is, many of us either don’t have funds for these types of purchases or even if we did, we’d rather use our money elsewhere.
Here are a few of our favorite design hacks to make your home look more expensive all while keeping it budget friendly.
- Paint to accentuate architectural details or create a focal point.
- Layer in lighting. Swap out builder’s grade light fixtures and incorporate task lighting in each room.
- Add window treatments. Whether it be curtains or a roman shade, window treatments help dress an otherwise empty window, soften the room and make the space feel complete.
- Use large scale artwork. A large piece of art automatically gives a wow factor and makes your space feel larger. When art is too small it can bring the room in and make the space feel smaller.
- Add wall moldings. From picture molding, board and batten, bead board to shiplap, incorporating any type of wall moldings immediately makes the home feel more custom and more expensive.
- Add built-ins. Similar to wall moldings, built-ins create a very customized look while adding a focal point to a room.
- Add or refresh an existing fireplace. What adds character and architectural detail more than a fireplace?
- Shop for dupes. If you can’t swallow the cost of a name brand item, shop for a similar look from a different brand. You might even create the same high-end look by refreshing thrift store finds.
Are you enjoying this project? Please Pin It, save it for later and share it with a friend.
Sharing is caring!
Home Tour

Starting off with the exterior of our home, curb appeal is everything. Nothing gives a better impression that you care for your home than a well manicured lawn and maintained flower beds.
Being a new build, we had to put in everything from a sprinkling system, grass and flower beds. We chose to incorporate shrubbery and perennials into our design to add variety with different shapes and textures. This also minimizes the need to plant new flowers annually unless we choose to, making this a low maintenance yard.
If you’re new here, welcome! We’re so glad you’re here.
Let us introduce ourselves, we’re Michelle and Steph, a mom and daughter team who love to DIY and decorate our homes.
Not only are we passionate about making our homes warm, comfortable and unique, but it’s our mission to help you create that same feeling in your own home.
You’ll find ideas for repurposing, creating, decorating and making your home truly yours, while always mindful of a tight budget.
Undoubtedly we love finding ways to make your home look high-end on a small budget.
Plus you’ll also find a recipe or two as we share our family favorites with you.
We’d love it if you’d join our community of doers so you won’t miss any inspiration for your home.
We love new friends.

[mailerlite_form form_id=2]
Entry
First Impressions: A High-End Entryway on a Budget
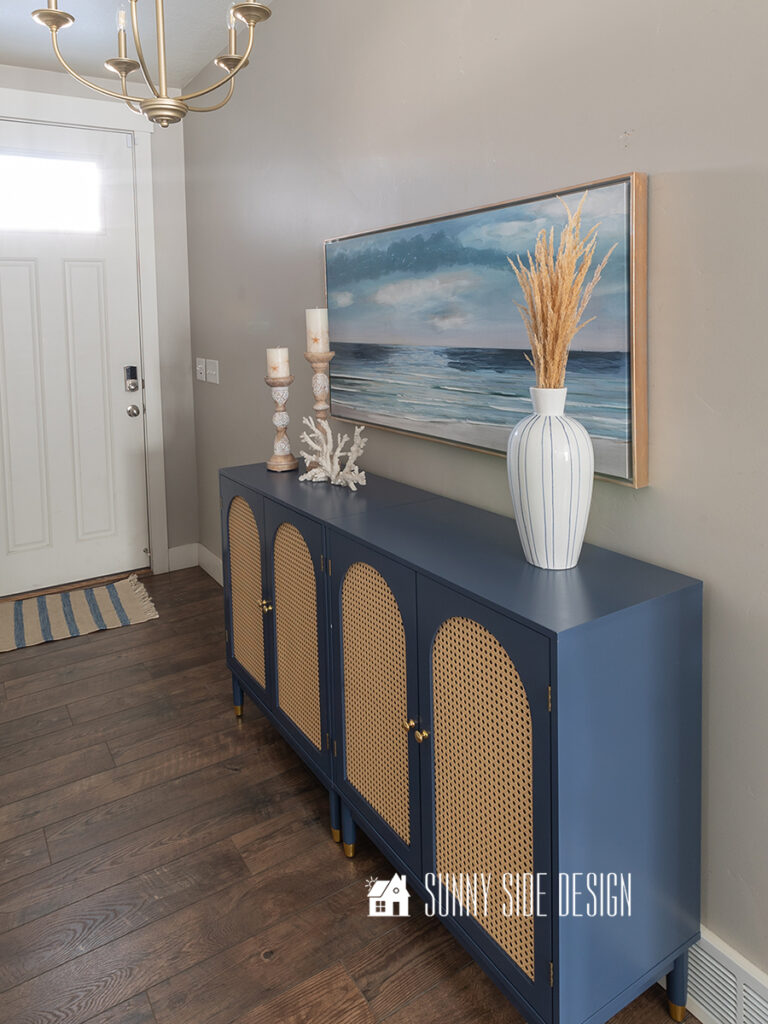
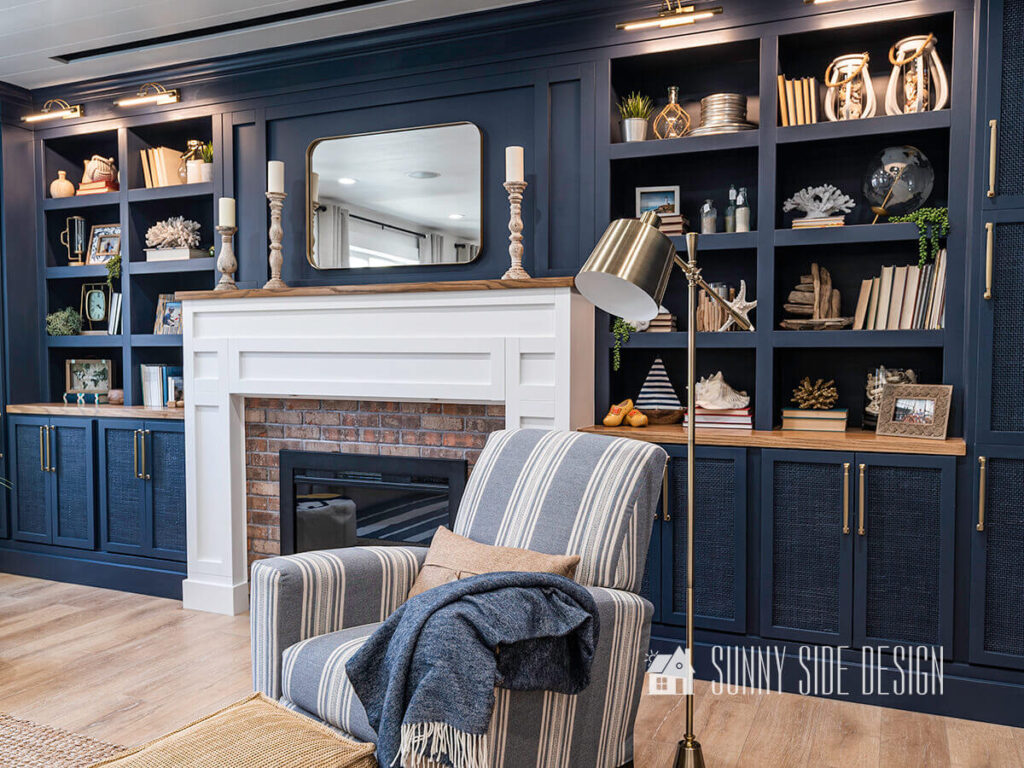
The moment guests step into our home, they are greeted with an ambiance that exudes elegance and modern charm, all achieved on a budget. The entryway, often the first impression of a home, sets the tone for what lies beyond. Here, it’s no different.
As our guests enter, their eyes are immediately drawn to the stunning navy blue cabinets. The deep, rich color creates a sense of sophistication and calm, inviting them to explore further. The rattan front doors of the cabinets add a touch of texture and warmth, perfectly complementing the modern aesthetic. The gold hardware provides a touch of opulence, making the space feel luxurious without breaking the bank.
Above the cabinets hangs a breathtaking piece of artwork depicting the ocean, evoking a sense of tranquility and endless possibility. This artwork not only adds a splash of color and beauty but also ties in seamlessly with the coastal theme that is subtly woven throughout the space.
On top of the cabinets, carefully selected coastal decor pieces are styled to perfection. Think seashells, driftwood, and delicate coral sculptures, each piece thoughtfully placed to create a cohesive and inviting look. These elements not only enhance the coastal vibe but also add a personal touch, making the space feel uniquely yours.
By combining affordable yet stylish elements, this entryway proves that high-end design doesn’t have to come with a high-end price tag. Our guests are left with a lasting impression of a home that feels both elegant and welcoming, all achieved through savvy decorating and a keen eye for detail.
Room by Room Decorating Ideas
Living Room
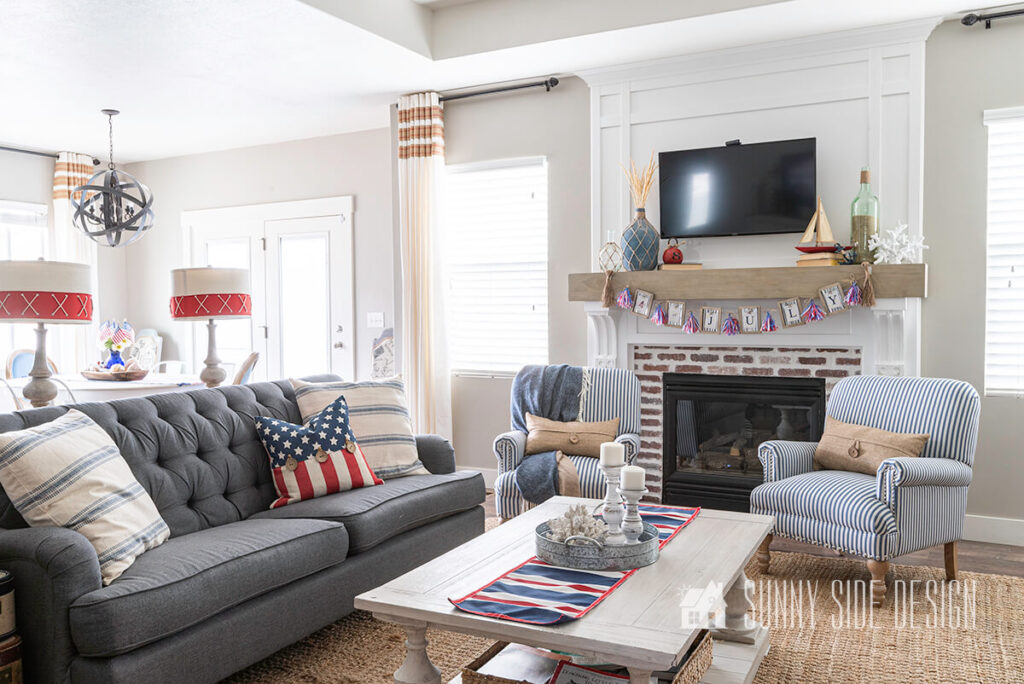
Continuing on with our home tour, we enter the living room.
This space has received the largest facelift so far.
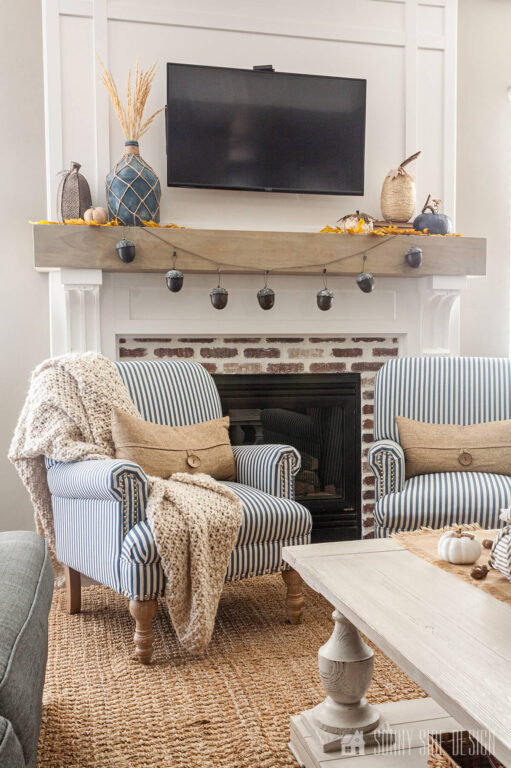
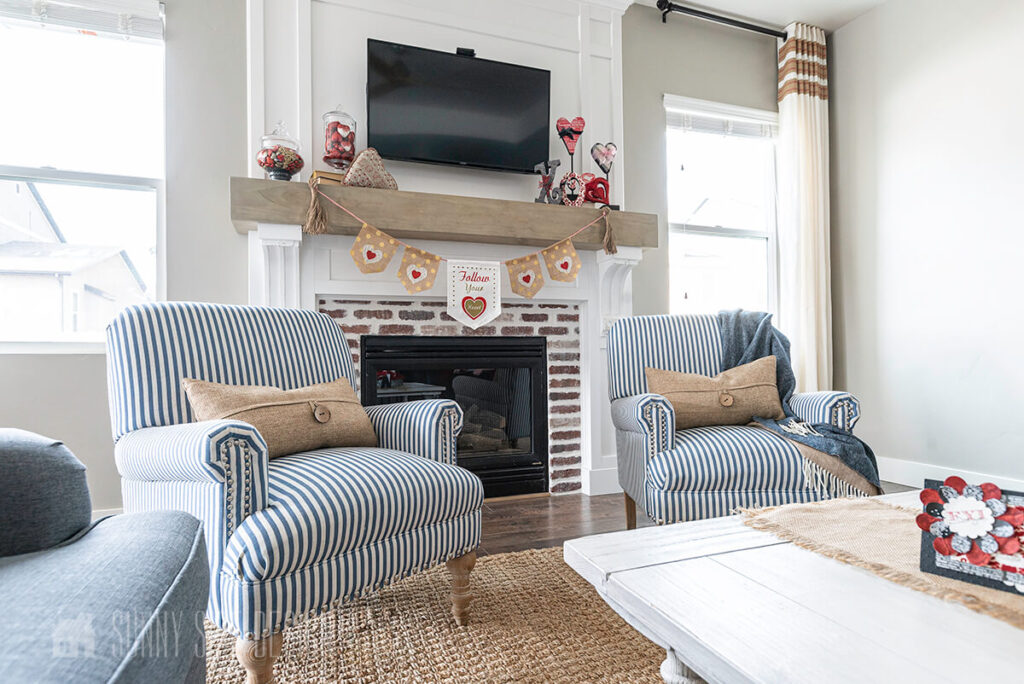
One of the most impactful ways to elevate the design of your living room without breaking the bank is by focusing on a standout architectural feature: the fireplace. A well-designed fireplace serves as the heart of the room, providing both warmth and a captivating focal point that can transform the entire space
To keep costs down while we built our home, we opted to install the fireplace down the road.

The exterior framing of our home included a bump out for the future fireplace, while the interior was finished with sheetrock concealing this opening.

By designing and installing this craftsman fireplace ourselves, it allowed us to save quite a bit of money and we were also able to customize the design without being limited to only a few builders options.
The centerpiece of the room, this fireplace features an aged brick surround that exudes an old-world charm, instantly adding character and depth to the living area. The choice of aged brick was deliberate, offering a timeless appeal that complements various interior styles, from rustic to modern farmhouse.

The beauty of this approach lies in its ability to deliver a high-end look without a high-end price tag. By sourcing materials wisely and incorporating DIY elements, you can achieve a luxurious aesthetic that aligns with your budget. The aged brick surround, for instance, was sourced from a local supplier at a fraction of the cost of more contemporary materials, yet it offers a rich, textured finish that elevates the entire room.
You can see how we installed the fireplace insert, made the fireplace mantle surround, installed the brick veneer, crafted a faux wood beam mantle and restored vintage corbels in each given tutorial.
Not only does the fireplace act as a visual anchor, but it also enhances the architectural detail of the living space. The careful selection of materials and the craftsmanship involved in its installation showcase a commitment to quality and design that resonates throughout the home. This blend of thoughtful design and budget-conscious choices demonstrates that luxury is attainable with a bit of creativity and resourcefulness.
Incorporating such a focal point doesn’t just improve the aesthetics; it also adds to the functionality and comfort of the room. Imagine cozying up by the fire on a chilly evening or using the mantel to display seasonal decor items. A well-designed fireplace can significantly impact the ambiance and overall feel of your living room, making it a space where family and friends naturally gather.
By focusing on key elements like a high-end fireplace, you can achieve an elegant and inviting living space that reflects your personal style and stays within budget. It’s all about making strategic choices and investing in features that offer the greatest return in terms of visual impact and timeless appeal.
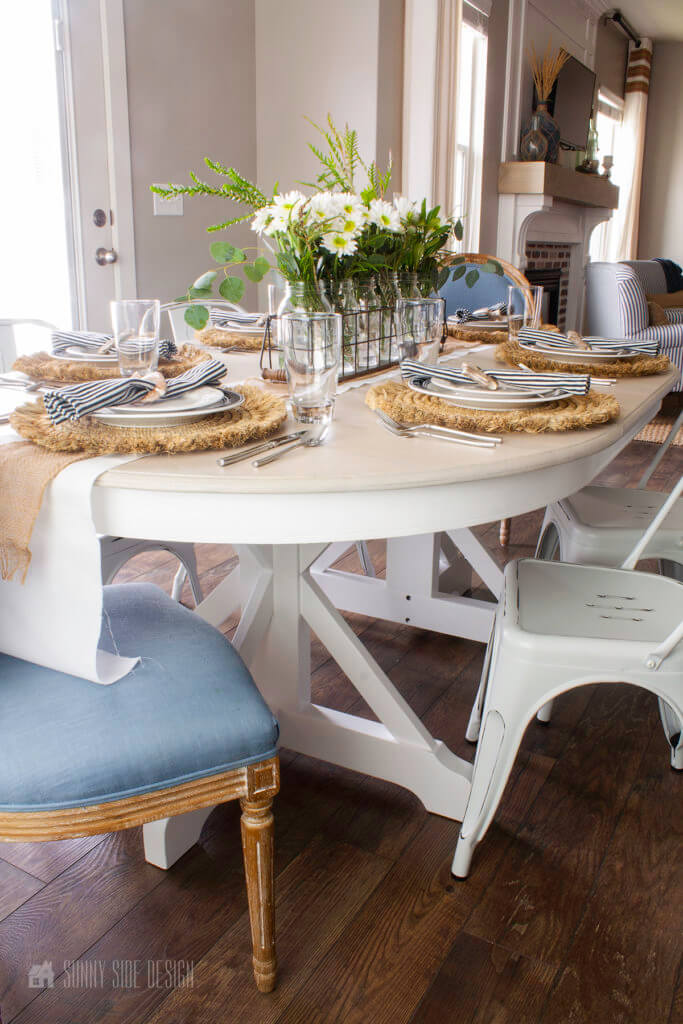
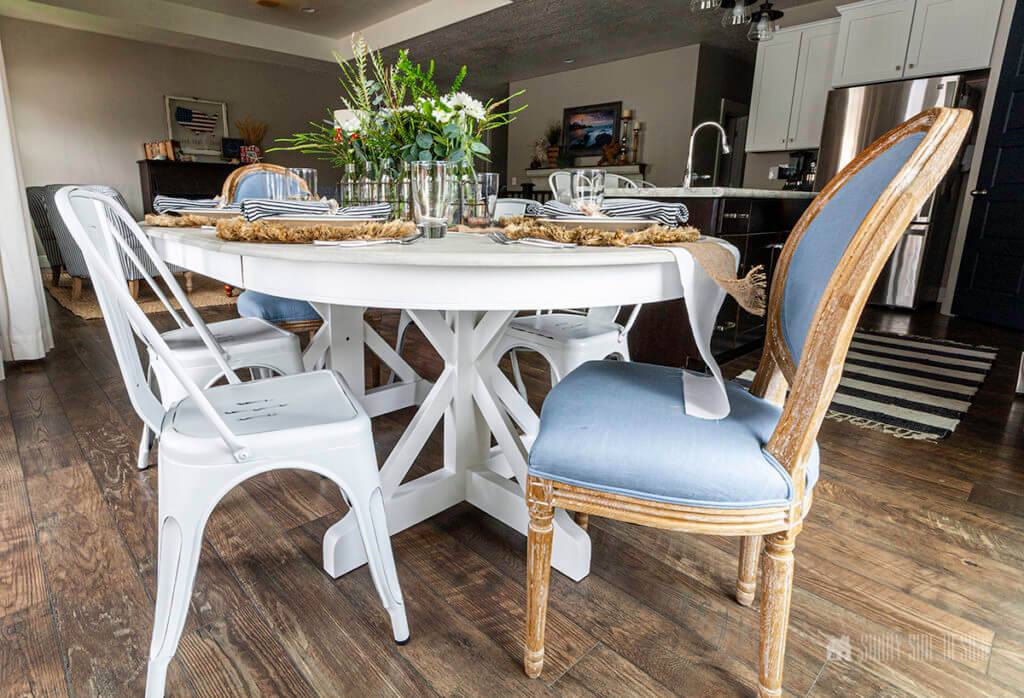
Dining area
The kitchen wont be included in our home tour today as the entirety is in the original basic builders grade state. However we have some big plans for this space!
Be sure to keep your eyes peeled for future posts in this area. We have several budget friendly upgrades we plan to implement that will customize the look of the entire space as well as increase functionality by gaining more work surfaces.
But for now, I have to be patient as we finish other projects first. (Our home can only handle being torn up so much at a given time!)
In the dining area we refinished a free table we found on the side of the road and added new and Facebook Marketplace chairs.
Let’s stay connected! Follow us on social media!
Mudroom
Built-ins are another great way to add customized storage creating that high-end look.

The original floor plan included a simple wall mounted bench in this space. But I had big plans!

We had them exclude the bench from the plans knowing we would soon install this custom mudroom storage system.
Now we have plenty of additional storage space and this built-in gives this space a wow factor.
Home Tour Bedroom Ideas
Primary Bedroom
Our master bedroom has quite a different look as well.

This room didn’t receive much attention the first few years other than a fresh coat of paint. The room wasn’t bad per se, but it definitely lacked character.
A couple years ago this room finally received the attention it was screaming for.

Indeed this space is now completely transformed with a neutral color pallet which automatically creates a high-end look.
A simple board and batten wall was installed creating a much needed focal point in this space.
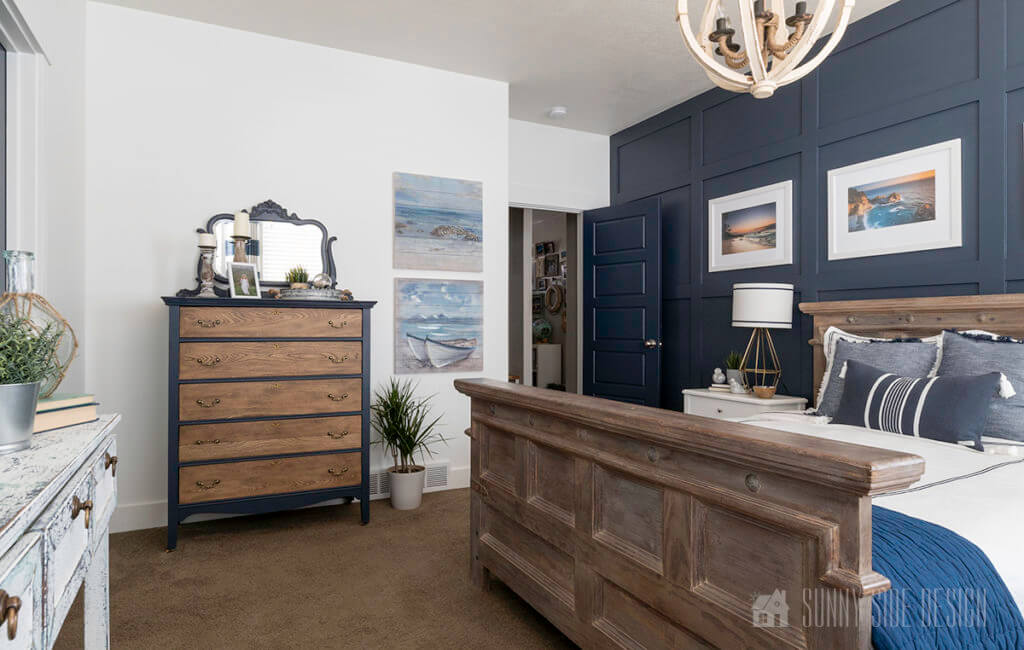
To complete this room makeover on a small budget, we also incorporated a few second hand items and refinished a few pieces of furniture.
We saved thousands alone refinishing our bed frame to look like my inspiration piece from Restoration Hardware. Their bed cost a whopping $2795, while our DIY version cost only $35!

You’ll find every DIY project we did in this space with corresponding tutorials here.

One of my favorite elements in our bedroom is the large artwork opposite from the bed that conceals our TV! To learn how we created this hidden TV cabinet see our detailed tutorial.

Minimal Star Wars Themed Bedroom
Next up on our home tour are the kids bedrooms.
Creating a themed bedroom for your child can be an exciting project, especially when it’s based on something as universally loved as Star Wars. However, going overboard with specific themes can limit the room’s adaptability as your child grows.
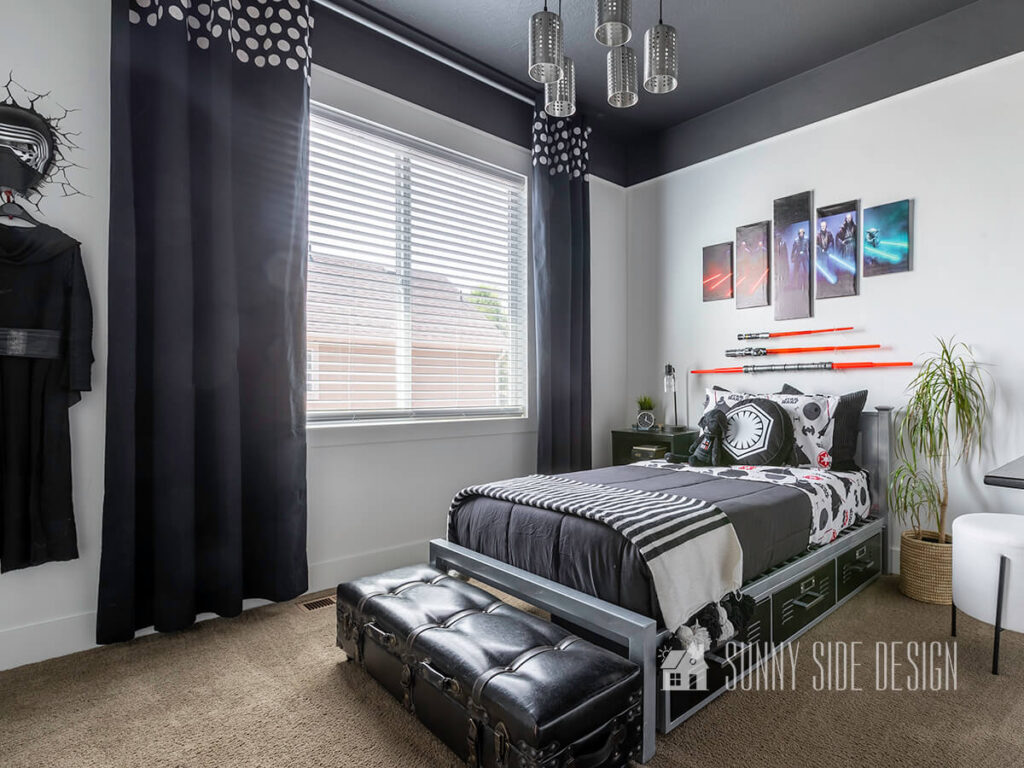
Start with a neutral color palette for the walls and main furniture pieces. Shades of white, gray, or beige can serve as a versatile backdrop that works well with various themes and styles. This way, the room can be easily updated as your child’s tastes evolve without requiring a complete overhaul.
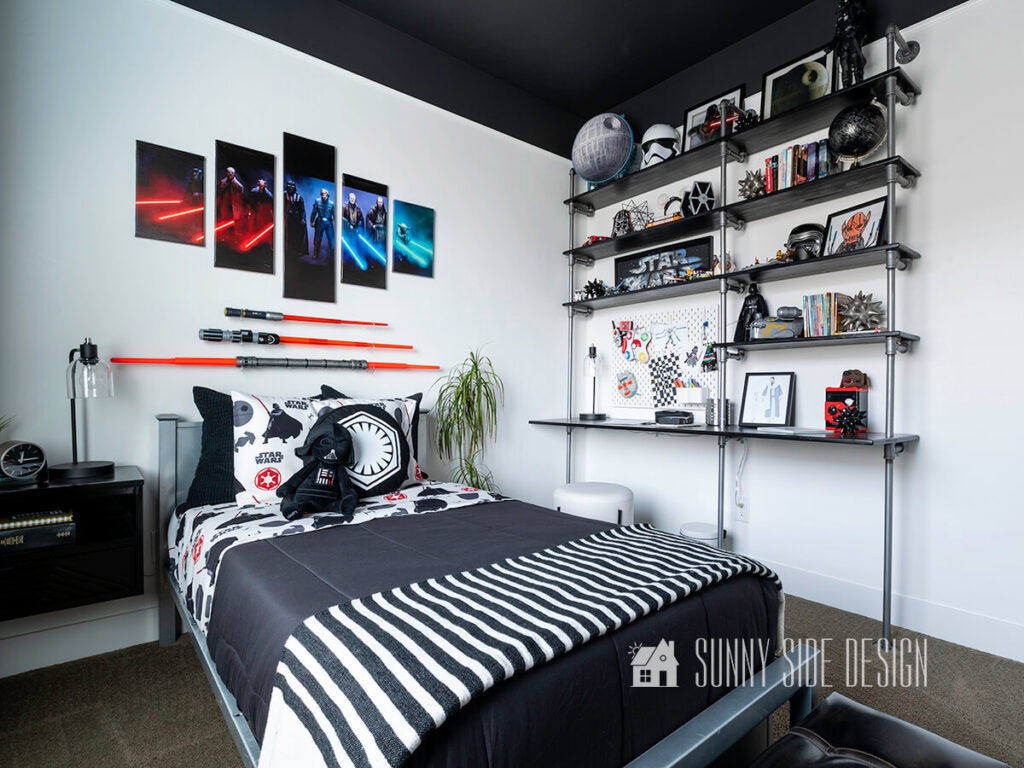
Incorporate Star Wars elements through easily changeable accessories and decor items. Think about framed posters, bedding, throw pillows, and rugs featuring iconic characters or symbols. These items are affordable and can be swapped out as needed. For example, a duvet cover with a Millennium Falcon print can be easily replaced when your child outgrows their Star Wars phase.
The bed was sourced from our local classifieds. To personalize it to flow with the rest of the room, I applied spray paint to each of the drawer fronts.
This collage of art is purposely centered above the bed to draw the eye upward which leads to the black ceiling acting as the window to an endless outer space, and DIY industrial light fixture.
In addition, the desk was also a DIY project made from pine boards and electrical conduit and joints.
For more information on this Star Wars room and tutorials on each of the DIY projects, click here.
Serene Modern Green and White Bedroom
One of the standout rooms in this home is the serene modern green and white bedroom, a perfect example of style and affordability coming together.
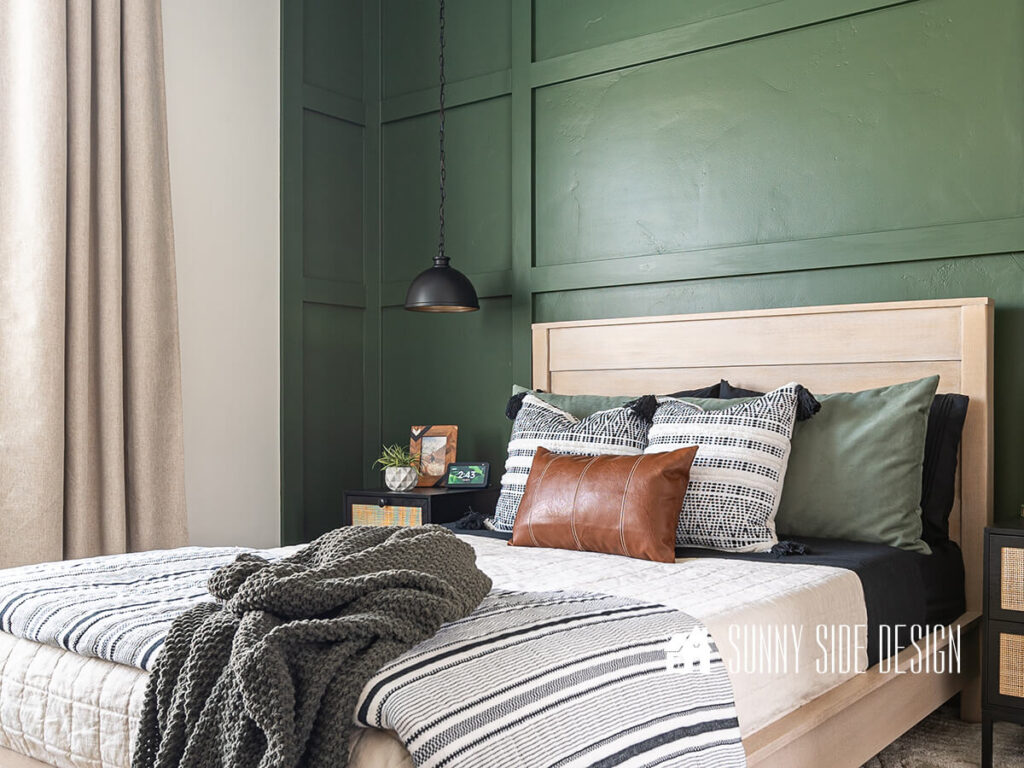
Inspired by earthy tones and sleek modern finishes you can learn more about our design process in our previous blog post, 16 Ways to Make a Small Bedroom Look Bigger, where we share practical tips and tricks to maximize space and style. By incorporating multiple DIY projects, we transformed a small, cramped room into a tranquil retreat.
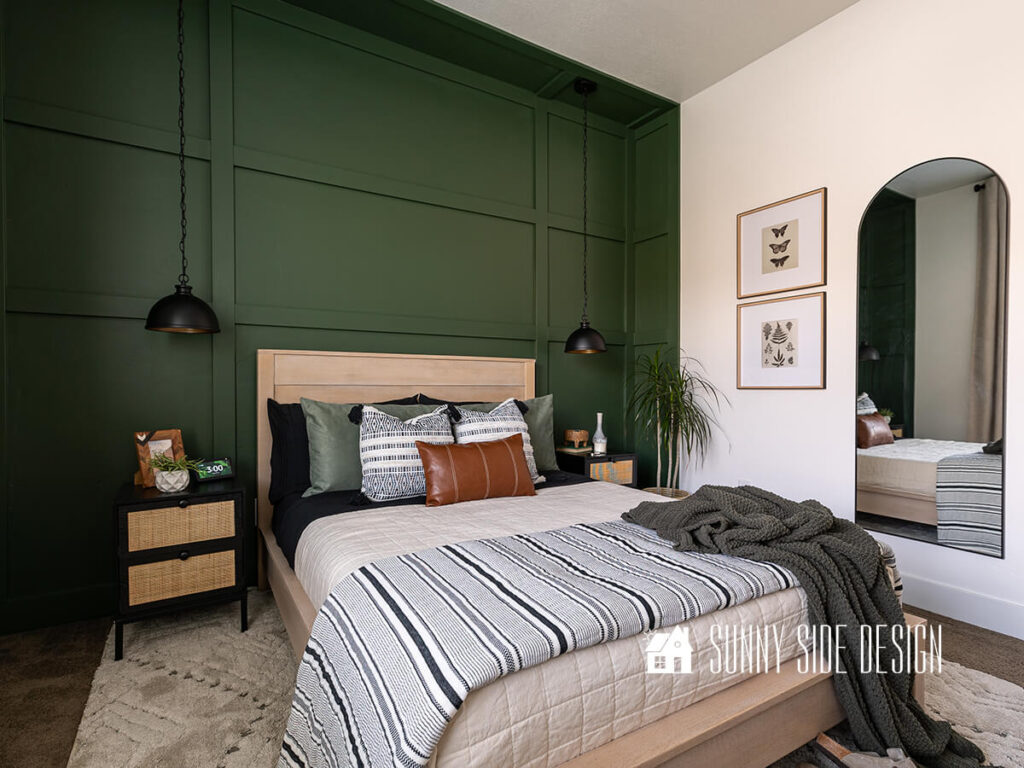
The accent wall, a highlight of this transformation, adds depth and character, making the room feel more spacious. Simple yet impactful, this DIY project uses paint and texture to create a stunning focal point. Alongside carefully chosen furniture and decor, each element works harmoniously to enhance the room’s aesthetics without overspending.
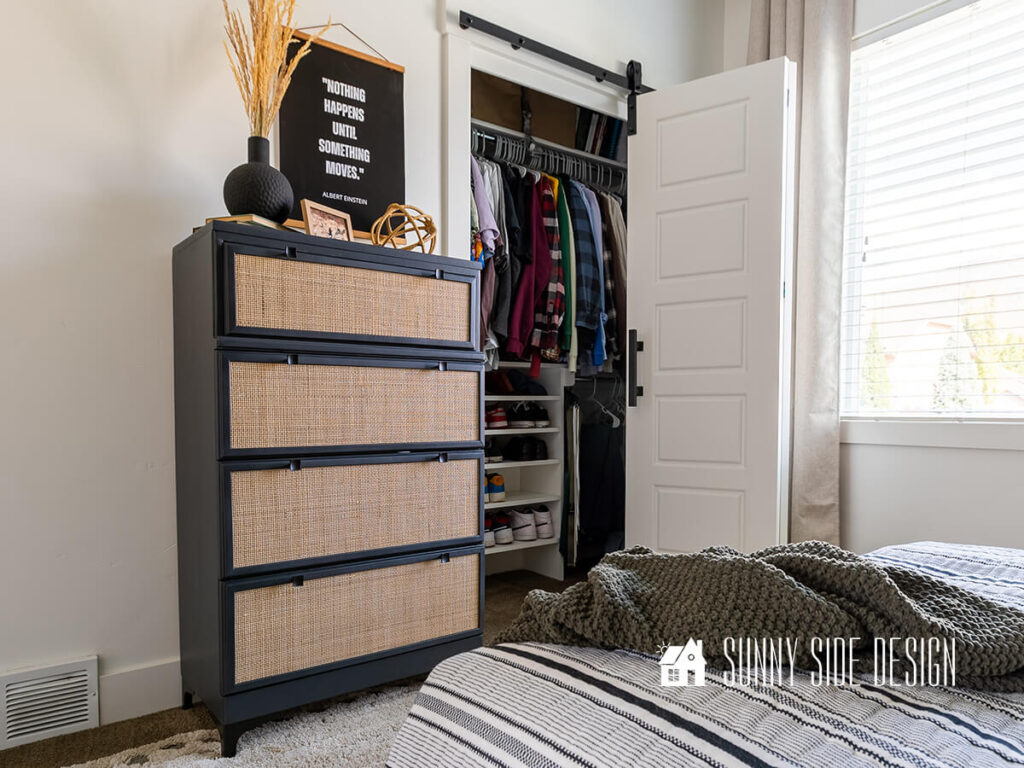
Other reader favorites include the Easy and Affordable Closet Organizers, Swivel Bi-Fold Barn Door Hardware, west elm Dresser Dupe, and our personal favorite this Pottery Barn Bed Dupe for $50! For more information on this serene bedroom and tutorials on each of the DIY projects, click here.
French Country Boho Bedroom
Next up on our home tour is this tween french country bedroom with a touch of boho flair.

Actually our little girl was just 3 years old when we moved in, needless to say she had outgrown her first bedroom.
Last year we spent the better part of the summer creating this more mature look. I feel that this bedroom now will grow with her.
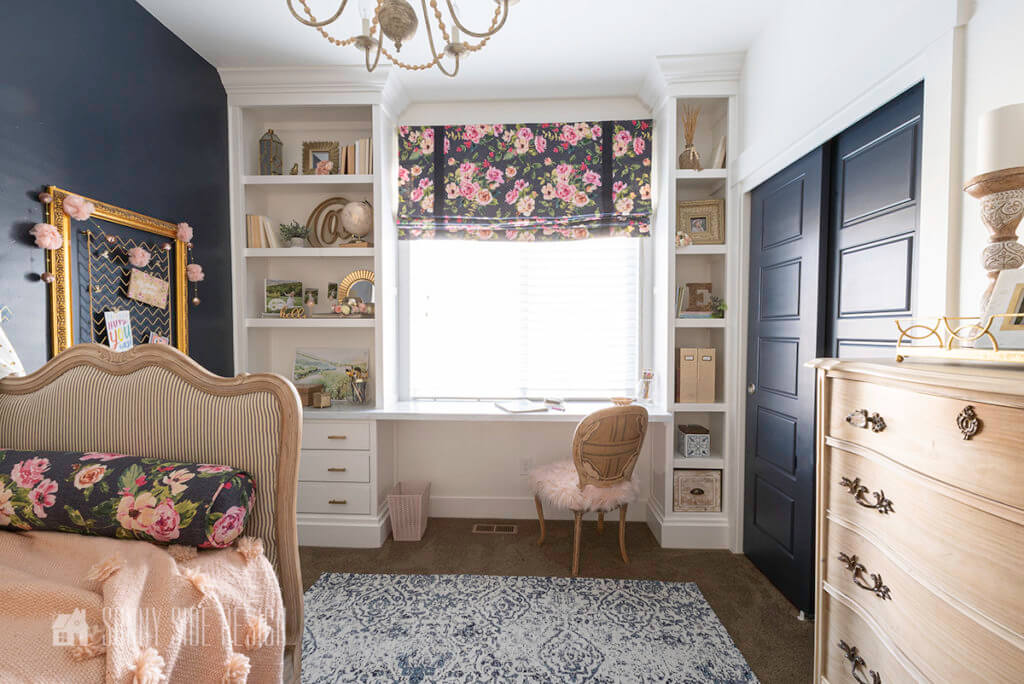
Clearly a large must have for her new space involved installing this upcycled built-in shelving unit and desk.
In fact, now she has plenty of storage space for all her art supplies, including a large work area too.

Indeed, there are so many favorites in this space I can’t pick only one!
This french provincial dresser is another great classifieds find! With a little bit of work we brought this piece back to it’s natural beauty. Clearly, it looks completely different from the before!
Surely a couple more favorites in this space include this awesome french country style daybed we upcycled from 2 twin beds, and the bed crown we upcycled from an old sofa table!
Lastly we transformed a dated brass chandelier into this french country wood look with a bit of paint and wooden beads.
Basement Living Room Design Ideas
In our blog post showcasing The Best Basement Family Room Ideas and the complete room reveal, we transformed an underutilized space into a high-end living area without breaking the bank. Which features three distinct zones: a media entertainment area, a cozy reading nook, and a stylish kitchenette complete with a pool table.
This zone is the heart of the basement, where family and friends can gather for movie nights or binge-watching the latest series. We opted for a large, custom sectional sofa paired with chic yet affordable throw pillows and a machine washable rug, creating a comfortable and inviting space. The entertainment unit, designed to conceal the massive surround sound speakers, also houses all the electronics neatly, proving that style doesn’t have to come with a hefty price tag, especially when you’re willing to learn new skills and build your own entertainment center.
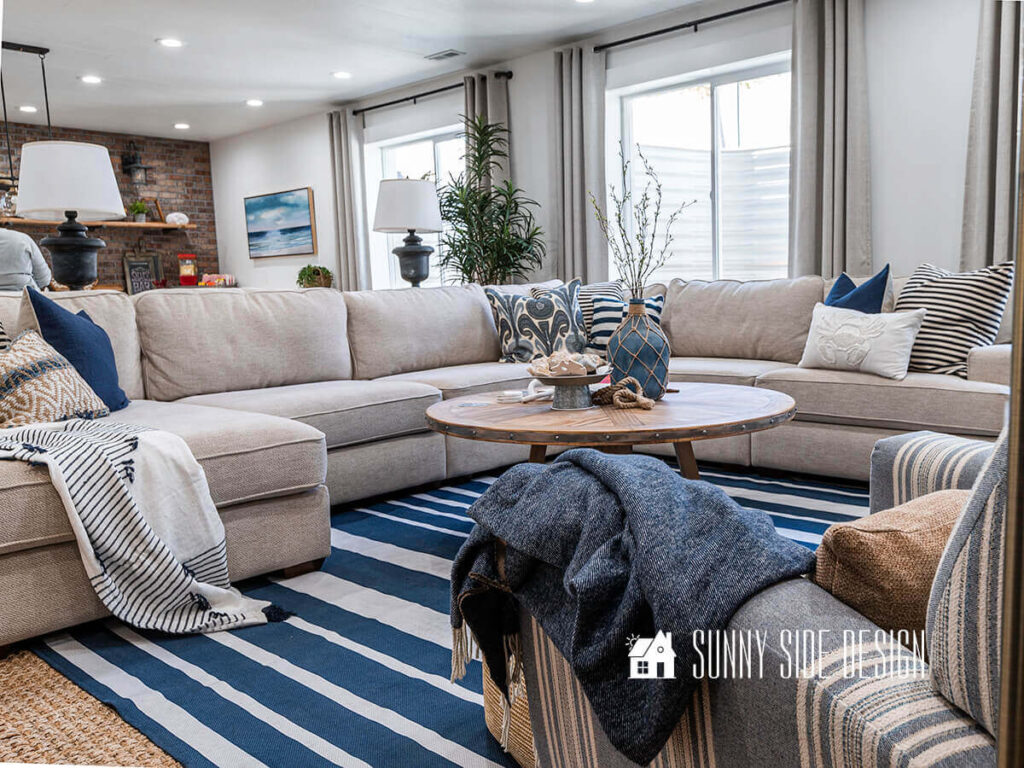
While this area doubles as a family room and theater room, it seamlessly caters to both relaxation and entertainment. Guests can enjoy playing games around this DIY Coffee table, which we upcycled from a dark and dated dining table for a rustic yet chic look. The coffee table not only serves as a perfect spot for board games and snacks but also adds a personalized touch to the room’s decor.
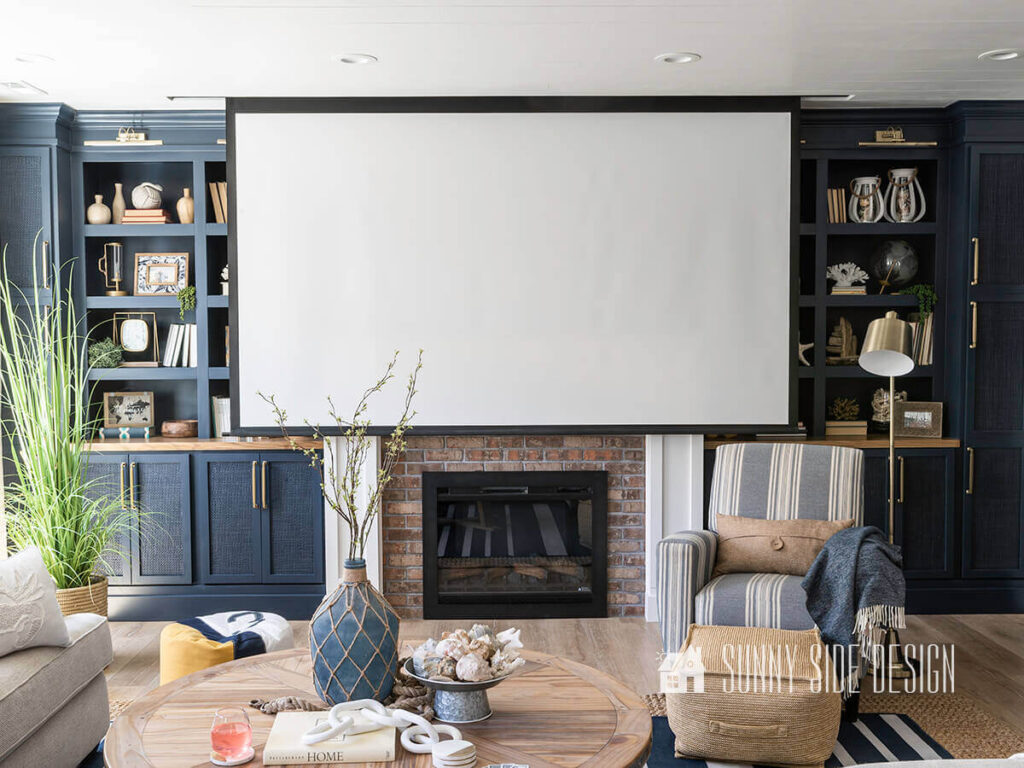
When it’s time to kick back and watch the latest movie, the big screen lowers effortlessly from the ceiling, transforming the space into a cozy home theater. The clever use of space-saving technology allows us to maintain a clean, uncluttered look while still having the full cinematic experience at our fingertips. This dual-purpose setup ensures that our basement living room is both practical and luxurious, offering endless entertainment possibilities for family and friends
Reading Nook
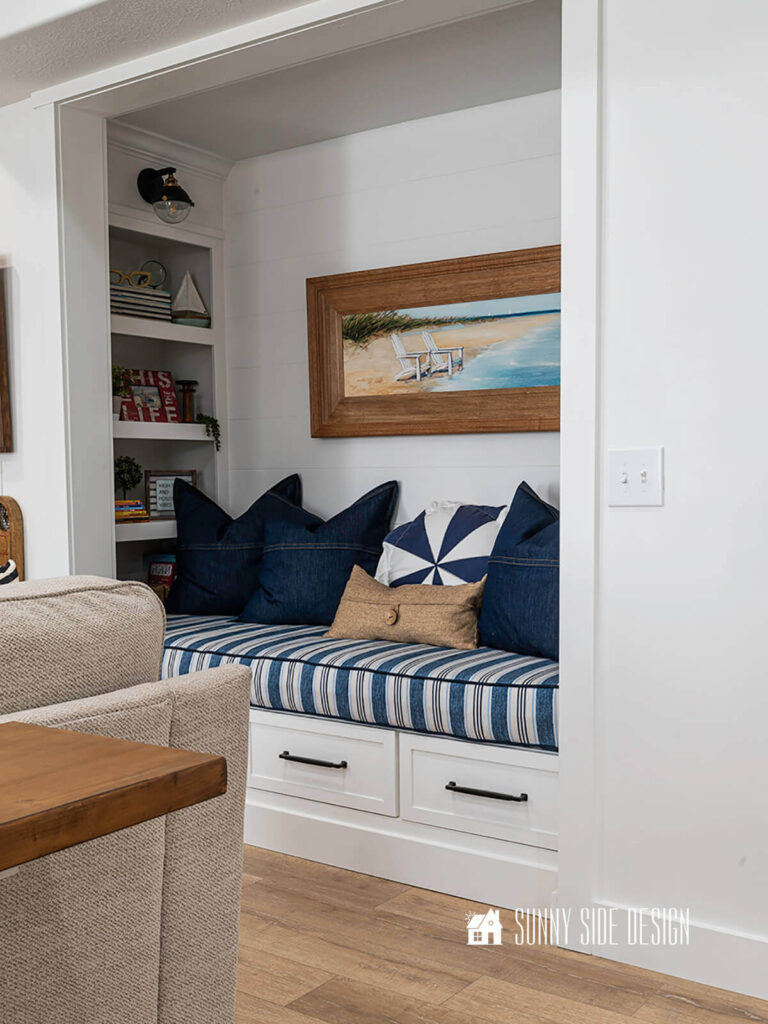
For those moments when you need a quiet escape, the Built-In Reading Nook in a Closet offers a perfect retreat. A comfortable built-in bench with drawers, provides a budget-friendly yet stylish seating option with extra storage. While the built-in book shelves, easily built and cost-effective, hold a curated selection of books and decorative items, adding personality and warmth to the space.
Kitchenette
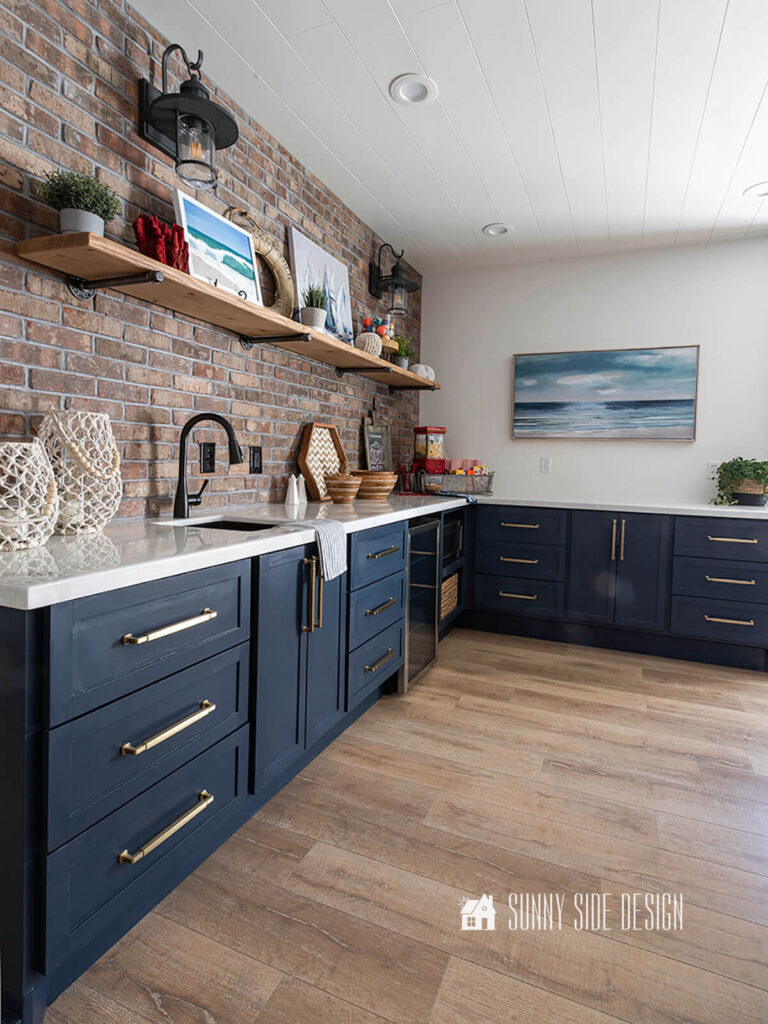
Entertaining guests becomes a breeze with the addition of a kitchenette and pool table. The kitchenette, constructed using affordable materials and DIY Epoxy Countertops to look like marble, provides functionality without compromising on aesthetics. While the aged Brick Backsplash exudes an old-world charm, instantly adding character and depth to the living area. Again the choice of aged brick was deliberate, offering a timeless appeal that complements various interior styles, from rustic to modern farmhouse, and compliments the fireplace design on the main level.
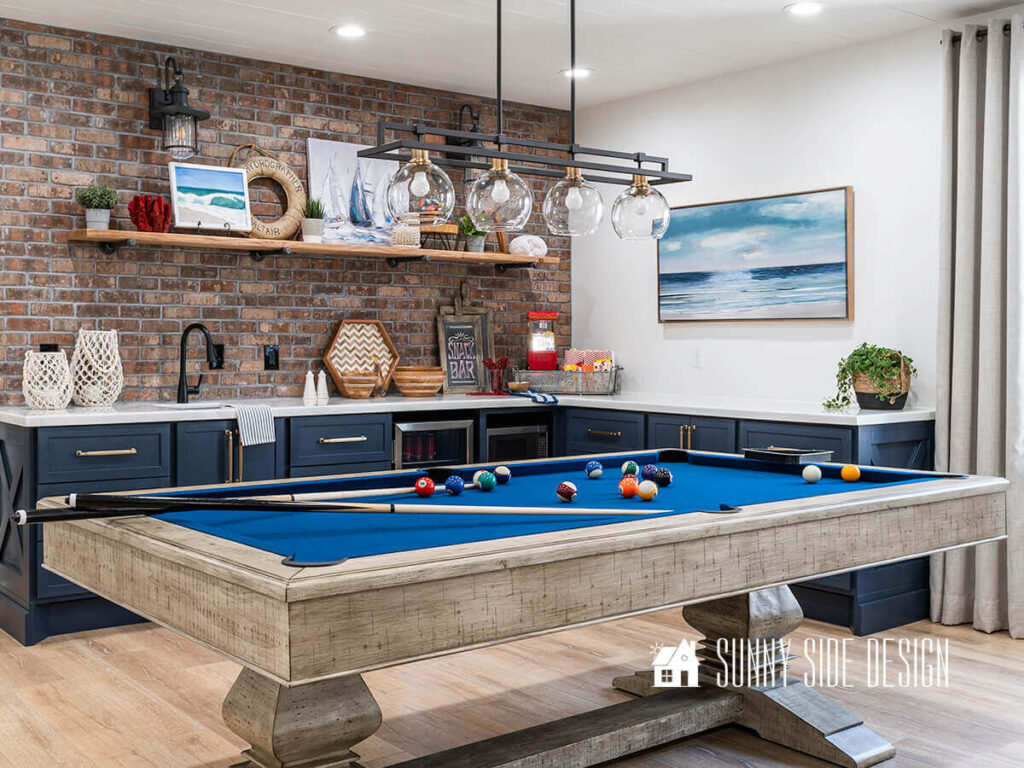
The pool table adds a touch of sophistication and fun to the basement. By combining DIY elements with the purchase of a new pool table, we achieved a luxurious feel while keeping the budget in check.
With these thoughtful and budget-conscious design choices, our basement living room is now a stylish, multifunctional space that elevates the entire home.
Jack & Jill Bathroom
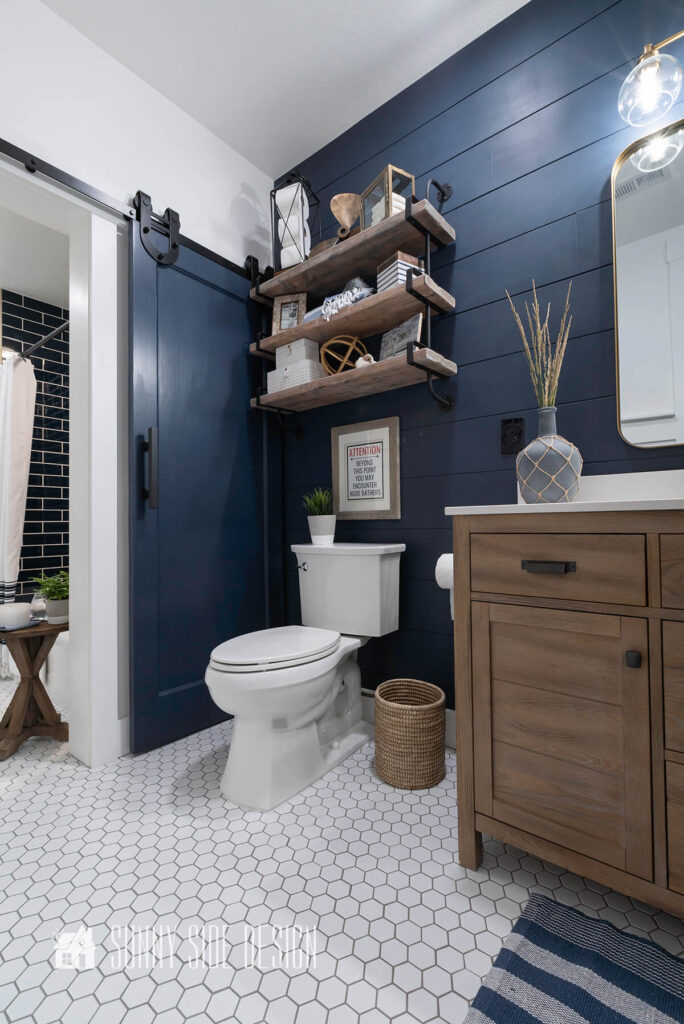
Previously on the blog, we unveiled the stunning transformation of our Modern Coastal Basement Jack and Jill bathroom. This elegant space is the epitome of high-end design on a budget, featuring a sophisticated color palette of navy blue and white, accented by natural wood tones. The shiplap walls add a touch of rustic charm, while the driftwood tone of the vanities, with its sleek lines and ample storage, anchors the room and contrasts beautifully with the crisp white countertops and fixtures. The natural wood elements, such as the open shelving, add warmth and texture, creating a balanced and inviting atmosphere.
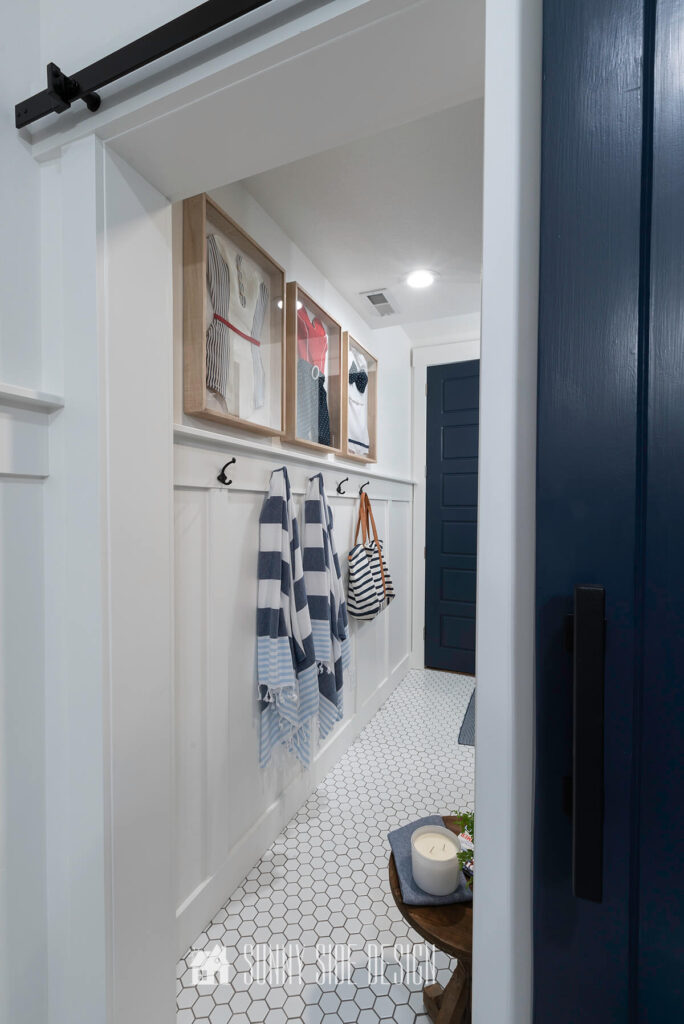
While custom art pieces, including vintage bathing suits, bring a unique and personal flair to the decor.
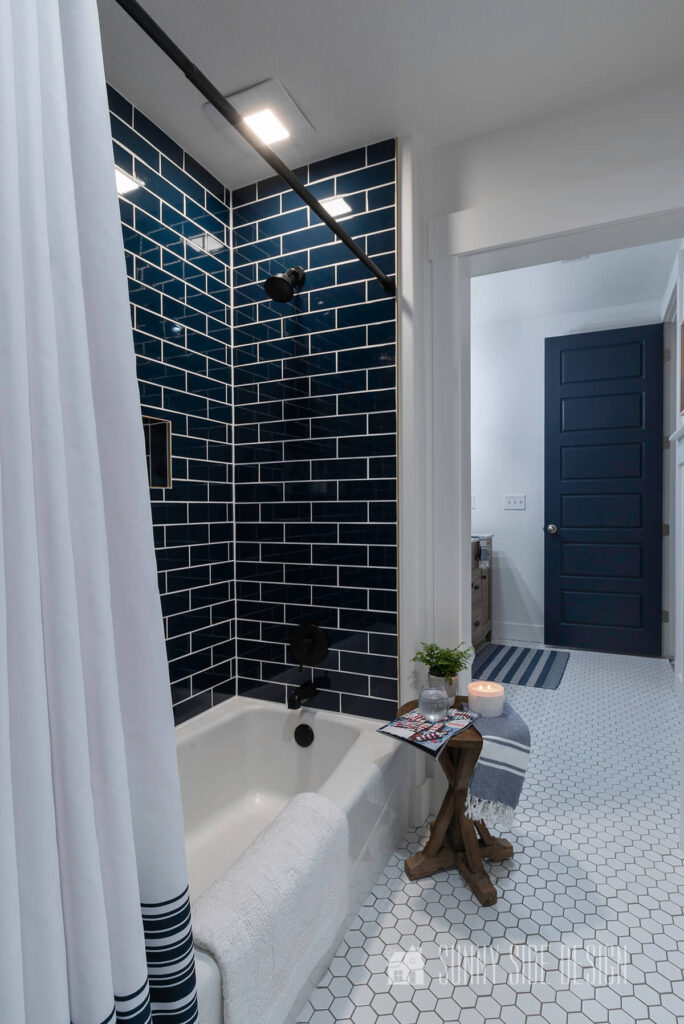
For those looking to achieve a similar look, focus on a cohesive color scheme and mix high and low-cost elements. The key is to invest in standout pieces that elevate the space, like the custom artwork, while opting for more affordable options for the rest of the decor. With careful planning and a bit of creativity, you can create a luxurious bathroom that exudes modern coastal charm without breaking the bank.
For more information on this DIY bathroom, including how to install a tile shower surround and tile flooring, click here.
Home Gym
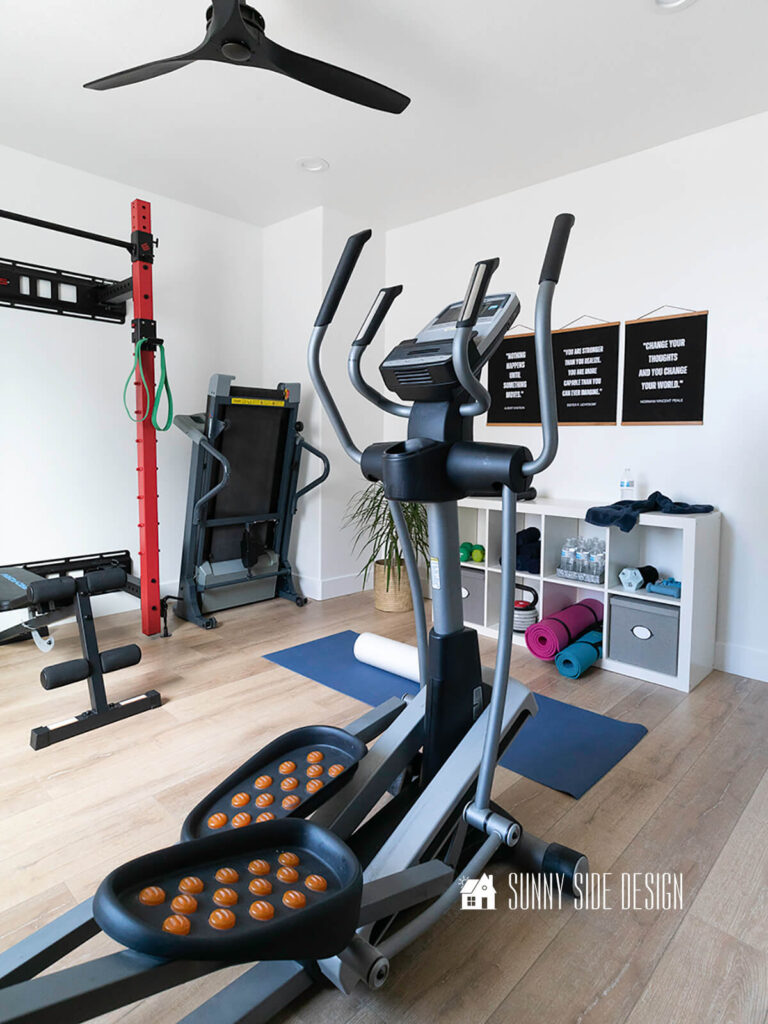
Transforming a spare room into a home gym can elevate your home, offering both luxury and practicality. With pristine white walls and sleek, modern finishes, the space exudes a clean, minimalist aesthetic that feels both invigorating and serene.
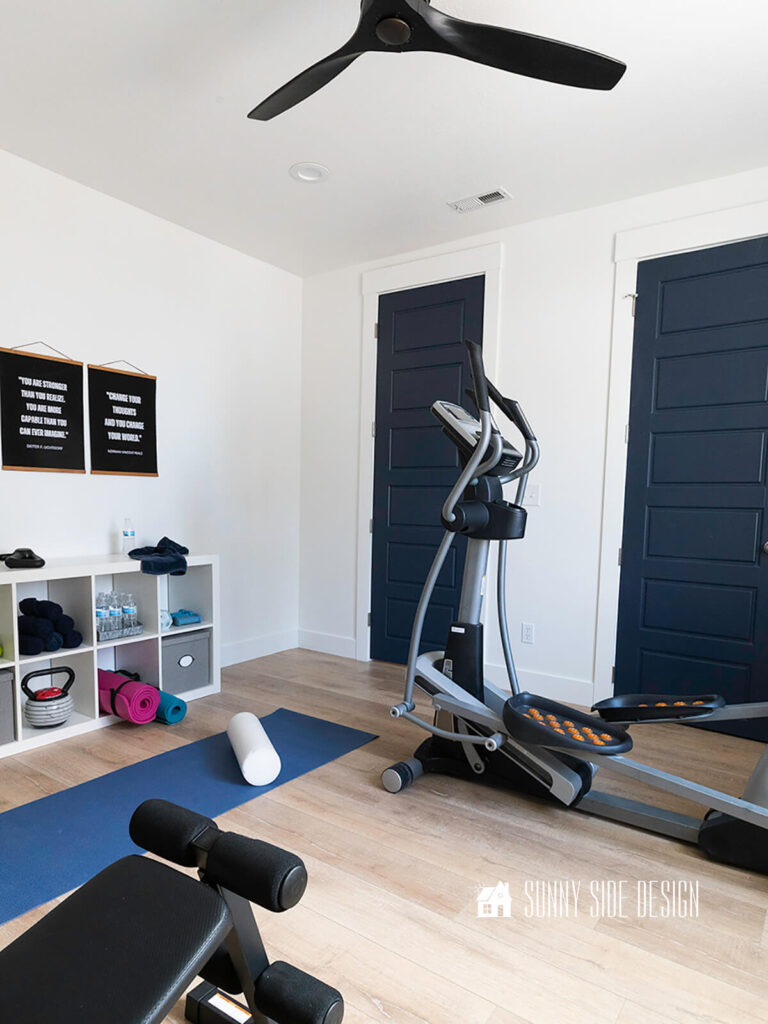
While not mandatory, a home gym is a useful addition that adds significant value and convenience. By opting for affordable yet stylish equipment, simple touches, like shelves for storage and potted plants for a hint of greenery, complete the sophisticated ambiance.
Creating a home gym doesn’t have to break the bank. With thoughtful planning and strategic choices, you can achieve a high-end feel that provides a personal wellness sanctuary.
Home Tour Office & Craft Room
Last stop on our home tour is our home office/craft room.
The cool, calm and coastal vibe is carried throughout this space. We installed white shiplap walls and brought in all the color with furniture and accessories.
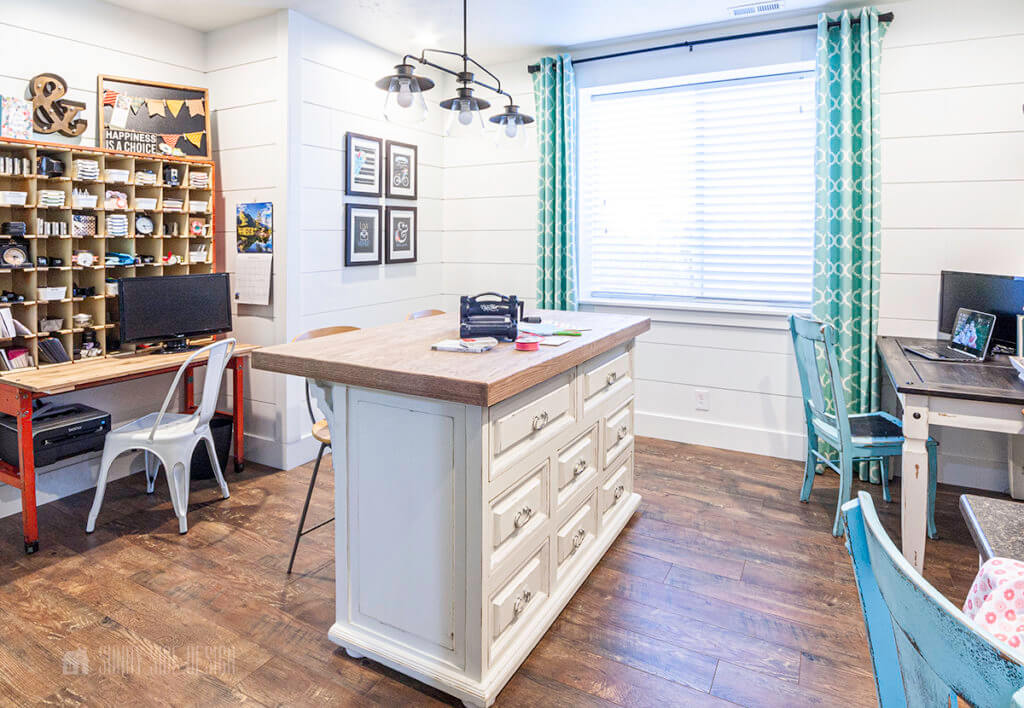
This space was carefully designed with five different work stations so everyone in the family could have their own space at the same time.
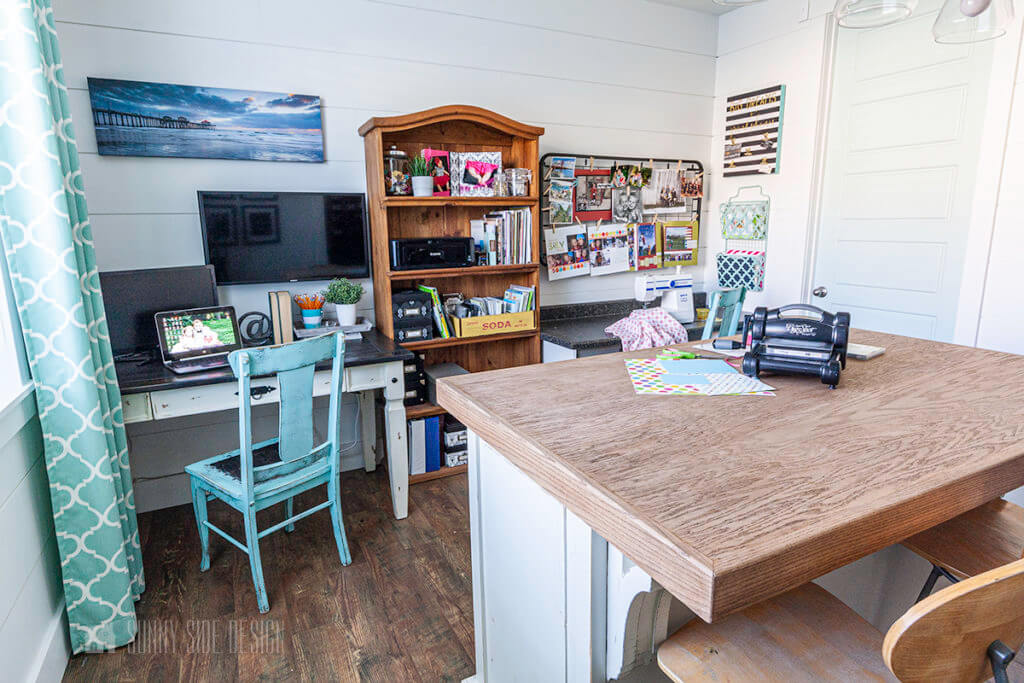

I believe one of my favorite pieces in this space is this vintage postal sorter which has been reconfigured into one of our work stations. It adds a bright pop of color and has plenty of storage for crafting supplies.
So thanks for joining me for our home tour.
Of course we hope you were inspired to incorporate some of our favorite design hacks into your own home.
What elements or rooms appealed most to you?
What other design hacks do you have that can make your home look more expensive?
Please share your tips and ideas with us.
We love hearing from you!
If you’re new here, WELCOME! We love having new readers and friends!
You can learn more about us here.
Let’s stay connected! Join our DIY community of doers and you won’t miss the weekly updates and more inspiration for you always on a budget.
Sharing is caring!

Thanks for stopping by Sunny Side Design. Empowering you to create a home you love!
DISCLAIMER
This blog’s content is for entertainment purposes only and is not professional advice. By reading this blog and attempting to recreate a project, you assume all responsibility for any injuries or damages incurred. Read my full disclaimer here.
PHOTO USE AND CONTENT SHARING
All of the photographs you see here are the property of Sunny Side Design unless otherwise credited.
We love for others to share our work, so please feel free to use one photo with a link back to our website.
Pinning and sharing is always encouraged!
Please do not reproduce other Sunny Side Design content without permission.
Retailers We Love
- Anthropologie
- Birch Lane
- Crate & Barrel
- Joss and Main
- Lampsplus
- Mark & Graham
- One Kings Lane
- Pottery Barn
- Rejuvenation
- Serena & Lily
- Wayfair
- West Elm
- Williams Sonoma
- World Market
Be sure to follow us on Pinterest for even more home decor and DIY ideas.
To see what we are working on before it’s on our blog, follow us on Instagram.
You will also find our video tutorials on our YouTube channel.
- 25 Must See Simple and Creative Reading Nook Ideas

- How to Make Peonies Last Longer with 7 Simple Tricks
- How to Build a Birdhouse with CharmingThrift Store Finds
- Simple Clay Pot Lighthouse Garden Decor Project