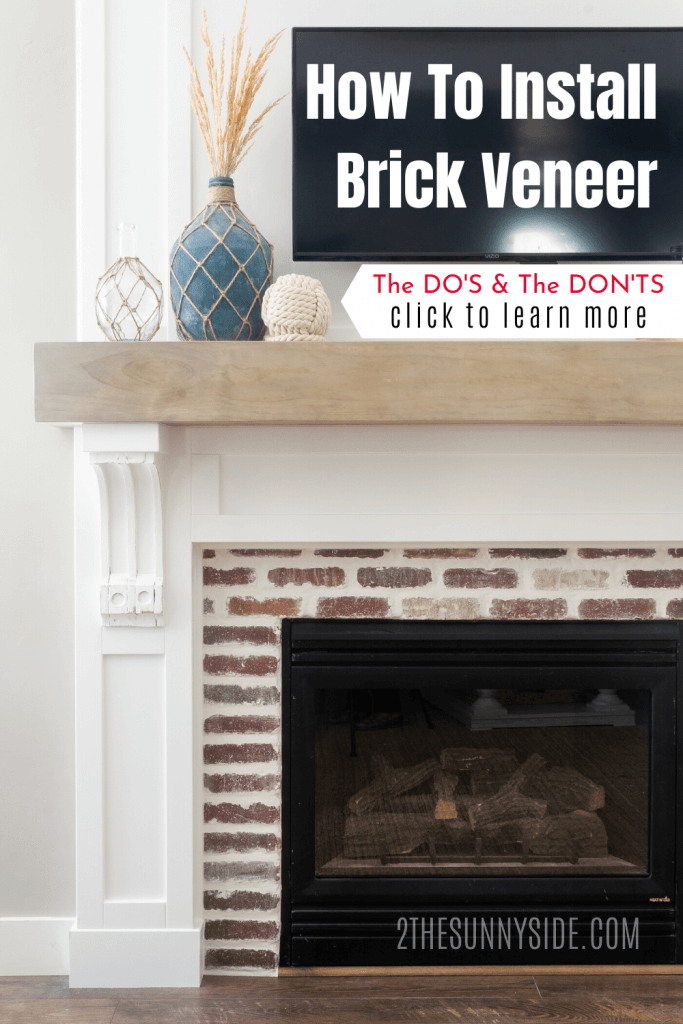
Would you agree that having a fireplace in a room helps make it feel cozy? A fireplace mantel and surround complete the look and add architectural interest to any space. Continue reading to see how we finished our fireplace surround by installing brick veneer.
We’ll share our DO’s and DON’TS to help you save time and money.
If you’ve been following along with our fireplace series, we’re glad to have you back again! This post will wrap up our series. If you missed any of the previous steps you can click the links below.
How To Install A Fireplace Insert
How To Build A Faux Wood Beam Mantel
How To Restore Vintage Corbels
How To Add Molding And Trim Work To Mantel Surround
Tap the video 👇🏻 below 👇🏻 to see this project come together from start to finish.
Sunny Side Design is a participant in the Amazon Services LLC Associates Program, an affiliate advertising program designed to provide a means for sites to earn advertising fees by advertising and linking to Amazon.com. As an Amazon Associate, this blog earns from qualifying purchases with no additional cost to you. Click here to read our full disclosure policy.
Fireplace Surround | Choose Materials

If you’ve learned anything about me during our blogging journey, you know that I’m a sucker for all things with an old, weathered, and worn look!
I wanted to incorporate a material in our surround that would be timeless and look great with any style my little heart might be drawn to.
Ultimately we chose to use Boston Mill from Floor & Decor. I was immediately drawn to all of the imperfections and worn edges, and knew it would work well in our space.
How To Install Brick Veneer
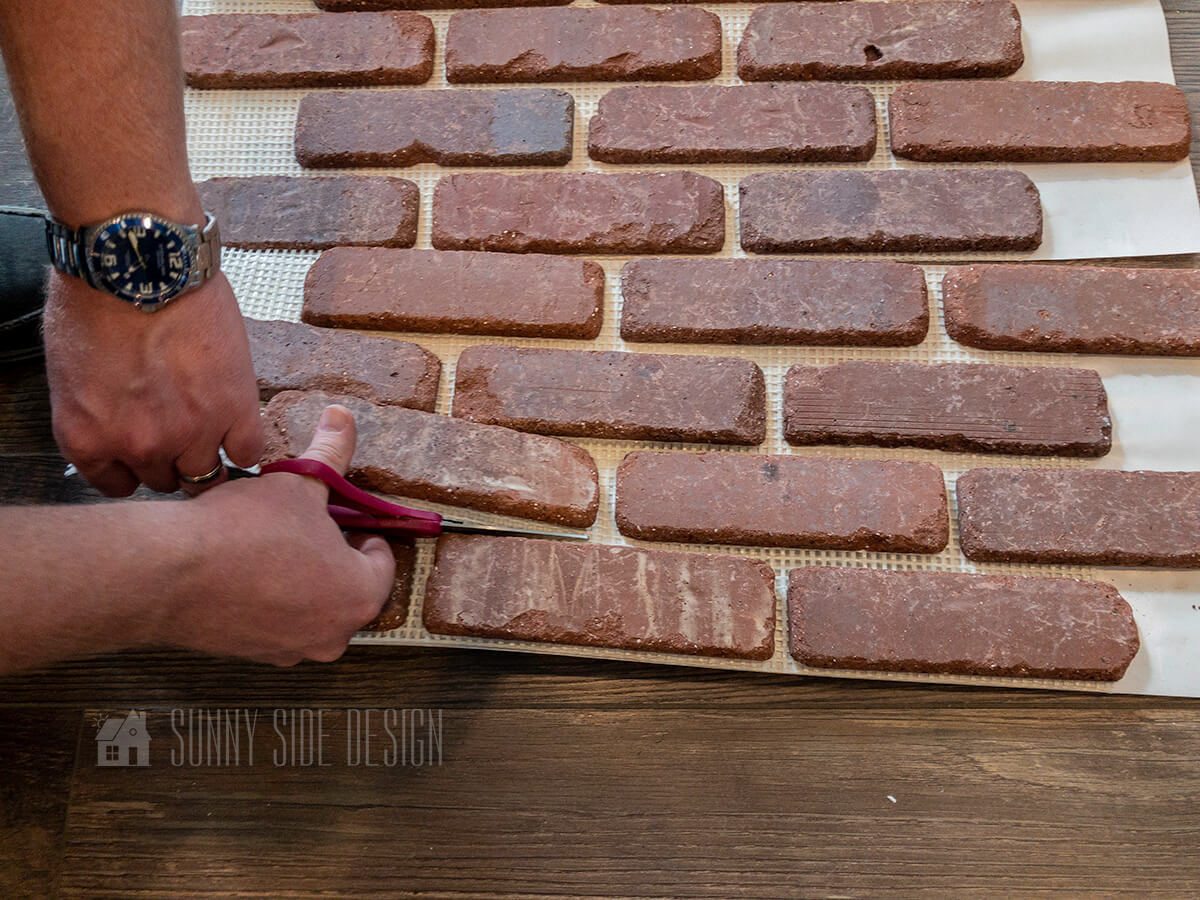
The Boston Mill brick veneer comes on a web for easy installation. Since our fireplace surround is small we opted to cut the webbing apart so we had individual brick pieces to work with.
(We actually ended up removing the webbing from each brick piece because they were falling off as we cut the webbing apart.)
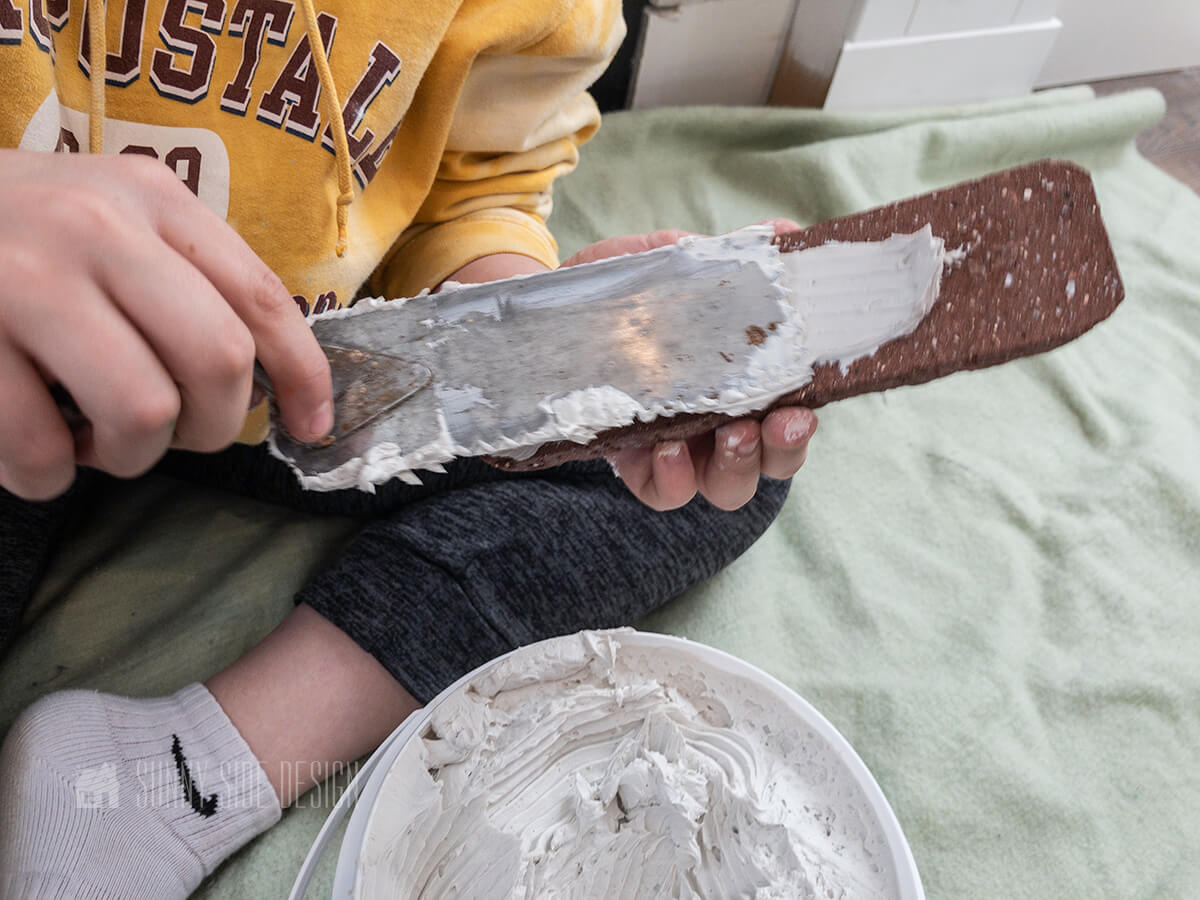
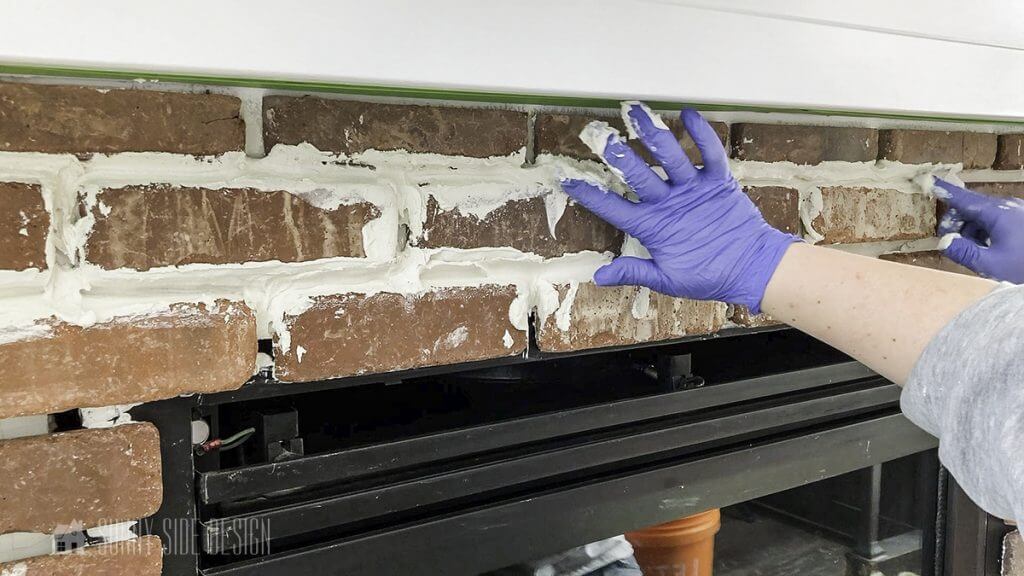
Using a small notched trowel tool, we buttered each brick with a premixed tile adhesive.
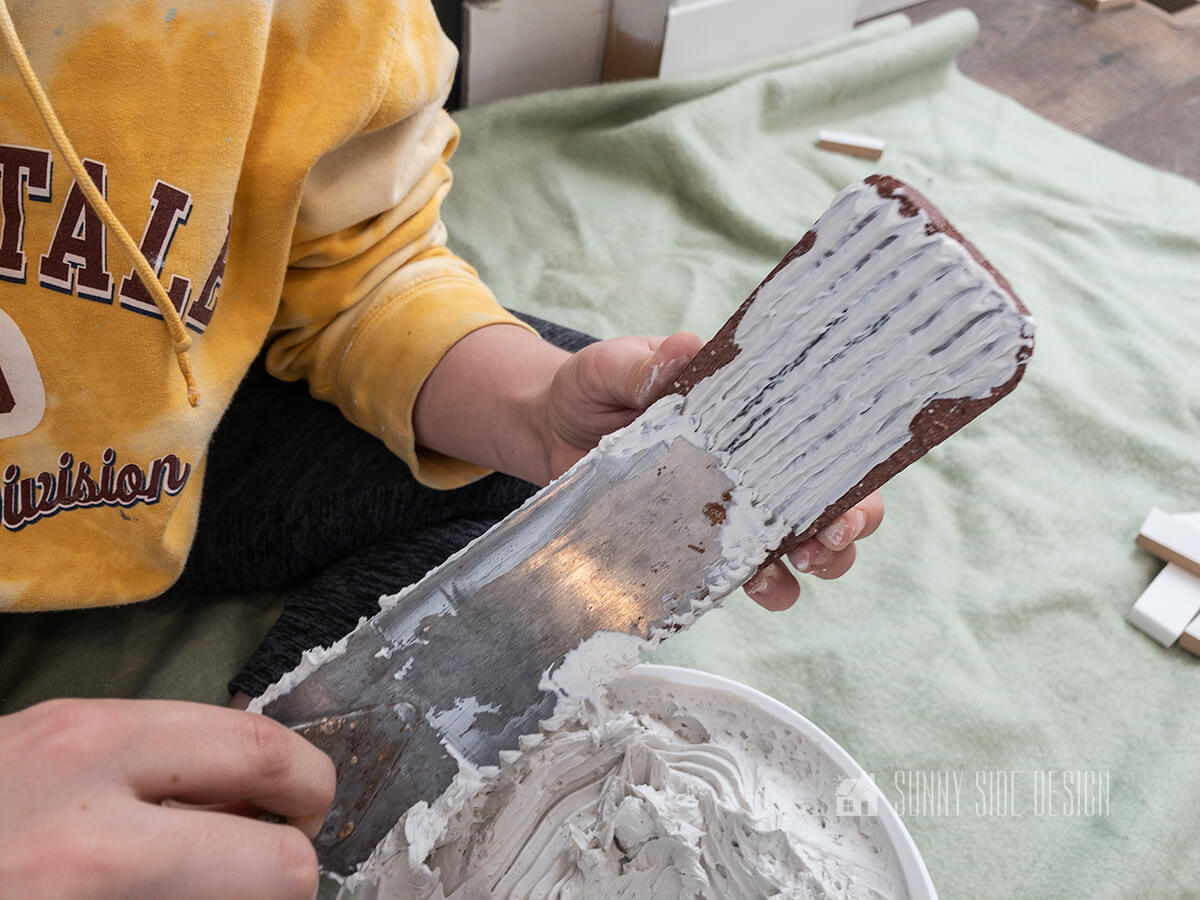
After applying a nice thick layer of adhesive, we used the notched edge of the trowel tool to remove any excess. This will leave the correct amount of adhesive on the backside of each brick.
Are you enjoying this project? Please Pin It, save it for later and share it with a friend.
Sharing is caring!
Fireplace Surround Brick Pattern

A typical brick pattern (as seen on the webbing) shows the bricks are staggered. Since the side spaces of our fireplace surround are only 7″ wide, we opted to stack the brick veneer right on top of one another to minimize the amount of cuts we’d have to make.
(We did install the bricks in a staggered pattern above the fireplace insert.)

In order for the fireplace surround to look symmetrical it’s important to locate and mark the middle of the fireplace insert.

To begin installing the bottom row of staggered bricks above the fireplace insert, we placed a brick on each side of the center mark.
Then the first brick to be installed on the second row will be centered on the mark.

The third and top row of brick veneer was a slightly smaller area. We used a small wet tile saw to trim off about 1/4″ to have them fit in the space.
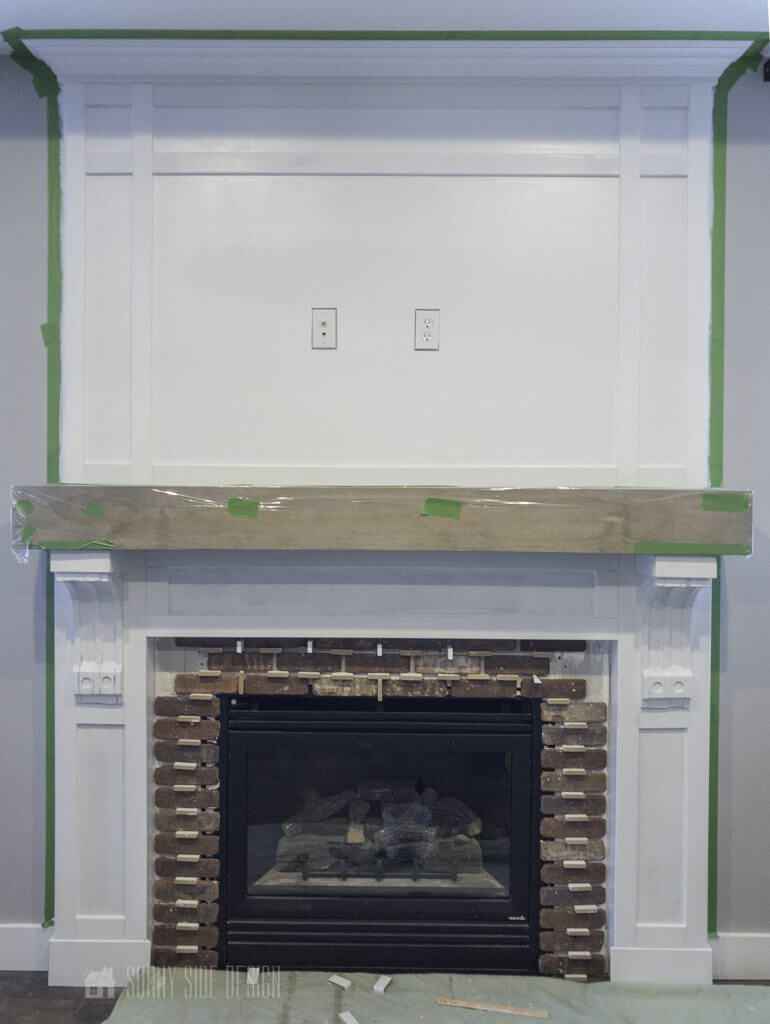

As we installed the brick veneer we used scraps of the trim molding from the previous week’s project and cut them into small pieces to use as spacers.
After about 30 minutes the bricks were adhering well and we removed the spacers. Some of them were even a little challenging to remove because they had a little adhesive on them.
If any of the bricks pop off or are moved at all when removing the spacers, simply move back into place and hold it firmly for about 30 seconds and it will regain its bond.
Fireplace Surround | Mixing Grout


When mixing grout it’s important to follow the specific directions per brand you’re using.
Begin by pouring the measured amount of water into a large mixing bucket. Next slowly dump the measured grout powder into the bucket.
(You may want to wear a face mask while mixing it together. It does put a lot of dust into the air.)
PRO TIP: Run a vacuum hose near the top of the mixing bucket while pouring and mixing the grout powder to minimize the dust in the air.
Use a trowel tool or a mixing attachment on your drill to mix the grout together. Again be sure to follow the directions per the specific brand you’re using. We mixed ours for 5 minutes, let sit for 10, then mixed again for 1.
PRO TIP: You’ll know you’ve achieved the right consistency when the grout mixture resembles toothpaste. To test that it’s the correct consistency, scoop a little of the mixture onto the trowel and hold it upside down. If the grout sticks to the trowel and doesn’t fall off (without some forceful shaking) you’ve achieved the right consistency.
If you’re new here, welcome! We’re so glad you’re here.
Let us introduce ourselves, we’re Michelle and Steph, a mom and daughter team who love to DIY and decorate our homes.
Not only are we passionate about making our homes warm, comfortable and unique, but it’s our mission to help you create that same feeling in your own home.
You’ll find ideas for repurposing, creating, decorating and making your home truly yours, while always mindful of a tight budget.
Undoubtedly we love finding ways to make your home look high-end on a small budget.
Plus you’ll also find a recipe or two as we share our family favorites with you.
We’d love it if you’d join our community of doers so you won’t miss any inspiration for your home.
We love new friends.

[mailerlite_form form_id=2]
The DON’TS To Grout Application
I need to add a little disclaimer here…up until this point, this was the first tile job my hubby Dan and I have ever tackled.
Don’t let that scare you off just yet! This simply means you have first hand access to learning from OUR mistakes so you can avoid making them yourself! We live and learn right?
We definitely have some tips on what NOT to do while applying grout, and what you SHOULD DO while applying grout!

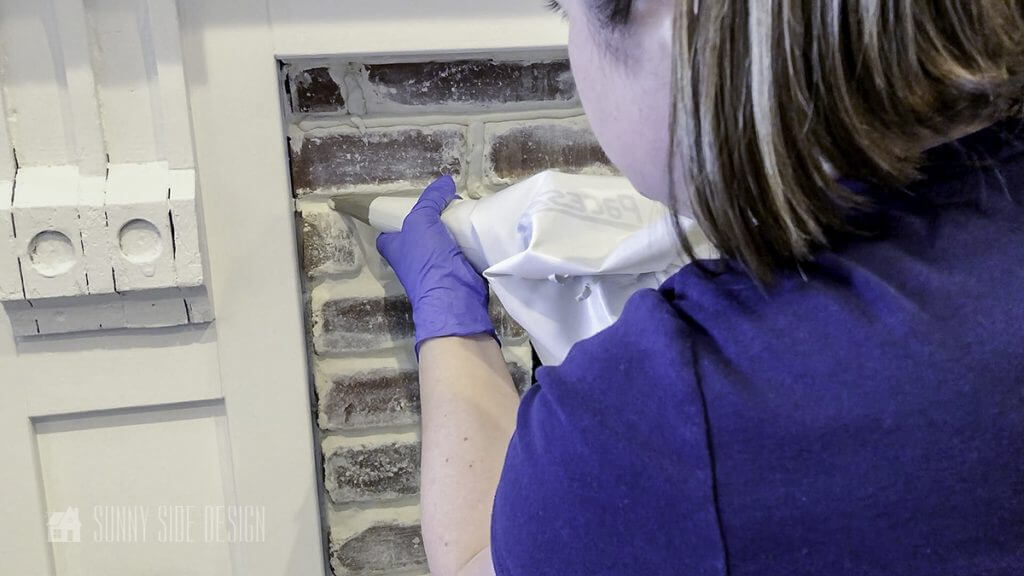
Mistake #1: DON’T use a ziploc bag for grout application!
(You can hear all about my little shopping story in the video tutorial about not having a piping bag. Thanks to Covid-19 for this unique shopping experience! 🙄)
Mistake #2: DON’T try to smooth out the grout too soon!
Again this was our first time grouting which I’ll admit was not one of our finest moments.
It’s a little embarrassing to admit, since I’m the one sharing how to apply grout.
We definitely learned from our mistakes, and hope you’ll learn from them too so you can avoid making them!
Just look at this MESS we’re making! 😳
After our first grouting attempt this is what our fireplace surround looked like.
Because we tried to smooth out the grout too soon, it was ultimately still too wet, and as much as we tried to avoid getting the grout on the front of the bricks, it was near impossible!
In the end we had more of the whitewashed, or German schmear look. Which isn’t bad if that’s what you’re going for. I actually do like this look, but I was hoping to have a little more of the red color showing.
Let’s stay connected! Follow us on social media!
The DO’S To Grout Application
DO: Use the proper tools to get the best results!
During our first grouting attempt, we ran out of grout due to some hardening before we used it.
This time around, I knew I couldn’t go inside the store to get what I needed…so I resorted to online shopping. I also couldn’t help but feel this whole grouting job should be easier! So I searched for a grout bag…and sure enough there is such a thing! So I quickly ordered a grout bag and another 10lb. bag of grout.
Your grouting experience (and work) will go SO much more smoothly and look SO much better if you’re using the right tools!
(The sad thing is, the grout bag was only about $5, had I been able to shop in the store while getting supplies the first go around, I would’ve looked for one and snagged it!)
DO: allow the grout to dry enough before attempting to smooth it out.
This time around, we decided to wait a while before smoothing out the grout. The waiting time will be different depending on different indoor temperatures and humidity levels.
Keep an eye on it and check every 5 minutes or so. To test if it’s ready or not, simply dab your finger onto the grout.
If the grout sticks to the glove and pulls up then it’s still too wet.
If the grout smooths down and doesn’t lift up when you pull your finger up, it’s ready to be smoothed out.
Removing Excess Grout

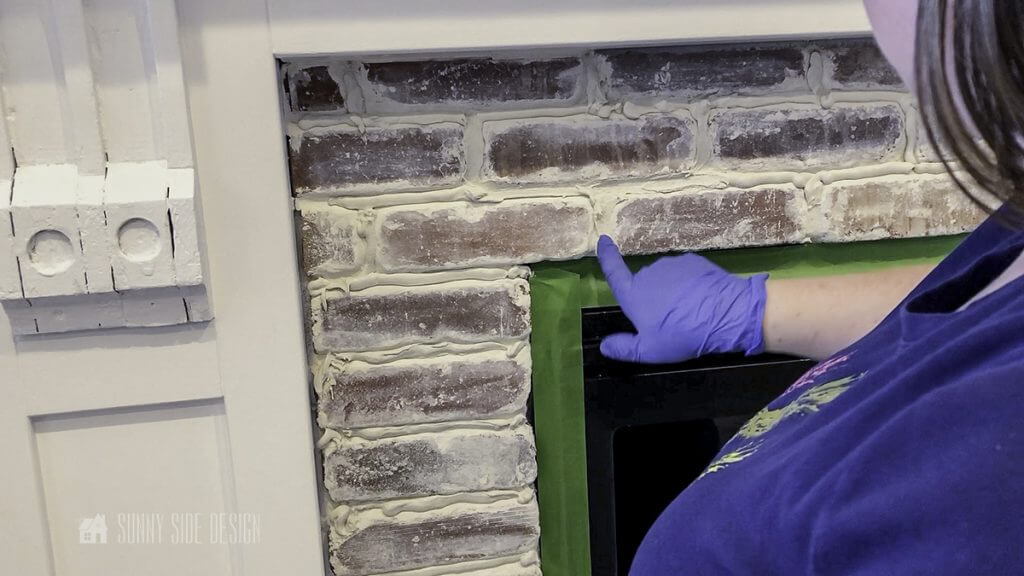
After our second attempt at applying the grout, we were much happier with the results!
Ultimately I did want more of the red color to be exposed, so I used a stiff plastic bristled brush from the dollar store to scrub away much of the excess.
I had a cup of water to dip the brush into, and a wet washcloth to wipe the brick “clean” after scrubbing.

Take a look at that difference!
Like I say if you’re going for the whitewashed or German schmear look, by all means you can call it good at this point!
I’m just happy I was able to get a bit more of that red color exposed.

Here’s a look at the fireplace surround with the left hand side scrubbed and the right hand side with the excess grout.

Once you’re happy with the grouting job, you’ll want to seal it. This will provide a moisture barrier and help prevent staining and keep it looking as good as new.
Before we sealed the brick, we also taped off the fireplace surround and used a tile grout caulk to get nice crisp lines bordering the fireplace insert.
Add Finish Molding
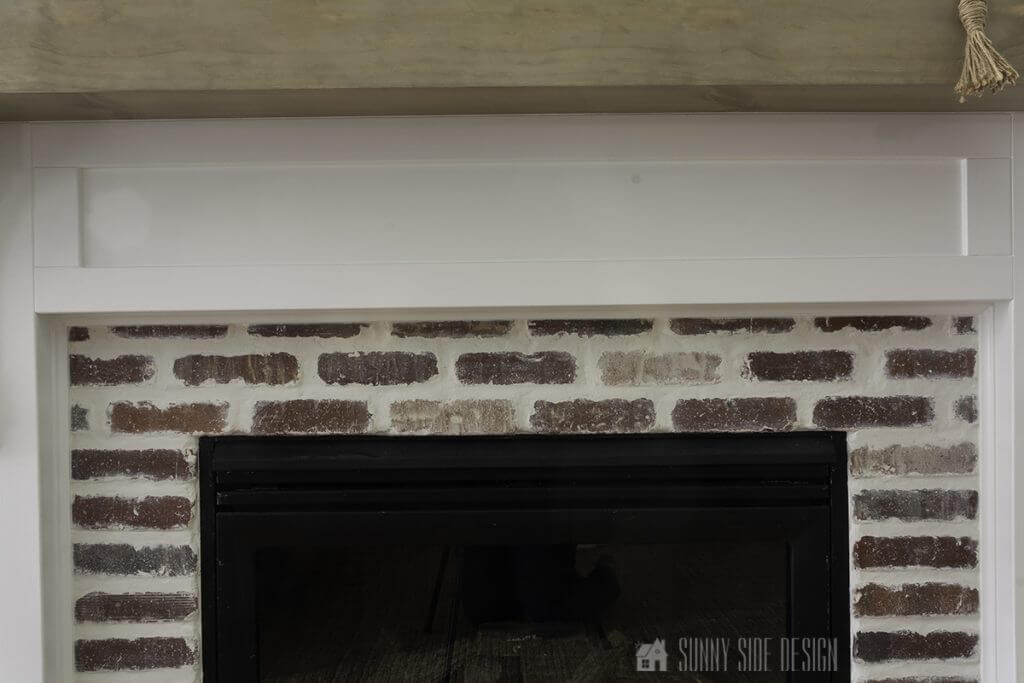
To create a nice crisp edge along the outside edges of the brick where it meets the molding, we also added a cove molding.
You can see the difference this makes in the picture that’s labeled above.
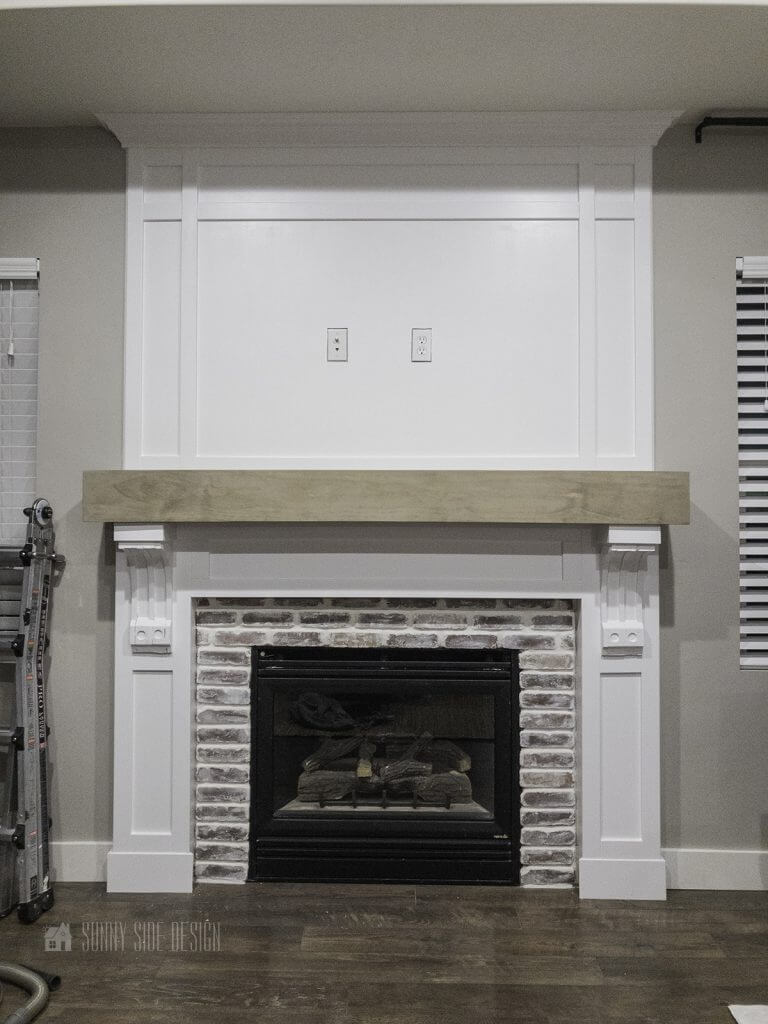
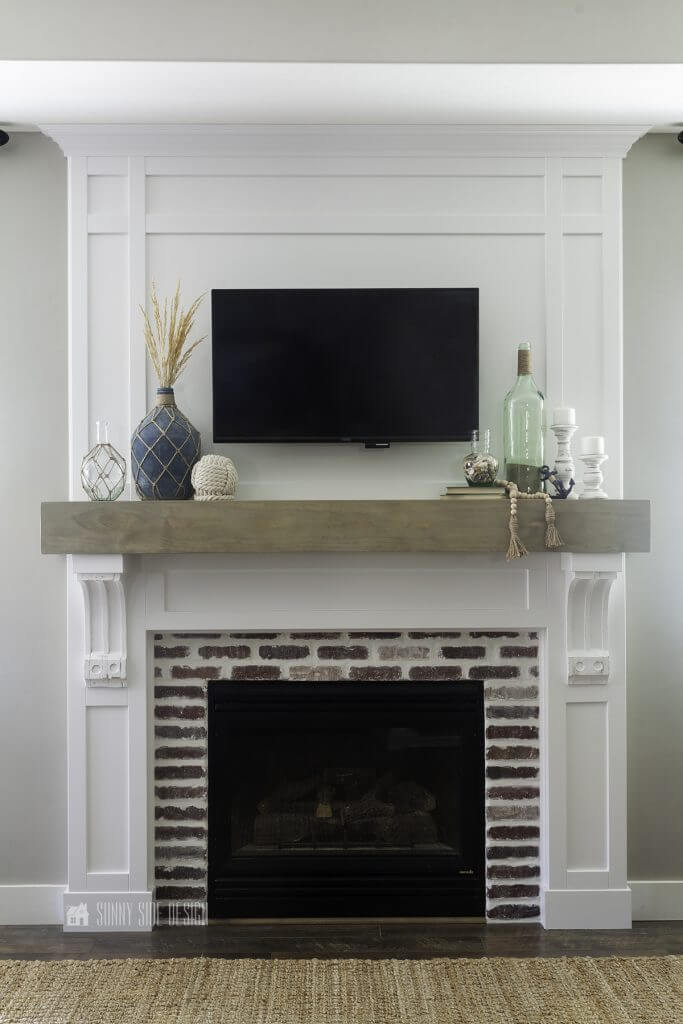
Completed Fireplace Surround

At long last this fireplace surround is complete! I’m not gonna lie, this grouting experience was a bit stressful! But, if you avoid the mistakes we made you’ll save a lot of stress and get better results right from the get go!

When all was said and done, it was nice to sit back and appreciate all the work that went into this fireplace install!

I absolutely love the way everything turned out even amidst the setbacks! From these amazing 100+ year old antique corbels, to the details in the trim work and yes, even the old, weathered and worn brick work!

I had to do a thing! I “borrowed” these darling chambray chairs from our Master Bedroom Makeover, and am totally in love with how they look with our fireplace!
Looks like I’ll be buying more of these! 😁

What do you think? Do you like the way our fireplace turned out? Would you have done things differently? PLEASE share any tips on how you’d make this project any better or easier! We can all definitely learn from one another!
We hope you found some inspiration for your home today.
Please share your tips and ideas with us.
We love hearing from you!
If you’re new here, WELCOME! We love having new readers and friends!
You can learn more about us here.
Let’s stay connected! Join our DIY community of doers and you won’t miss the weekly updates and more inspiration for you always on a budget.
Sharing is caring!
Thanks for stopping by Sunny Side Design. Empowering you to create a home you love!
DISCLAIMER
This blog’s content is for entertainment purposes only and is not professional advice. By reading this blog and attempting to recreate a project, you assume all responsibility for any injuries or damages incurred. Read my full disclaimer here.
PHOTO USE AND CONTENT SHARING
All of the photographs you see here are the property of Sunny Side Design unless otherwise credited.
We love for others to share our work, so please feel free to use one photo with a link back to our website.
Pinning and sharing is always encouraged!
Please do not reproduce other Sunny Side Design content without permission.
Retailers We Love
- Anthropologie
- Birch Lane
- Crate & Barrel
- Joss and Main
- Lampsplus
- Mark & Graham
- One Kings Lane
- Pottery Barn
- Rejuvenation
- Serena & Lily
- Wayfair
- West Elm
- Williams Sonoma
- World Market
Be sure to follow us on Pinterest for even more home decor and DIY ideas.
To see what we are working on before it’s on our blog, follow us on Instagram.
You will also find our video tutorials on our YouTube channel.
- 25 Must See Ideas for Organizing Under Kitchen Sink

- How to Decoupage a Vase with Blue and White Napkins
- 18 Daily Cleaning Habits for a Neat and Tidy Home
- How to Paint a Ceramic Pitcher Inspired by Pottery Barn


I am so curious to know what kind of grout you used in the veneer brick project around the fireplace. I have gotten mixed advice on what kind to use and some people said that standard grout (not intended for high temps) worked just fine while others swear that you need to use something suited to high temps. With the caulk have you had any issues with running/melting with it up against the metal? I got the brick up in a reasonable amount of time – not my first veneer brick job – but it is the first time I have had to consider environmental factors with the grout. I would so appreciate if you could share anything about the grouting material/brand, etc because I would love to have the project wrapped up before Christmas gets here. Thanks so much.
We used Mapei sanded grout and found it’s best to apply it with a grout bag. We did use the Mapei sanded grout caulk where the brick meets the fireplace and have had no issues with it melting. It’s been 5 years since we installed it and it still looks great. We also install cove moulding where the brick meets the surround. I hope this helps and good luck with your project. Merry Christmas