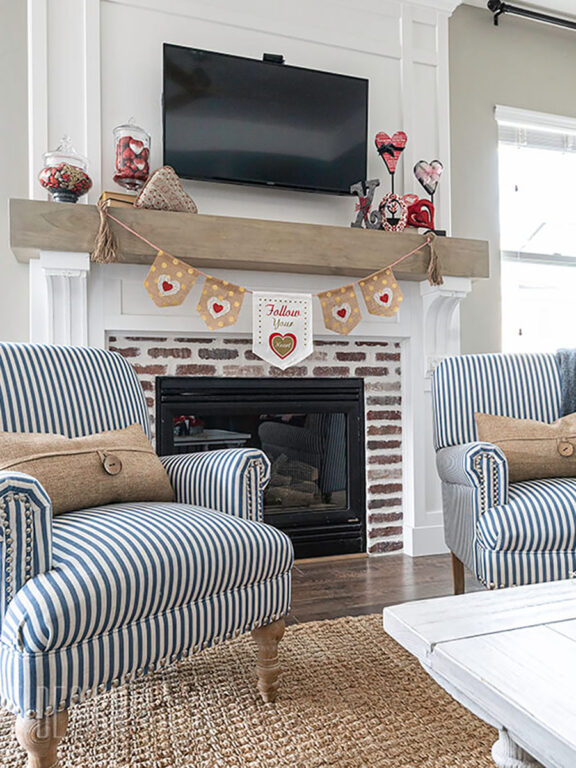
We LOVE a fireplace in the living room. It adds such beautiful architectural details to any space. If you are following along from the previous weeks, welcome. We are coming to the finish line, adding in all the details with molding and trim. This simple DIY tutorial will show you how easy it is to build a fireplace surround and mantel. We will show you our step by step process, so you can be a doer as well. 😉
The title of “doer” makes me chuckle. When we moved into our home 5 years ago, one of our neighbors came over to introduce herself and welcome us to the neighborhood. One of her first comments to me was, “oh, you’re a doer”. I wasn’t quite sure what she meant, but soon understood. We soon became great friends, she never was a “doer” but she loved to spend her weekends at yard sales, another passion of mine. I am a doer, DIYer and I love it!
If you are a doer and are looking for ideas to add value to your home, take a look at 10 Sensational Home Improvement Ideas on a Budget.
- Supplies Used to Create Fireplace Mantle Surround
- Step 1: Mount Cleats – Fireplace Mantle Surround
- Step 2: Construct Fireplace Surround
- Step 3: Attach Fireplace Surround to Cleats
- Step 4: Attach Corbels
- Step 5: Add Detail Molding & Trim – Fireplace Mantel Surround
- Step 6: Trim Molding on Corbels
- Step 7: Construct Overmantle
- Step 8: Finish Work – Fireplace Mantle Surround
Sunny Side Design is a participant in the Amazon Services LLC Associates Program, an affiliate advertising program designed to provide a means for sites to earn advertising fees by advertising and linking to Amazon.com. As an Amazon Associate, this blog earns from qualifying purchases with no additional cost to you. Click here to read our full disclosure policy.
Are you loving the way this turned out? It has been fun to watch Steph and Dan’s living room transform with the addition of a fireplace. After all, the center of every living room should be a fireplace. This is a special place in a home as it brings people together.
For a little more fireplace inspiration, check out their basement built-in entertainment center with an electric fireplace.
Sit back, relax and enjoy the process! If you are more of a visual learner, we’ve created a short video of our steps adding the detail molding and trim. Click on the link below.
Supplies Used to Create Fireplace Mantle Surround
Materials:
- 4′ x 8′ MDF Wood Panel
- 1 x 3″ Primed MDF Board
- Crown molding
- wood glue
- Primed Masonite board
- Caulk
- DAP DryDex
- Behr Urethane Alkyd Satin Enamel Paint
Tools:
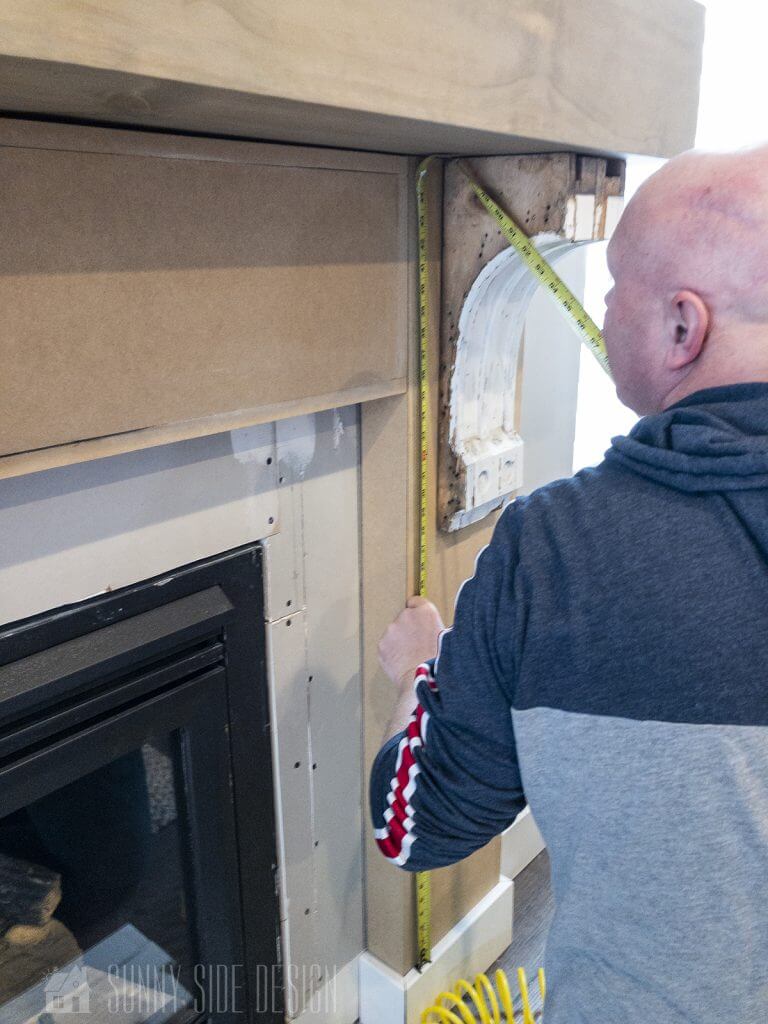
Step 1: Mount Cleats – Fireplace Mantle Surround


From our previous post, you know that we created a faux beam mantle, which was attached to the wall with a large cleat. We temporarily put the faux beam into position as we prepared and attached the cleats which would secure the fireplace surround to the wall. The surround would fit snugly against the faux beam mantle.
Are you enjoying this project? Please Pin It, save it for later and share it with a friend.
Sharing is caring!
Step 2: Construct Fireplace Surround

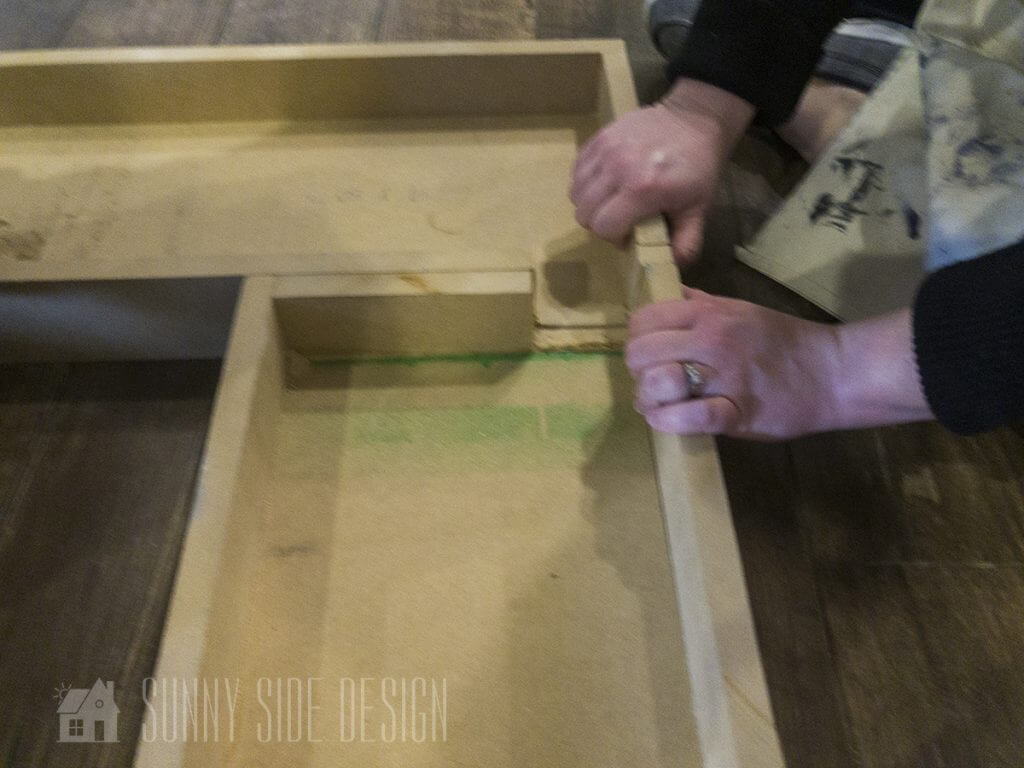
The surround consists of 3 boxes. The top box for the center measure 10 1/2″ x 54″ The 2 boxes for the sides measure 10 1/2″ x 51″ The depth for all 3 boxes is 3 5/8″.
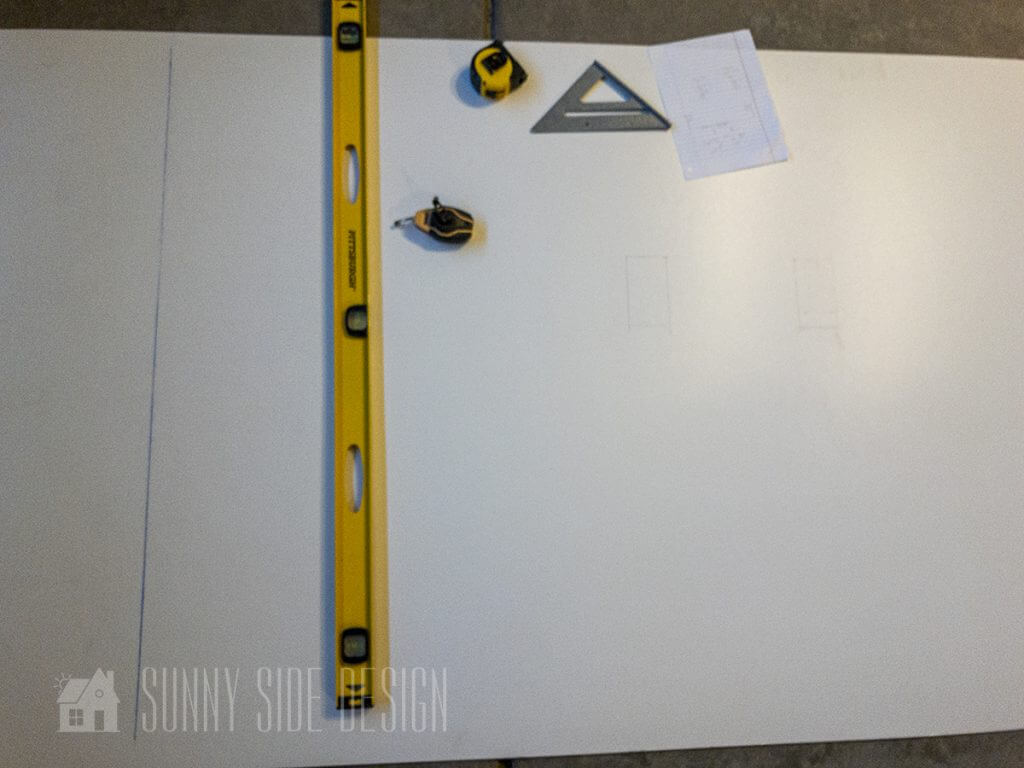
The pieces for the boxes were cut from a 4′ x 8′ MDF wood panel. We like to use MDF for our projects and built-ins because it’s easy to work with, paints beautifully and is inexpensive. We made all of the cuts using a table saw, but a circular saw with a guide would also work. Or if you are not comfortable using a saw, you can have the cuts made for you at Home Depot. I believe they charge $.50 per cut.
As the boxes were assembled, all of the seams face towards the front. All of the seams will be covered with molding later on in the construction process.
The 3 boxes were then secured together with screws. First we cut a notch out were the 2 boxes connected with the center box, so it is able to attach to the cleat. Because the cleats needed to be secure in studs, we needed the top cleat to run the entire distance. This is more clearly illustrated in the video tutorial.
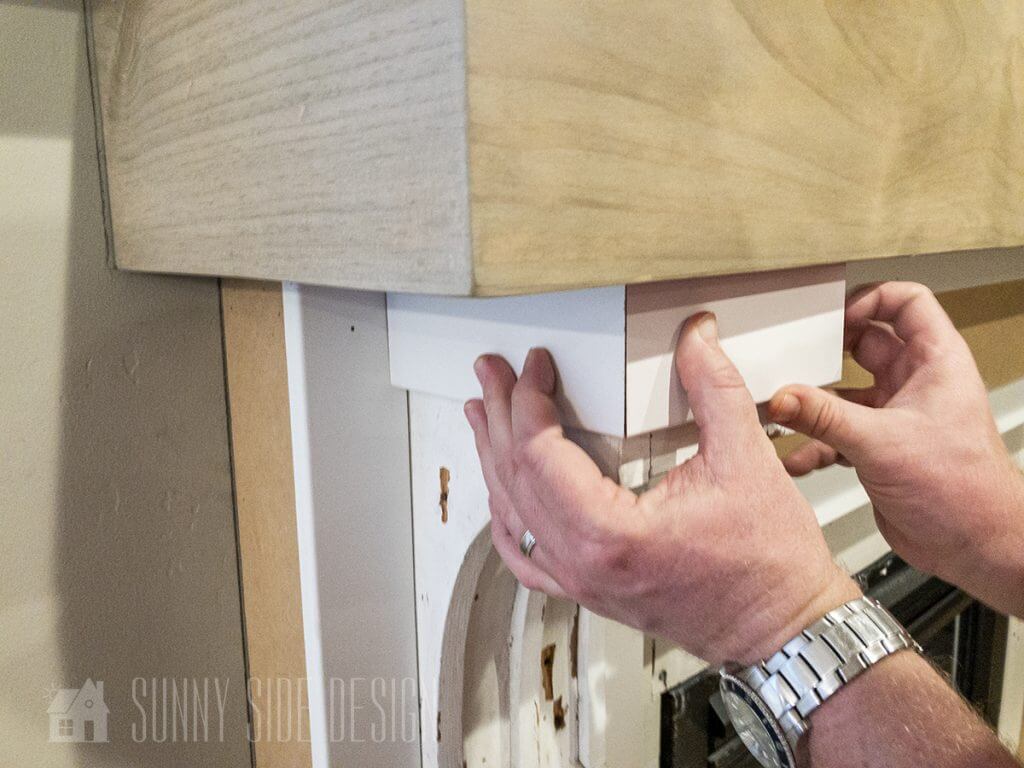
Step 3: Attach Fireplace Surround to Cleats

We then positioned the surround over our cleats and secured them with brads with a pneumatic brad nailer.
If you’re new here, welcome! We’re so glad you’re here.
Let us introduce ourselves, we’re Michelle and Steph, a mom and daughter team who love to DIY and decorate our homes.
Not only are we passionate about making our homes warm, comfortable and unique, but it’s our mission to help you create that same feeling in your own home.
You’ll find ideas for repurposing, creating, decorating and making your home truly yours, while always mindful of a tight budget.
Undoubtedly we love finding ways to make your home look high-end on a small budget.
Plus you’ll also find a recipe or two as we share our family favorites with you.
We’d love it if you’d join our community of doers so you won’t miss any inspiration for your home.
We love new friends.

[mailerlite_form form_id=2]
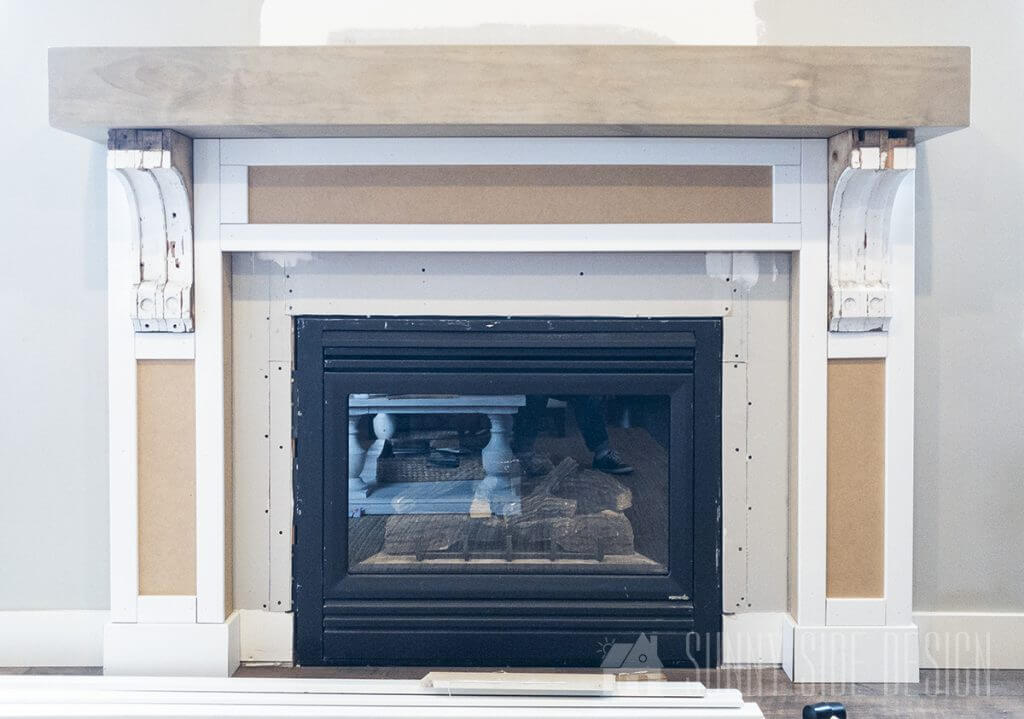
Step 4: Attach Corbels

Steph had bought 3 antique corbels several years ago at a vintage market. She was so excited to use them for her fireplace mantle surround! They were in rough condition, you can see how she restored them here.
We attached the corbels to the surround with wood glue and 2″ brads. The corbels are not structural, they are not supporting the beam. The beam is secured with the wall cleats.
Step 5: Add Detail Molding & Trim – Fireplace Mantel Surround

This is the exciting part, the details that add that craftsman look.
We began by adding the 5″ base molding around the 2 side surrounds. The corners were cut at a 45º, then nailed into position with 2″ brads.
The dimension of the surround was all based on the width of the corbels and the 2 1/2″ wide molding we were planning on using.
We next measured for the 2 1/2″ wide molding that would be attached to the front of the surround.
Note: all of the decorative molding we used was primed 2 1/2″ wide flat trim molding.
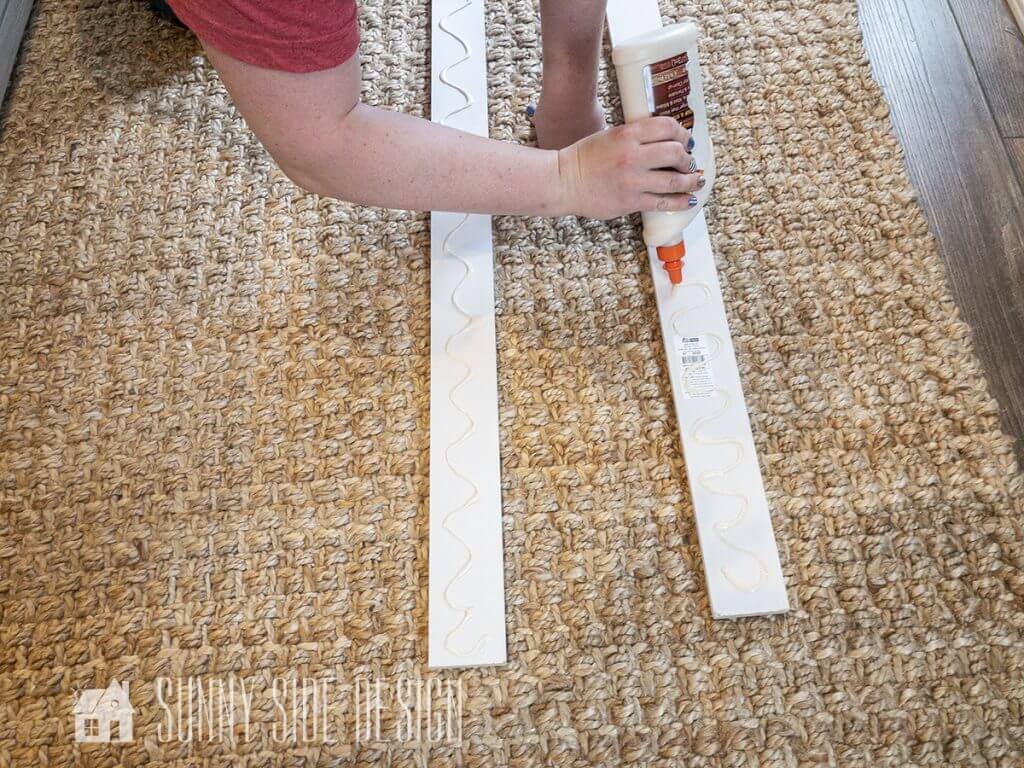
Once the trim molding was cut to length, we ran a bead of wood glue on the back side.
Then we attached each piece of molding with the pneumatic brad nailer.
If you do not have a brad nailer, and are doing a lot a projects, it is a great investment. It makes the job so much easier. The pneumatic nailer sets the brads just below the surface of the wood, which makes it so easy to fill with wood putty and create a beautiful finish.
We cut and secured all of the long pieces of trim molding first. Then we measured, cut and secured all of the short trim molding pieces. We repeated this same design above the mantle as well. You will see that in the photos below.
Let’s stay connected! Follow us on social media!
Step 6: Trim Molding on Corbels
Using the same 2 1/2″ trim molding we cut and angled the corners with a 45º. They are also secured with wood glue and brads.
Step 7: Construct Overmantle


Steph’s walls are textured and she wanted the overmantel to look like a wood panel. Therefore we cut a piece of primed masonite to go above the mantle. We made cuts in the panel for the outlets for the TV.


We began by prepping the top for the crown molding. To make the crown molding appear chunkier, we first attached a 1 x 5 board. Then the crown was cut to length, angling the corners back to the wall.

Now the crown molding is not perfect! But with a little caulk it will look terrific.
Every time I mention to Steve that the project involves crown molding, he gives me THAT look. You know the one, that says are you kidding me, no! He hates cutting crown molding, he usually cuts the angle wrong and we need to go purchase another piece. However this time he got it right the first time, it must be all that practice I’m giving him. 😉

To finish off the sides of the overmantel as well as the fireplace mantle surround, we attached a small 1/4 round.
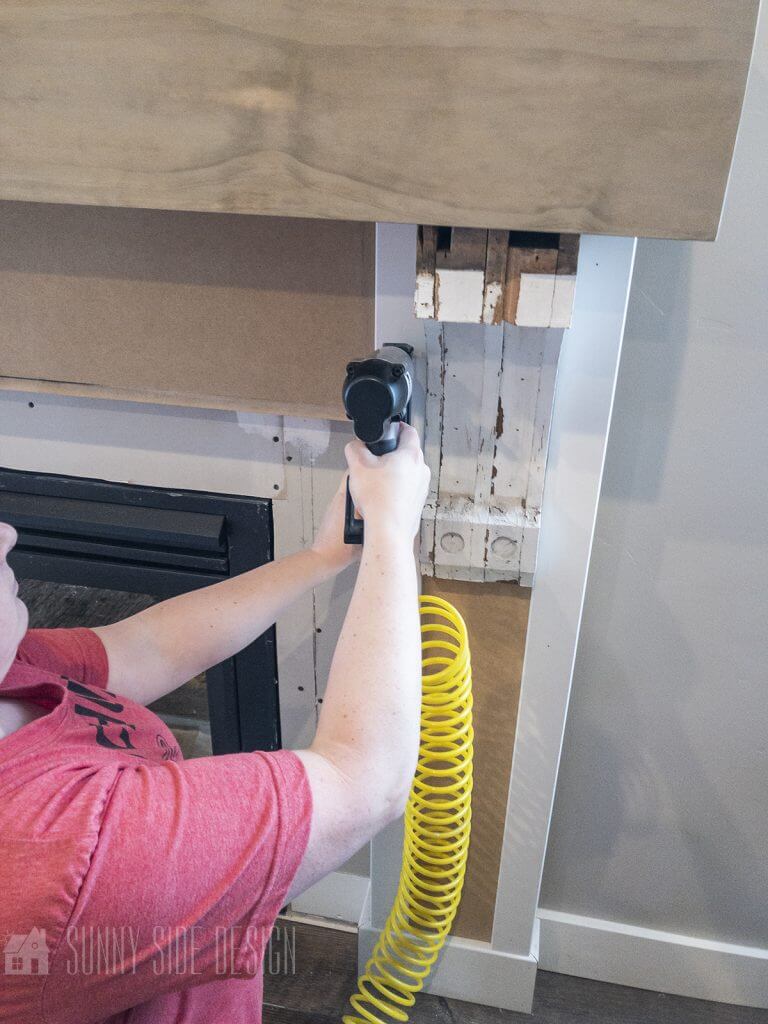
Step 8: Finish Work – Fireplace Mantle Surround

We are approaching the finish line! 😃 We begin by filling all of the holes from the brads with putty. We like to use DAP DryDex. Fill in the holes with a small putty knife, when dry (pink putty turned white) sand with a fine grit sandpaper until smooth.

Next, caulk all of the edges of the molding and around the corbels. Apply a thin bead of caulk with the gun, them smooth with your finger.
Steph is a real pro at this! She actually likes to caulk, so I have her do all of the caulking. Darn it, my nails just get in the way and I can’t get a smooth finish!
Once all the caulking is dry and the fireplace mantle surround is sanded and the dust removed, it’s ready for the finish.
We primed the bare wood, then applied 2 coats of a cabinet paint. We used Behr Urethane Alkyd Satin Enamel. This paint is fabulous for cabinetry and wood projects. It is extremely durable and has a self-leveling component, which minimized brush strokes.
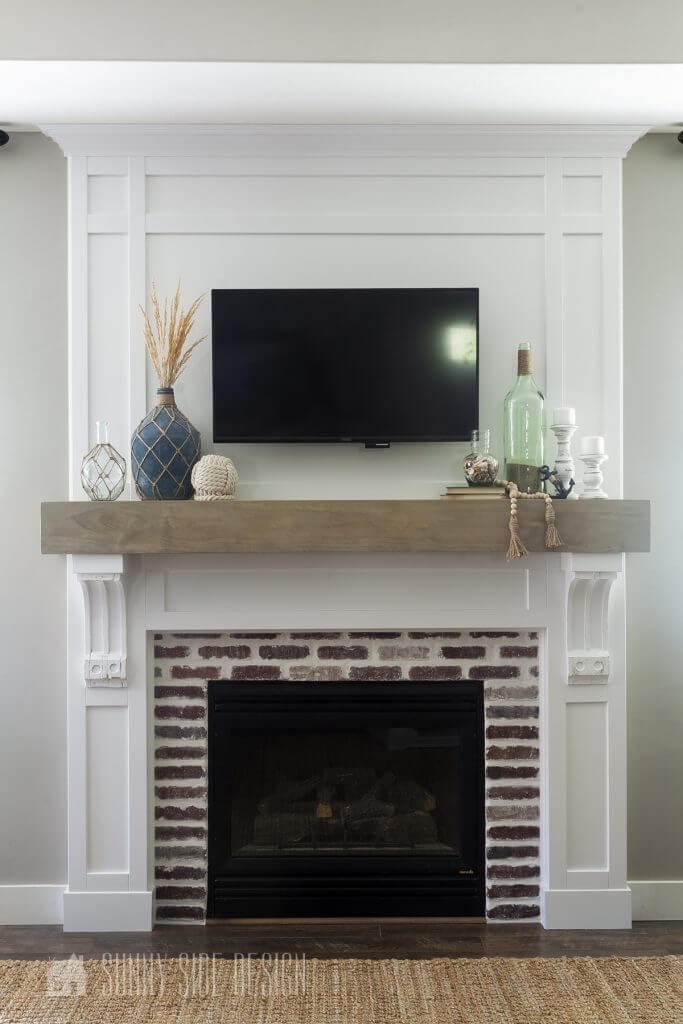
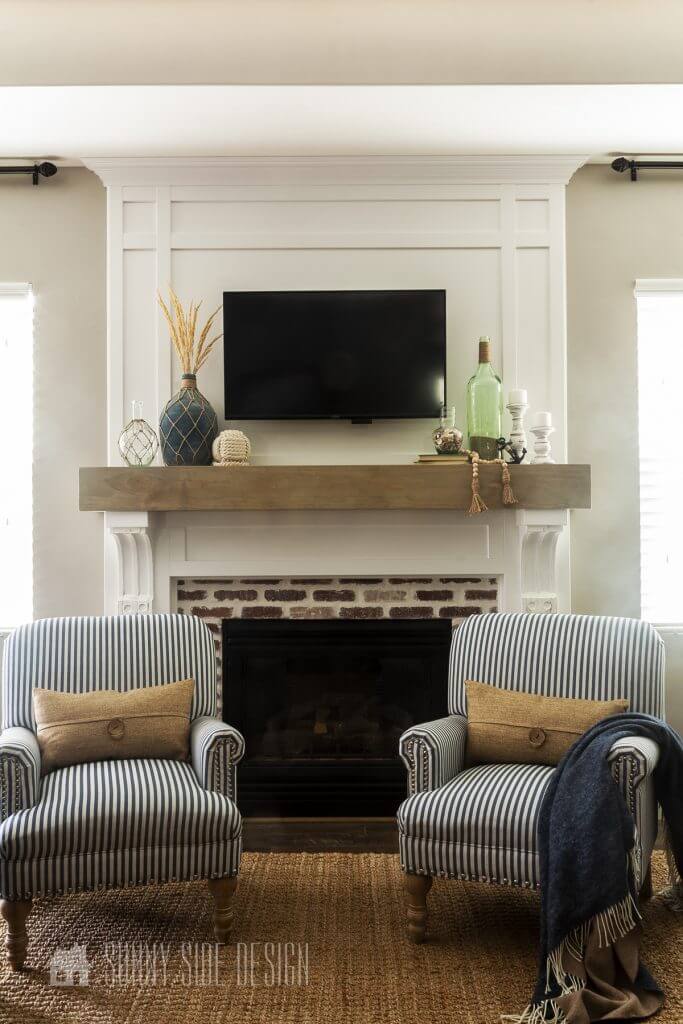
And here she is in all of her glory! You can see better in the photo how we carried the same trim molding design up to the overmantel, creating a beautiful craftsman, coastal, farmhouse style. Take your pick, I think this style of fireplace mantle surround would work well in so many different home styles.

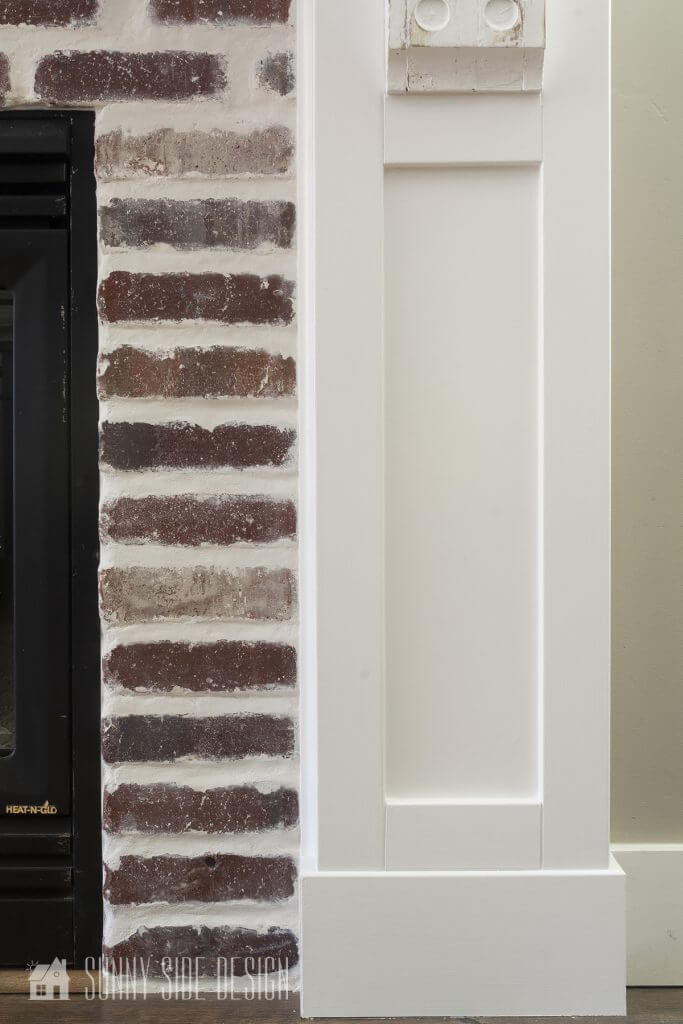
We love the chippy, rustic corbels with the clean lines of the craftsman style fireplace mantle surround. It looks fresh and gave us a little vintage, lived in look.

So is this a project you think you would like to tackle? It definitely helps to have many hands doing a project of this size. We enjoyed working on this together, it makes for a fun date night, or nights!
To see our tutotial for installing the brick tile surround click here. You will not want to miss this!
If you’ve missed any of these previous posts from our fireplace series click on the links below.
How to Install a Gas Fireplace Insert
How to Restore Vintage Corbels
We hope you found some inspiration for your home today.
Please share your tips and ideas with us.
We love hearing from you!
If you’re new here, WELCOME! We love having new readers and friends!
You can learn more about us here.
Let’s stay connected! Join our DIY community of doers and you won’t miss the weekly updates and more inspiration for you always on a budget.
Sharing is caring!
Thanks for stopping by Sunny Side Design. Empowering you to create a home you love!
DISCLAIMER
This blog’s content is for entertainment purposes only and is not professional advice. By reading this blog and attempting to recreate a project, you assume all responsibility for any injuries or damages incurred. Read my full disclaimer here.
PHOTO USE AND CONTENT SHARING
All of the photographs you see here are the property of Sunny Side Design unless otherwise credited.
We love for others to share our work, so please feel free to use one photo with a link back to our website.
Pinning and sharing is always encouraged!
Please do not reproduce other Sunny Side Design content without permission.
Retailers We Love
- Anthropologie
- Birch Lane
- Crate & Barrel
- Joss and Main
- Lampsplus
- Mark & Graham
- One Kings Lane
- Pottery Barn
- Rejuvenation
- Serena & Lily
- Wayfair
- West Elm
- Williams Sonoma
- World Market
Be sure to follow us on Pinterest for even more home decor and DIY ideas.
To see what we are working on before it’s on our blog, follow us on Instagram.
You will also find our video tutorials on our YouTube channel.
- Easy Strawberry Chicken Salad with Lime Maple Balsamic Vinaigrette

- How to Fix Chipped Kitchen Cabinets with a Pen
- Easy 4th of July Door Decor You Can Make in Minutes
- 35 Easy Decorating Ideas for Summer to Welcome the Season