

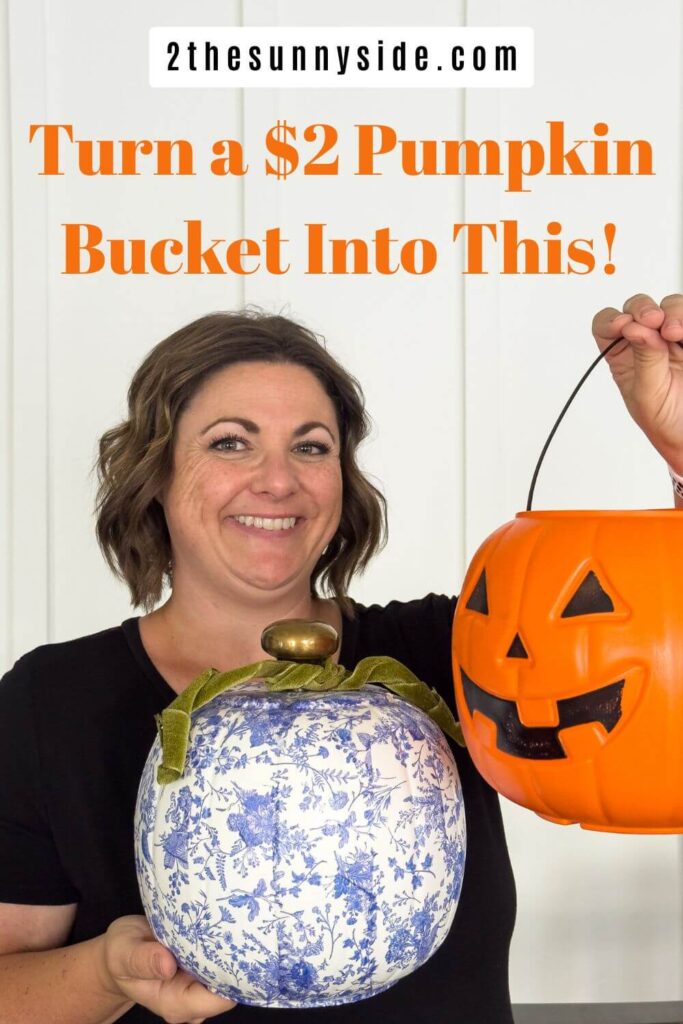
Turn an ordinary plastic pumpkin bucket into a beautiful blue and white chinoiserie pumpkin with this easy decoupage pumpkin with napkins.
This past week, we’ve been enjoying cooler temperatures and a some much-needed rain.
The mornings are getting chilly, and I have a feeling fall will soon be knocking on our door!
Lately, I’ve been completely obsessed with beautiful blue and white chinoiserie.
I’ve worked it into my spring and fall tablescapes, added a few pretty vases around my home, and now I’m wondering…
why not create a chinoiserie pumpkin?
You’d never guess this beautiful pumpkin started out as a Walmart plastic pumpkin bucket!
My mom and I challenged ourselves to take 10 of these inexpensive trick-or-treat buckets and turn them into beautiful fall decor.
And let me tell you, the results were better than we expected!
After you check out this decoupaged pumpkin tutorial, head over to our YouTube channel to see the other pretty pumpkins we created from these humble little buckets.
You don’t want to miss what they became!
Sunnyside home is a participant in the Amazon Services LLC Associates Program, an affiliate advertising program designed to provide a means for sites to earn advertising fees by advertising and linking to Amazon.com. As an Amazon Associate, this blog earns from qualifying purchases with no additional cost to you. Click here to read our full disclosure policy.
Supplies for Decoupage Pumpkins
Here’s what you’ll need to transform an ordinary pumpkin bucket into a beautiful blue and white chinoiserie pumpkin:
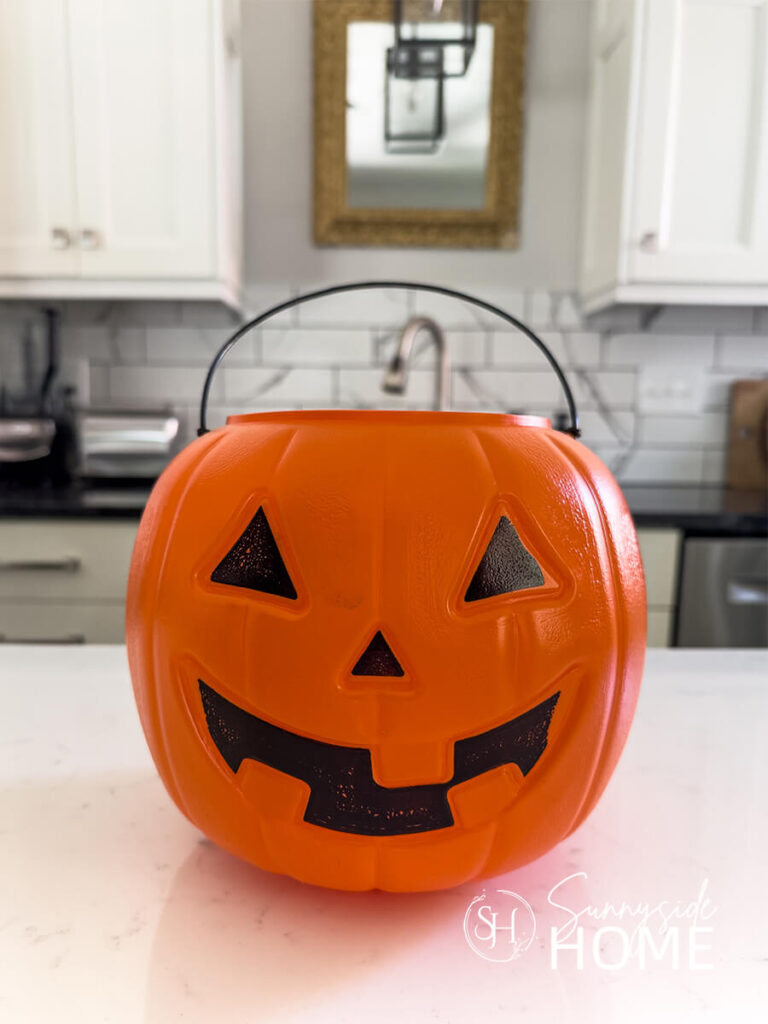
- plastic pumpkin bucket we purchased ours at Walmart, but you can also use a white craft pumpkin
- spackling plaster or JB Weld plasticWeld
- white paint with primer
- Mod Podge
- 3 ply napkins
- pumpkin stem (I used a vintage door knob, but a dried pumpkin stem, stick or finial will also work.)
- ribbon
Prep the Pumpkin Bucket
Start by removing the handle from the pumpkin bucket and giving it a good cleaning to remove any stickers, dirt or residue.
Next, we’ll need to fill in the jack-o’-lantern face so the surface is nice and smooth for applying the napkins.
We used drywall filler because that’s what we had on hand, and it adhered to the plastic surprisingly well.
Once it was completely dry, we lightly sanded it smooth.
If you want a product specifically designed to bond to plastic, you can also use JB Weld PlasticWeld, a two-part epoxy filler made for repairing and adhering to plastic.
Once the filler is completely dry, apply two light coats of white paint with primer, allowing each coat to dry thoroughly before applying the next.
This creates a clean, smooth surface and gives our blue and white chinoiserie napkins a beautiful background to shine against.
Are you enjoying this project? Please Pin It, save it for later and share it with a friend.
Sharing is caring!
Prepare the Napkins
Before you start decoupaging, take a few minutes to prepare your napkins.
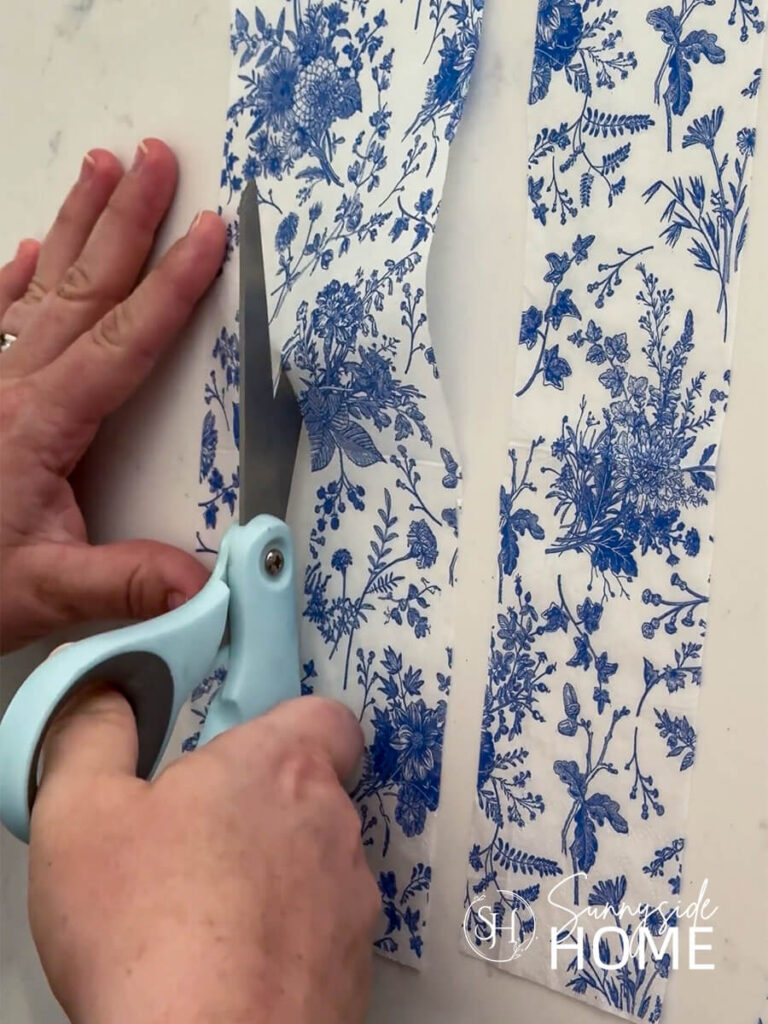
Begin by carefully separating the printed layer from the other layers of the napkin—you’ll only need the thin, printed layer for this project.
Next, decide which parts of the chinoiserie pattern you want to feature on your pumpkin and cut or gently tear the napkin into smaller, manageable pieces.
I chose to cut my napkins into strips that were about 2″ wide (the width of the pumpkin ribs).
While my napkins did overlap a bit at the top and bottom of the pumpkin, because of the print of my napkins, it still worked well.
However if you are cutting or tearing out specific elements from the napkins, take a moment to plan where you’d like each piece to go.
This little bit of planning will help you create a pretty, balanced pattern and make the decoupaging process much easier.
If you’re new here, welcome! We’re so glad you’re here.
Let us introduce ourselves, we’re Michelle and Steph, a mom and daughter team who love to DIY and decorate our homes.
Not only are we passionate about making our homes warm, comfortable and unique, but it’s our mission to help you create that same feeling in your own home.
You’ll find ideas for repurposing, creating, decorating and making your home truly yours, while always mindful of a tight budget.
Undoubtedly we love finding ways to make your home look high-end on a small budget.
Plus you’ll also find a recipe or two as we share our family favorites with you.
We’d love it if you’d join our community of doers so you won’t miss any inspiration for your home.
We love new friends.
Decoupage the Pumpkin
Now for the fun part!
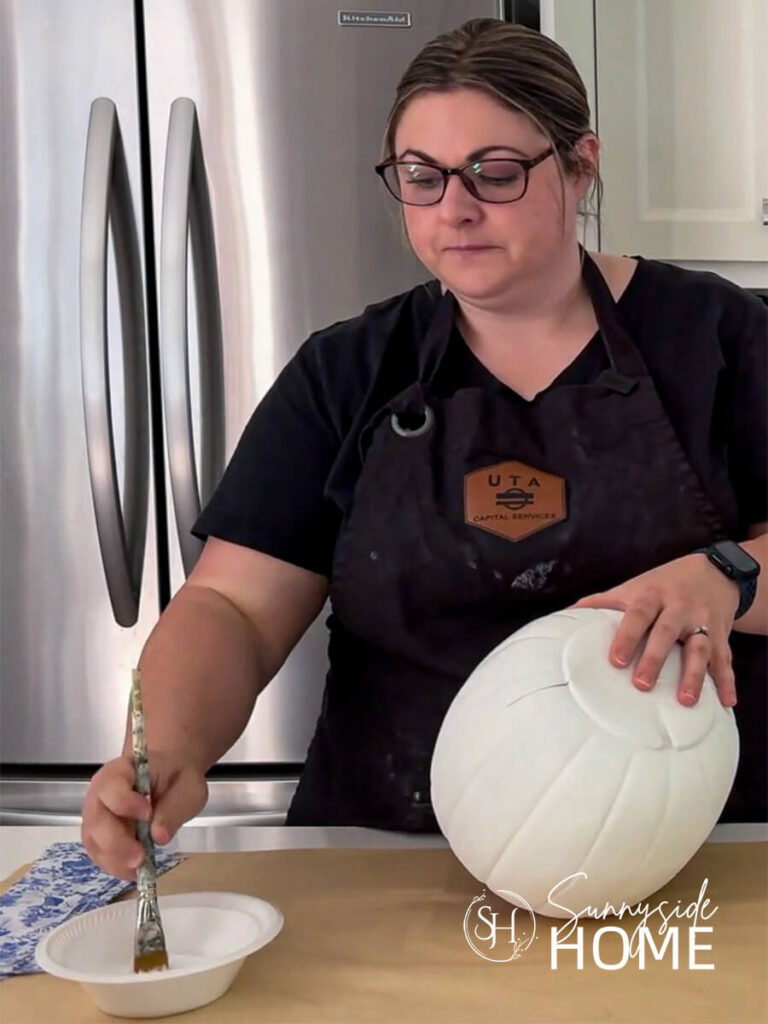
Start by applying a thin layer of decoupage medium along one of the ribs of the pumpkin.
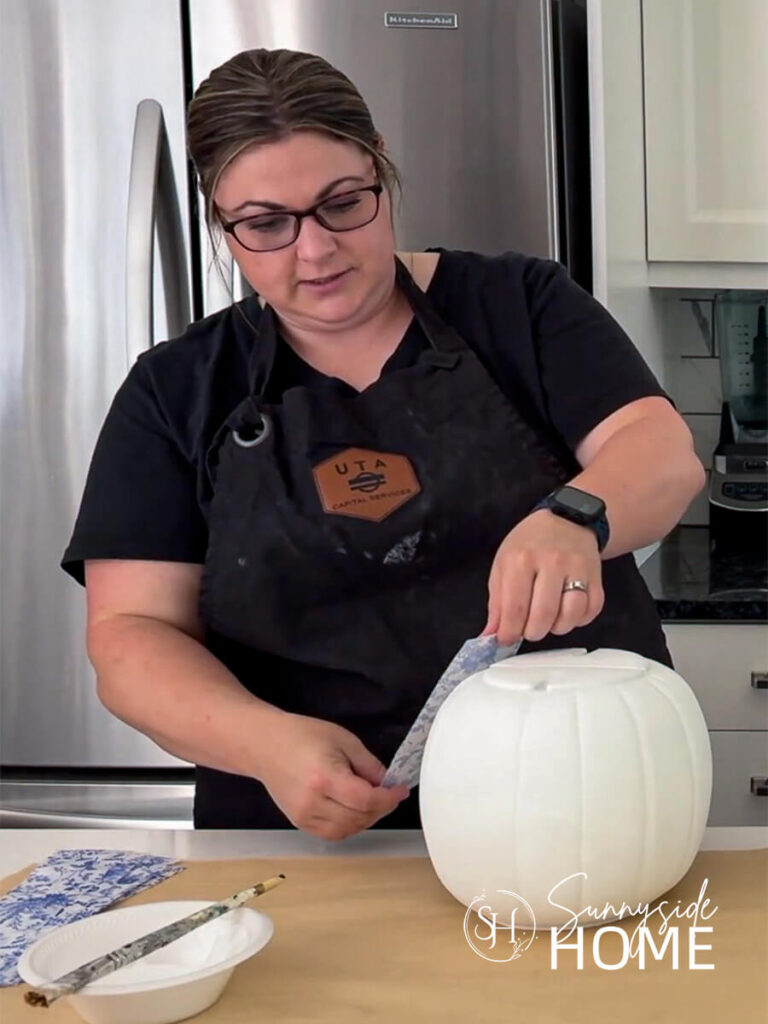
Carefully place your napkin pieces over the surface,
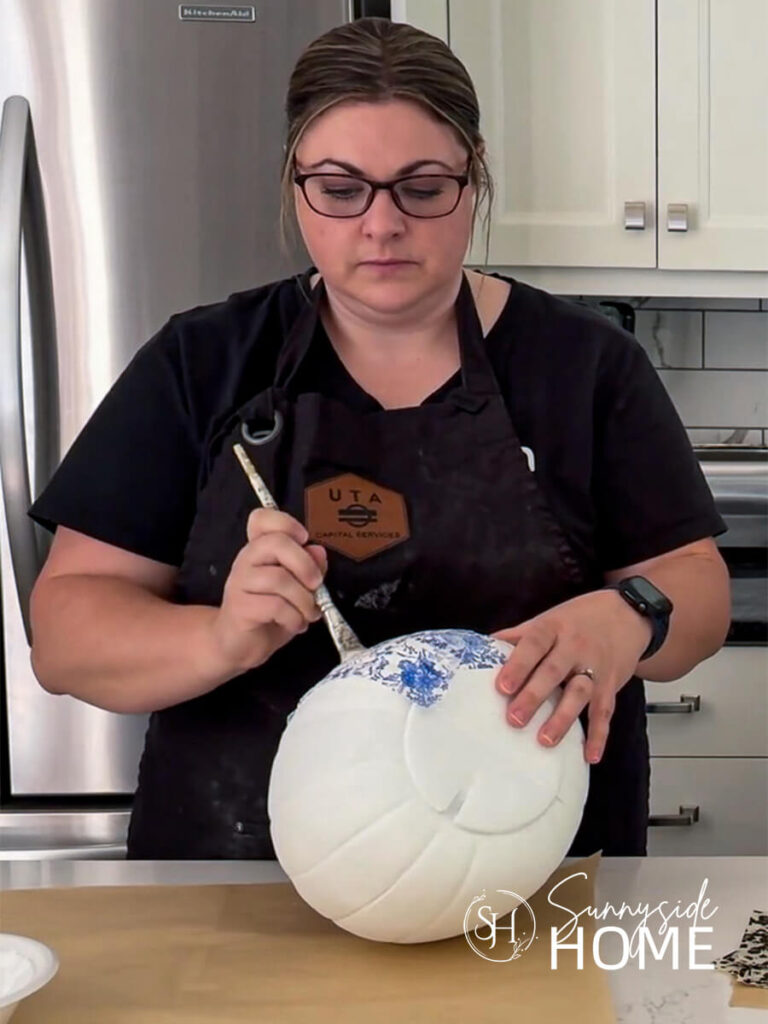
then gently smooth them with a soft paintbrush to help minimize wrinkles and tears.
Because the pumpkin has a curved surface, my napkins did wrinkle a little, but thankfully, the pattern disguises the wrinkles so well that they’re barely noticeable.
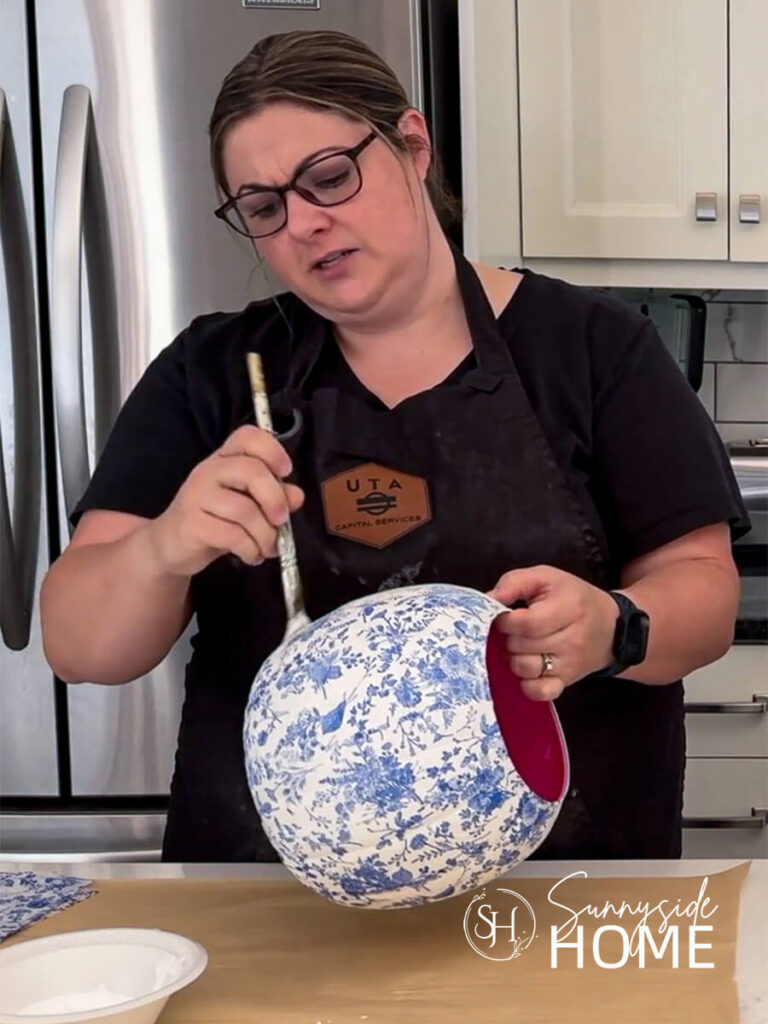
Continue working your way around the pumpkin, adding and overlapping pieces as needed to cover the entire surface.
Because we are using a pumpkin bucket, we used the bottom of the bucket as the top of our pumpkin.
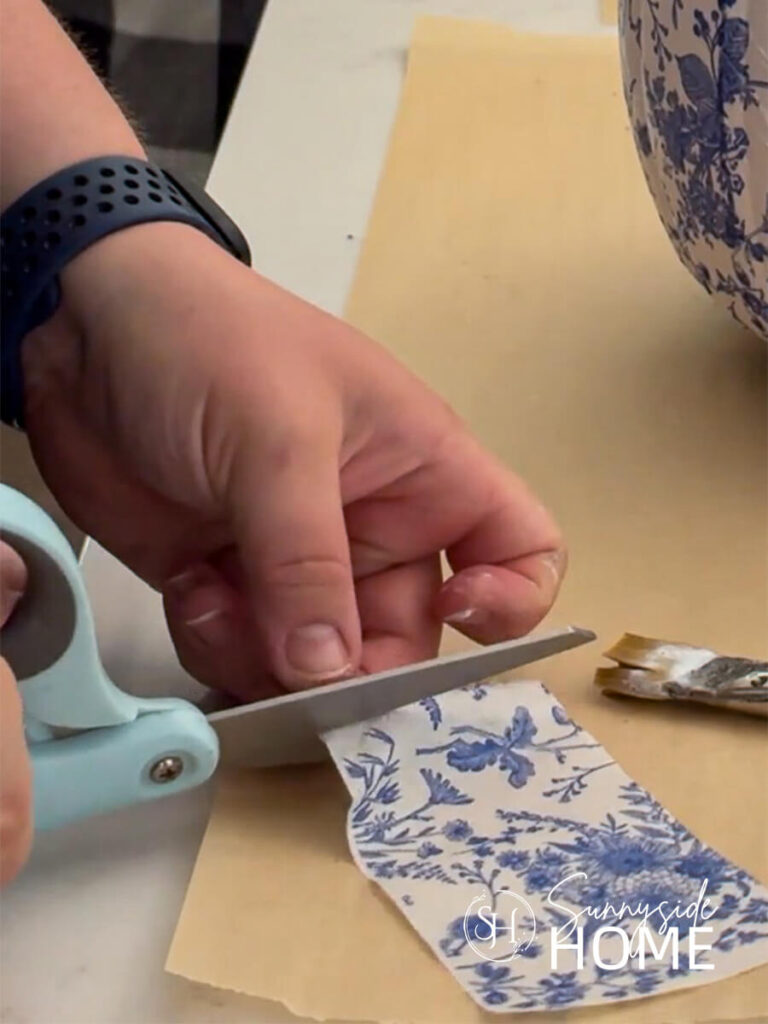
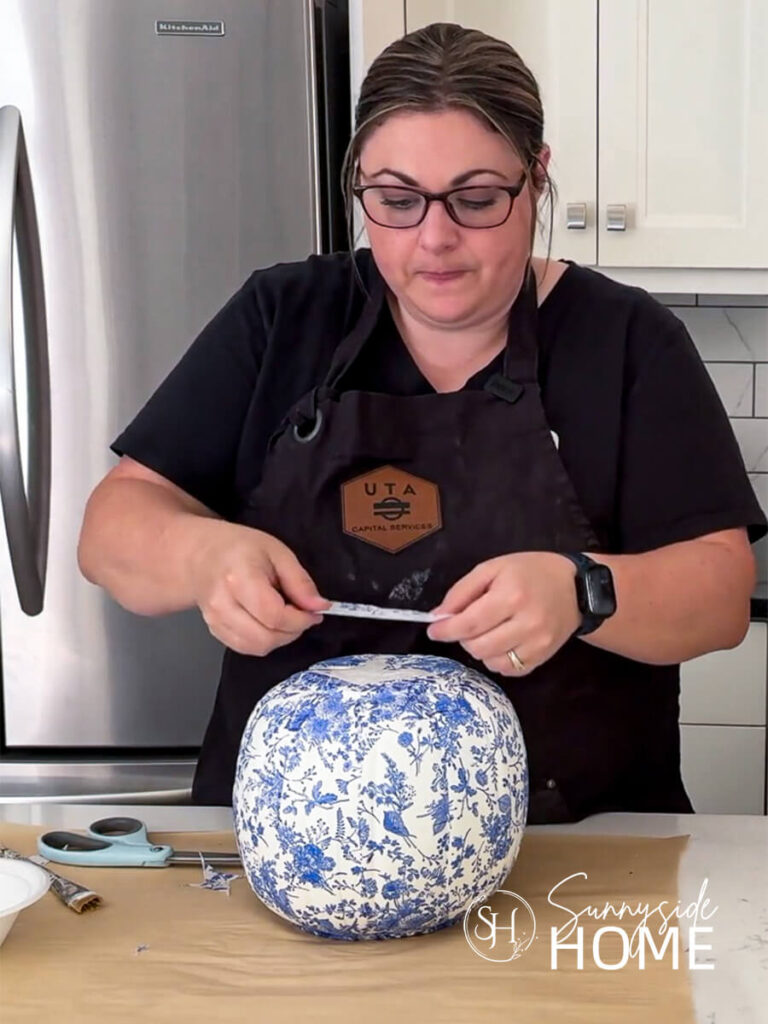
Once all of the pumpkin ribs are covered with the napkins, I cut a piece of napkin to fit over the flat top of my pumpkin and adhered it with the Mod Podge.
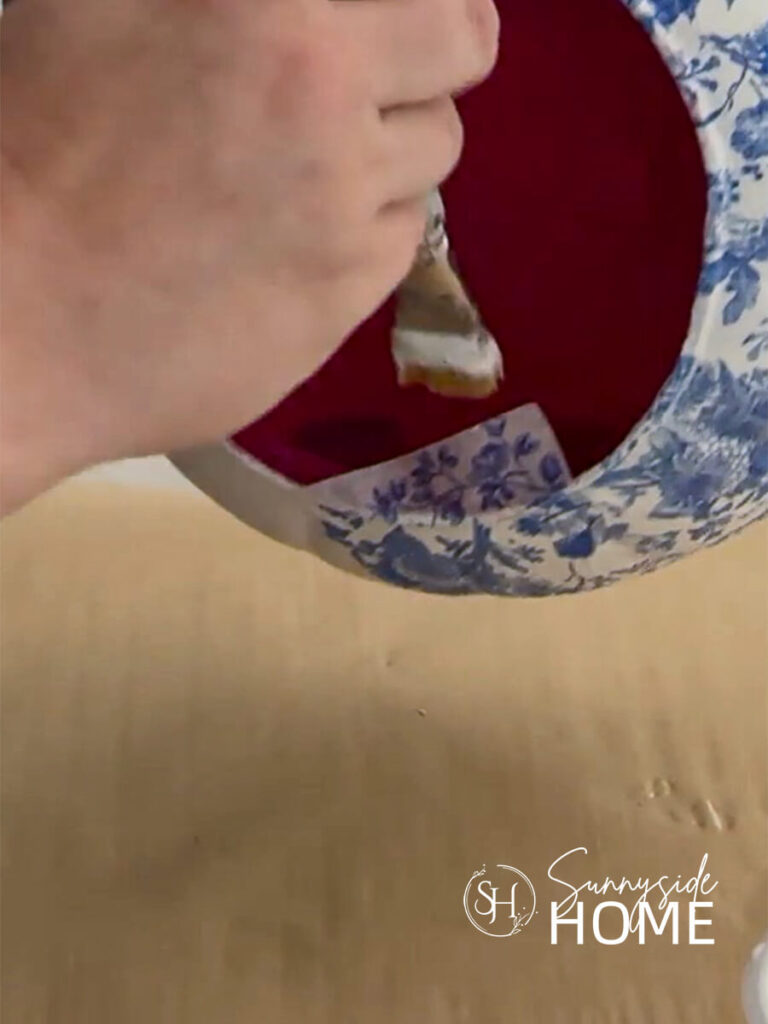
For the lower edge of my pumpkin I allowed about 1″ of the napkin to fold into the inside of pumpkin bucket and secured it with the Mod Podge.
Once you’ve finished, allow the pumpkin to dry completely.
Then apply a final, thin layer of decoupage medium over the entire pumpkin to seal and protect the napkins.
Add the Finishing Touches
Now it’s time to give your chinoiserie pumpkin a little personality!
First, you’ll want to add a stem.
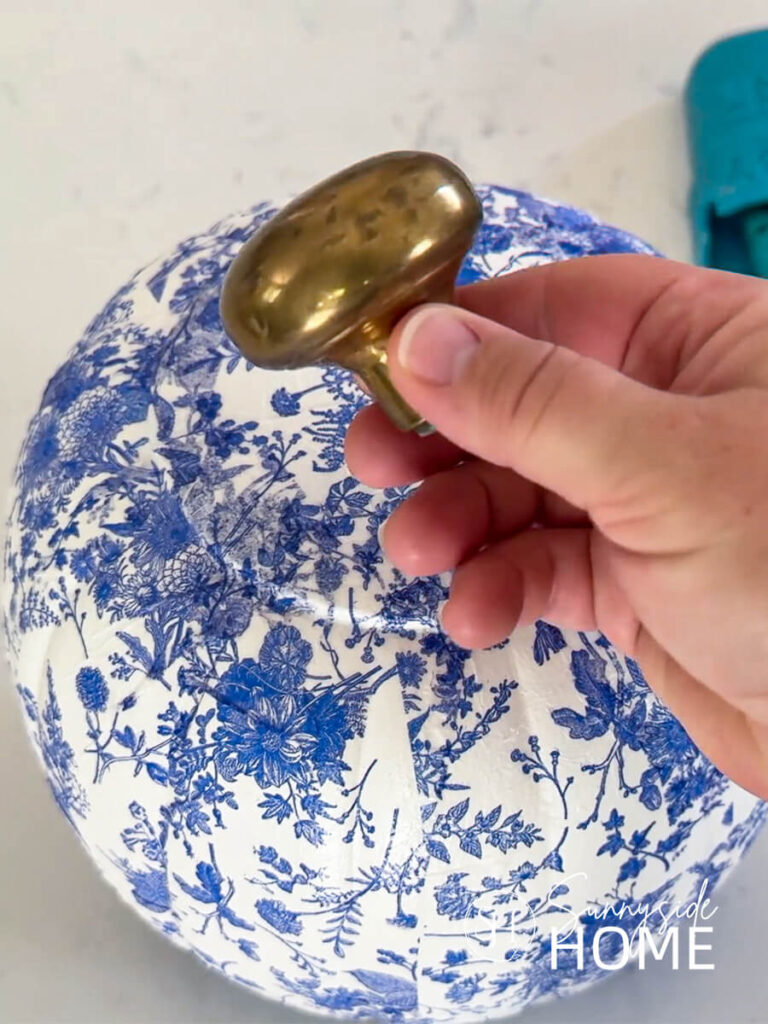
For mine, I rummaged through my mom’s stash of vintage goodies and found the perfect finishing touch—a vintage brass doorknob.
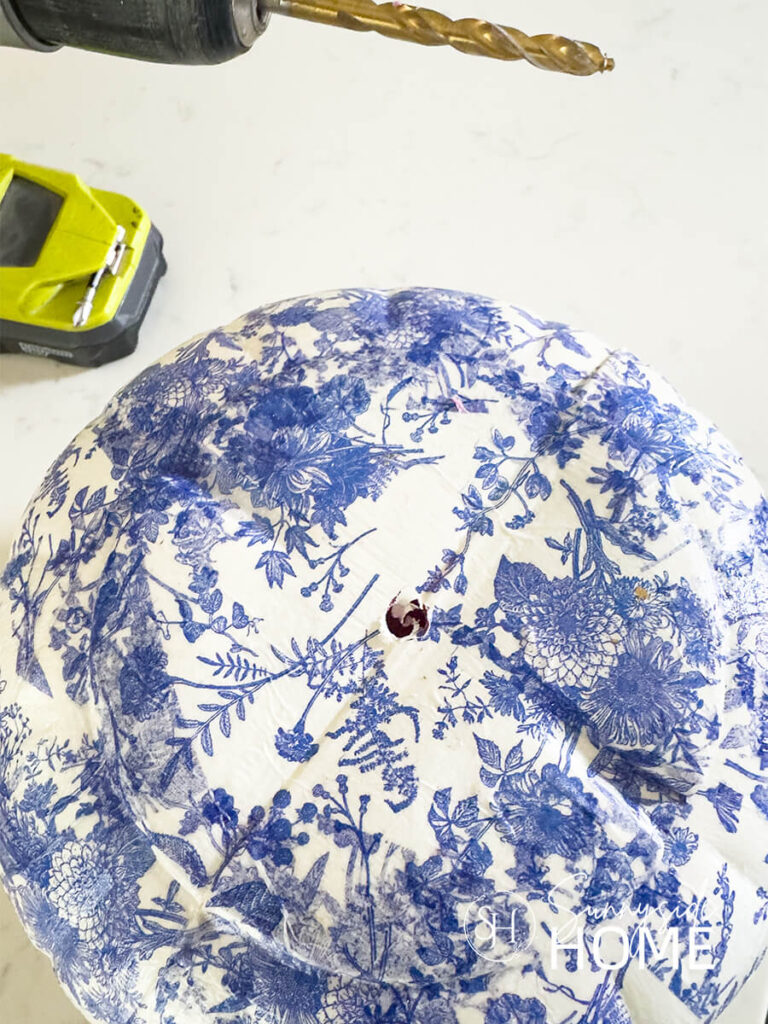
To attach it, I drilled a hole through the top of the pumpkin and found a small bolt that threaded into the doorknob.
I simply placed the bolt through the hole and threaded the doorknob onto it.
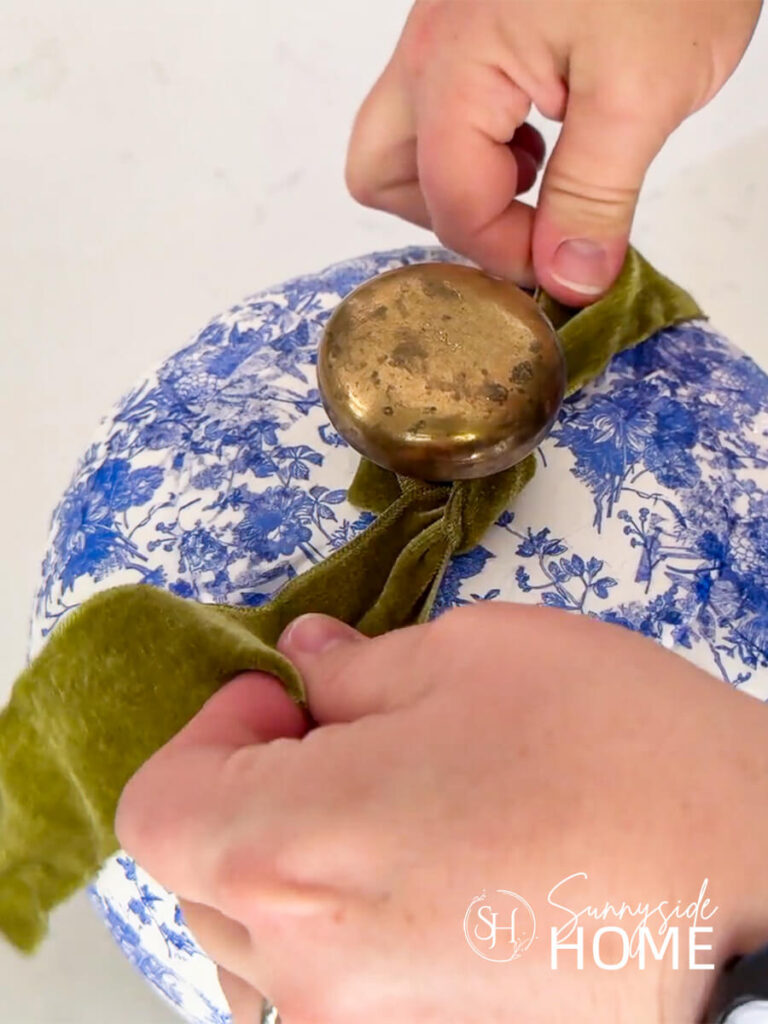
To finish off the look, I tied a pretty green velvet ribbon around the stem.
You could also add leaves, greenery, a bow, or other embellishments to make your pumpkin uniquely yours.
Looking for other options for a stem? Try one of these ideas:
- dried pumpkin or squash stem
- curtain finial,
- stick or branch
- cinnamon stick
- salvaged hardware
- wine cork
- cabinet knob
- kitchen utensil handel
- thread spool
- lamp finial
- chair spindle
Let’s stay connected! Follow us on social media!
Style and Enjoy
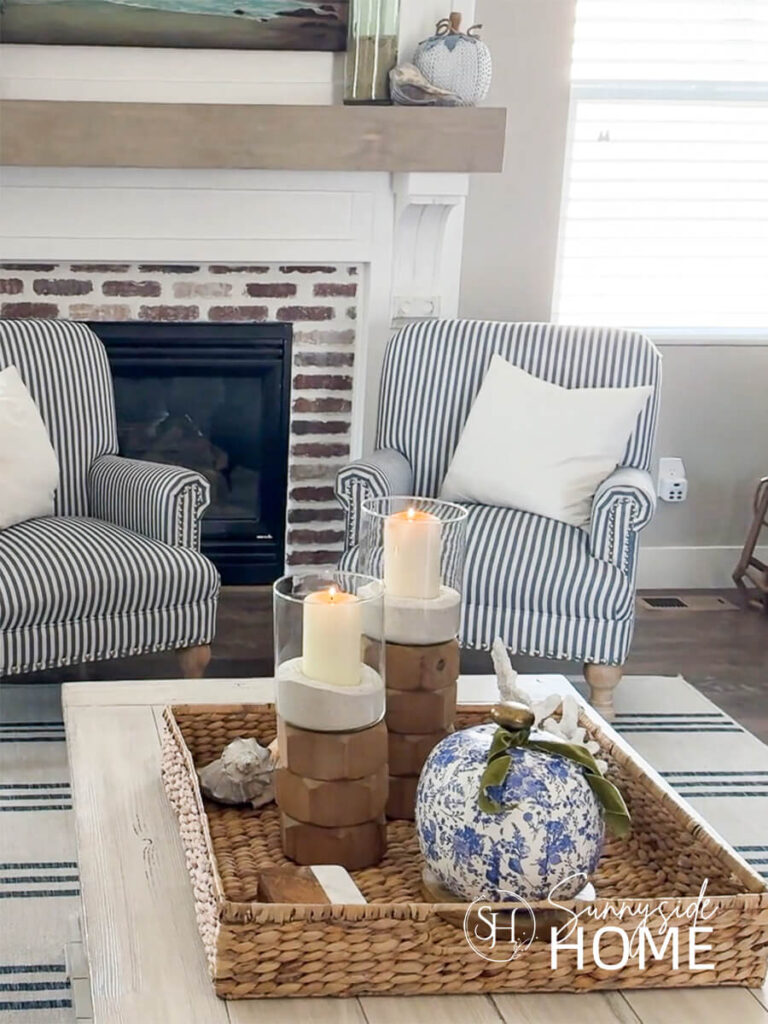
Now comes the best part—finding the perfect spot for your beautiful chinoiserie pumpkin!
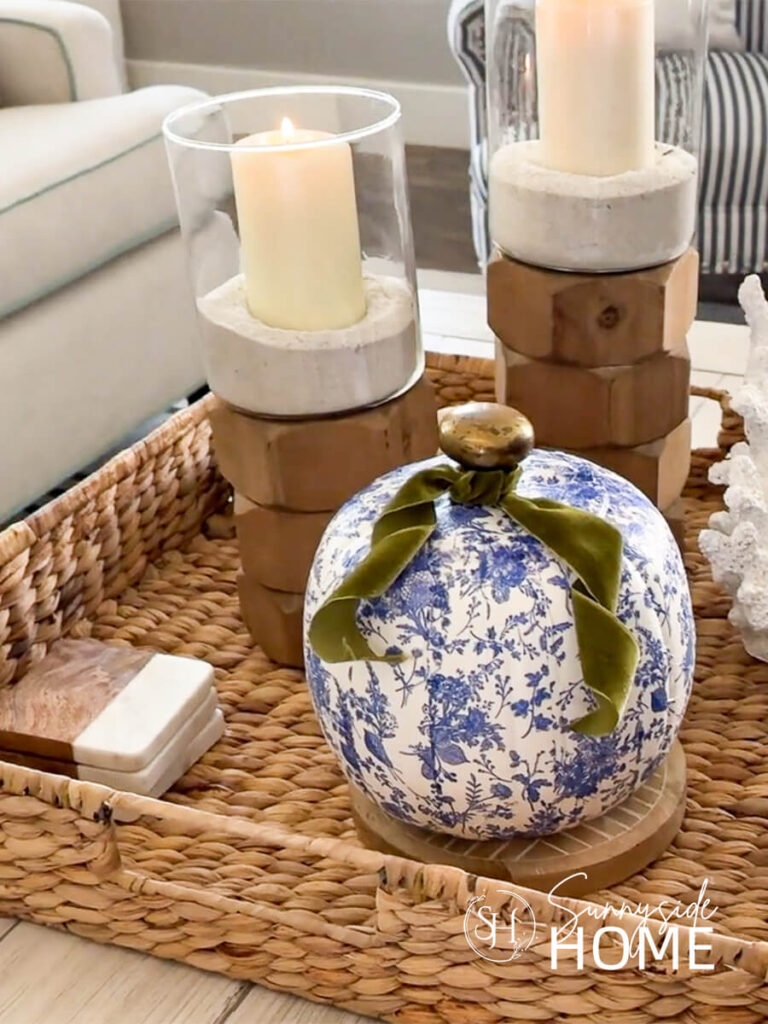
Place it on a fall tablescape, tuck it onto a shelf or mantel, or use it as part of a pretty centerpiece.
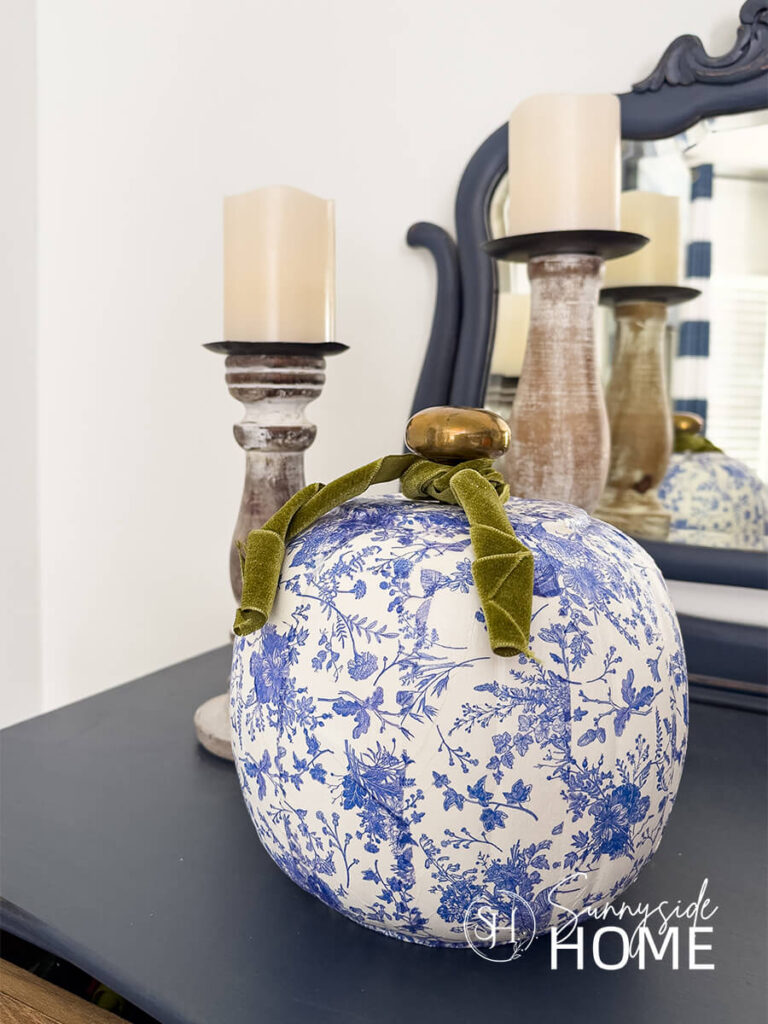
I love how the classic blue and white pattern adds a touch of elegance to fall decor without relying on traditional orange.
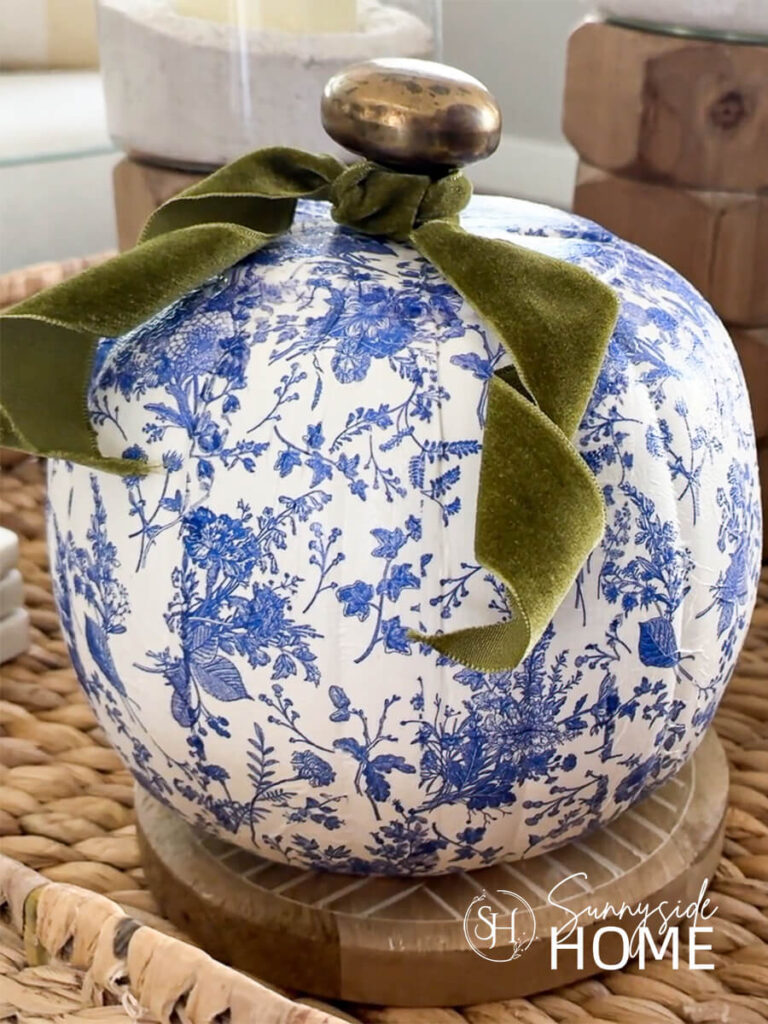
Pair it with other blue and white pieces, a little greenery, or even a few more pumpkins for a collected, cozy look you’ll enjoy all season long.
More DIY Pumpkin Ideas
- Easy Vintage Lace Pumpkin Decor
- Fall Craft Finger Knit Pumpkins
- Fall Macrame Pumpkin Wreath
- 5 Simple Pumpkin DIY Ideas That Look High-End
- Easy 5 Minute Pumpkin with A Toilet Paper Roll
- Easy DIY Denim Pumpkin Decor
And don’t forget to check out our YouTube channel to see the other pretty pumpkins we created from these humble little buckets.
Frequently Asked Questions
What kind of napkins work best for decoupage?
For decoupage pumpkins, thin, lightweight paper napkins with a pretty printed design work best. Paper cocktail or luncheon napkins both work well. Look for 2- or 3-ply paper napkins — you’ll use only the thin, printed top layer. High-quality napkins with a fairly smooth surface. They’re less likely to tear while you’re working. Small or repeating patterns — especially helpful when working around the curves and ribs of a pumpkin.
Do you separate napkin layers before decoupaging
Yes! Always separate the napkin layers before decoupaging, especially when working with paper napkins. Most decorative napkins are 2 or 3-ply, meaning they have a printed top layer and one or two plain layers underneath. You want to carefully peel away the plain layers and use only the thin, printed layer for your project.
Tip: Separate the layers before cutting your napkin pieces. It’s much easier to work with the delicate printed layer when you’re not trying to peel it apart after cutting.
How do you prevent wrinkles when decoupaging napkins?
Wrinkles are pretty common when decoupaging napkins, especially on a curved surface like a pumpkin. You can minimize them with a few simple tricks:
Embrace a few wrinkles! On a textured or patterned pumpkin, tiny wrinkles often disappear into the design once everything is dry. As you discovered with your chinoiserie pumpkin, a busy pattern can be wonderfully forgiving.
Use only the printed layer of the napkin. The thinner the paper, the easier it is to smooth onto the surface.
Apply a thin, even layer of decoupage medium. Too much can make the napkin overly wet and more prone to wrinkling.
Work in small sections. Don’t try to cover the entire pumpkin at once.
Smooth gently with a soft paintbrush. Start in the center of the napkin piece and work outward toward the edges. A gentle touch is important because wet napkin paper tears easily.
Don’t overwork the napkin. Once it’s in place, resist the temptation to keep brushing it. Too much brushing can actually create more wrinkles—or tear the paper.
Overlap pieces when necessary. It’s better to use several smaller pieces that conform to the curves than one large piece that fights the shape.
Can decoupage pumpkins be used outdoors?
Yes! If you’d like to display your decoupage pumpkin outdoors, be sure to use Outdoor Mod Podge to seal and protect it. We used Outdoor Mod Podge on a wind chime last spring, and it has held up beautifully outside, so we’re confident using it for this project, too.
How do you protect a decoupage pumpkin?
Once your decoupage pumpkin is completely dry, apply a final coat of Mod Podge over the entire surface. This adds a protective layer that helps seal the napkin and protect it from moisture and everyday wear. If you plan to display your pumpkin outdoors, Outdoor Mod Podge is a great choice.
Shop

Final Thoughts
I love when a little creativity can turn something ordinary into something beautiful—and this chinoiserie pumpkin is the perfect example!
Who would have guessed that an inexpensive plastic pumpkin bucket could become such pretty fall decor?
The blue and white napkins give it an elegant, timeless look, while the vintage brass doorknob and green velvet ribbon add the perfect finishing touches.
And the best part?
You don’t need a big budget to create something that looks special.
So before you pass up those inexpensive pumpkin buckets this fall, grab a few and get creative—you might be surprised by what you can turn them into!
We hope you found some inspiration for your home this fall.
Please share your tips and ideas with us.
We love hearing from you!
If you’re new here, WELCOME! We love having new readers and friends!
You can learn more about us here.
Let’s stay connected! Join our DIY community of doers and you won’t miss the weekly updates and more inspiration for you always on a budget.
Sharing is caring!
Thanks for stopping by Sunnyside Home. Empowering you to create a home you love!

Retailers We Love
- Anthropologie
- Birch Lane
- Crate & Barrel
- Joss and Main
- Lampsplus
- Mark & Graham
- One Kings Lane
- Pottery Barn
- Rejuvenation
- Serena & Lily
- Wayfair
- West Elm
- Williams Sonoma
- World Market
Be sure to follow us on Pinterest for even more home decor and DIY ideas.
To see what we are working on before it’s on our blog, follow us on Instagram.
You will also find our video tutorials on our YouTube channel.
What’s New . . .
- The Best Sweet Potato Casserole with a Pecan Topping

- 25 Beautiful Thanksgiving Centerpiece Ideas You Can Create

- Last Minute Outdoor Halloween Decorations with Thrifted Finds
- Easy DIY Frankenstein Halloween Decor




I love this project, Stephanie. Simple but such pretty results.
Thanks Cyndi, it’s one of my favorite fall decor pieces. It fits my style and looks elegant.