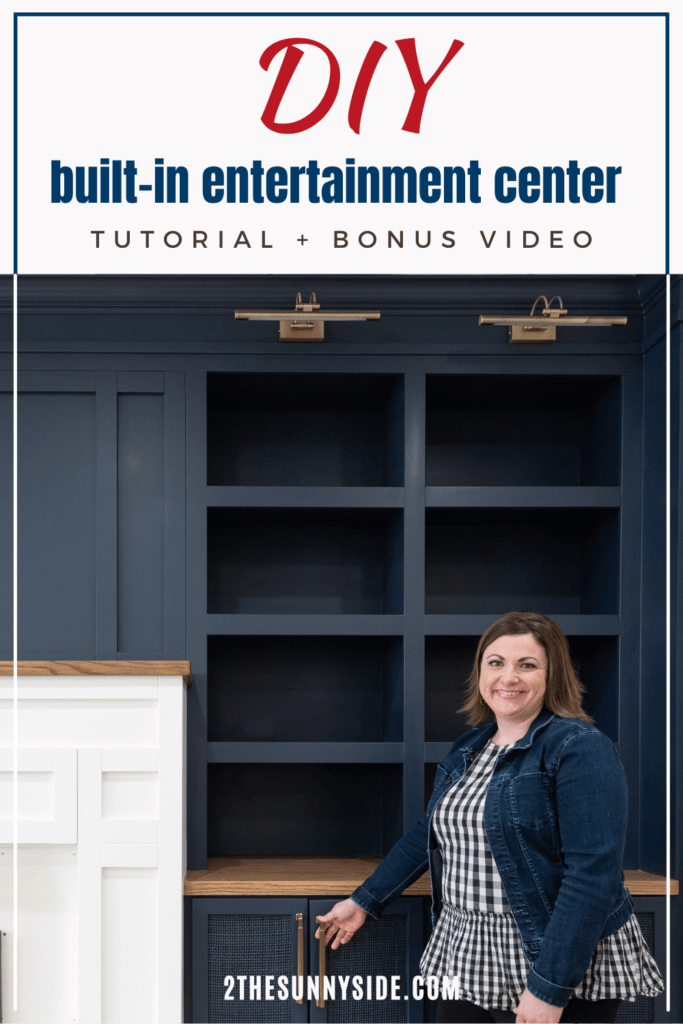
We are so excited to once again be participating the One Room Challenge.
For the next 8 weeks we will be transforming an unfinished basement room into the ultimate family hangout room, beginning with a custom built in entertainment center!
If you’re new here, WELCOME! You can learn more about us here.
Certainly be sure to follow us on Instagram for behind the scenes progress and updates!
What is the Room Challenge?
The One Room Challenge is a biannual event held every April and October.
Each round 20 design influencers are selected to take the challenge of being featured designers and transform one space in just 8 weeks!
Additionally, guest participants like ourselves are also invited to transform any given space during the same time frame.
Each week designers and guest participants share their progress via the One Room Challenge platform as well as blogs and all forms of social media.
Be sure to join us each week to check our progress!

Of course if this isn’t exciting enough, several guest participants will be selected by the editors at Apartment Therapy, the official media partner for this event to be featured on their site.
Clearly, that would be an amazing opportunity!
Projects in Our One Room Challenge
You can easily navigate through each week of this ultimate modern coastal family room project below.
- Week 1 – You are here!
- Week 2 – How to Build a Cabinet Box
- Week 3 – How to DIY an Epoxy Countertop to Look Like Marble
- Week 4 – How to Install a Laminate Floor Over Concrete
- Week 5 – Add Old World Charm with a Simple Brick Backsplash
- Week 6 – How to Make a Built in Reading Nook in a Closet
- Week 7 – How to Make a Simple Upcycled DIY Sofa Table
- Week 8 – Reveal Day! Basement Family Room Ideas on a Budget
- Projects in Our One Room Challenge
- Modern Coastal Family Room Design Plan
- How Much is a Custom Built-in Entertainment Center?
- Design the Built In Entertainment Center
- Preparations for the Entertainment Center
- Can you build cabinets with MDF?
- Built In Entertainment Center Shelves
- Test Fit Cabinets and Shelves
- Prime and Paint
- Attach Molding
- Installing Hardware
- Completed Built In Entertainment Center
- Built In Entertainment Center Cost Break Down
Modern Coastal Family Room Design Plan

If you’ve been following along for a while you know that last spring for the One Room Challenge we built a Jack and Jill bathroom with that Modern Coastal style that I love.
So, needless to say you’ll find that same feel in my family room design.
Let’s begin with the flooring.
First we chose a waterproof laminate with a natural distressed white oak finish.
I feel this flooring has a relaxed coastal feel to it and will hold up well to the traffic of a busy family.
Next we layer in coastal inspired rugs and fabrics to create a relaxed and cozy feel.
Are you starting to see why I love this coastal vibe.
This busy mom needs a home that feels calm and casual!

Certainly one of the main features in our family room design is the built in entertainment center wall.
Not only will it feature the navy blue color that I love, but it’s also been built to hide away all of the media components.
Another area we are creating in this room is a reading nook with bookshelves and storage underneath.
It will be the perfect spot to curl up with a good book and relax.

In addition, this room will also function as an entertaining space.
With that in mind, we will also add a kitchenette or wet bar area.
Again, the cabinets will feature the Hale Navy paint and we will install a brick backsplash.
This room is filled with so many DIY projects so I can have a high-end custom look for a fraction of the price.
So be sure to check back each week and see our progress!
Just between you and me . . .
Also there’s one more item I’d like to tell you about.
There is no way we could possibly do all of this work in just 8 weeks!
This is a project we’ve been working on for several months.
We are sharing projects with you each week, but just know we are not super-humans!
This was a joint effort with our husbands.
They are right by our side helping us with each project.
But all of the design plans and ideas are all mine!
Of course a special thanks go to our husbands!
For cheering us on and HELPING us create this ultimate family hangout room!
Are you enjoying this post?!
Pin it and save it for later. Please share it with your family and friends.
Before we dive into our built in entertainment center, take a look at the plan for the entire basement.
How Much is a Custom Built-in Entertainment Center?
I read that the average cost for a custom built-in entertainment center is $3,000 to $15,000.
And most people pay around $9,000 for a full-wall solid wood entertainment center with shelving, storage cabinets, and a TV mount.
However, doing it yourself with a few basic tools can literally save you thousands of dollars.
We used the following tools to build our entertainment center:
At the end of the post we’ll give you a break down of how much our built in entertainment center cost.
Design the Built In Entertainment Center
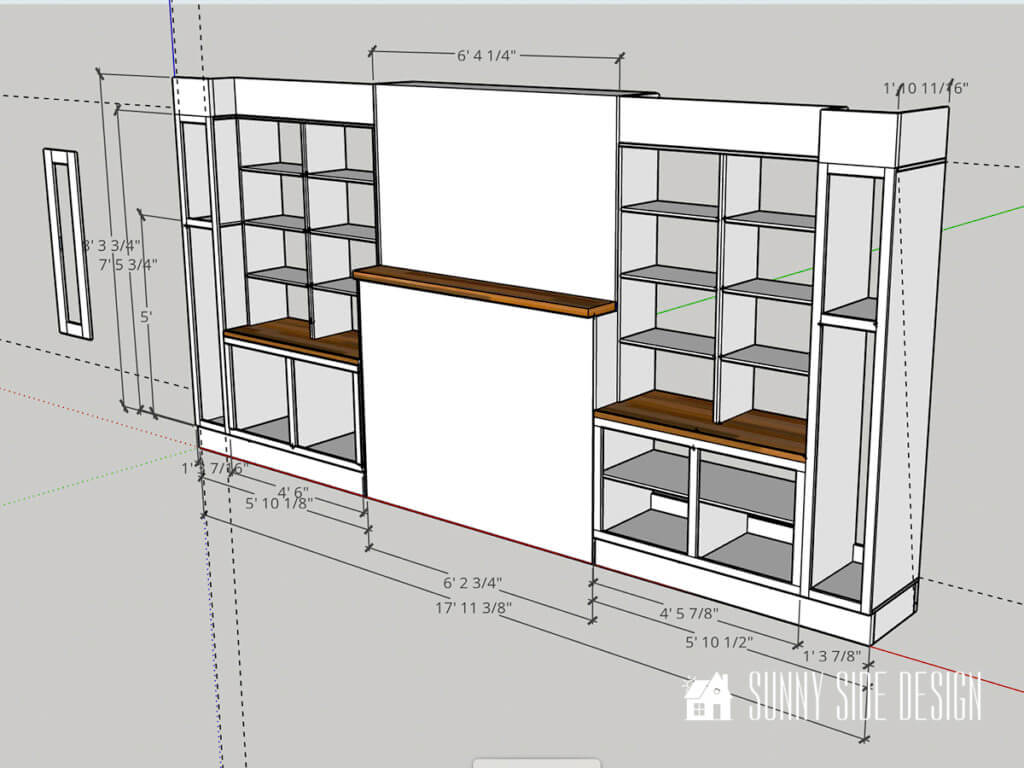
First and foremost before starting a project like this, you’ll need to design what you’d like your built in entertainment center to look like.
Mine is customized to hide all of the media equipment.
Let me just tell you that when I saw the speakers my husband bought I about died!
I thought they would be hidden away in the ceiling.
While there are speakers hidden in the ceiling, there are also 4 huge speakers that are not!
But as you scroll down you’ll see how they are neatly hidden away behind the rattan cabinet doors in the built in cabinets.
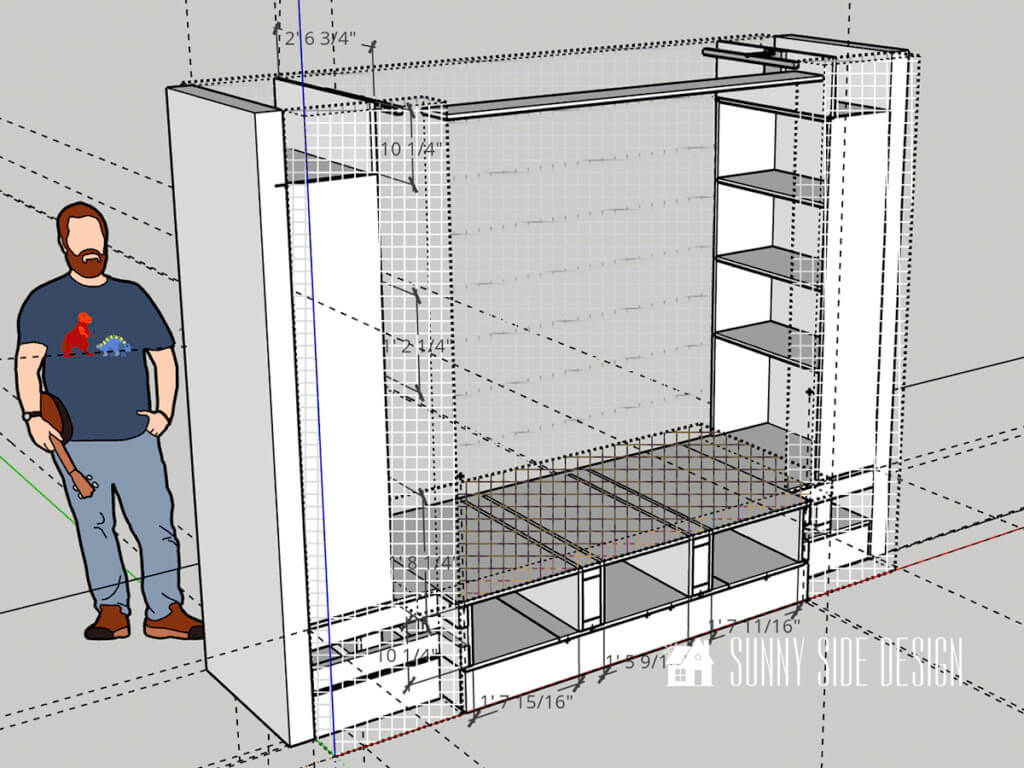
With the measurements of the speakers in hand, we first began to design our built in entertainment center with Sketchup.
Sketchup is a free online modeling software where you can bring your project to life.
It will help you create the dimensions and measurements for your project.
With this in mind, we chose to build our own lower cabinetry to fit our needs.
But you can easily buy stock kitchen cabinets and create your own built in entertainment center.
In this post we are focusing on how we put all of the cabinets and shelves together.
We will have individual posts on how to build the cabinet carcass, how to build cabinet doors, how to install rattan in a cabinet door, how to make an oak countertop and how to install an electric fireplace.
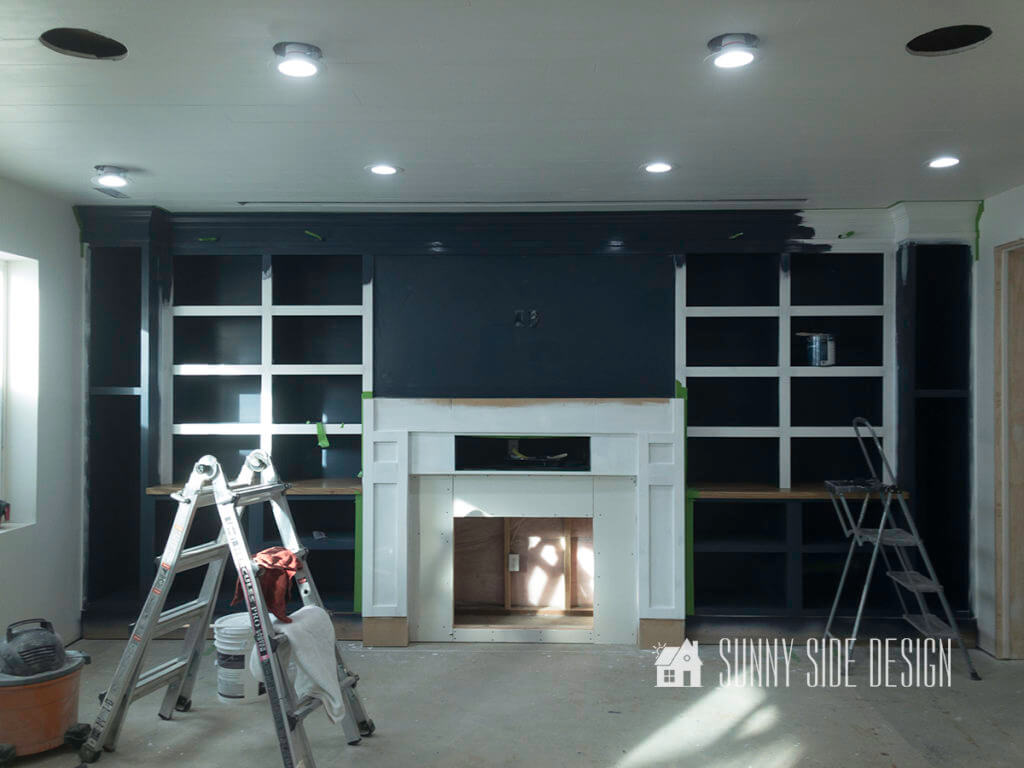
Preparations for the Entertainment Center

Since we started with an unfinished basement space you’ll first see that there is no drywall on the walls.
First all of the electrical, cables and speaker wire is run in the wall area.

Then it’s framed with 2×4’s for the fireplace surround area.

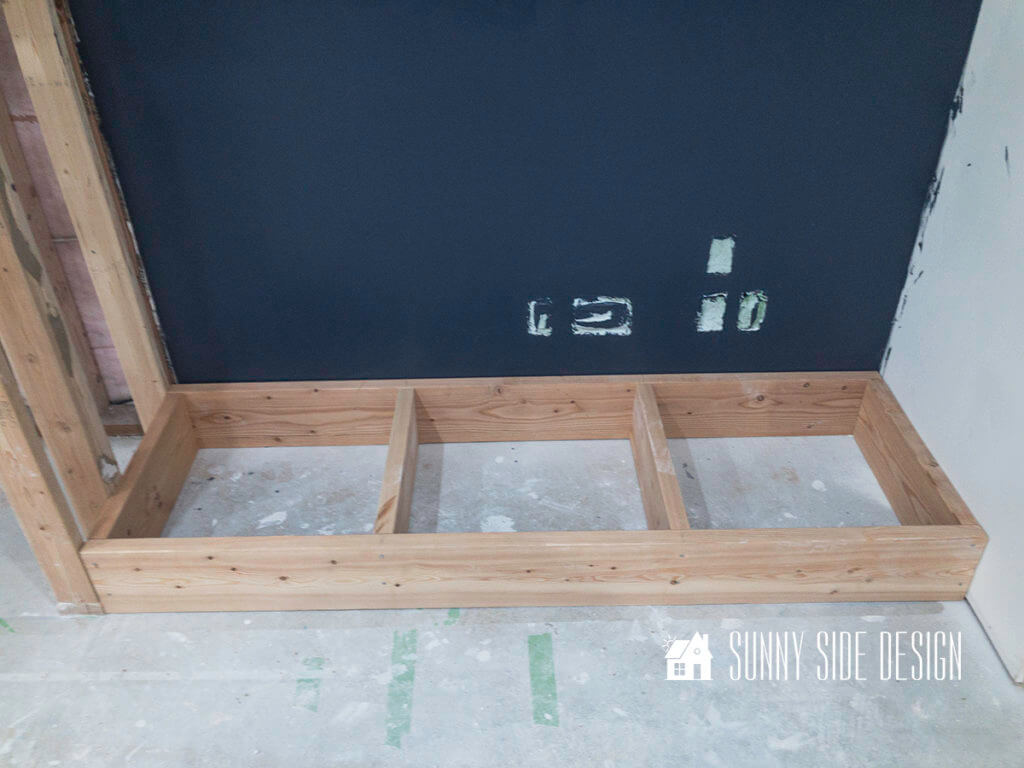
Next we framed the base area for the cabinets to sit on with 2×8 lumber that was ripped down to 7″ high.
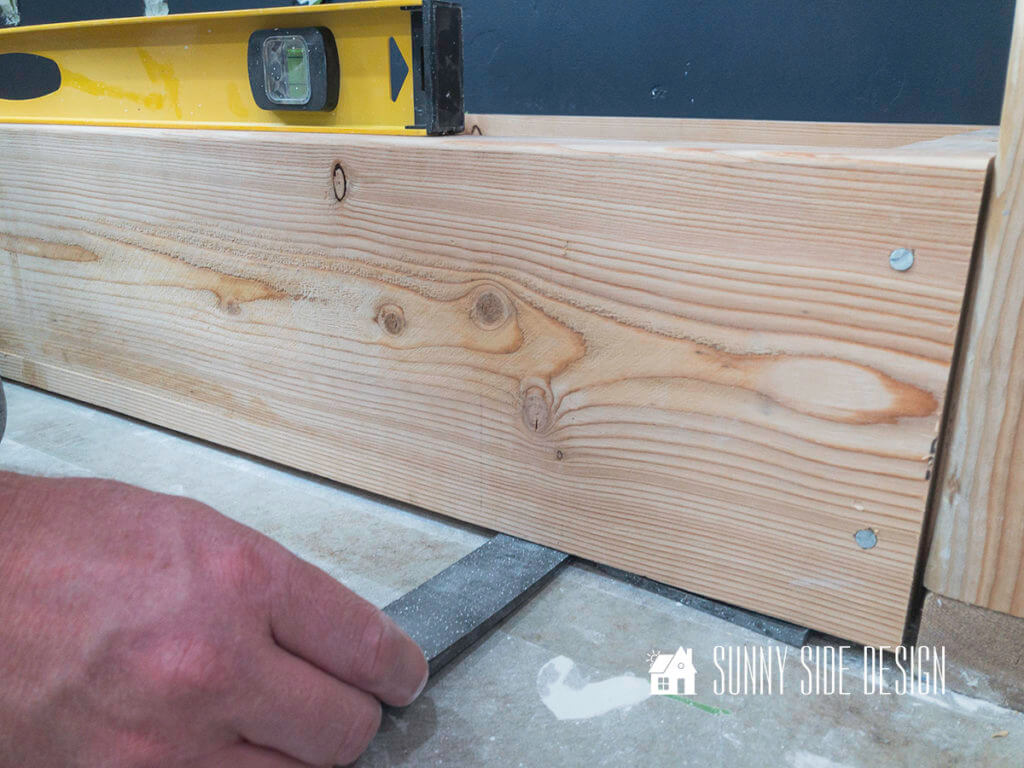
Shims are used to ensure that the base for the cabinets is level.
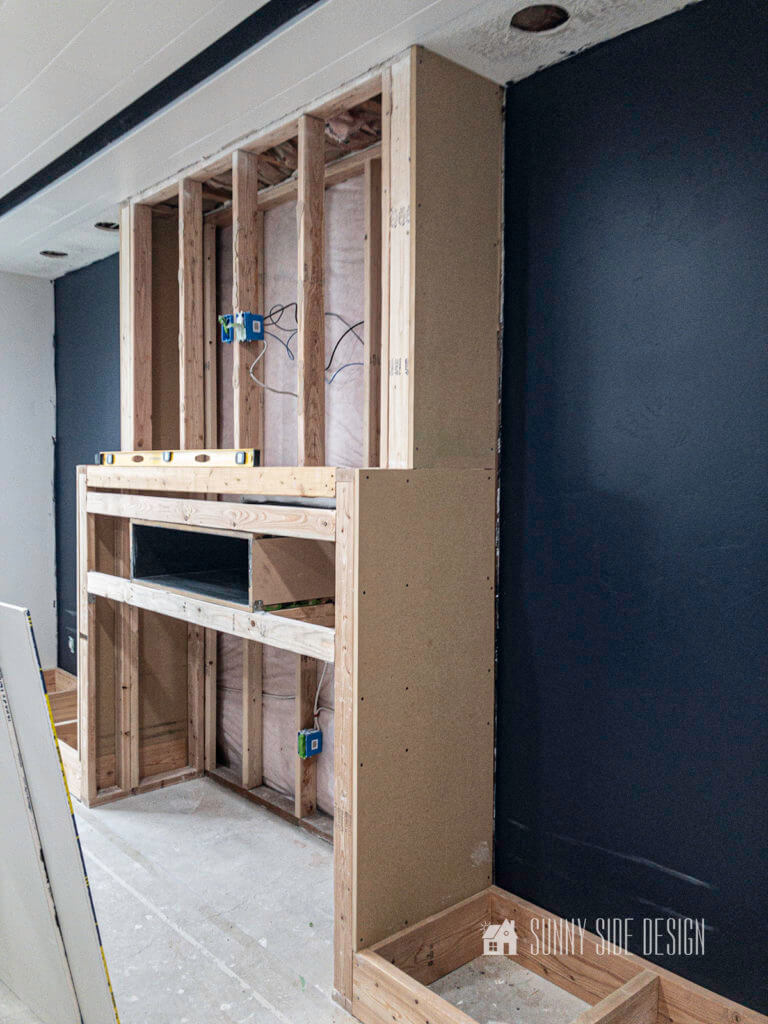
Before the cabinets and shelves are installed, wood it attached to the frame of the fireplace box.
We are installing an electric fireplace, so there is no need for duct work in the wall.

Can you build cabinets with MDF?
MDF, (Medium Density Fibreboard) is an engineered material made by breaking down hardwood or softwood residuals into fine particles, combining it with wax and a resin binder and applying high temperature and pressure.
It is an ideal choice for cabinet construction.
It cuts and assembles into pieces that, when built into a cabinet, provide a stable base for shelving.
We have used MDF to build all of our built ins in both of our homes, including the built in bookcases and fireplace in my parents home.
Not only is it easy to work with, but it’s much less expensive than plywood.
In addition, when cutting MDF board you don’t get the splitting that you do with plywood.
Built In Entertainment Center Shelves

The built in shelves are constructed the same way we built the mudroom cubbies and also the same way we built the custom shelves in the wall, with one difference.
A groove is created in the back of each side and top piece, so a backing can be added to the shelves.
In previous projects we have used the wall as the backing for the built in shelves, but we discovered that the wall was crooked behind our entertainment center.
So this time we added a backing to the built in shelves.

They are constructed using 4’x8′ 3/4″ MDF sheets that are cut down to the depth of the shelf.
Then a router with a straight cutting bit is used to cut a 3/4″ wide groove 3/8″ deep where each shelf will be placed.
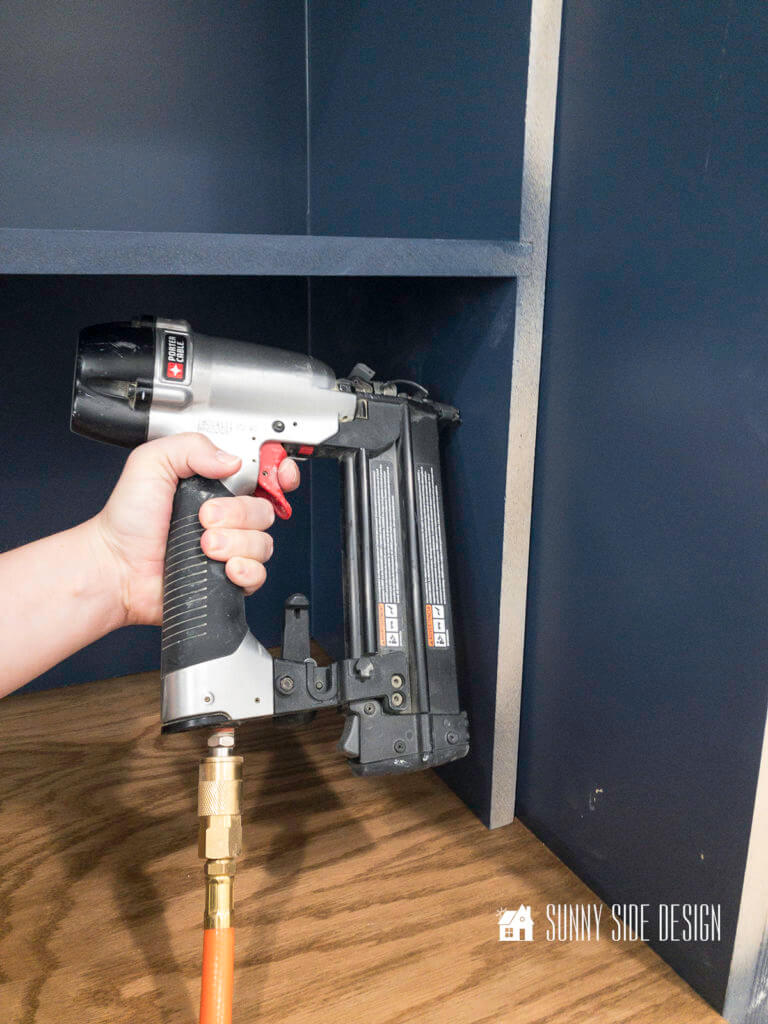
Wood glue and nails secure each shelf in place.
Notice in the photo abode that the shelves are 1″ shallower than the frame of the shelves, allowing for the backing to fit into the groove.
The groove was made on the table saw 1″ from the edge, 1/8″ wide to fit a piece of utility plywood.
You’ll find the video below helpful in seeing how the shelves are constructed.

Here is a view of the back side of the built in entertainment center shelf with the backing in place.
Test Fit Cabinets and Shelves
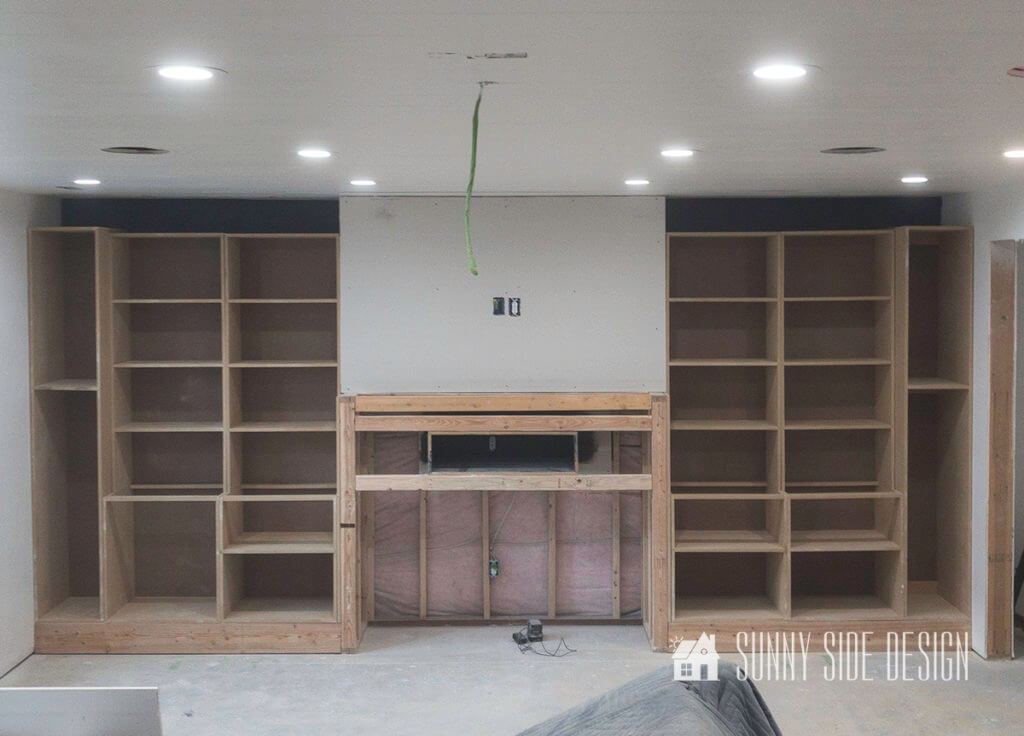
Once all of the cabinets and shelves are built, it’s time to place them into position and make sure they all fit nicely together.
Since our built in entertainment center is constructed to fit wall to wall, it is important that we dry fit it before installing each piece.
The lower cabinets are secured to the wall at the studs.
And where the wall was crooked shims were used to make everything square.

[mailerlite_form form_id=2]
Prime and Paint
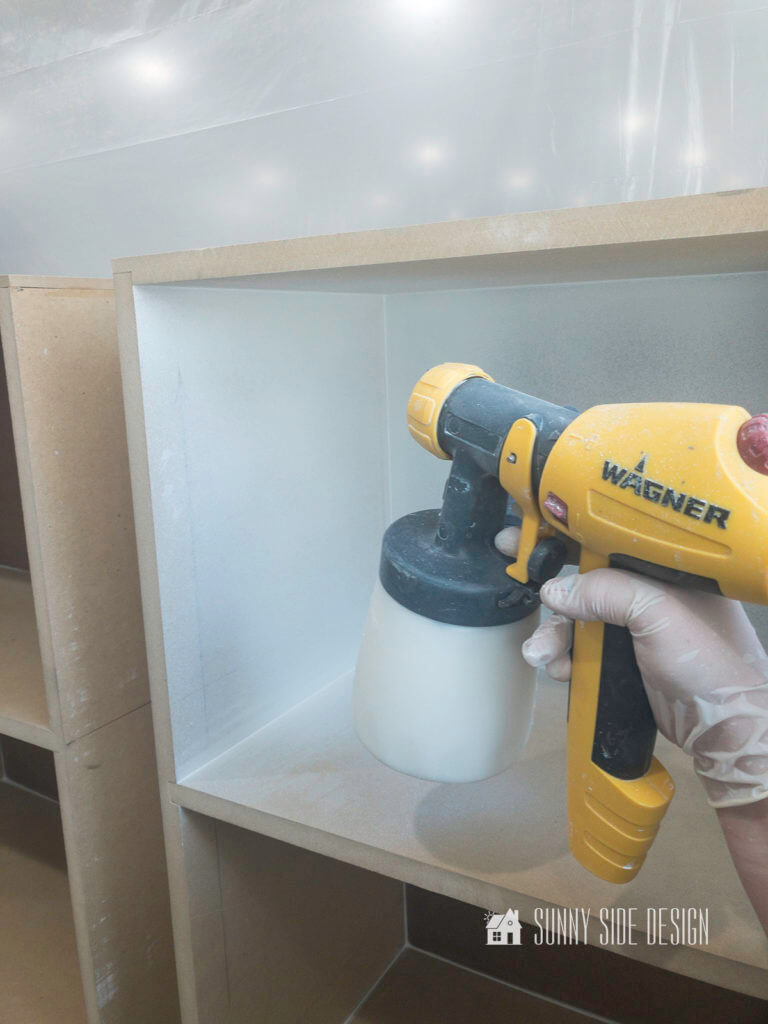
Before you begin to paint, apply paintable caulk to all of the seams.
Now it’s time to prime all of the shelves and built in cabinets.
Using the Wagner paint spray is certainly the easiest way to get a big job like this done.
Plus, when using a sprayer you definitely get professional results!

However, it’s not pretty!
Paint dust gets everywhere!
And make sure you where where a mask!
Then use plastic drop cloths to seal off an area of the basement for painting.
But even with all that effort the dust still manages to get everywhere!
Once we finish this project, my house will definitely need a deep cleaning!

After the primer is dried, lightly sanded each piece before applying 2 coats of paint.

For this project we used Behr’s Premium Cabinet and Trim enamel in a satin finish.
The color we used was Benjamin Moore Hale Navy mixed in the Behr paint.
Don’t you love this color!
It definitely looks so rich!
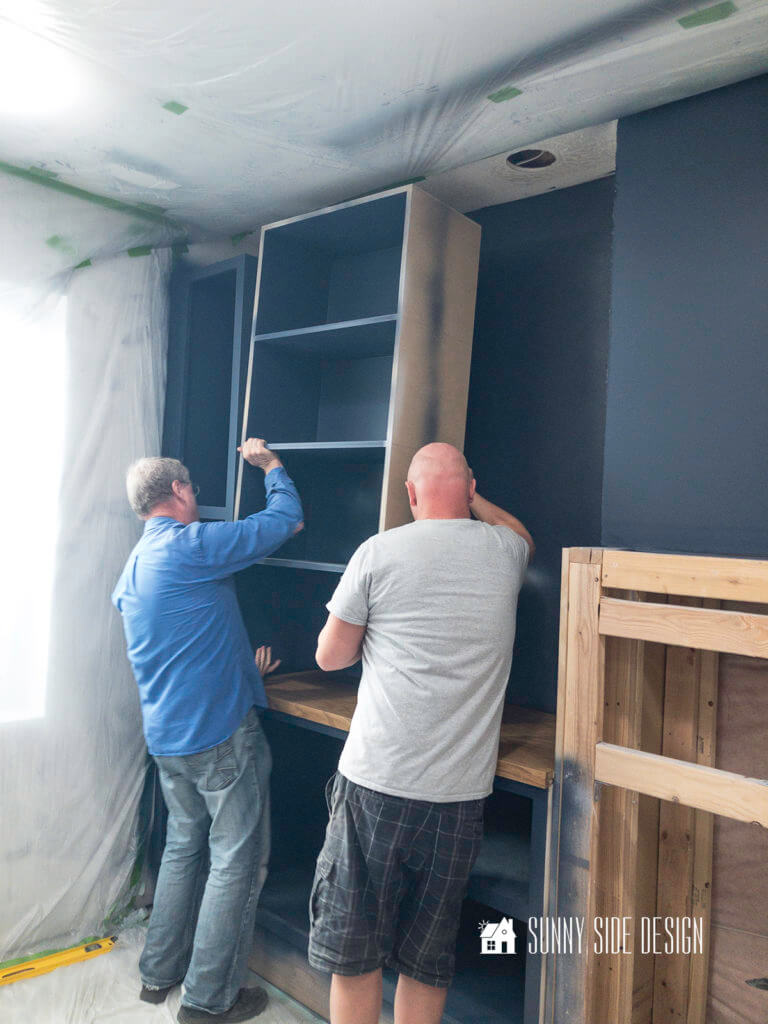
Once all of the painting is finished with the sprayer, it’s time to install the oak countertop over the cabinets.
The video below will give you all the details on building this countertop and tips for using a water based stain.
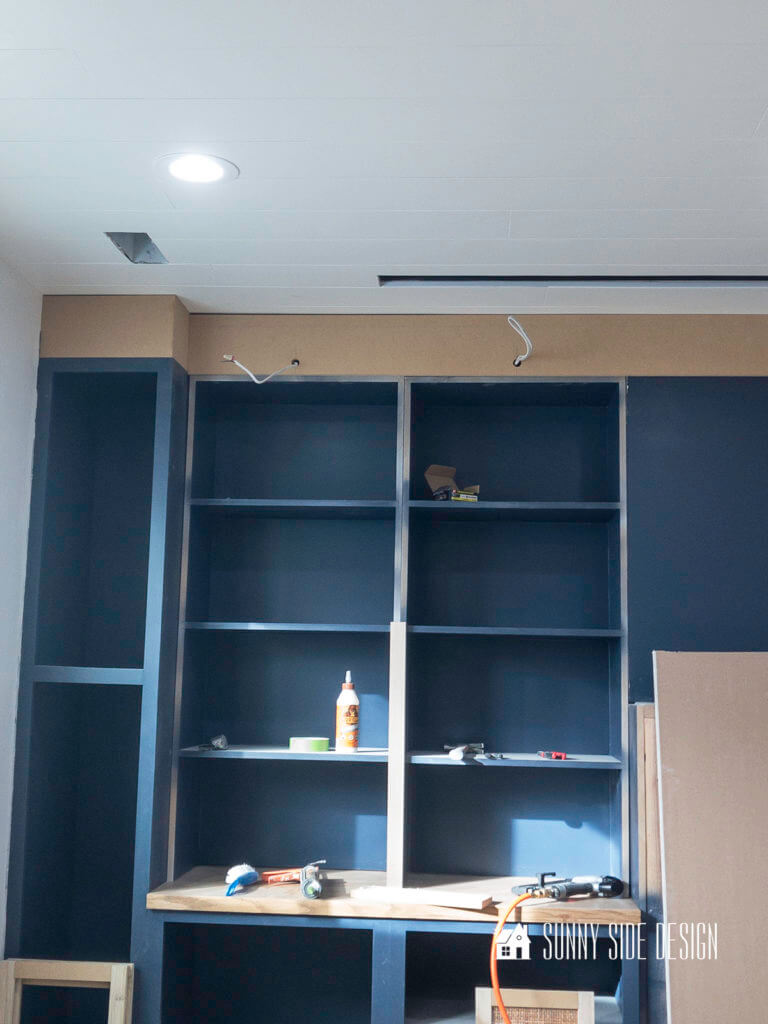
Then it’s time to bring in the shelves.
The built in shelves are then secured to the cabinetry on the sides and the fireplace area.

Now don’t you think this progress look amazing!
Attach Molding

Now that all of our built in entertainment center pieces are installed and painted it’s time to add the finish details with the molding.
First a header is created above the shelves and two cabinet towers on each side.
To do this you’ll attached a cleat to the ceiling and the top of the cabinet.
Then cutscraps of MDF wood fit between the top of the cabinet or shelf to the ceiling.
To give it a professional finish, the wood is mitered at the corners and then nailed in place.
The plan is to install library lights above the shelves.
So, holes are drilled through the header board for the wire to be threaded through.
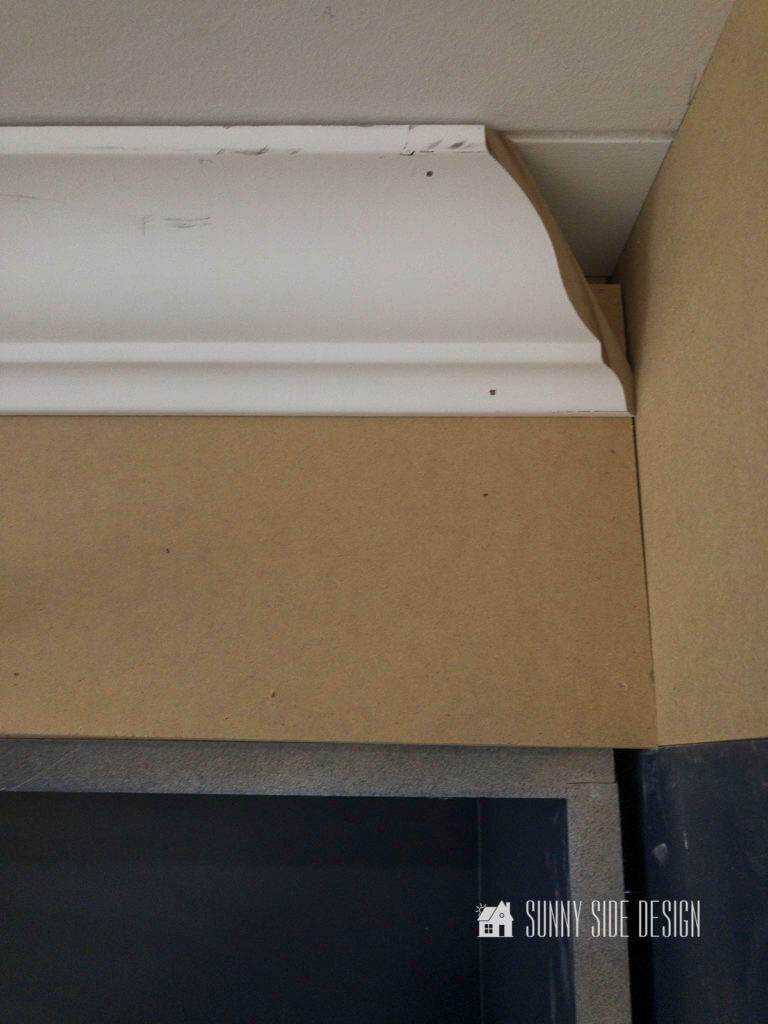
Crown molding is then installed all around the top of the built in entertainment center.

With a 2 1/2″ flat molding added to the shelves.

Once all of the molding is attached to the built in, you’ll caulk all of the seams, fill in all of the nail holes with wood putty and sand until smooth.
We also added a 1″ piece of molding where the cabinets and shelves meet the header.
Now we’re ready to finish up by painting all of the molding.
It’s so exciting to see this progress!
Installing Hardware
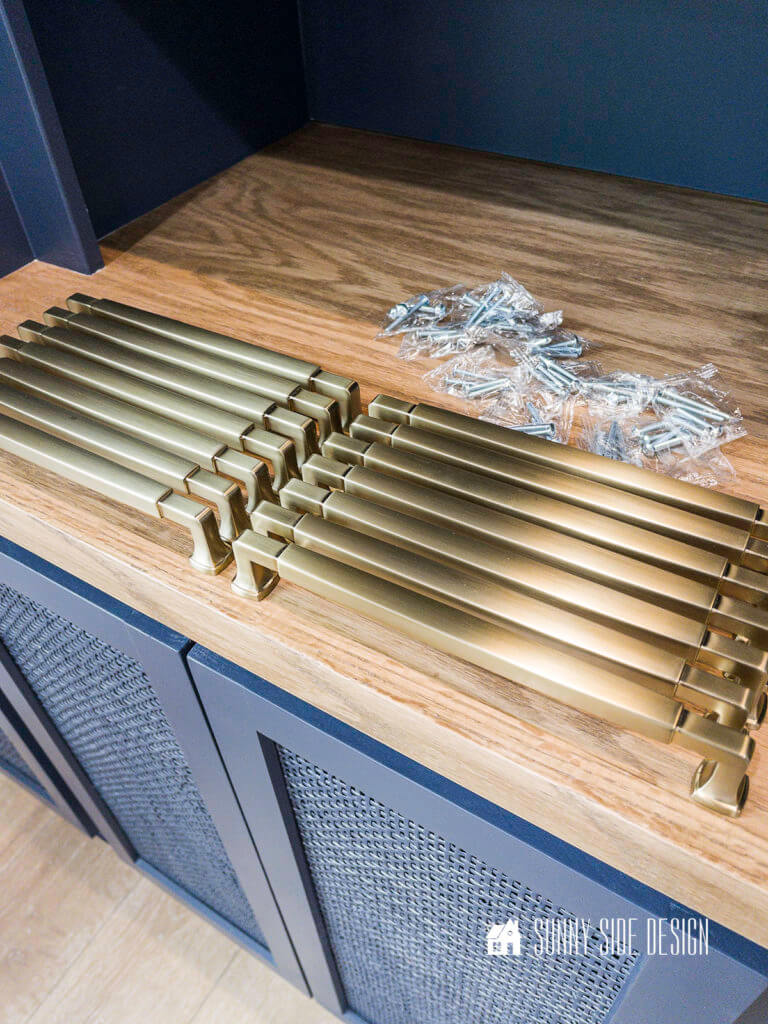
Certainly, adding the hardware to a beautiful built in entertainment center like this is the icing on the cake, or jewelry with a new outfit.
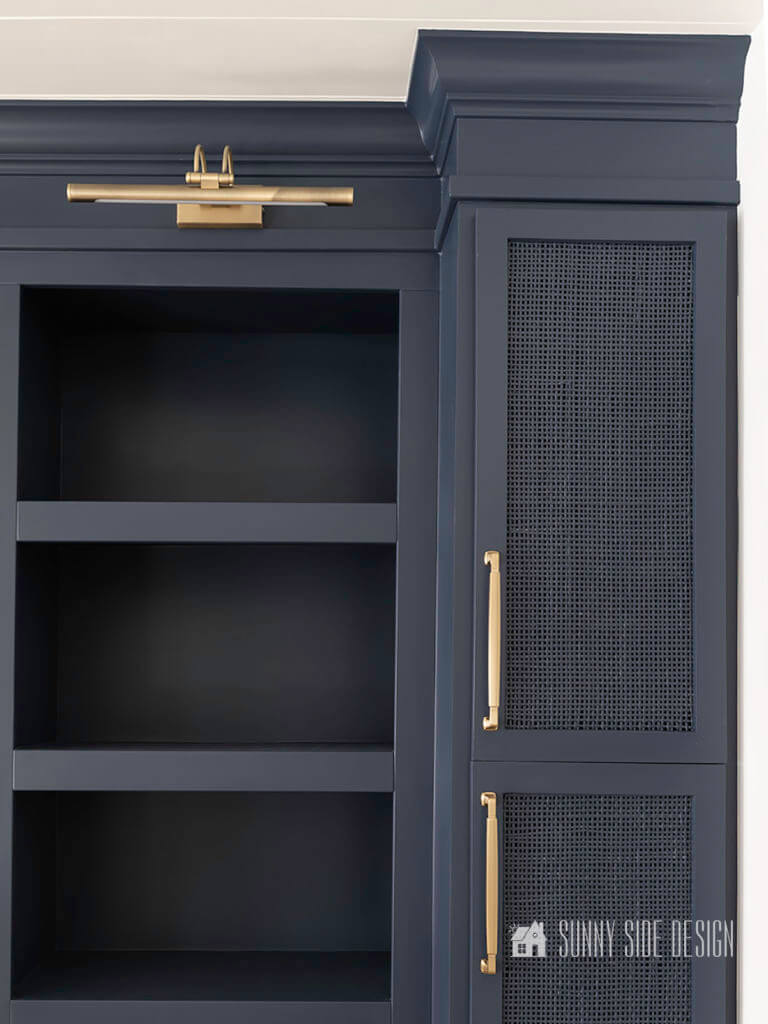
Just take a look at this gorgeous hardware we got from Amerock Hardware!
In my opinion, Amerock has the most beautiful hardware and you can really feel the quality when you place it in your hands.
For my built in entertainment center I chose the Stature pull in Champagne Bronze with a 8 13/16″ center.

Clearly drilling holes into my beautiful cabinetry is a little stressful!
What if I make a mistake, or they’re crooked?!
I had purchased a Kreg hardware jig, but my pulls were too large, so we made our own jig.
To create a jig we used my quilting ruler and marked the alignment for the top of the door with tape.
Then we marked and drilled holes in the ruler for the pull.
With the ruler being clear, we could flip it to either side and were able to quickly drill all of the holes for the door pulls.

Using the locking Kreg clamp to hold our jig in place made drilling the holes easy.

And to make it go a little faster, you can use two drills.
One with the drill bit in it and the other the driver bit.
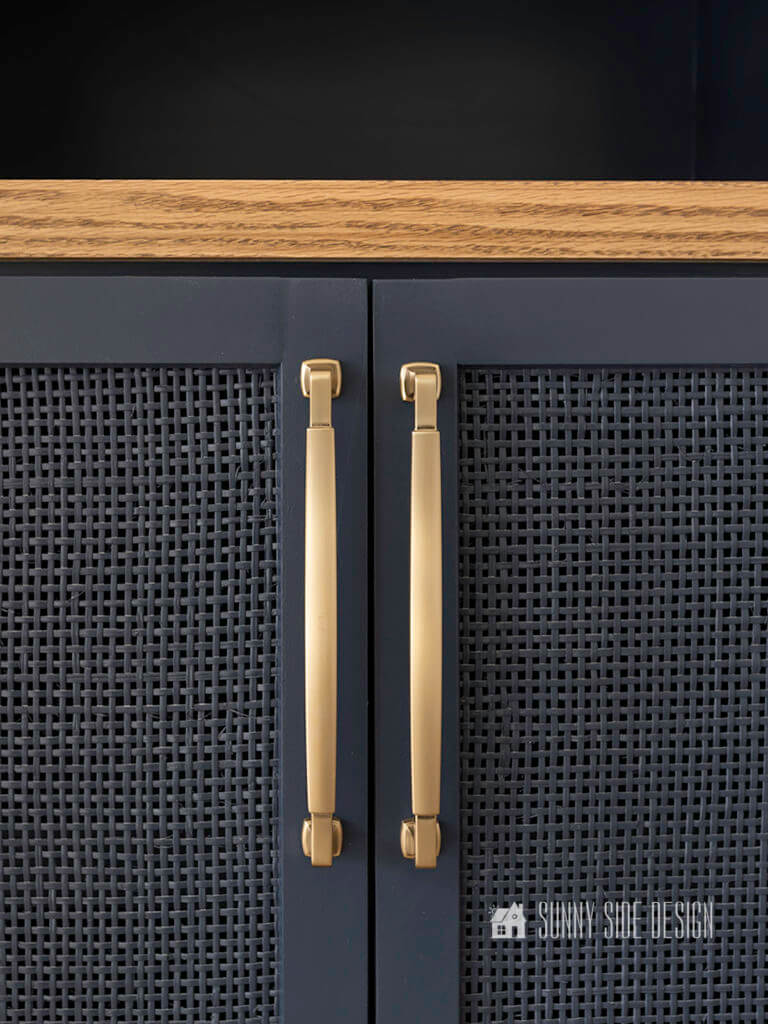
And just take a look at this gorgeous hardware!

I think the door pulls look stunning against the navy paint.
We did make our own custom door frames and attached rattan to them.
It made it possible for us to hide all of the speakers for the entertainment system.
Let’s stay connected! Follow us on social media!
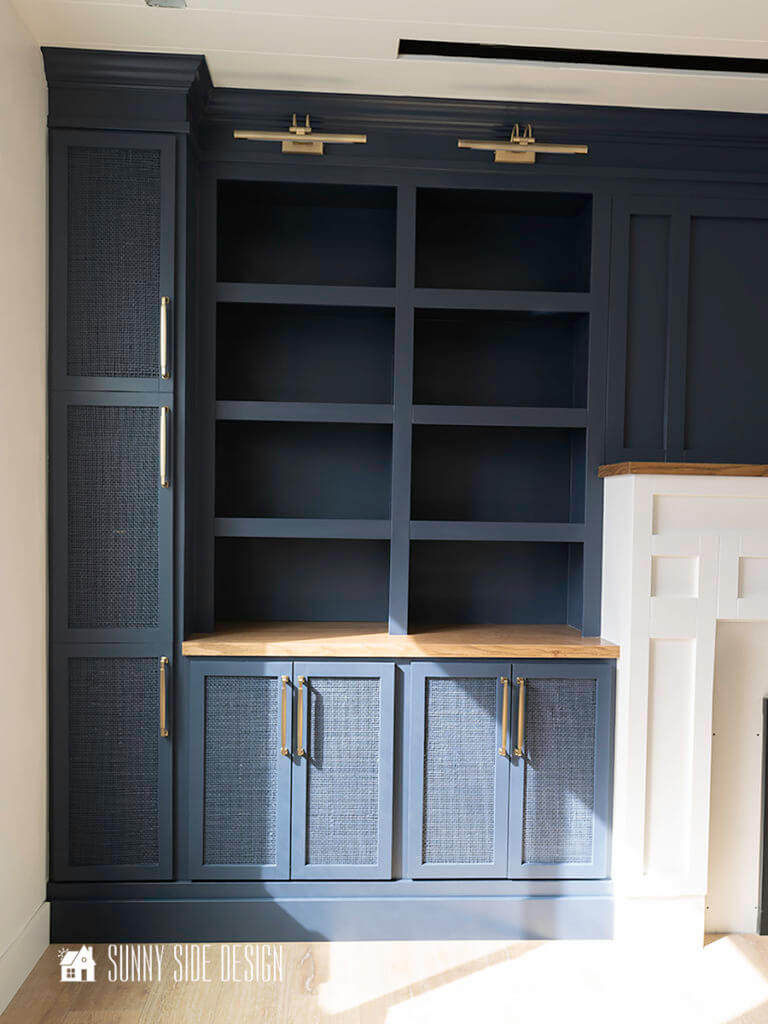
Completed Built In Entertainment Center

I’m so anxious to fill these beautiful shelves and start to decorate our family room.
In fact, this past weekend we watched our first program on the BIG screen!
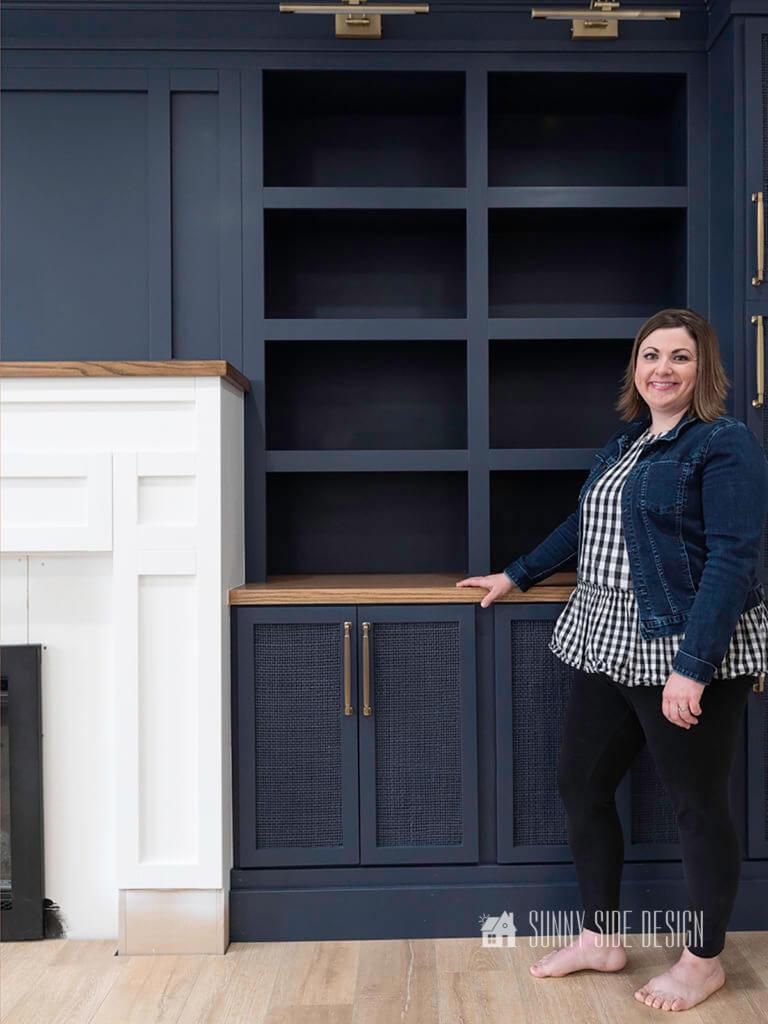

This elegant built in entertainment center really anchors this side of the room.
While hiding away all of the elements I didn’t want to see.

The side tower cabinets each hold huge speakers.

One of the lower cabinets houses the sub woofer.
And another one has all of the gaming consoles, DVD player and surround sound equipment.

And there’s a secret panel that opens for the center speaker in the fireplace surround.
When the big screen is pulled down you don’t even see it.
Don’t you think it’s pretty clever how you can hide all of the media components so the family room still looks beautiful?!
Are you enjoying this post?!
Please pin it for later and share it with your friends and family.
Sharing is caring!
Built In Entertainment Center Cost Break Down
I’m sure you’re all curious, wondering how much did we spend on this entertainment center.
For one thing it’s huge, the wall is 18′ across.
- Framing supplies: $150
- sheetrock $50
- MDF $480
- Poplar lumber $200
- electrical $60
- library lights $160
- electric fireplace $650
- hinges $52
- cane $195
- paint and primer $162
- nails, dowels, glue $50
- brick for fireplace surround $200
- moulding $100
We hope you found a little inspiration here today.
So tell me, are you ready to make a built in entertainment center for your home?
Remember to check back each week as we continue the One Room Challenge.
Each week we’ll share a new DIY project.
Next week we’ll share how to build the cabinet box along with the kitchenette.
What are your favorite elements in this room so far?
We’d love to hear from you!
Please share your thoughts and questions with us.
If you’re new here, WELCOME! We love having new readers and friends!
You can learn more about us here.
Let’s stay connected!
Subscribe to our free newsletter so you don’t miss any inspiration for your home.
Please PIN and save for later, and share with your friends!
Sharing helps grow our following!
Thanks for stopping by and as always here at Sunny Side Design…
WE HOPE TO BRING YOUR HOME TO THE SUNNY SIDE OF THE STREET.
Be sure to follow us on Pinterest for even more home decor and DIY ideas.
To see what we are working on before it’s on our blog, follow us on Instagram.
You will also find our video tutorials on our YouTube channel.


This is beautiful and inspirational! Congrats!
Thank you Carina for your kindness.