Create adorable red, white, and blue patriotic popsicle decor for free using paint stir sticks and supplies you likely already have on hand!
The 4th of July is just around the corner, and I’m officially in red, white, and blue mode!
I love adding a few fresh touches of Americana decor each year, but I didn’t want to spend a single penny this time around.
So I went digging through my stash—and guess what?
I whipped up the cutest patriotic popsicle decor using paint stir sticks… and it didn’t cost me a thing!
Yep, the stir sticks are free, and I already had the red, white, and blue paint, wood glue, and a little ribbon.
Totally free,
super easy,
and so stinkin’ cute!
Sunnyside home is a participant in the Amazon Services LLC Associates Program, an affiliate advertising program designed to provide a means for sites to earn advertising fees by advertising and linking to Amazon.com. As an Amazon Associate, this blog earns from qualifying purchases with no additional cost to you. Click here to read our full disclosure policy.
What You’ll Need to Make Patriot Popsicle Decor
If you’re like me, you probably already have most of these supplies on hand.
And if you need to pick up paint stir sticks, head over to Lowes, theirs are only printed on one side and are much easier to cut.
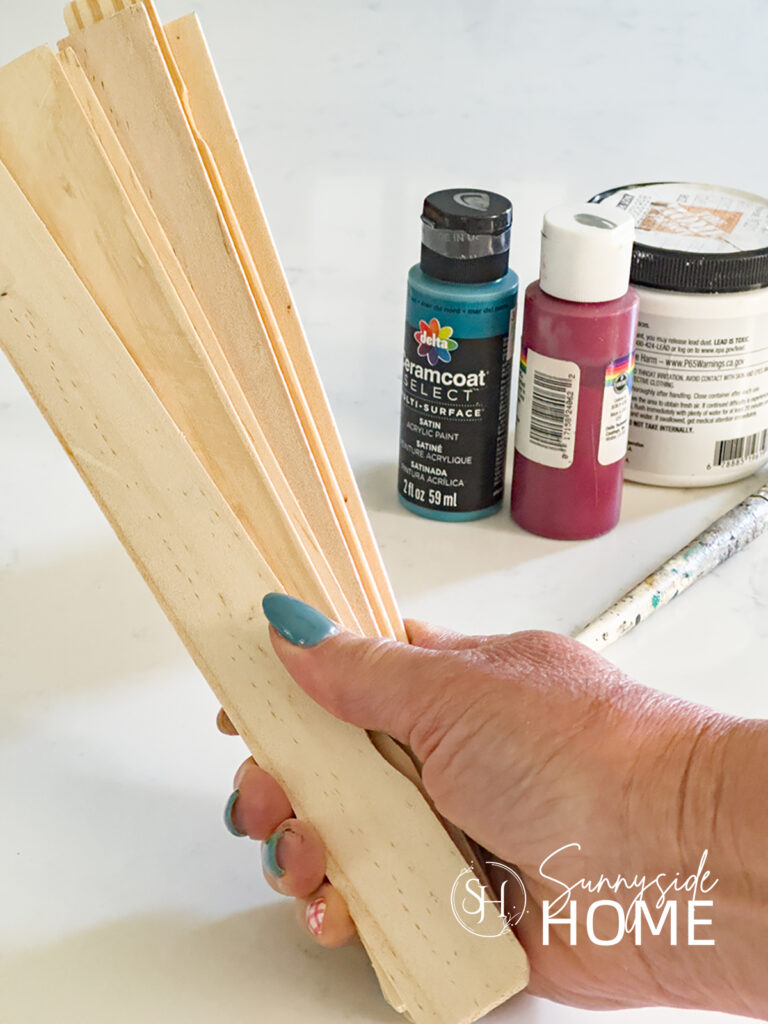
Here’s what we used:
- Paint stir sticks (free from the hardware store)
- Red, white, and blue paint
- Wood glue
- Sandpaper
- Paintbrush
- Utility knife
- Twine or white cord (for hanging)
- Ribbon (to embellish)
Once you have all your supplies you’re ready to make the cutest patriotic popsicle decor ever!
Are you enjoying this project? Please Pin It, save it for later and share it with a friend.
Sharing is caring!
Prep Your Stir Sticks
For each patriotic popsicle, you’ll need 3 paint stir sticks cut into specific pieces:
- One piece at 11 inches
- Two pieces at 6 3/4 inches each
- Two smaller pieces at 2 1/2 inches from the leftover scraps
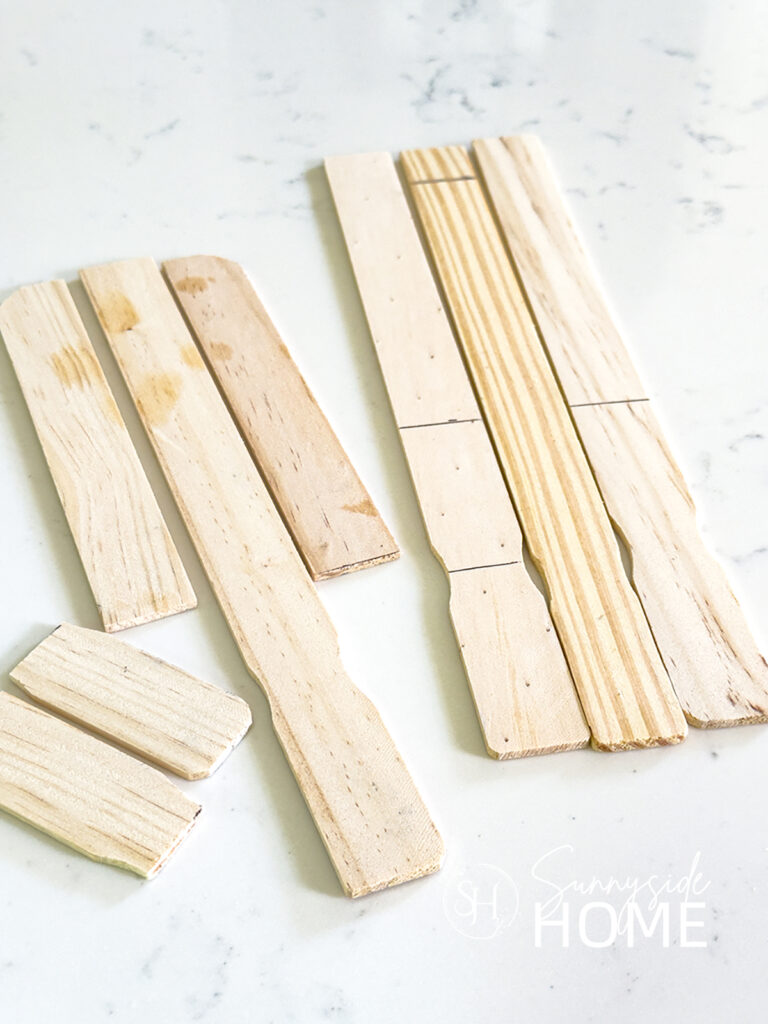
To make your popsicles look more authentic, round off the outer edges of the 6 3/4″ pieces.
This adds that classic popsicle shape!
You can use a saw if you want, but I skipped the hassle and used a utility knife for all my cuts.
Here’s a little tip: Lowes paint stir sticks are thinner and softer wood, so they’re way easier to cut with a utility knife than the thicker Home Depot ones.
How to cut:
- Place a straight edge along your cut line.
- Score firmly 3 to 4 times on the front side with your utility knife.
- Flip the stick over, transfer your marks, and score 3 to 4 times again.
- Snap the piece off by hand.
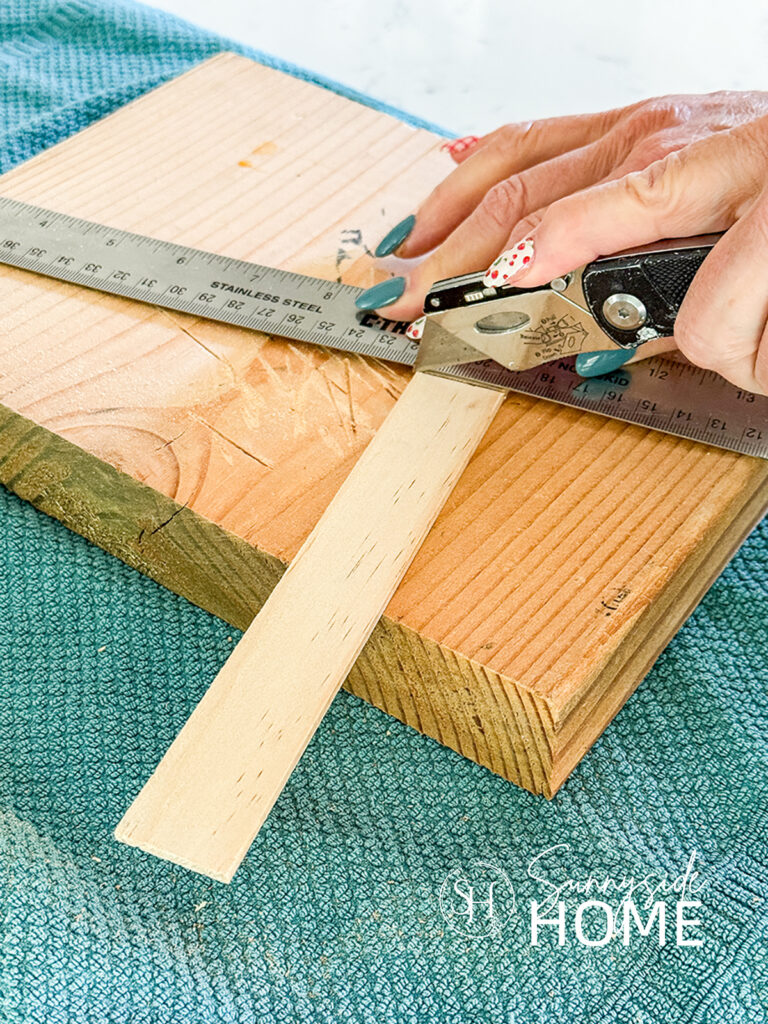
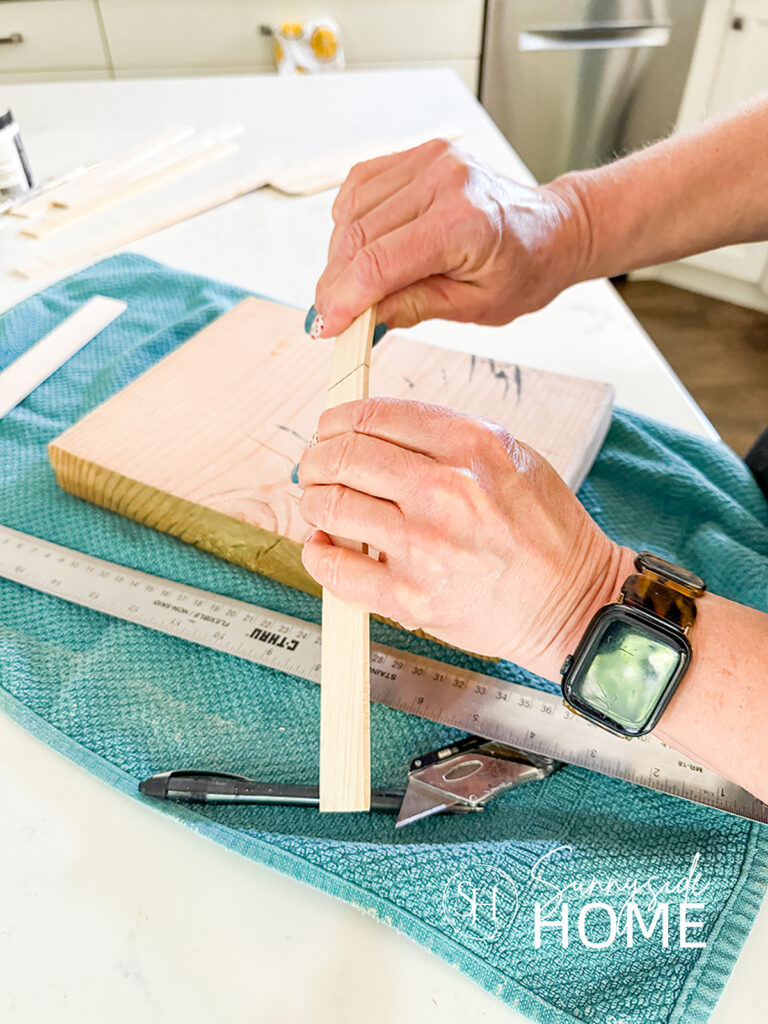
For the rounded edges, I used a bowl to trace the curve, then carefully scored along the line with the utility knife.
Score both sides, then gently snap off the corners.
Finally, smooth all edges with sandpaper to get rid of any rough spots.
Now your pieces are ready for painting!
If you’re new here, welcome! We’re so glad you’re here.
Let us introduce ourselves, we’re Michelle and Steph, a mom and daughter team who love to DIY and decorate our homes.
Not only are we passionate about making our homes warm, comfortable and unique, but it’s our mission to help you create that same feeling in your own home.
You’ll find ideas for repurposing, creating, decorating and making your home truly yours, while always mindful of a tight budget.
Undoubtedly we love finding ways to make your home look high-end on a small budget.
Plus you’ll also find a recipe or two as we share our family favorites with you.
We’d love it if you’d join our community of doers so you won’t miss any inspiration for your home.
We love new friends.
Paint in Patriotic Colors
Next up, it’s time to bring on the red, white, and blue!
You can paint your stir sticks in classic patriotic patterns—think stripes, stars, or simple solid colors.
I found it easier to paint my red and white sticks before assembling them, but for the blue popsicle, I glued the pieces together first, then painted it solid blue and added white stars on top.
Since I didn’t have a star stencil handy, I made my own using a scrap of shrinky dink plastic and a star-shaped punch.
Make sure the paint is completely dry before you start assembling your popsicles.
Let’s stay connected! Follow us on social media!
Assemble the Popsicles
To assemble your patriotic popsicles, start by placing a curved edge piece on each side of the 11″ stir stick handle, with the painted side facing down.
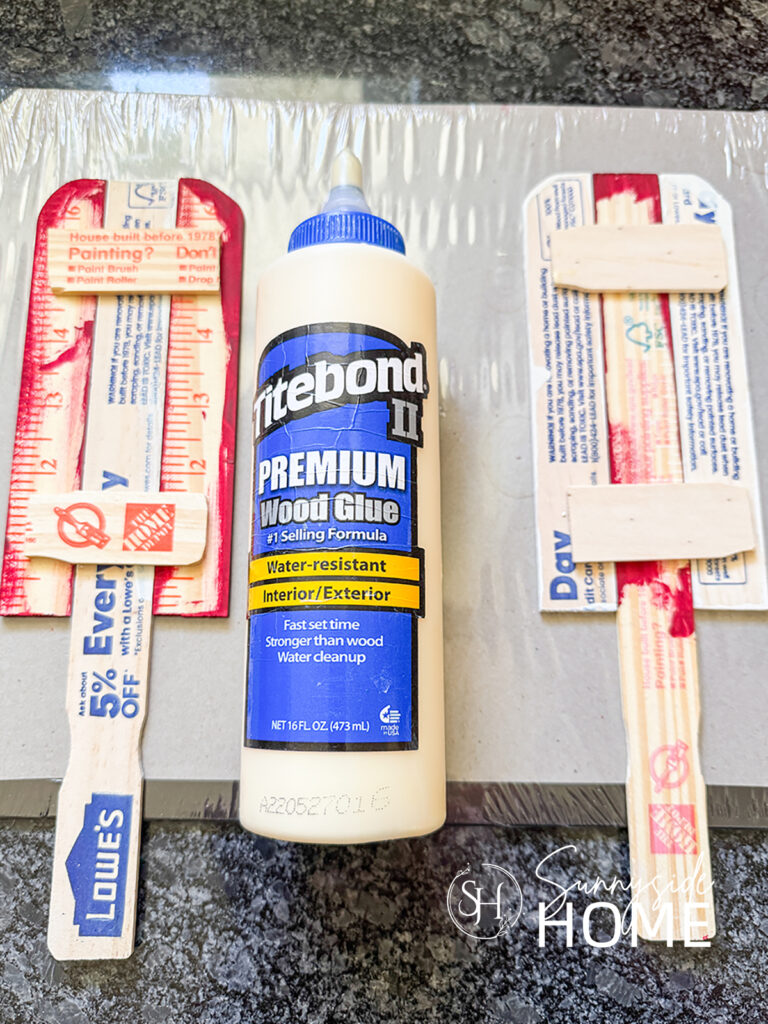
Next, add a small amount of wood glue to the two 2 1/2″ pieces and attach them to the back of the popsicle.
Finally, place something heavy on top to hold everything firmly in place and let the glue cure for several hours until fully dry.
Add a Hanger and Embellish
To turn my three patriotic popsicles into a charming little bunting for my front door, I started by drilling small holes near the top on each side of the popsicles.
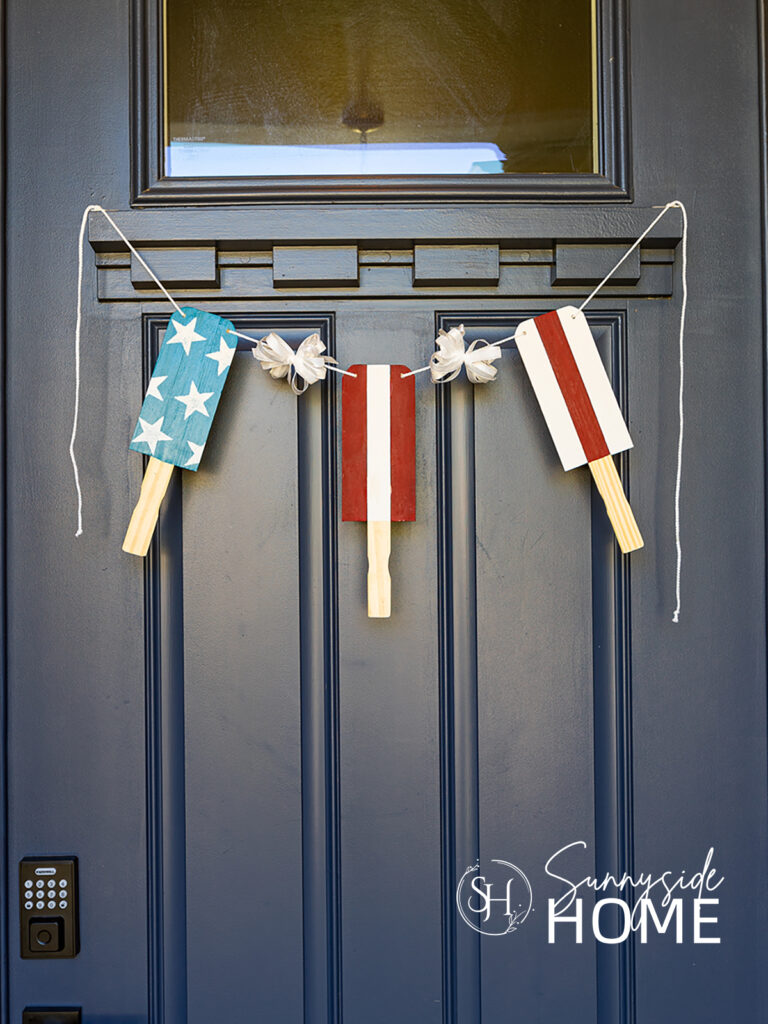
Then, I threaded a white cord through the holes to string them together.
For a festive finishing touch, I made a 10-loop bow by wrapping ribbon around my palm 10 times, tying a short piece of ribbon tightly around the center, and then gently pulling the loops apart to create a full, fireworks-like shape.
Then I tied this bow to the cord.
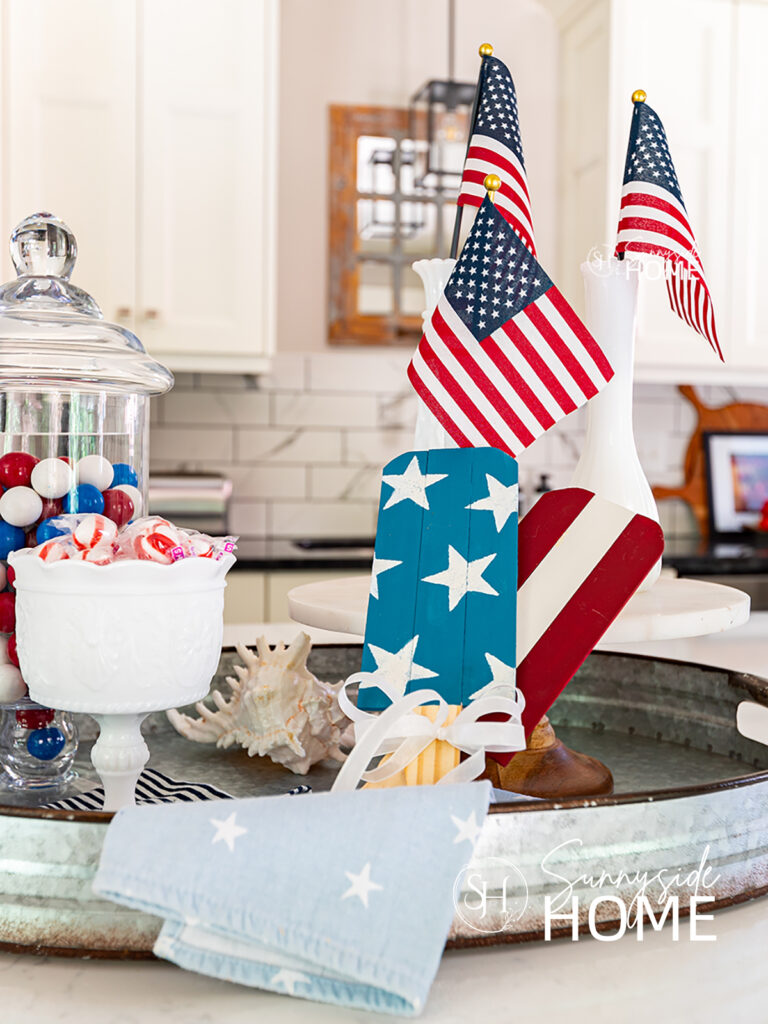
My mom got inspired and made a few popsicles too—she tied hers together with a similar bow and placed them in a tray alongside other patriotic decor for a festive display in her kitchen.
Where to Style Your Patriotic Popsicle Decor
These patriotic popsicles are super versatile and can add a festive touch almost anywhere!
Hang them on your front door and greet guests with some red, white, and blue spirit.
They also make a fun addition to a wreath for extra Americana charm.
You can use them as wall decor to brighten up any room or display them on a tiered tray or mantel for that patriotic vibe.
Or simply lean them on a shelf or entry table to sprinkle in some July 4th cheer.
More Budget-Friendly Patriotic Ideas
- Simple Fourth of July Decor
- Easy 4th of July Door Decor You Can Make in Minutes
- How to Make a Playful Summer Wreath
- Paint A Rug For A Quick Refresh
- Beautiful Wall Art Free Printable
- Fourth of July Decorating Ideas You’ll Love This Summer
- Simple & Inexpensive July 4th Decor
- Simple Patriotic Decorating Ideas
Shop Patriotic Decor

Final Thoughts
What I love most about this patriotic popsicle craft is that it was totally free!
It’s a great reminder to dig through your supplies and get creative with what you already have on hand.
Plus, it adds a festive, handmade charm that brightens up any space.
Whether you tackle this project solo or make it a fun activity with kids, it’s simple and satisfying.
I hope you give it a try—be sure to share your results!
Feel free to leave a comment or tag us on social media if you recreate these popsicles.
Remember, with just a little creativity, you can add big charm to your home without spending a dime!
We hope you found some inspiration today for your home.
Please share your tips and ideas with us.
We love hearing from you!
If you’re new here, WELCOME! We love having new readers and friends!
You can learn more about us here.
Let’s stay connected! Join our DIY community of doers and you won’t miss the weekly updates and more inspiration for you always on a budget.
Sharing is caring!

Thanks for stopping by Sunnyside Home. Empowering you to create a home you love!

Retailers We Love
- Anthropologie
- Birch Lane
- Crate & Barrel
- Joss and Main
- Lampsplus
- Mark & Graham
- One Kings Lane
- Pottery Barn
- Rejuvenation
- Serena & Lily
- Wayfair
- West Elm
- Williams Sonoma
- World Market
Be sure to follow us on Pinterest for even more home decor and DIY ideas.
To see what we are working on before it’s on our blog, follow us on Instagram.
You will also find our video tutorials on our YouTube channel.
What New . . .
- 25 Beautiful Thanksgiving Centerpiece Ideas You Can Create

- Last Minute Outdoor Halloween Decorations with Thrifted Finds

- Easy DIY Frankenstein Halloween Decor
- Simple Pumpkin Solar Lights in Under 5 Minutes