Comprehensive step by step guide to install a prefab shower pan in your bathroom!
If you’re looking to upgrade your bathroom without the hassle of complex installations, you’ve come to the right place.
In this article, we’ll walk you through the step-by-step process of installing a prefab shower pan.
Whether you’re a seasoned DIY enthusiast or a novice looking to tackle your first home improvement project, we’ve got you covered.
Say goodbye to building your own shower pan with mortar and the stress that involves and hello to a sleek, updated bathroom in no time!
It’s week 2 of the One Room Challenge and we’ve made good progress on our bathroom renovation project.
As a reminder you can easily navigate through each week of this master bathroom renovation by clicking on the links below.
Week 1 | Week 2 you’re here | Week 3 | Week 4 | Week 5 | Week 6 | Week 7 | Week 8

If you’re looking for ideas for updating or renovating your home, be sure to head over to their website and see all of the amazing participants this season.
Bathroom Renovation Progress
Demolition
It’s been a very busy and productive week.
After 2 days of demolition, we have the space cleared out and ready for our new design.
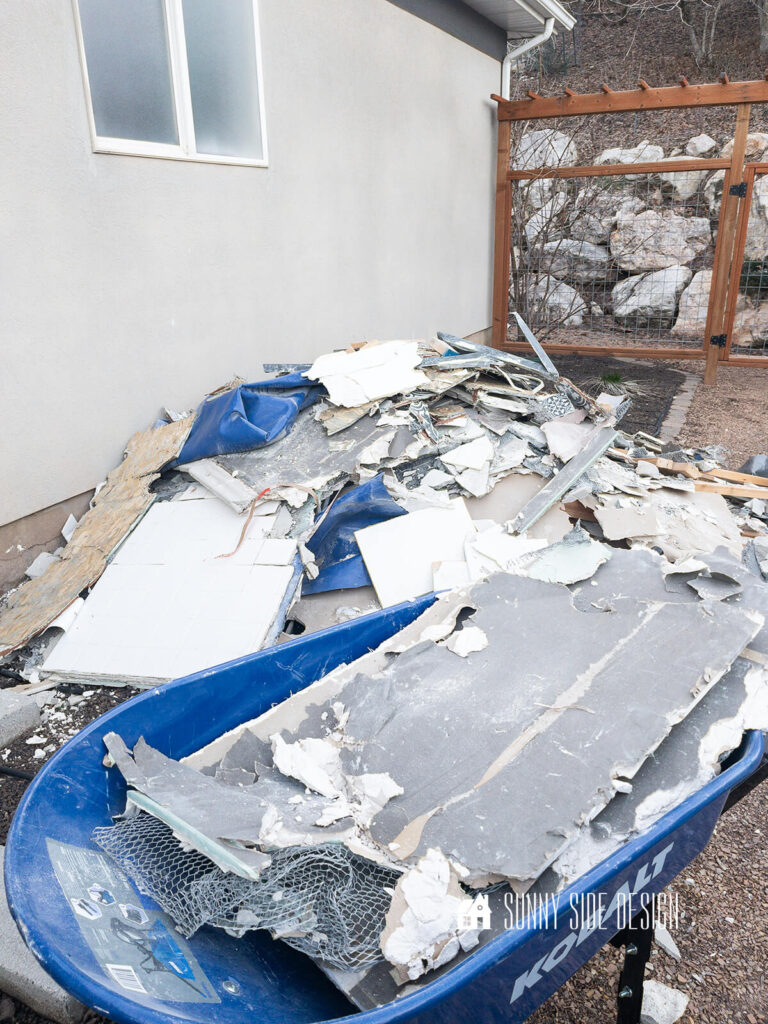
Instead of carrying the rubble through the house, we tossed everything out the bathroom window.
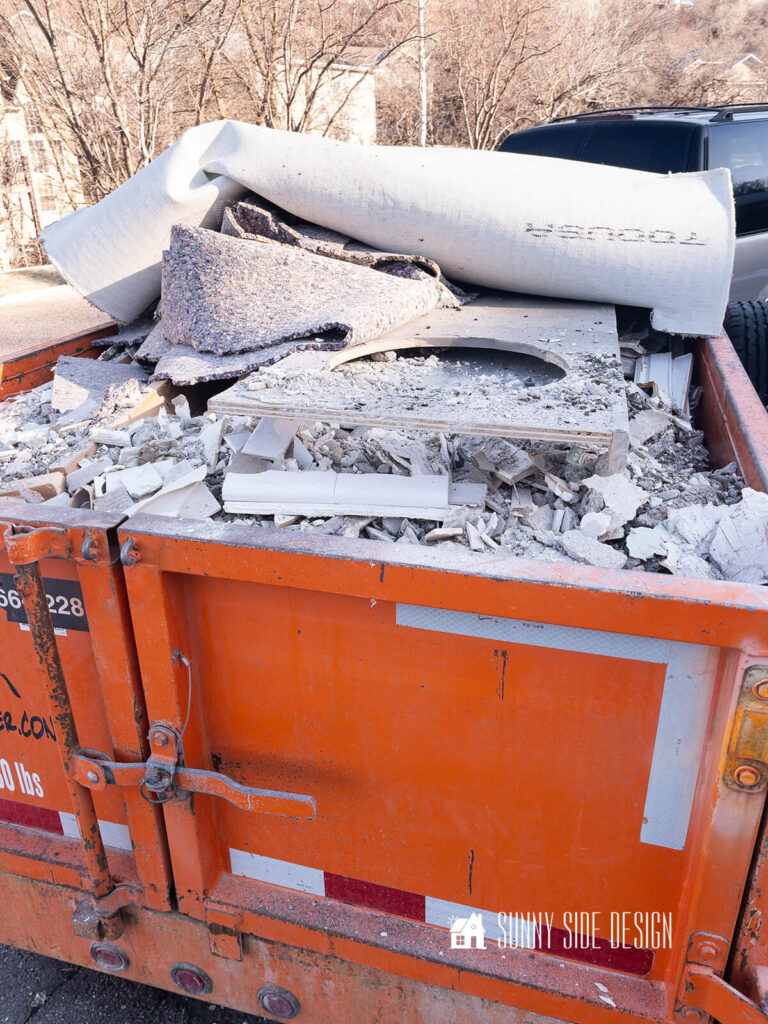
Then loaded it up into a trailer and hauled it off to the dump.
Moving the Closet Wall
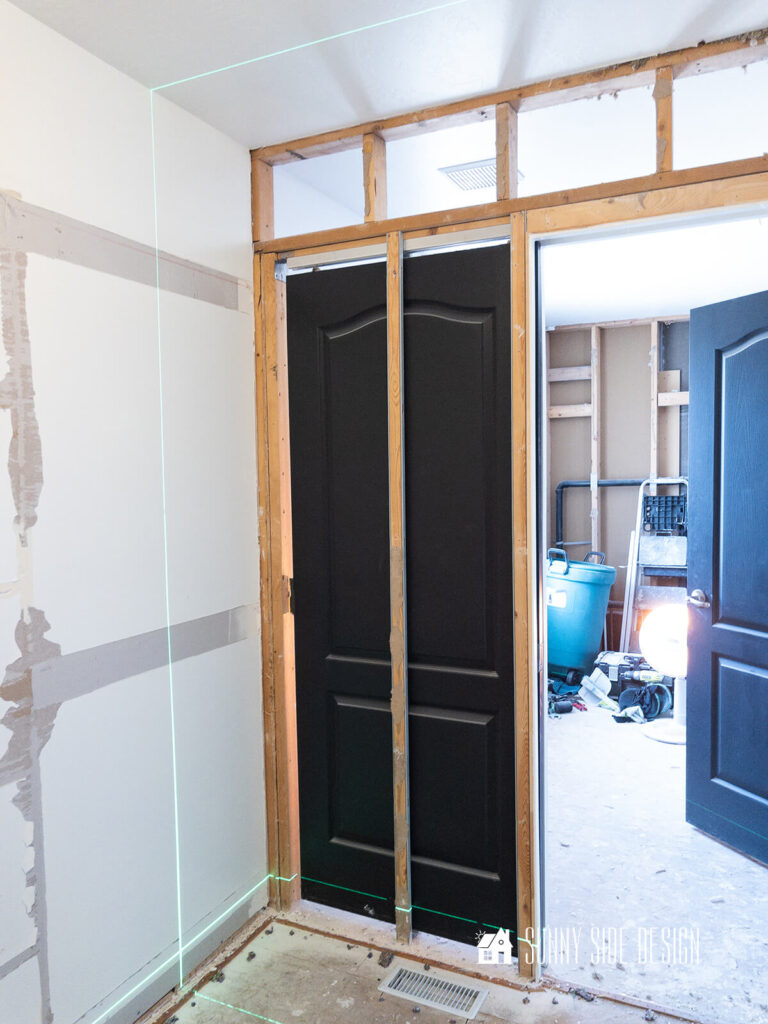
If you remember from week 1, in order to make our design work we needed to steal a little space from the walk-in closet.
First we removed the drywall from the wall separating the two spaces, then used our laser level to mark the placement for the new wall.
Over the years we’ve used a couple of different brands of laser levels and this one is by far our favorite.
It shoots a 360° line and the laser is bright enough to easily see.
We then cut out the dry wall from this area.
Next we used a reciprocating saw to cut through the nails that secured the wall to the side walls, floor and rafters.
And then using sledge hammers we slowly pushed the wall back to its new location.
Our plan was to see if we could move the wall without taking it apart and we were pleasantly surprised how well it worked.
You gotta love it when things work out just as planned!
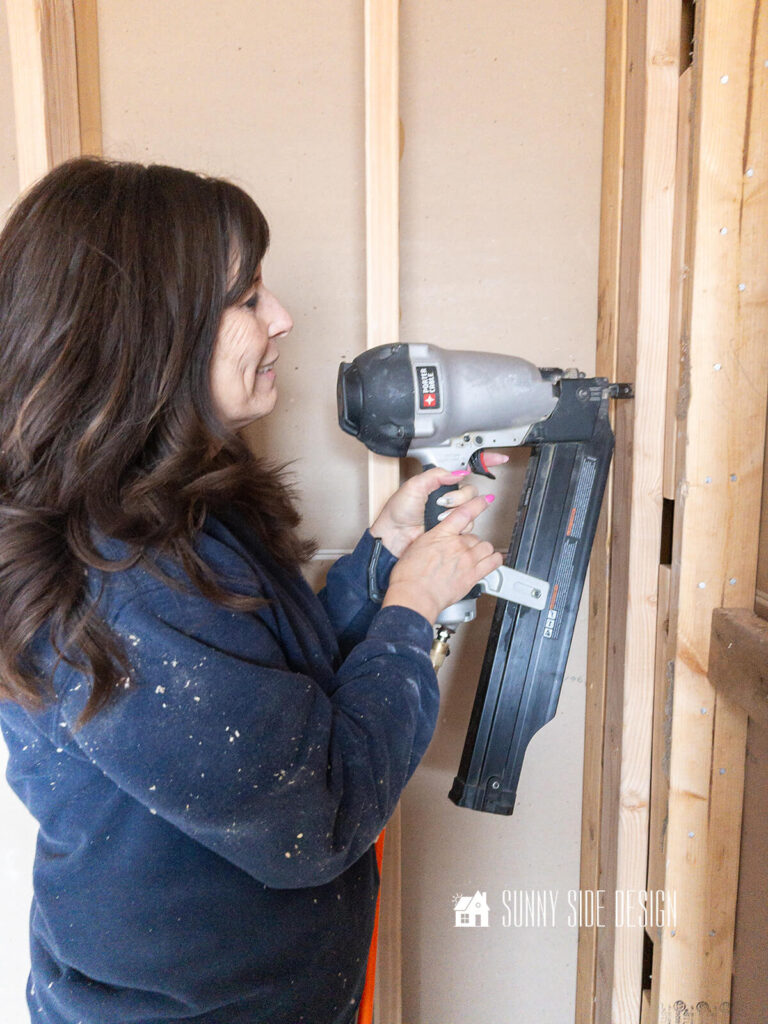
Once into position, we made sure it was level and then secured it into position using the big framing nailer.
Plumbing Problems
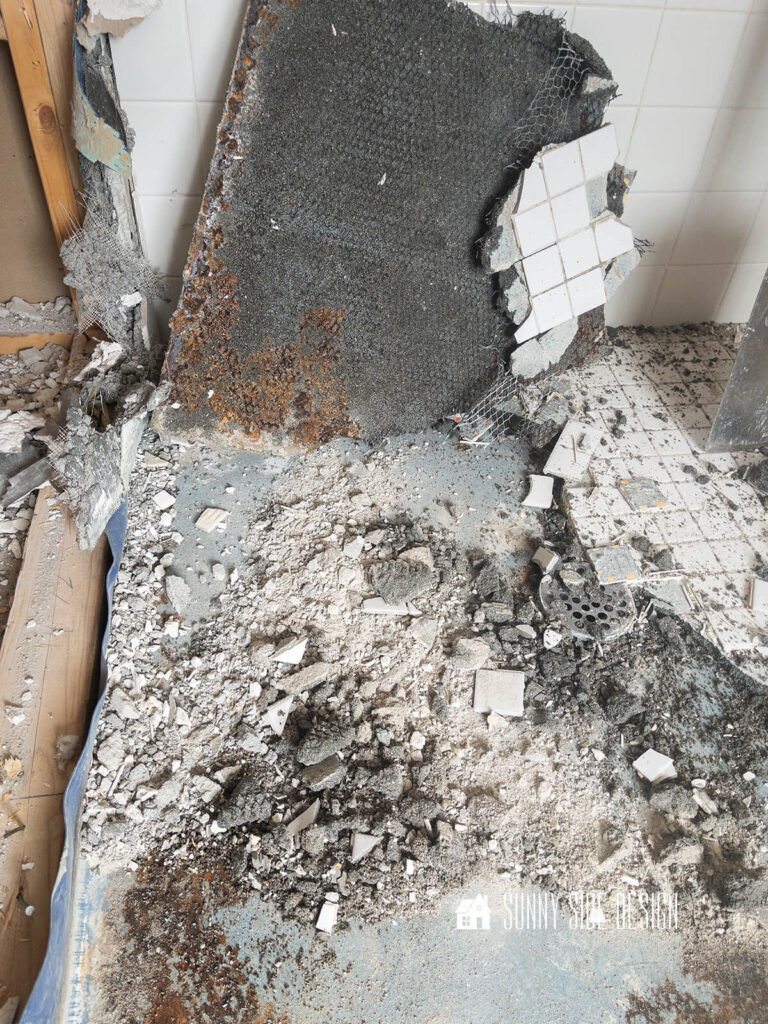
As we were demolishing the original shower floor, we discovered that moisture gets trapped below the tile in the mortar shower pan.
It was a smelly mess and I’m so glad we’ll install a prefab shower pan instead.
There was a waterproof membrane below the mortar shower pan so no moisture went through to the subfloor.
But that explains why you can never keep the grout clean in a tile shower floor.
There is always moisture that gets trapped down there.
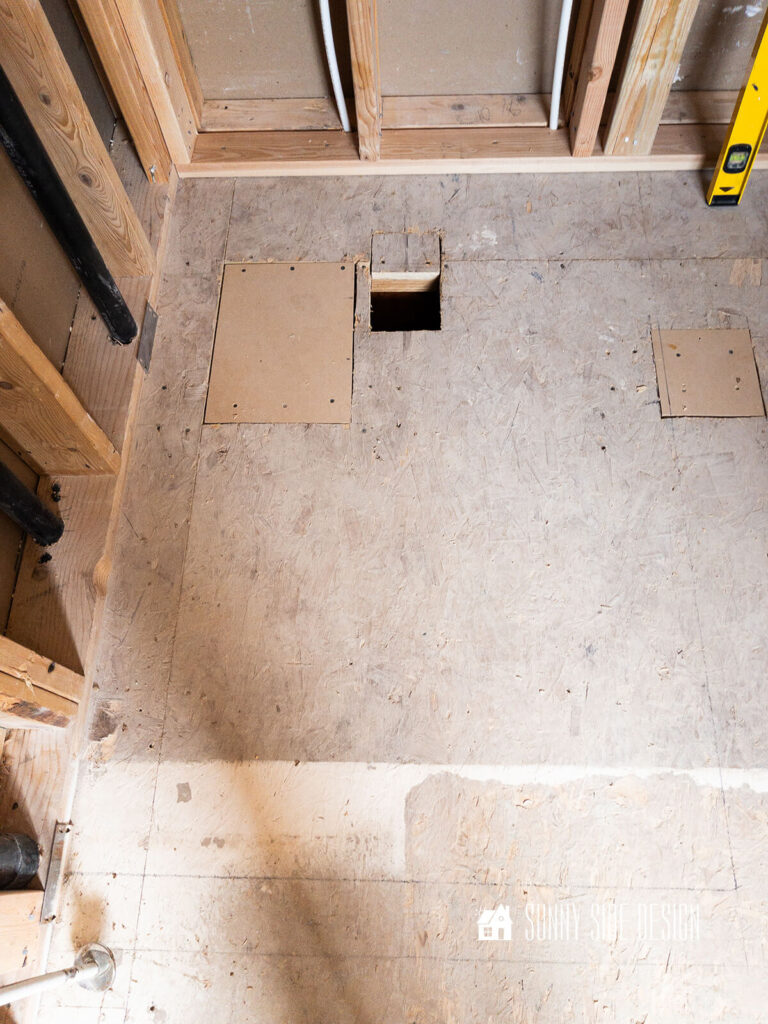
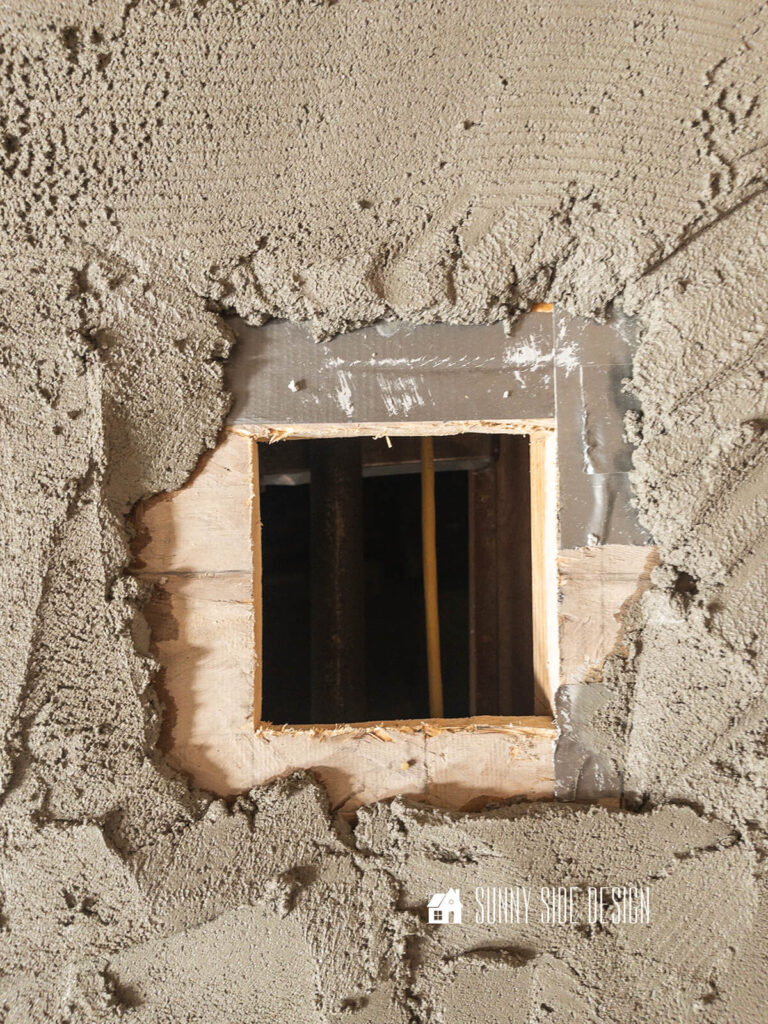
One other challenge we came across this week was the placement for the shower drain and the plumbing for the toilet.
As luck would have it, both drains were going to be exactly where there’s a floor joist.
In order to remedy this problem we had to frame out the wall an additional 3 1/2″.
When we discovered this problem, I was so worried that my shower and tub would not fit.
But I was relieved when it all worked out.
You’ll find behind the scene videos of the demo, moving the closet wall and framing the wall to allow for our drains in our Instagram stories and YouTube channel.
Are you enjoying this post?! Please Pin It, save it for later and share it with a friend.
Sharing is caring!
Select the Perfect Shower Pan
Installing a prefab shower pan is a relatively straightforward process that can dramatically transform the look of your bathroom.
Prefabricated shower pans come in a variety of shapes, sizes, and materials, making them suitable for virtually any bathroom space.
A quick google search will bring up a variety of options for you.
In my case I was looking for a black shower pan that needed to be about 36″ x 54″ to fit my space.
I also wanted to have a double threshold so I can install a glass shower enclosure on two sides.
You’ll want to also consider how large you want your shower pan to be so that your shower is comfortable for you.
There are so many options out there.
In fact as I was searching for the perfect shower pan for my bathroom, I even came across custom prefab shower pans made from Corian.
They are built to your specifications and come in a variety of finishes.
With the right tools and a clear understanding of the steps involved, even DIY enthusiasts with minimal experience can successfully complete this project.
Whether you’re replacing an old shower pan or a full bathroom remodel, installing a prefab shower pan offers an efficient and cost-effective solution for achieving a stylish and functional shower area.
Supplies and Tools
You’ll need a few basic tools, a shower pan, mortar and plumbing parts to install your shower pan.
- tape measure
- pencil
- level
- drill
- mixer bit
- mortar
- shower pan
- shims
- shower drain flange
- bucket
- trowel
- plumbers putty
- plumbing parts (elbows, gooseneck pipe, etc.)
If you’re new here, welcome! We’re so glad you’re here.
Let us introduce ourselves, we’re Michelle and Steph, a mom and daughter team who love to DIY and decorate our homes.
Not only are we passionate about making our homes warm, comfortable and unique, but it’s our mission to help you create that same feeling in your own home.
You’ll find ideas for repurposing, creating, decorating and making your home truly yours, while always mindful of a tight budget.
Undoubtedly we love finding ways to make your home look high-end on a small budget.
Plus you’ll also find a recipe or two as we share our family favorites with you.
We’d love it if you’d join our community of doers so you won’t miss any inspiration for your home.
We love new friends.

[mailerlite_form form_id=2]
Install a Prefab Shower Pan
1. Prepare Subfloor
Before you begin this project, you’ll want to inspect your subfloor and see if it needs any repair.
In our case when we demolished the shower, there was a small section of our subfloor that was pushed in.
So we cut out that section with a circular saw and replaced it with a 3/4″ plywood piece cut to fit.
Then we secured it to the floor joists with screws.
2. Dry Fit Shower Pan
Before installing the shower pan, you’ll first want to dry fit to ensure a seamless installation process.
Begin by placing the shower pan in its designated position on the floor to assess the fit and alignment.
We also found it helpful to make a pencil line on the subfloor marking the outline of the shower pan.
In addition you’ll also want to mark where the shower drain will go through the floor and remove that section of floor.
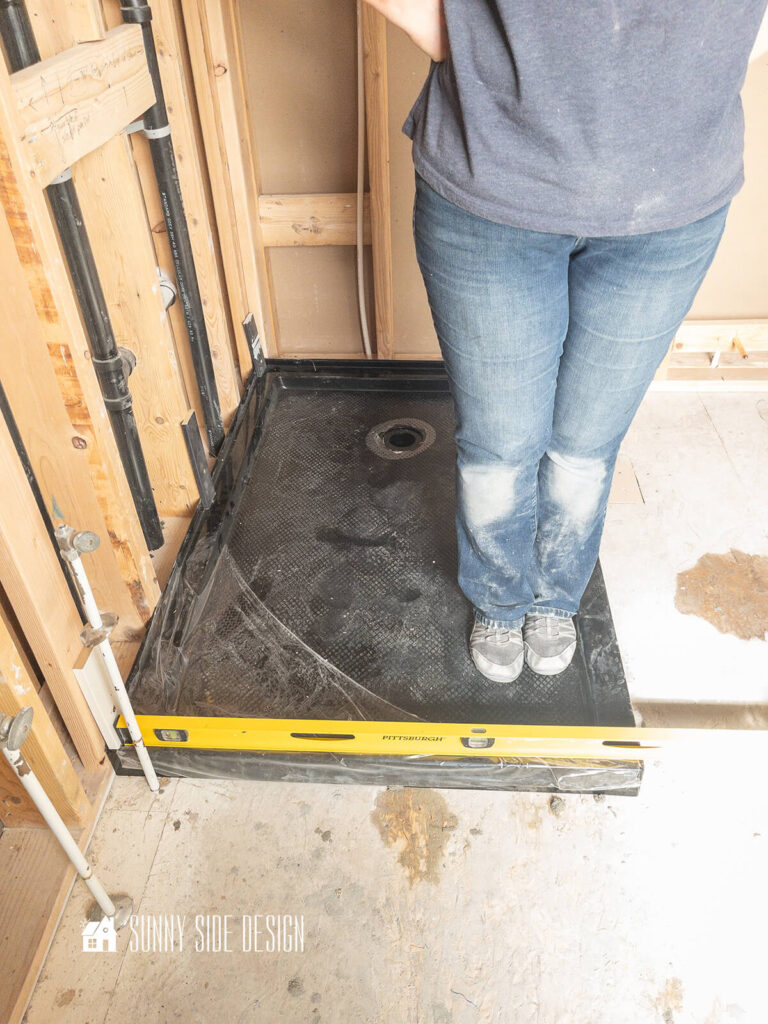
Then you want to check that the shower pan is level to ensure proper drainage once the shower pan is installed.
If your shower pan is not level on your subfloor, place shims along the outer edge until it’s level.
And then secure the shims to the floor with brads or tape.
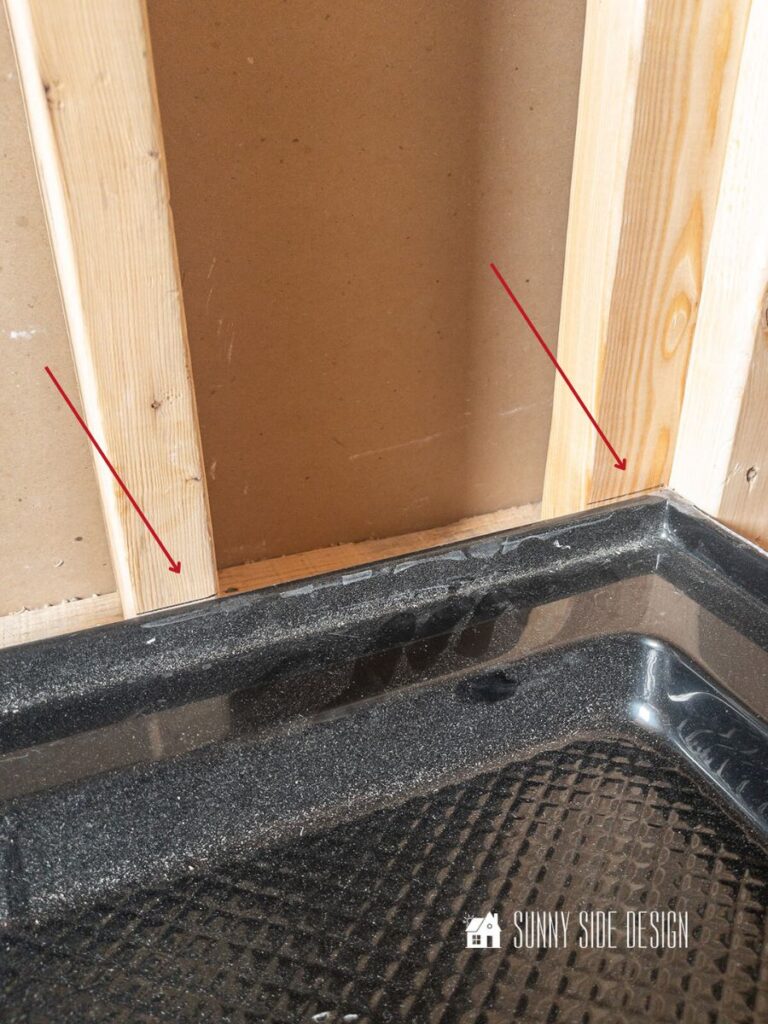
At this time you’ll also want to place a pencil mark on the wall studs at the height the shower pan will set.
It’s crucial that your shower pan is installed level to prevent water pooling and ensure the water flows towards the drain.
By conducting a dry fit and confirming the floor’s levelness beforehand, you can alleviate potential challenges and achieve a flawless installation of your shower pan.
Let’s stay connected! Follow us on social media!
3. Install Shower Drain
At this time you’ll install the shower drain into the pan.
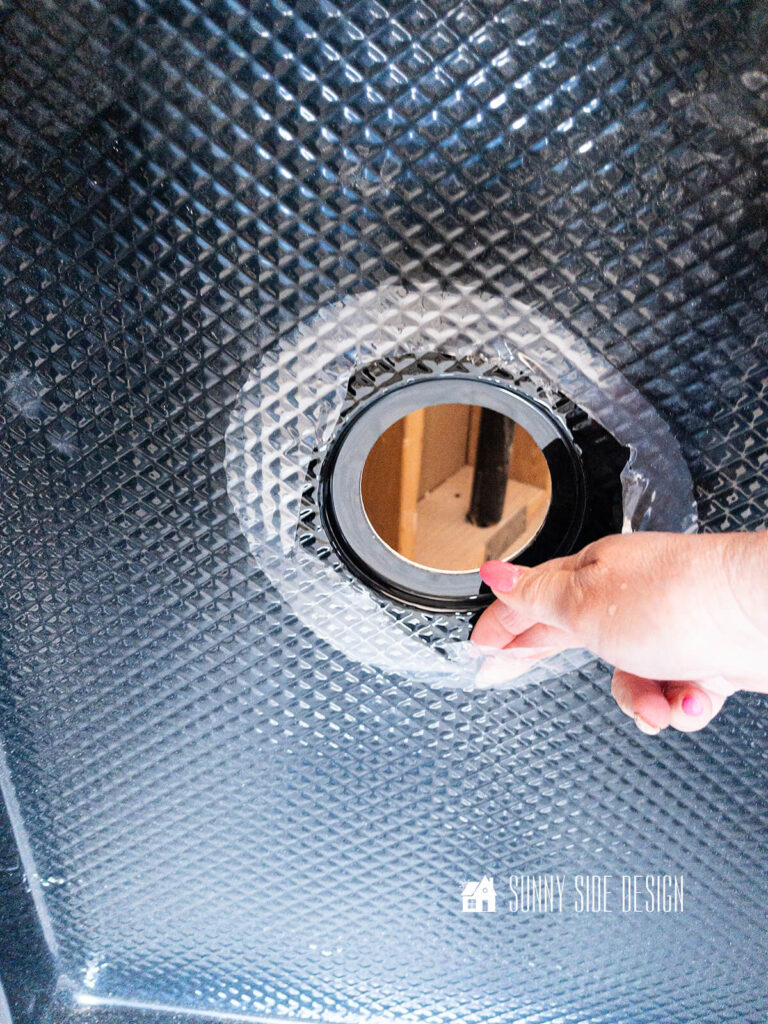
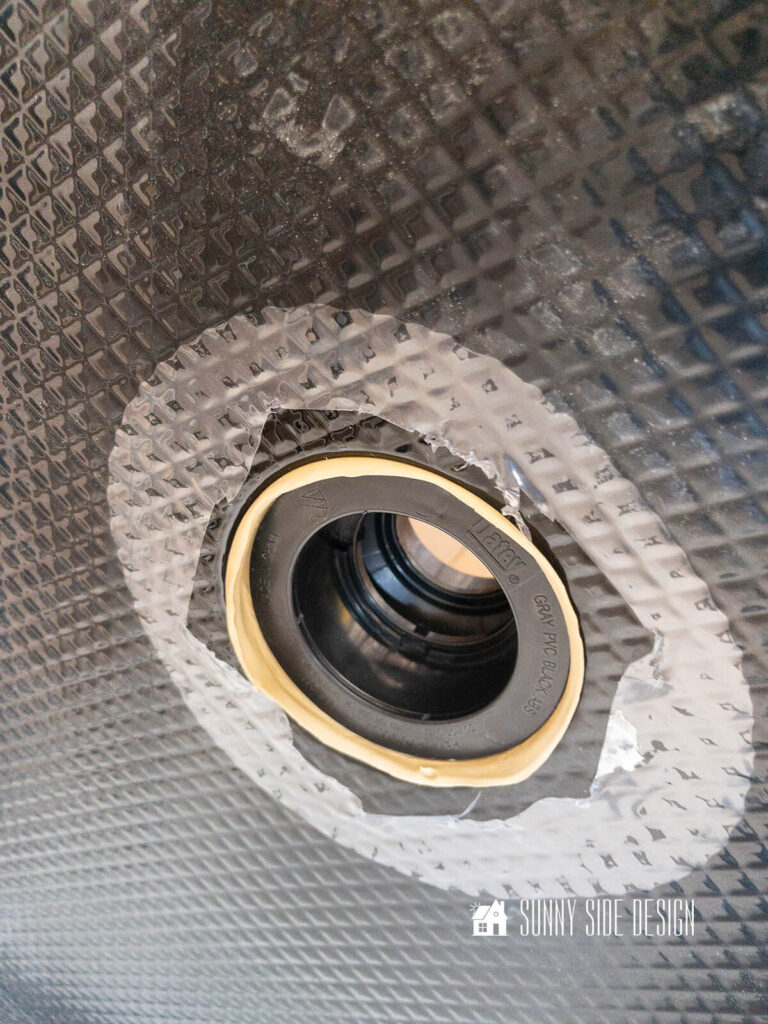
If your shower pan has a protective covering, you’ll want to trim around the hole for the drain.
The drain will sit flush with the circular opening in the shower pan and any protective covering may prevent a proper seal.
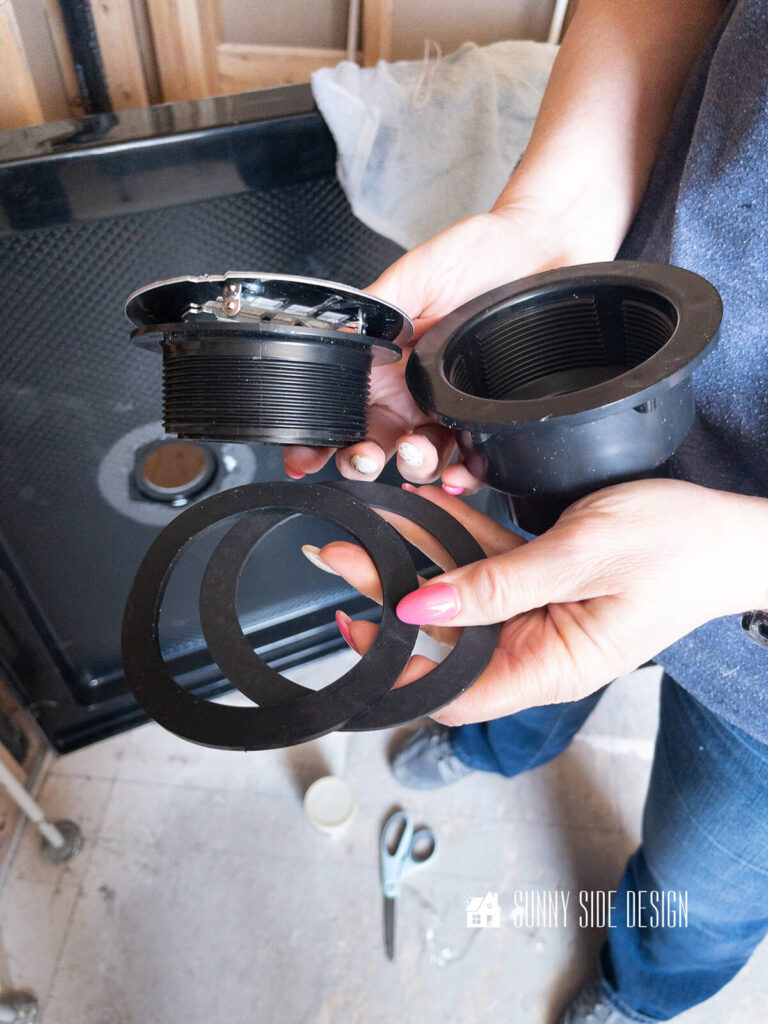
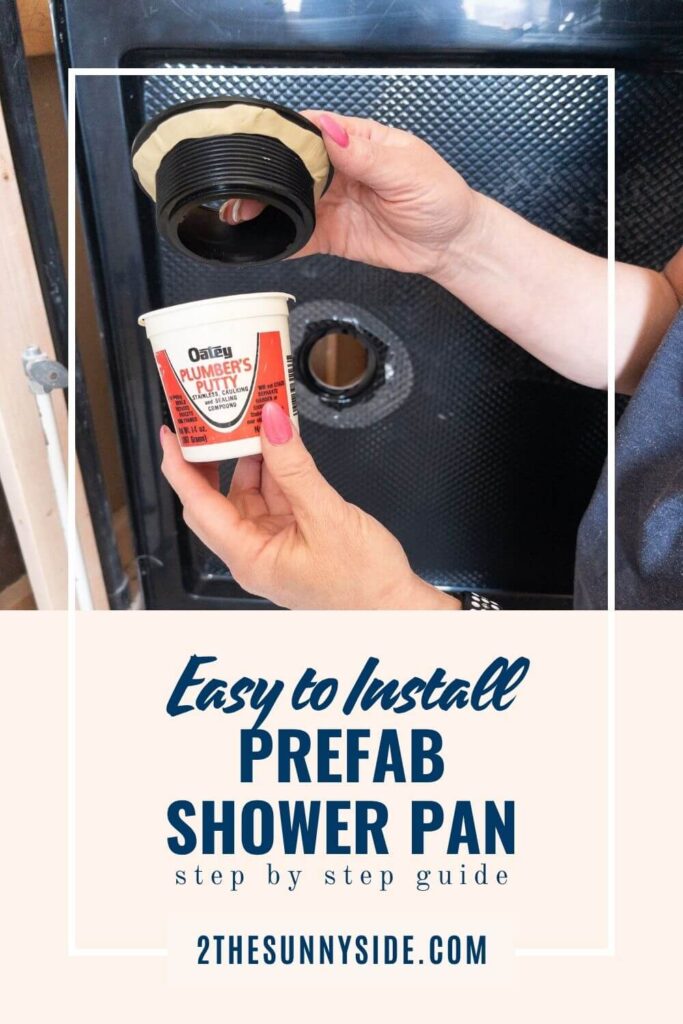
The shower drain consists of two black pieces that are threaded together and two gaskets, one is rubber and one is more of a papery consistency.
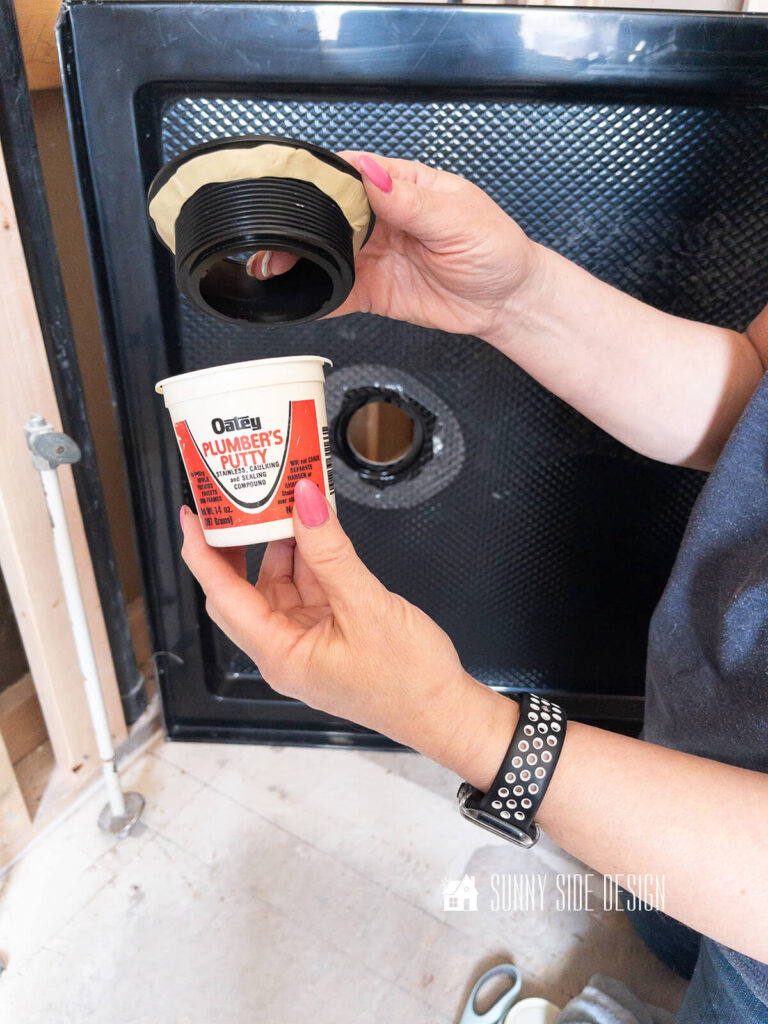
Begin by applying a layer of plumber’s putty around the underside of the drain flange to create a watertight seal.
First roll a piece of plumbers putty into a long snake that will fit around the drain and then press around the pipe.

Then, insert the drain into the pre-cut hole in the shower pan.
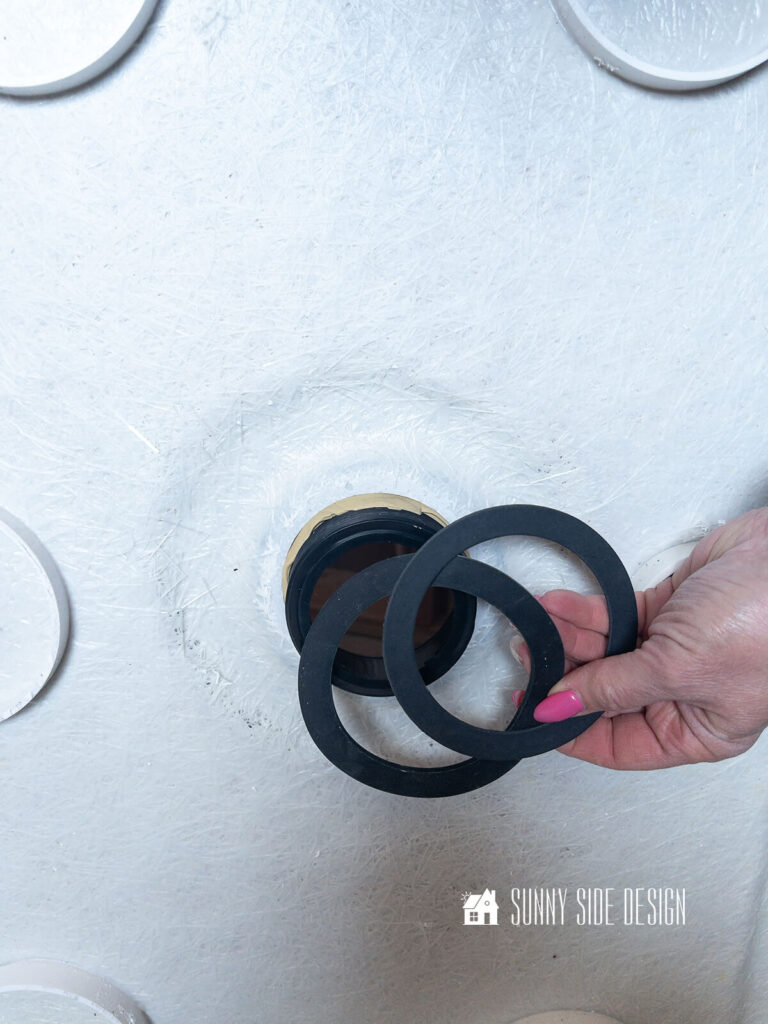
Next place the rubber gasket and then the papery gasket on the drain piece.
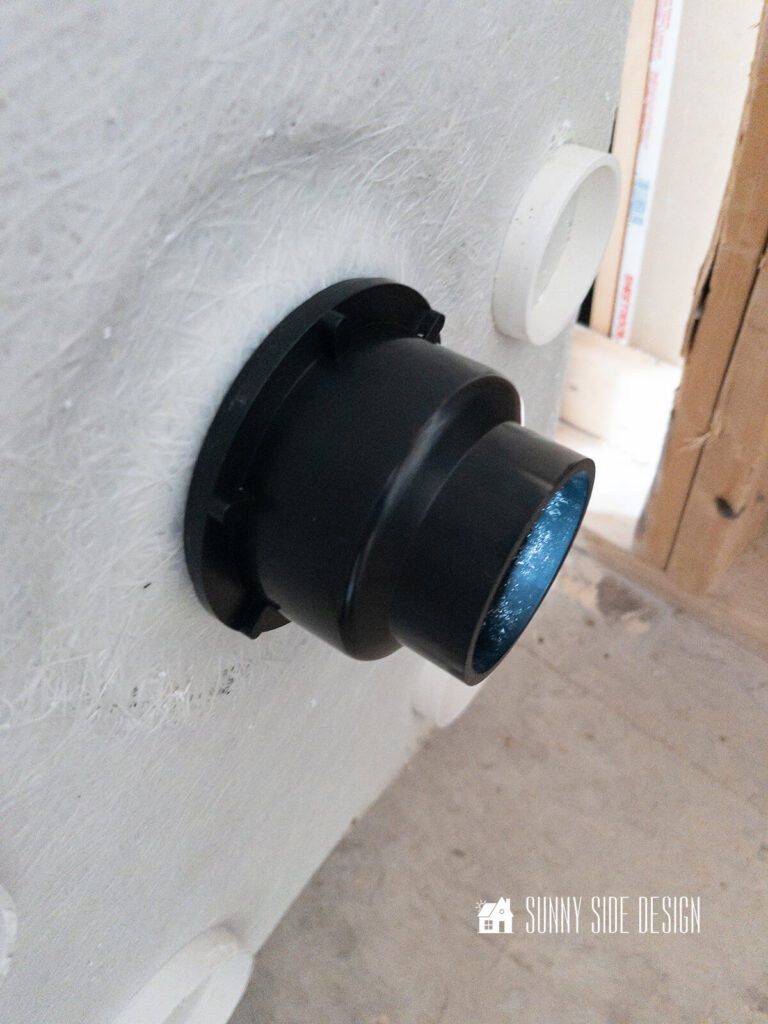
Finally tighten the remaining drain piece from underneath to secure it in place.
As the drain is tightened, excess plumbers putty will ooze from the lip of the drain.
Then remove any excess putty from the rim.
Ensure that the drain sits flush with the surface of the shower pan to maintain an even flow of water.
4. Secure Shower Pan in Place
Each shower pan may differ in the final installation process.
Be sure to check your manufacturers instructions.
Some shower pans will have clips to secure to the wall studs or some shower pans are secured to the studs with screws.
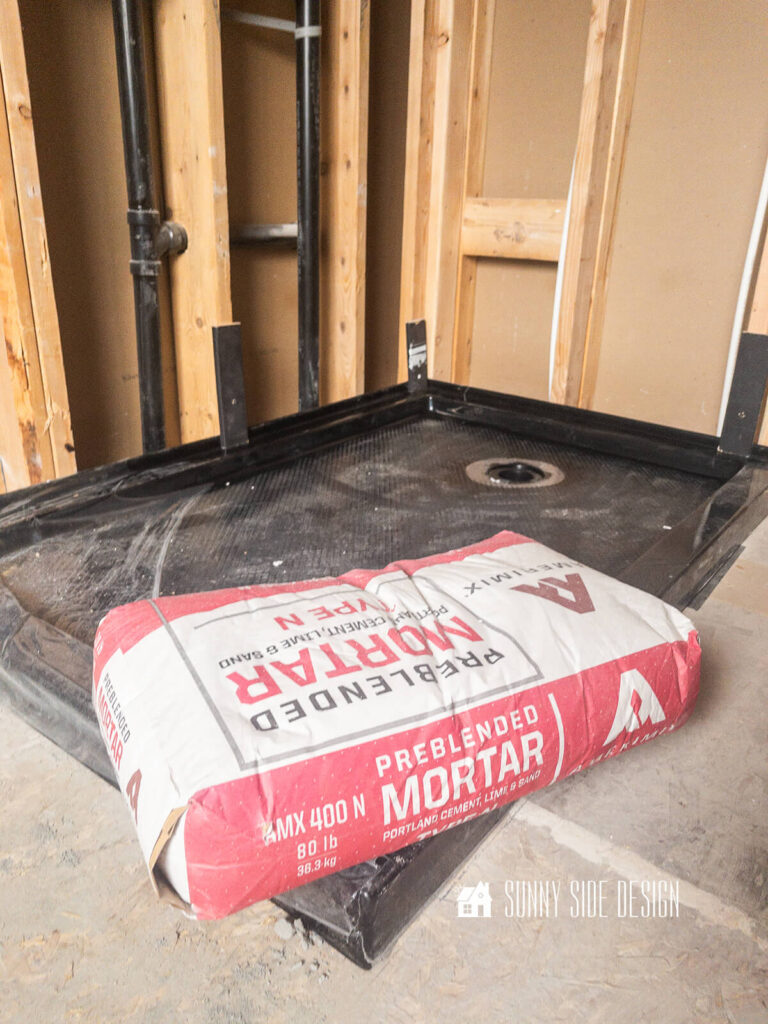
Our shower pan from Dreamline is secured on a mortar base and that’s it.
Not knowing how far a bag of mortar would go, we purchased two 80 pound bags of mortar.
However, one bag was more than enough to set and secure our 36″ x 54″ shower pan.
We have marked an outline of the shower pan on the subfloor and also marked the studs at the height the shower pan will be set.
Mix up the mortar according to the package instructions.
You’ll want it to be a wet peanut buttery consistency.
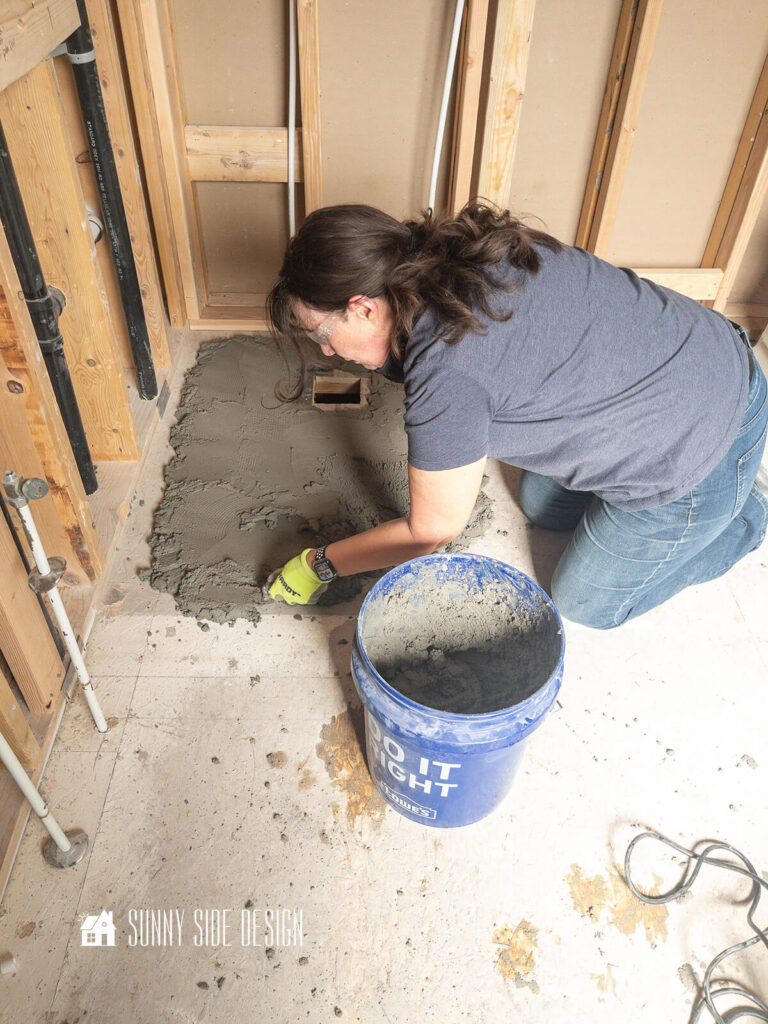
Now begin to trowel the mortar onto your subfloor, leaving a 1″to 2″ gap around the hole for the drain and also about 2″ from the outer edge of the shower pan on all 4 sides.
The mortar should be 1″ to 2″ deep so that as the shower pan is placed into position it will fill in any gaps and make a solid surface for your shower pan to set on.
We found that we had to put our weight onto the pan to get it to level out.
You’ll also want to double check the marks you placed on the studs and make sure everything is aligned as you planned with the dry fit.
Pull out your bubble level and once again check and make sure it’s level on all sides.
Finally to make sure that nothing moves as the mortar cures we attached a few pieces of scrap wood to the studs with screws.
And we also placed that extra bag of mortar on the shower pan as it cured.
At this time we don’t have any beautiful photos of the shower pan with all the construction going on in the bathroom.
But as soon as the tiling is finished we’ll update this post with an image of the shower pan with the protective cover removed.
5. Finish the Drain Assembly
Once the shower pan is set and the mortar is cured you can finish installing the remaining drain assembly.
Finally you’ll want to run some water down the drain and check for any leaks.
FAQ
Is it cheaper to use a shower pan or tile?
Generally, opting for a shower pan can be more cost-effective than tiling.
Tiling is labor intensive and that can drive up the cost.
Even opting for professional installation, a shower base proves considerably less costly and time-consuming compared to tiling the entire floor.
Even with a fully tiled bathroom, selecting a shower base remains a cost-effective and time-saving choice.
What is the difference between a shower base and a shower pan?
Both a shower pan and a shower base serve to guide water towards the drain.
However, the primary distinction lies in their respective locations within the shower structure.
The shower pan is the actual surface upon which you stand, directly receiving the flow of water.
On the other hand, the shower base is situated beneath the pan, forming an integral part of the shower’s substructure.
Do you need to put anything under a shower pan?
Yes, it’s typically necessary to provide support and ensure proper installation for a prefab (pre-fabricated) shower pan.
This usually involves placing the shower pan on a level and sturdy subfloor, which may be constructed from materials like plywood or concrete.
In addition, it’s common practice to use a layer of mortar to secure the shower pan to the subfloor, ensuring stability and preventing movement over time.
Proper support is essential for preventing flexing, cracking, or leaking of the shower pan. Always following the manufacturer’s instructions and any local building codes.
Final Thoughts
Installing a prefab shower pan is a doable and rewarding DIY project that can elevate the look and functionality of your bathroom.
By following the steps outlined in this guide, from choosing the right shower pan to ensuring proper drainage and conducting a dry fit, you can achieve professional-quality results with confidence.
What do you think? Is this a project you’d like to try in your home?
Do you feel confident in tackling a project like this?
I’m so pleased with the results in my home and can’t wait to install the tile and enjoy this new look in my bathroom.
For more ideas to update a bathroom in your home, take a look at these ideas:
- Simple and Stylish Cane Tray
- How to Make a Custom Shower Curtain
- Make a Shower Curtain from a Sheet
- Modern Coastal Bathroom
- Inexpensive Master Bathroom Makeover
- DIY Bathroom Remodel on a Budget
- Fail to Fabulous Bathroom Tile Tutorial
Bathroom Remodel To Do List
demo bathroommove closet wallrough in plumbing and electrical- change swing of door
- repair walls and ceiling
- install shiplap ceiling, paint
- paint doors
install shower pan- paint walls
- install vanity
- prime and paint baseboards
- install cement backer board
- install shower niche
- waterproof shower
- tiling & grout
- install waterproof luxury vinyl plank floors
- install soaker tub
- install plumbing fixtures
- install toilet
- shower enclosure
- recessed shelves
- install lighting
- mirrors
- curtains
- towel hooks
- art and decor
Disclosure: This post contains affiliate links or referral links for your convenience. It is a way for this site to earn advertising commissions by advertising or linking to specific products and/or services. Click here to read my full disclosure policy.
Don’t forget to check out the many other room transformations taking place on the One Room Challenge blog this season.
No doubt you’ll be inspired with countless design styles and creative ideas.
If you’re new here, WELCOME! We love having new readers and friends!
You can learn more about us here.
Let’s stay connected! Join our DIY community of doers and you won’t miss the weekly updates on our One Room Challenge and more inspiration for you always on a budget.
Please PIN and save for later, and share with your friends! Sharing helps grow our following!
Sharing is caring!
Thanks for stopping by Sunnyside Home. Empowering you to create a home you love!
Retailers We Love
- Anthropologie
- Birch Lane
- Crate & Barrel
- Joss and Main
- Lampsplus
- Mark & Graham
- One Kings Lane
- Pottery Barn
- Rejuvenation
- Serena & Lily
- Wayfair
- West Elm
- Williams Sonoma
- World Market
Be sure to follow us on Pinterest for even more home decor and DIY ideas.
To see what we are working on before it’s on our blog, follow us on Instagram.
You will also find our video tutorials on our YouTube channel.
- The Best ‘Berry in Love’ Bridal Shower Ideas

- Paint an Old World Texture Finish on a Vase
- Easy Strawberry Chicken Salad with Lime Maple Balsamic Vinaigrette
- How to Fix Chipped Kitchen Cabinets with a Pen


I didn’t know you two are participating in the One Room Challenge! I follow you on YouTube. I really admire how you two figure out things and get it done. I need to read week 1. Will you be posting this eventually on YouTube, too? I know it’s too time consuming right now between doing the work and writing blog posts.
Hi Cindi, We’re so happy you found our website. Currently the bathroom makeover is only on our blog, but it will be heading to YouTube soon. It’s just too difficult to take on a major renovation like this and keep up with all of the posting. You can also follow along on our Instagram or Facebook storied for behind the scenes of what we are currently working on. Please let us know if you have any questions. Have a wonderful day.
I am so amazed at all your DIY knowledge! Who knew about the lack of a shower pan preventing you from getting your grout clean. I see your photos of you two doing the work yourselves and all I can think is Girl Power!!! Pat yourselves on the back for all the hard work you are doing. I’m so impressed, and can’t wait to see more.
Thanks you Julie for your kindness. We are enjoying the process of this bathroom transformation. Only 6 more weeks to go. 🤪