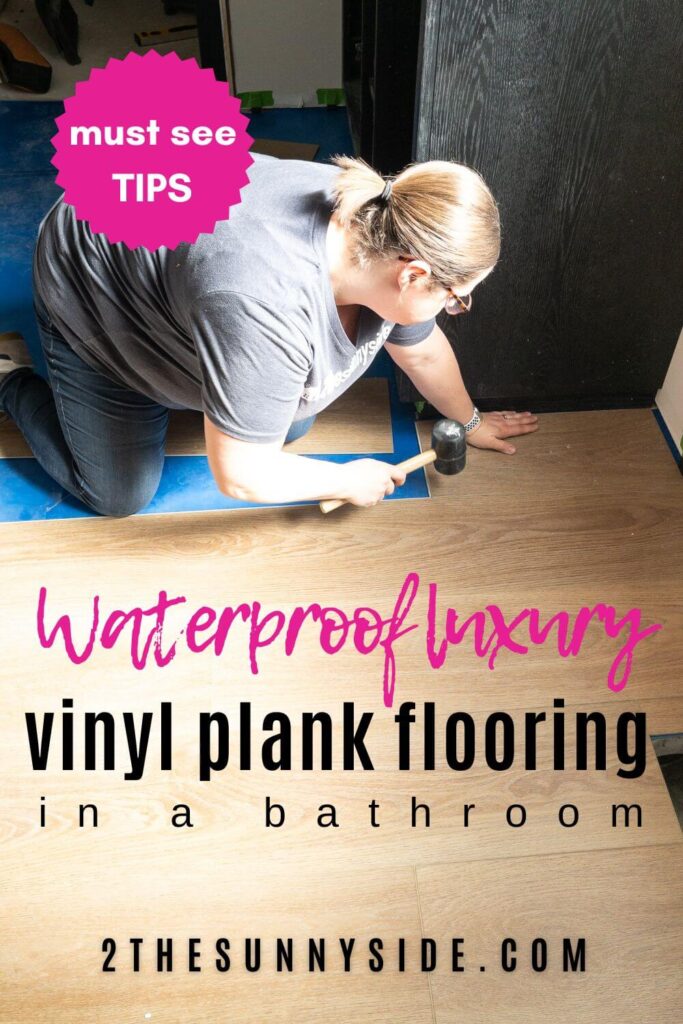
The ultimate guide on installing luxury waterproof vinyl plank flooring in a bathroom or any room in your home.
No question renovating your bathroom can be both exciting and daunting, but with the right materials and know-how, you can achieve stunning results.
It’s week 7 of the One Room Challenge and the reveal is only one week away!
Are you excited to see how our Modern Cottage master bathroom turns out?!
Clearly, we can’t wait to add the finishing touches that will bring this room to life.
As a reminder you can easily navigate through each week of this master bathroom renovation by clicking on the links below.
Week 1 | Week 2 | Week 3 | Week 4 | Week 5 | Week 6 | Week 7 you’re here | Week 8

In this post, we’ll share our best tips for installing waterproof luxury vinyl plank flooring.
We’ll walk you through everything you need to know about selecting, installing, and maintaining vinyl plank flooring to transform your space into a luxurious oasis.
Whether you’re a seasoned DIY enthusiast or tackling your first home improvement project, our tips will ensure a successful and stylish outcome.
Let’s dive in and turn your bathroom into a retreat with style and functionality!
Why Choose Luxury Vinyl Plank Flooring?
You may be wondering why I chose vinyl plank flooring for our bathroom remodel.
Certainly there are several options for bathroom flooring, from sheet vinyl to tile.
However for this bathroom I wanted to add the warmth of wood to my bathroom design and we all know a wood floor wouldn’t be a great idea in a bathroom.
Don’t get me wrong, I love tile floors.
We’ve installed a tile floor in my main bathroom, and Steph’s modern coastal basement bathroom, but with my cottage design, I felt like a wood floor would add a cozy cottage charm.
There are also many wood-look tile options, but I really wanted this floor to feel warm and have the texture and feel of wood.
And I feel a waterproof luxury vinyl flooring does just that!
Our first experience installing a waterproof laminate floor was in Steph’s basement family room and we loved it so much we decided to install it in our home office library.
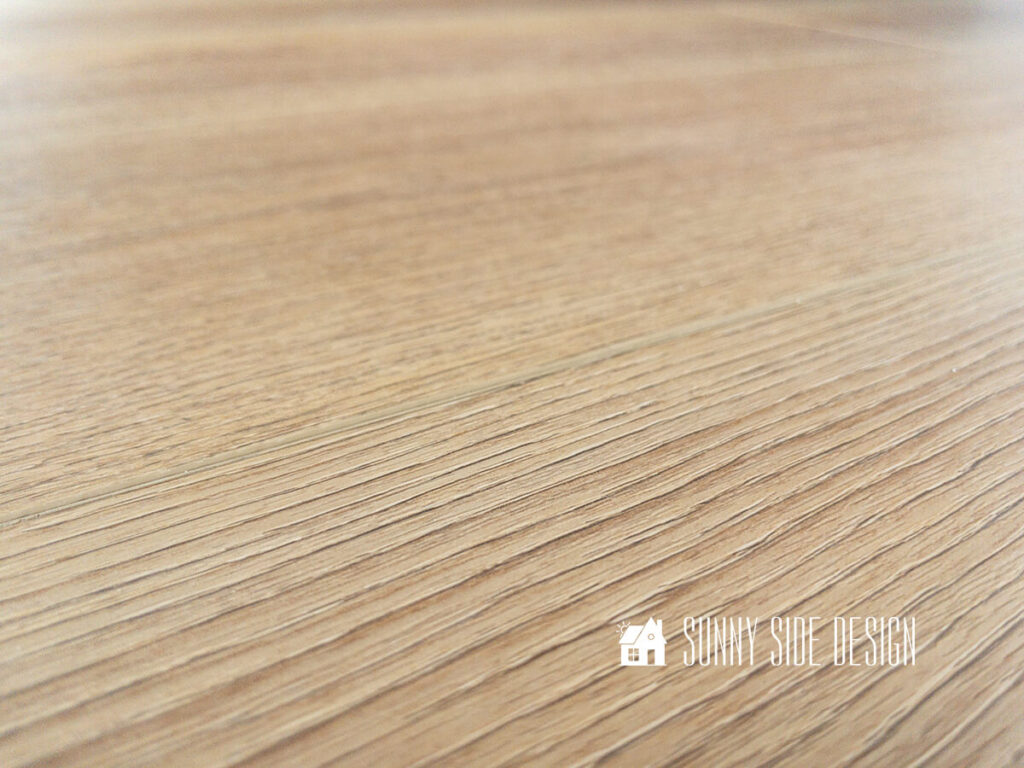
Laminate or luxury vinyl plank flooring has come a long way and has a realistic wood look and feel.
In addition it’s a project that anyone can DIY in their own home.
Sunny Side Design is a participant in the Amazon Services LLC Associates Program, an affiliate advertising program designed to provide a means for sites to earn advertising fees by advertising and linking to Amazon.com. As an Amazon Associate, this blog earns from qualifying purchases with no additional cost to you. Click here to read our full disclosure policy.
Tools and Supplies
This home improvement project requires just a few tools, in fact we made about 95% of our cuts with a straight edge and a utility knife.
But, if you need to make cuts for heat vents or around the toilet flange you’ll also need a saw.
- Waterproof Luxury Vinyl Plank Flooring
- underlayment
- pencil
- tape measure
- straight edge
- utility knife
- jig saw, table saw, or circular saw
- silicone caulk
Because we are installing our vinyl plank flooring in a bathroom, we chose a mold and mildew resistant underlayment.
While the flooring itself is waterproof, the subfloor is not and we want to cover and protect it if any water were to seep through the seams of the flooring.
Prep Floor
Before you begin to install your waterproof vinyl plank flooring, you’ll want to first check your subfloor for any mastic, staples or nails.
You’ll want a good flat surface to install your new flooring on.
It’s also a good idea to carefully remove your existing baseboards if you plan to reuse them.
In our case we plan install new moulding throughout the bathroom.
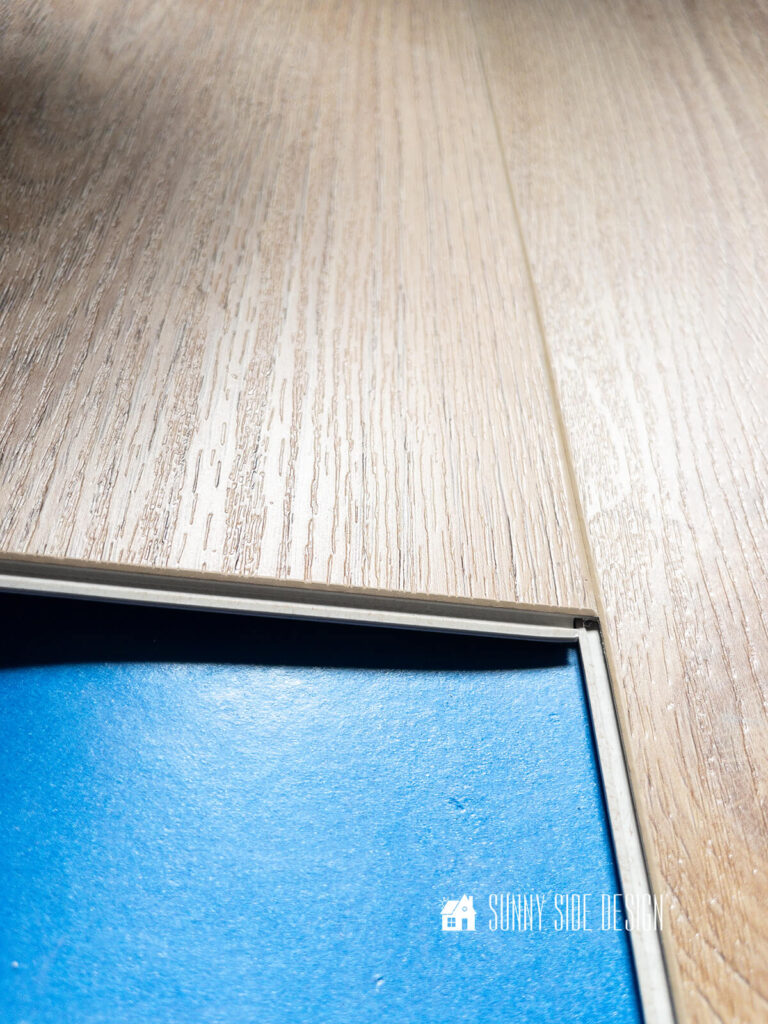
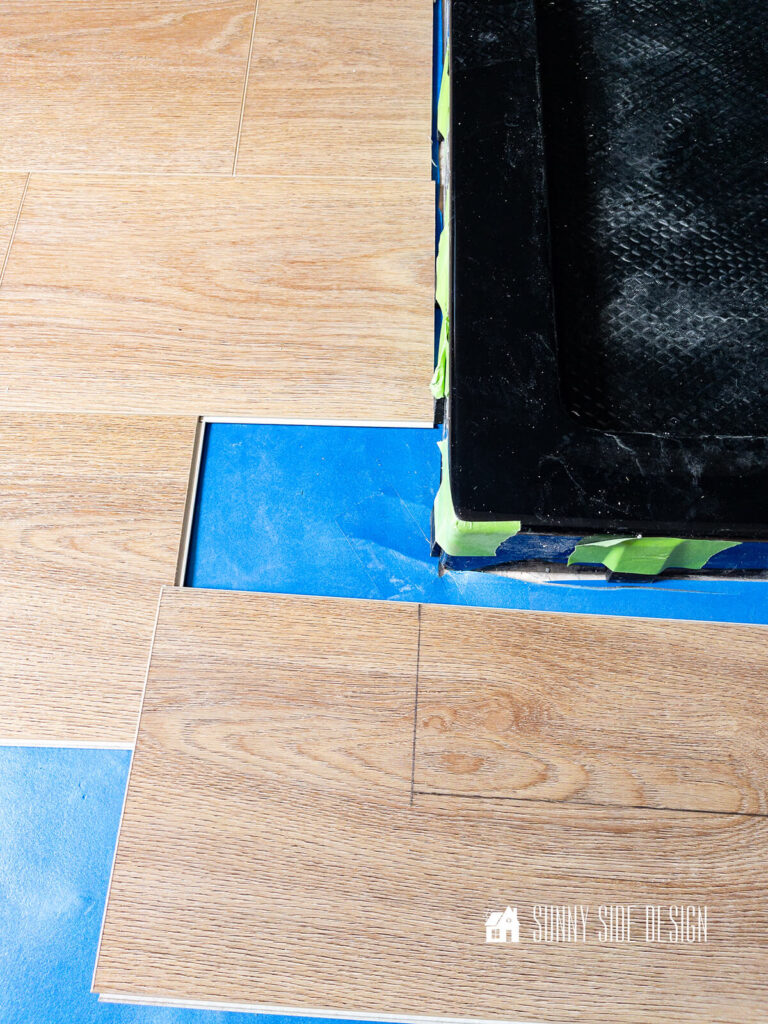
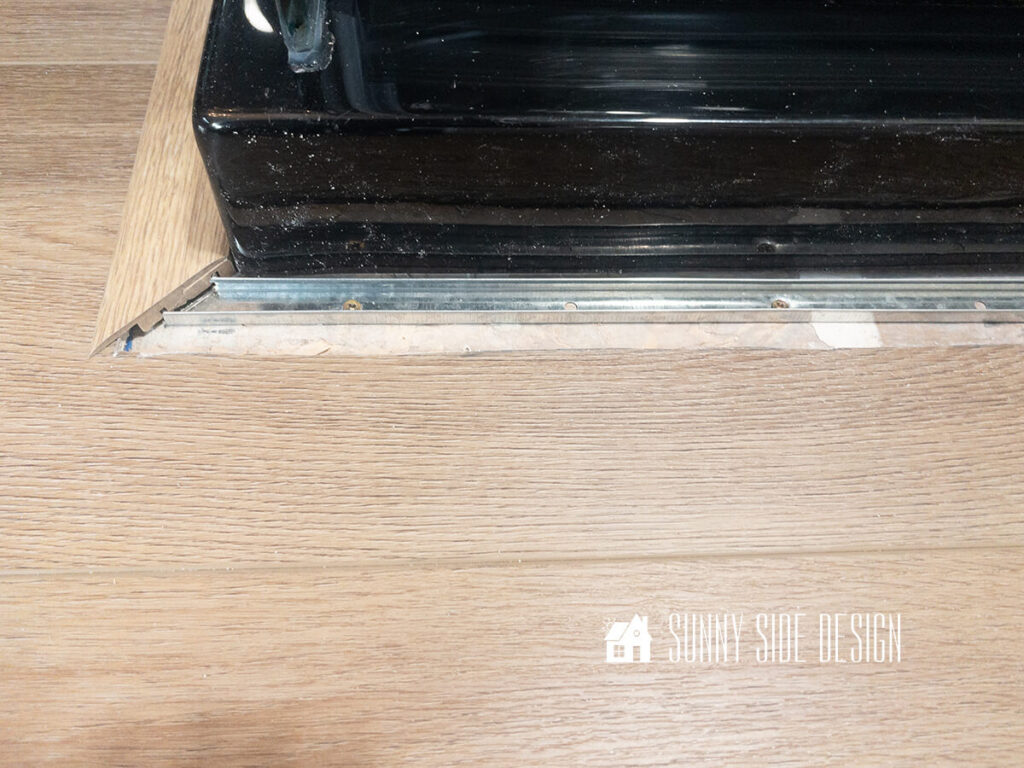
Another important step before you begin to install your new vinyl plank floor is to place spacers around the perimeter of the room.
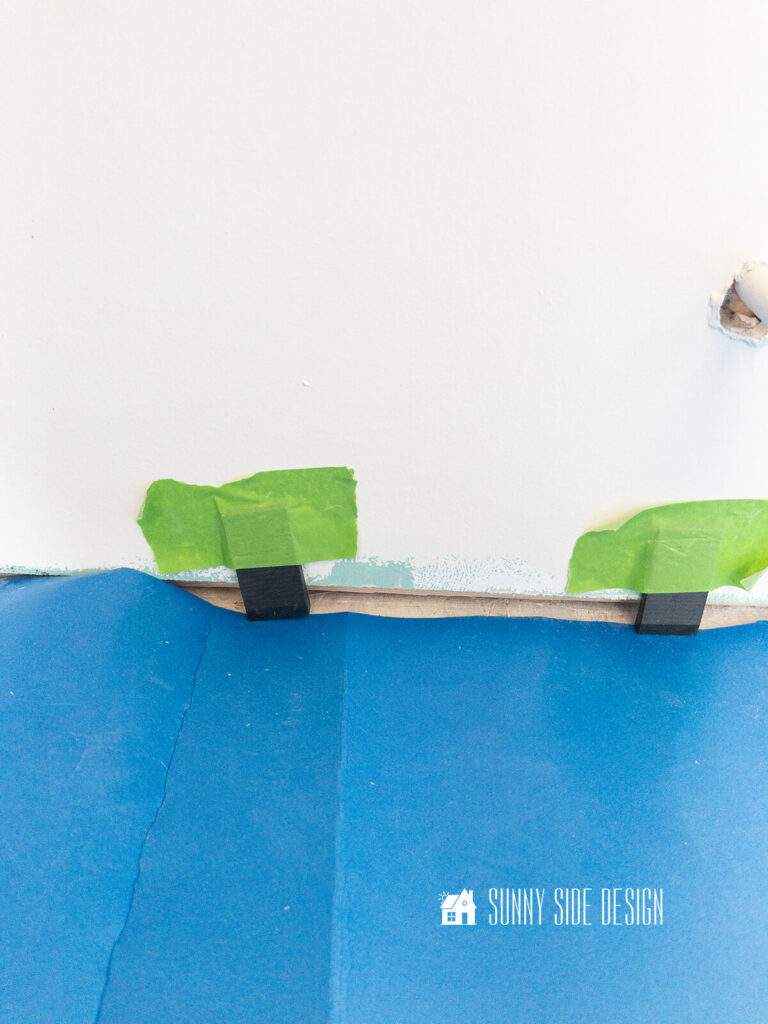
These spacers ensure a consistent expansion gap between the flooring and the walls, allowing for natural expansion and contraction of the material with changes in temperature and humidity.
Without this gap, the flooring could buckle or warp over time, leading to costly repairs or replacements.
To keep the spacers in place we found it helpful to tape them to the walls with painters tape.
This will ensure a consistant 1/4″ gap around the perimeter of the room.
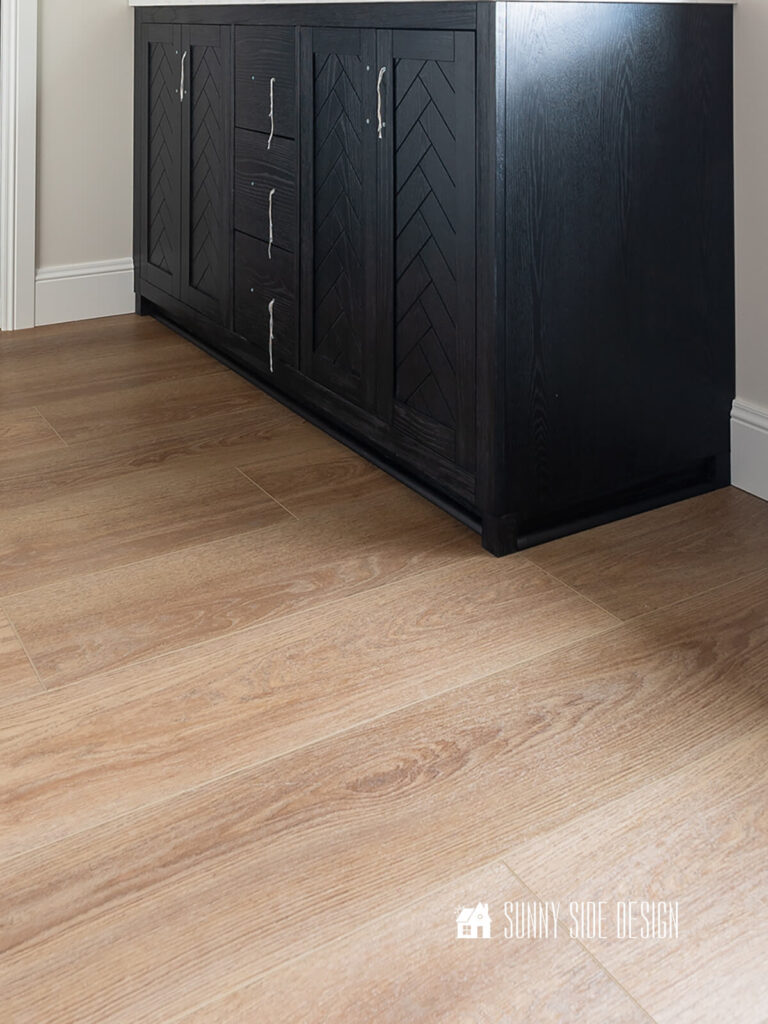
A floating vinyl floor is meant to expand and contract, it’s best to not install heavy items over the floor.
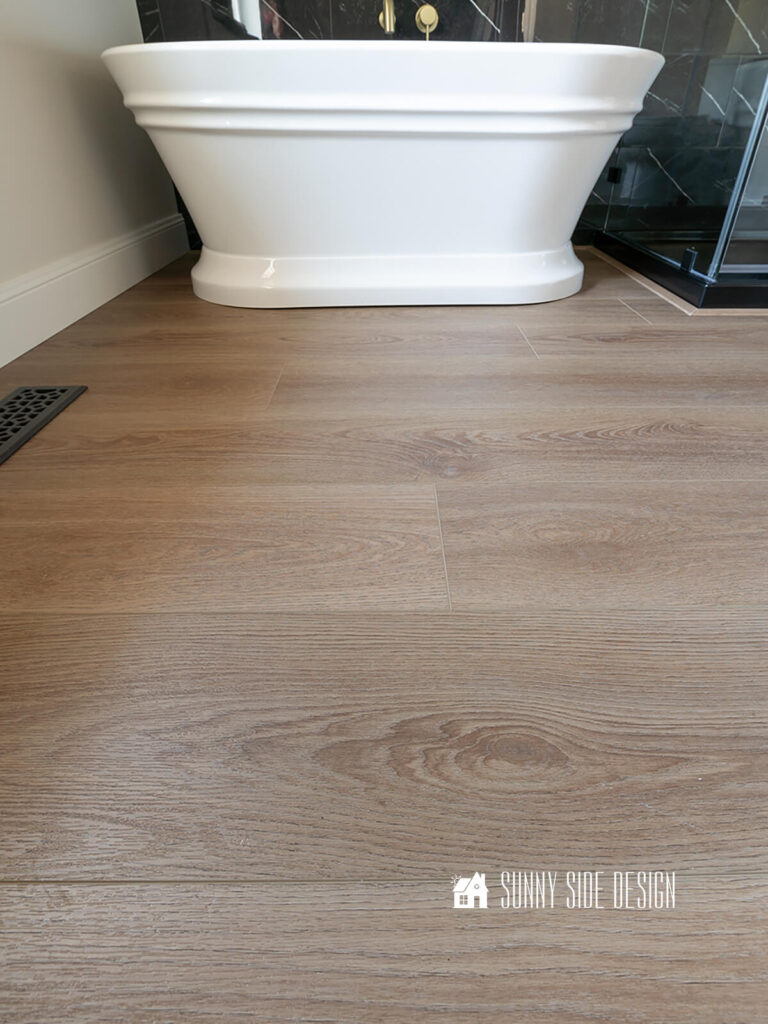
In our bathroom we will be installing a free-standing bathtub.
Our tub has a skirt that hides 6 legs under the bathtub.
To allow the floor to expand and contract we cut 6 holes in our flooring for the legs to rest in.
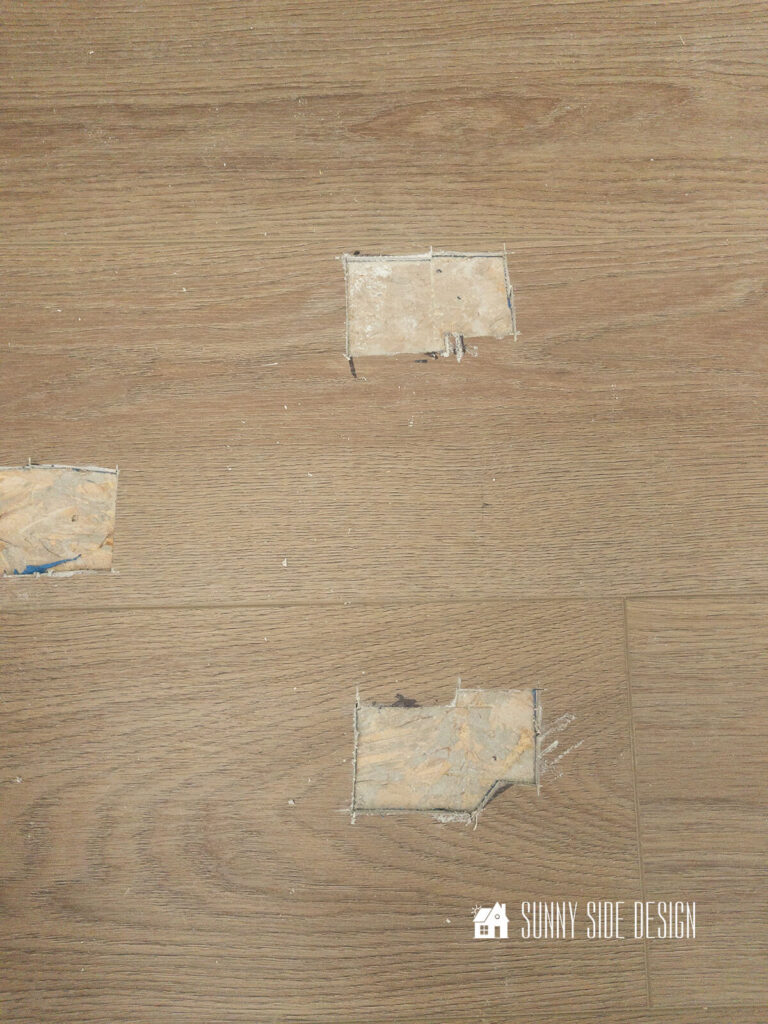
This will allow the floor to still freely float.
Vinyl Plank Floor Underlayment
Depending on the type of flooring you choose, or the location it’s being installed, you may need to install an underlayment.
Since we are installing our floor in a bathroom, we want to protect the subfloor with an underlayment.

We choose a mildew and mold resistant underlayment.
While the luxury vinyl plank flooring is waterproof, if water were to seep through the seams it could damage the subfloor.
Better to be safe than sorry.
Vinyl plank floor underlayment also plays an important role in ensuring a successful and durable flooring installation.
Acting as a buffer between the subfloor and the vinyl planks, underlayment provides several key benefits.
Firstly, it helps to smooth out minor imperfections in the subfloor, ensuring a level surface for the vinyl planks to rest on.
Additionally, underlayment can help reduce noise, providing a quieter and more comfortable environment.
It also adds an extra layer of insulation, helping to keep your space warmer in colder months.
When selecting underlayment for vinyl plank flooring, it’s important to choose a product specifically designed for use with vinyl flooring to ensure compatibility and optimal performance.
With the right underlayment in place, you can enhance the longevity and performance of your vinyl plank flooring for years to come.
Are you enjoying this project?! Please Pin It, save it for later and share it with a friend.
Sharing is caring!
Which Direction to Install Vinyl Plank Flooring
Determining the direction in which to install vinyl plank flooring can significantly impact the overall aesthetic of the space.
While there’s no one-size-fits-all answer, several factors should be considered when making this decision.
In most cases, it’s recommended to install vinyl plank flooring parallel to the longest wall in the room, as this tends to create a visually appealing and more expansive look.
Another option is to lay the flooring horizontally to the longest wall, which can make the room appear wider.
Some say that in a small space like a bathroom, it doesn’t matter which direction the flooring is laid, as long as you’re parallel to the bathtub, if the room has one.
In addition, you’ll also want to consider how the planks will lay out across your floor.
You don’t want to end up with a skiff of board on one side of the room and a full plank on the other.
To determine the plank layout take the length of the room and divide it by the width of a single plank.
This will help you determine if you want to begin your first row with a full plank or want to rip it down.
By carefully assessing these factors and selecting the appropriate direction for installation, you can enhance the overall design and functionality of your space with vinyl plank flooring.
Welcome to Our Site
If you’re new here, welcome! We’re so glad you’re here.
Let us introduce ourselves, we’re Michelle and Steph, a mom and daughter team who love to DIY and decorate our homes.
Not only are we passionate about making our homes warm, comfortable and unique, but it’s our mission to help you create that same feeling in your own home.
You’ll find ideas for repurposing, creating, decorating and making your home truly yours, while always mindful of a tight budget.
Undoubtedly we love finding ways to make your home look high-end on a small budget.
Plus you’ll also find a recipe or two as we share our family favorites with you.
We’d love it if you’d join our community of doers so you won’t miss any inspiration for your home.
We love new friends.

[mailerlite_form form_id=2]
How to Start the First Row of Vinyl Plank Flooring
Now you’ve determined the direction you want the planks to run, place spacers along the wall, remember you want to maintain a consistent expansion gap along the perimeter of the room.
To maintain a straight and uniform appearance, use a chalk line or straightedge to create a guideline for the first row.
Then, carefully lay the planks, ensuring they are snugly butting against the guideline and spacers.
There may be a slight difference in how each brand of flooring will click and lock together.
Be sure to refer to the manufacturers installation guide.
We are using Malibu Wide Plank vinyl flooring and it is by far the easiest floor we’ve installed.
I also love the large 9″x60″ planks and the realistic look and feel of each plank.
In our case the the plank is placed onto the previous row at a 45° angle, aligning the horizontal seam.
Then once it’s all aligned with the vertical seam you simple push into place, listening for an audible click.
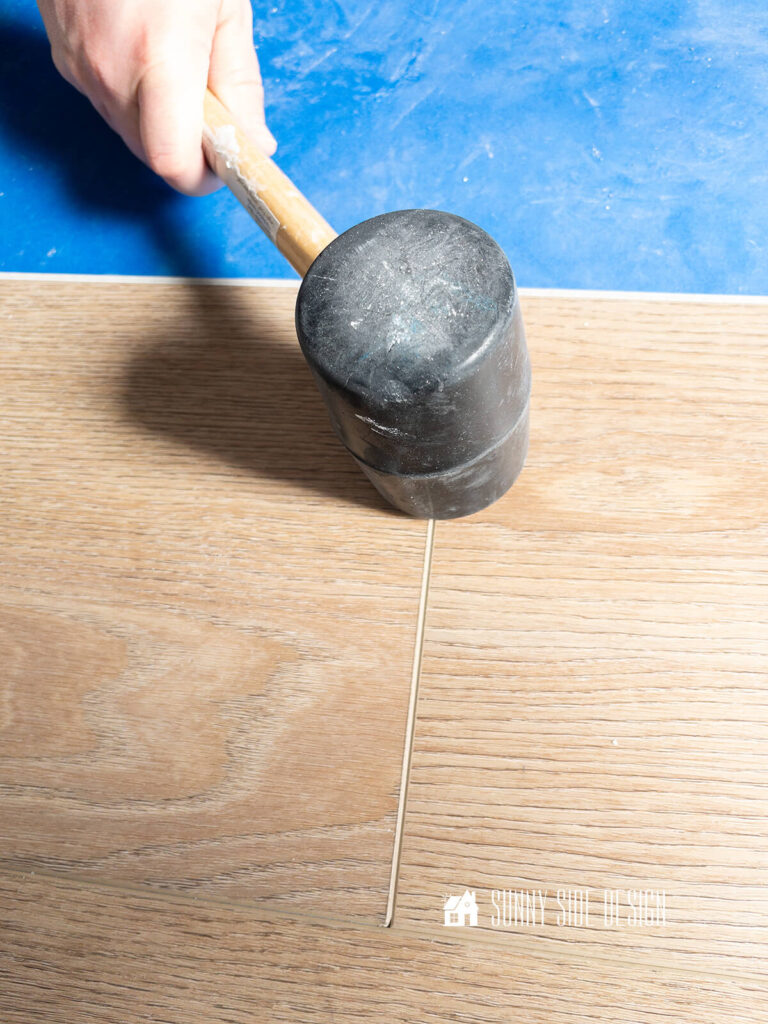
To click the vertical seam, tap with a rubber mallet.
As you progress, periodically check for any irregularities or gaps and make corrections immediately.
How to Cut Vinyl Plank Flooring
Cutting vinyl plank flooring accurately is essential for achieving a polished and professional-looking installation.
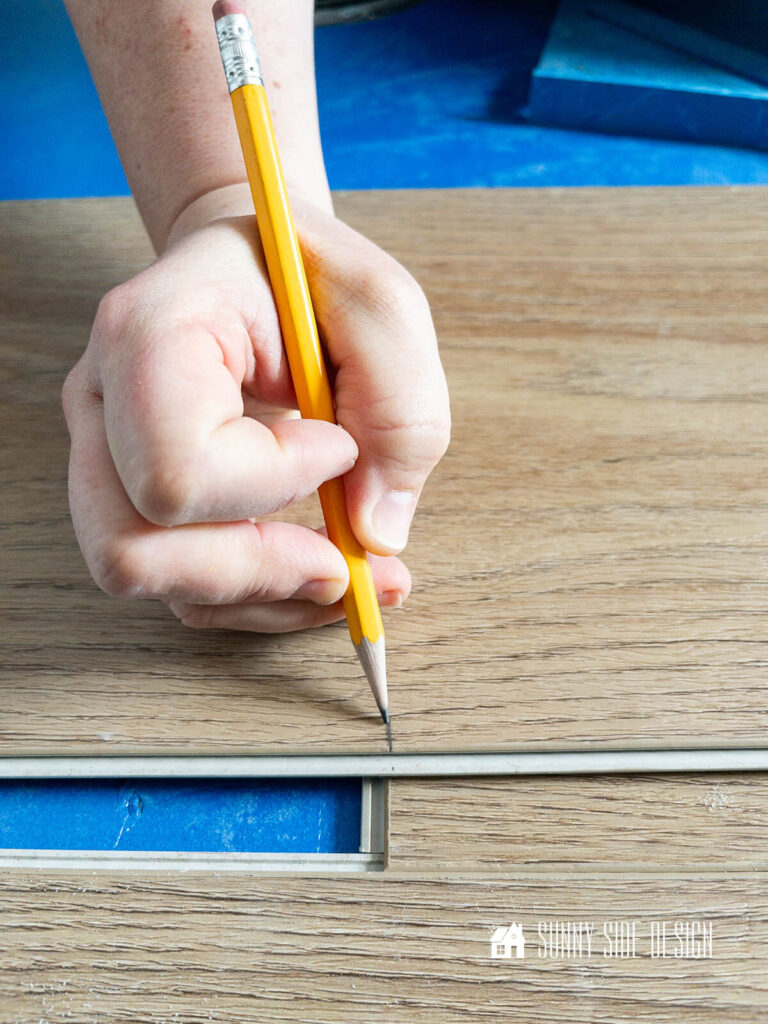
Start by measuring the length you need to cut, marking the plank with a pencil or marker.
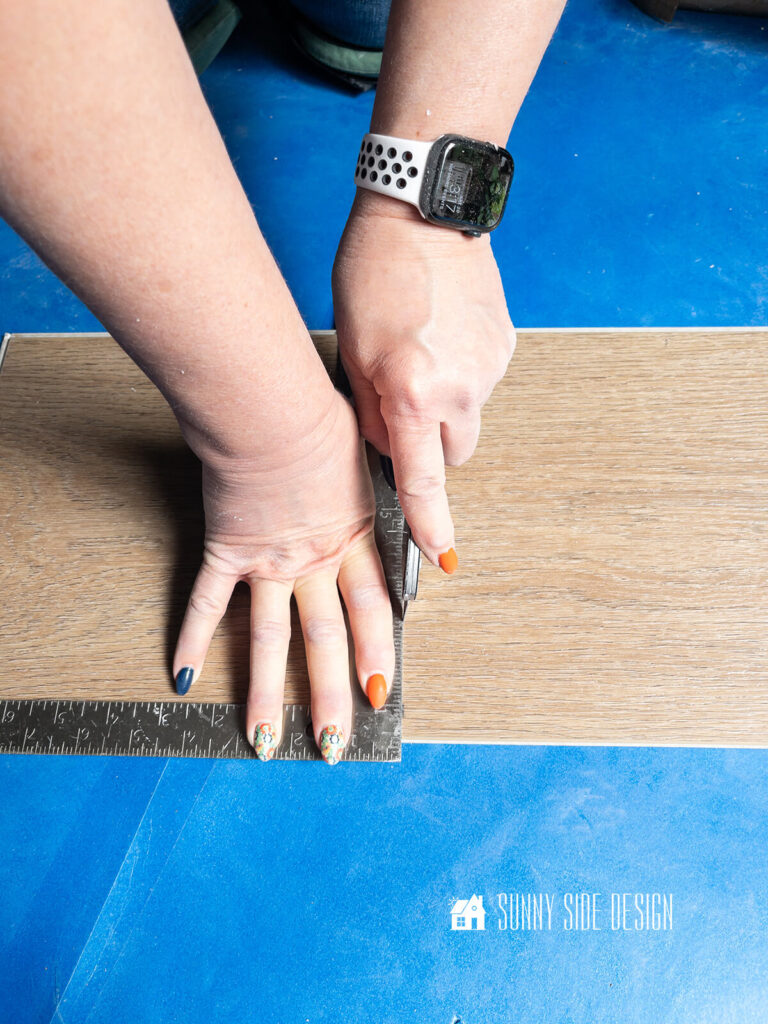
For straight cuts, use a utility knife equipped with a sharp blade and score the vinyl plank.
Use a straightedge or ruler to guide the knife along the marked line, applying firm pressure to ensure a clean cut.
Then bend the plank towards the back until it snaps, making a clean cut through the plank.
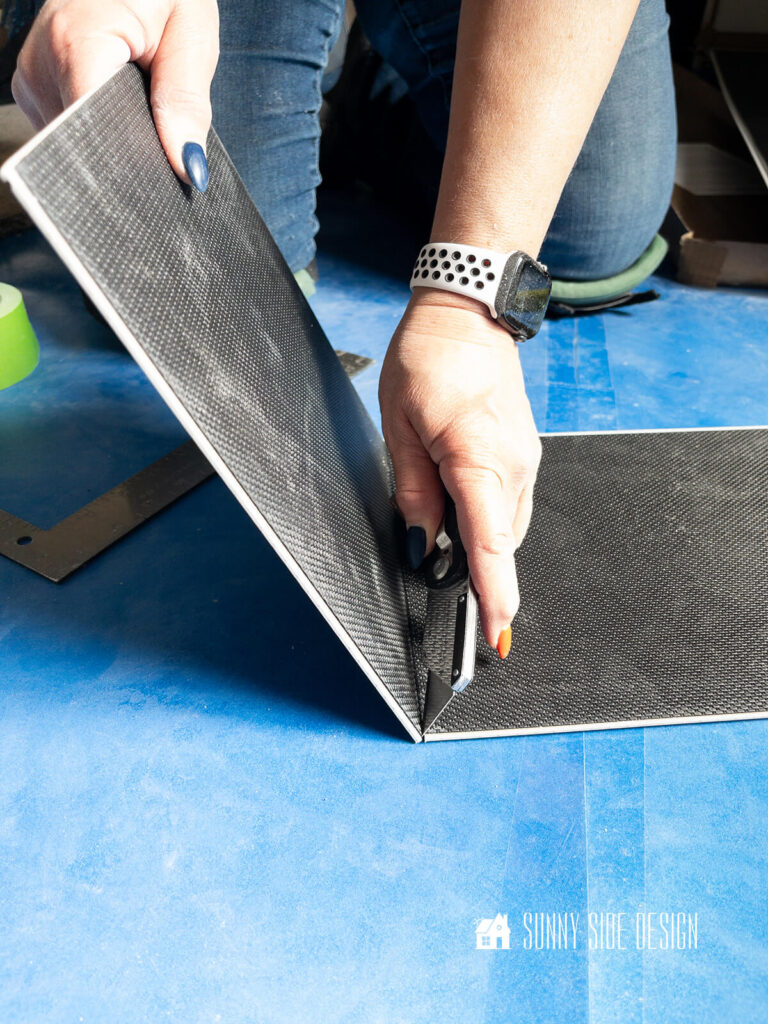
Next flip the plank over and cut through the backing with a utility knife.
We were able to use this method for 95% of our cuts, however for more intricate cuts or curves, a jigsaw or circular saw with a fine-tooth blade can provide precise results.
Take care to wear appropriate safety goggles and always follow manufacturer guidelines for the tools being used.
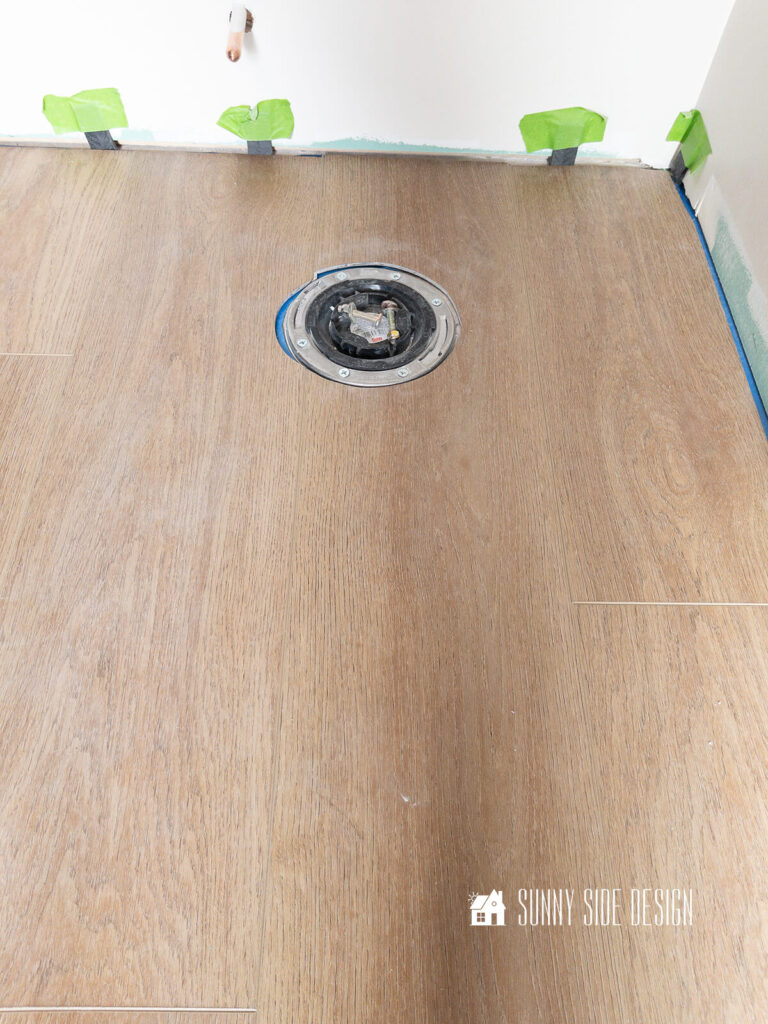
To cut around the toilet flange we used a jigsaw and this doesn’t need to be perfect.
This area will be covered by the toilet.
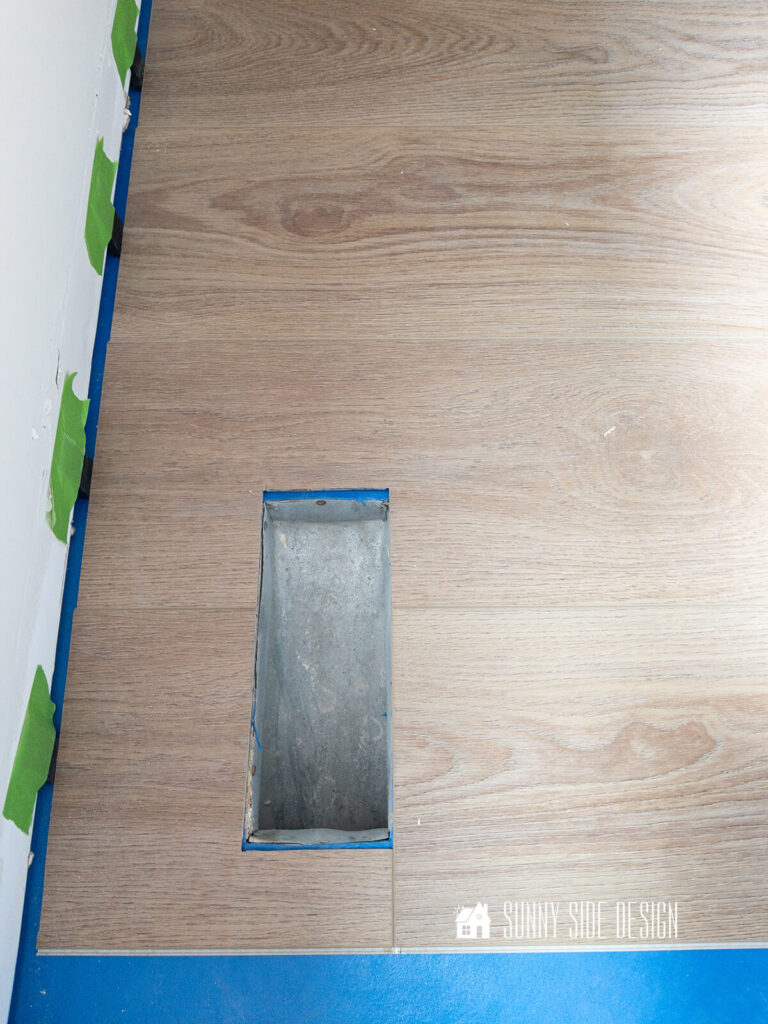
For the area around the vanity and shower base, we marked the planks and then made the cuts with the table saw.
But a jig saw or circular saw would also work well making these cuts.
With the right techniques and tools, you can confidently tackle any cuts and achieve custom fits for your vinyl plank flooring project.
Let’s stay connected! Follow us on social media!
Transition Pieces
Base molding and transition pieces play crucial roles in the finishing touches of a vinyl plank flooring installation.
Transition pieces, such as T-moldings and reducers, provide smooth transitions between different flooring surfaces, such as vinyl plank and carpet, or vinyl plank and tile.
These pieces not only enhance the visual appeal of the space but also prevent tripping hazards and protect the edges of the flooring.
Installing transition pieces involves measuring and cutting them to fit the specific transition area and securing them in place with adhesive or screws, depending on the type of transition.

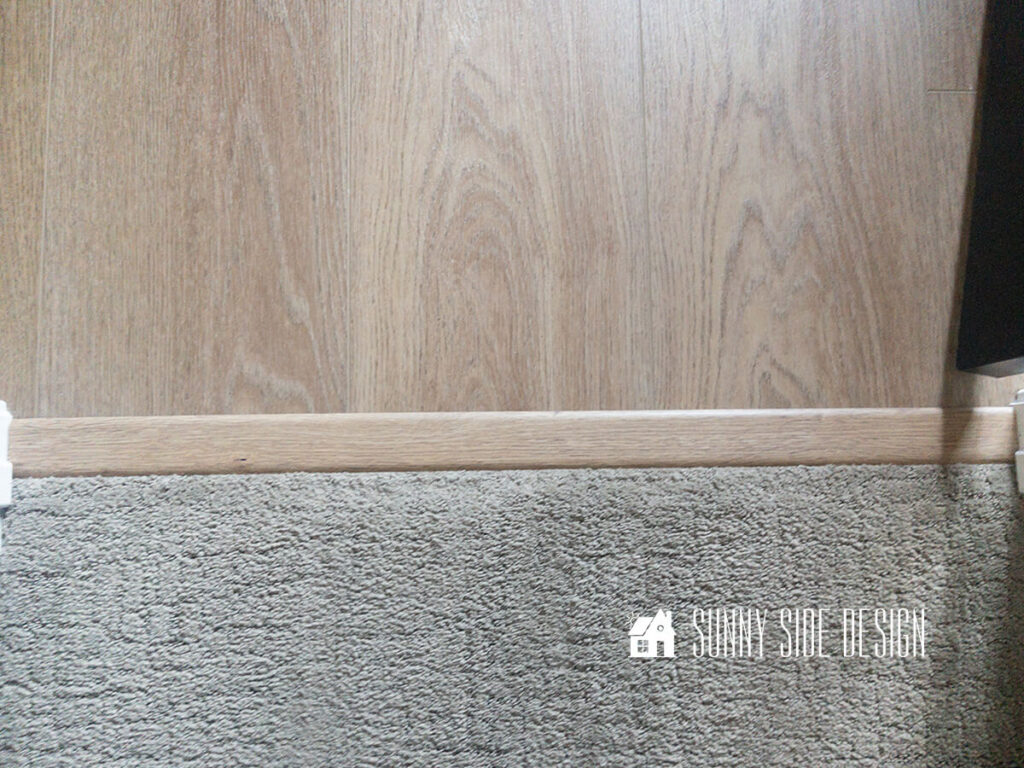
Base molding, on the other hand, provides a seamless transition between the flooring and the walls while concealing the expansion gap.
It’s installed around the perimeter of the room, covering the edges of the flooring and adding a finishing touch to the space.
In addition, 1/4 round moulding may be helpful for concealing the expansion gap around the bathroom vanity.
Proper installation of transition pieces, 1/4 round and base molding ensures a polished and professional-looking result for your vinyl plank flooring project.
Other Tips
Installing vinyl plank flooring next to the bathtub requires careful attention to detail to ensure a watertight seal and a seamless transition between surfaces.
Start by measuring and cutting the planks to fit snugly against the bathtub, leaving a small expansion gap to accommodate any movement.
Apply a bead of silicone caulk along the edge of the bathtub before laying the first row of planks, pressing them firmly into place to create a secure bond.
Once all the planks are installed run another bead of silicone caulk and if necessary you can install a 1/4 piece over the gap.
The silicone will not only create a moisture barrier, but it will allow the planks to expand and contract.
Finally, seal the perimeter of the flooring with silicone caulk to prevent water from seeping underneath.
Bathroom Remodel To Do List
This week we painted the doors, installed the floor transition pieces, installed the freestanding tub, installed the toilet and the shower enclosure arrived and was installed.
Let’s take a look at what still needs to be accomplished this last week of the One Room Challenge.
demo bathroommove closet wallrough in plumbing and electricalchange swing of doorrepair walls and ceilinginstall shiplap ceiling, paintpaint doorsinstall shower panpaint wallsinstall vanityprime and paint baseboardsinstall crown mouldinginstall cement backer boardinstall shower nichewaterproof showertiling & grout- i
nstall waterproof luxury vinyl plank floors install flooring transition piecesinstall soaker tub- install plumbing fixtures
install toiletshower enclosurerecessed shelves- sew pleated curtain panels
- frame out window
- install lighting
- mirrors
- hang curtains
- install towel hooks and rod
- install vanity faucets
- install vanity hardware
- art and decor
This is the fun part of this bathroom remodel adding all of the beautiful finishes.
I can’t wait!!!
Final Thoughts
Installing luxury waterproof vinyl plank flooring in your bathroom or kitchen can truly elevate the aesthetic appeal of your space.
With it’s realistic feel and look, it adds instant warmth and charm to any room.
Is this a project you’d like to try in your home?
With careful planning and execution, you can transform your bathroom, kitchen or living room with the beauty and functionality with luxury vinyl plank flooring.
Don’t forget to check out the many other room transformations taking place on the One Room Challenge blog this season.
I believe you’ll be inspired with countless design styles and creative ideas.
If you’re new here, WELCOME! We love having new readers and friends!
You can learn more about us here.
Let’s stay connected! Join our DIY community of doers and you won’t miss the weekly updates on our One Room Challenge and more inspiration for you always on a budget.
Please Pin It and save for later, and share with your friends! Sharing helps grow our following!
Sharing is caring!
Thanks for stopping by Sunnyside Home. Empowering you to create a home you love!
Retailers We Love
- Anthropologie
- Birch Lane
- Crate & Barrel
- Joss and Main
- Lampsplus
- Mark & Graham
- One Kings Lane
- Pottery Barn
- Rejuvenation
- Serena & Lily
- Wayfair
- West Elm
- Williams Sonoma
- World Market
Be sure to follow us on Pinterest for even more home decor and DIY ideas.
To see what we are working on before it’s on our blog, follow us on Instagram.
You will also find our video tutorials on our YouTube channel.
- Paint an Old World Texture Finish on a Vase

- Easy Strawberry Chicken Salad with Lime Maple Balsamic Vinaigrette
- How to Fix Chipped Kitchen Cabinets with a Pen
- Easy 4th of July Door Decor You Can Make in Minutes


