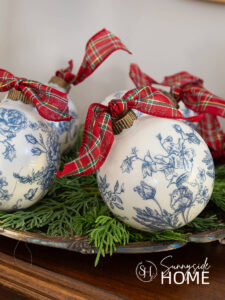
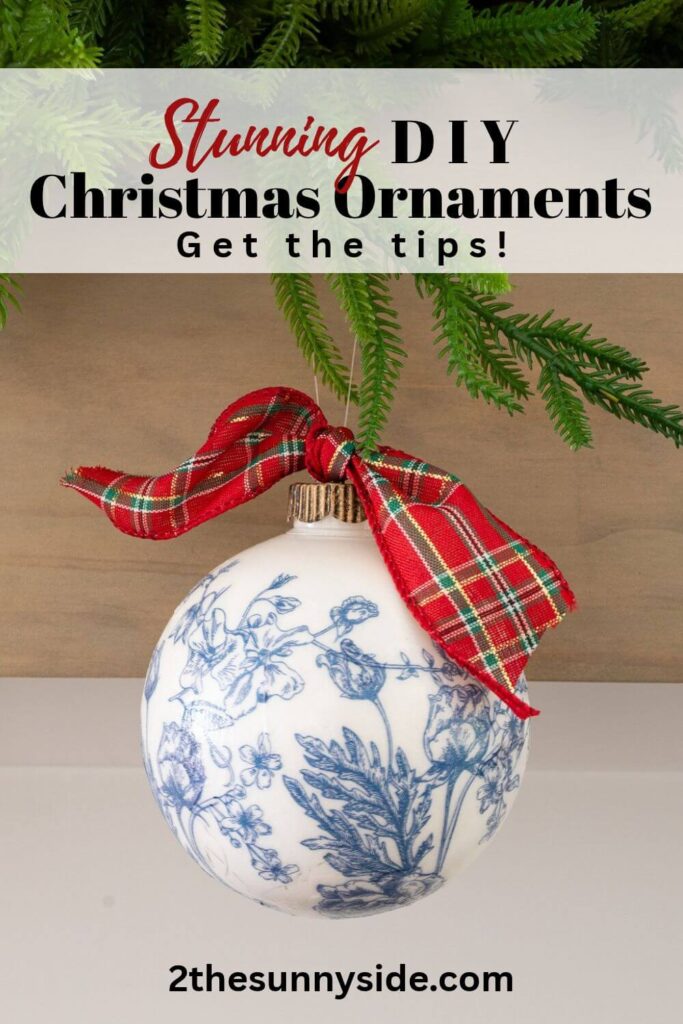
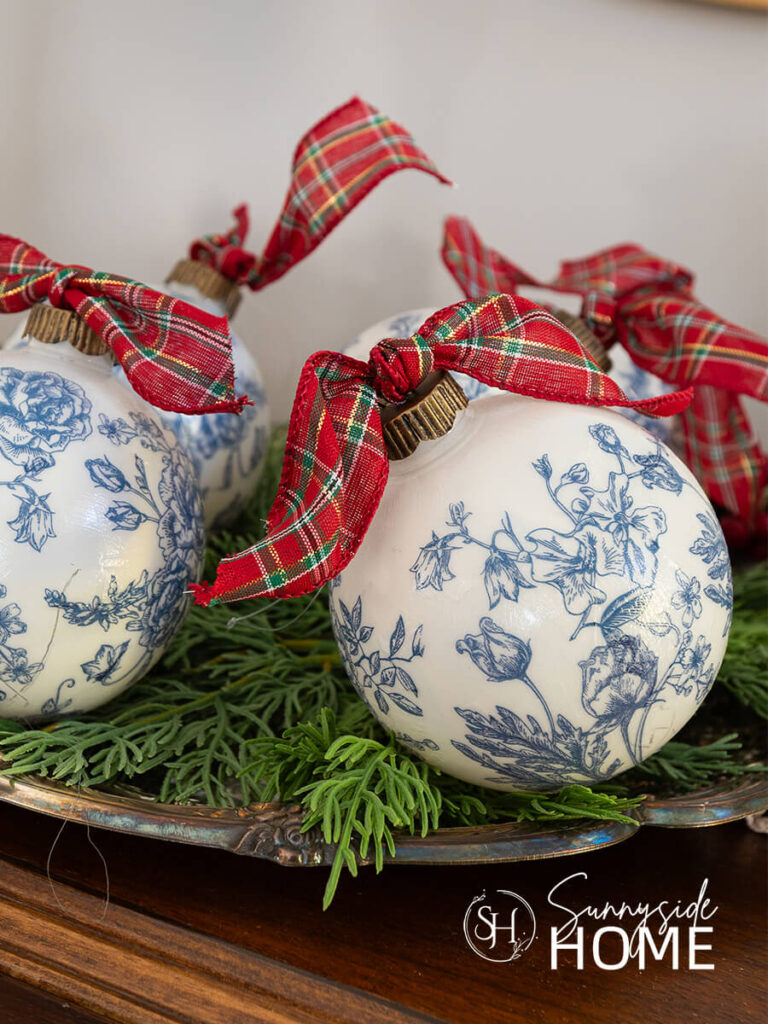
Beautiful blue and white Chinoiserie decoupage Christmas balls bring an elegant, high-end look to your Christmas tree, and they’re surprisingly easy to make! Grab some pretty napkins and a few simple supplies, and let us show you how to create these stunning DIY Christmas ornaments on a budget.
Over the past year, I’ve been adding more blue and white Chinoiserie pieces to my home decor, and I can’t get enough of this timeless style!
I love how beautifully it complements the modern coastal look throughout my home.
So, this Christmas, I thought it would be fun to bring that same blue and white beauty to my Christmas tree with DIY decoupage Christmas balls.
You know we always love a good DIY, and this project turned out to be such a fun and relaxing way to spend an afternoon with my mom.
We had the best time creating these pretty ornaments together, and I’m absolutely thrilled with how they turned out!
I can’t wait to get my Christmas tree set up and see these beauties hanging on the branches.
The best part?
You can create your own high-end-inspired Chinoiserie ornaments without spending a fortune!
Keep reading, and I’ll show you how we made them so you can add a little blue and white magic to your own Christmas decor.
- Supplies Needed
- Choosing the Perfect Napkins for Your Chinoiserie Ornaments
- Painting the Christmas Ornaments (Optional)
- Decoupage Christmas Balls
- More Decoupage Ideas
- Tips for Beautiful, Professional-Looking Results
- Style and Display Your Chinoiserie Christmas Ornaments
- Frequently Asked Questions
- Shop Chinoiserie Ornaments
- More Christmas DIY Ornaments You’ll Love
- Final Thoughts
Sunnyside home is a participant in the Amazon Services LLC Associates Program, an affiliate advertising program designed to provide a means for sites to earn advertising fees by advertising and linking to Amazon.com. As an Amazon Associate, this blog earns from qualifying purchases with no additional cost to you. Click here to read our full disclosure policy.
Supplies Needed
Before we get started, let’s gather a few simple supplies to create these beautiful blue and white Chinoiserie decoupage Christmas balls. You don’t need anything fancy, and you may already have some of these items at home, making this an easy and budget-friendly DIY!
Are you enjoying this project? Please Pin It, save it for later and share it with a friend.
Sharing is caring!
Choosing the Perfect Napkins for Your Chinoiserie Ornaments
Choosing the perfect napkins is one of my favorite parts of this project!
Look for napkins with pretty designs and motifs that are easy to cut out and fit onto your Christmas balls.
If you want to achieve a true blue and white Chinoiserie look like mine, I recommend choosing napkins with a white background.
While traditional Chinoiserie patterns are beautiful, I’m especially drawn to the pretty floral designs!
Before you start cutting your motifs, you’ll need to separate the napkin layers.
Most napkins are two- or three-ply, but for decoupage, you’ll want to use just the thin, printed top layer.
And if you can’t find napkins with a design you love, don’t worry!
Tissue paper is another great option for creating beautiful decoupage Christmas ornaments.
Painting the Christmas Ornaments (Optional)
I wanted to use at least 4-inch Christmas ball ornaments for my Chinoiserie design, but I had a hard time finding solid white ones locally.
Instead, I found clear Christmas balls at Hobby Lobby and was able to purchase eight for $5.49.
Although I really didn’t want to add another step to this project, painting the ornaments isn’t difficult; you just need to allow 24 hours for the paint to dry.
To get started, remove the caps from the ornaments.
Next, dilute white craft paint with a little water until it has a consistency slightly thicker than milk.
If the paint is too thick, it won’t flow easily enough to coat the inside of the ornament, but if it’s too thin, it may not provide an opaque white finish.
Once the paint is mixed, pour some into a Christmas ball and slowly rotate the ornament until the entire inside is coated.
Place the ball upside down in a paper cup to allow the excess paint to drain, then move on to the next ornament.
As the paint collects in the cups, you can pour it into the next ball to avoid wasting paint.
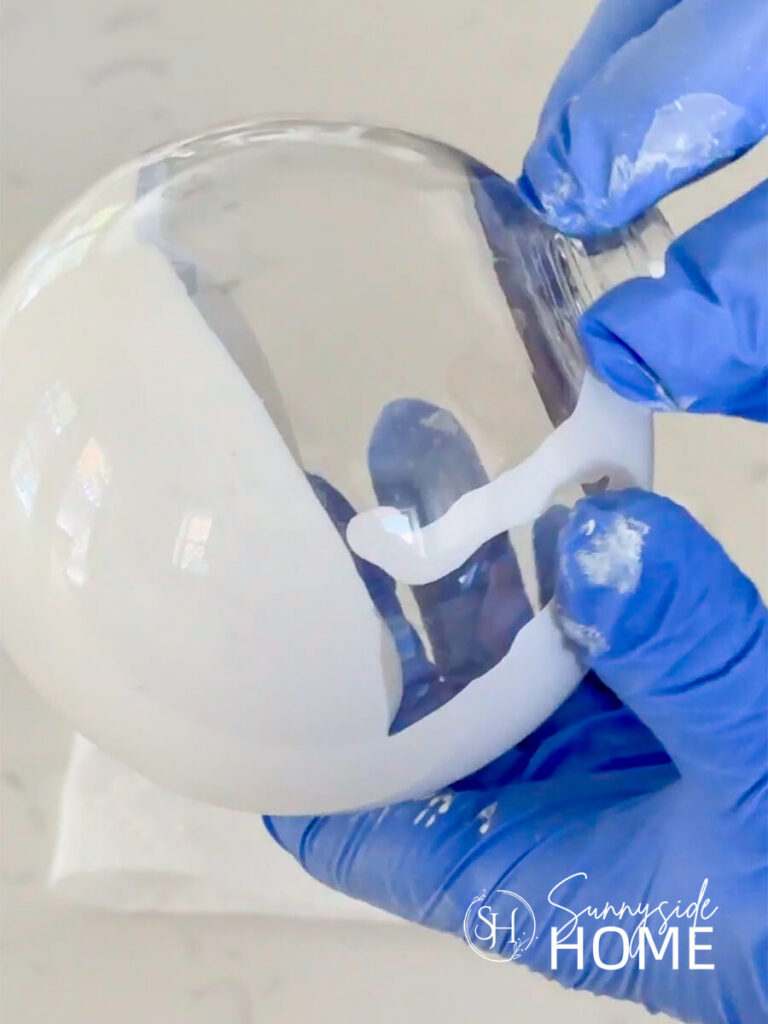
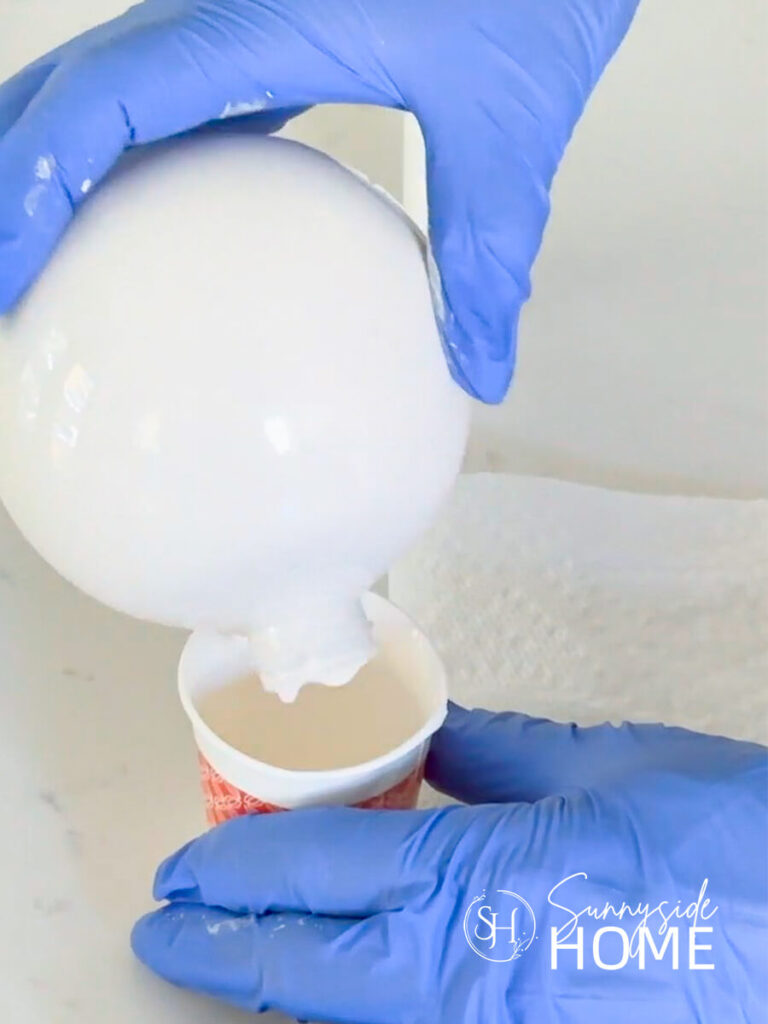
Two 2 ounce containers of white craft paint was more than enough to paint my ornaments.
It takes a little time to coat all 16 ornaments, but the result is a beautiful, glossy white Christmas ball that’s perfect for decoupaging!
Let the ornaments rest upside down in the cups for 24 hours so the excess paint can drain and the remaining paint can dry.
If you can find white Christmas balls in the size you want, feel free to skip this step and move straight to decoupaging!
Welcome to our site
If you’re new here, welcome! We’re so glad you’re here.
Let us introduce ourselves, we’re Michelle and Steph, a mom and daughter team who love to DIY and decorate our homes.
Not only are we passionate about making our homes warm, comfortable and unique, but it’s our mission to help you create that same feeling in your own home.
You’ll find ideas for repurposing, creating, decorating and making your home truly yours, while always mindful of a tight budget.
Undoubtedly we love finding ways to make your home look high-end on a small budget.
Plus you’ll also find a recipe or two as we share our family favorites with you.
We’d love it if you’d join our community of doers so you won’t miss any inspiration for your home.
We love new friends.
Decoupage Christmas Balls
Now comes the fun part – adding those beautiful blue and white designs to your Christmas balls!
Start by separating your napkins so you’re left with just the single printed ply, then cut out the motifs you’d like to use.
We found it helpful to sort our designs by size, making it easier to find the perfect pieces as we worked.
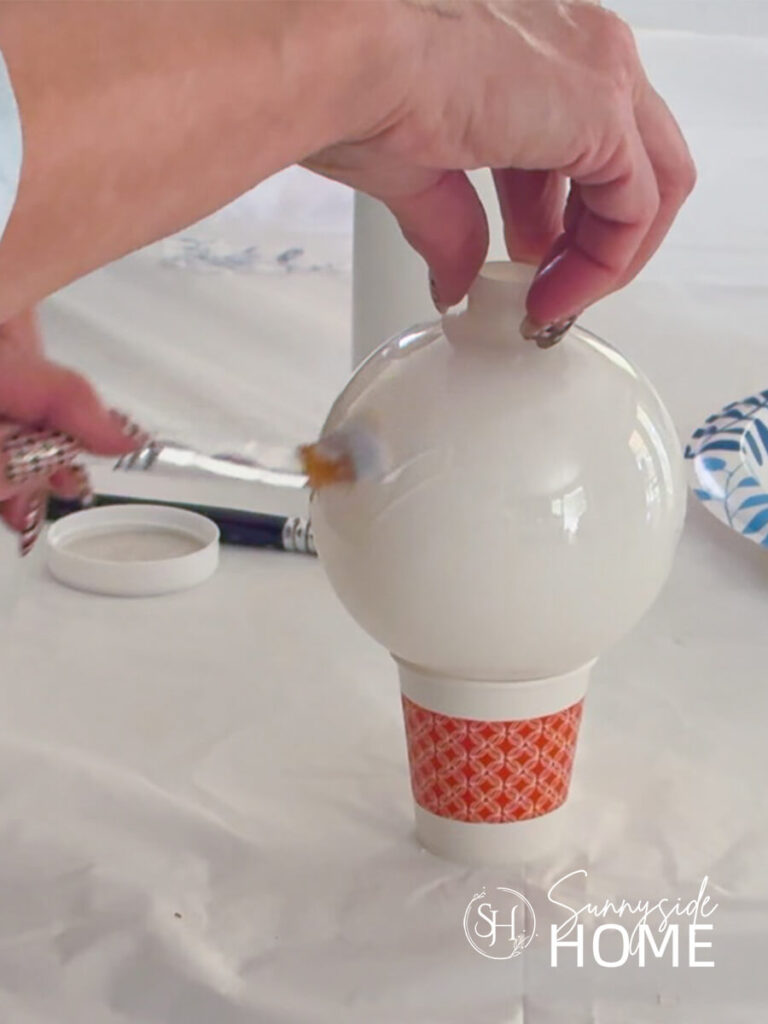
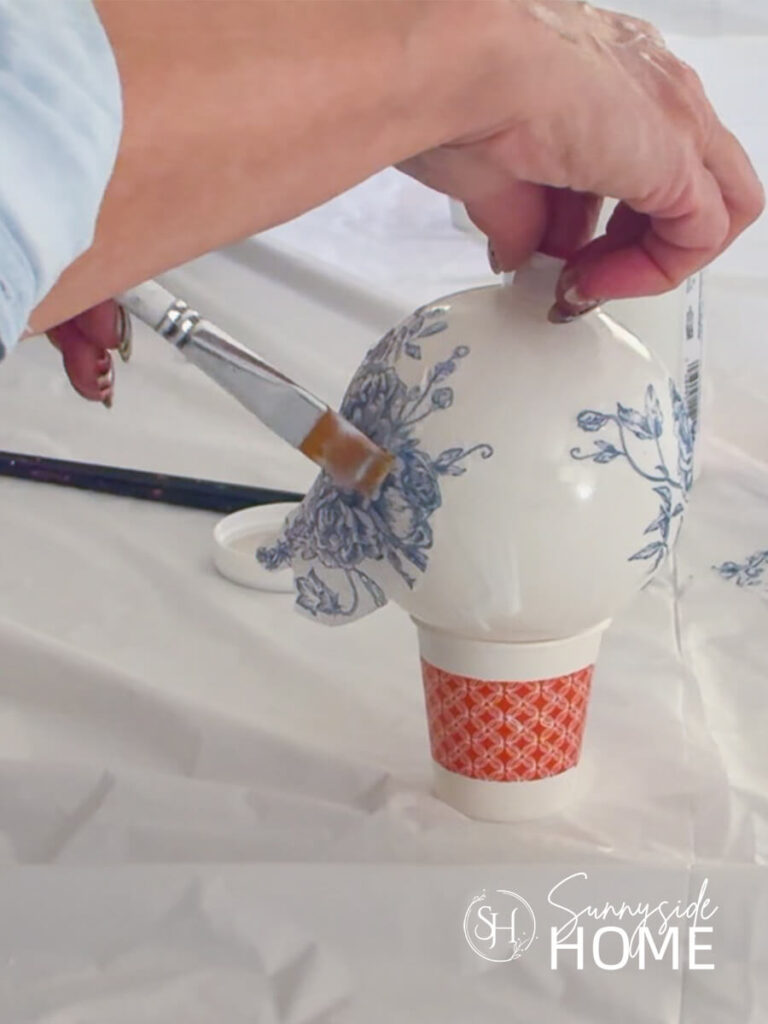
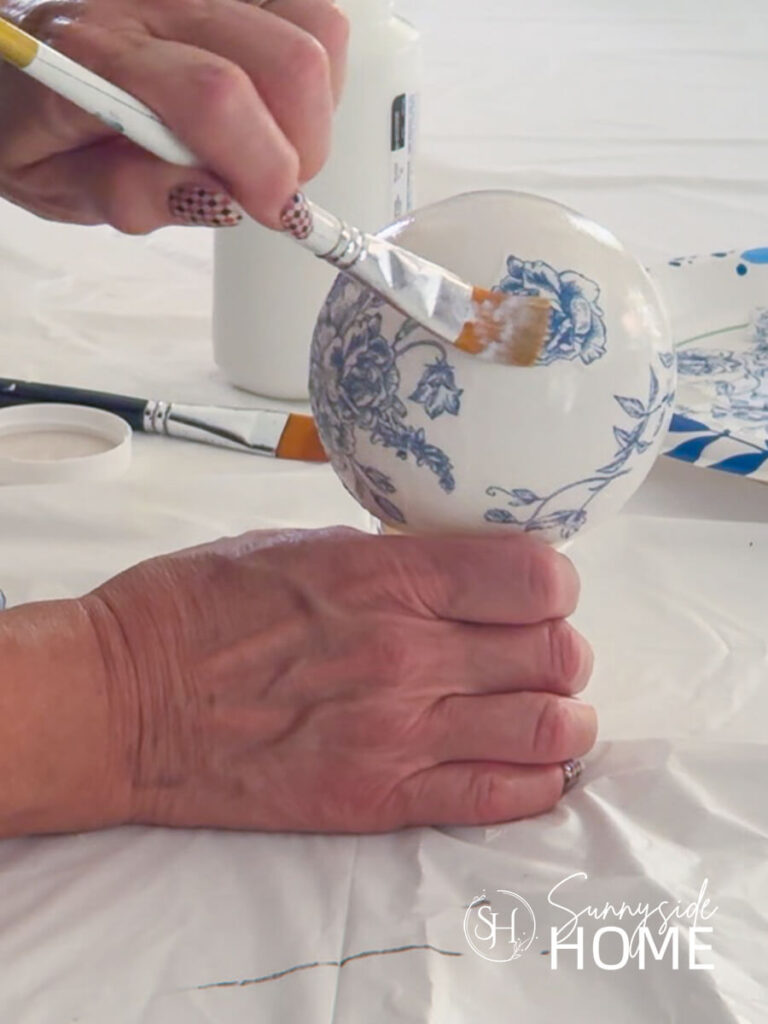
Place a Christmas ball in a paper cup to keep it from rolling around on your countertop, then use a 1-inch artist brush to apply a thin layer of Mod Podge to a small area of the ornament.
Carefully position a napkin motif over the wet adhesive and gently press it into place with your brush, applying a thin coat of Mod Podge over the design as you smooth it onto the ball.
Continue rotating the ornament and adding more motifs until you’re happy with the coverage.
Once the ornaments are completely dry, apply one final coat of Mod Podge over the entire ball to seal the design.
We used glossy Mod Podge to give our ornaments that beautiful, glass-like finish reminiscent of traditional blue and white Chinoiserie porcelain.
I love how elegant they look, especially knowing we created them ourselves!
Ornament Caps
Once all the ornaments are completely dry, it’s time to put the caps back on!
Mine were silver, and they looked a little too cheap next to my beautiful Chinoiserie designs.
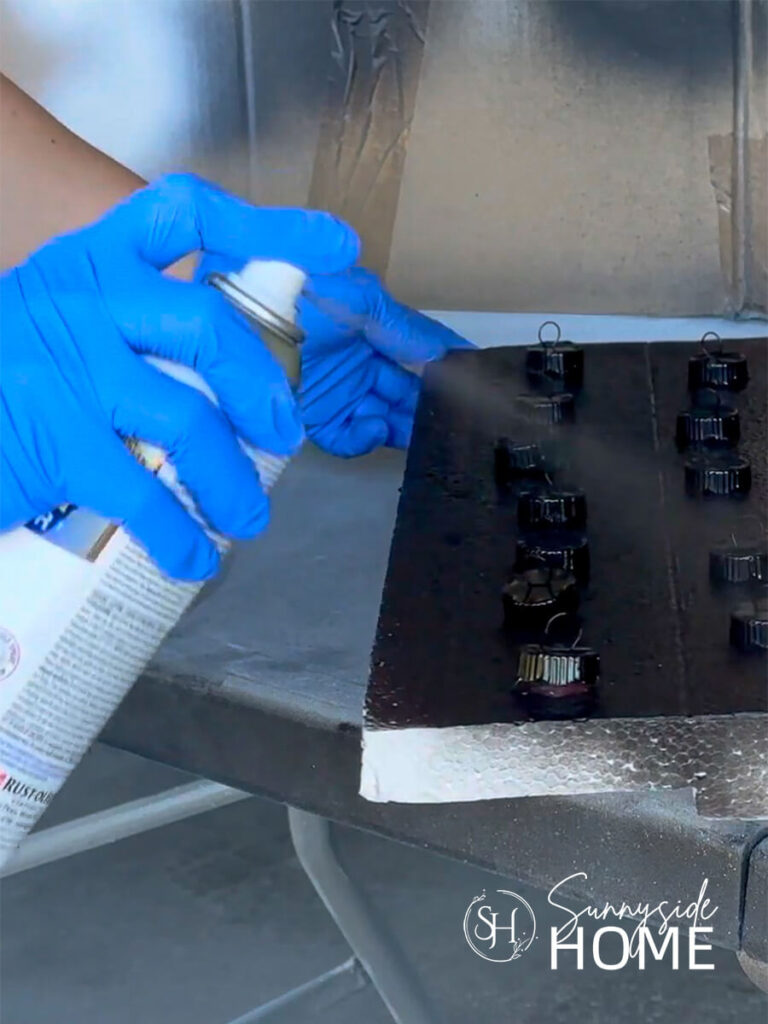
I wanted that rich, warm, aged brass look, so I gave the caps a coat of black spray paint and primer.
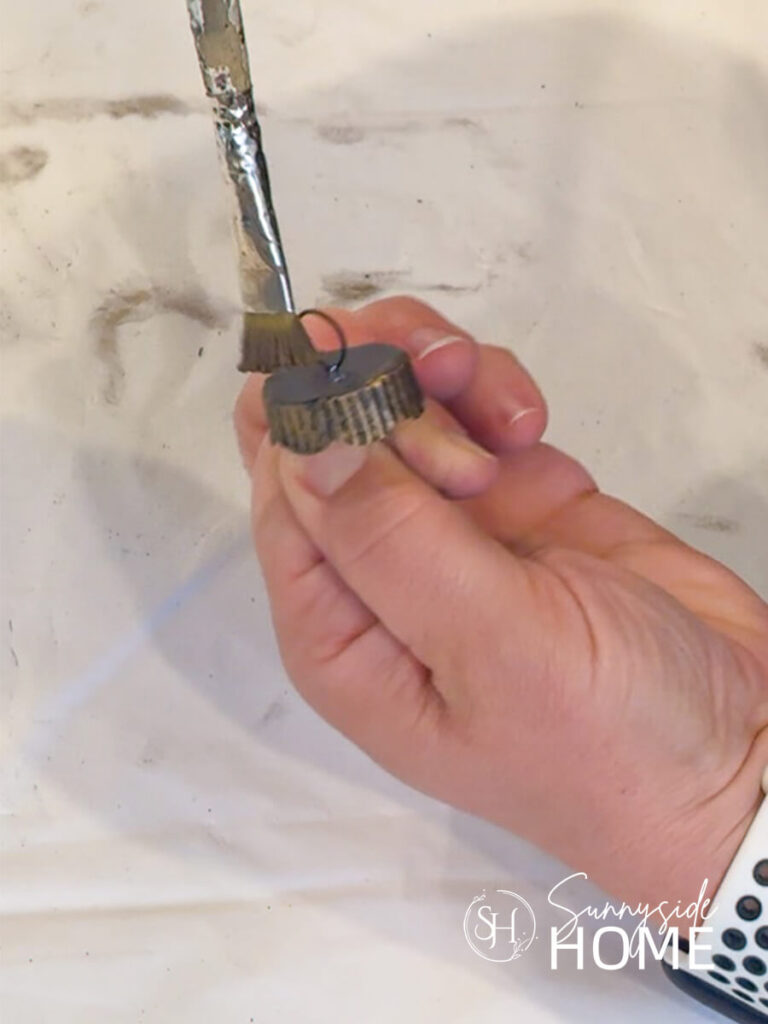
Once they were dry, I used an old paintbrush to apply a little European Gold Rub ’n Buff in a circular motion, creating a gorgeous aged brass finish.
This simple finishing touch made all the difference and gave my DIY ornaments that elegant, high-end look I was after!
More Decoupage Ideas
- Decoupage a Vase with Blue and White Napkins
- Easy Chinoiserie Decoupage Pumpkins with Napkins
- Decoupage Easter Eggs with Napkins
Tips for Beautiful, Professional-Looking Results
The secret to getting beautiful, professional-looking decoupage Christmas balls is to take your time and work in small sections.
Use a thin layer of Mod Podge rather than applying too much at once, and gently press your napkin designs into place with a soft brush to help minimize wrinkles and tears.
Don’t worry if your motifs overlap a little; this can actually help create a lovely, all-over pattern!
It’s also helpful to have a variety of motif sizes on hand so you can fill in smaller spaces as you work.
Most importantly, let each ornament dry completely before applying the final coat of glossy Mod Podge.
Let’s stay connected! Follow us on social media!
Style and Display Your Chinoiserie Christmas Ornaments
I can’t wait to hang these beautiful blue and white Chinoiserie Christmas ornaments on my Christmas tree!
It’s still October, so my tree isn’t quite ready to come out of storage, but that doesn’t mean we can’t start thinking about all the pretty ways to decorate with them.
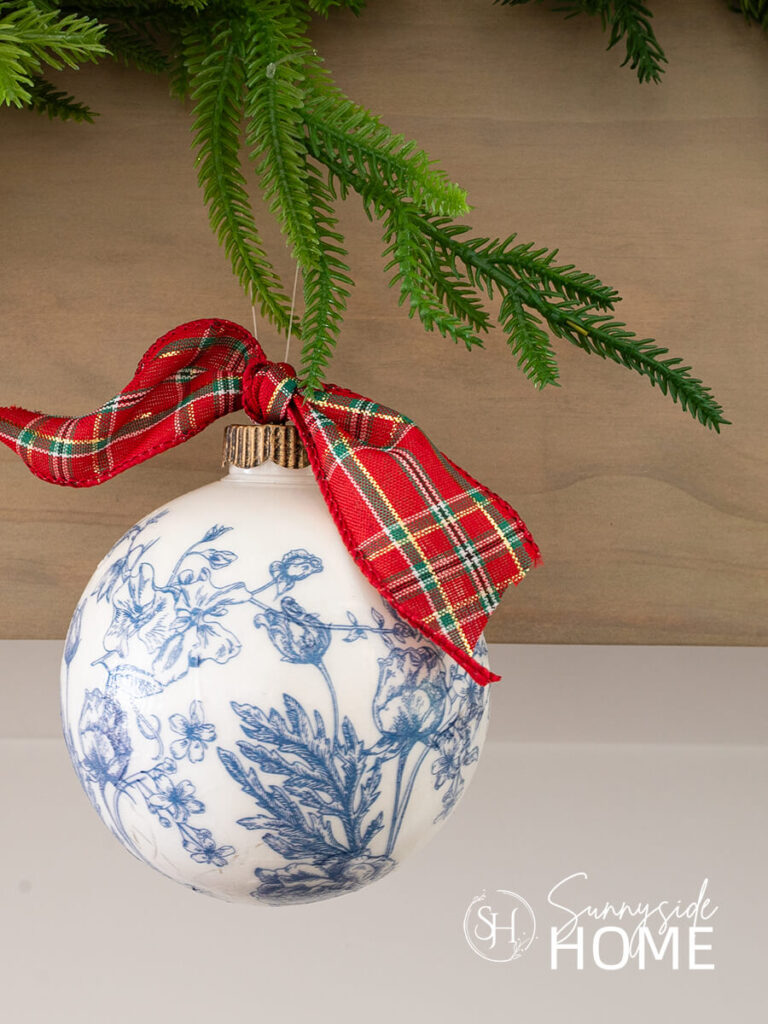
These elegant ornaments would look stunning tucked into a real-touch pine garland draped across a mantel, mixed with greenery in a large decorative bowl, or nestled into a centerpiece on your dining table.
You could also hang them from a chandelier with pretty velvet ribbons, display them in a dough bowl with fresh evergreen clippings and pinecones, or arrange them on a tiered tray for a festive touch.
I think they’d even look beautiful hanging from a decorative branch in a vase or gathered in a blue and white chinoiserie bowl on a coffee table.
The classic blue and white pattern pairs beautifully with fresh greenery, warm gold accents, and natural textures, making these ornaments versatile enough to complement both traditional and modern coastal Christmas decor.
However you choose to display them, these DIY ornaments are such a lovely way to bring an elegant, designer-inspired look to your holiday home without spending a fortune!
Frequently Asked Questions
Can you decoupage plastic Christmas balls?
Yes! You can absolutely decoupage plastic Christmas balls, and they’re a great budget-friendly option for making your own Chinoiserie Christmas ornaments. Smooth plastic balls work best for decoupaging.
Do you need to paint the ornaments first?
You don’t have to paint your Christmas ornaments before decoupaging them! The key is to choose an ornament that matches the background color of the napkin you’re using. This allows the design to blend seamlessly into the ornament for a beautiful, finished look. For my blue and white Chinoiserie Christmas balls, I chose napkins with a white background, so I wanted my ornaments to be white as well. Since I couldn’t find white ornaments in the size I wanted, I purchased clear ones and painted the insides white. If you can find ornaments that already match your napkin background, you can skip the painting step and make this DIY even easier!
How do you keep napkins from wrinkling?
The trick to keeping napkins from wrinkling when making decoupage Christmas ornaments is to work slowly, use a thin layer of Mod Podge, and gently press the napkin into place with a soft artist brush. Start by applying Mod Podge to a small section of the ornament, then carefully lay your napkin motif over the wet adhesive. Working from the center of the design outward, use gentle strokes to smooth the napkin against the curved surface. Because napkins are so delicate, avoid pressing too hard, as they can tear easily when wet. Don’t worry if you end up with a few small wrinkles! Working on a round ornament makes perfectly smooth results tricky, and the finished designs will still be beautiful.
How long do decoupage Christmas ornaments take to dry?
Decoupage Christmas ornaments typically take 1–2 hours to dry between coats of Mod Podge, depending on how thickly it’s applied and the humidity in your home. For the best results, allow your ornaments to dry completely before adding the final coat of glossy Mod Podge. Once you’ve applied the final coat, let them dry for several more hours or overnight before handling or hanging them on your Christmas tree.
Shop Chinoiserie Ornaments

More Christmas DIY Ornaments You’ll Love
- Vintage Inspired Santa Ornaments
- Simple Frosted Pinecone Christmas Ornaments
- Beautiful DIY Christmas Bells Made From Recycled Materials
- Make a Christmas Star with Bottlebrush Trees
- Metal Tinsel Christmas Ornaments
- Easy Cameo Christmas Ornaments
- Christmas Bells Using Dollar Tree Items
- Personalized Christmas Ornaments with Nostalgic Memories
- Stunning DIY Glitter Ornaments
- Christmas Bell Decorations Made with TP Rolls
- How to Make Vintage Door Plate Christmas Ornaments
- 75+ Easy Homemade Christmas Ornament Ideas
Final Thoughts
I absolutely love how these DIY decoupage Christmas balls turned out!
The beautiful blue and white Chinoiserie designs paired with the warm, aged brass caps give these ornaments such an elegant, high-end look.
My mom and I had so much fun creating them together, and I can’t wait to see them on my Christmas tree!
If you love decorating with blue and white as much as I do, I hope you’ll give this easy DIY a try.
Be sure to save this project to Pinterest so you can make your own beautiful Chinoiserie Christmas ornaments this holiday season!
We hope you found some inspiration for your home today.
Please share your tips and ideas with us.
We love hearing from you!
If you’re new here, WELCOME! We love having new readers and friends!
You can learn more about us here.
Let’s stay connected! Join our DIY community of doers and you won’t miss the weekly updates and more inspiration for you always on a budget.
Sharing is caring!
Thanks for stopping by Sunnyside Home. Empowering you to create a home you love!

Retailers We Love
- Anthropologie
- Birch Lane
- Crate & Barrel
- Joss and Main
- Lampsplus
- Mark & Graham
- One Kings Lane
- Pottery Barn
- Rejuvenation
- Serena & Lily
- Wayfair
- West Elm
- Williams Sonoma
- World Market
Be sure to follow us on Pinterest for even more home decor and DIY ideas.
To see what we are working on before it’s on our blog, follow us on Instagram.
You will also find our video tutorials on our YouTube channel.
What’s New . . .
- Stunning Decoupage Christmas Balls for a High-End Christmas Look

- How to Make Vintage Inspired Santa Ornaments
- The Best Sweet Potato Casserole with a Pecan Topping
- 25 Beautiful Thanksgiving Centerpiece Ideas You Can Create