Learn how to transform simple dollar store solar lights into beautiful, high-end looking solar orbs using affordable Dollar Tree supplies. This easy DIY adds warmth, charm, and a stylish glow to your outdoor space—without breaking the budget.
I’ll be the first to admit—I haven’t done a whole lot to my yard.
While we did landscape the front, the backyard has pretty much stayed the same…
just grass, nothing fancy.
And if I’m being honest, I’ve been a little envious of my mom’s yard, dreaming of having an outdoor living space we can actually enjoy like she does.
After she shared backyard ideas last week, I felt inspired to finally start somewhere—nothing big, just adding a little fun garden decor.
Now, if you know me, you know I don’t like to spend a lot of money…
but I definitely don’t want things to look cheap.
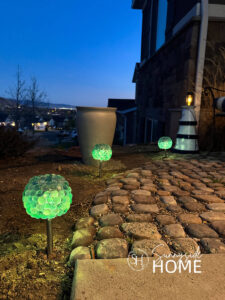
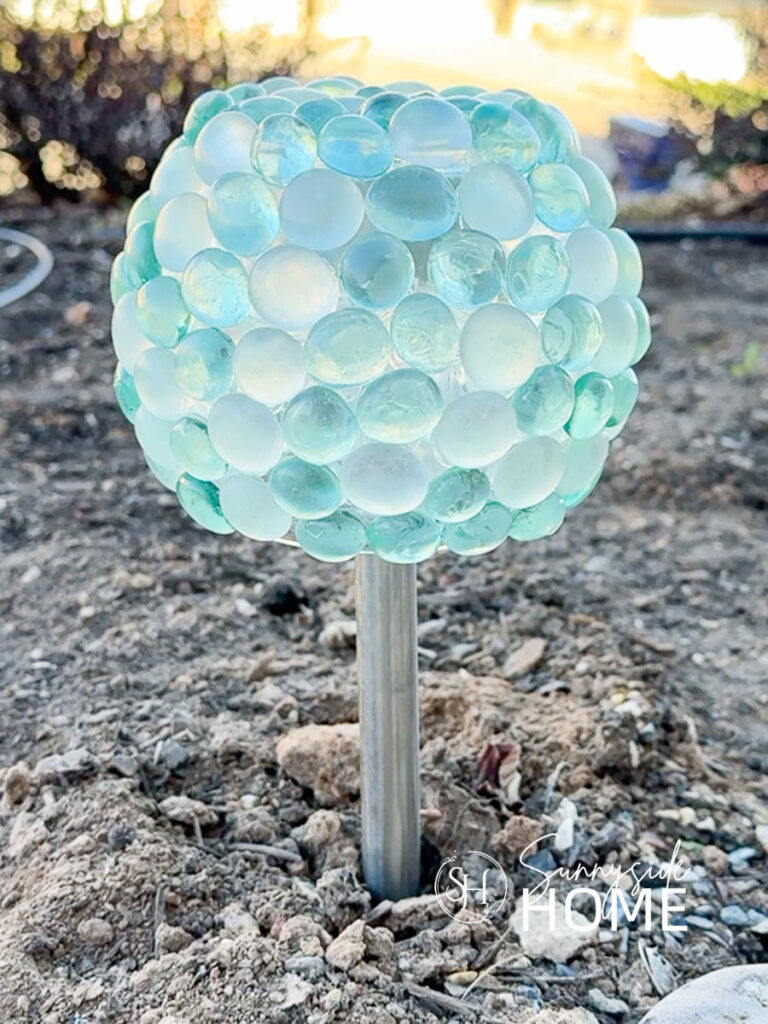
So using only Dollar Tree supplies, we created these beautiful solar orbs for the yard.
I love the warmth and charm they bring to our cobblestone sitting area—and the subtle coastal vibe is exactly what I was going for.
Want to see how to give your dollar store solar lights an easy glow-up? Keep reading!
Sunnyside home is a participant in the Amazon Services LLC Associates Program, an affiliate advertising program designed to provide a means for sites to earn advertising fees by advertising and linking to Amazon.com. As an Amazon Associate, this blog earns from qualifying purchases with no additional cost to you. Click here to read our full disclosure policy.
Supplies Needed
For this project, we kept things simple and budget-friendly by picking up everything we needed at Dollar Tree except the silicone.
For each solar light orb you’ll need:
- clear round floral vase
- 2 bags glass gems
- solar light
- clear silicone (waterproof exterior)
That’s it!
These basic supplies come together to create a surprisingly high-end look, proving you don’t need to spend a lot to make beautiful outdoor decor.
Are you enjoying this project? Please Pin It, save it for later and share it with a friend.
Sharing is caring!
Clean the Vase
Before you get started, take a few minutes to prep your vase for the best results.
First, remove the label, then make sure the glass is nice and clean.
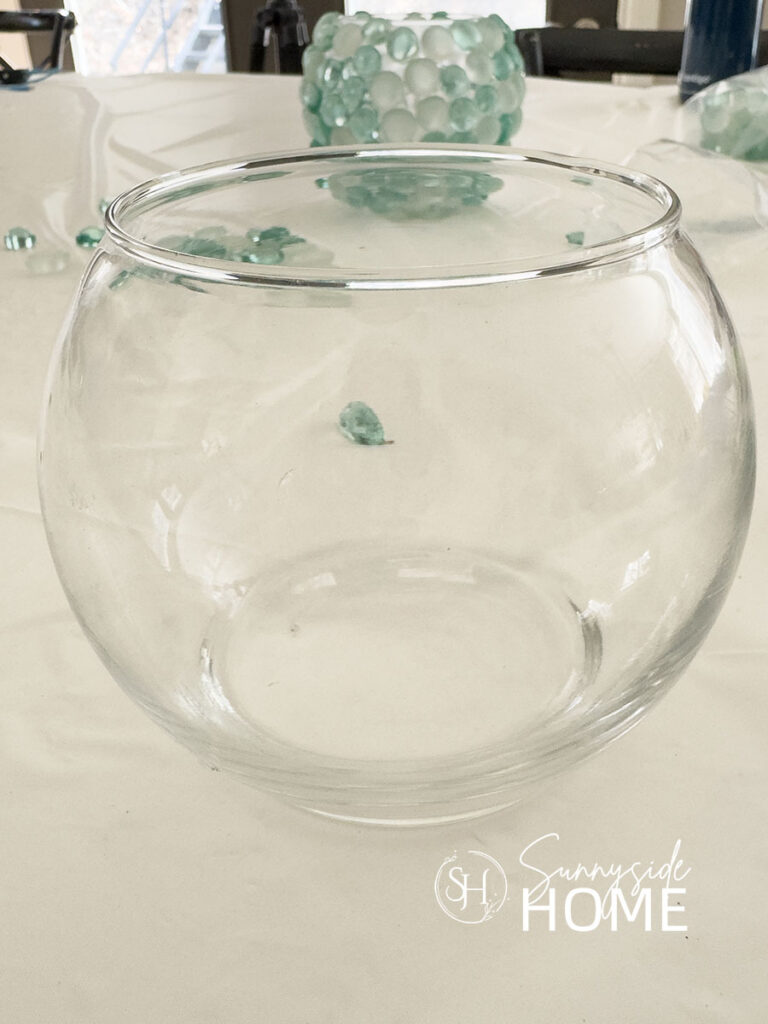
We used a little rubbing alcohol to wipe away any sticky residue and fingerprints, which helps the adhesive stick better.
If you’re new here, welcome! We’re so glad you’re here.
Let us introduce ourselves, we’re Michelle and Steph, a mom and daughter team who love to DIY and decorate our homes.
Not only are we passionate about making our homes warm, comfortable and unique, but it’s our mission to help you create that same feeling in your own home.
You’ll find ideas for repurposing, creating, decorating and making your home truly yours, while always mindful of a tight budget.
Undoubtedly we love finding ways to make your home look high-end on a small budget.
Plus you’ll also find a recipe or two as we share our family favorites with you.
We’d love it if you’d join our community of doers so you won’t miss any inspiration for your home.
We love new friends.
Attach Glass Gems
Next comes the fun part—attaching the glass gems to create that beautiful orb look.
We used a clear outdoor silicone adhesive for this step, and after trying two methods, we definitely recommend using a squeeze tube over a caulk gun.
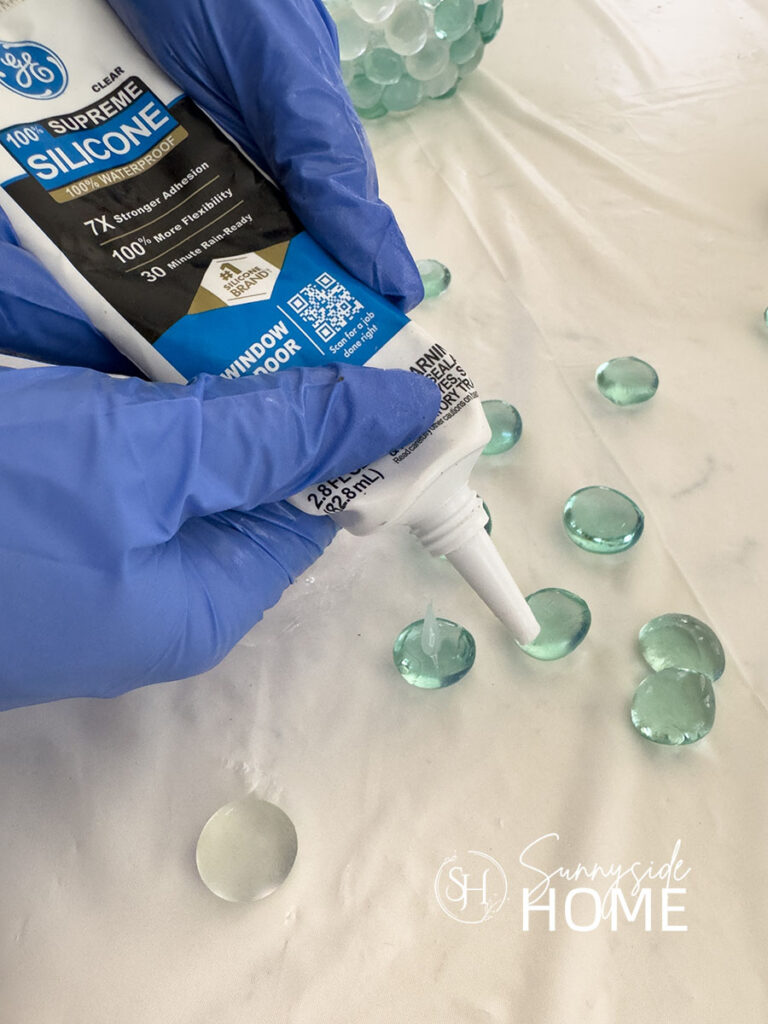
I used the tube while my mom used a caulk gun, and she found it much harder to control how much silicone came out on each gem.
Before you begin, protect your work surface (silicone is tough to clean!) and wear gloves if possible.
Lay your glass gems flat side up, then squeeze a small amount of silicone, about a ¼-inch dab, onto the flat side.
Press the adhesive side onto the vase, starting on the flat bottom.
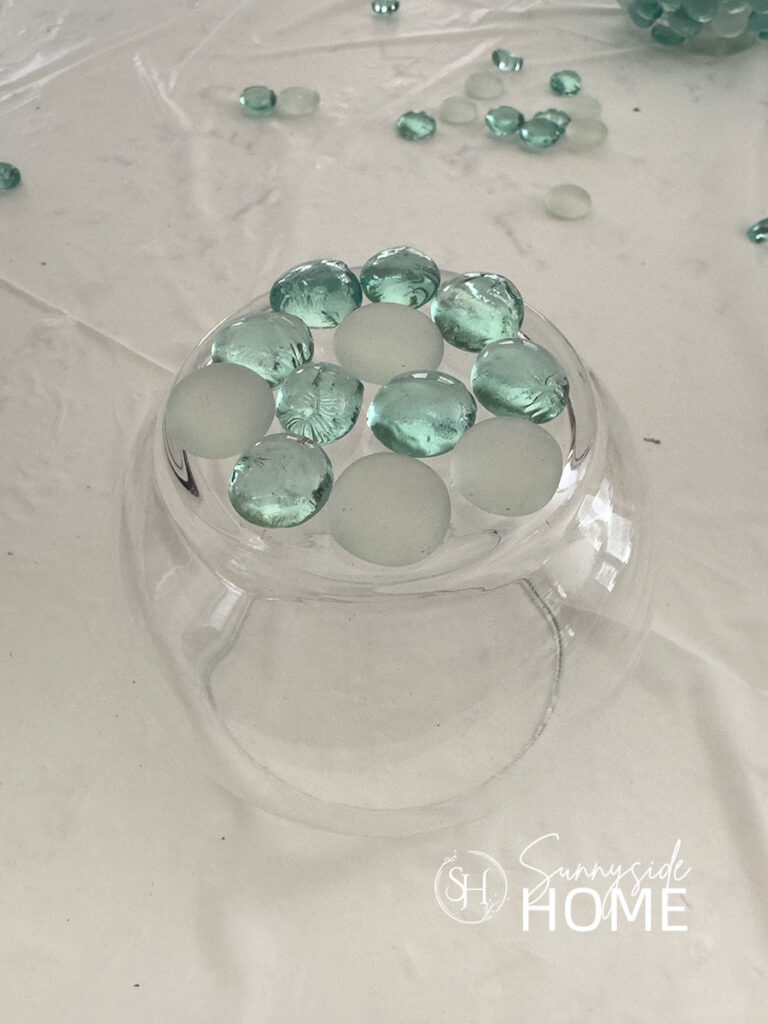
Once that area is covered, begin working your way down the sides.
I was able to get about two rows before the gems started sliding, so instead of waiting for it to dry, we flipped the vase over and this worked perfectly!

The gems rested on the ones already in place, making it much easier to keep going.
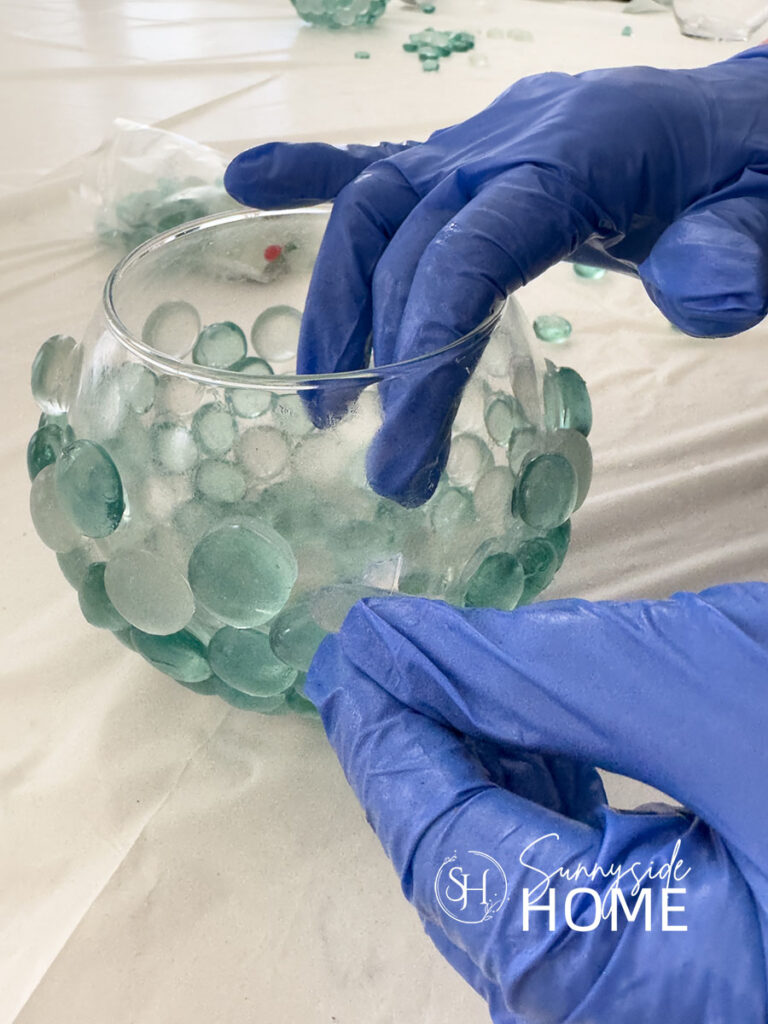
If you still have trouble with slipping, a little painter’s tape can help hold things in place while it dries.
The silicone sets in about 30–60 minutes and fully cures in 24–48 hours.
Continue adding gems until the entire vase is covered up to the rim, don’t worry about small gaps, they actually add to the charm and glow of the finished piece.
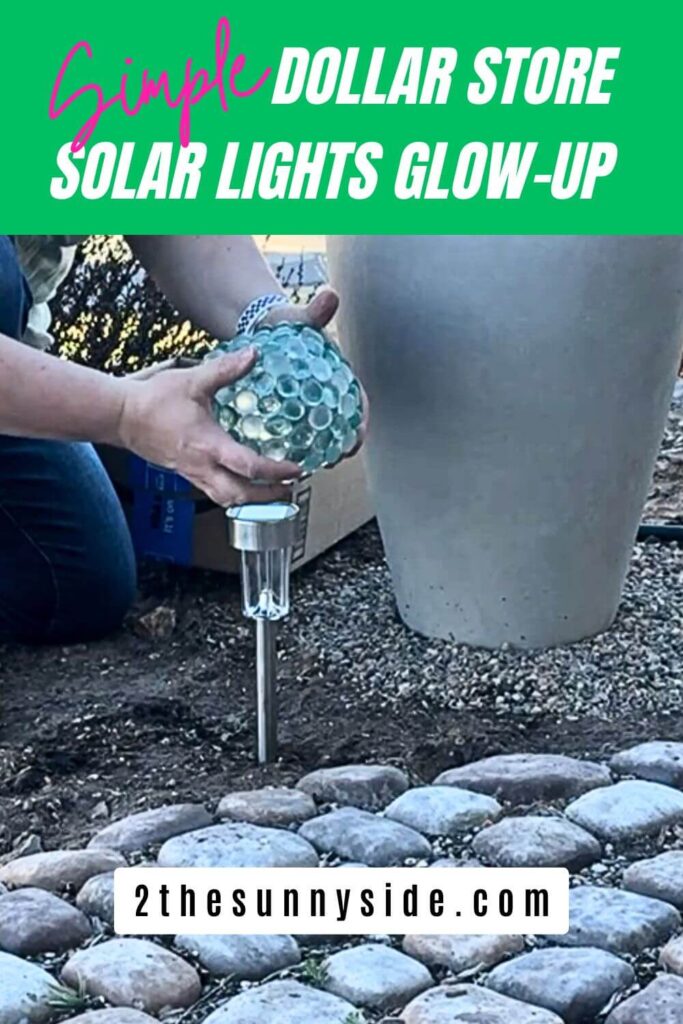
Install Solar Lights and Orbs
Now it’s time to bring everything together and install your solar lights and orbs.
Start by prepping your solar light, some come with a small plastic tab you’ll need to remove to activate the battery, or an on/off switch, so be sure to follow the instructions that came with yours.
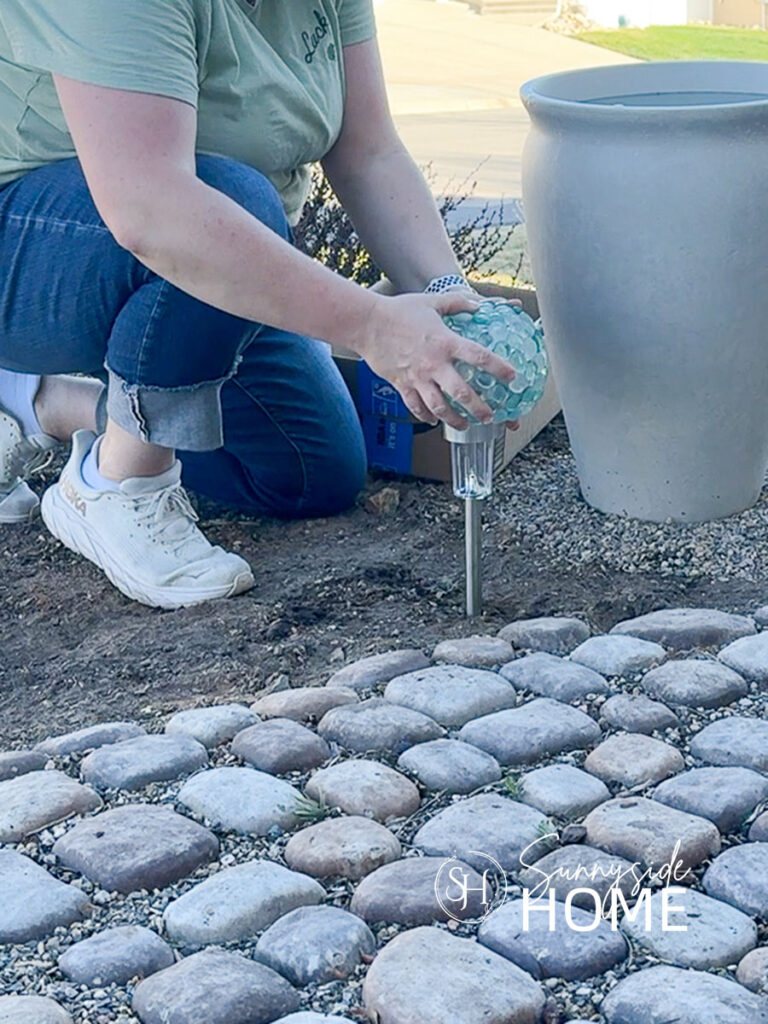
Once it’s ready, insert the plastic ground stake into the soil where you’d like your light, then attach the solar light on top.
After that, simply place your finished glass gem orb over the light.
I styled mine along a cobblestone path leading to a bench, and it instantly added such a warm, inviting glow.
For the best results, choose a spot that gets plenty of direct sunlight during the day so your lights charge fully.
Make sure the stake is pushed securely into the ground for stability.
Let’s stay connected! Follow us on social media!
Tips & Variations for Dollar Store Solar Lights
One of the best things about these dollar store solar lights orbs is how easy they are to customize to fit your style.
If you love a coastal look like me, try using soft blues, aqua and frosted glass gems, or even try adding sea glass and a few shells for a summer vibe.
For something more modern, stick with clear or monochromatic glass gems, just remember the sun light will need to penetrate the top of the orb.
For a more rustic style try incorporating a few warm toned pepples look beautiful with warm stones or a bit of sheet moss.
Be sure to place your lights in full sun, keep the solar panels clean.
Small changes like these can make your solar orbs feel completely custom while still keeping your project budget-friendly.
FAQs
- Do solar lights work well year-round?
Solar lights can work year-round, but their performance really depends on how much sunlight they receive. During the summer months, they tend to shine brighter and longer since they get a full day of direct sun. In the winter or on cloudy days, you may notice they don’t stay lit as long—but they’ll still add a soft glow. My mom keeps her lights out year round and they work until after 10 pm. - How long do they last?
Most dollar store solar lights last a couple of years with regular use. The good news is that the rechargeable batteries inside can often be replaced, which can extend the life of your lights, however they are easy and cheap to replace. - Can you use different containers?
Yes, definitely! You’re not limited to just one type of vase. Any clear or translucent container will work, as it allows the light to shine through beautifully. You can experiment with different shapes and sizes to create a more custom, high-end look. - What glue works best?
A clear outdoor silicone adhesive works best for this project. It’s strong, weather-resistant, and holds the glass gems securely in place. Plus, it dries clear, which helps keep your finished solar orb looking clean and polished.
Shop Affordable Solar Lights

More Affordable Backyard Ideas
- Whimsical Garden Teapot Decor
- Enchanting Chair Planter an Easy DIY
- DIY Wind Chimes Using Thrifted Vintage Finds
- DIY Bird Bath with Recycled Materials
- Simple and Cheap DIY Garden Lighting
- How to Build a Raised Garden Box
- Fix Faded Aluminum Patio Furniture Without Paint
- Cheap and Easy Garden Path
- Simple Planter Box on Wheels
- Modern Plant Trellis for Climbing Flowers
- Install a Paver Patio that Will Last
- How To Hang A Tree Swing Without A Branch
- Easy DIY Outdoor Stone Steps for Your Yard
- Modern Deer Fence for Your Garden
- The Best Budget-Friendly Backyard Ideas We’ve Made
Final Reveal + Thoughts
I couldn’t be happier with how these turned out!
These simple dollar store solar lights went from basic to beautiful, and they truly add so much warmth and charm to our yard.
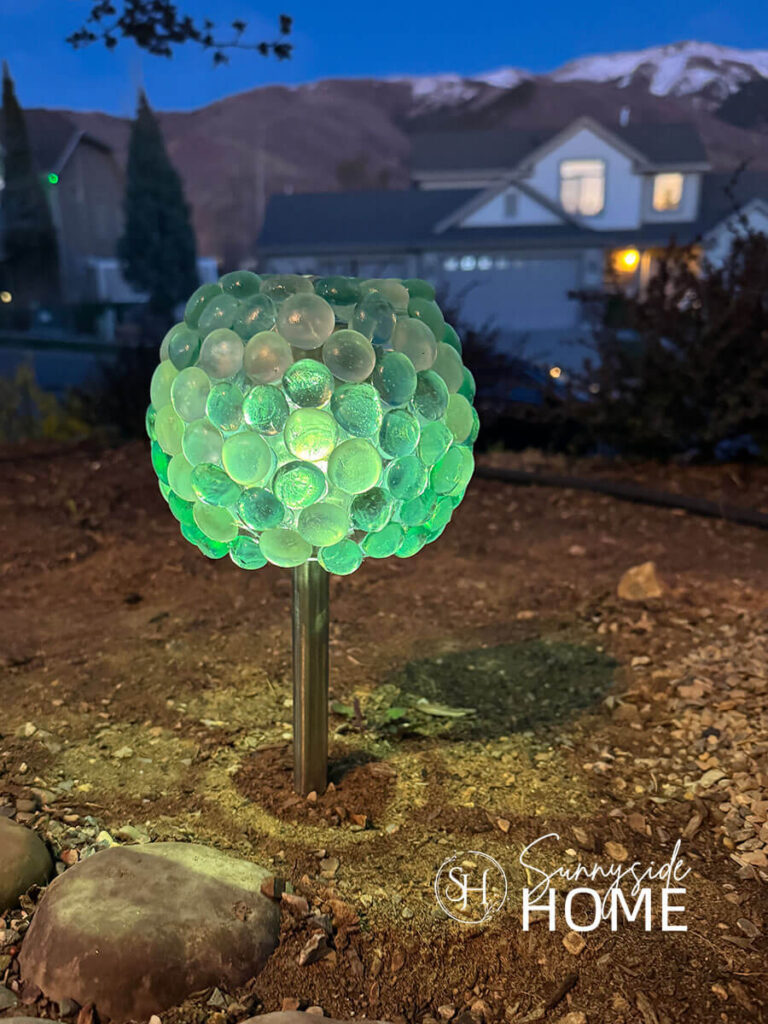
I love the soft glow they give off in the evening and how they elevate our cobblestone sitting area.
Even better, this was such an affordable project that looks anything but cheap.

It’s proof that with a little creativity, you can create a space that feels inviting and thoughtfully designed—without spending a fortune.
We hope you found some inspiration for your yard today.
Please share your tips and ideas with us.
We love hearing from you!
If you’re new here, WELCOME! We love having new readers and friends!
You can learn more about us here.
Let’s stay connected! Join our DIY community of doers and you won’t miss the weekly updates and more inspiration for you always on a budget.
Sharing is caring!
Thanks for stopping by Sunnyside Home. Empowering you to create a home you love!
Retailers We Love
- Anthropologie
- Birch Lane
- Crate & Barrel
- Joss and Main
- Lampsplus
- Mark & Graham
- One Kings Lane
- Pottery Barn
- Rejuvenation
- Serena & Lily
- Wayfair
- West Elm
- Williams Sonoma
- World Market
Be sure to follow us on Pinterest for even more home decor and DIY ideas.
To see what we are working on before it’s on our blog, follow us on Instagram.
You will also find our video tutorials on our YouTube channel.
What’s New . . .
- Simple Dollar Store Solar Lights Glow-Up

- The Best Budget-Friendly Backyard Ideas We’ve Made

- 6 Simple Easter Table Settings for a Beautiful Spring Table
- 15 Simple Decorating Ideas for Spring with Common Thrifted Items