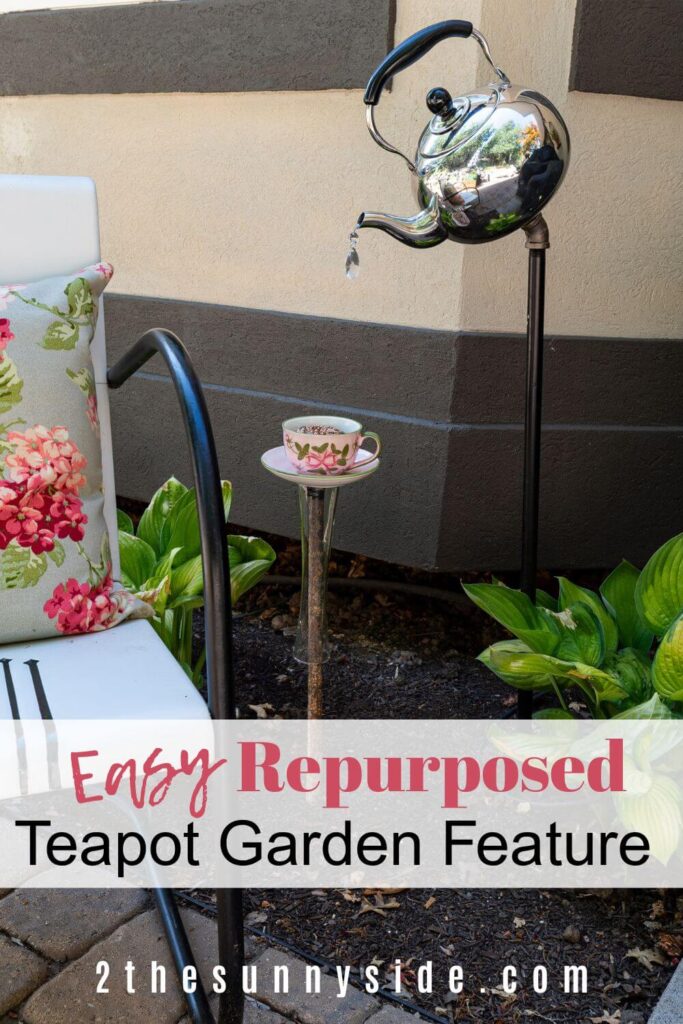
Add a touch of cottagecore charm to your yard with this quick and easy garden teapot yard art using thrifted finds.
We’ve slowly been adding more cottagecore elements to my garden this season, and this garden teapot project might be my favorite one yet!
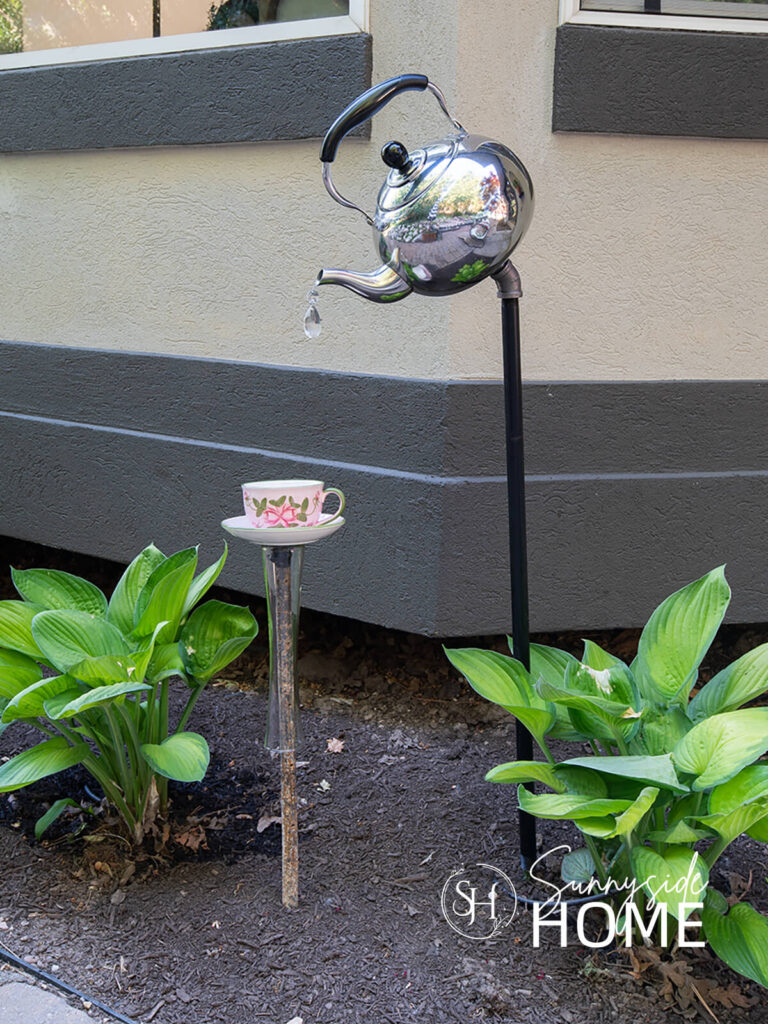
Using a charming thrifted teapot, teacup and saucer and a few simple supplies, we created a whimsical piece of DIY garden art that instantly adds personality and storybook charm to our outdoor space.
If you’re looking for a quick and easy way to elevate your garden, this garden teapot decor is the perfect project to try.
Sunnyside home is a participant in the Amazon Services LLC Associates Program, an affiliate advertising program designed to provide a means for sites to earn advertising fees by advertising and linking to Amazon.com. As an Amazon Associate, this blog earns from qualifying purchases with no additional cost to you. Click here to read our full disclosure policy.
Why You’ll Love This Garden Teapot DIY
If you’re anything like us, you love repurposing thrift store finds into creative decor for your garden and home.
This spring and summer, we’ve had so much fun making unique garden pieces like a bird bath from a bundt pan, a vintage spool wind chime, solar garden lights crafted from thrifted treasures, and even a charming chair planter.
It brings such joy into our lives to create something fun and beautiful out of someone else’s trash.
That’s why this garden teapot DIY is so perfect—it adds whimsical charm and personality to your outdoor space while giving an old teapot new life.
It’s an inexpensive project that fits beautifully with cottagecore, vintage, or eclectic garden styles and makes a wonderful conversation starter or standout garden feature.

Are you enjoying this project? Please Pin It, save it for later and share it with a friend.
Sharing is caring!
Materials You’ll Need
For this charming garden teapot DIY, you’ll need just a few simple supplies: an old teapot, teacup and saucer.
These are easily found at thrift stores, garage sales, or even tucked away in your stash.
You’ll also need the following supplies:
- E6000 glue
- crystal (ours is from a thrifted chandelier)
- garden stakes (we used old stakes found in the garage)
- bud vase (we found ours at the thrift store)
- flange
- threaded nipple
- threaded 45° elbow
- threaded pipe
If you’re new here, welcome! We’re so glad you’re here.
Let us introduce ourselves, we’re Michelle and Steph, a mom and daughter team who love to DIY and decorate our homes.
Not only are we passionate about making our homes warm, comfortable and unique, but it’s our mission to help you create that same feeling in your own home.
You’ll find ideas for repurposing, creating, decorating and making your home truly yours, while always mindful of a tight budget.
Undoubtedly we love finding ways to make your home look high-end on a small budget.
Plus you’ll also find a recipe or two as we share our family favorites with you.
We’d love it if you’d join our community of doers so you won’t miss any inspiration for your home.
We love new friends.
Prepare the Teapot
First, you’ll want to give your teapot a good cleaning to remove any dust or residue, especially if it’s a secondhand find.
We always use Dawn dish soap as it’s a great degreaser.
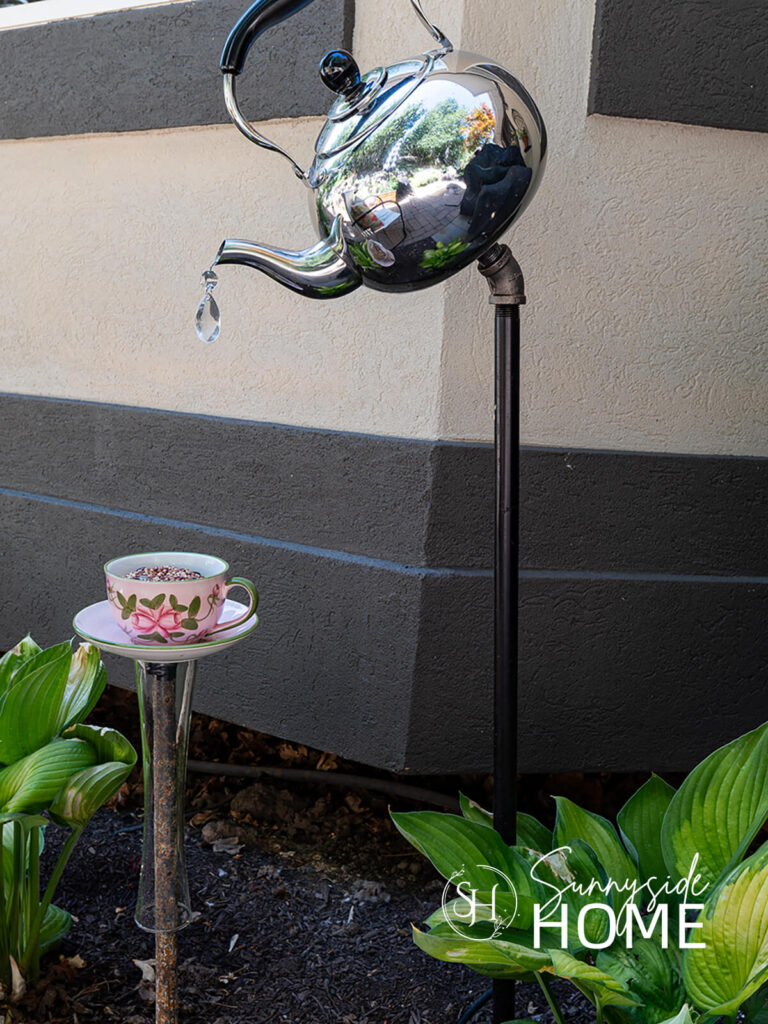
Next you’ll want to attach a chandelier crystal to the teapot spout.
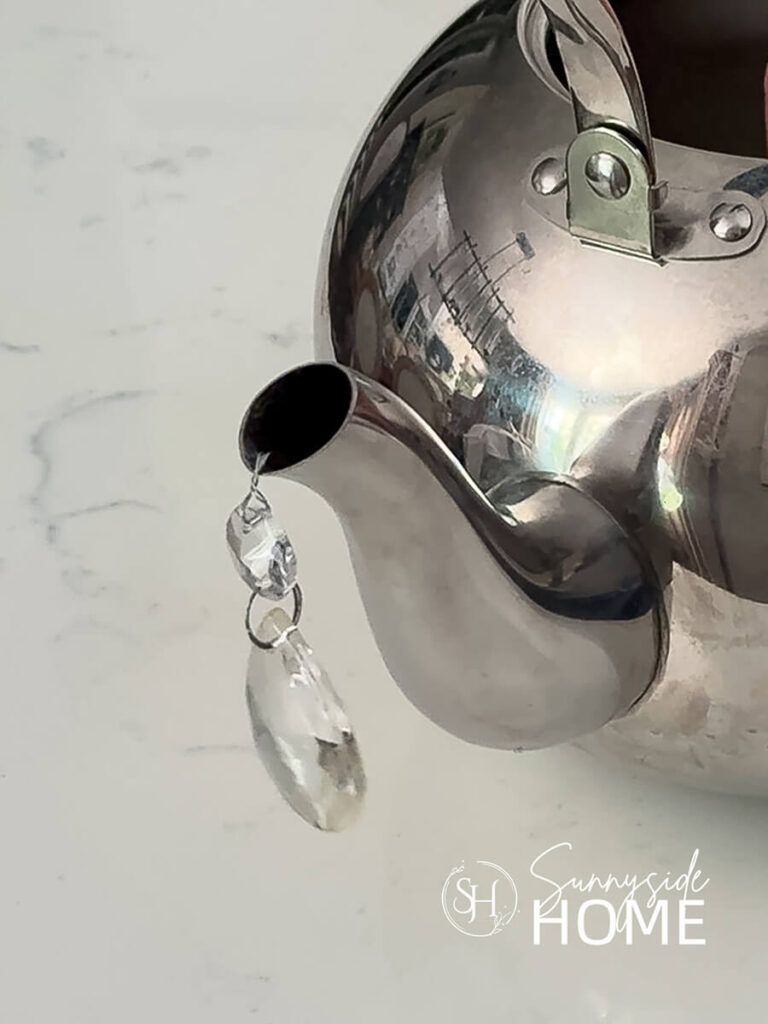
To do this, we threaded a piece of wire up into the spout and secured inside the teapot to the strainer.
Then we attached the crystal to the wire.
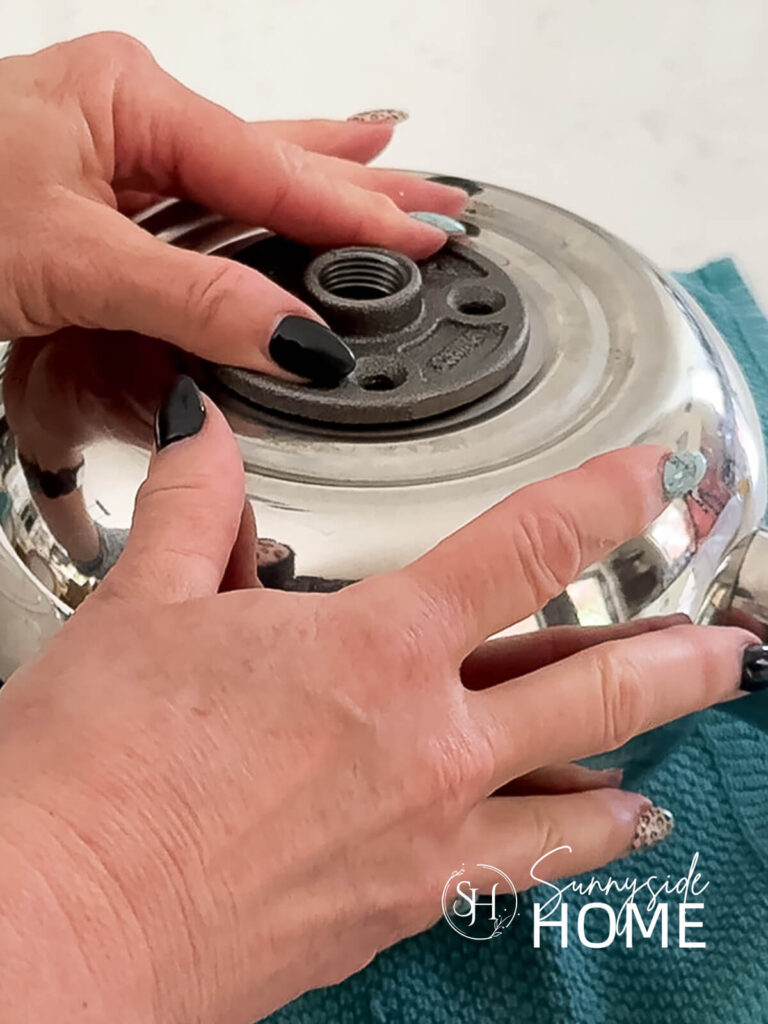
Once it’s clean and dry, attach the flange to the bottom of the teapot using a strong adhesive like E6000 glue.
Be sure to press it firmly in place, then set it aside and allow it to cure overnight for a secure hold.
After the glue has fully cured, you can begin assembling the mounting hardware.
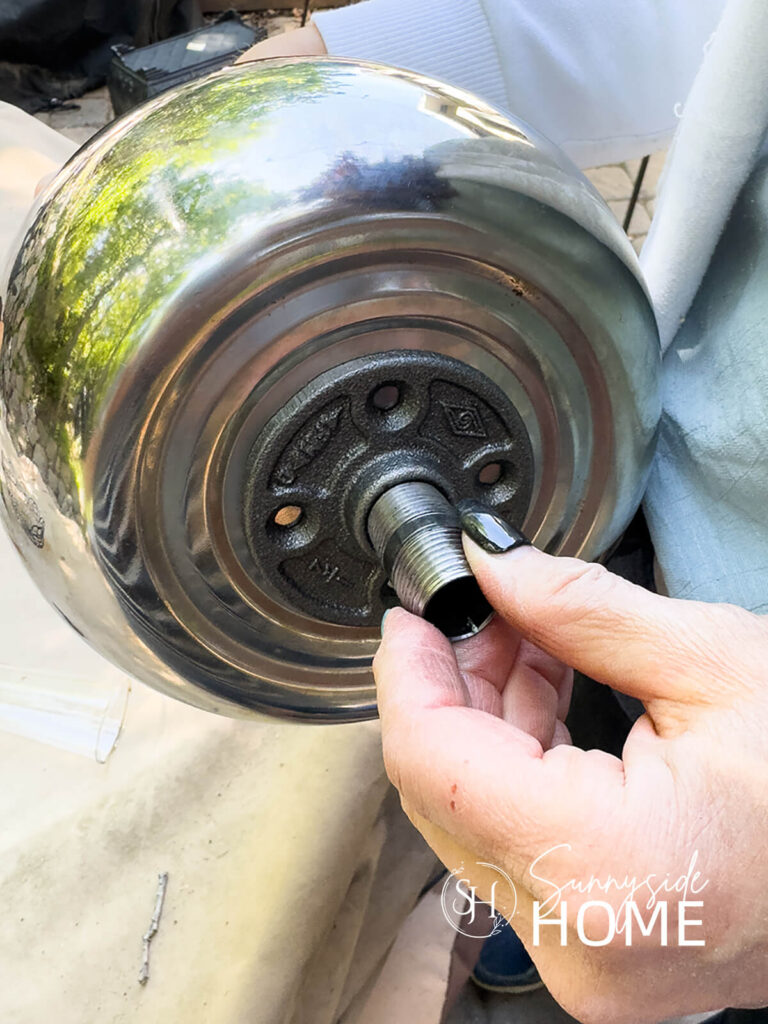
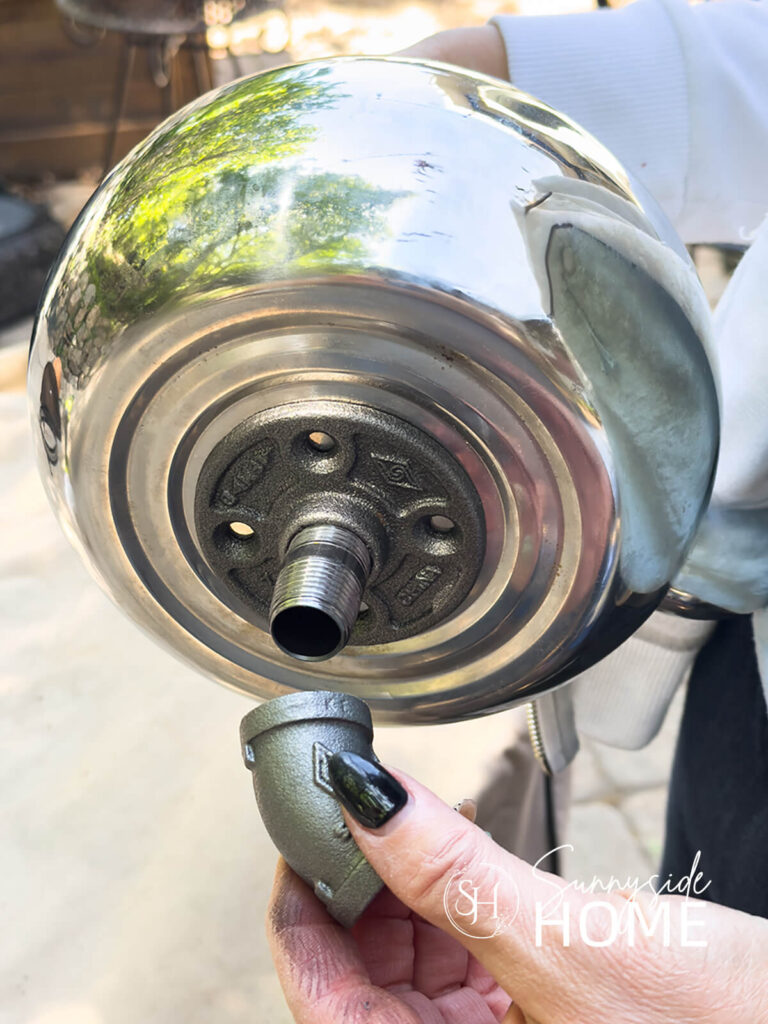
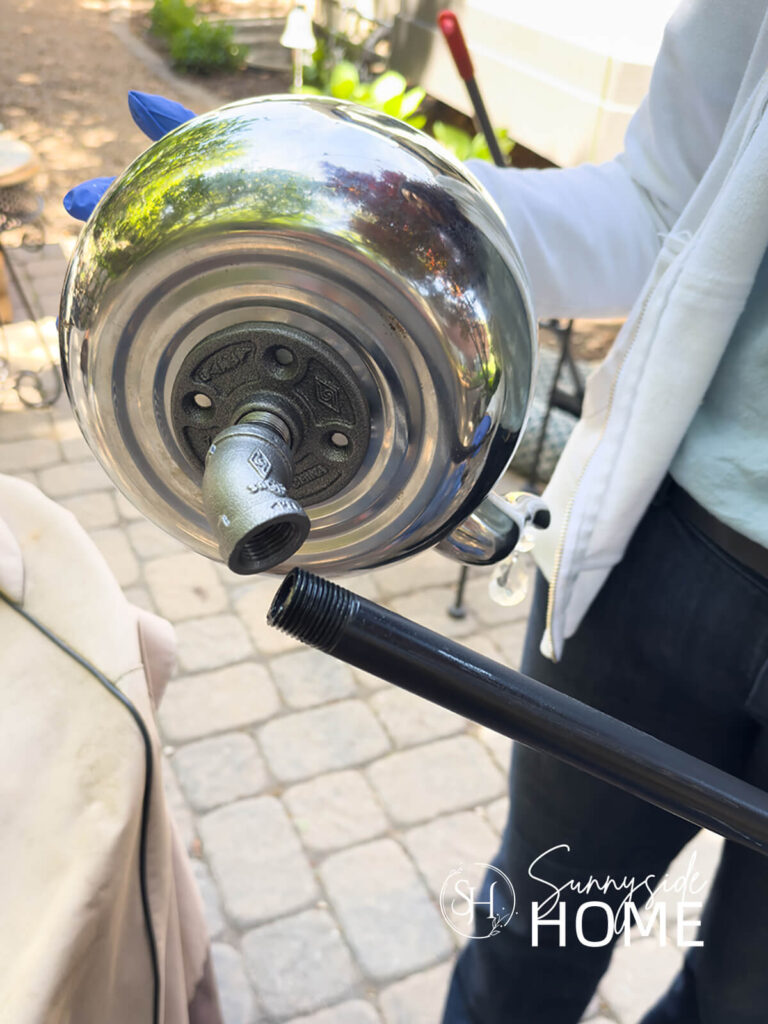
Thread the nipple into the flange, then attach the elbow fitting to the nipple.
Finally, thread the pipe into the elbow, and your whimsical garden teapot is ready to be placed in the garden!
Prepare the Teacup and Saucer
To prepare the teacup and saucer for your DIY garden art, start by giving both pieces a good cleaning to ensure a strong bond—especially if they’ve been sitting in storage or came from a thrift store.
Once they’re clean and dry, use E6000 glue to attach the teacup to the center of the saucer, pressing it firmly in place.
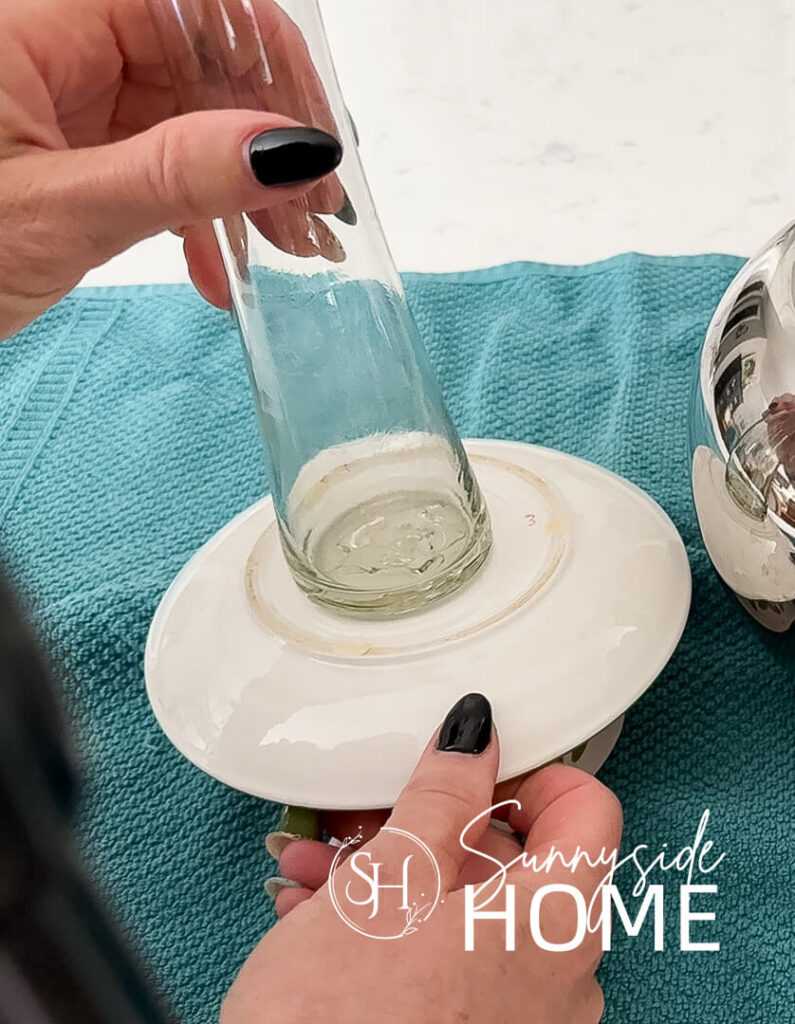
After that, attach a small bud vase to the bottom of the saucer with the same adhesive.
This will act as a support piece so you can easily mount the teacup and saucer onto a garden stake.
Let everything cure overnight before assembling it in your garden.
Let’s stay connected! Follow us on social media!
Place Garden Teapot Art in Flower bed
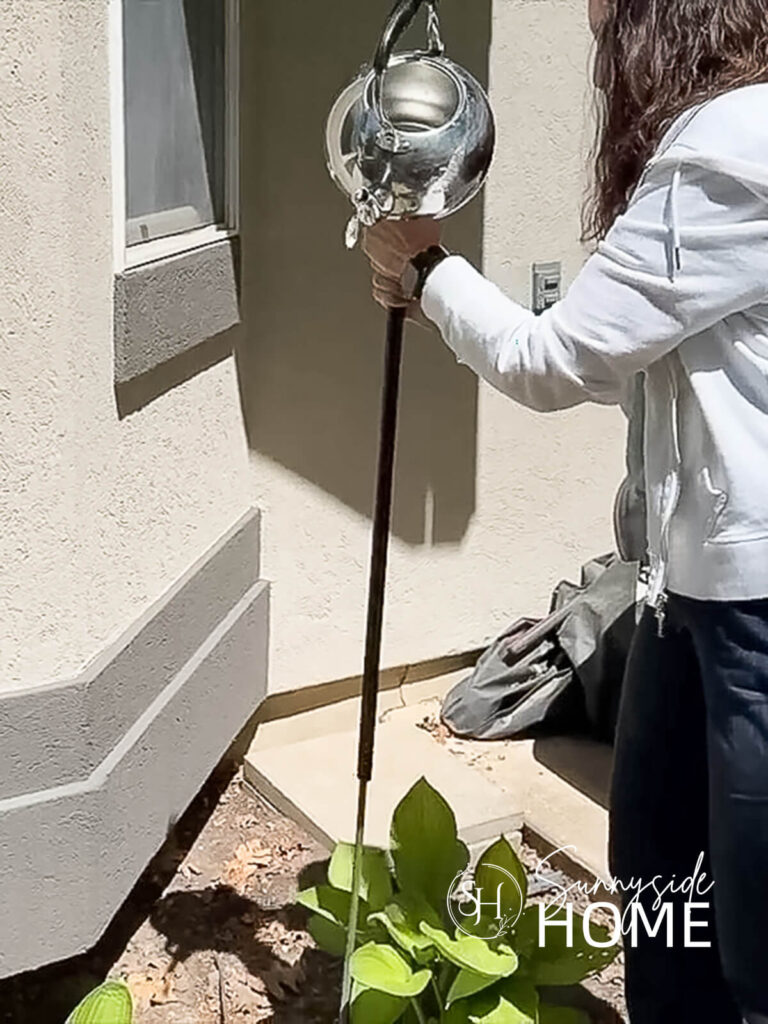
Now it’s time to bring your whimsical garden teapot decor to life in the flower bed.
Start by selecting where you’d like to place the teapot.
Look for a spot where it will be visible and complement your garden’s layout.

Press the garden stake firmly into the ground and use a hammer to drive it in until the top of the pipe will sit flush with the soil.
Next, choose the spot for your teacup and saucer.
Take a second, shorter stake and hammer it into the ground to the desired height for your teacup display.
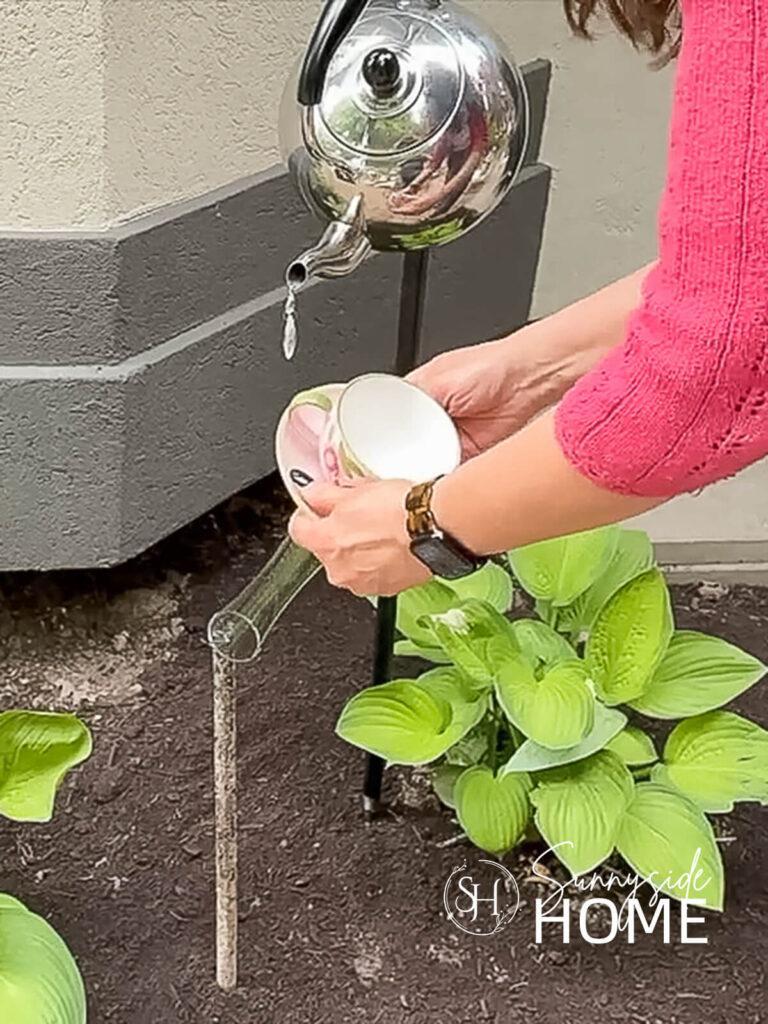
Once both stakes are in place, slide the teapot pipe over the taller garden stake and gently place the teacup and bud vase over the shorter one.
Now step back and admire your charming new cottagecore garden feature!
Shop DIY Garden Teapot Supplies

Shop Garden Decor Ideas
FAQ
You might be wondering if ceramic teapots can hold up outdoors—and the answer is yes, with a little care!
The glaze on a ceramic teapot is waterproof and work beautifully in garden decor, but to help them last longer, it’s a good idea to place them in a sheltered spot or bring them indoors during extreme winter weather.
To protect your garden teapot from the elements, you can also apply a clear outdoor sealant for added durability.
As for adhesive, we recommend E6000 glue—it’s strong, weather-resistant, and works great for bonding ceramics metal and glass in outdoor projects.
Final Thoughts
Creating your own garden teapot decor is such a fun, affordable, and beginner-friendly way to add charm to your outdoor space.
With just a few thrifted finds and a little creativity, you can turn something old into a beautiful new focal point for your garden.
It’s cheap, easy, and so rewarding to see how a few simple materials can bring so much personality and whimsy to your yard.
I am certainly loving my vintage garden decor we made with thrifted finds!
If you give this project a try, we’d love to see what you create! Share your photos or ideas, tag us on Instagram or in the comments, we always enjoy hearing from fellow DIYers.
More Outdoor Projects You’ll Enjoy
- Fix Faded Aluminum Patio Furniture Without Paint
- Build a Birdhouse with CharmingThrift Store Finds
- Simple Clay Pot Lighthouse Garden Decor Project
- Simple Tabletop Fire Bowl DIY in Under 10 Minutes
- Simple Dollar Store Solar Lights Glow-Up
- Simple Faux Limestone Garden Fountain
- How to Fix Old Rusty Metal Furniture
- How to Make a Modern Plant Trellis
- Creative Planter Container Ideas from Thrifted Finds
- Simple Paver Patio Ideas
- 45 Beautiful Garden Path Ideas
- How to Make a Cheap and Easy Garden Path
- How to Build a Simple Stone Retaining Wall for Free
- How to Make a Simple Planter Box on Wheels
- DIY Outdoor Stone Steps for Your Yard
- How to Make a Modern Deer Fence for Your Garden
- How To Hang A Tree Swing Without A Branch
- How to Install a Paver Patio
- The Best Budget-Friendly Backyard Ideas We’ve Made
If you’re new here, WELCOME! We love having new readers and friends!
You can learn more about us here.
Let’s stay connected! Join our DIY community of doers and you won’t miss the weekly updates and more inspiration for you always on a budget.
Sharing is caring!
Thanks for stopping by Sunnyside Home. Empowering you to create a home you love!
Retailers We Love
- Anthropologie
- Birch Lane
- Crate & Barrel
- Joss and Main
- Lampsplus
- Mark & Graham
- One Kings Lane
- Pottery Barn
- Rejuvenation
- Serena & Lily
- Wayfair
- West Elm
- Williams Sonoma
- World Market
Be sure to follow us on Pinterest for even more home decor and DIY ideas.
To see what we are working on before it’s on our blog, follow us on Instagram.
You will also find our video tutorials on our YouTube channel.
What New . . .
- How to Fix Chipped Kitchen Cabinets with a Pen

- Easy 4th of July Door Decor You Can Make in Minutes
- 35 Easy Decorating Ideas for Summer to Welcome the Season
- Fourth of July Decorating Ideas You’ll Love This Summer