A functional and inviting mudroom bench can transform your home’s entryway, making it both stylish and practical. This simple project adds both function and style, is perfect for beginners with an easy to follow step by step guide.
I’m excited to share this easy to build mudroom bench with you today. Certainly every home needs to have some sort of storage system like this. In fact, that was the case for the income suite that my son and daughter-in-law had built in their basement.
A few weeks ago my daughter-in-law, Megan sent me a picture of a mudroom bench. She was wondering if I would help her build one for their basement apartment. After all the time and energy spent finishing their basement, Alex was tired of projects and was not interested in building mudroom storage for their renters.
I was excited to help Megan with this project. You see, a few years back she had asked for a table saw for Christmas and she had never really used it. I thought his would be the perfect opportunity to teach her how to use it and get her over her fear of power tools.
Well, as it turned out, I didn’t get to help much after all. After a trip to The Home Depot to buy the supplies, Alex came home and started to build the mudroom bench. In fact, by the time I arrived on Saturday, the bench was built. My only portion was to paint the mudroom storage bench with my Wagner paint sprayer.
For more ideas to add value to your home, take a look at 10 Sensational Home Improvement Ideas on a Budget.
Sunny Side Design is a participant in the Amazon Services LLC Associates Program, an affiliate advertising program designed to provide a means for sites to earn advertising fees by advertising and linking to Amazon.com. As an Amazon Associate, this blog earns from qualifying purchases with no additional cost to you. Click here to read our full disclosure policy.
Installing a Mudroom Bench
Supplies and Tools Needed
All of the supplies to build this mudroom bench are readily available at The Home Depot. Purchasing primed boards, saves time in the painting process.
In addition, you will also need a few tools. A pneumatic brad nailer makes it go up rather fast. However, if you don’t have one, old fashioned hammer and nails will work. In addition, a drill was used to secure the shelf brackets to the wall as well. But you can muscle it with a screwdriver.
Supplies:
- primed shiplap
- farmhouse arch bracket
- 3/4″ mdf 4×8′ board
- spackling putty
- caulk
- 48″ unfinished pine stair tread
- wood glue
- primed 2 1/2″ x 8″ board
- wood screws
- paint
- stain
- Minwax Wipe On Poly
Tool:
Prep Area for Mudroom Bench
First, you’ll want to prep the area you want to install the mudroom bench.
Begin by removing the baseboards from the wall. To do this first score the caulk edge and gently remove with a pry bar.
This entrance for the income suite is new construction, so the base moldings had not been installed yet.
Are you enjoying this project? Please Pin It, save it for later and share it with a friend.
Sharing is caring!
Install Shiplap Boards
First, you’ll want to mark the location of studs in the wall with a stud finder.

Tip: For easy stud marking, Alex placed painters tape where the studs were located. I think that’s a brilliant idea. In fact, why didn’t I think of that!
Next, you’ll want to cut the shiplap boards to length. Then attach to the wall with the pneumatic nailer where the studs are located.
If you’re new here, welcome! We’re so glad you’re here.
Let us introduce ourselves, we’re Michelle and Steph, a mom and daughter team who love to DIY and decorate our homes.
Not only are we passionate about making our homes warm, comfortable and unique, but it’s our mission to help you create that same feeling in your own home.
You’ll find ideas for repurposing, creating, decorating and making your home truly yours, while always mindful of a tight budget.
Undoubtedly we love finding ways to make your home look high-end on a small budget.
Plus you’ll also find a recipe or two as we share our family favorites with you.
We’d love it if you’d join our community of doers so you won’t miss any inspiration for your home.
We love new friends.

[mailerlite_form form_id=2]
Install Trim Moulding Over Shiplap

Once all of the shiplap is installed, cut the 2 1/2″ flat moulding to length and install across the top, down the 2 sides and the center.
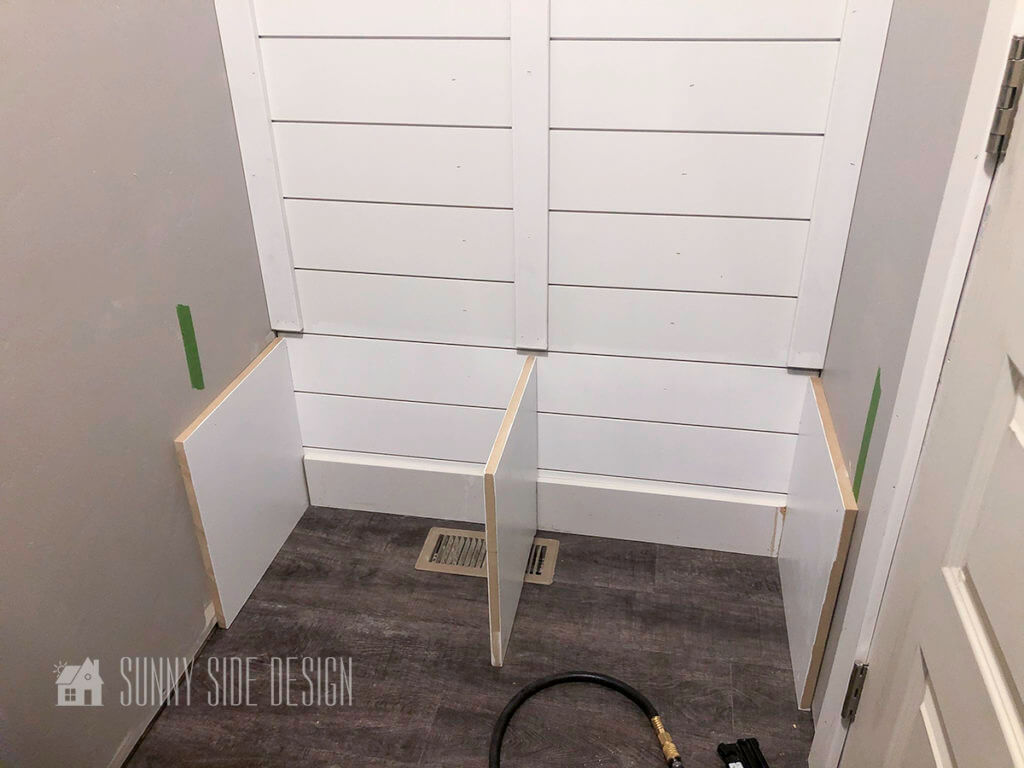
The vertical boards were cut to the height of the mudroom bench seat.
Installing Legs for the Mudroom Bench

Now it’s time to install the 3 legs.
First, Alex marked on the shiplap, the center of the center board. This will be the placement for the center leg.

It turned out that the center leg of the mudroom bench would be directly over the HVAC vent. Therefore, Alex cut a notch out of the bottom of the leg piece with an oscillating tool.

At this time the 3 leg pieces were primed and painted white with a foam roller. This will ensure that the finish is smooth.
Finally, the 2 side legs were secured to the wall into the studs. Once again you’ll notice the wall is marked with painters tape where the studs are located.
Next, Alex secured the center leg. He first lined up the leg centering it on the wall. Then he cut 2 pieces of the base moulding to fit snuggly between the center and side legs. And finally he secured the baseboard moulding to the wall.
To make sure that the center leg will be secure, it will also be attached to the mudroom bench seat.
Attaching Brackets & Shelf
Don’t you just love these farmhouse style brackets? Not only will they ensure that the shelf will be secure, but they really add character to this mudroom bench.

All of the products that were used to build this mudroom storage were already primed except the brackets.
To make things easier, Megan primed the brackets before they were installed.

It’s so fun to see it coming together. I’m loving the way it’s looking!
What do you think? Does this look easy enough that you might try it?
When Steph designed her mudroom, she wanted it to have lots of cubbies, locker type storage and look very custom. While it looks amazing, it’s definitely a project for a more skilled woodworker.
I definitely feel that even a beginner could build this mudroom bench!
The brackets are easy to install. In fact, they are pre-drilled for mounting. You simply secure to the boards with long wood screws at both the top and bottom of each bracket.
To finish off the top of the mudroom bench, the shelf board is attached into place with a wood screw at the front of the bracket.
Note: For the shelf and mudroom seat Alex and Megan used pine stair treads. I’ll let you in on a little secret, Alex it just as picky as me. Can you believe it?!
When they were choosing wood for the mudroom bench seat, Alex didn’t like the grain of the wood on the 1×4 boards. But, he did like the grain on the pine stair treads.
What I love about it, is when the 2 stair treads are butted up together for the seat, it looks like one solid piece of wood.
Mudroom Bench Seat
At first to prepare the stair tread wood, the bull-nose edge was cut off with the table saw.

At this time, prepare the wood for staining. Begin sanding the wood with a fine grit sandpaper, wipe with a damp or tack cloth to remove any dust.
Next, you’ll want to apply the desired stain, Once dry, apply 2-3 coats of a topcoat. We love Minwax Wipe On Poly for this. Clearly, we always get a beautiful finish with this product. Once it’s all dry, it’s ready to install.
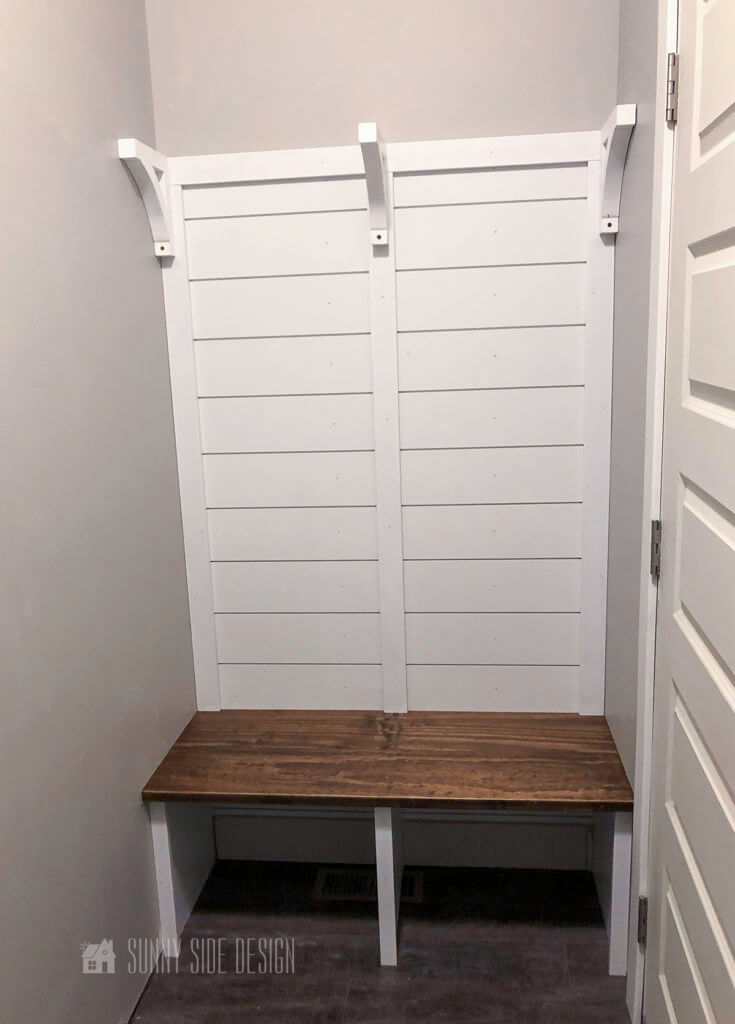
At this time we are ready to install the bench seat.
First apply a little wood glue along the top of each leg. Then slide the back stair tread into place under the 3 moulding pieces.
Now add the second board and secure each board with a couple of brads into the 3 legs pieces.
Last but not least, 3 strips of 1/2 x 1 1/2″ flat moulding was cut to fit the front of each leg. They were then secured with wood glue and a few brads.
Finally, fill in all of the nail holes with a little putty and sand, then caulk the seams of the trim moulding and shelf.
A piece of MDF board was cut to fit across the top for a shelf and then attached to the brackets with brad nails.
Paint

Personally, I think using our Wagner paint sprayer is the quickest way to get the job done with professional results. When using a sprayer, mask off any area you don’t want paint to get on. It’s takes a bit of work, but in my opinion, it’s so worth it!
However, the painting can be done with a brush and foam roller. You’ll want to paint all of the groves with a brush first, then roll each section.
Farmhouse Mudroom Bench Storage

Of course to make this a functional mudroom add hooks and baskets for lots of storage.

Overall I think this is a quick and easy project that can be completed in a weekend. It’s easy enough for even the novice woodworker!

Okay, we want to know what you think. Do you think this is a project you could do? What projects are you working on at your home. We always love to hear from you!
Let’s stay connected! Follow us on social media!
Mudroom Storage Ideas

Shop This Project
We hope you found some inspiration for your home today.
Please share your tips and ideas with us.
We love hearing from you!
If you’re new here, WELCOME! We love having new readers and friends!
You can learn more about us here.
Let’s stay connected! Join our DIY community of doers and you won’t miss the weekly updates and more inspiration for you always on a budget.
Sharing is caring!

Thanks for stopping by Sunny Side Design. Empowering you to create a home you love!
DISCLAIMER
This blog’s content is for entertainment purposes only and is not professional advice. By reading this blog and attempting to recreate a project, you assume all responsibility for any injuries or damages incurred. Read my full disclaimer here.
PHOTO USE AND CONTENT SHARING
All of the photographs you see here are the property of Sunny Side Design unless otherwise credited.
We love for others to share our work, so please feel free to use one photo with a link back to our website.
Pinning and sharing is always encouraged!
Please do not reproduce other Sunny Side Design content without permission.
Retailers We Love
- Anthropologie
- Birch Lane
- Crate & Barrel
- Joss and Main
- Lampsplus
- Mark & Graham
- One Kings Lane
- Pottery Barn
- Rejuvenation
- Serena & Lily
- Wayfair
- West Elm
- Williams Sonoma
- World Market
Be sure to follow us on Pinterest for even more home decor and DIY ideas.
To see what we are working on before it’s on our blog, follow us on Instagram.
You will also find our video tutorials on our YouTube channel.
- Creating a Cozy Outdoor Living Room with Thrifted Finds

- The Best ‘Berry in Love’ Bridal Shower Ideas
- Paint an Old World Texture Finish on a Vase
- Easy Strawberry Chicken Salad with Lime Maple Balsamic Vinaigrette