If you’re looking for an easy way to refresh your kitchen, a simple island makeover can make a big impact. This post shares tips for upgrading your kitchen island with shiplap and trim moulding to turn it into a stylish showstopper.
If you’re looking for a way to give your kitchen a little facelift, then look no further!
A quick and easy way to update your kitchen is a little kitchen island makeover.
We all know the kitchen is the heart of the home and if you’ve got an island you know it’s where everyone gathers.
So why not add an extra touch of style and sophistication to your kitchen island with shiplap and trim moulding.
In this blog post, we’ll share tips and tricks to make your island a real show stopper!
So if your kitchen island is in need of a little TLC, read on!
How Do I Update a Kitchen Island?
There are many options to consider when giving your kitchen island a makeover.
First, consider the style and look you want for your kitchen.
If your style is more on the modern side you might want to consider a modern slat kitchen island makeover.
And if you want something more simple, you can easily update your kitchen island just with paint.
But if you’re a little more ambitious you may want to try refresh your kitchen island with trim moulding or even beadboard.
Since I love that modern farmhouse coastal feel and have loved our basement bathroom with the navy blue shiplap wall.
I thought I’d try wrapping my kitchen island with shiplap along with additional trim and bring that same modern farmhouse coastal feel into my kitchen.
Supplies:
You’ll just need a few supplies to transform your basic island.
Luckily, I had a bunch of scrap wood from the basement family room project.
And the only item I needed to purchase was the shiplap panels.
The paint was gifted to us from Black Dog Salvage and we are excited to share this new paint with you.
Of course the opinions and reviews of this product are all my own.
- shiplap panel
- flat trim moulding
- construction adhesive
- caulk
- wood filler
- TSP
- Black Dog Salvage Paint (we used black dog and blue ridge)
- Top coat
And you can get a 20% discount if you use the code 2THESUNNYSIDE20.
Tools we used:
- tablesaw or circular saw
- jig saw
- brad nailer
- paint brush
- paint sprayer (optional)
Prep Kitchen Island for Makeover

Certainly there isn’t anything special about my kitchen island.
It’s a basic builder’s grade island with faux wood panels.
With three active kids my kitchen island has really taken a beating.
Not to mention the fact that I had toyed with the idea of just painting it and had painted test samples of several blue paint colors.
My kitchen island was looking pretty rough and was definitely in need of a makeover.

First to prepare the kitchen island for the shiplap panels, we removed the base quarter and the other moulding used to conceal the seams.
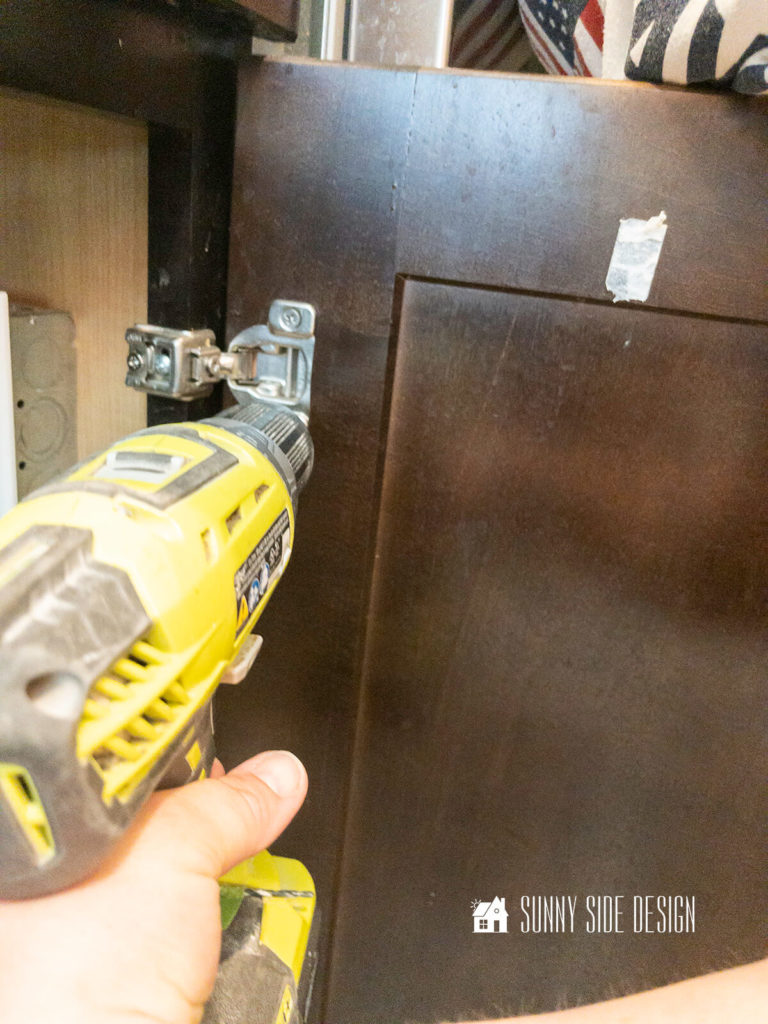
Next we removed all of the drawers and doors.

Then we cleaned the cabinet frames, doors and drawer fronts with TSP.
It’s important especially in a kitchen to prep the surface to be painted with a degreaser.
If you just sand the surface without cleaning with a degreaser you’ll just push the grease further into the surface.
And then your painted surface will be compromised.

Cut Shiplap and Trim for Island
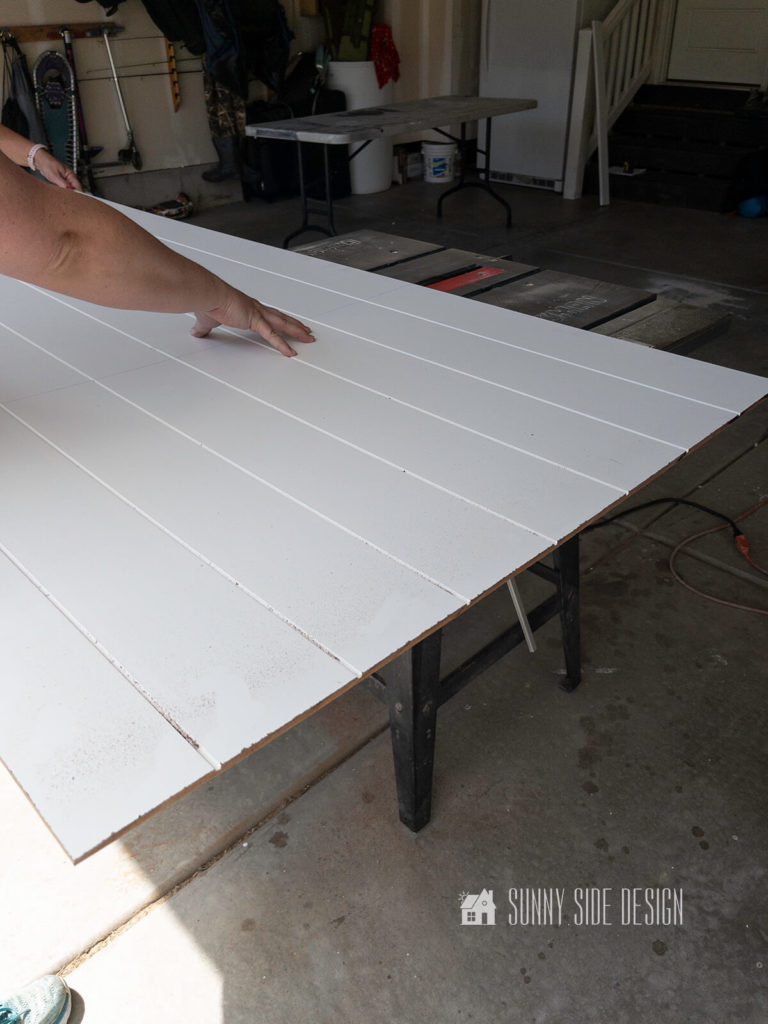
For our makeover for the kitchen island we decided to use shiplap panels.
They come in a 4’x8′ piece and it’s super easy to work with.
First determine if you’d like to have your shiplap run vertically or horizontally like ours.
To help get the shiplap home we had the panel cut at the store to the height we needed.
Then we only needed to cut the length for each piece.
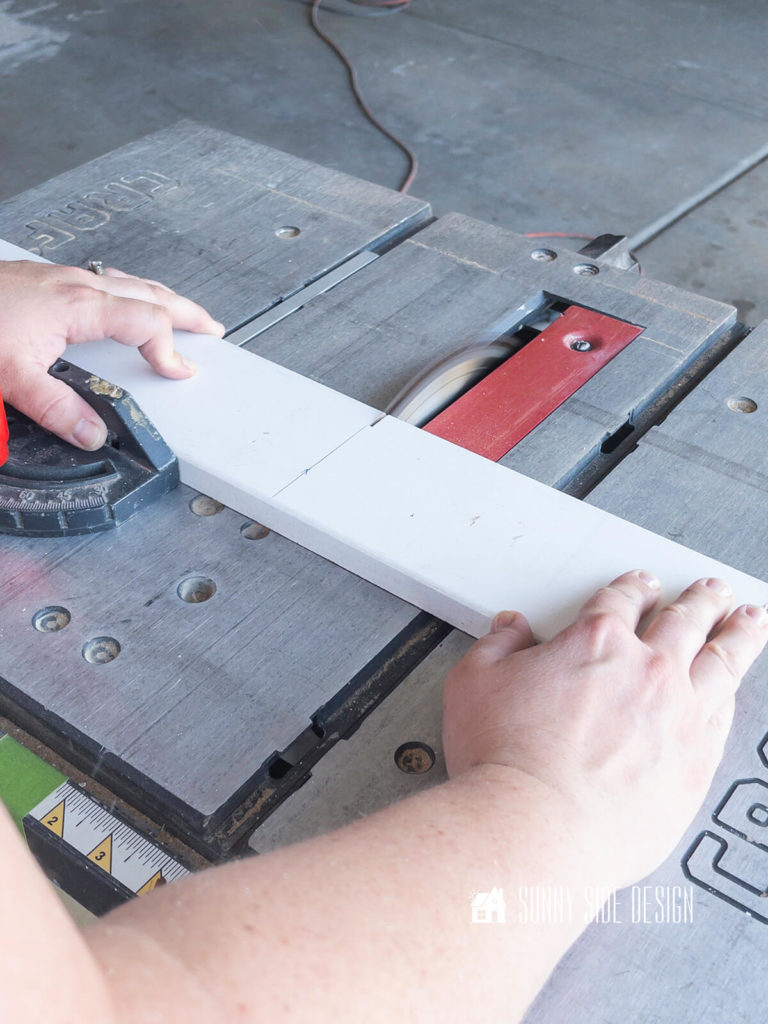
Next measure your kitchen island and cut the shiplap panels with a saw.
We used a table saw for this, but you can also use a circular saw.
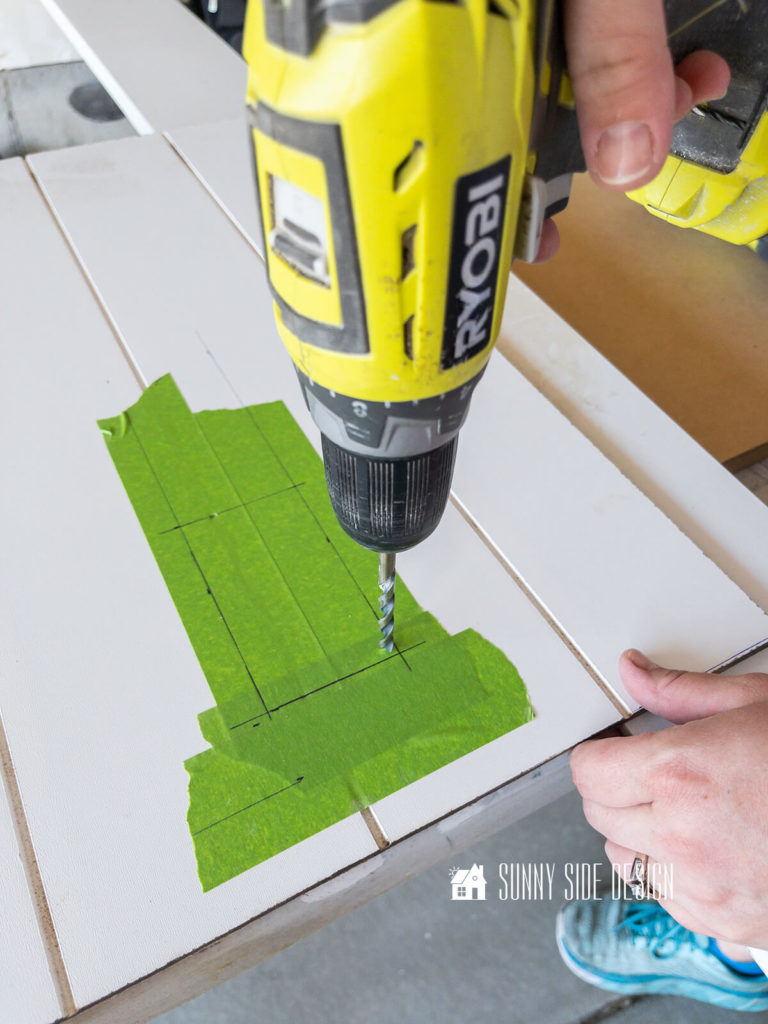
Next make any cuts for outlets in your kitchen island.
To make the cut, drill a hole near the corner of your cut.

Then place the jigsaw blade through the hole to make the necessary cuts.
Enjoying this post?!
Please Pin It, save it for later and share it with a friends.
Sharing is caring!
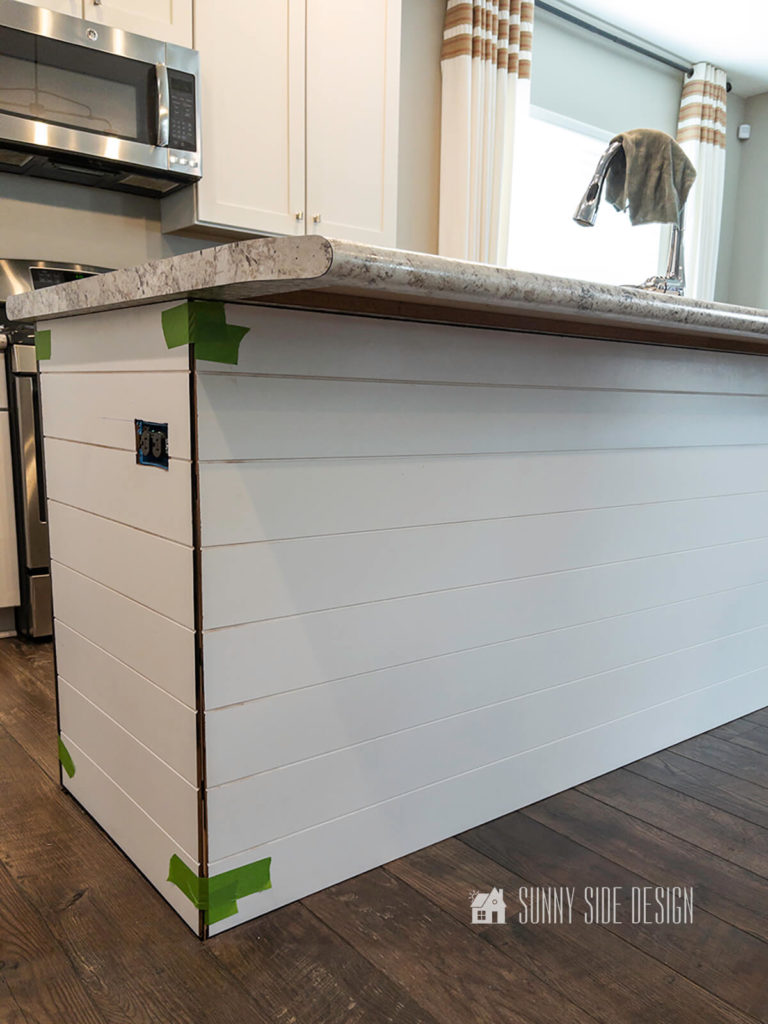
Finally do a dry fit and make sure it all aligns properly.
We secured ours to the island with masking tape and then took the measurements for the trim moulding.
With the measurements in hand we then cut the trim with the saw.
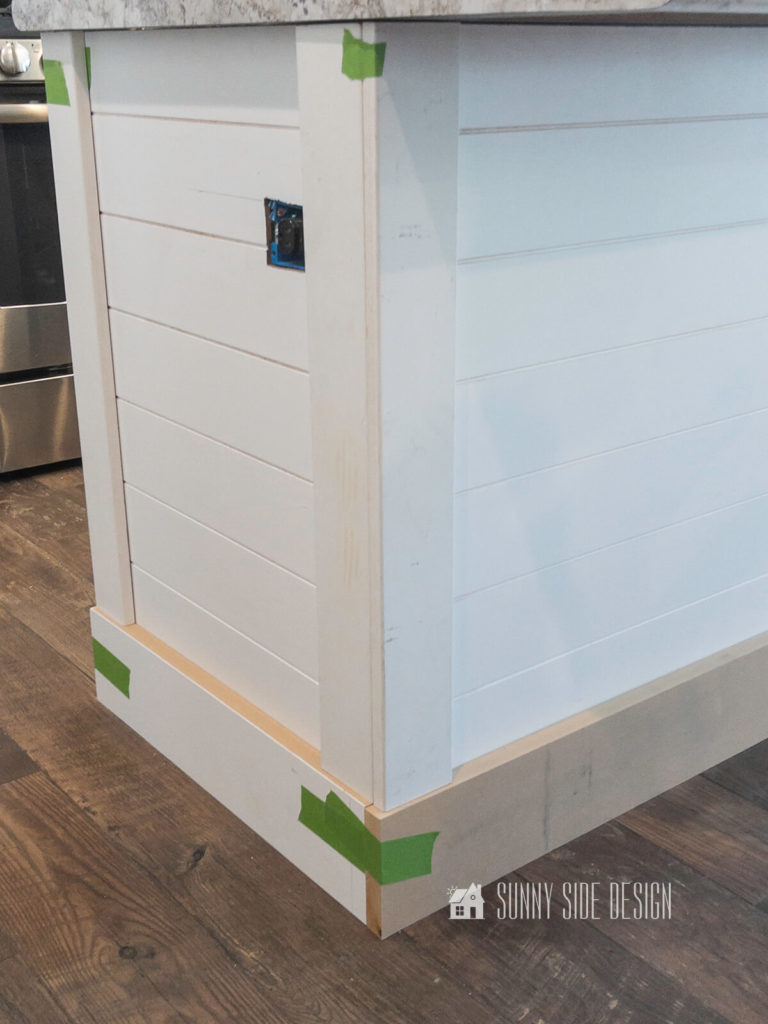
First we cut the base and secured it to the island with tape.
Then we measured and cut the vertical boards.
Once again we secured everything in place with masking tape to make sure everything fit properly.
At this point you can secure them to the island with construction adhesive and a brad nailer.
Paint Kitchen Island

To paint the kitchen island we used Black Dog Salvage furniture paint.
Let me first tell you a little about this paint.
Black Dog Salvage Furniture Paint is a water-based, low VOC, matte finish paint.
It’s made in small batches in the United States and is intended to be easy to use, safe and customizable for your projects.
There’s no limit to the colors you can create, just let your creativity flow!
It dries to a velvety matte finish and can be used on many surfaces including glass, metal, wood and ceramics.
Black Dog Salvage Furniture Paint can be applied over paint, varnish, lacquer, or poly.
It can be applied with either a brush or a paint sprayer.
Note: However, a high density foam roller is not recommended with this paint.
When you’ve finished painting your furniture piece remember to protect it with a top coat.
Always clean your surface before applying the paint.
It’s suggested to use TSP or Krud Kutter and rinse well with water before applying the paint.
There’s no need for primer or sanding, however you’ll want to sand chipped or scratched areas.
Black Dog Salvage Paint and Top Coat is self leveling, so no brush marks.
For best results apply 2 coats of paint and 2 coats of top coat.
Allow at least 24 hours of dry time before applying the top coat.
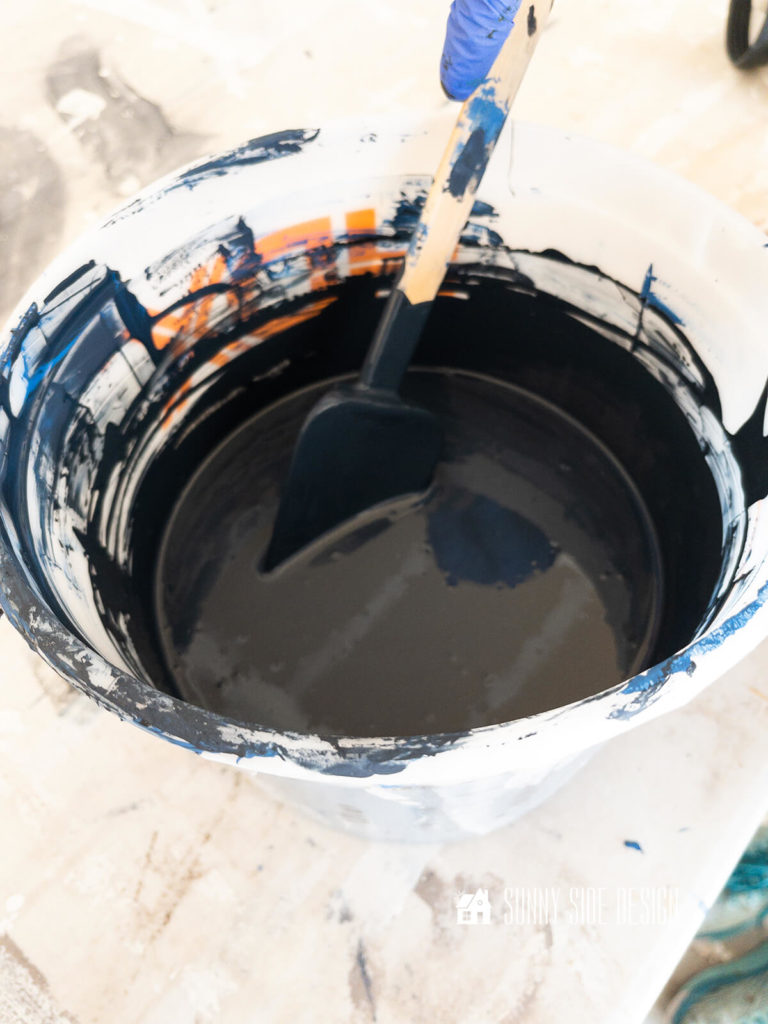
Mix a Custom Color
We customized our paint to match the Hale Navy paint we have used throughout my house.
A mix of 50% blue ridge and 50% black dog was the perfect recipe for Hale Navy.
As is dries it may look a little dark, but once the top coat is applied it’s a perfect match!
Apply Paint with Brush or Sprayer

We are very impressed with the coverage of this paint.
Not only does it dry quickly, but the finish is flawless.
Because this paint dries so quickly, you’ll want to paint it on and leave it.
Don’t try going back over an area once the paint starts to dry.
It you find it’s not perfectly smooth, sand lightly when dry and re-coat the area.
While painting the face frames of the cabinets, I noticed a little paint clump and tried to brush it out.
I quickly learned to let it be and sand out the flaw once it dries and then touch it up.
Let’s stay connected! Follow us on social media!

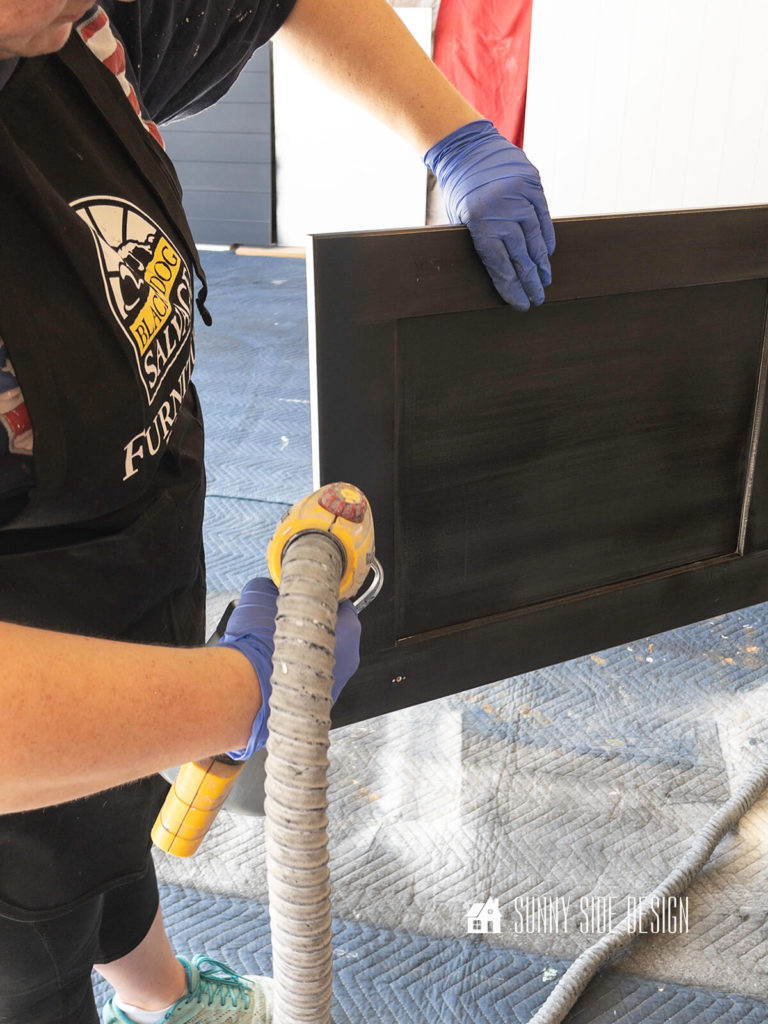
In addition, this paint is easy to apply with a paint sprayer.
As we began to play with it, we found we did need to thin the paint a little to get the coverage we wanted with the paint sprayer.
Apply Top Coat
For us 2-3 T of water with our 1/2 gallon of paint was perfect.
If you need to add water, add it slowly until you get the desired consistency.
This paint will need a top coat, especially with the abuse a kitchen island can get.
We applied 2 coats of Black Dog Salvage Guard Dog top coat with a brush.
If you paint with a white or pastel color choose the Show Dog top coat, as it will not amber over time.
The top coat can be applied with a brush or a sprayer as well.
We chose to brush the top coat because once we installed the shiplap and trim moulding we had to caulk and apply wood putty to the nail holes.
If you are painting a piece of furniture, you can easily apply the top coat with a paint sprayer.
Paint Cabinet Doors and Drawers

To make the job of painting both sides of the cabinet doors fast and easy, we drilled a couple of pilot holes in the bottom of the cabinet door.
And then screwed in a cup hook on each side.
The door is then hung from a hanger and both sides of the door can be painted at the same time.
First, I’ll paint all of the edges of the cabinet door.

Next I use the cup hooks to hang the door with a hanger.
Then the hanger is hung on a bar in the garage.
This way I can paint both sides of the door at the same time.
When it’s finished, I carry it by the hanger and place it on a rod to dry and repeat the process with the next door.
I believe this is the quickest and easiest way to paint cabinet doors.
Tips for Using Black Dog Salvage Paint
First of all this paint dries extremely fast.
So when applying the paint, brush across the piece until the paint runs out, and add more paint if needed.
Don’t try to go back over to make it spread further.
If you do, the results will be streaky.
So, paint it on and let it be.
Choose a good quality brush!
With any paint the quality of the brush will affect the outcome of your piece.
Allow paint to cure for 24 hours before applying the top coat.
With our dry climate we found it helpful to wet the brush with water and then brush out most of the water on paper towel.
This was extremely helpful when applying the top coat.
Once again the top coat dries very quickly, so lay it on and leave it.
Don’t try to brush it over and over again.
We are so thrilled with the way the island makeover turned out.
The coverage of Black Dog Salvage paint is amazing.
You’ll find that it almost covers completely with one coat.
However, always apply 2 coats for durabily.
We used a satin finish top coat for the island, for ease in cleaning.
But we love the velvety matte finish of this paint and are looking forward to trying it on a piece of furniture with a matte top coat.
Now is the perfect time to try Black Dog Salvage furniture paint and save 20% with our code 2THESUNNYSIDE20.
Shiplap and Trim Moulding Installation
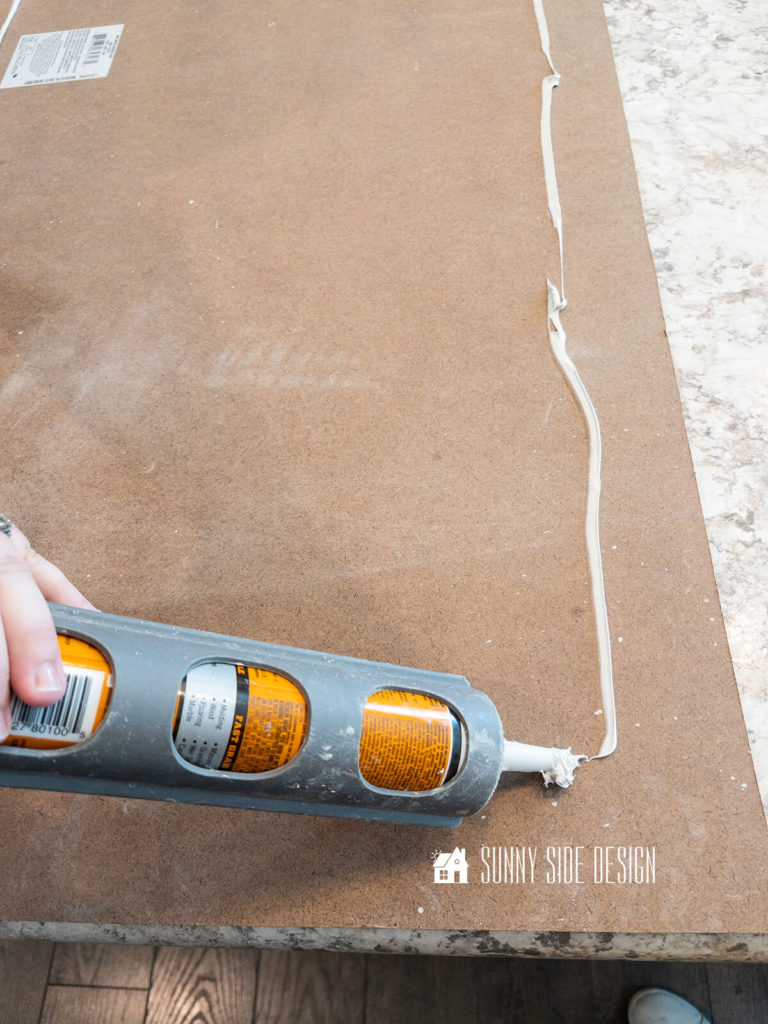
To install the shiplap, we first placed construction adhesive along the backside of the panel.

Then I secured it to the island with the brad nailer.
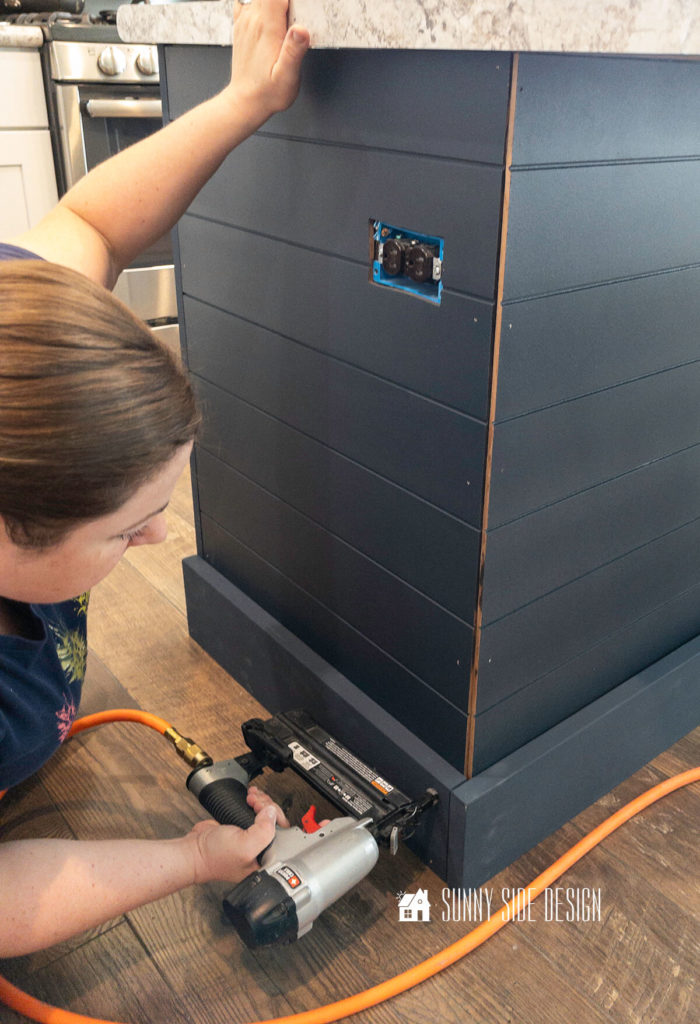
Once all of the shiplap is installed, the base moulding pieces are then secured with the brad nailer.

And finally the vertical trim moulding is added at each side of the kitchen island.
To finish up this project, the seams are caulked and nail holes are filled in with wood putty.
Sand and touch up with paint.
The trim moulding covered most of the nails in the shiplap.
Are you enjoying this post?!
Please Pin It and save it for later, share it with a friend too!
Sharing is caring!

For less than $100, I was able to update the kitchen island.

Now my kitchen feels brand new.
It’s amazing what a little change can do!
Shop Supplies & Tools For This Project

Are you ready to update your kitchen island?
What changes would you like to make?
Shiplap and trim moulding can give your kitchen island a quick and easy makeover on a budget.
In just a weekend, you can have a whole new look for your kitchen.
We’ve shared some tips for painting the kitchen island without brush strokes and ways to do it fast.
So what are you waiting for?
Get started on your own kitchen island makeover today!
If you’re not ready for a total makeover on your kitchen island, check out how my mom fixed her chipped stained kitchen island.
Do you love shiplap?
Then you’ll want to check out these projects too!
- Add Character with an Easy Shiplap Bathroom Ceiling
- DIY a Shiplap Wall the Easy Way
- Time Saving Simple Mistakes to Avoid Installing a Shiplap Ceiling
For more ideas to add style and value to your home, take a look at 10 Sensational Home Improvement Ideas on a Budget.
We’d love to hear from you!
Please share your thoughts and questions with us.
If you’re new here, WELCOME! We love having new readers and friends!
You can learn more about us here.
Let’s stay connected!
Subscribe to our free newsletter so you don’t miss any inspiration for your home.
Please PIN and save for later, and share with your friends!
Sharing helps grow our following!

Thanks for stopping by a Sunnyside Home. Empower you to create a home you love.
Retailers We Love
- Anthropologie
- Birch Lane
- Crate & Barrel
- Joss and Main
- Lampsplus
- Mark & Graham
- One Kings Lane
- Pottery Barn
- Rejuvenation
- Serena & Lily
- Wayfair
- West Elm
- Williams Sonoma
- World Market
Be sure to follow us on Pinterest for even more home decor and DIY ideas.
To see what we are working on before it’s on our blog, follow us on Instagram.
You will also find our video tutorials on our YouTube channel.


I love this island! Can you please clarify the two different sizes of trim moulding? I can’t find it anywhere. Thank you!
Thank you Ashley. We actually used leftover moulding from previous projects. For the vertical boards on the corners is a flat MDF primed board that’s 3 1/2″ x 11/16″ thick. For the base we used leftover Craftsman header board. It measures 5 1/2″ x 1″ thick. I hope that helps you. Good luck on your project and thanks for stopping by our website.
I love this. Your island is beautiful!
Thank you Renae, you’re always to kind.