Looking for an easy and budget-friendly way to bring autumn charm into your home? This DIY fall topiary is the answer!
Ready to add autumn charm to your home?
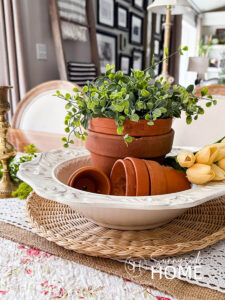
This DIY fall topiary is quick, easy, and can be made in under 30 minutes with just a few supplies—like a favorite pot, dish, or tureen for your container.
The result is stunning seasonal décor that looks high-end on a budget.
Even better, this charming piece works beautifully anywhere—on a tabletop, in an entryway, or styled on a mantel.
Ready to make your own?
Follow along with this simple guide and create a gorgeous fall topiary today!
Sunnyside home is a participant in the Amazon Services LLC Associates Program, an affiliate advertising program designed to provide a means for sites to earn advertising fees by advertising and linking to Amazon.com. As an Amazon Associate, this blog earns from qualifying purchases with no additional cost to you. Click here to read our full disclosure policy.
Fall Topiary Supplies
To make this fall topiary, you only need a handful of simple supplies.
First you’ll need a container to hold your topiary.
For our fall topiary we decided to use a tureen, that only gets used a couple of times a year, but any pretty pot, or decorative dish will do.
Then you’ll need a grapevine wreath to create the structure.
Pretty faux mini fall leaf stems, we found ours at a local home decor store, but this is another good option.
And finally you’ll need floral foam, moss and a few wire hangers.
As for tools, a pair of wire cutters will be helpful to cut the wire hangers to secure the wreath to the styrofoam.
Before you head to the store, check your stash of craft supplies—you might already have most of what you need!
For this project, the only thing we purchased was a mini fall leaf bush.
We reused a piece of styrofoam along with other items we already had on hand, making this DIY both budget-friendly and simple.
Are you enjoying this project? Please Pin It, save it for later and share it with a friend.
Sharing is caring!

Prepare the Container
Start by placing a block of floral foam inside your tureen or chosen container.

You’ll want to secure it so it stays in place and doesn’t slide around as you build your topiary.
We used museum wax since we already had some on hand, but floral tape works just as well.
Build the Fall Topiary Base
Now, it’s time to build the base.
Position your grapevine wreath on top of the styrofoam and secure it firmly with heavy-duty wire.


We got creative and used a few old wire hangers—snipping off the tops with cutting dykes and used the loops.
Each loop was placed over a section of the grapevine wreath, then the ends were pushed down into the styrofoam.
We used three loops along the back and two along the front, which held the wreath securely in place.

To finish this step, cover the exposed styrofoam and wire with Spanish moss.
If you’re new here, welcome! We’re so glad you’re here.
Let us introduce ourselves, we’re Michelle and Steph, a mom and daughter team who love to DIY and decorate our homes.
Not only are we passionate about making our homes warm, comfortable and unique, but it’s our mission to help you create that same feeling in your own home.
You’ll find ideas for repurposing, creating, decorating and making your home truly yours, while always mindful of a tight budget.
Undoubtedly we love finding ways to make your home look high-end on a small budget.
Plus you’ll also find a recipe or two as we share our family favorites with you.
We’d love it if you’d join our community of doers so you won’t miss any inspiration for your home.
We love new friends.
Add Fall Leaf Stems
Now it’s time to bring your topiary to life with fall leaves.
Our mini maple leaf bush came with five main stems, so we started by cutting each one at the base.

Begin by placing one stem at the bottom of the grapevine wreath and gently weave the leaves into the grapevine as you work your way around.


Next, take another stem and position it just above the first section.


Then repeat the same process on the opposite side of the wreath.
Finally, use the last stem in the center of the arrangement, weaving the leaves to the right and left.
We only used a single five-stem bush for our fall topiary DIY, but if you prefer a fuller look, simply add more stems around the grapevine wreath form until you get the look you love.
Let’s stay connected! Follow us on social media!
Styling Ideas for Your Fall Topiary
Once your fall topiary is complete, the fun really begins—styling it!

Place it in the center of your dining table for an easy autumn centerpiece, or set it on an entryway console table to greet your guests.
It also looks beautiful on a mantel, especially when paired with pumpkins, candles, or other fall décor to create a cozy vignette.

No matter where you display it, this DIY fall leaf topiary adds instant warmth and elegance to your home.
Topiary Variations
One of the best parts about making your own DIY fall topiary is how easy it is to customize.
For a farmhouse feel, try a neutral palette with cream or taupe leaves, or add fairy lights to create a warm, cozy glow.
Make a mini version to display on a tiered tray or shelf.
Want more color?
Mix in faux bittersweet stems for a pop of autumn color, or use faux plum Cimicifuga Ramosa leaves—their deep hues are absolutely stunning for fall.
You can also add real foraged elements like acorns or dried leaves for extra texture.
And don’t stop with autumn!
Swap in variegated ivy and tie on a festive bow to transform your topiary into a charming piece of Christmas décor.
Shop Fall Topiaries

More DIY Ideas for Fall
- Easy Vintage Lace Pumpkin Decor
- Easy Recycled Paper Fall Leaf Garland
- Easy Acorn Craft with Real Caps and Wool Balls
- 5 Simple Pumpkin DIY Ideas That Look High-End
- Easy DIY Fall Macrame Wreath
- Macrame for Beginners Easy Fall Leaves
- Toilet Paper Roll Craft an Easy 5 Minute Pumpkin
- Easy DIY Denim Pumpkin Decor for Fall
- Simple Acorn Crafts
- Fall Craft Finger Knit Pumpkins
Final Thoughts
This DIY fall leaf topiary is such a simple yet beautiful way to refresh your seasonal décor.

With just a few supplies and less than 30 minutes, you can create a piece that looks high-end, adds cozy autumn charm, and can be reused year after year.
It’s the kind of project that’s quick, affordable, and endlessly versatile.
If you loved this project, don’t forget to pin it for later and share your version with me—I’d love to see how you style your own fall topiary!
We hope you found some inspiration for your home this fall.
Please share your tips and ideas with us.
We love hearing from you!
If you’re new here, WELCOME! We love having new readers and friends!
You can learn more about us here.
Let’s stay connected! Join our DIY community of doers and you won’t miss the weekly updates and more inspiration for you always on a budget.
Sharing is caring!
Thanks for stopping by Sunnyside Home. Empowering you to create a home you love!
Retailers We Love
- Anthropologie
- Birch Lane
- Crate & Barrel
- Joss and Main
- Lampsplus
- Mark & Graham
- One Kings Lane
- Pottery Barn
- Rejuvenation
- Serena & Lily
- Wayfair
- West Elm
- Williams Sonoma
- World Market
Be sure to follow us on Pinterest for even more home decor and DIY ideas.
To see what we are working on before it’s on our blog, follow us on Instagram.
You will also find our video tutorials on our YouTube channel.
What New . . .
- Simple Dollar Store Solar Lights Glow-Up

- The Best Budget-Friendly Backyard Ideas We’ve Made

- 6 Simple Easter Table Settings for a Beautiful Spring Table
- 15 Simple Decorating Ideas for Spring with Common Thrifted Items