If you’ve been swept away with the current macrame frenzy, you’re not alone.
Certainly, macrame has made a flamboyant comeback since it was hot back in the 70’s.
Although macrame comes finished ready to purchase in the form of feathers, keychains, garland, wall hangings, necklaces, earrings, plant hangers and more.
Perhaps you’re simply mesmerized how each pattern and item are created.
As a beginner you may wonder:
“Can I teach myself to macrame?”
“How do I get started with macrame?”
“What is the easiest thing to macrame?”
What Is Macrame? Can I Teach Myself?
So, what is macrame anyway?
Macrame is the art of knotting thread or cording into decorative designs that often double as useful items.
Not only is it one of the easiest crafts to learn, but most projects are created with only 5 basic knots, used in different patterns.
Luckily with the accessibility of information available online, anyone at any skill level can most definitely learn how to macrame.
What Is The Easiest Thing To Macrame?
As a beginner you need to start somewhere.
So, we’ve got the perfect beginner macrame project for you, easy fall macrame leaves.
In fact, with this easy to follow guide you’ll learn how to macrame with one of the most basic knots, the square knot.

With a little bit of practice you’ll be on your way to creating unique works of art for your own home.
Are you enjoying this project?! Please Pin It, save it for later and share it with a friend.
Sharing is caring!
How Do I Get Started With Macrame?
A few basic supplies are needed to begin this macrame project.
- Cotton rope cording
- Ruler
- Sharp scissors
- Comb
- Hairspray
- Thumbtack
- Piece of cardboard
If you’re new here, welcome! We’re so glad you’re here.
Let us introduce ourselves, we’re Michelle and Steph, a mom and daughter team who love to DIY and decorate our homes.
Not only are we passionate about making our homes warm, comfortable and unique, but it’s our mission to help you create that same feeling in your own home.
You’ll find ideas for repurposing, creating, decorating and making your home truly yours, while always mindful of a tight budget.
Undoubtedly we love finding ways to make your home look high-end on a small budget.
Plus you’ll also find a recipe or two as we share our family favorites with you.
We’d love it if you’d join our community of doers so you won’t miss any inspiration for your home.
We love new friends.

[mailerlite_form form_id=2]
How To Make A Macrame Leaf
1. Cut the cording

To make a macrame leaf roughly 8″ in height you’ll begin by cutting strips of cording as follows.
- (1) 16″ strand for the center spine of the leaf
- (6) 8″ strands for the top portion
- (6) 7″ strands for the top portion
- (6) 6″ strands for the lower portion
- (4) 5″ strands for the lower portion
We used 6mm cotton cord.
You can used different weights of cording, but you may have to adjust the number of sections you use.
2. Fold center cord and secure with pin

First, fold the 16″ strand in half.
This will be the center or spine of the leaf.
Then secure the strand at the top of the fold into a piece of cardboard with a push pin.
3. Alternating square knots

To make a macrame leaf you’ll made a series of alternating square nots.
In this image the first knot has already been tied so you can see what it looks like.
The first three knots will be made using the 8″ strands.
Take one strand, fold it in half and slide it under the spine.

Then fold a second strand and place it on top of the previous strand and spine in the opposite direction.

Then, insert the ends of the top strand down into the loop of the bottom strand, and the ends of the bottom strand up into the loop of the top strand.
Finally, pull both sides tightly to make the knot.

In addition, alternate the starting side with each new row of knots.
For example, since the loop of the previous strand was on the left of the spine, for the next row place the first loop under the spine on the right.
Then continue with this process, gradually decreasing the strand size as you work down the spine.
Finally, push each knot up toward the previous knot to keep the rows tight.
4. Comb cording to make fringe

Now that each of the knots have been tied it’s time to create that soft fringe.
First, begin by placing the comb next to the spine and pull outward through the cording.
It should be noted, this will need to be done several times to create the fringe.
Let’s stay connected! Follow us on social media!
5. Trim fringe to shape leaf

After both sides of the cording have been combed out give it a rough trim.
Comb the edges out again and trim any pieces that are longer to keep the shape of the leaf.
6. Apply stiffener to leaf
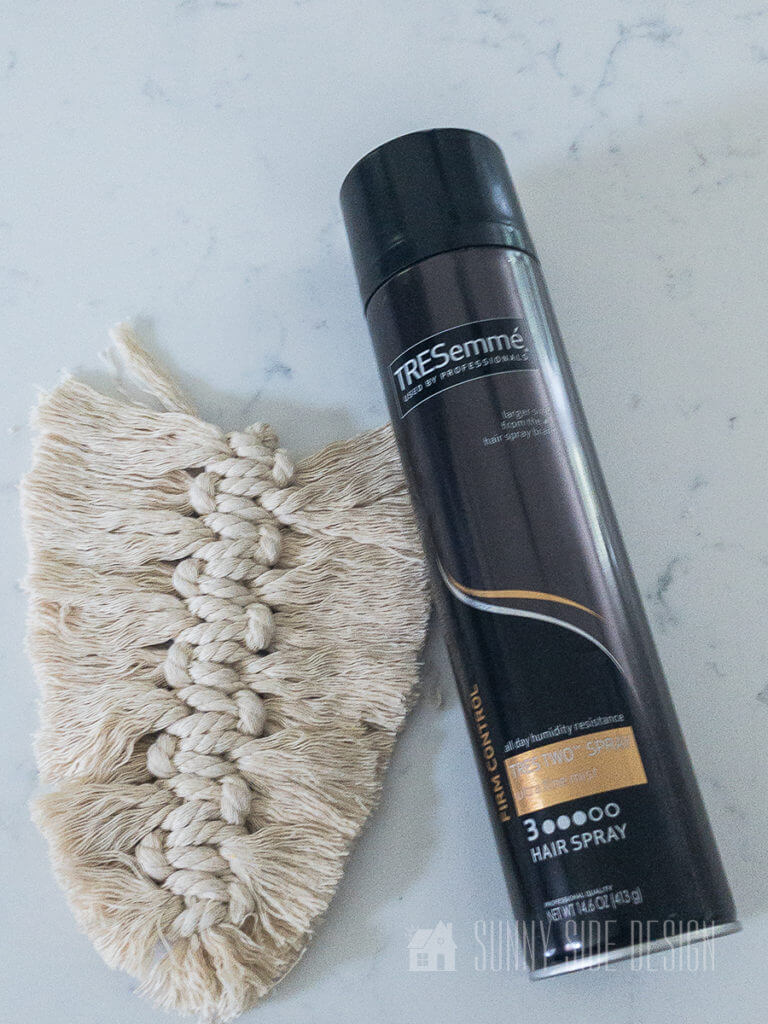
Now for the final step.
Clearly, since the fringe is soft, the leaf will be droopy when placed upright.
So, to prevent the leaf from flopping you’ll need to stiffen it up.
Of course, use what you have on hand, like hairspray.
On the other hand, you can also use a fabric stiffener or spray starch.
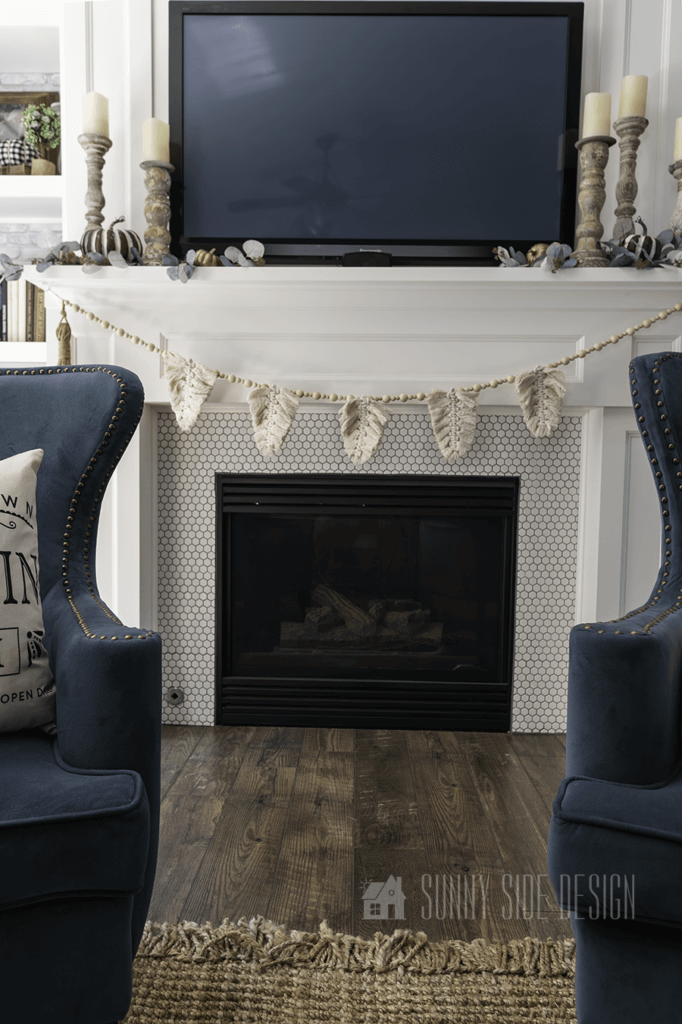
Then, allow it to dry and then decorate to your hearts content.
Finally, small clips are attached to the back of these leaves with hot glue.
Although, the loop at the top of the leaf can be used for hanging too.
Wasn’t that simple?
Comment below if you’re anxious to try your hand at this easy beginner macrame project.
Did you miss the 10 affordable fall decor ideas that don’t look cheap?
Don’t you just love decorating for fall!
You’ll find even more ideas with 65 Simple DIY Fall Decor Ideas You Can Make Today!
You’ll see these macrame leaves styled as well as another darling macrame idea for your front door! Macrame tutorial (which is also BEGINNER friendly).
Shop This Post
More DIY Fall Ideas
- Fall Macramé Wreath
- Simple Fall Topiary
- Easy Vintage Lace Pumpkin Decor
- Cheap and Easy Recycled Paper Fall Leaf Garland
- The Best Pumpkin Craft Ideas
- Finger Knit Pumpkins
- Pumpkin DIY Ideas that Look High-End
Are you ready to try your hand macrame?
How would you style these macrame leaves in your home?
And if you’re looking for more fall decorating ideas, then you’ll want to see How to Make your Home Cozy for Fall.
Thanks for spending some time with us today, we hope you found a little inspiration here today!
If you’re new here, WELCOME! We love having new readers and friends!
You can learn more about us here.
Let’s stay connected! Join our DIY community of doers so you won’t miss any of our weekly updates.
Please PIN and save for later, and share with your friends! Sharing helps grow our following!
Sharing is caring!

Thanks for stopping by and as always here at Sunny Side Design
WE HOPE TO BRING YOUR HOME TO THE SUNNY SIDE OF THE STREET!
Retailers We Love
- Anthropologie
- Birch Lane
- Crate & Barrel
- Joss and Main
- Lampsplus
- Mark & Graham
- One Kings Lane
- Pottery Barn
- Rejuvenation
- Serena & Lily
- Wayfair
- West Elm
- Williams Sonoma
- World Market
Be sure to follow us on Pinterest for even more home decor and DIY ideas.
To see what we are working on before it’s on our blog, follow us on Instagram.
You will also find our video tutorials on our YouTube channel.
- Paint an Old World Texture Finish on a Vase

- Easy Strawberry Chicken Salad with Lime Maple Balsamic Vinaigrette
- How to Fix Chipped Kitchen Cabinets with a Pen
- Easy 4th of July Door Decor You Can Make in Minutes


