Have you ever wondered how to redo or repurpose a piece of furniture from a thrift store?
In this post we will give you the inspiration you need to bring new life into your flea market find.
Upcycling can be easy with these creative ideas and tips.
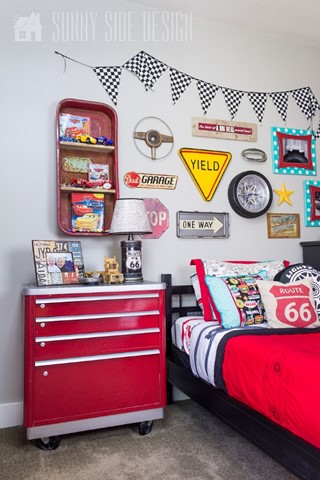
You won’t want to miss this before and after transformation of an old lateral filing cabinet into a darling kids tool chest dresser!
If you love to re-imagine old furniture pieces like us, then you’ll love our Modern Desk Makeover too!
One of our favorite makeovers is grandpa’s old dresser!
Hi Friends! I am so excited to bring you on my maiden voyage of my first ever tutorial!
I do have to apologize in advance though for the lack of photos for this project.
Back in the day before I thought I’d give blogging a whirl I was always too anxious to dive into my projects before taking pictures!
Luckily I do have 1 picture that is for the most part in it’s original before state.
Sunny Side Design is a participant in the Amazon Services LLC Associates Program, an affiliate advertising program designed to provide a means for sites to earn advertising fees by advertising and linking to Amazon.com. As an Amazon Associate, this blog earns from qualifying purchases with no additional cost to you. Click here to read our full disclosure policy.
How To Repurpose Thrift Store Furniture. Where Do I Even Start?
Can you relate to this question? Are you clueless where to even start?
Here are some tips when choosing a piece of furniture.
- Look for quality built furniture. If possible choose solid wood pieces. Many newer pieces of furniture are built with particle board and have a veneer finish. (These can be salvaged if they’re in good enough shape, but real wood is better!)
- Assess what kind of condition the piece is in. If it’s a chair, is it wobbly? Does it have any broken pieces of wood? It may be as simple as repairing with wood glue then refinishing. Looking at a dresser? Test all of the drawers. Do they slide well? If anything is broken, is it something you’d feel comfortable enough to fix?
- Take the price into consideration. Some pieces may be in great condition, just needing a little sprucing up and updating. Decide if the price is worth it to you, and estimate how much money you’d need to put into the project to fix it up. (You can always try negotiating on the price too.)
As mentioned in The Ultimate DIY Car Bedroom Ideas post, I originally refinished this dresser for our oldest, Mr. G, but decided it was time to give it a new home in Mr. A’s room since he’s the ultimate car LOVER!

Going into the thrift store I already had an idea in mind of what I was looking for. I wanted to create a tool chest dresser.
When I found this lateral filing cabinet I was immediately drawn to its curved edges, metal drawer pulls and locks.
I could definitely see the tool chest vision!
AND it was only $15! SCORE!
In this picture I had already given it a light sanding with my palm sander, but just look at it.
BLEH!
Tan color with gold hardware…not my taste! (You can see the gold hardware to the left behind the dresser. I removed the hardware to make it easier to paint the dresser.)

Now doesn’t this Colonial Red in a high gloss finish just speak tool chest dresser to you?
I’ve always had great results using the Rust-Oleum brand.
But when you get the paint + primer in one it’s even better!
I do prefer to shop at The Home Depot. I picked mine up for $3.97. (Most supplies came from The Home Depot.)
(Since I did this project several years ago, I don’t recall if 1 can was enough or not. My guess is I used a little more than 1. Start with 2 cans and if you don’t end up opening the 2nd you can always return it.)
This post contains affiliate links for your convenience. As an Amazon Associate I earn from qualifying purchases. See our disclosure for details.
Are you enjoying this project? Please Pin It, save it for later and share it with a friend.
Sharing is caring!
How To Repurpose Furniture
Step 1: Preparing the surface
Since there are multiple types of paints and stains on the market, be sure to read the specific directions before you begin.
As a general rule of thumb a light sanding of the furniture is helpful to smooth out any imperfections.
This will also help the paint to bond better.
Other methods using products such as Saltwash™ or Chalk Paint may not require the piece to be sanded first.
Be sure to follow the guidelines per the product of your choice.
Step 2: Applying Paint
Now I’ll admit I’m not the most patient person when it comes to spray painting.
I’m always too anxious to see the finished product and kinda go crazy and forget to apply the paint in thin layers that overlap.
I did end up with a few spots where I applied too much paint which resulted in runs.
If you’re not as hasty as me, you can avoid this problem. (I think I’ve learned my lesson to slow down a little.)
If you do end up with any runs, you can smooth it out with a little sand paper after it has dried and spray that spot again. (We have a complete tutorial on how to fix runs here.)
The best piece of advice is to follow the directions on your product and take your time.

For the drawer pulls I used Antique Nickel spray paint.
I applied a few coats of paint knowing the drawer pulls would likely get a lot more use, and I want it to look great several years from now.
I also masked off the bottom of the dresser and painted the bottom edge with the Antique Nickel as well.

Fast forward to today for a minute and you can check out the top of the dresser.
This was a detail I finally added to the dresser this year!
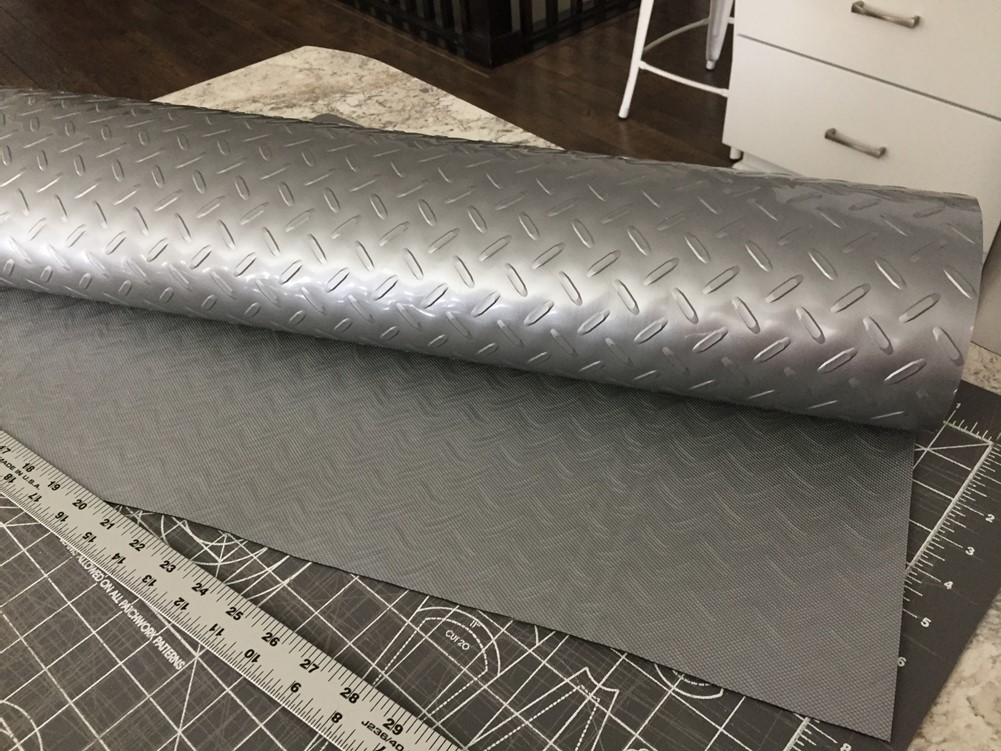
For all of these years I have wanted to add a diamond plated material to the top of the dresser but I just didn’t know what product to use that wasn’t super expensive or hard to work with.
Originally, I thought about using a sheet of the real deal but with the dresser having rounded corners I didn’t have the tools or the know how to cut the metal to size and round the corners without having sharp edges.
So, the top had only been spray painted for several years, which was ok…but lacking in character.
All these years later, I have FINALLY found the perfect material for this piece!
I am absolutely in love with the way it turned out!
Sing hallelujah and let the Heavens part, the PERFECT product has been discovered!

Carpet protector of all things! Who knew right?!
And it’s even the right color and sheen!
It was only $2.17/ft. and was really easy to work with!
Can you guess where I first laid my eyes on this beauty?
Yep, The Home Depot!
Ok, ok, maybe I’m getting a little carried away but I have been waiting for so many years to finally find the right product and I’m just SO happy to share it with you!
(This runner, sold by the foot may only be available in store at your local Home Depot, however I did find a ton of similar options they have available online. Take a look.)
If you’re new here, welcome! We’re so glad you’re here.
Let us introduce ourselves, we’re Michelle and Steph, a mom and daughter team who love to DIY and decorate our homes.
Not only are we passionate about making our homes warm, comfortable and unique, but it’s our mission to help you create that same feeling in your own home.
You’ll find ideas for repurposing, creating, decorating and making your home truly yours, while always mindful of a tight budget.
Undoubtedly we love finding ways to make your home look high-end on a small budget.
Plus you’ll also find a recipe or two as we share our family favorites with you.
We’d love it if you’d join our community of doers so you won’t miss any inspiration for your home.
We love new friends.

[mailerlite_form form_id=2]
Step 3: Applying the dresser top
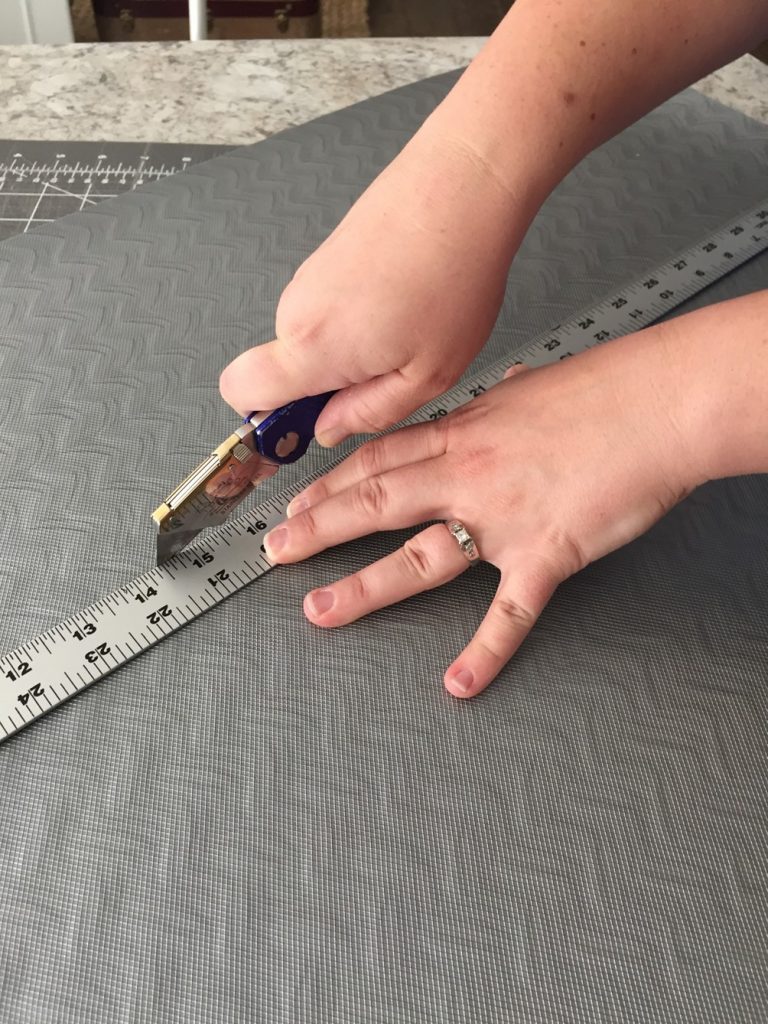
To fit the carpet protector to size, I placed a piece right side up on top of the dresser and traced around the edges underneath the protector to mark the size and shape.
Then I used a cutting mat, utility knife and yard stick to cut the carpet protector along the straight edges. To round the corners I used a pair of scissors.
The scissors actually worked a lot better than I thought they would. You can definitely use scissors to cut the entire piece if you don’t have access to these other tools.
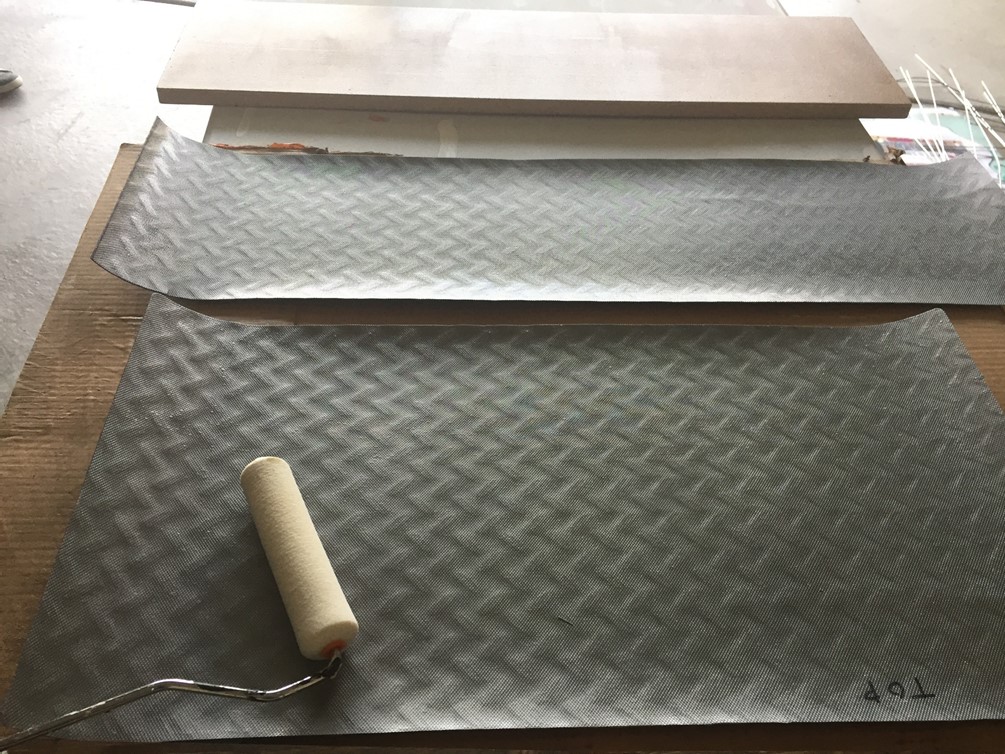
After tracing the shape of the dresser, be sure to label the top edge. I wasn’t sure how symmetrical and perfect the dresser top really was, so to be safe I wanted to make sure I adhered it in the same direction that I had traced the shape.
Let’s stay connected! Follow us on social media!

Using painters tape, mask off the side edges of the dresser top. You only want the adhesive to be on the top of the dresser.
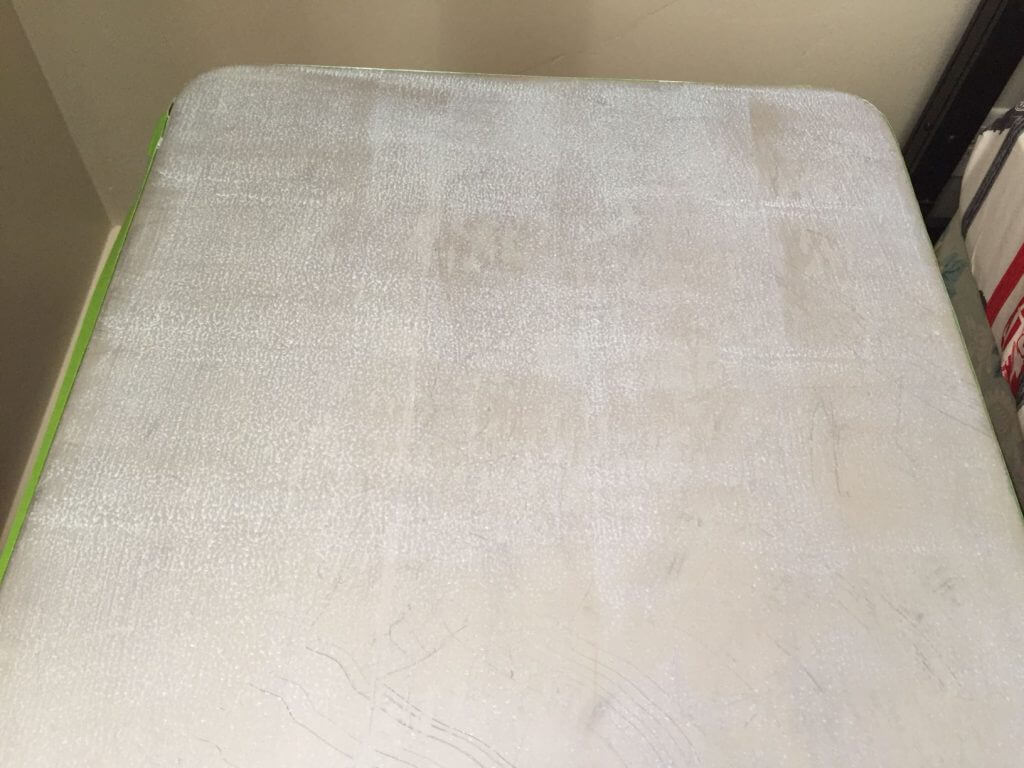
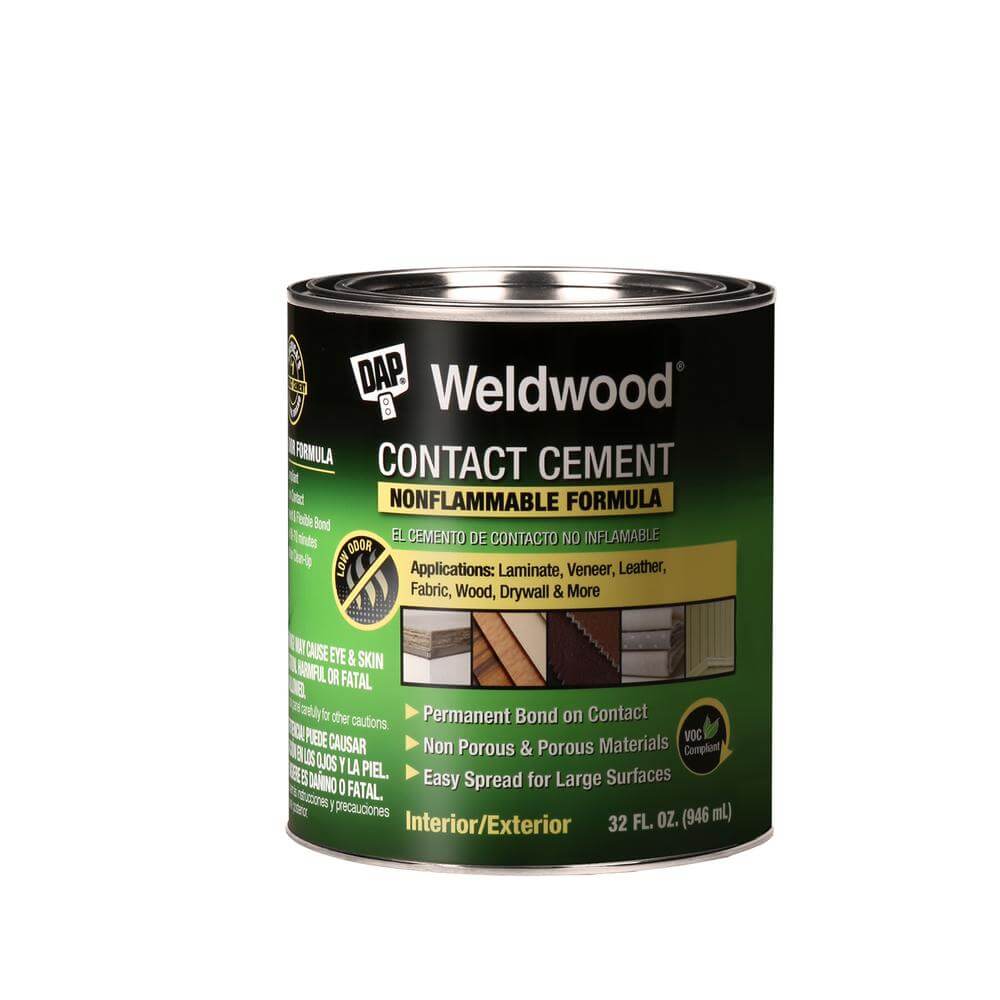
I used this contact cement by DAP. It was really easy to use, had very little to no odor and has a strong and durable bond.
Be sure to follow the directions for accurate application tips, and specific dry times.
I used a small foam roller to apply the adhesive to the top of the dresser as well as the carpet protector.
You definitely want 2 sets of hands to apply the carpet protector onto the dresser top.
My Mom and I carefully held it over the top of the dresser to line it up and then firmly pressed it into place, rubbing the entire surface to make sure it was adhered. Easy Peasy!
The final touch to this dresser was completed by adding 5″ casters from Harbor Freight.
There are all sorts of options for casters, from different colors, sizes and even some that lock.
I LOVE that Harbor Freight sends coupons ALL…THE…TIME.
If you’re a pretty frugal shopper like me you’ll buy 1 caster at a time so you can buy them all with a coupon.
Hey, there’s NO SHAME in saving money!

Overall, I am so happy how this project turned out! For approximately $70 this is a pretty dramatic makeover!
-Dresser $15
-Spray paint $18
-Diamond Plated Top $7
-Four 5″ casters with coupons $32
We hope you found some inspiration for your home today.
Please share your tips and ideas with us.
We love hearing from you!
If you’re new here, WELCOME! We love having new readers and friends!
You can learn more about us here.
Let’s stay connected! Join our DIY community of doers and you won’t miss the weekly updates and more inspiration for you always on a budget.
Sharing is caring!

Thanks for stopping by Sunny Side Design. Empowering you to create a home you love!
DISCLAIMER
This blog’s content is for entertainment purposes only and is not professional advice. By reading this blog and attempting to recreate a project, you assume all responsibility for any injuries or damages incurred. Read my full disclaimer here.
PHOTO USE AND CONTENT SHARING
All of the photographs you see here are the property of Sunny Side Design unless otherwise credited.
We love for others to share our work, so please feel free to use one photo with a link back to our website.
Pinning and sharing is always encouraged!
Please do not reproduce other Sunny Side Design content without permission.
Retailers We Love
- Anthropologie
- Birch Lane
- Crate & Barrel
- Joss and Main
- Lampsplus
- Mark & Graham
- One Kings Lane
- Pottery Barn
- Rejuvenation
- Serena & Lily
- Wayfair
- West Elm
- Williams Sonoma
- World Market
Be sure to follow us on Pinterest for even more home decor and DIY ideas.
To see what we are working on before it’s on our blog, follow us on Instagram.
You will also find our video tutorials on our YouTube channel.
- Paint an Old World Texture Finish on a Vase

- Easy Strawberry Chicken Salad with Lime Maple Balsamic Vinaigrette
- How to Fix Chipped Kitchen Cabinets with a Pen
- Easy 4th of July Door Decor You Can Make in Minutes


Wow, Steph! This is so cool. Looks like a tool chest for sure. Score on the diamond plate look alike. (Cyndi from YouTube)
Awe thanks Cyndi, you’re always the sweetest! This might be my favorite furniture makeover ever! The size, curved edges and the fact that I scored it from the thrift store for just $15…it screamed tool chest from the moment I laid eyes on it.