Join me for a tour of this fun industrial teen bedroom! As mentioned in the Painting the Perfect Stripe Tutorial I let Mr. G pick out the color scheme for his new room. He chose Kelly Green, Navy and White. I loved his choice! I thought it would be perfect using a combination of these classic colors to bring his new room into his teenage years. I wanted to create a space where he could kick back and relax, have space to do his studying and have it grow with him as he gets older.
If you’re working with a small space, you want to see 16 Ways to Make a Small Bedroom Look Bigger.
And for ideas for designing a kids bedroom that will grow with them, click here.
Sunny Side Design is a participant in the Amazon Services LLC Associates Program, an affiliate advertising program designed to provide a means for sites to earn advertising fees by advertising and linking to Amazon.com. As an Amazon Associate, this blog earns from qualifying purchases with no additional cost to you. Click here to read our full disclosure policy.


As you tour more of my home, you’ll see that I like stripes! I use them in almost every room. They can be fun and playful, yet using the right color scheme and right application they can even create a classic feel. My Mom and I love to attend the Parade of Homes each year if we can make it. I’m always drawn to the spaces that bring the theme of the room up onto the ceiling. When you’re in the space it helps draw your eye upward and makes the space feel taller and larger. I had seen some images of striped ceilings on Pinterest and knew I HAD to do this in Mr. G’s room!

Repurposing old items lying around and giving them new life is one of my passions! I’d had an old electrical spool (which I found for FREE) in our garage for over a year. I’d had plans to cut it apart and make a large wall clock, but I ended up using something else in the intended space. So, there it sat. In fact, my Hubby and I had even purged the garage and cleaned it out and I told him I’d only hang onto it for one more year before I would be willing to part with it. If I hadn’t done anything with it by then I would let it go.
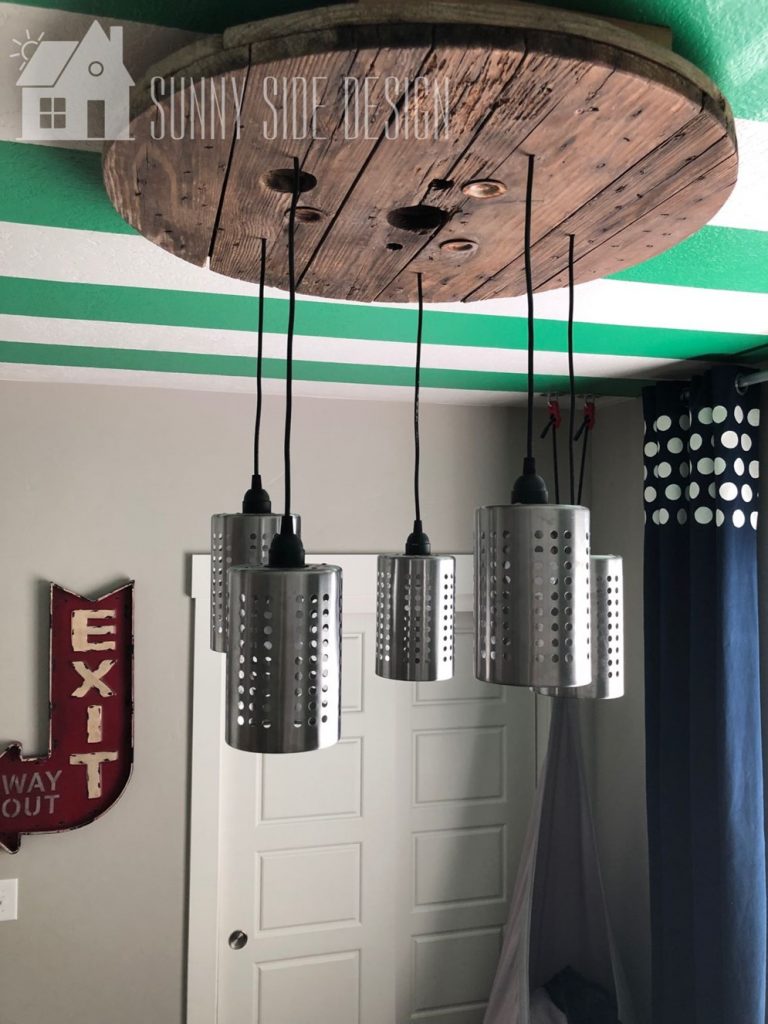
Shezam! Check out this awesome light fixture my parents helped me with! (Geez my Hubbs keeps getting out of these projects…well, to be fair he was helping keep the kids entertained while we worked on this one.) Electrical spool + Utensil Holders = 1 unique light fixture. You can check out the tutorial here.
Are you enjoying this project? Please Pin It, save it for later and share it with a friend.
Sharing is caring!

Using reclaimed wood adds character to this light fixture, while the utensil holders add that industrial touch. Using both of these elements together in the fixture also helps tie the space together. It plays off of the raw wood and electrical piping conduit of the built-in shelving unit and desk space.

My Hubby and I built this desk for Mr. G so he would have a quiet space to do his homework.
It also provides plenty of storage and space to showcase his awards, books, games and pictures.
You’ll find a detailed tutorial on how to build an industrial wood and pipe desk with shelves here.


With a bit of spray paint, I brought this office organizer (from the thrift store) up to date. It was pretty blah before but now that little pop of green adds so much to the space.
If you’re new here, welcome! We’re so glad you’re here.
Let us introduce ourselves, we’re Michelle and Steph, a mom and daughter team who love to DIY and decorate our homes.
Not only are we passionate about making our homes warm, comfortable and unique, but it’s our mission to help you create that same feeling in your own home.
You’ll find ideas for repurposing, creating, decorating and making your home truly yours, while always mindful of a tight budget.
Undoubtedly we love finding ways to make your home look high-end on a small budget.
Plus you’ll also find a recipe or two as we share our family favorites with you.
We’d love it if you’d join our community of doers so you won’t miss any inspiration for your home.
We love new friends.

[mailerlite_form form_id=2]

As a parent, I feel that as Mr. G is getting older I have more of a responsibility to teach and remind him that he will ultimately become what he wants to be in life. I’ve tried to incorporate positive sayings throughout his room to serve as reminders that he is capable of doing hard things, and that by keeping a positive attitude he can achieve anything he sets his mind to. I love this sign I found at Hobby Lobby that says “Attitude is everything, pick a good one”. Another I found that I love is the saying around the black and white silhouette of the world on this shelf. “To the world you may be one person, but to one person you may be the world.”


You can use just about anything for a nightstand. I picked up this awesome old water Barrell through the local classifieds! The lamp is even made out of the same electrical conduit pipe and joints as the shelving unit and desk. I’d thought to make my own but found this one at Hobby Lobby and it was half off so a snagged it! It would likely have cost the same or more to build it on my own because all of the joints add up quickly. I love the industrial character both of these pieces add to the room.
Let’s stay connected! Follow us on social media!

My Mom made this artwork for Mr. G’s room. Here’s another way to utilize old pallet wood and give it a new purpose. She applied green vinyl to the pallet wood in the shape of the world, and black vinyl with the saying “Adventure…awaits”. I later found the metal looking propeller at Rod Works and thought it would compliment the pallet artwork and bring in that metal look mixed with old repurposed wood as has been done around the room with the desk and light fixture. It also adds a little travel vibe to the space and lets me reiterate that Mr. G can go anywhere and do anything in his life if he sets his mind to it. This is his journey. The final touch to this grouping are the time zone clocks above the propeller. It helps tie the whole travel vibe together.
Part of the fun I have with a space is the hunt for a specific item. I scoured the classifieds for a locker bed, I believe we picked this up for about $40. Sure, you can pick one up from Pottery Barn for several hundred dollars, but that doesn’t fly on my budget! Plus, where’s the fun if you don’t have to hunt for something specific? It even came with about 10 different colored locker fronts so you can switch out the colors. I used the white and blue in their original state and the same spray paint that I used on the office organizer for the green locker front.

Here we used electrical conduit pipe, elbows and flanges for the curtain rod. The same materials used to build the shelving unit and desk. I roped my Mom into helping me paint these polka dots on the curtain! Check out the tutorial here. The hanging chair came from IKEA.

Another aspect of this room that I love is all of the attention to detail that ties the space together. (Well, the cat’s out of the bag now! Yes, I am anal: I exhibit personality traits such as orderliness, frugality, being extremely neat, and careful. This doesn’t mean my house isn’t a mess most days! It’s hard to stay on top of an orderly home with 3 busy kiddos, but when I’m working on a project, I feel it’s all the little details that help pull a space together.) As you look throughout the space, you’ll notice repeating shapes and materials that help tie everything together. From the straight lines that repeat in the stripes on the bedding and ceiling to the rectangles on the doors, to the rectangular shapes of the shelves. To the circles you see in the shape of the hanging chair, the light fixture, details in the curtains, flanges, grommets on the trunk in front of the bed and on the propeller, to the wall clocks and back of the chair and headboard of the bed. All of these repeating shapes and patterns help tie the space together.
Another fun idea to add to a teen bedroom is LED strip lights.
See how easy they are to install and conceal here.
We hope you found some inspiration for your home today.
Please share your tips and ideas with us.
We love hearing from you!
If you’re new here, WELCOME! We love having new readers and friends!
You can learn more about us here.
Let’s stay connected! Join our DIY community of doers and you won’t miss the weekly updates and more inspiration for you always on a budget.
Sharing is caring!

Thanks for stopping by Sunny Side Design. Empowering you to create a home you love!
DISCLAIMER
This blog’s content is for entertainment purposes only and is not professional advice. By reading this blog and attempting to recreate a project, you assume all responsibility for any injuries or damages incurred. Read my full disclaimer here.
PHOTO USE AND CONTENT SHARING
All of the photographs you see here are the property of Sunny Side Design unless otherwise credited.
We love for others to share our work, so please feel free to use one photo with a link back to our website.
Pinning and sharing is always encouraged!
Please do not reproduce other Sunny Side Design content without permission.
Retailers We Love
- Anthropologie
- Birch Lane
- Crate & Barrel
- Joss and Main
- Lampsplus
- Mark & Graham
- One Kings Lane
- Pottery Barn
- Rejuvenation
- Serena & Lily
- Wayfair
- West Elm
- Williams Sonoma
- World Market
Be sure to follow us on Pinterest for even more home decor and DIY ideas.
To see what we are working on before it’s on our blog, follow us on Instagram.
You will also find our video tutorials on our YouTube channel.
- How to Build a Birdhouse with CharmingThrift Store Finds

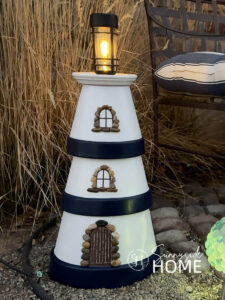
- Simple Clay Pot Lighthouse Garden Decor Project
- Simple Tabletop Fire Bowl DIY in Under 10 Minutes
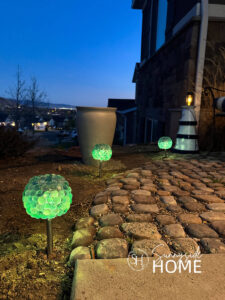
- Simple Dollar Store Solar Lights Glow-Up