Create a vintage-style Christmas tree collar that looks like old tin ceiling tiles—without the high price tag using Dollar Tree tiles. A budget-friendly DIY that looks just like the real thing—follow our step-by-step guide to make your own!
This year, my mom is decorating with a charming vintage-style Christmas theme, and she’s been dreaming of a tree collar that captures the look of old-fashioned tin ceiling tiles.
The problem?
Every one we found had a not-so-vintage price tag.
So, we decided to get creative!
Using affordable Dollar Tree tiles, we were able to recreate that timeless tin tile look—and you’d never guess they’re actually plastic.
This easy DIY Christmas tree collar comes together in no time, and the results are absolutely stunning.
Keep reading for our step-by-step guide to make your own and see just how beautiful budget decorating can be!
Sunnyside home is a participant in the Amazon Services LLC Associates Program, an affiliate advertising program designed to provide a means for sites to earn advertising fees by advertising and linking to Amazon.com. As an Amazon Associate, this blog earns from qualifying purchases with no additional cost to you. Click here to read our full disclosure policy.
Why You’ll Love This DIY Tree Collar
You’re going to love this DIY tree collar because it’s the perfect blend of budget-friendly and beautiful!
With just a few Dollar Tree tiles, you can create a custom piece that looks like high-end metalwork for a fraction of the cost.
Even better, Dollar Tree carries a variety of tile styles, so you can easily match your Christmas decor theme—whether you love a vintage, farmhouse, or modern look.
This project requires only a few basic tools, making it an ideal weekend DIY, and once it’s finished, you’ll have a sturdy, reusable tree collar you can enjoy year after year.
Are you enjoying this project? Please Pin It, save it for later and share it with a friend.
Sharing is caring!

Supplies Needed
To make this DIY Christmas tree collar, we kept things simple and used materials we already had on hand.

Here’s what you’ll need:
- scrap lumber (we used leftover shelves from a build in desk).
- wood glue
- nails
- spray adhesive
- Dollar Tree tiles
- black spray paint
- white spray paint
- fine grit sandpaper
- saw
- pneumatic nail gun (but you can easily hammer it together by hand)
- corner clamps (optional, but helpful)
Simple tools, inexpensive supplies, and a stunning end result!
If you’re new here, welcome! We’re so glad you’re here.
Let us introduce ourselves, we’re Michelle and Steph, a mom and daughter team who love to DIY and decorate our homes.
Not only are we passionate about making our homes warm, comfortable and unique, but it’s our mission to help you create that same feeling in your own home.
You’ll find ideas for repurposing, creating, decorating and making your home truly yours, while always mindful of a tight budget.
Undoubtedly we love finding ways to make your home look high-end on a small budget.
Plus you’ll also find a recipe or two as we share our family favorites with you.
We’d love it if you’d join our community of doers so you won’t miss any inspiration for your home.
We love new friends.
Measure and Plan Your Tree Collar Size
Before you start building, it’s important to measure your tree stand so you know exactly how big the inside of your tree collar needs to be.
Begin by measuring the widest part of your stand, then add a little wiggle room so it slides in easily.
For ours, we needed an interior measurement of 20 inches, so with our ¾-inch thick wood, we cut our panels to 21 inches wide and 11½ inches tall—the finished height of our tree collar box.
A height between 10–14 inches usually creates a nicely balanced look under most Christmas trees, giving you plenty of coverage without overwhelming the base.
Taking time to plan these dimensions ensures your finished tree collar fits perfectly and looks beautifully proportioned.
Cut and Assemble the Box

Once your measurements are set, it’s time to cut and assemble the base structure of your tree collar.
We cut all four panels from scrap wood from the built in desk we made a few years ago.
Our dimensions are 21″ x 11½” for all 4 boards.

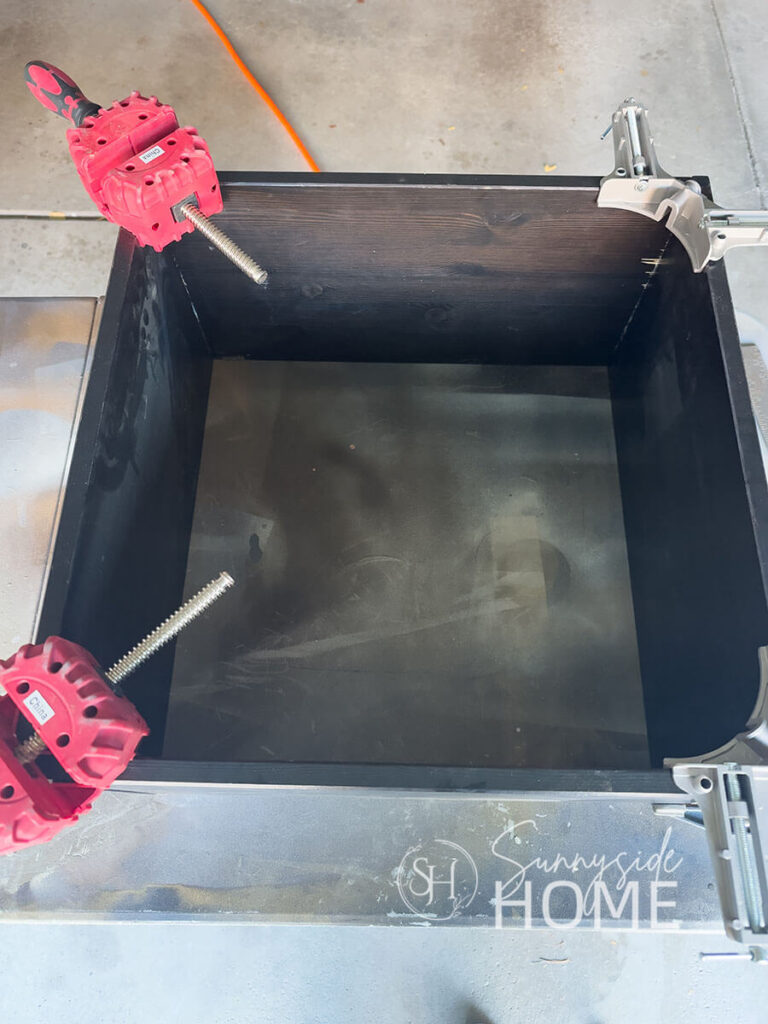
To assemble, apply wood glue along the cut edge of one panel and align it with the next to form a perfect 90° corner.
A corner clamp is incredibly helpful here, keeping everything square as you work your way around the box, but you can also get a helper to hold it in place while you secure it with nails.
Continue adding glue to the edges, attaching each panel in the same way, and clamping until the full box shape comes together.
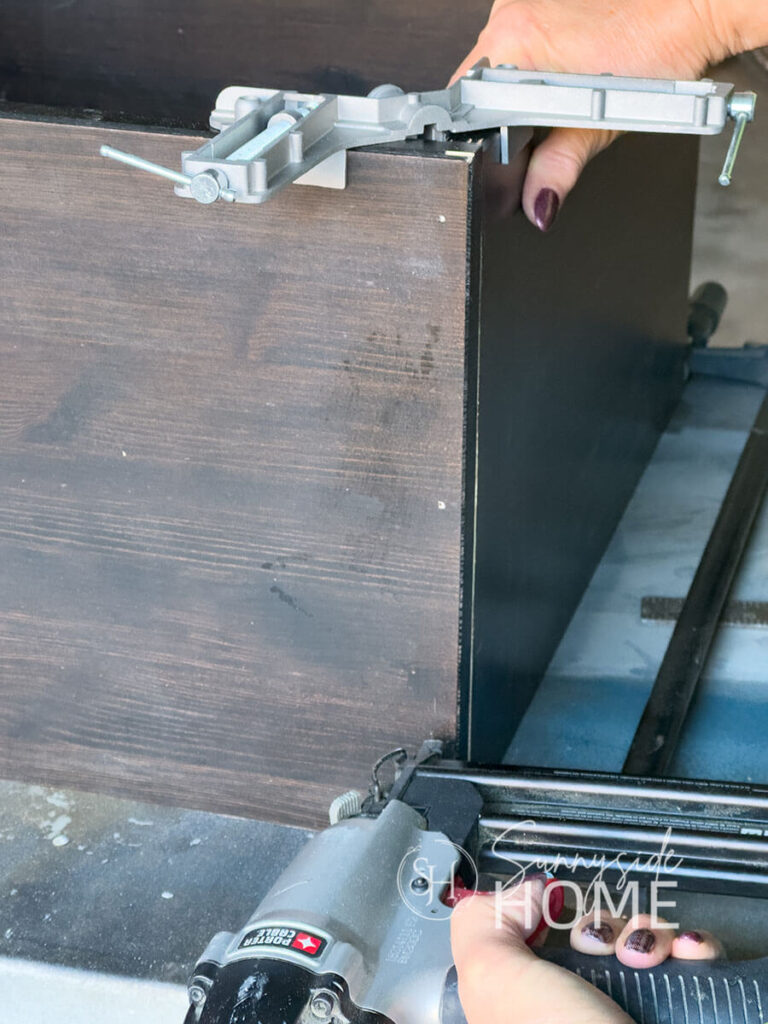
Once aligned, secure each corner with brad nails—we used three nails per corner.
If you want extra durability, you can add corner brackets inside the box for additional reinforcement.
This simple method creates a sturdy, long-lasting base for your DIY tree collar.
Let’s stay connected! Follow us on social media!
Prep and Adhere Tiles
With the box assembled, it’s time to prep and attach the Dollar Tree tiles that give this tree collar its vintage “tin” look.
Start by trimming the tiles to match the height of your box—we cut ours down to 11½ inches.


Next, make sure the tile pattern is centered on each side.
Our box required two tiles per side, and since two full tiles measure 24 inches while our box sides measured 21¾ inches, we needed to trim off a total of 2¼ inches.
To keep the design centered, we removed 1⅛ inches from one side of each tile.
The good news is that these tiles are lightweight plastic, so they’re super easy to cut using a craft knife or scissors.
Once everything is trimmed and centered, you’re ready to adhere the tiles.
Even though the Dollar Tree tiles are labeled as self-adhesive, we found that the stickiness wasn’t strong enough for a long-lasting hold.
To get better adhesion, we peeled off both the clear protective sheet and the white adhesive backing—don’t worry, they come off easily and are only lightly attached around the tile edges.
Once the backing is removed, spray one side of your wooden box with adhesive spray, following the instructions on your can.
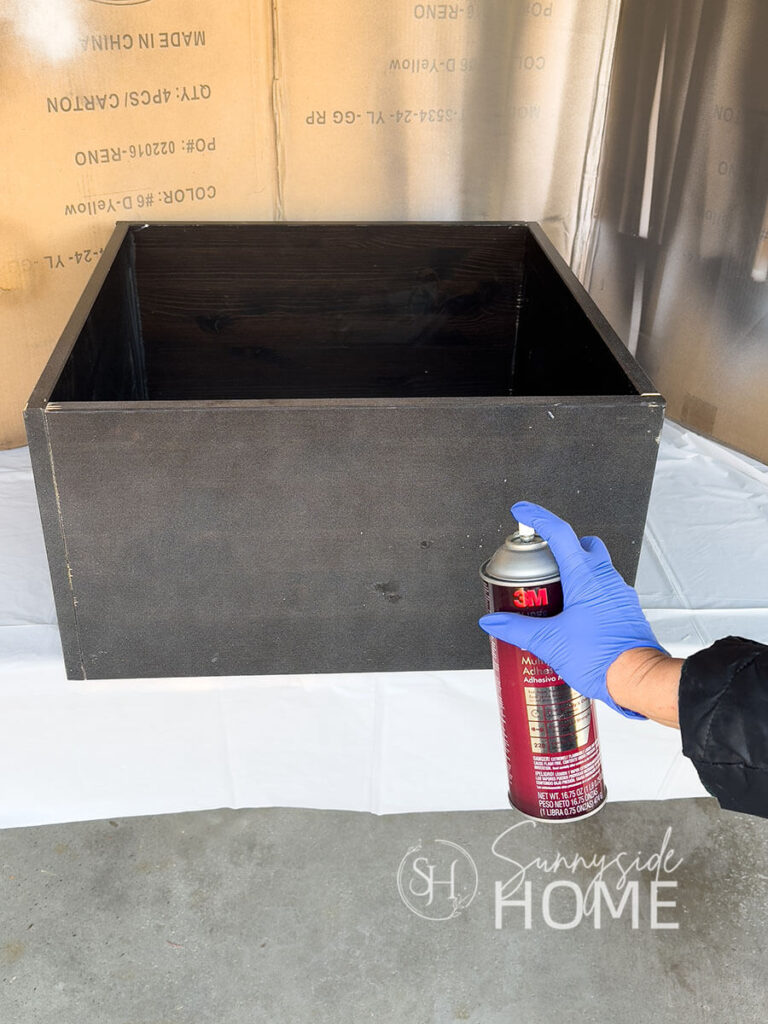
We waited about 30 seconds for the adhesive to get tacky, then pressed the first tile into place, carefully aligning it with the top edge and side of the box.
Add the second tile next, making sure the pattern lines up.
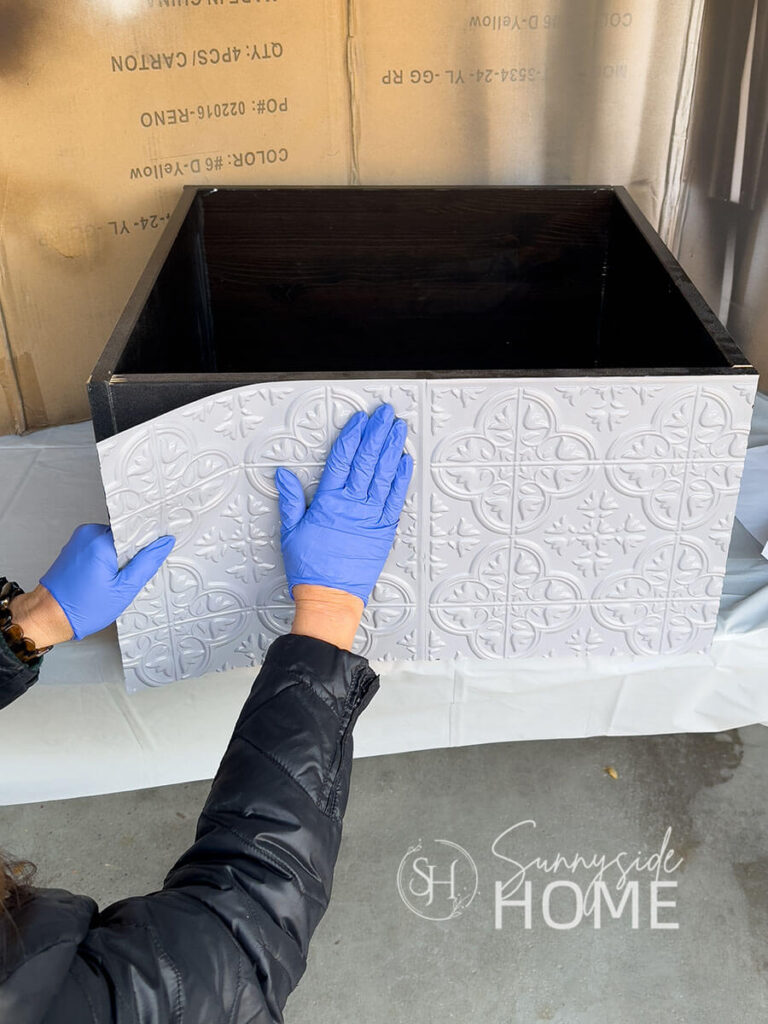
Repeat this process on all four sides of your tree collar box.
This method ensures the tiles stay firmly in place and gives you a beautifully polished finish.
Paint the Tree Collar
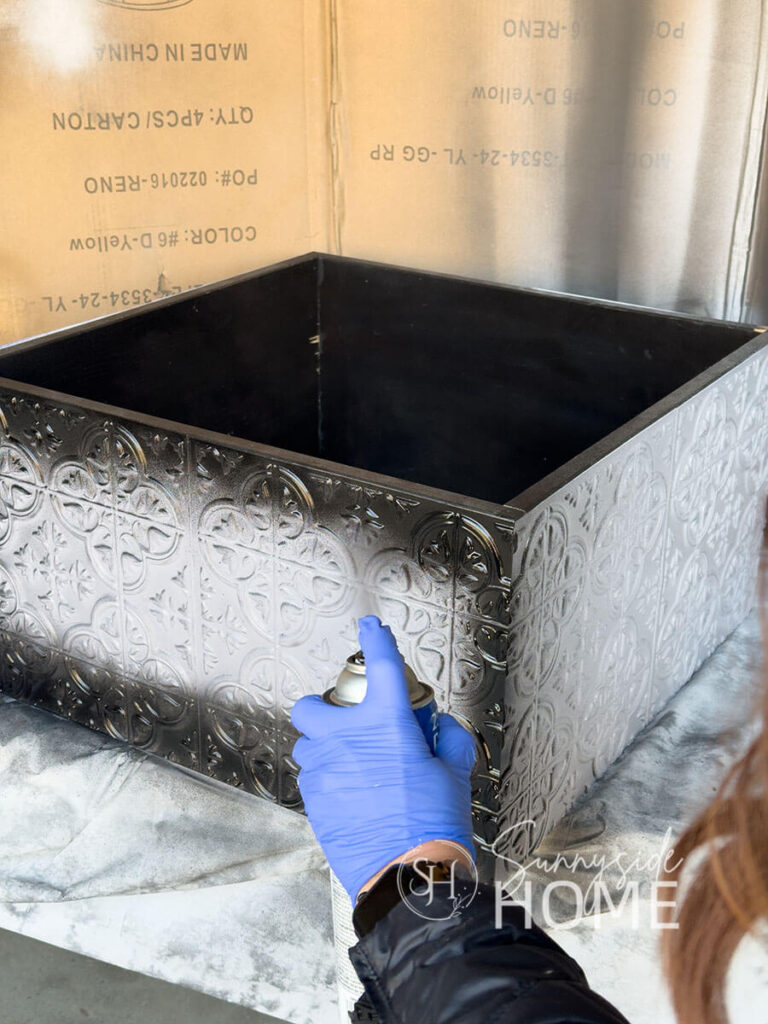
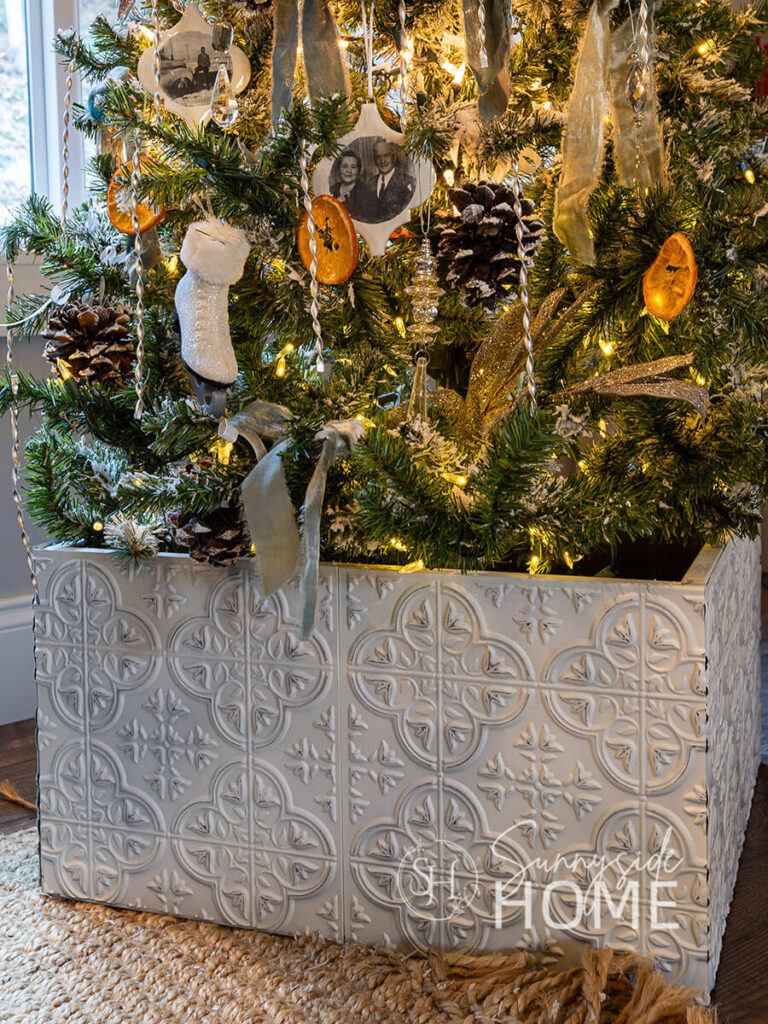
To create the look of worn, vintage tin, we used a simple layered paint technique that gives the Dollar Tree tiles a surprisingly realistic metal finish.
We started by spraying the entire collar with a flat black spray paint to act as the base layer, then let it cure for about two hours.

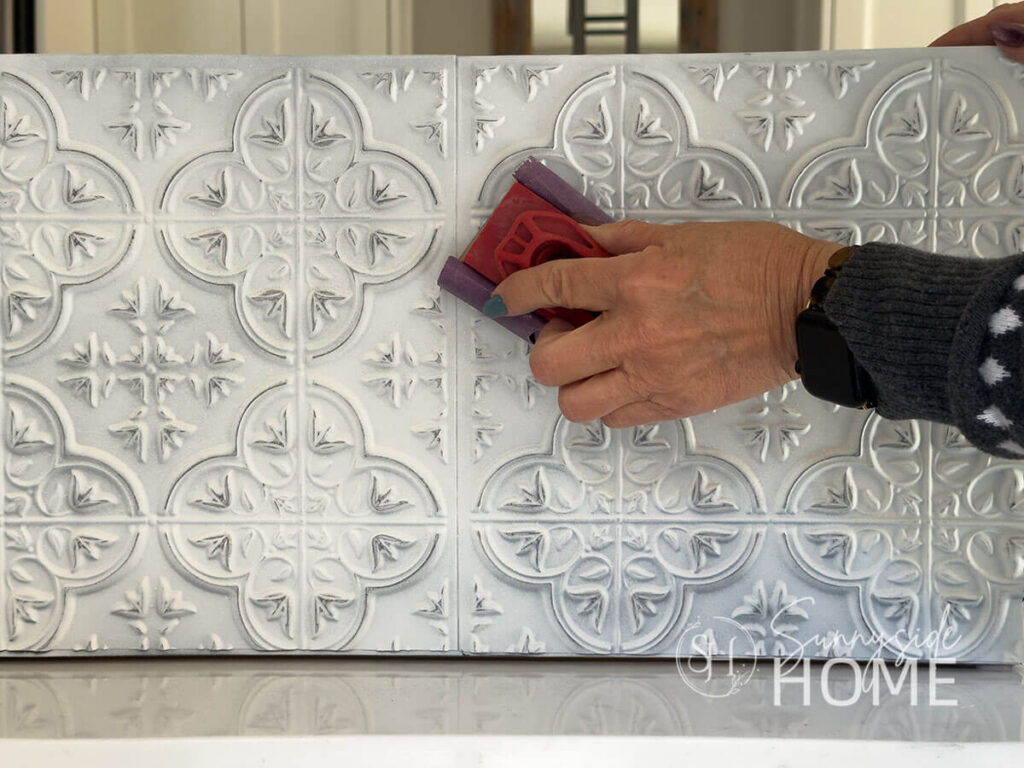
Once dry, we followed with a coat of matte white spray paint with a chalky finish and allowed it to dry overnight.
The next morning, we used fine-grit sandpaper to gently sand the raised details and edges, revealing the black underneath and creating that authentic, timeworn patina.
If you want to experiment with other looks, you can also try layering metallic paints like antique silver, aged copper, or pewter, or add extra texture using dry brushing or a light wax finish.
These small touches make the collar look like real distressed metal—without the weight or the cost.
The Reveal
Once your tree collar is finished and in place, the transformation is instant—your Christmas tree suddenly feels elevated, polished, and full of character.
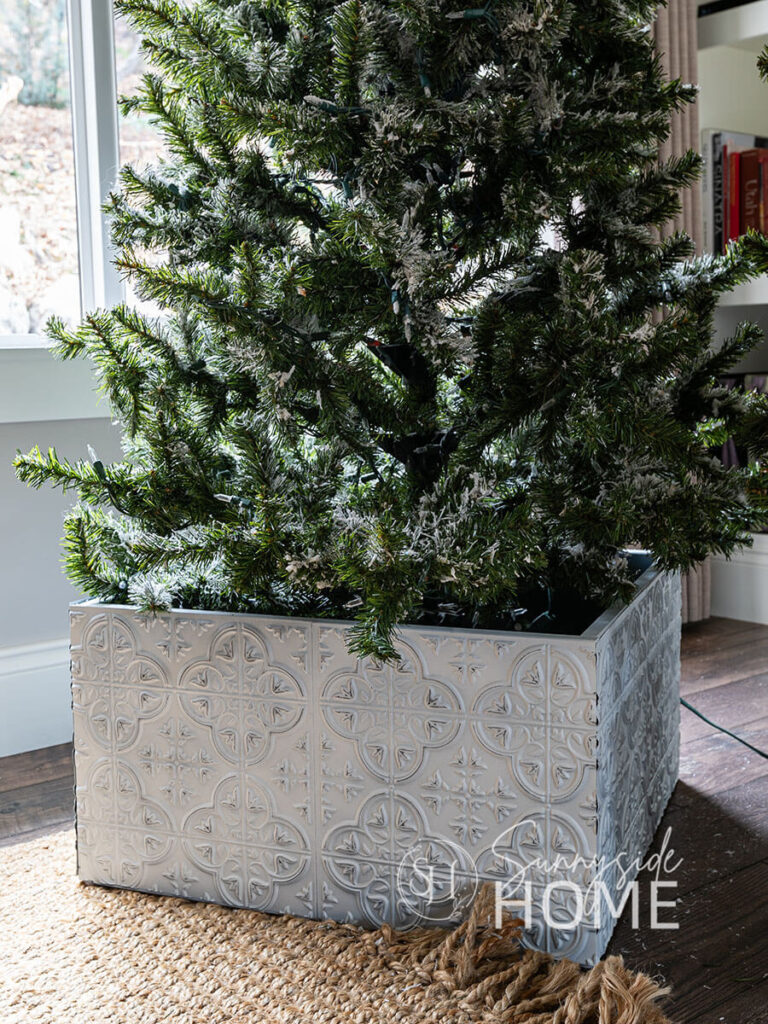
The vintage tin–inspired finish adds the perfect touch under the tree, especially when paired with vintage style ornaments.
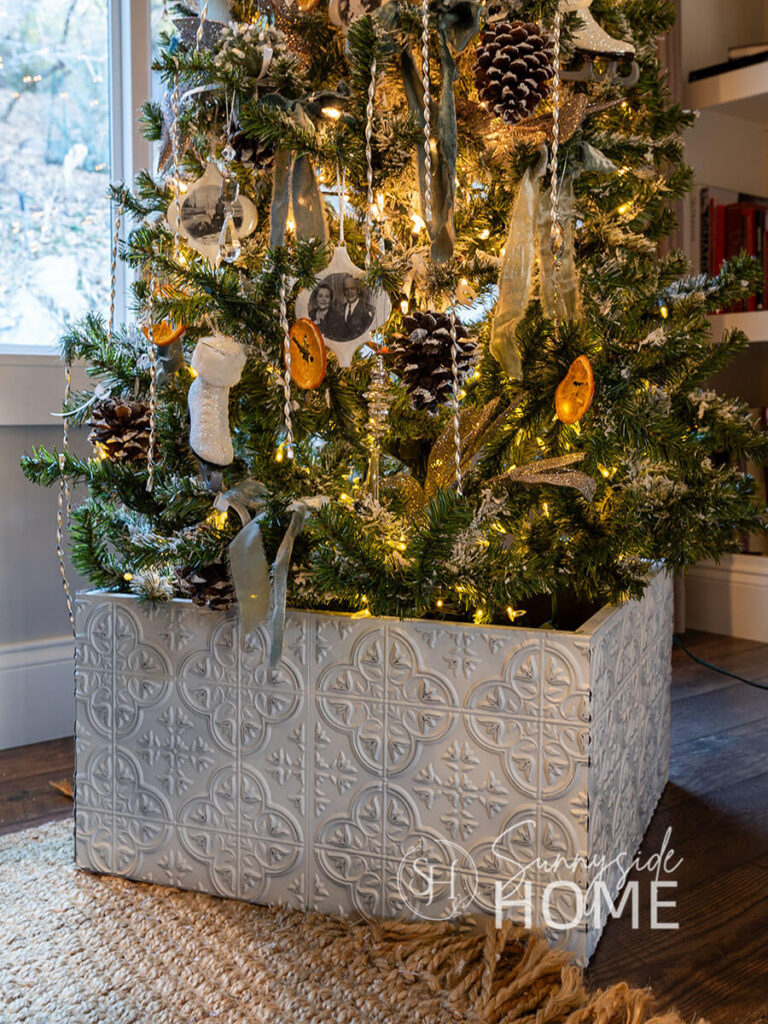
My mom captured that charming vintage look on her tree with her Victorian tinsel, dried orange slices, and her personalized tile ornaments.
This Christmas tree collar is incredibly versatile too: style it with farmhouse décor for a rustic holiday look, or keep things light and airy with coastal-inspired ornaments and soft neutrals.
I can definitely see this looking amazing in my home with my coastal Christmas décor.
No matter how you decorate, your handmade tree collar becomes a beautiful focal point that pulls the whole holiday scene together.
Shop Christmas Tree Collars

More Christmas Ideas
- Beautiful DIY Christmas Bells Made From Recycled Materials
- Simple Frosted Pinecone Christmas Ornaments
- How to Make a Christmas Star with Bottlebrush Trees
- 8 Beautiful Ways to Put Ribbon on a Christmas Tree
- Quick and Easy Cameo Christmas Ornaments to Make
- How We Made Christmas Bells Using Dollar Tree Items
- How to Make a Christmas Wreath with Yarn
- How to Make Christmas Bell Decorations with a Toilet Paper Roll
- How To Make Stunning DIY Glitter Ornaments
- How to Make a Quick & Easy Christmas Countdown Advent Calendar
- Cozy Christmas Decorations That Are Quick & Easy
- Simple Ideas to Decorate for Christmas Indoors
And click here for ideas for storing and organizing your Christmas decorations.
Final Thoughts
Creating this simple Christmas tree collar was such a fun and rewarding project, and we love how perfectly it fits into the vintage Christmas theme.
It’s amazing what a few inexpensive materials and a little creativity can become!
Whether you’re decorating on a budget or just love adding handmade touches to your holiday home, this project is definitely worth trying.
We hope it inspires you to make one of your own—and we’d love to see how you style it under your tree!
We love hearing from you!
If you’re new here, WELCOME! We love having new readers and friends!
You can learn more about us here.
Let’s stay connected! Join our DIY community of doers and you won’t miss the weekly updates and more inspiration for you always on a budget.
Sharing is caring!
Thanks for stopping by Sunnyside Home. Empowering you to create a home you love!
Retailers We Love
- Anthropologie
- Birch Lane
- Crate & Barrel
- Joss and Main
- Lampsplus
- Mark & Graham
- One Kings Lane
- Pottery Barn
- Rejuvenation
- Serena & Lily
- Wayfair
- West Elm
- Williams Sonoma
- World Market
Be sure to follow us on Pinterest for even more home decor and DIY ideas.
To see what we are working on before it’s on our blog, follow us on Instagram.
You will also find our video tutorials on our YouTube channel.
What New . . .
- 25 Must See Ideas for Organizing Under Kitchen Sink

- How to Decoupage a Vase with Blue and White Napkins
- 18 Daily Cleaning Habits for a Neat and Tidy Home
- How to Paint a Ceramic Pitcher Inspired by Pottery Barn