Are you looking for ideas to add architectural interest in your home? Undoubtedly I’ve been wanting to add an accent wall in my master bedroom for a long time. Not only is this board and batten accent wall easy to install, but it’s also easy on the budget.
Today I’m excited to share tips on how to install a board and batten accent wall that costs less than $50! It’s easy enough that my hubby and I had this beauty installed in just one day!
For more ideas to add value to your home, take a look at 10 Sensational Home Improvement Ideas on a Budget.
To see the complete video tutorial of the installation of this board and batten wall, click here.
You will see this transformation in a sped up process as I guide you through each of the steps.
Would you like to see more of the DIY projects in this master bedroom makeover? Then take a look at these post:
- Easy No Sew Hemming
- How To DIY Your Own Bay Window Curtain Rod
- Dresser Refresh
- How to Use SaltWash for an Amazing Worn & Weathered Finish
- Adding Coastal Style to an Orb Chandelier
- How to Age Wood with Vinegar & Steel Wool
- Easy Embellished Lampshades for a Design Look
- How to Repair Light Fixture Ceiling Hole
- The Most Clever DIY Hidden TV Cabinet
- How To Resize Canvas Art
- Master Bedroom Makeover on a Budget
Supplies Needed
A few supplies are needed to easily install this board and batten accent wall.
- Visual blueprint of design to aid during installation
- Precut and lightly sanded boards
- Large and small level (A small one is fine, but a larger one is helpful for the vertical boards.)
- Pneumatic brad nailer
- Box of 2″ brads
- Pencil.We also used a white pencil to mark on the dark navy wall.
- Speed square
- Measuring tape
- Tube of liquid nails construction adhesive
- Caulk
- Caulk gun (you can buy these for a couple dollars but it’s definitely worth spending a little more and getting one that works better. In my experience, you can get a decent one for $10-$15. It will make caulking SO much easier!)
Sunny Side Design is a participant in the Amazon Services LLC Associates Program, an affiliate advertising program designed to provide a means for sites to earn advertising fees by advertising and linking to Amazon.com. As an Amazon Associate, this blog earns from qualifying purchases with no additional cost to you. Click here to read our full disclosure policy.

Prep Accent Wall
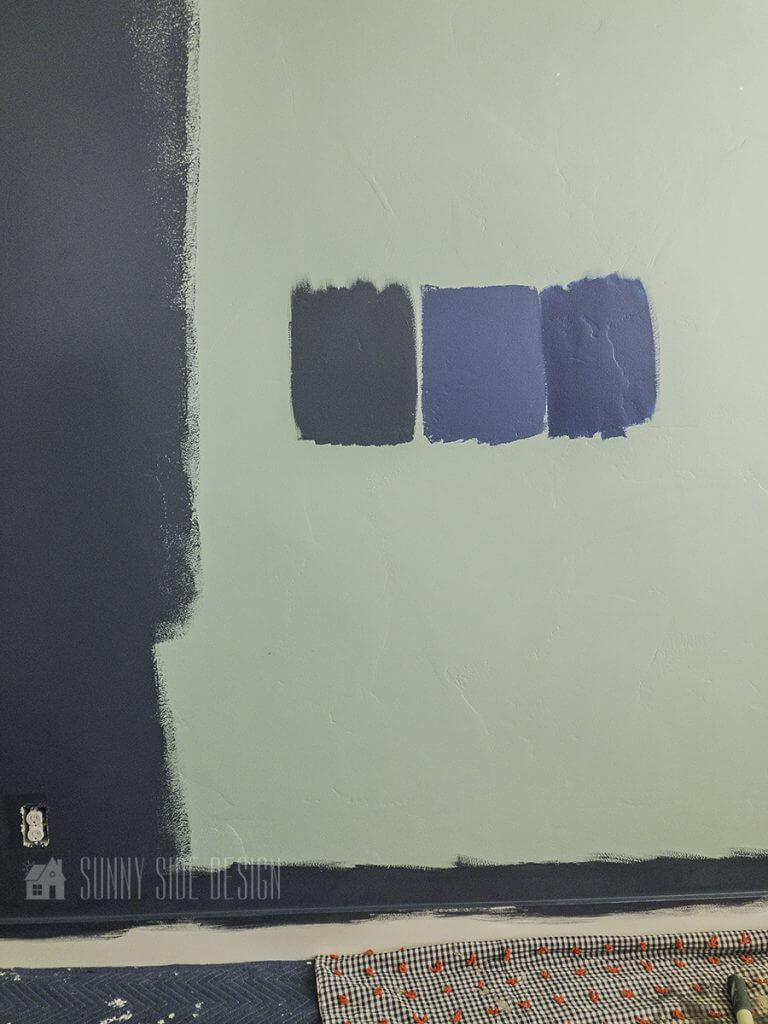

We opted to paint the wall before the board and batten accent wall was installed. It was much easier to paint the entire wall rather than to individually paint inside each of the frames created by the design.
Ultimately I chose to use Hale Navy by Benjamin Moore. However I opted to have it mixed as a custom color at The Home Depot. What can I say? Behr paint has great coverage at a fraction of the cost.
In addition, the remaining walls in the room were painted white to allow this accent wall to really be the feature in our room.
For more painting tips, see painting a room fast and with less mess.
If you love a dark wall, then check out this dark and moody man cave and this moody home office library.
Are you enjoying this project? Please Pin It, save it for later and share it with a friend.
Sharing is caring!
Tips for Painting Existing Base Boards
Pro Tip:
- First, take a long drywall taping knife and carefully slide it under the baseboard.
- Then carefully paint along the edge of the knife and baseboard. Avoid loading the brush with too much paint to prevent any bleeding.
- Last, slowly drag the brush over the edge again to remove any excess paint. Then finish painting the remaining baseboard.
Again this tip does take a little bit of time but it does keep the flooring clean!
Plan the Board and Batten Accent Wall Design

Now for the fun part! As a visual person it’s helpful for me to map things like this out. This is easy to do with a simple piece of graph paper and dimensions of the wall.
Each board in the design are 4″ wide. So I cut several strips of paper that would be equivalent to this measurement on my chart. Subsequently I was able to move them around and play with the design of the accent wall before committing to anything.
Such a helpful step!
If you’re new here, welcome! We’re so glad you’re here.
Let us introduce ourselves, we’re Michelle and Steph, a mom and daughter team who love to DIY and decorate our homes.
Not only are we passionate about making our homes warm, comfortable and unique, but it’s our mission to help you create that same feeling in your own home.
You’ll find ideas for repurposing, creating, decorating and making your home truly yours, while always mindful of a tight budget.
Undoubtedly we love finding ways to make your home look high-end on a small budget.
Plus you’ll also find a recipe or two as we share our family favorites with you.
We’d love it if you’d join our community of doers so you won’t miss any inspiration for your home.
We love new friends.

[mailerlite_form form_id=2]
Shop for Supplies

Off to The Home Depot to buy supplies!
I love getting down and dirty with all of our DIY projects.
With the help of a kind Home Depot employee I had a 4′ x 8′ x 1/2″ piece of MDF board cut into 4″ strips.
Easy peasy!
Getting the Board and Batten Materials Home

If only getting these supplies home were as easy!
Along with the cut MDF strips, I purchased a 16′ primed baseboard for the top border of the design.

Clearly it’s apparent I use our SUV like a truck and haul everything…but fitting a 16′ board inside was a bit tricky!
Luckily the baseboard was pliable so I was able to bend it down into the back of the SUV while letting the other end stick out the front passenger window a little.
(Another kind Home Depot employee supplied me with a little rope to tie the end of the wood onto the side mirror. In small talk I mentioned he’d probably seen people try to do crazier things before…and he agreed! As for me, I think he had a good laugh at my expense.)
In spite of this I’m glad the wood was pliable and didn’t break as I crammed it in there! Oh the things I do…the things I do!
Prep Word for Board and Batten Accent Wall
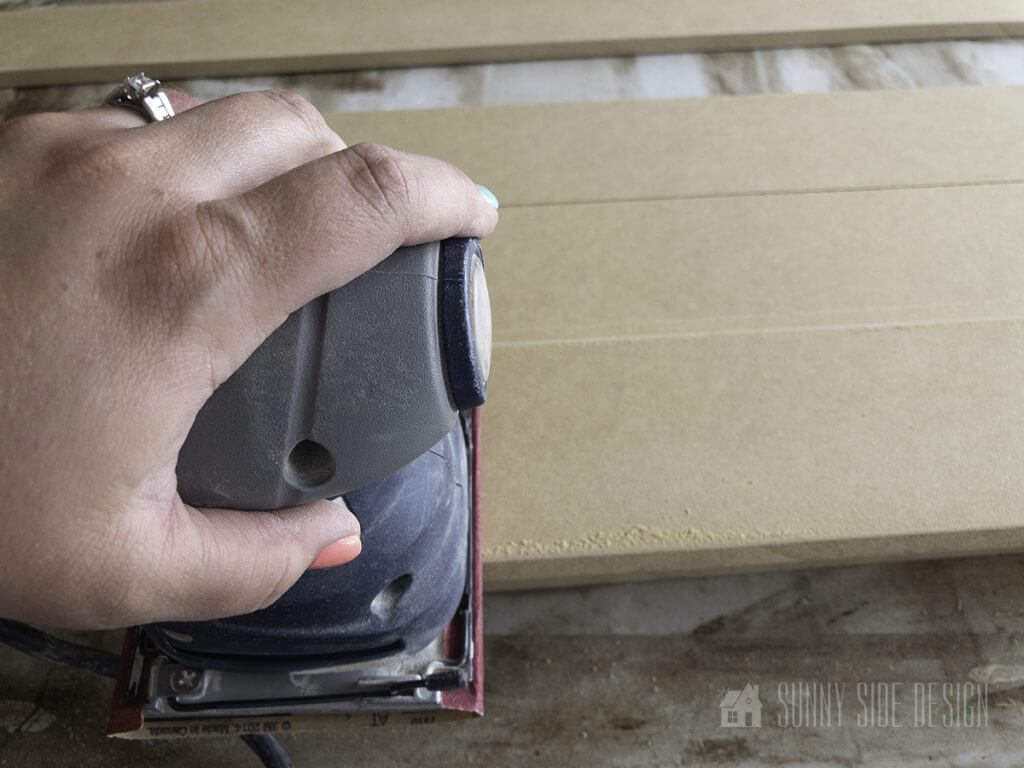
Use a palm sander to remove any rough areas along the cut edges of the pieces of MDF.
Not only will this make your finished board and batten wall look more professional, but it will make it easier to keep clean.
Rough edges are dust magnets!
Let’s stay connected! Follow us on social media!
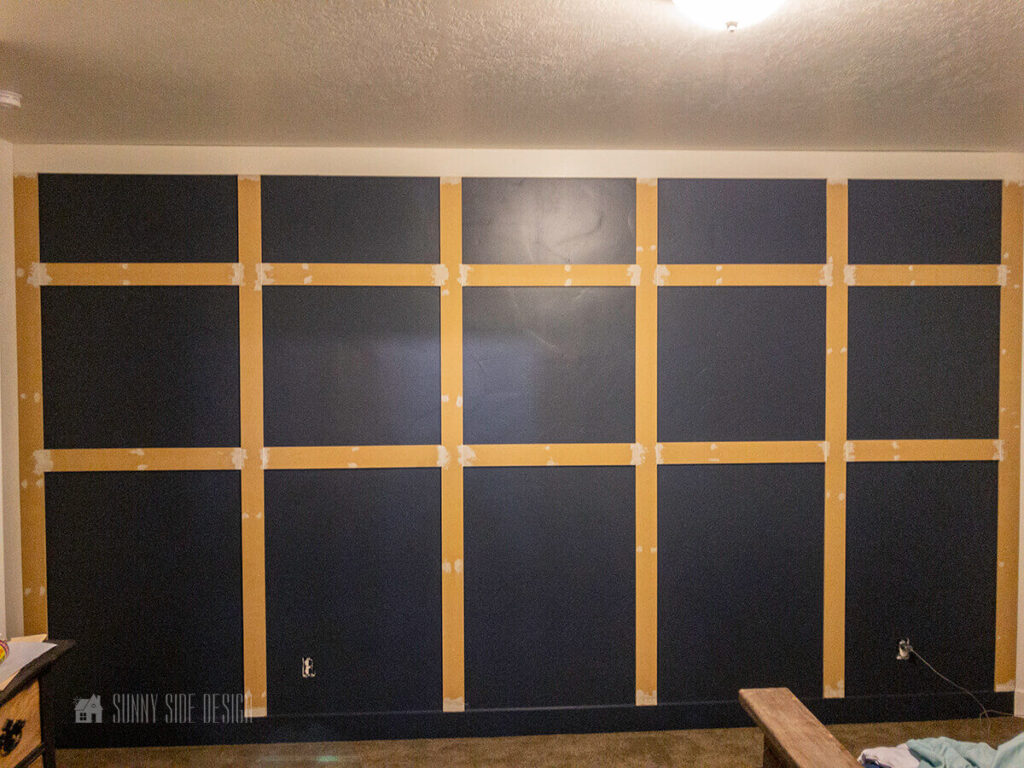
Installing Board and Batten Accent Wall

Gather all the supplies needed, it’s time to get this accent wall installed!
Install Top Horizontal Board

Measure the length of the wall.
Cut the craftsman baseboard to size and install.
We used a craftsman baseboard for the top horizontal board for our accent wall.
This was the header board will not have any seams.
We applied liquid nails to the backside of each board before nailing them into place.
The baseboard was nailed into position at the top of the wall flush to the ceiling.
Install Vertical Boards

After the header border of the design is installed, proceed to install all the vertical boards.
First place the board into position for a dry fit.
Then apply the Liquid Nails adhesive.
Place the board onto the wall in the designated place.
Next use a level to ensure the board is aligned and plumb.
At that point, secure into place with brads.
We began on the far right wall adjacent to the bay window and worked our way toward the opposite wall.

Once the first board has been secured to the wall, use the measuring tape and mark where the next board will be installed.
Be sure to mark the wall near the base board at the bottom and the top of the wall.
Continue to install each vertical board.
Carefully measure where the next board will be installed.
Mark the wall.
Dry fit into place.
Apply adhesive.
Place back into position.
Use the level to ensure the board is plumb and secure with brads.
Install Horizontal Boards
Now install the first horizontal row.

Measure up from the floor and place a mark on the wall to the desired height.
Next, measure the horizontal distance between the vertical boards and cut a piece to fit.
Repeat this step for all horizontal boards on the first row.
To speed up the process, we measured and cut all the horizontal boards at the same time.
Once again after the board has been fit to size, apply the adhesive, position on the wall and secure into place.

Follow this step for the upper row.
To do this measure down from the ceiling to the desired height and marked the wall.
PRO TIP: Take the time to dry fit each piece before applying the adhesive and placing on the wall.
Some boards may need to be trimmed slightly even though they were measured and cut carefully.
Finish Work
Fill in all of the nail holes and seams with wood filler.
Naturally, the less filler you apply the easier the next step will be.
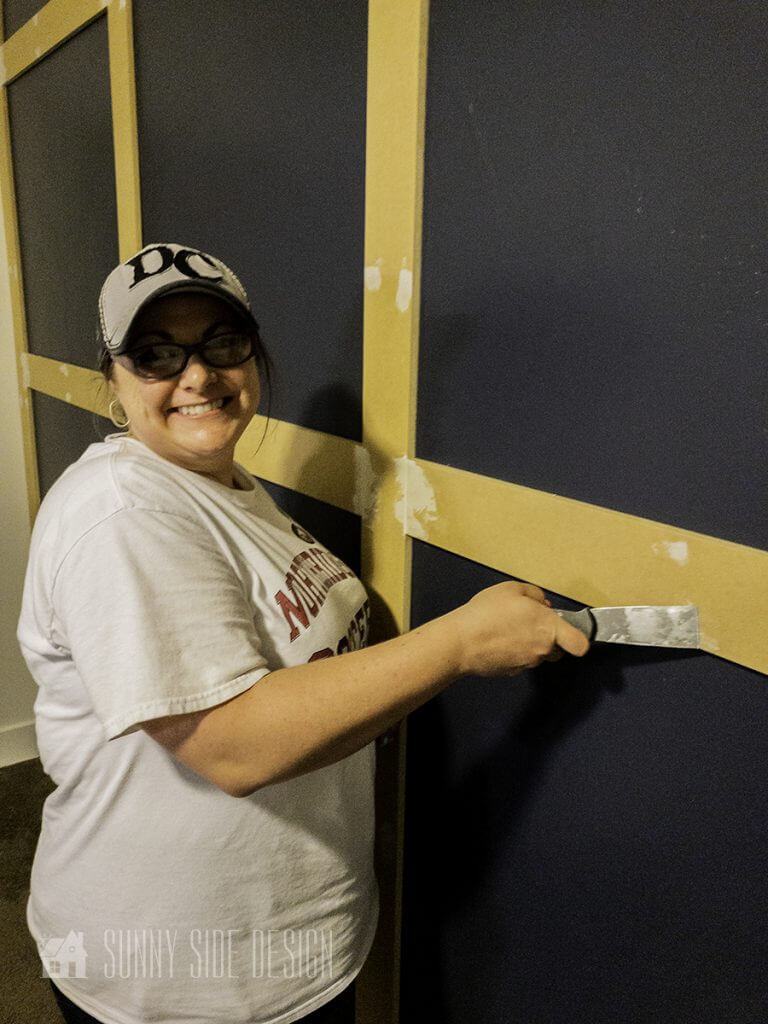

To apply, take a small amount of wood filler and push it into the hole.
Scrape off any excess filler with the edge of the knife.
Allow the filler to completely dry, then lightly sand each spot to make sure it’s smooth.
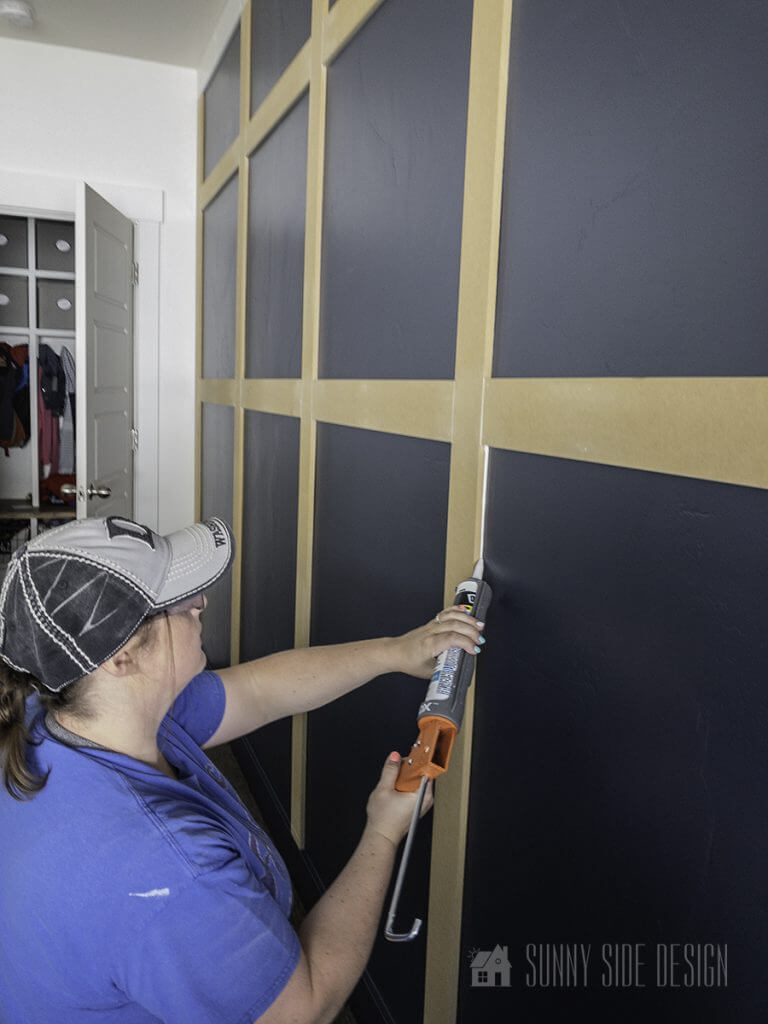
Time to caulk!
Our board and batten accent wall is almost finished!
Caulk around the inside of each of the shapes you’ve created with your design.
Every place a board meets to the wall could be caulked.
(A little known fact about me: I like to caulk. Weird I know! Personally, I think it’s the perfectionist in me. Caulking adds a neat professional look to any project.)
Check out my pro-tips for caulking here.


Last but not least, paint the boards!
The easiest method I’ve found is to take a paint brush and first paint over the caulk in a section then brush the boards.
PRO TIP: To get an extra crisp paint line at the top of the wall where it meets the ceiling, I used a little trick I talked about in another tutorial.
This trick is especially helpful when painting a line at the edge of the wall and a textured ceiling!
Apply painters tape along the ceiling.
Next brush on one coat of the ceiling paint.
Let dry,
Then paint the navy blue accent wall color.
If there is any bleed through with the tape it will be with the ceiling color, so you get a perfect crisp line at the ceiling even if it’s textured.
Completed Board and Batten Accent Wall
Now you can take a step back and enjoy your new accent wall!

This project actually comes together pretty quickly!
If you start with a good visual blueprint of your design and measure and mark as you work, it goes pretty smoothly!
My Hubby and I had this installed start to finish in an afternoon.
More time was spent with all the finish work: filling in all the nail holes, sanding, caulking and painting to create the finished look.
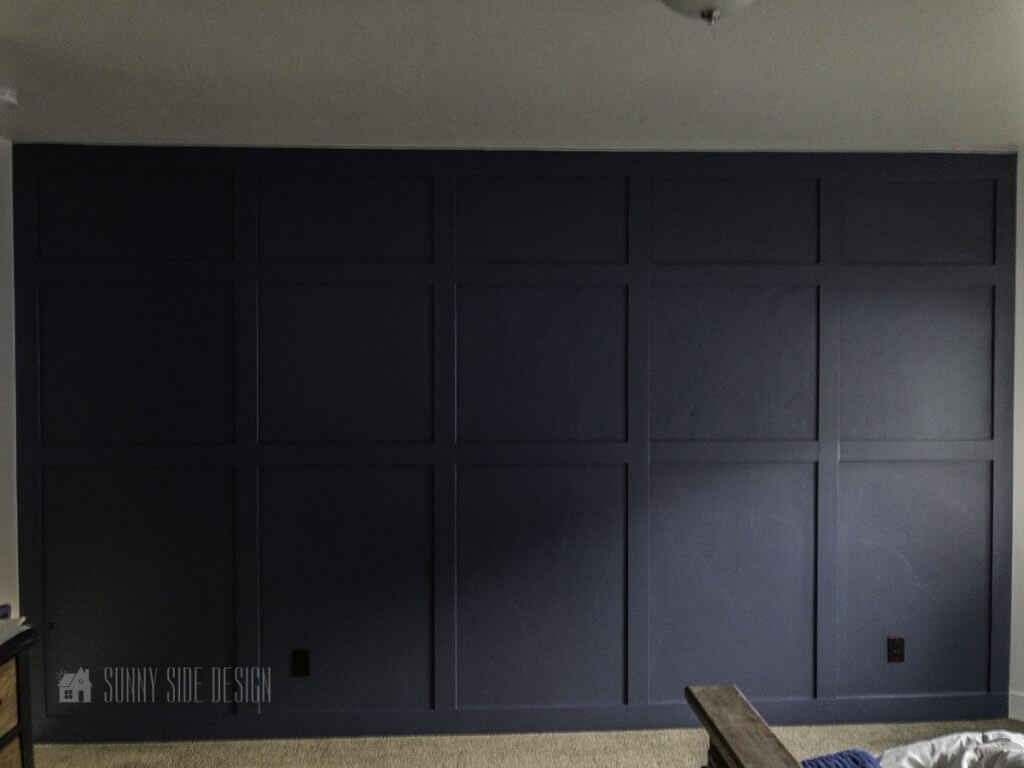
Additionally we upgraded the electrical outlets to a dark color with USB ports.
Clearly this helps camouflage them.
Looking for more inspiration for an accent wall in your home?!
Take a look at these ideas:
- How to DIY a Shiplap Wall the Easy Way
- How to Install a Wallpaper Mural
- Beautiful Board and Batten Wall with a Hidden Door
- Beautiful Bead board Paneling That’s Surprisingly Easy
- Easy DIY Board and Batten Wall with a Twist
- Easy Modern Box Moulding You Can Do—No Power Tools Required
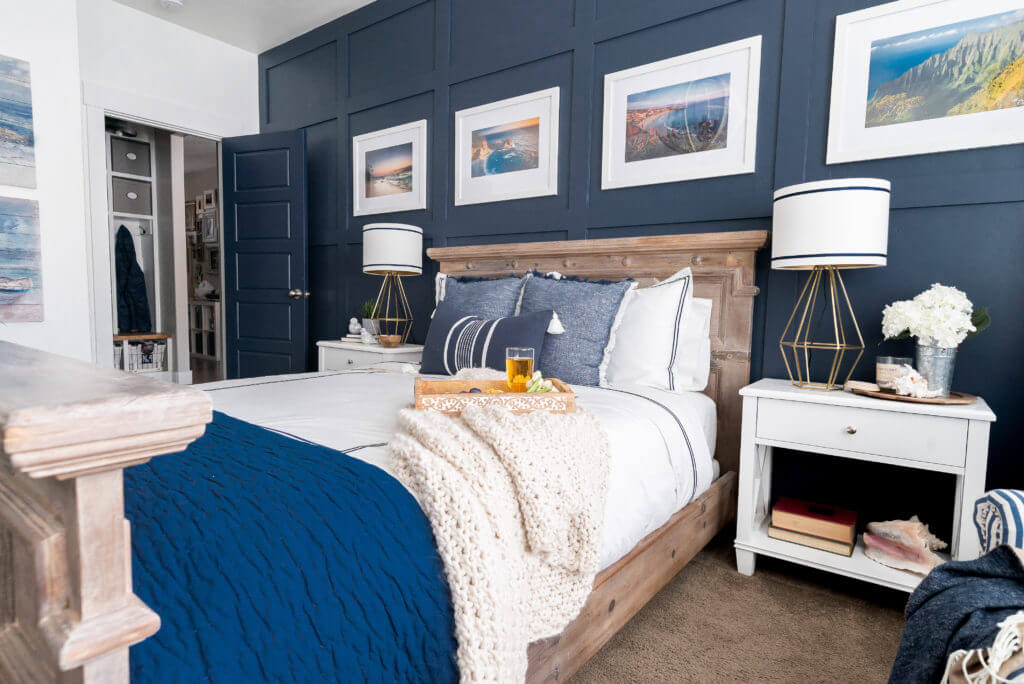
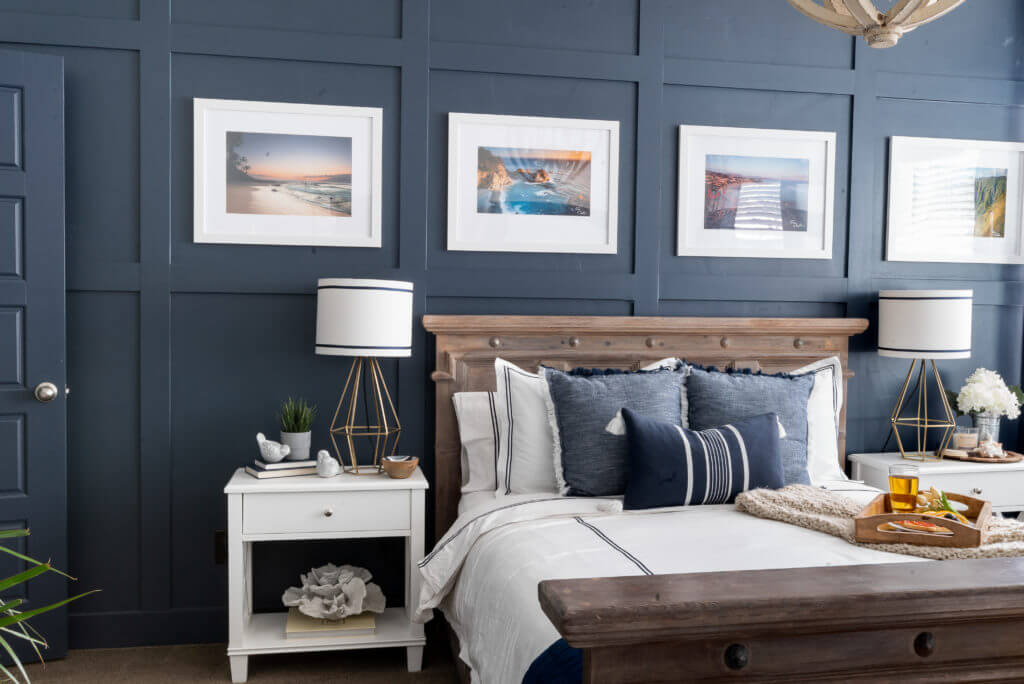
I love the character and cozy feel this board and batten accent wall adds to my bedroom.
If this a project you’d like to try in your home?
We hope you found some inspiration for your home today.
Please share your tips and ideas with us.
We love hearing from you!
If you’re new here, WELCOME! We love having new readers and friends!
You can learn more about us here.
Let’s stay connected! Join our DIY community of doers and you won’t miss the weekly updates and more inspiration for you always on a budget.
Sharing is caring!

Thanks for stopping by Sunny Side Design. Empowering you to create a home you love!
Disclaimer
This blog’s content is for entertainment purposes only and is not professional advice. By reading this blog and attempting to recreate a project, you assume all responsibility for any injuries or damages incurred. Read my full disclaimer here.
PHOTO USE AND CONTENT SHARING
All of the photographs you see here are the property of Sunny Side Design unless otherwise credited.
We love for others to share our work, so please feel free to use one photo with a link back to our website.
Pinning and sharing is always encouraged!
Please do not reproduce other Sunny Side Design content without permission.
Retailers We Love
- Anthropologie
- Birch Lane
- Crate & Barrel
- Joss and Main
- Lampsplus
- Mark & Graham
- One Kings Lane
- Pottery Barn
- Rejuvenation
- Serena & Lily
- Wayfair
- West Elm
- Williams Sonoma
- World Market
Be sure to follow us on Pinterest for even more home decor and DIY ideas.
To see what we are working on before it’s on our blog, follow us on Instagram.
You will also find our video tutorials on our YouTube channel.
- Easy Strawberry Chicken Salad with Lime Maple Balsamic Vinaigrette

- How to Fix Chipped Kitchen Cabinets with a Pen
- Easy 4th of July Door Decor You Can Make in Minutes
- 35 Easy Decorating Ideas for Summer to Welcome the Season


